Upholstered Storage Bench
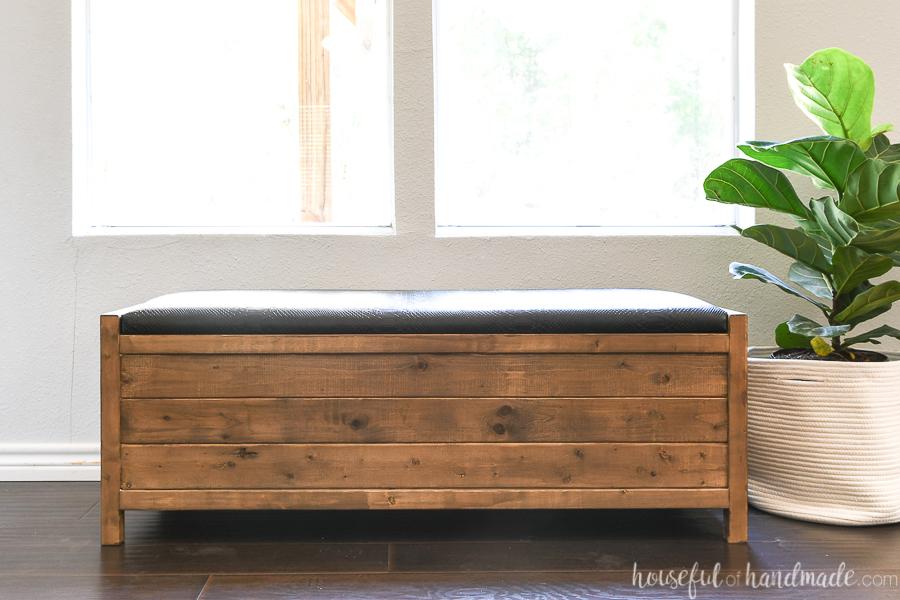
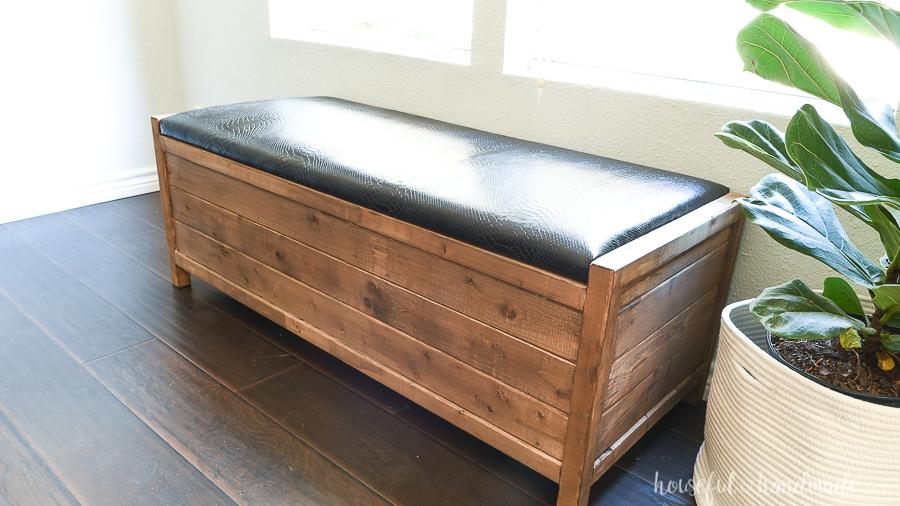
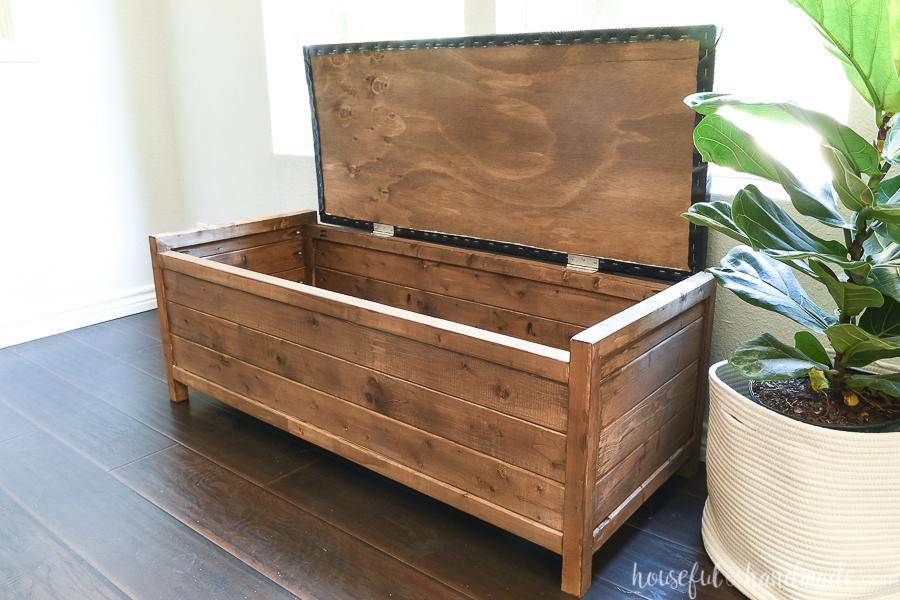
By Houseful of HandmadeAdd more storage for shoes, blankets, games and more with this simple storage bench. The beautiful upholstered bench is the perfect place to sit and put on your shoes. Or use it as a storage coffee table. However you decide to use it, you will love the simple design and easy build!
Directions
-
Assemble the side slats
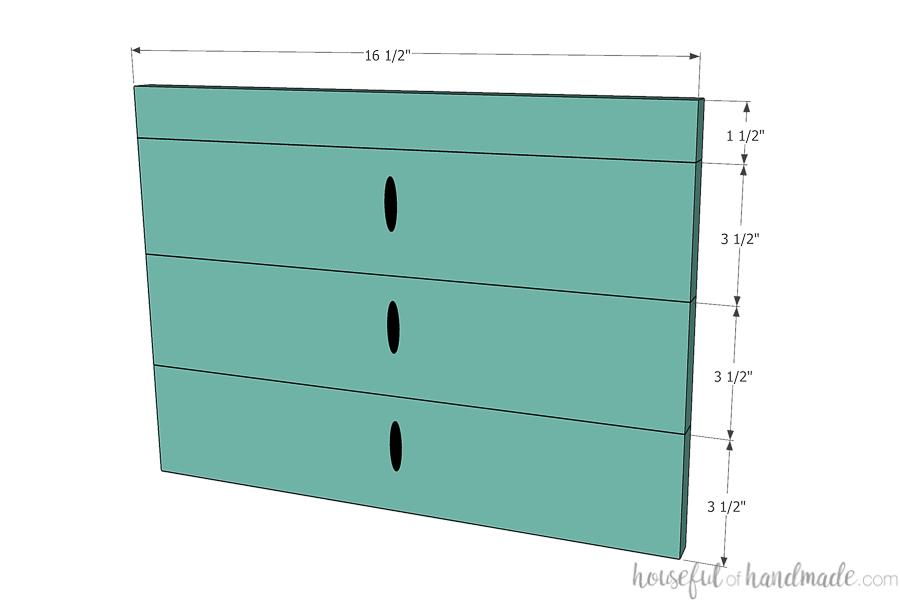
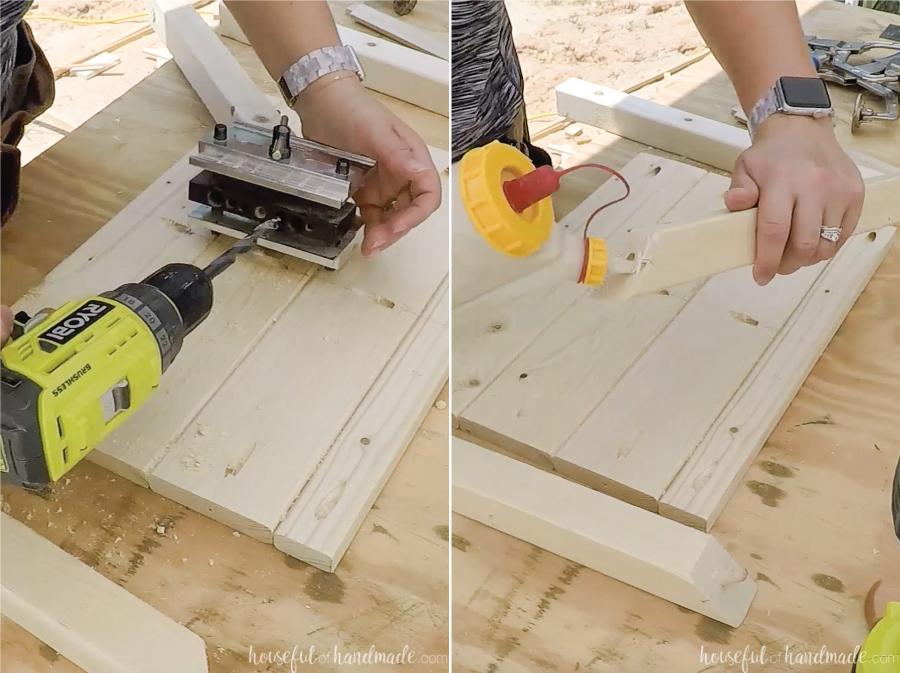
Set your pocket hole jig for 3/4" thick material. Drill 1 pocket hole in the center of each of the 1x4 boards. Attach them to each other with wood glue and 1 1/4" pocket hole screws to create a slatted side. Then drill pocket holes in the ends of each of the boards to attach them to the legs in the next step.
-
Create the mitered top
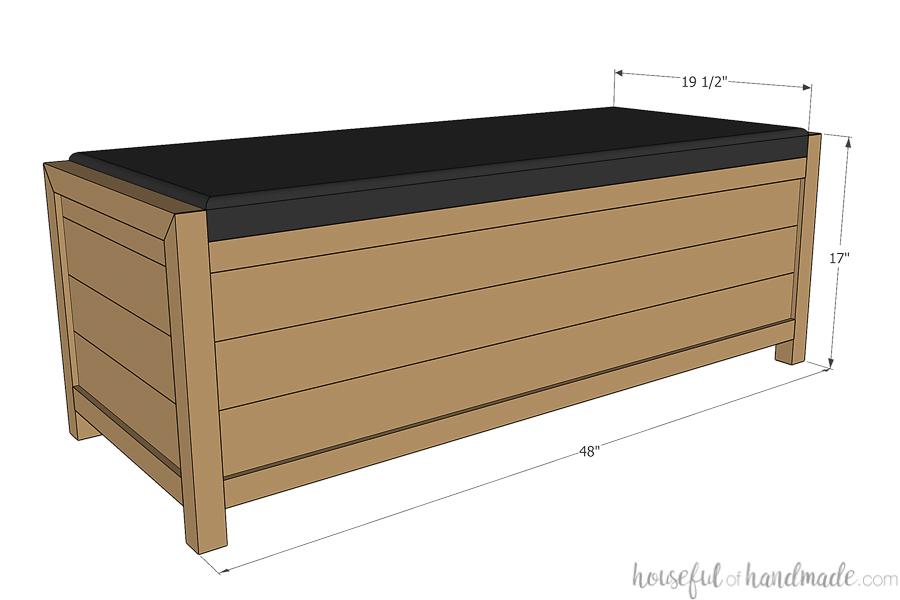
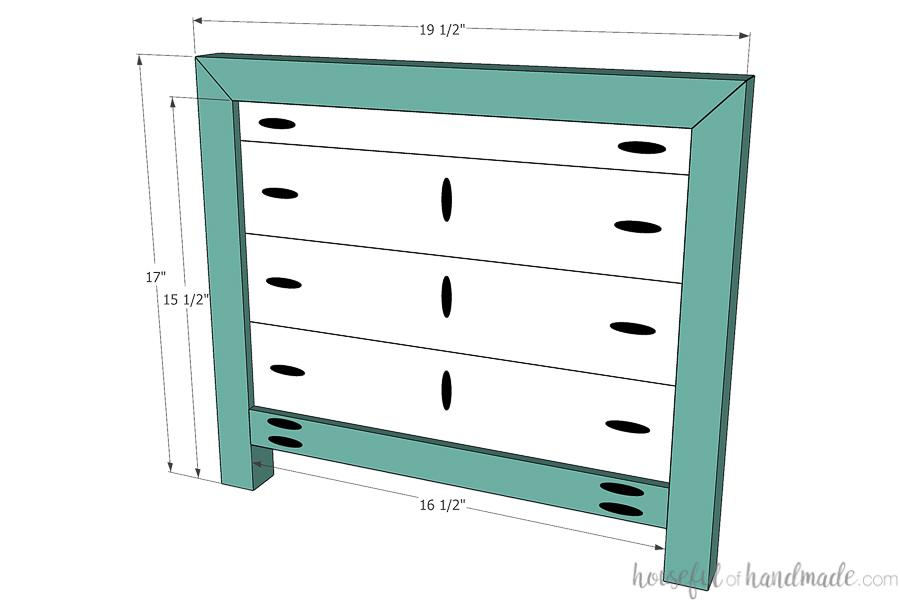
Cut the top of the legs with a 45 degree angle on one end (the longest side should be 17"). Cut the side top boards with a 45 degree angle on both ends (the longest side should be 19 1/2" and the short side 16 1/2"). Using a doweling jig, drill a hole in the center of the mitered sides of the boards. Cut a dowel to fit.
-
Finish the sides
Set your pocket hole jig for 1 1/2" thick material. Drill 2 pocket holes on each side of the side bottom boards. Assemble the sides by creating a frame with the mitered side top, legs, and side bottom with the assembled slats in the middle. Set the slats back from the front 1/4" to 3/4" as desired. Clamp it all together and secure with wood glue, dowels, and pocket hole screws (1 1/4" long in the 3/4" thick boards and 2 1/2" long in the 1 1/2" thick boards).
-
Assemble the front/back slats
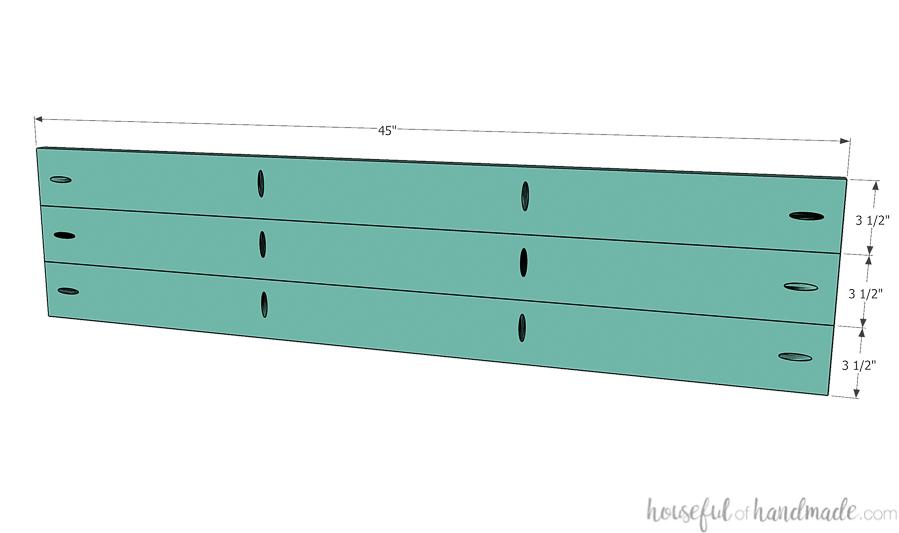
With the pocket hole set for 3/4" thick material, drill 2 pocket holes in the front/back slats 15" apart and 15" in from each side. Attach the front/back slats together with wood glue and 1 1/4" pocket hole screws.
-
Attach the back
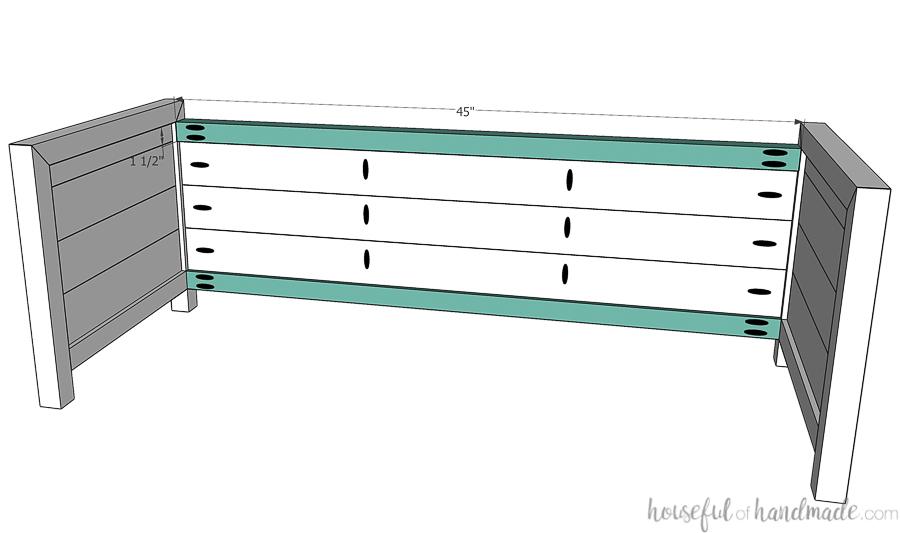
Set your pocket hole jig for 1 1/2" thick material. Drill 2 pocket holes in each end of the front/back top & bottom boards. Attach the top boards so they are 1 1/2" down from the top of the sides. Secure with wood glue and 2 1/2" pocket hole screws. Attach the assembled slats below it with wood glue and 1 1/4" pocket hole screws, and finish off with the back bottom board.
-
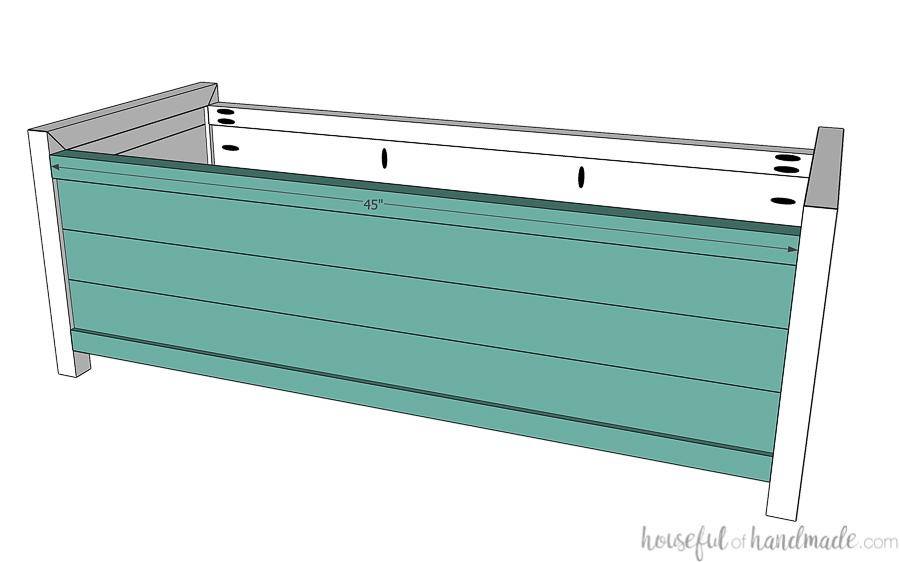
Attach the front
Repeat the previous step for the front of the bench.
-
Attach bottom slats
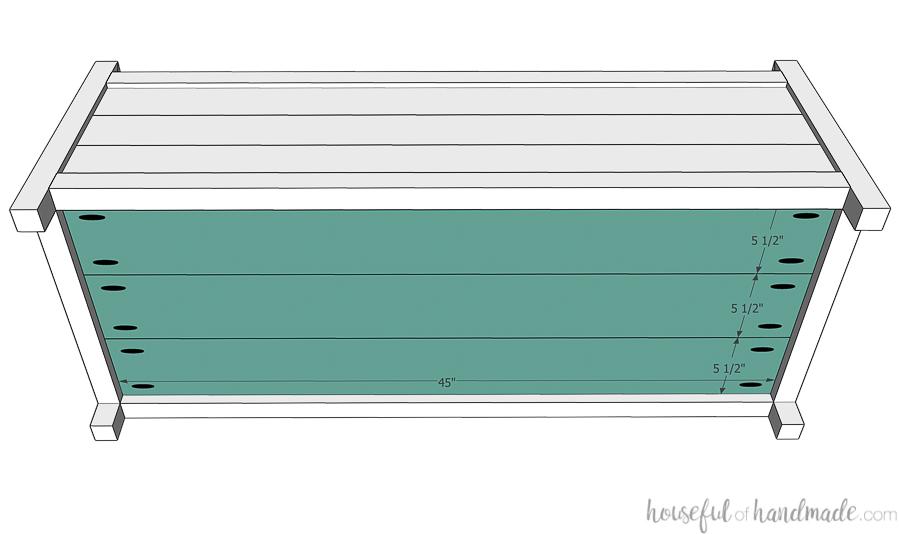
Drill 2 pocket holes set for 3/4" thick material in each end of the bottom boards. Attach to the bottom frame of the bench with wood glue and 1 1/4" pocket hole screws so they are flush with the top of the bottom 2x2 boards.
-
Add bottom supports
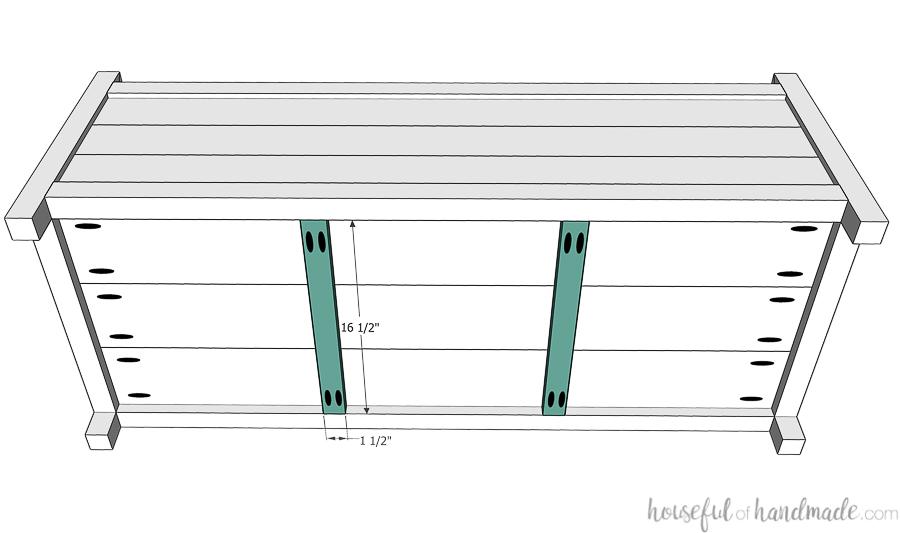
Drill 2 pocket holes set for 3/4" thick material in each end of the bottom support 1x2 boards. Attach them evenly spaced (15" on center) under the bottom boards so they are secured into the bottom 2x2 frame with 1 1/4" pocket hole screws and wood glue.
-
Upholster the bench top
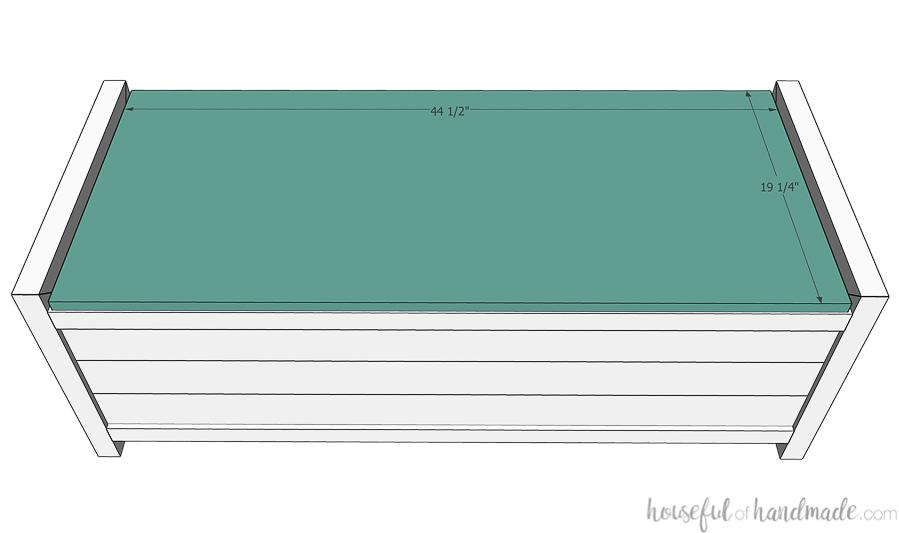
Cut the plywood top for the bench. It should be slightly smaller than the frame to allow for the thickness of the fabric and batting. Glue the 1" foam to the top of the board. It should be the same size as the plywood. Then lay the batting over it followed by the faux leather.
-
Attach the upholstery
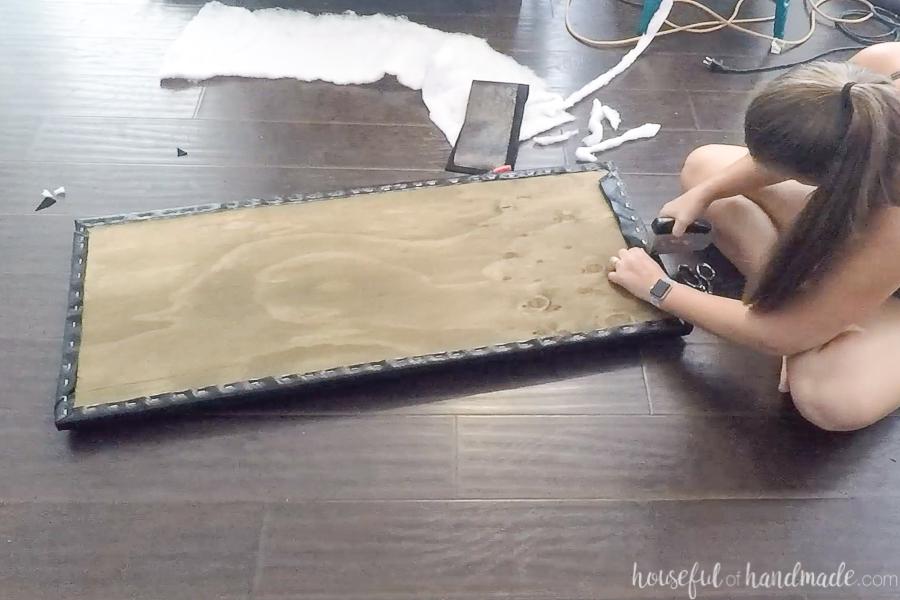
Flip the entire thing over and staple one long side of the leather to the back of the board. Pull the other long side taught and secure with staples. Then repeat for the short sides, folding the corners neatly before securing. Trim the excess fabric and batting off.
-
Finish the bench
Attach the finished top to the bench using the hinges. Add a lid support if desired. Make sure to get a soft close lid support if you want to prevent smashed fingers. And stop by Houseful of Handmade for more fun things to build!


