

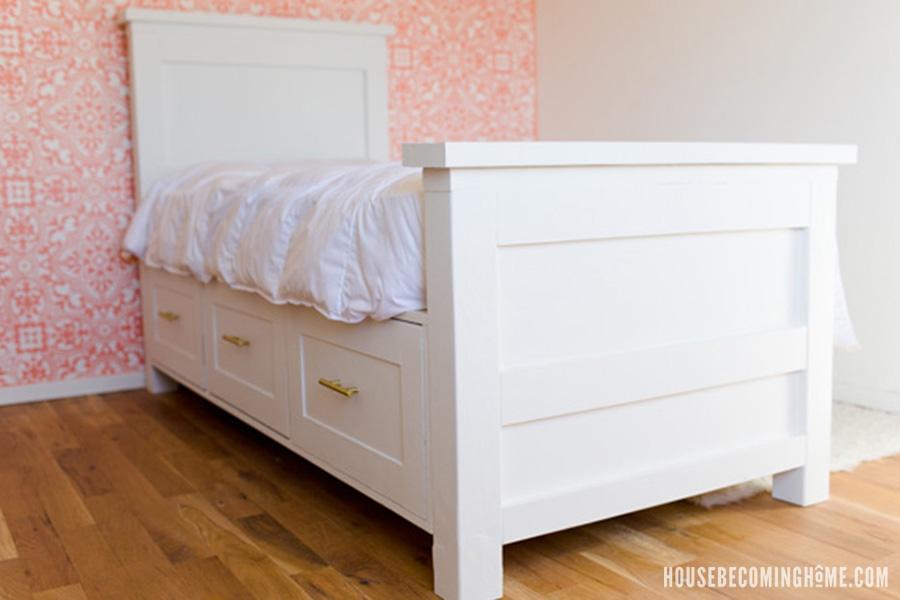
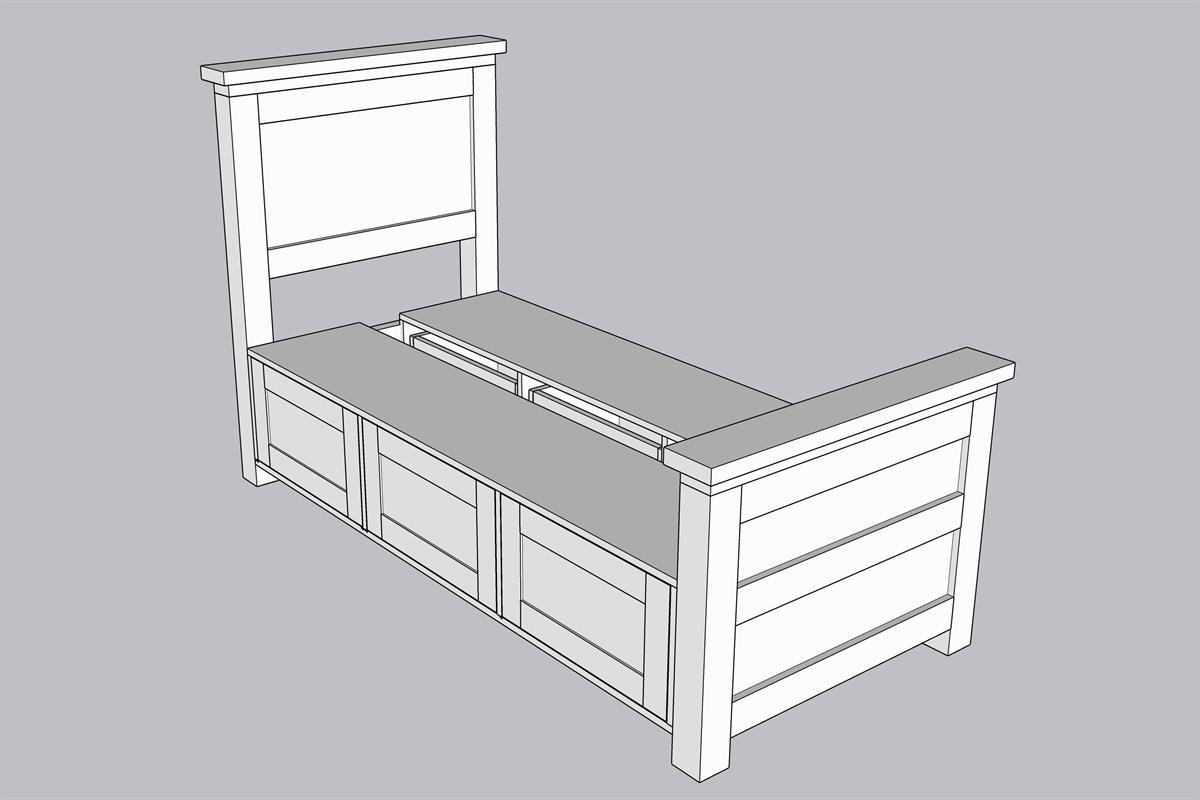


A twin size bed designed with with storage in mind. Three drawers on each side can store clothing, bedding and more.
Tools
Kreg Tools


Other Tools
-
Miter Saw

-
Table Saw
-
Tape Measure
-
Clamps
-
Nail Gun
-
Air Compressor
-
Tape Measure
Materials
Wood Products
- 2 Board , 4x4 , 96"
- 2 Board , 1x4 , 96"
- 3 Board , 2x4 , 96"
- 2 Board , 2x6 , 96"
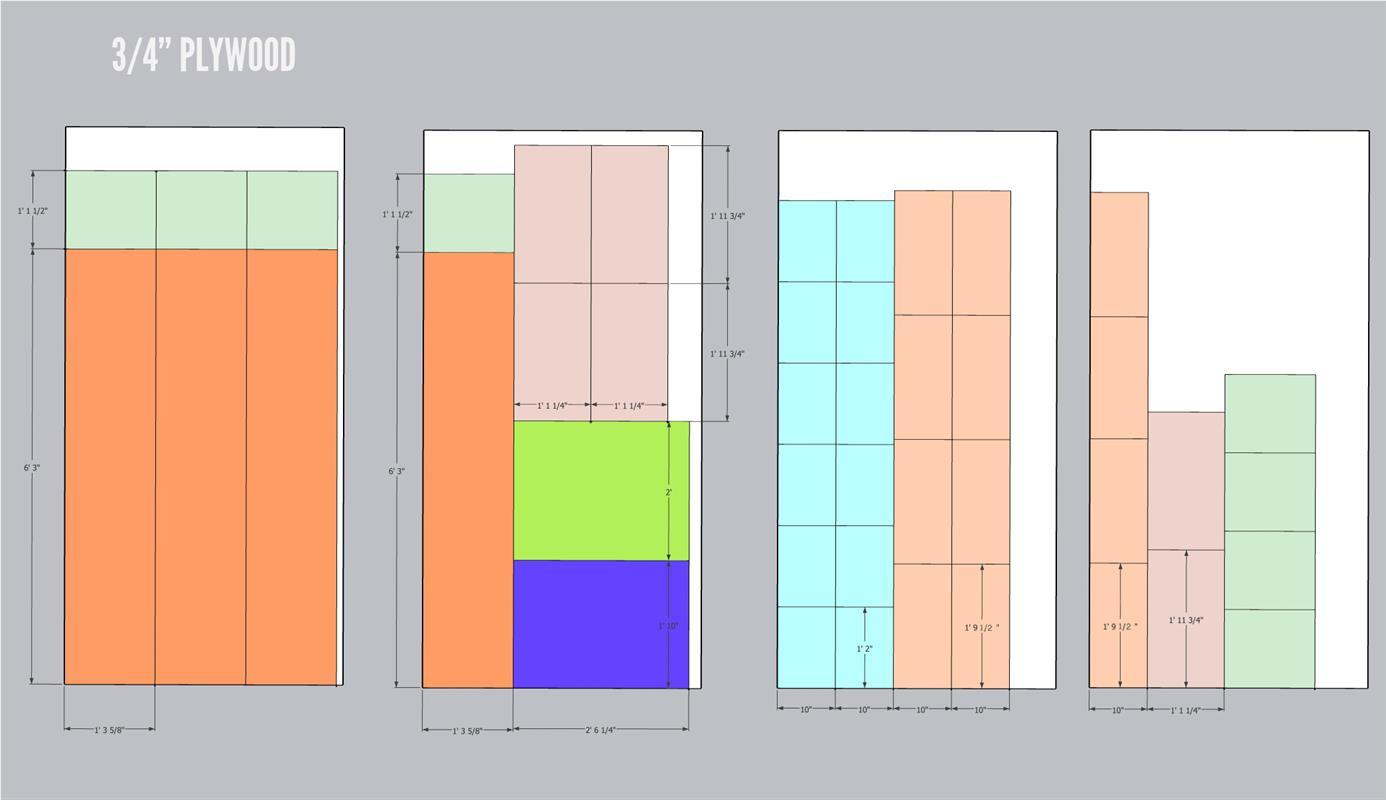
- 4 Plywood , 3/4" Thick , Full Sheet
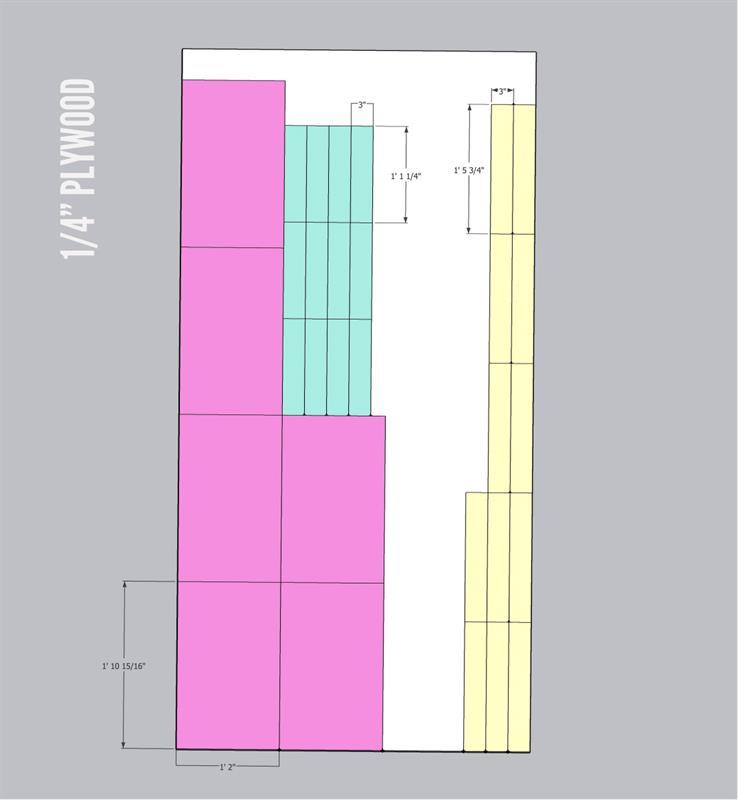
- 1 Plywood , 1/4" Thick , Full Sheet
Hardware & Supplies
- 6 14" Drawer Slides
- 6 Drawer Knobs or Pulls
- 16 2-1/2" Coarse Pocket Hole Screws
- 156 1-1/4" Coarse Pocket Hole Screws
- 50 18 gauge 1" nails
- 1 Wood Filler
- 1 Finishing Supplies of choice: primer, paint, stain, edge banding, etc.
- 16 3" Wood Screws
- 8 3" Lag Screws
- 8 2" Lag Screws
Cut List & Parts
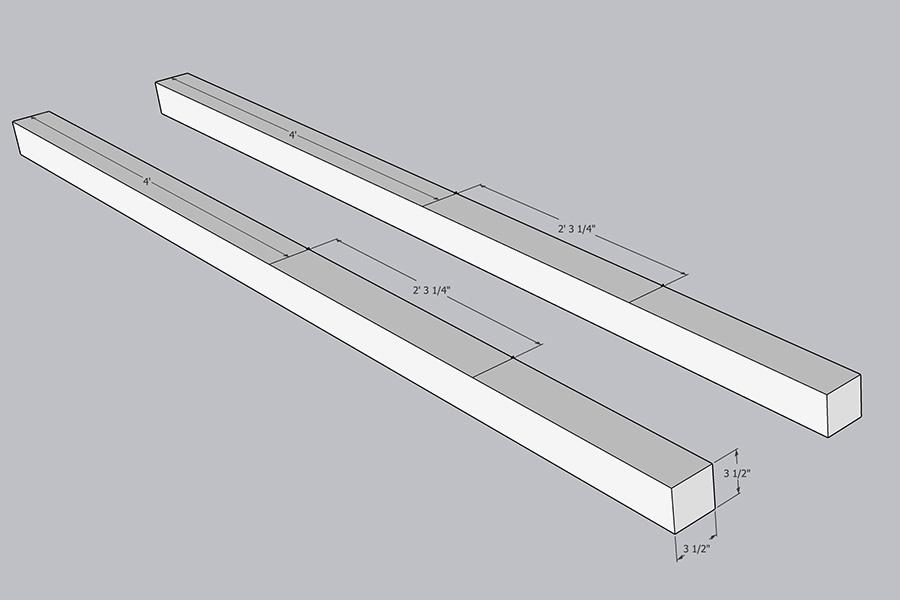
- 2 Footboard Post , 3-1/2" x 3-1/2" x 27-1/4"
- 2 Headboard Post , 3-1/2" x 3-1/2" x 48"
- 2 2x4 Footboard/Headboard Cap , 1.5" x 3.5" x 37.25"
- 2 2x6 Footboard/Headboard Cap , 1.5" x 5.5" x 39.25"
- 4 2x4 Footboard/Headboard Support , 1.5" x 3.5" x 30.25"
- 1 Footboard Plywood , 3/4" x 24" x 30.25"
- 1 Headboard Plywood , 3/4" x 22" x 30.25"
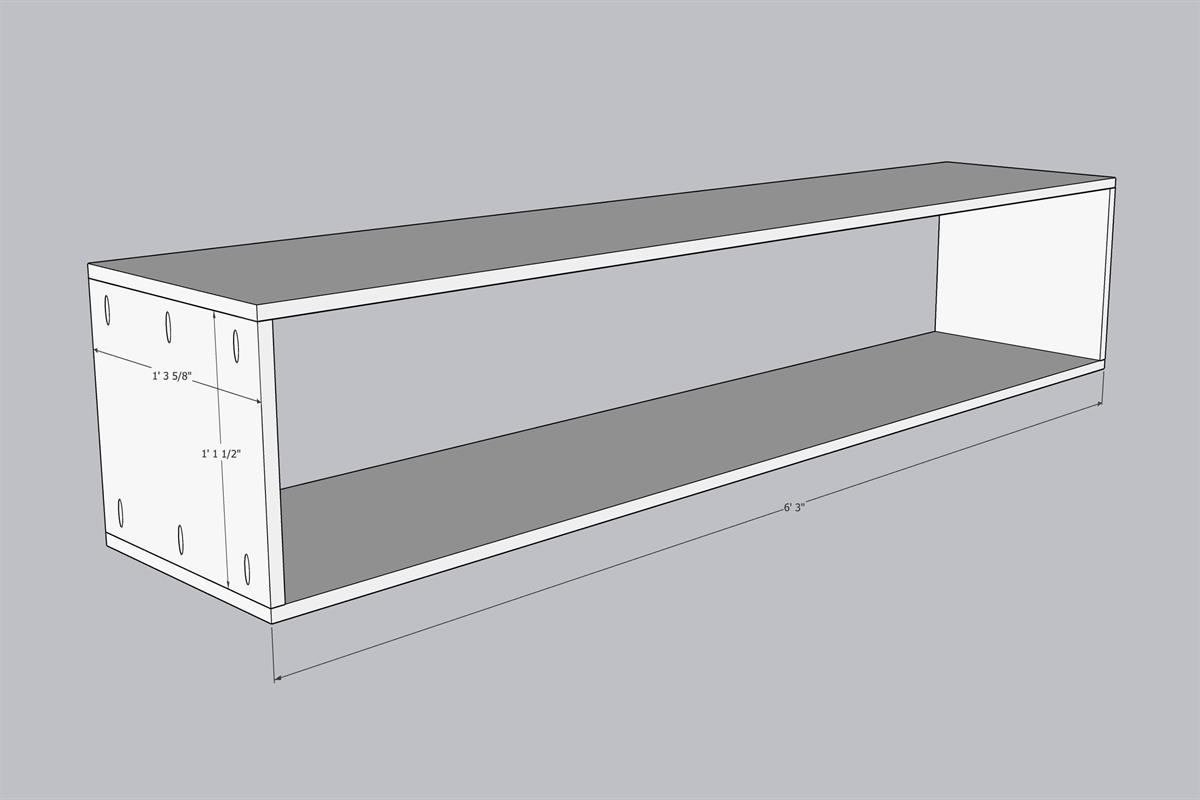
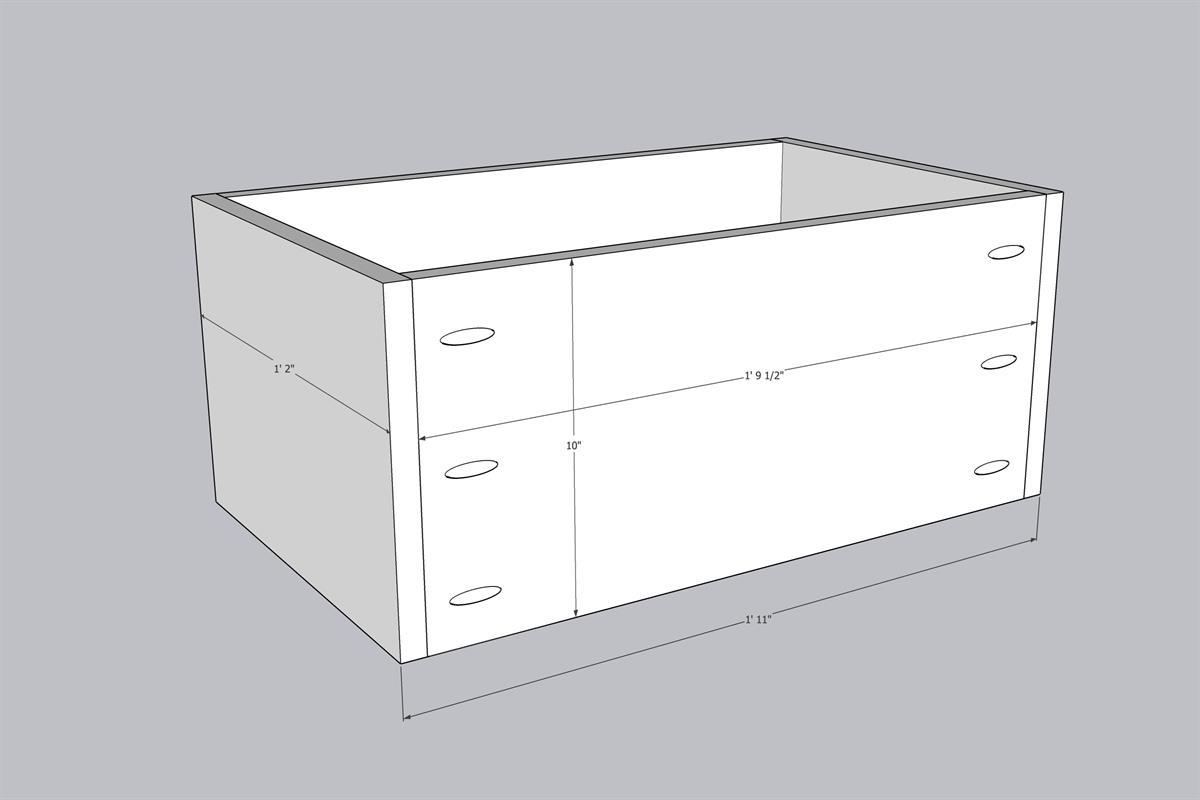
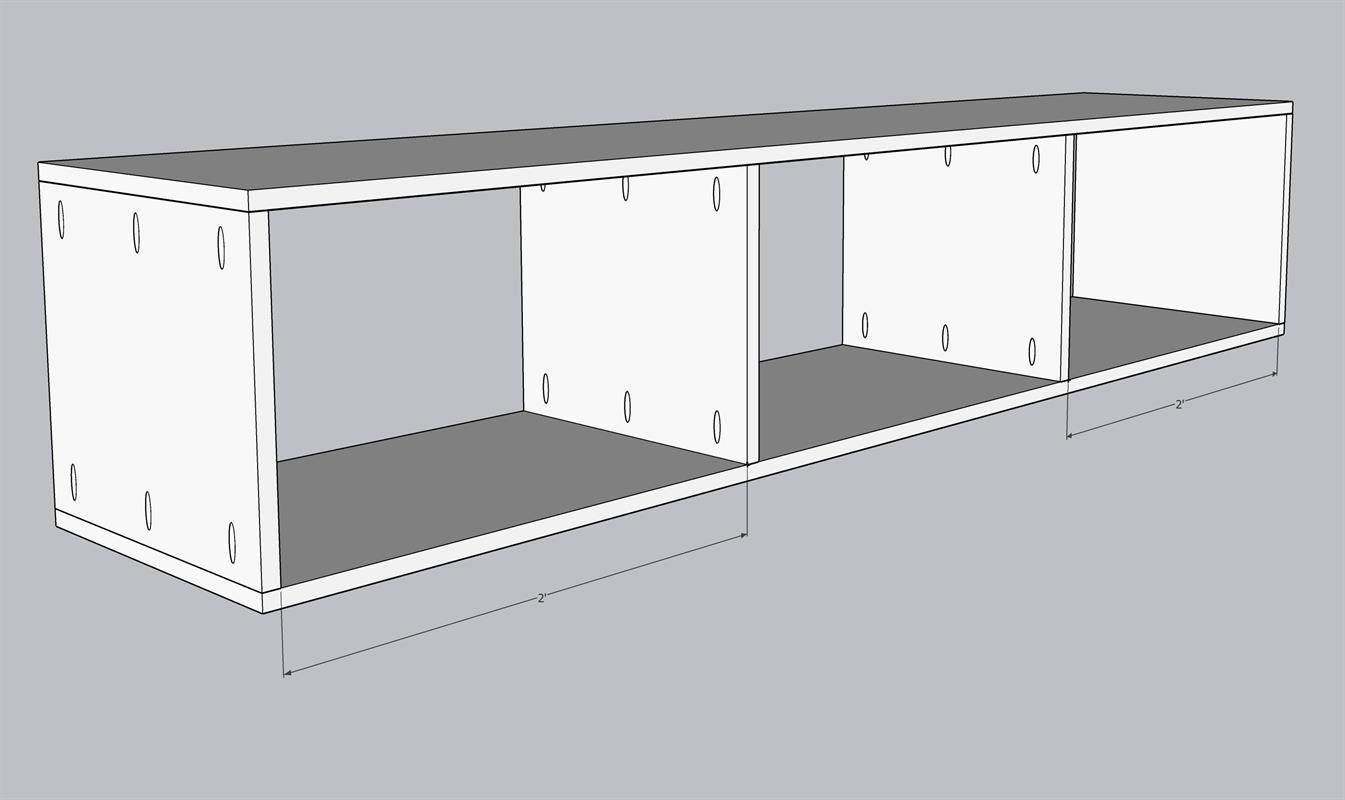
- 4 Bed Storage Area Top/Bottom , 3/4" x 75" x 15 5/8"
- 8 Bed Storage Area Sides/Dividers , 3/4" x 13.5" x 15 5/8"
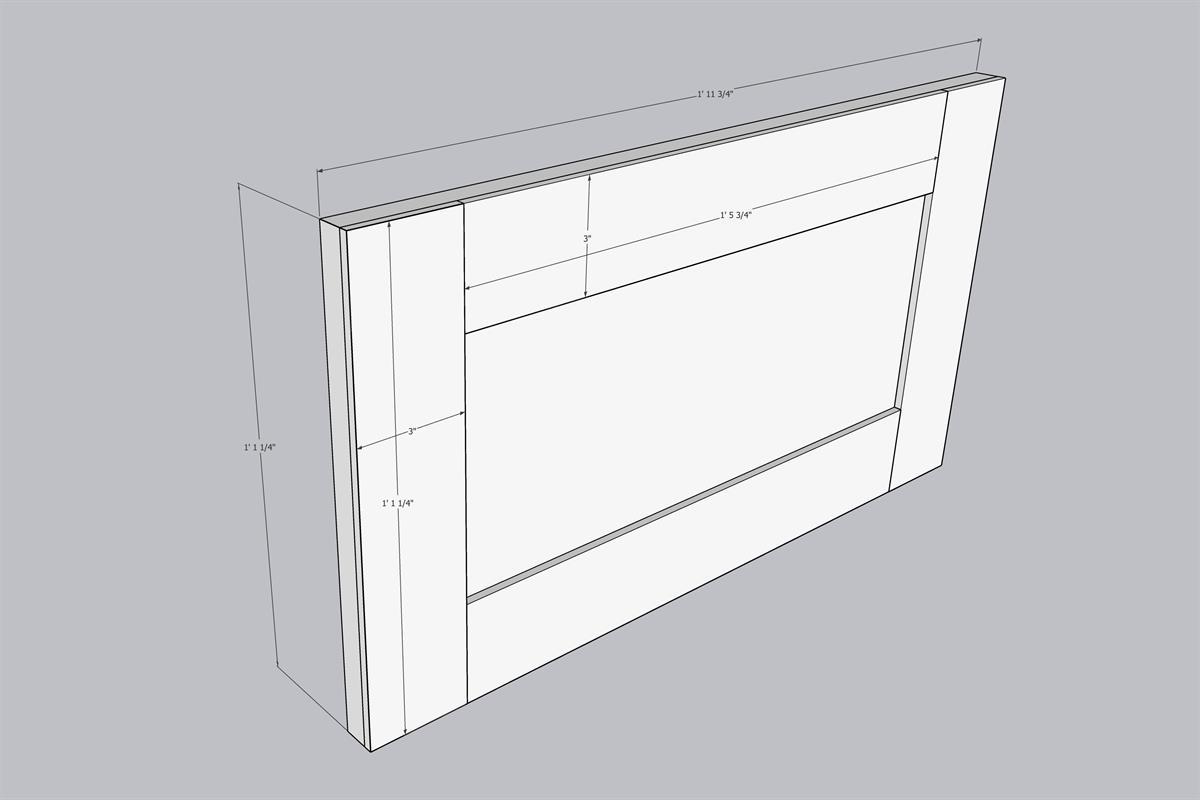
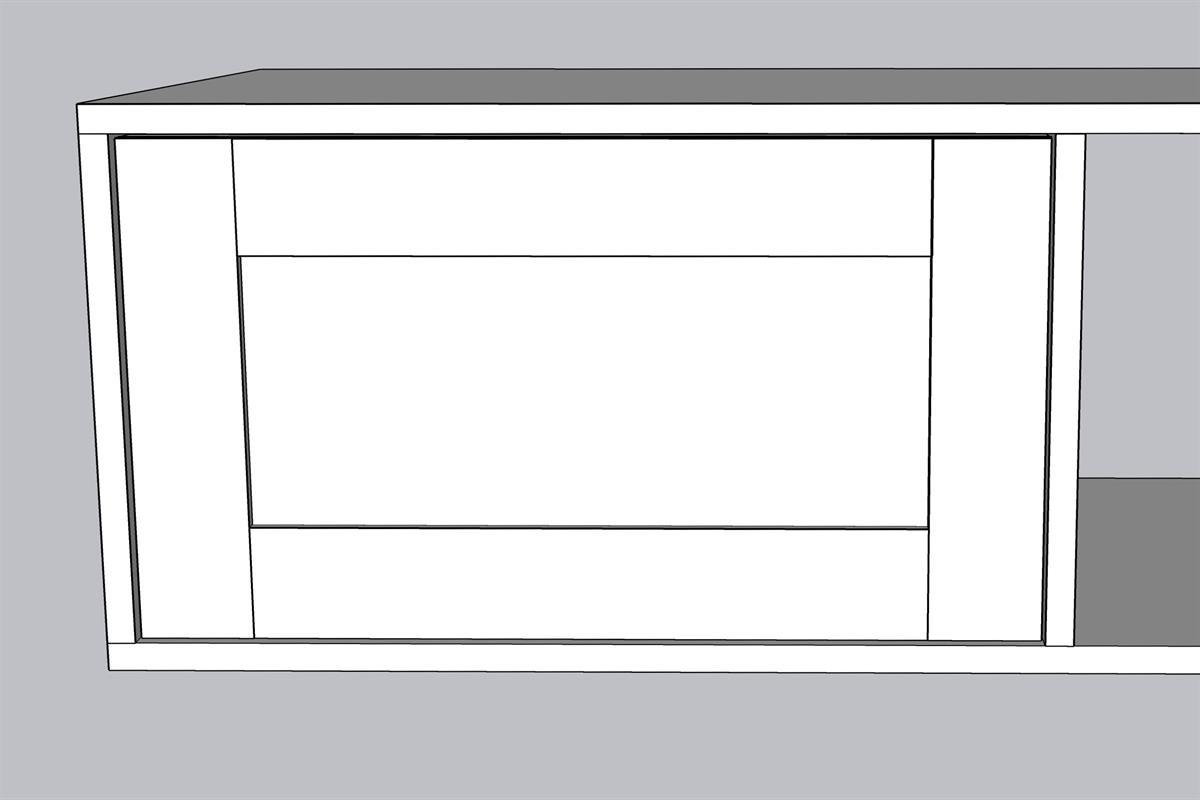
- 6 Drawer Face , 3/4" x 23.75" x 13.25"
- 12 Drawer Face Vertical Panel , 1/4" x 3" x 13.25"
- 12 Drawer Face Horizontal Panel , 1/4" x 3" x 17.75"
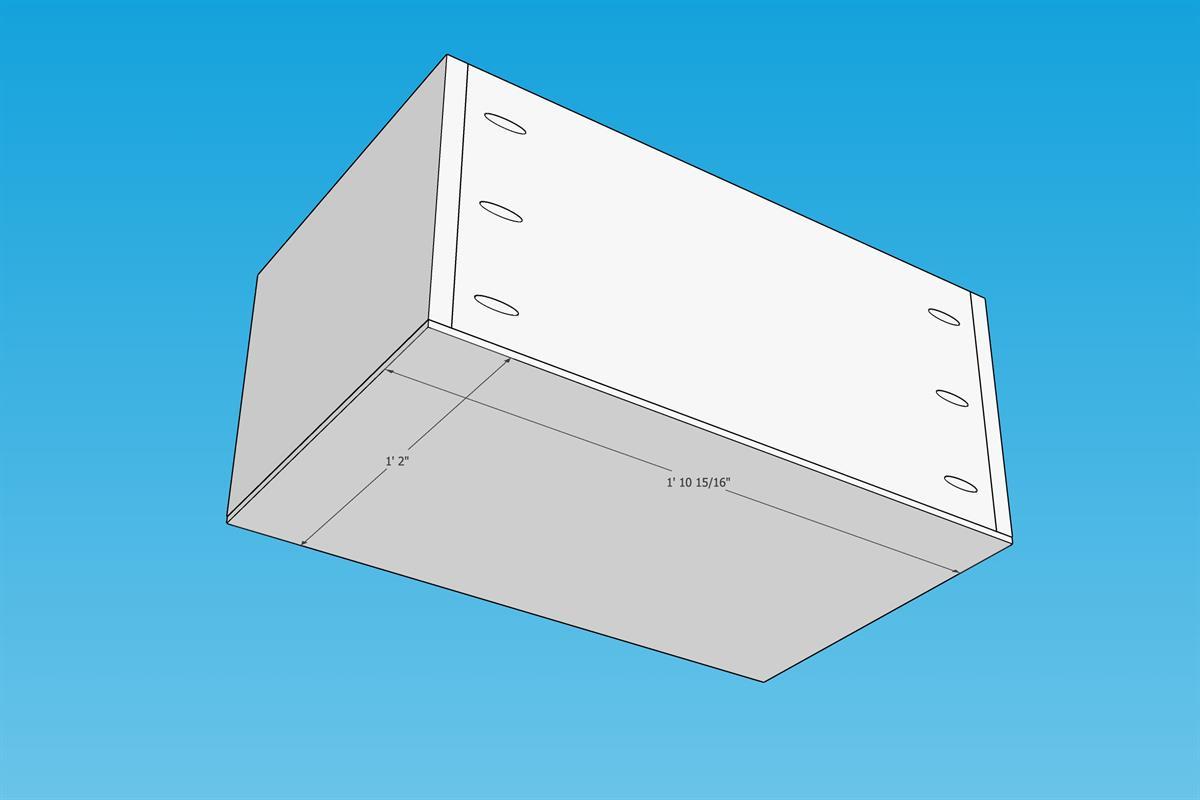
- 12 Drawer Box Sides , 3/4" x 14" x 10"
- 12 Drawer Box Front/Back , 3/4" x 21 1/2" x 10"
- 6 Drawer Box Bottom , 1/4" x 14" x 22 15/16"
- 5 Footboard/Headboard 1x4s , 3/4" x 3.5" x 30.25"
Directions
-
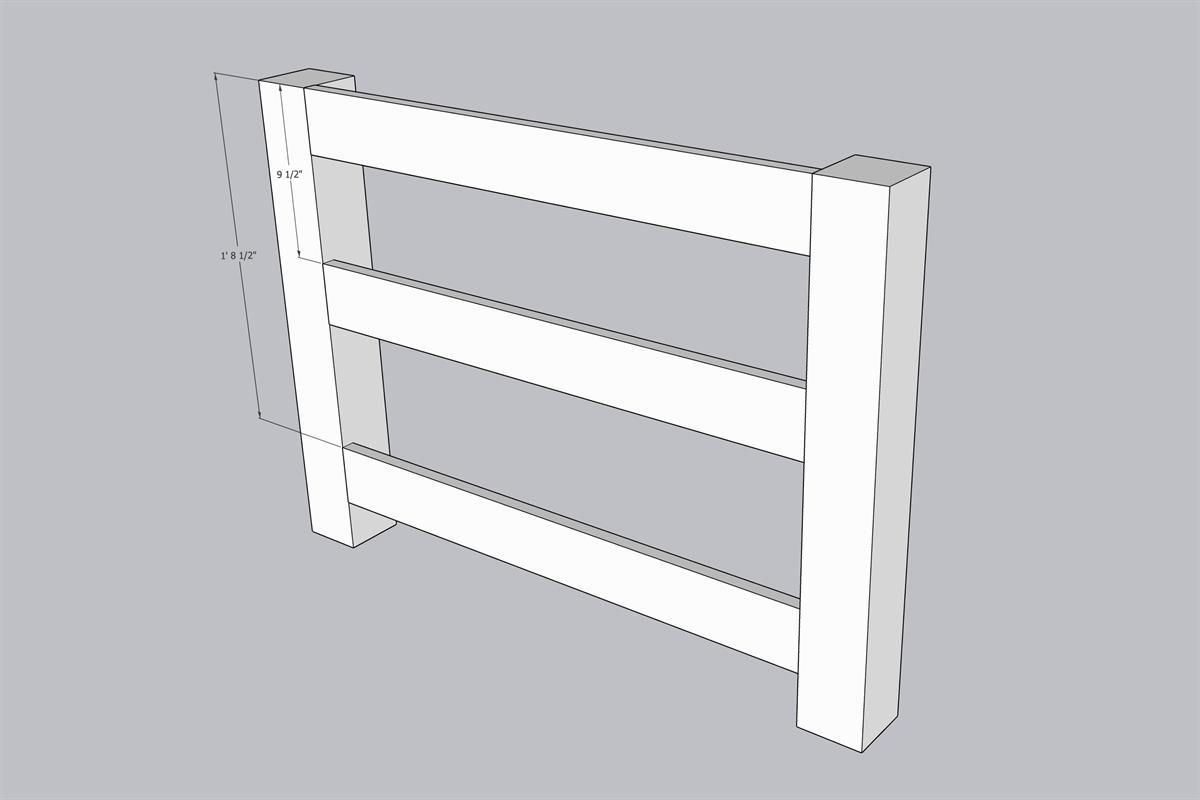
Prepare Footboard 1x4s
Begin constructing the footboard by making pocket holes (set for 3/4" thick material) on the back face of the footboard 1x4s.
-
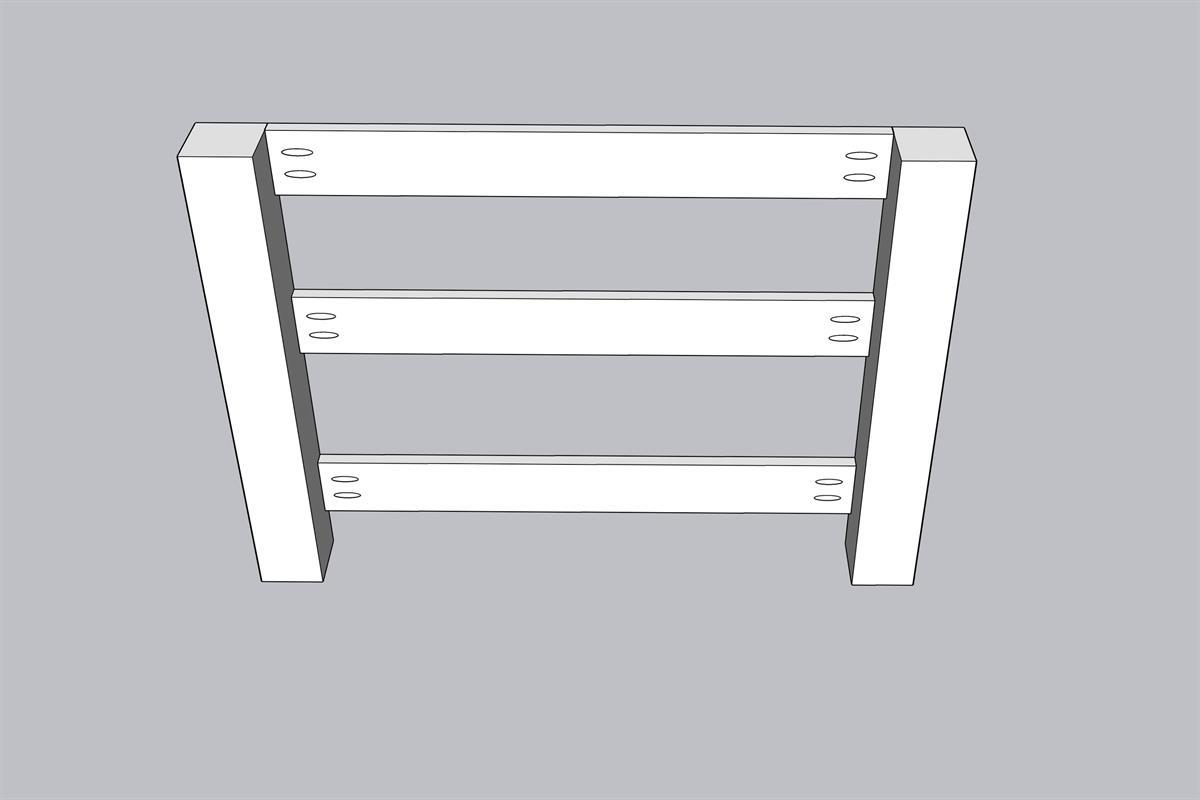
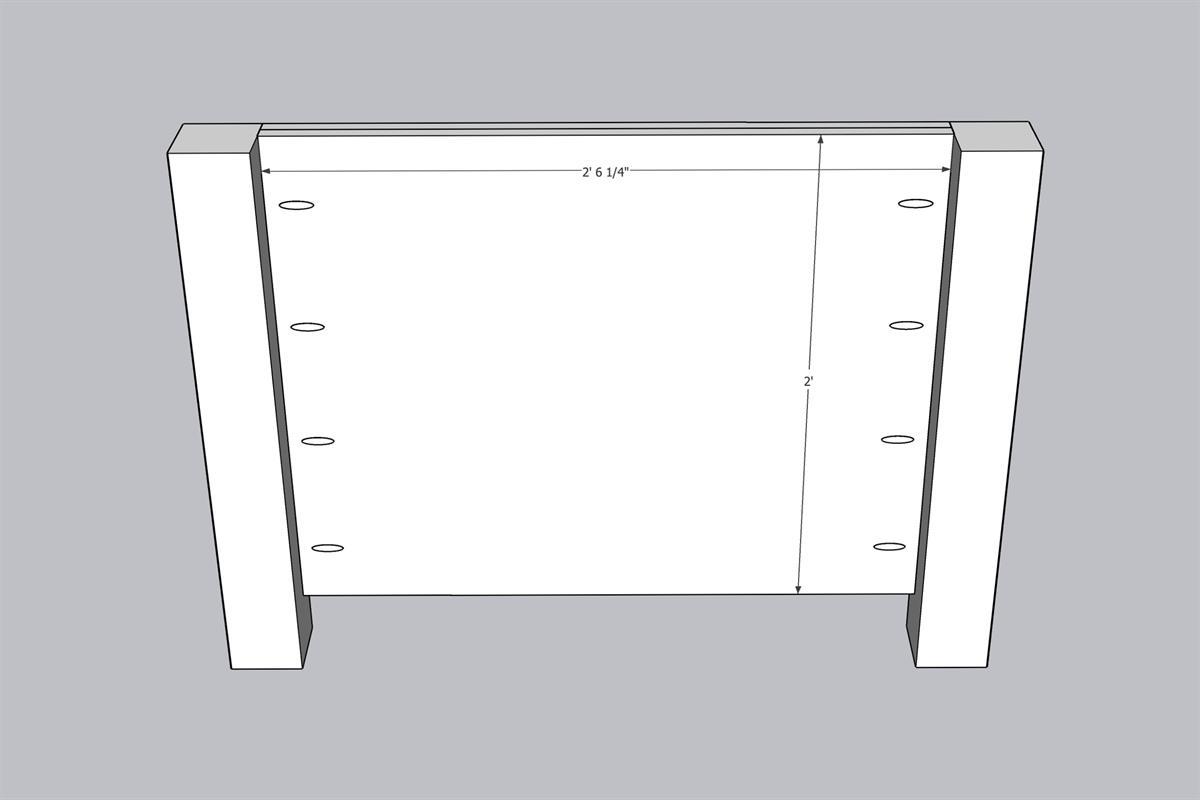
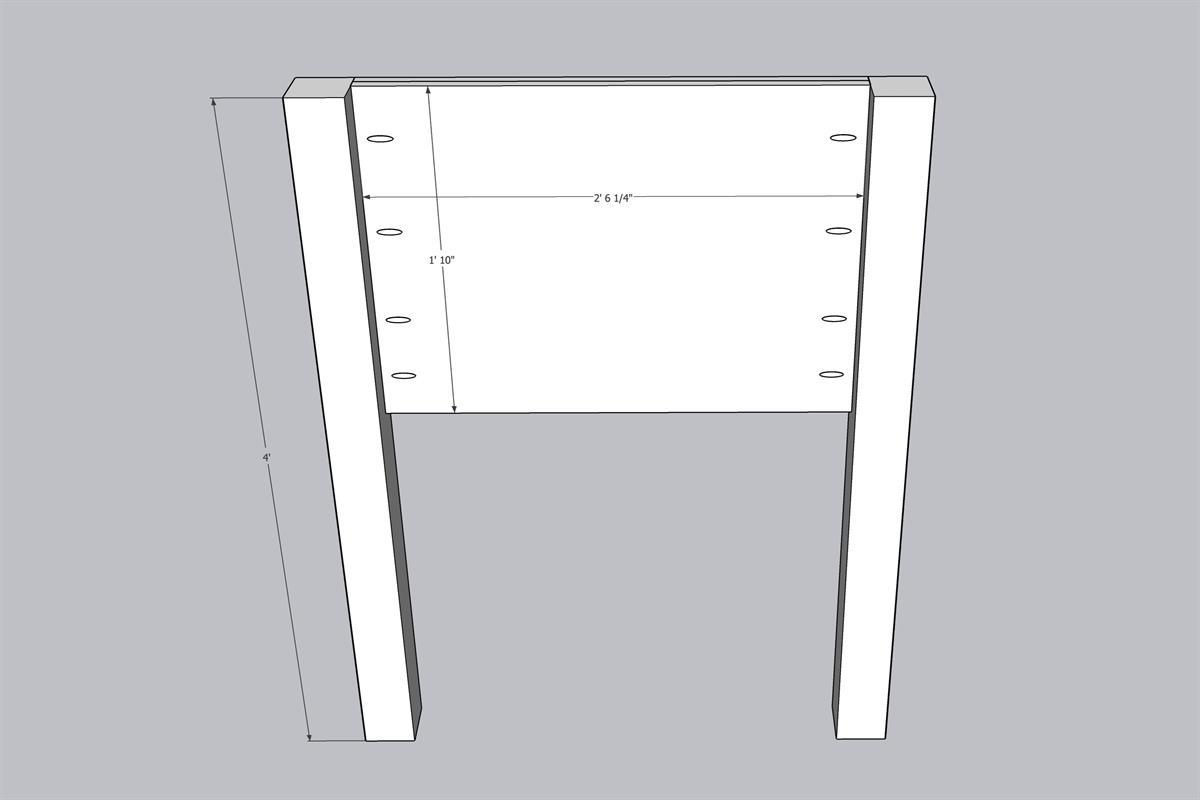
Join Headboard 1x4s to Posts
Begin constructing the headboard by making pocket holes (set for 3/4" thick material) on the back face of the headboard 1x4s. Attach headboard 1x4s to headboard posts with 1-1/4" coarse pocket hole screws at the positions shown. The front face of the headboard 1x4s should be flush to the front face of the headboard posts.
-
Construct Bed Storage Area
Construct the Bed Storage Area by making pocket holes (set for 3/4" thick material) on the bed storage area sides. Attach with 1-1/4" coarse pocket hole screws to the bed storage area top and bottom pieces.
-
Build Drawer Boxes
Construct six drawer boxes from 3/4" plywood. Make pocket holes (set for 3/4" thick material) in the drawer box front and back pieces and join with 1-1/4" coarse pocket hole screws. Remember to adjust the size of the two center drawer boxes if your plywood is less than 3/4, leaving you with a center opening larger than 24". The width of each finished drawer box should be one inch less than the width of the opening, to give room for 1/2" drawer slides on either side.
-
Make Drawer Faces
Cut drawer face and drawer face vertical and horizontal panel pieces. Attach drawer face panel pieces to drawer faces with wood glue and clamps.
-
Finishing
Finish the bed as desired. If desired, add edge-banding along the edges of exposed plywood drawers. Sand. Prime. Paint.
-
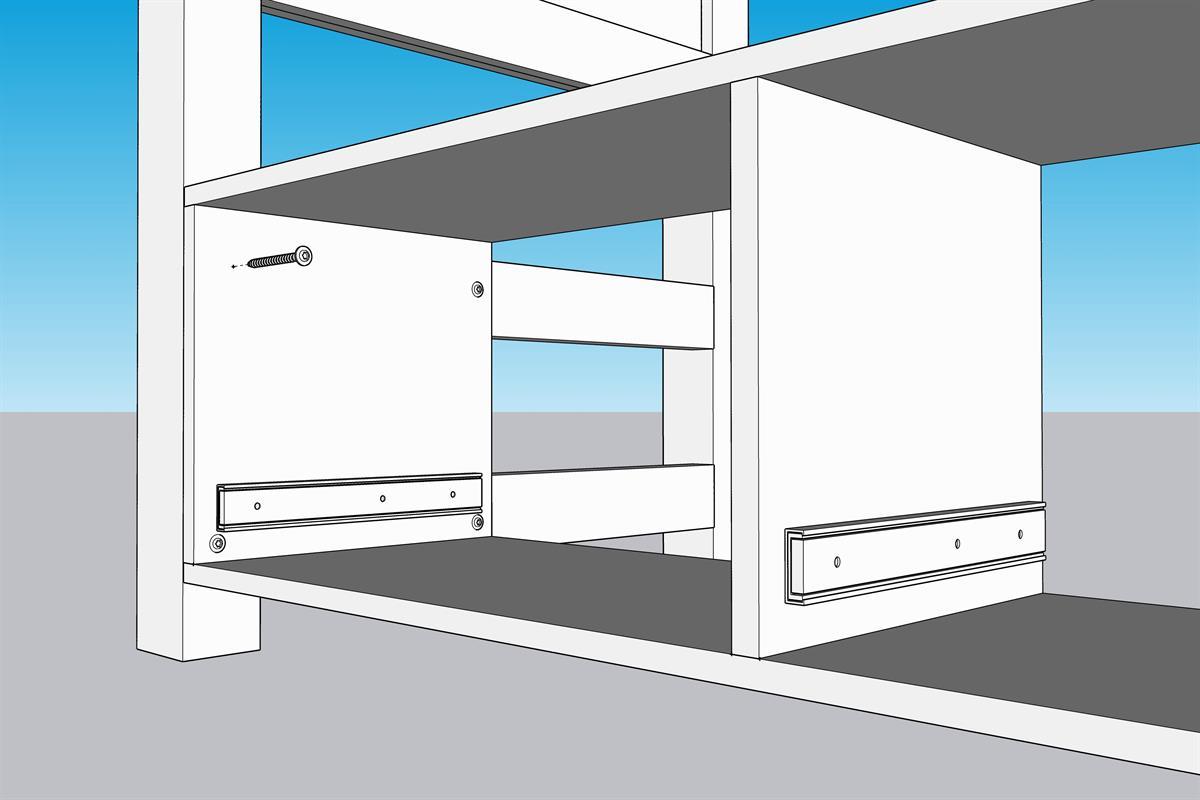
Putting it all together
Remove the drawers from the bed storage area compartments. Bring all bed pieces (footboard, headboard, six drawers and two bed storage areas) to the room where the bed will be. Set the headboard and footboard in place. Clamp both bed storage areas to the footboard and headboard posts, set 3" above the floor. Use lag screws to attach the storage area compartments to the headboard and footboard. Drive 3" lag screws into the headboard/footboard posts, and 2" lag screws into the the 2x4 headboard/footboard supports.
-
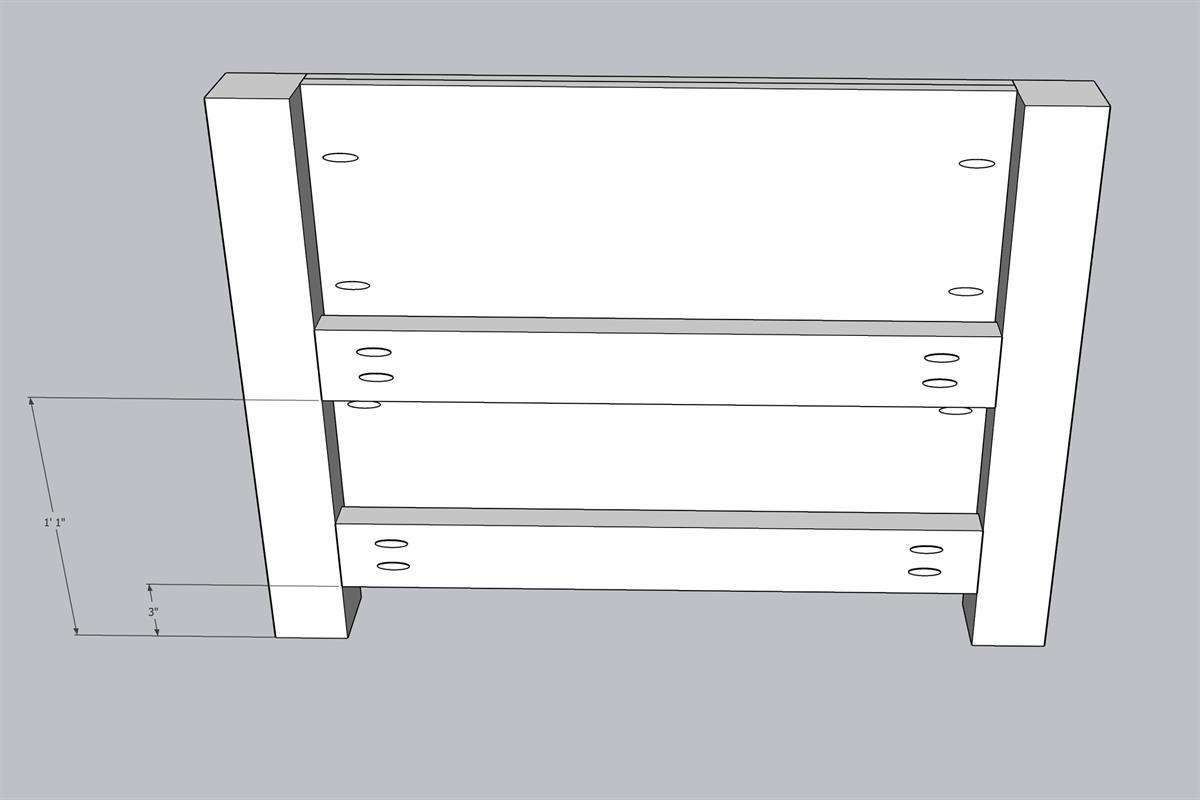
Join Footboard 1x4s to Posts
Attach footboard 1x4s to footboard posts with 1-1/4" coarse pocket hole screws at the positions shown. The front face of the footboard 1x4s should be flush to the front face of the footboard posts.
-
Footboard Plywood
Make eight pocket holes (set for 3/4" thick material) on the back face of the footboard plywood. Evenly space four holes on both the left and right sides. Attach with 1-1/4" coarse pocket hole screws directly behind the footboard 1x4s.
-
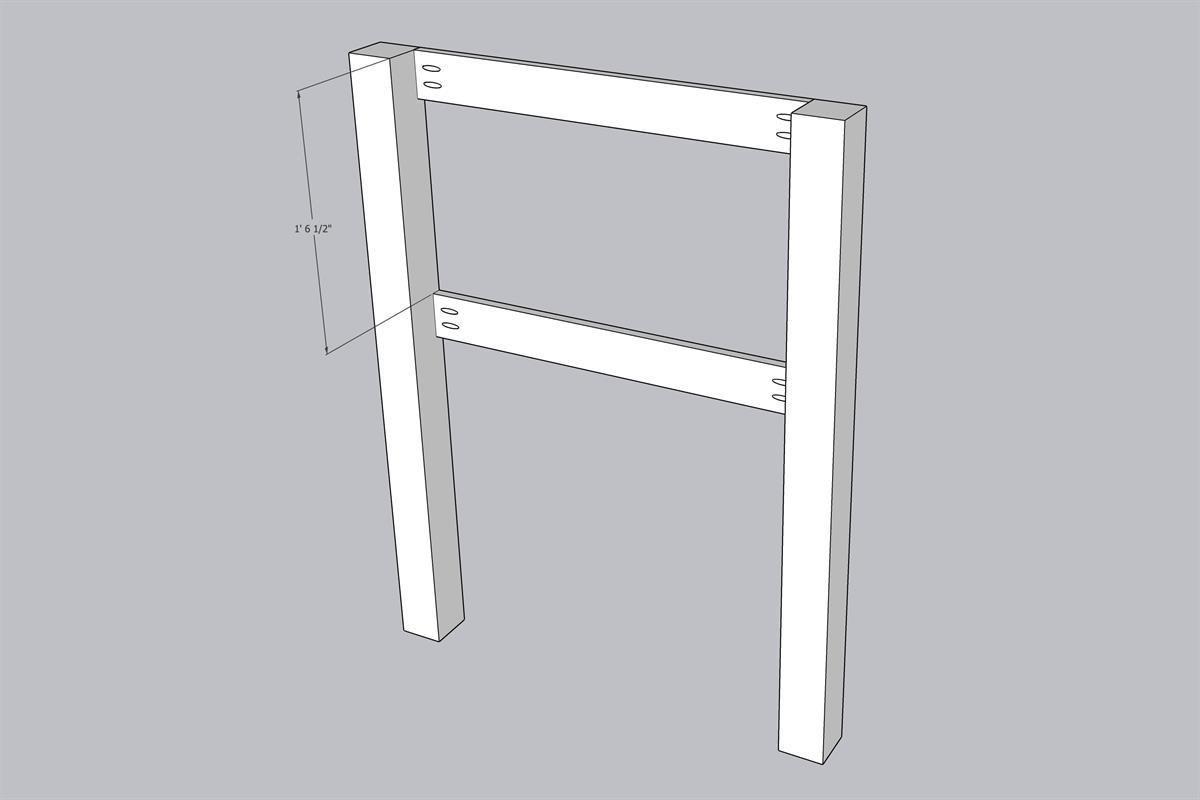
2x4 Footboard Supports
Make pocket holes on the 2x4 footboard supports (set for 1-1/2" thick material), then attach to the footboard posts with 2-1/2" coarse pocket hole screws. These should be attached flush to the back face of the footboard posts.
-
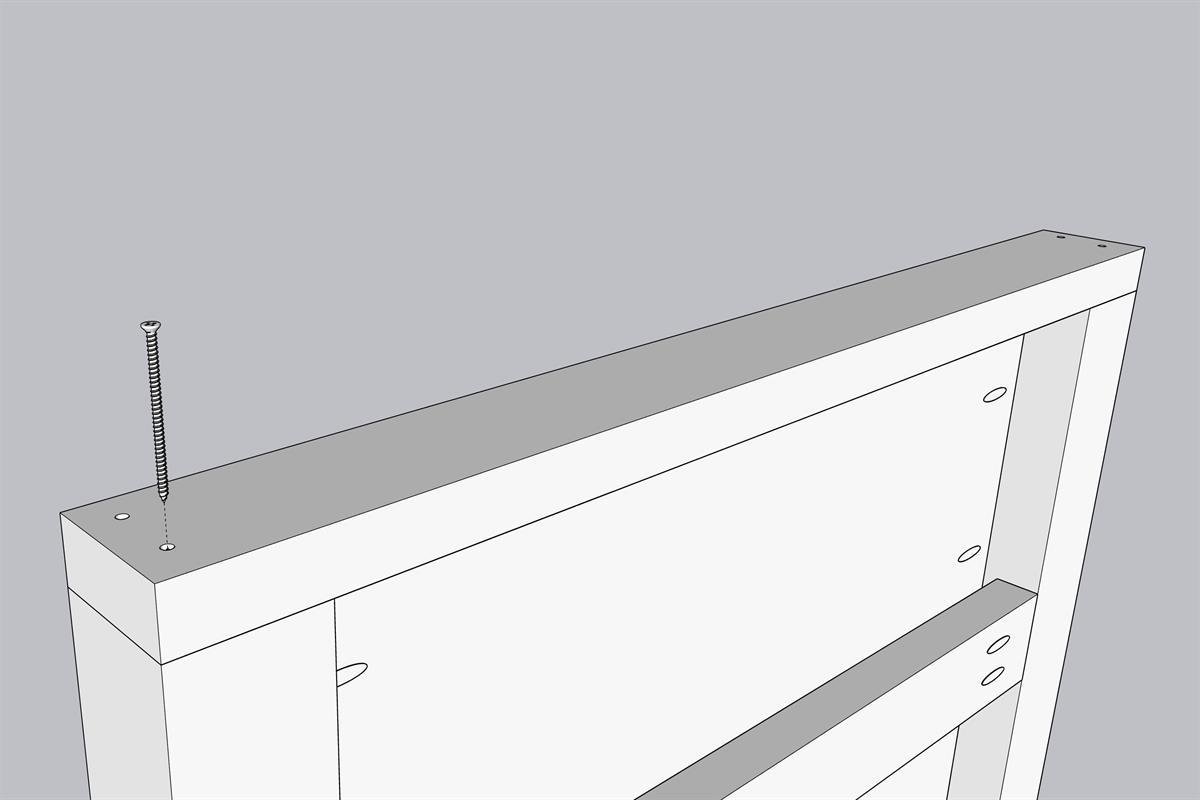
Attach Footboard 2x4 Cap
Attach the 2x4 footboard cap to the footboard using 3" wood screws, into four pre-drilled, countersunk holes (two per side).
-
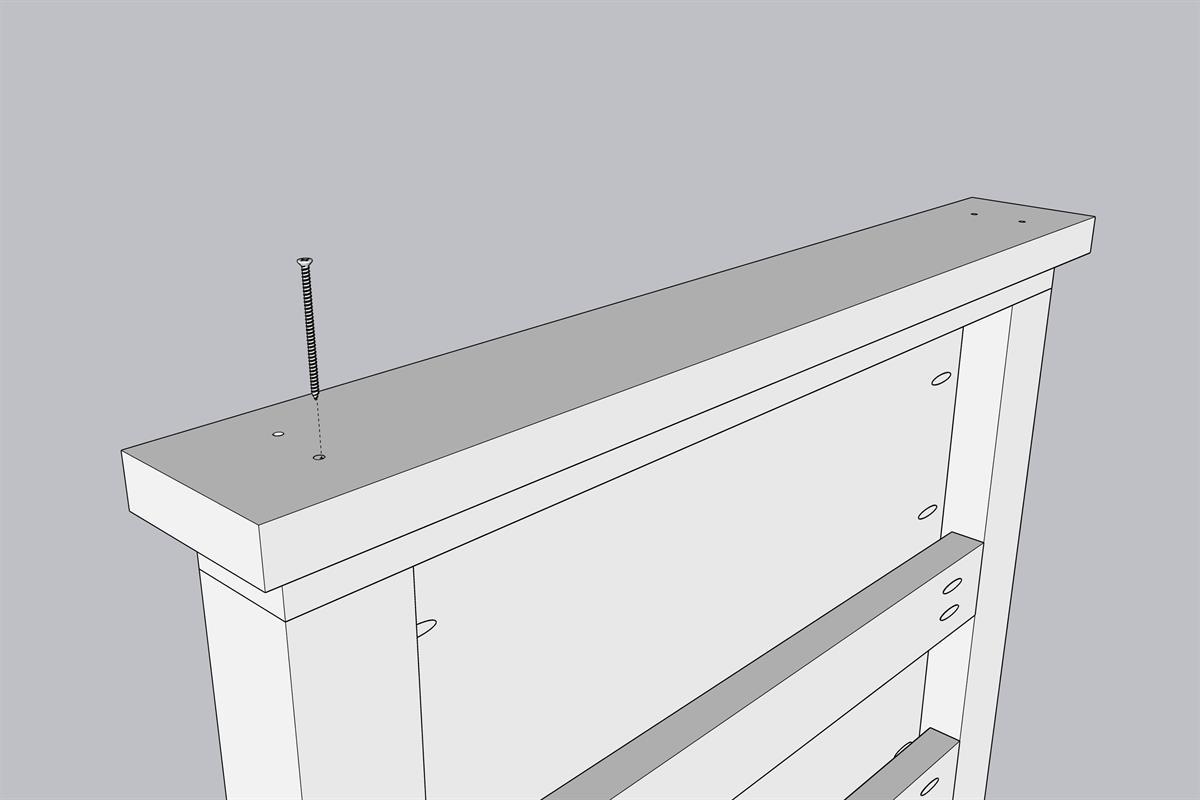
Attach Footboard 2x6 Cap
Attach the 2x6 Footboard Cap to the footboard using 3" wood screws, into four pre-drilled, countersunk holes (two per side). Be sure to offset the screws from the screws in the previous step. The 2x6 Footboard Cap should overhang 1" on all sides.
*For even more stability, add wood glue to the underside of the 2x6 before screwing it into place.
-
Fill Footboard Holes
Fill countersunk screw holes with wood filler, or appropriately sized dowels with wood glue.
-
Headboard Plywood
Make eight pocket holes (set for 3/4" thick material) on the back face of the headboard plywood. Evenly space four holes on both the left and right sides. Attach with 1-1/4" coarse pocket hole screws directly behind the headboard 1x4s.
-
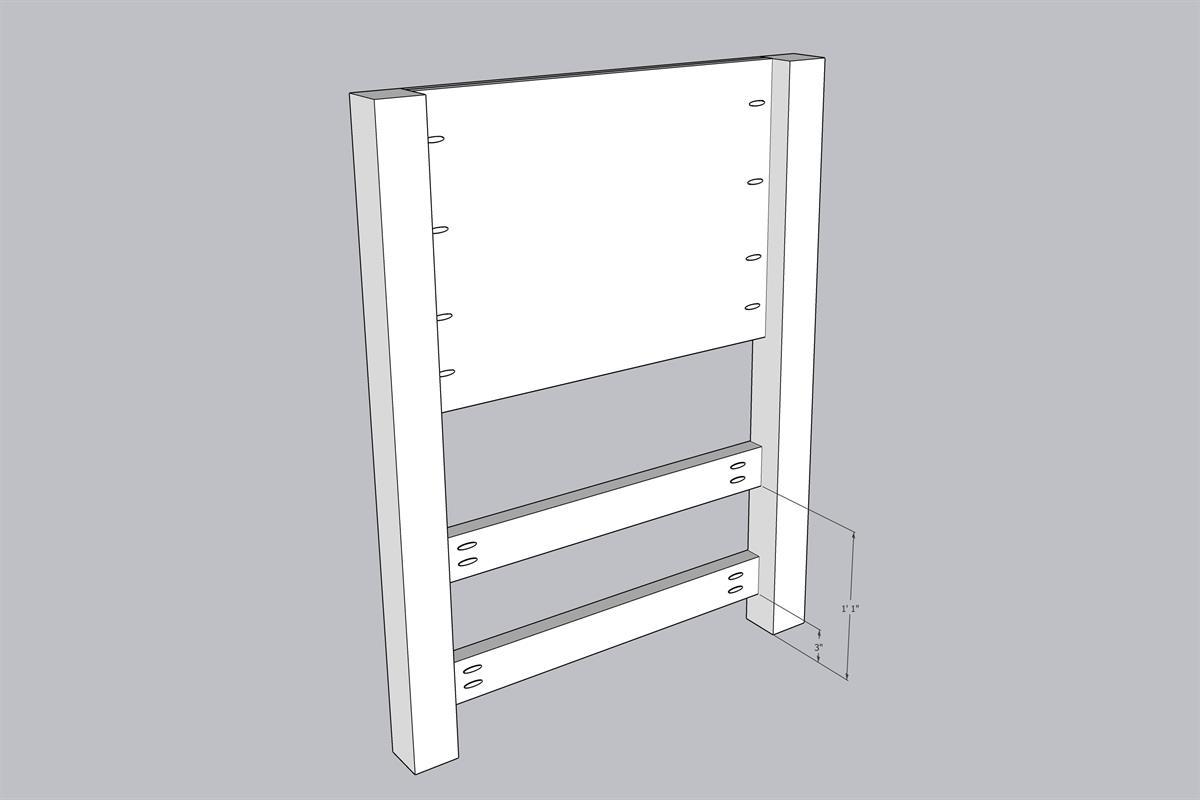
2x4 Headboard Supports
Make pocket holes on the 2x4 headboard supports (set for 1-1/2" thick material), then attach to the headboard posts with 2-1/2" coarse pocket hole screws. These should be attached flush to the front face of the headboard posts.
-
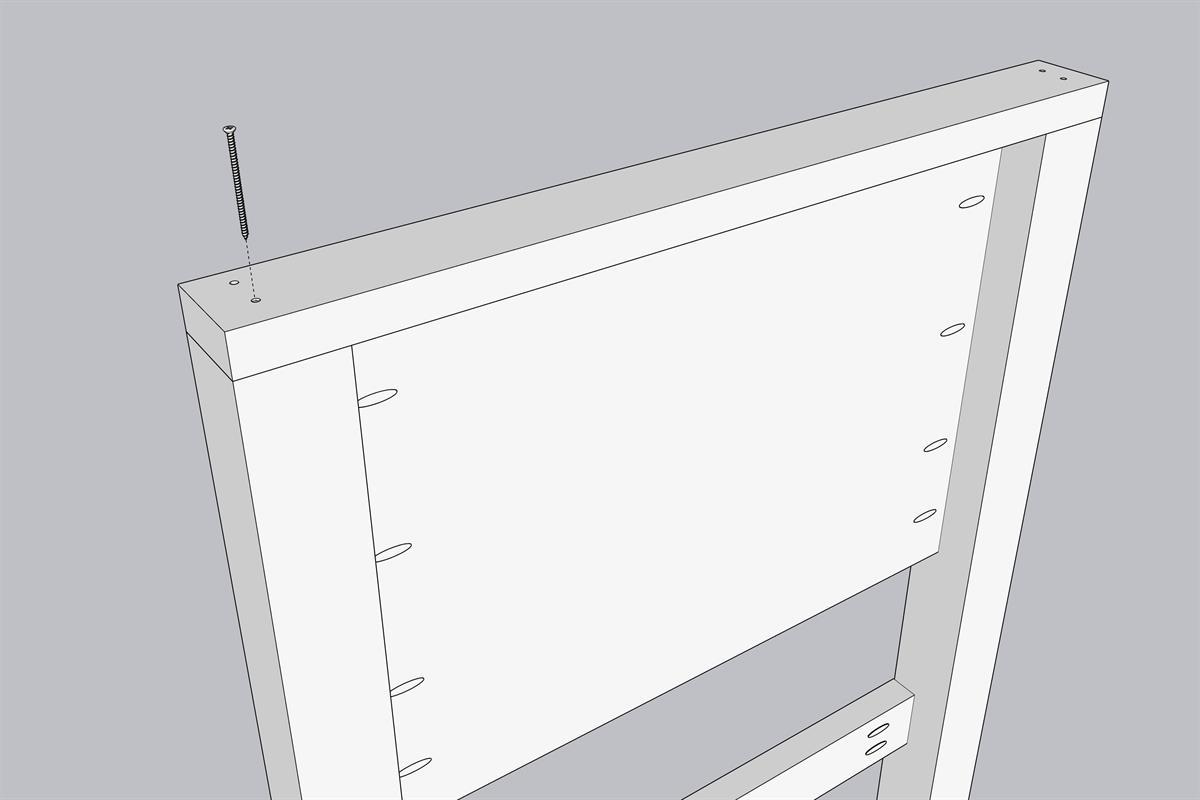
Attach Headboard 2x4 Cap
Attach the 2x4 headboard cap to the headboard using 3" wood screws, into four pre-drilled, countersunk holes (two per side).
-
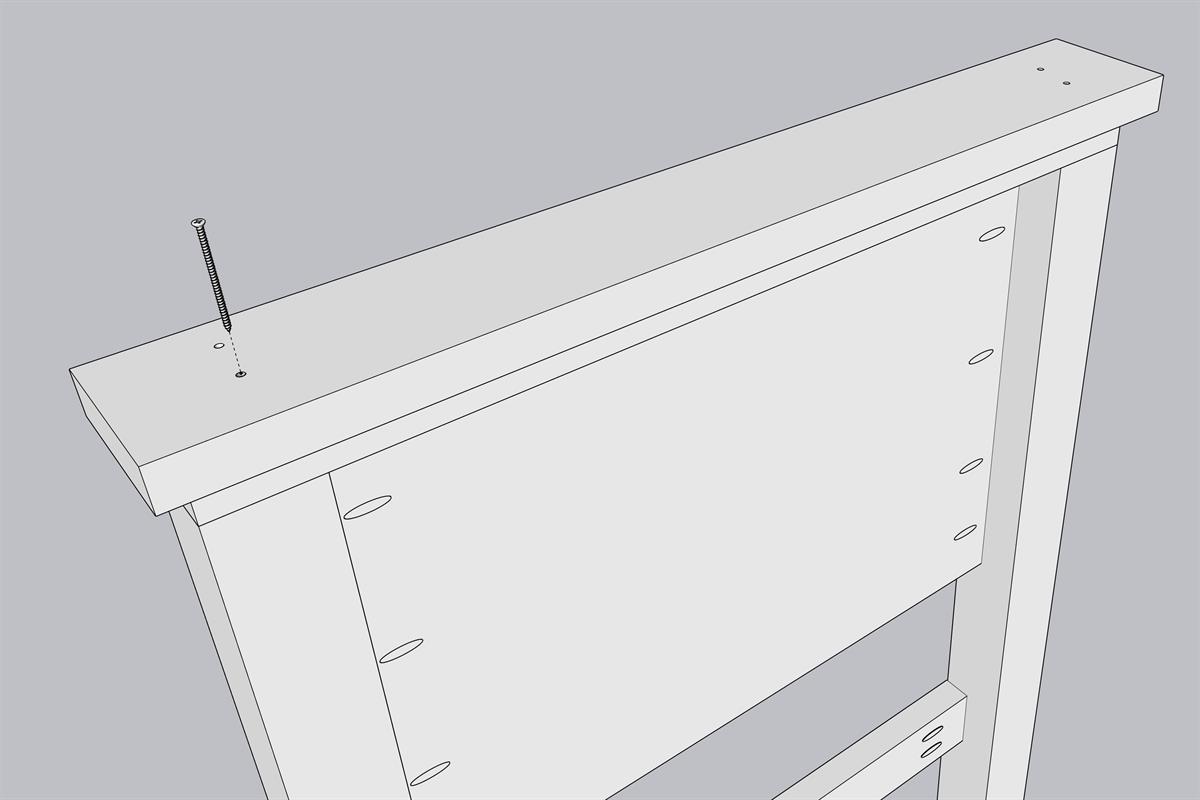
Attach Headboard 2x6 Cap
Attach the 2x6 Headboard Cap to the headboard using 3" wood screws, into four pre-drilled, countersunk holes (two per side). Be sure to offset the screws from the screws in the previous step. The 2x6 headboard cap should overhang 1" on all sides.
*For even more stability, add wood glue to the underside of the 2x6 before screwing it into place.
-
Add Bed Storage Area Dividers
Make pocket holes (set for 3/4" thick material) on the bed storage area dividers. Attach to the bed storage area with 1-1/4" coarse pocket hole screws. Attach so that the left and right openings are both 24." The middle opening will be 24-1/6" if your storage area dividers are true 3/4" plywood, but because most plywood is slightly less than 3/4", it may be slightly larger, and the dimensions of your center drawers will need to be adjusted in the next step.
-
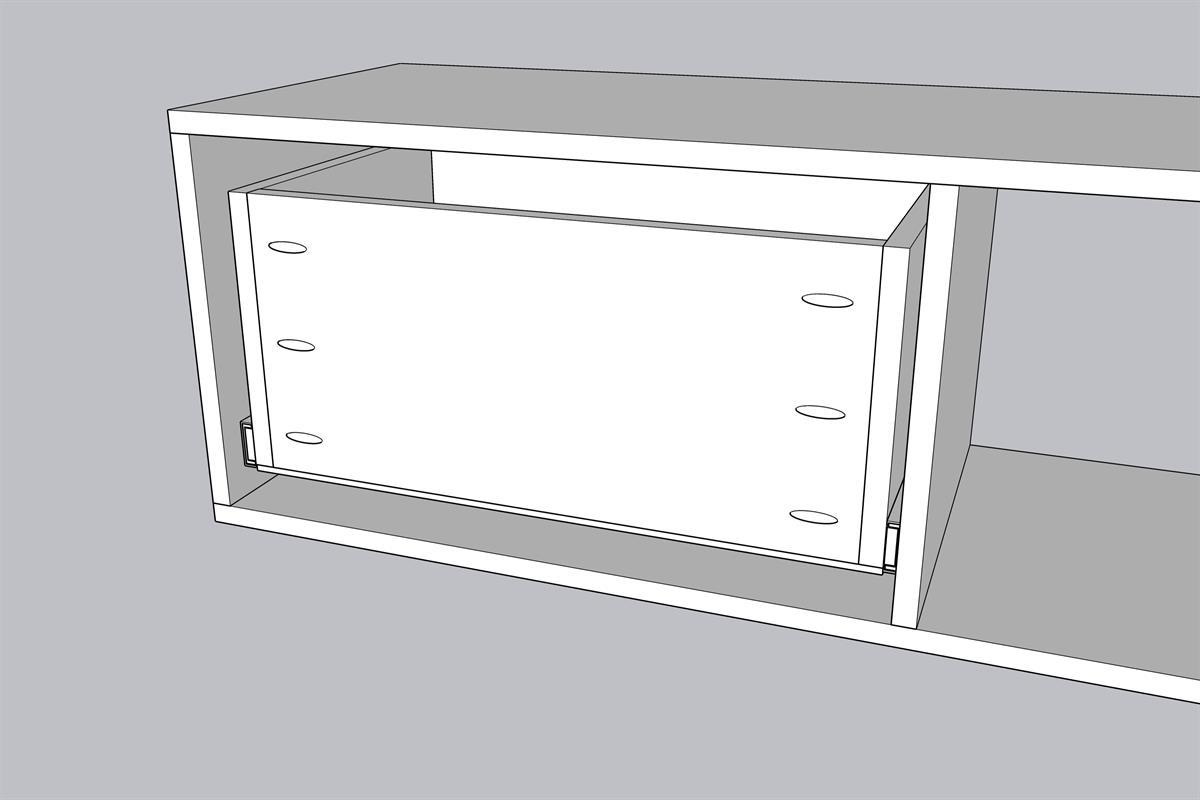
Attach Drawer Bottom
Attach a 1/4" plywood drawer bottom to each drawer using a nail gun with 18 gauge 1" nails.
-
Attach Drawers to Bed Storage Area
Install 14" drawer slides in each of the six compartments. Install 1" from the front to allow room for the drawer face. Next, attach slides to drawers, then add drawers to the bed storage area.
-
Attach Drawer Faces
Attach drawer faces to drawers using screws from inside the drawer box. There should be 1/8" gap between the drawer face and all sides.
-
Fill Headboard Holes
Fill countersunk screw holes with wood filler, or appropriately sized dowels with wood glue.
-
Add Knobs or Pulls
Drill a hole into the center of each drawer and install drawer knobs or pulls.