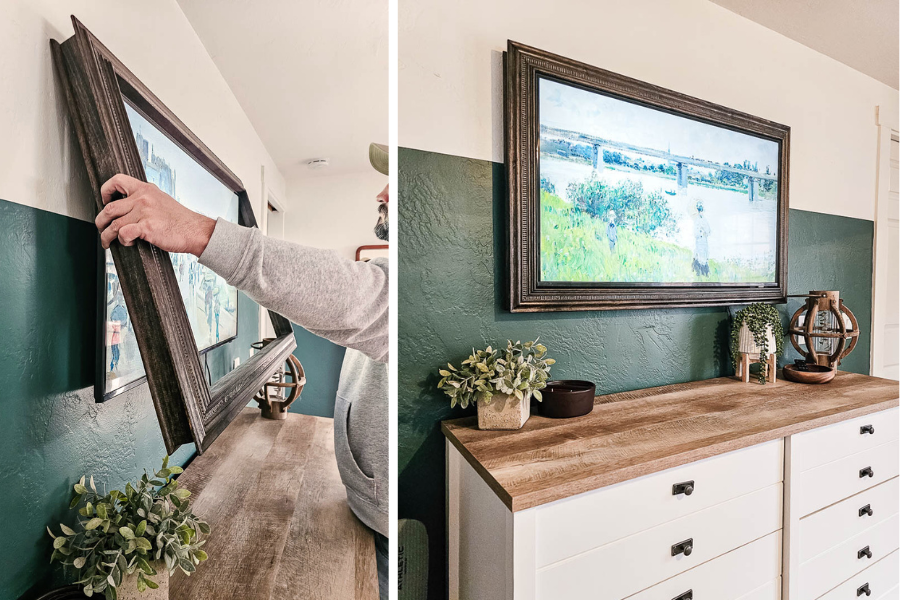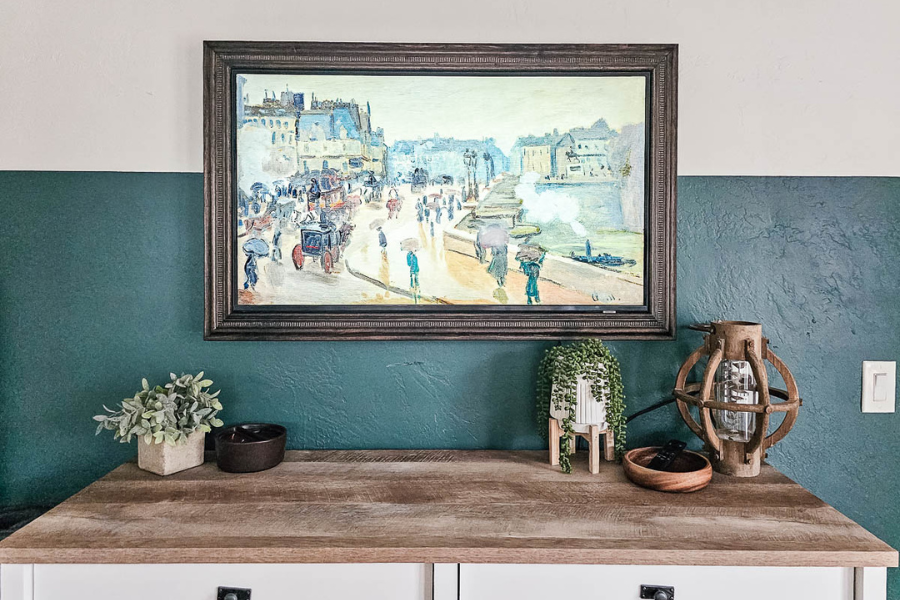
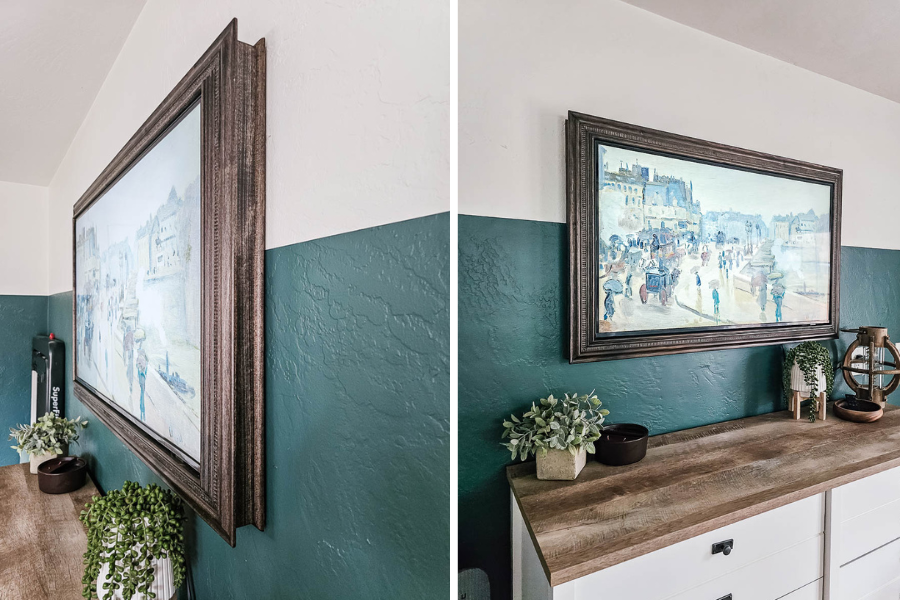


Make any smart TV look like art on the wall with this gorgeous TV frame! The woodworking plans are for a 43” TV but can be modified to fit a TV of any size.
Tools
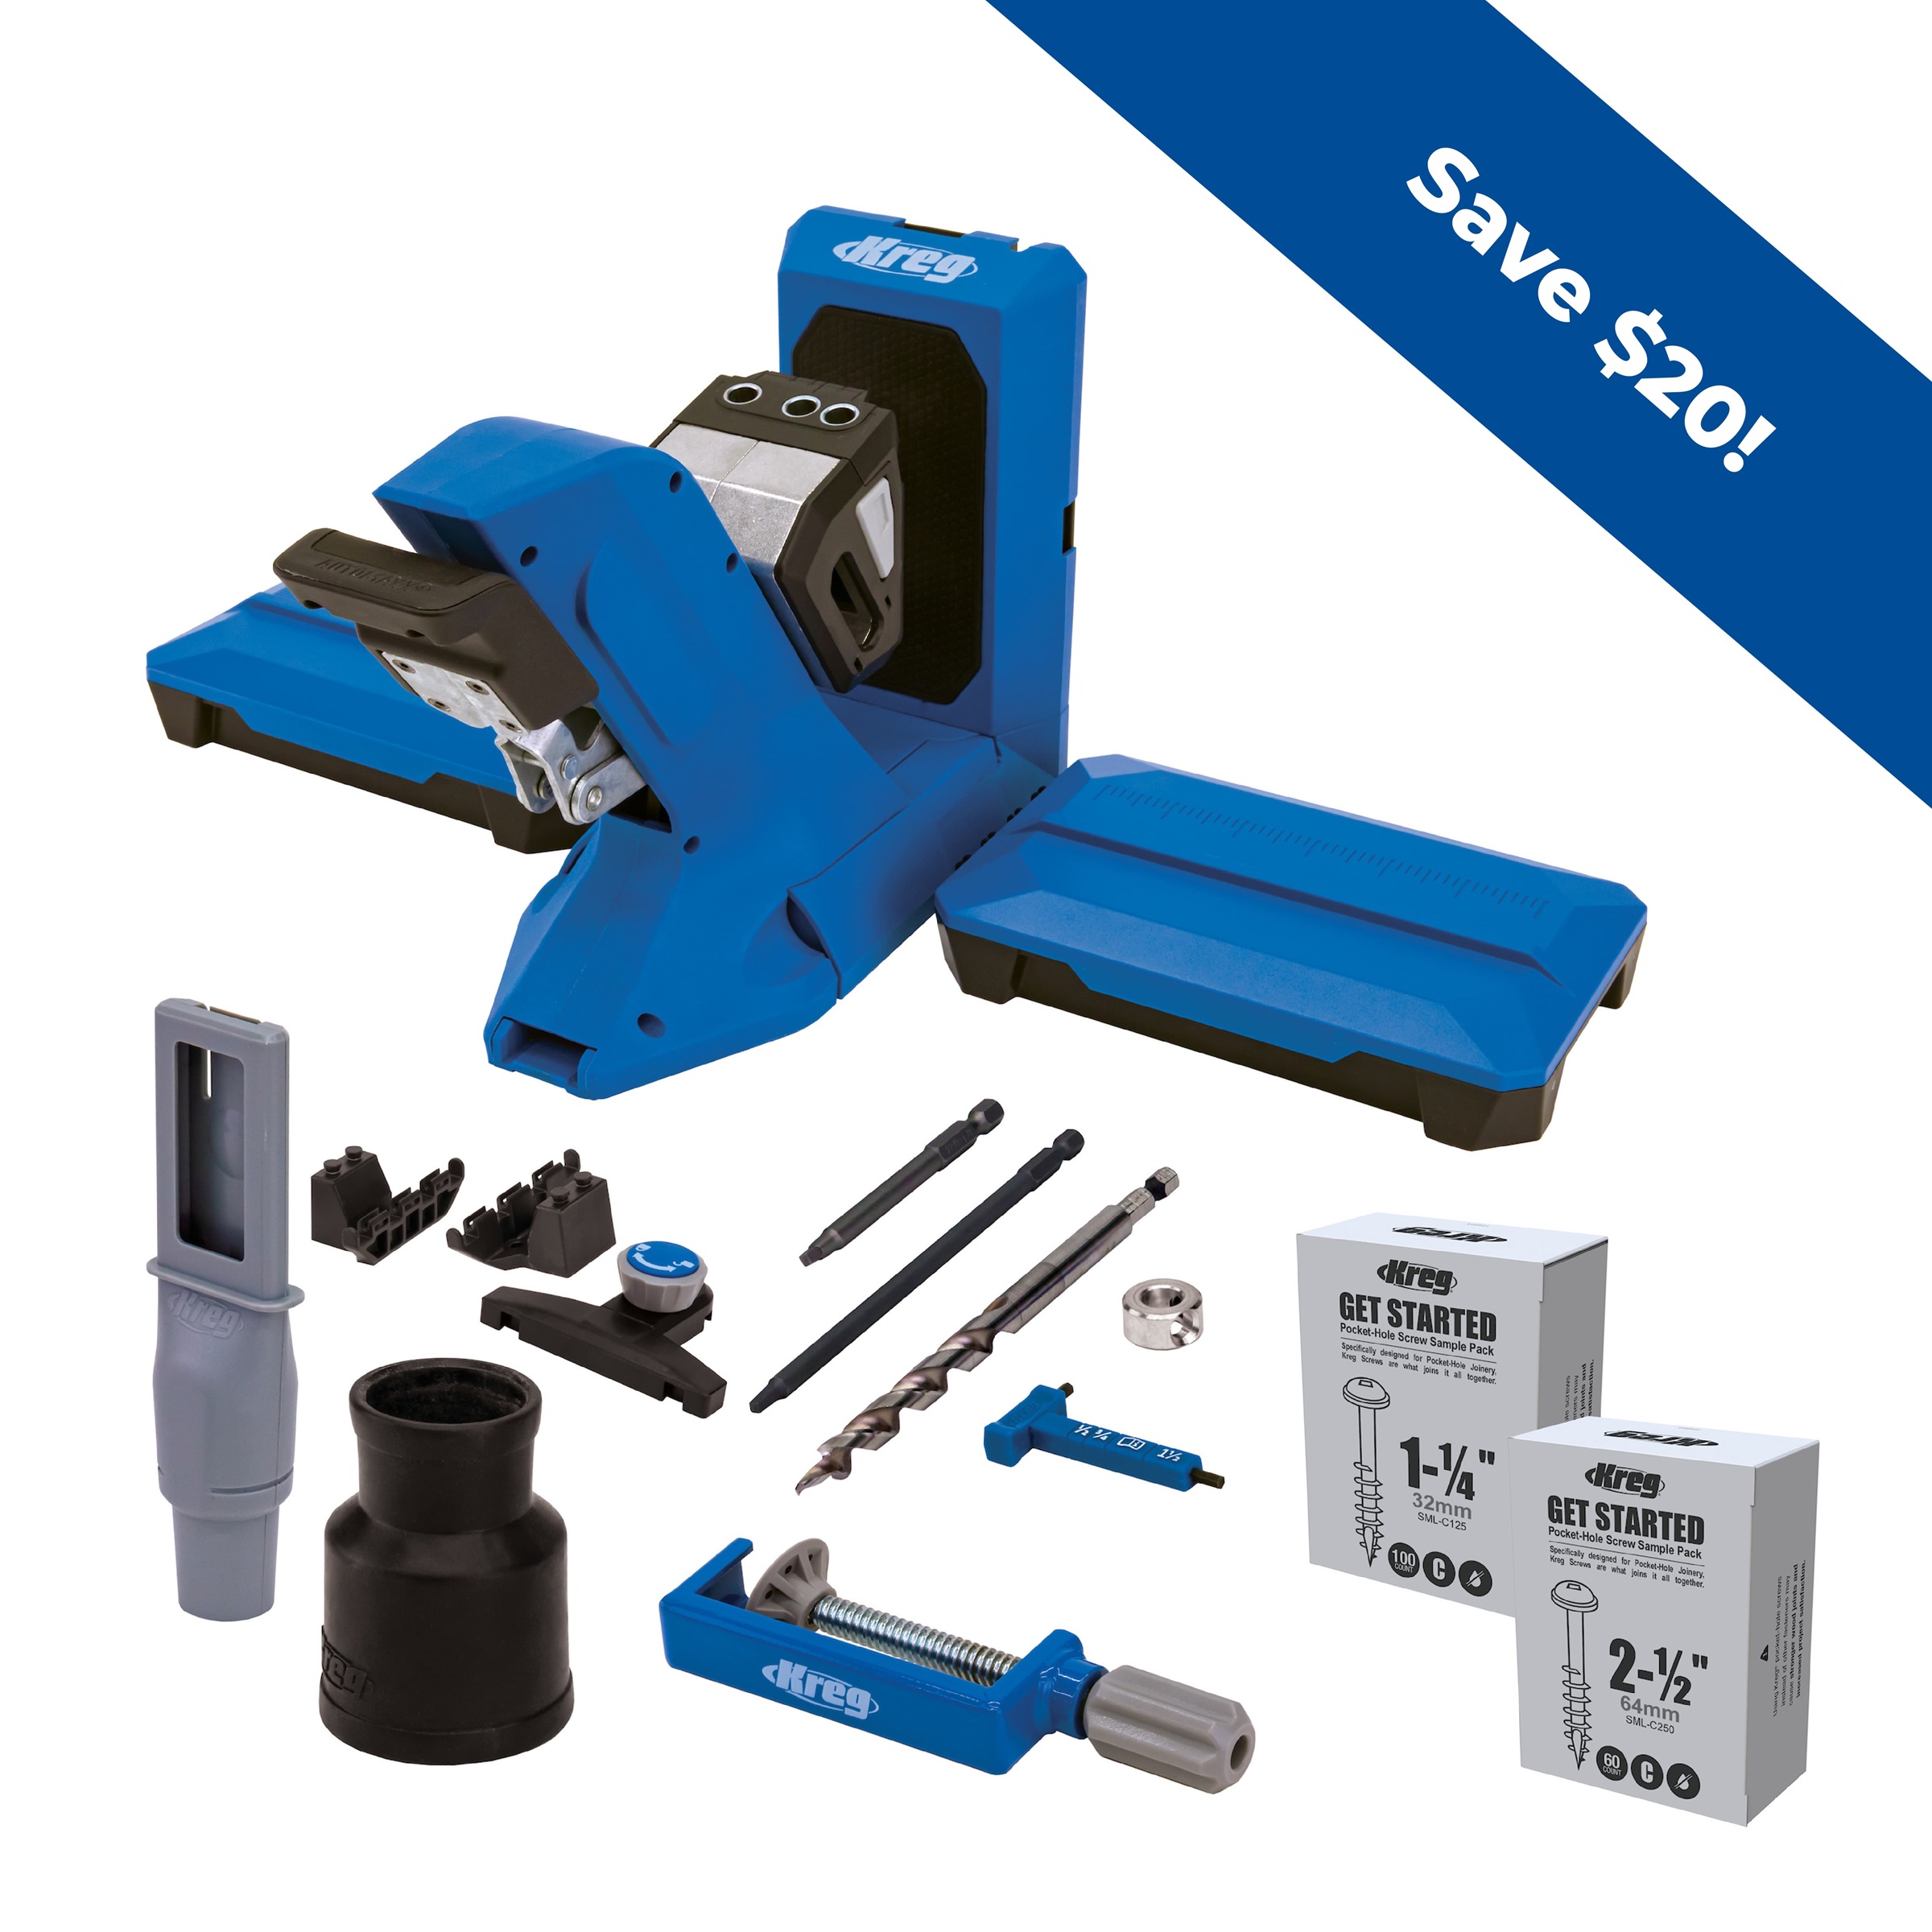
Kreg Tools


Other Tools
-
Miter saw

-
Table saw
-
Tape measure
-
Pin nailer
Materials
Wood Products
- 1 Poplar Board , 1”x 3” x 5’
- 1 Poplar Board , 1”x 3”x 8’
- 1 Poplar Board , 1”x 2” x 5’
- 1 Poplar Board , 1”x 2”x 8’
- 1 Hardwood Chair Rail Molding , ⅞” x 2 ⅝” x 10’
- 1 Hardwood Chair Rail Molding , ⅞” x 2 ⅝” x 6’
- 4 Basswood Quarter Round Tinytrim Molding , ⅜” x ⅜” x 4’
Hardware & Supplies
- -- Kreg pocket hole screws 1 ¼”, zinc, fine grit (see tool list)
- -- Wood glue
- -- Stain (we used Dark Walnut)
- -- Stain cloth
- -- Spray lacquer
- -- Putty (that matches your stain)
- -- Sandpaper (80, 150 & 220)
- -- 1" pin nails
Directions
-
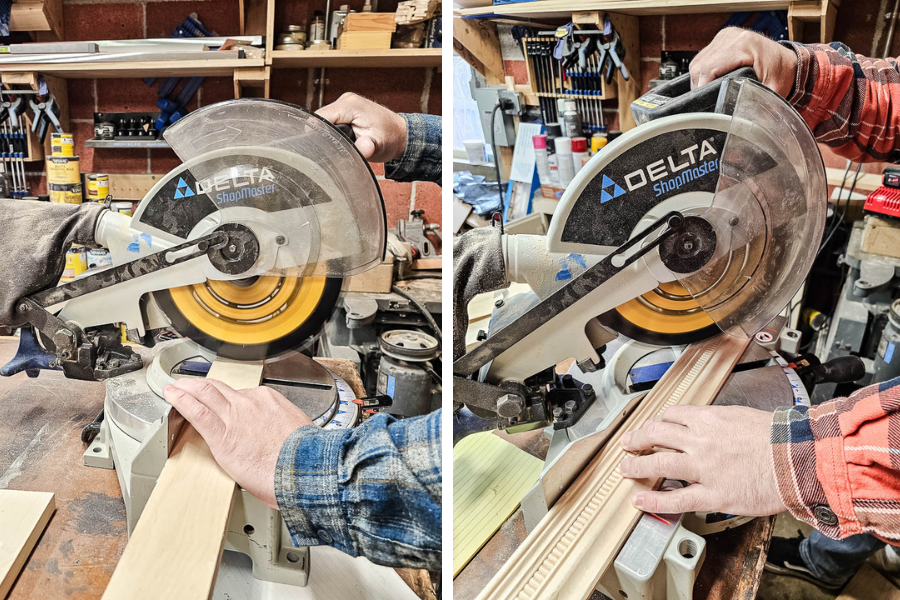
Cut wood
Cut wood according to the visual cut list in the woodworking plans with a miter saw for the lengths and a table saw for the rip cuts.
45-degree miters
The molding and quarter round are both cut with 45-degree miter cuts on the corners so they fit together. Keep in mind that all the measurements for the angle cuts are the short sides. This ensures no matter what type of molding you choose your inside cuts will always stay the same.
-
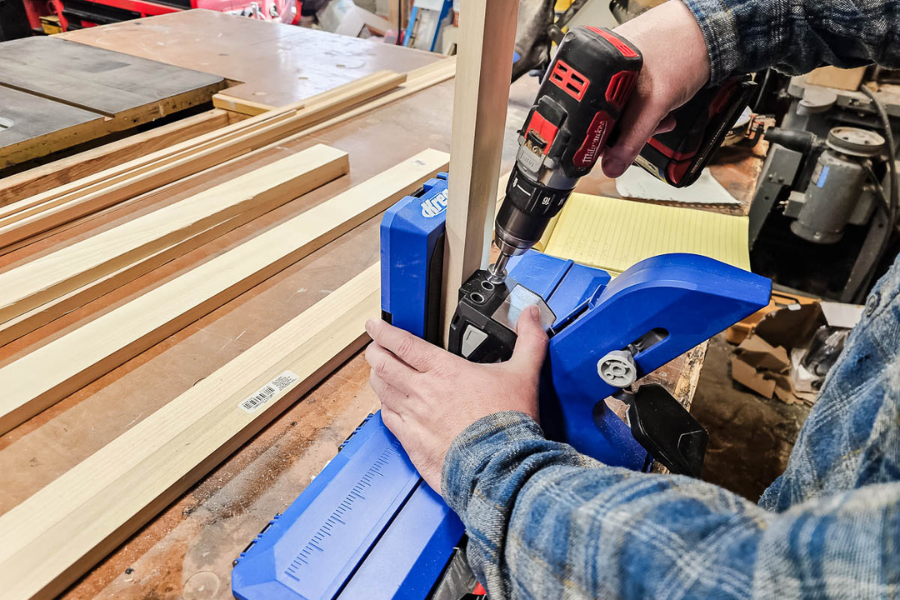
Drill pocket holes
Drill pocket holes as shown in the woodworking plans. We’re using the 720Pro jig.
-
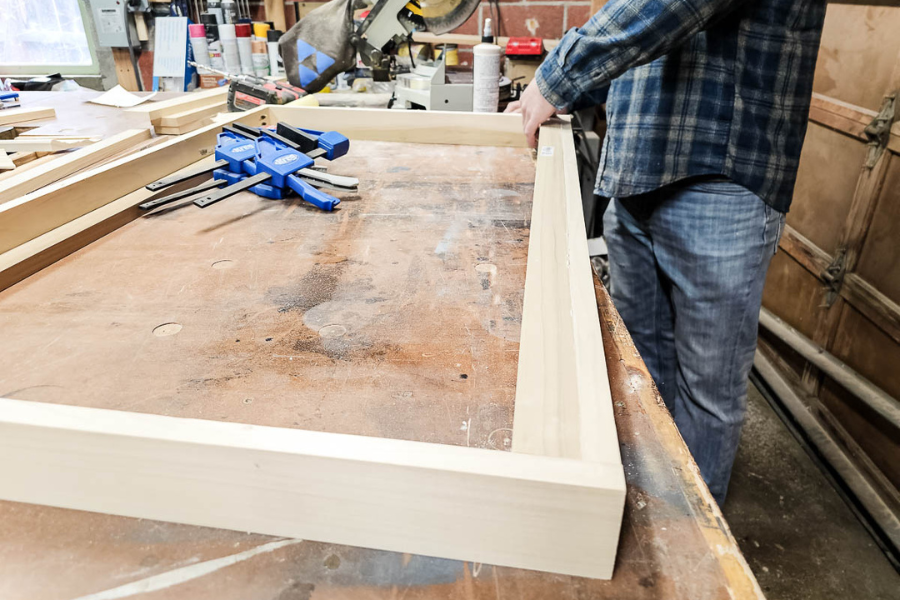
Assemble the frame
Using clamps, assemble the top, sides, and bottom frame pieces with the pre-drilled pocket holes and 1 ¼” pocket hole screws as shown in the woodworking plans. Large clamps or a clamp table can help keep these pieces together as you attach.
Fill pocket holes?
There’s no need to fill the pocket holes with plugs afterward because they are all hidden on the inside.

-
Glue on nailer boards
You need to have a wider surface on the front of the frame to nail the molding into, so next you’ll add nailer boards for this purpose. Using some wood glue and clamps, start gluing on the nailer pieces on the inside of the frame. Then clamp each piece flush with the frame pieces and let dry.
-
Sand the nailer and frame
Take the 80 grit sandpaper and start sanding down the frame and the nailer boards flush. You want a nice flat surface to attach the face frame molding to.

-
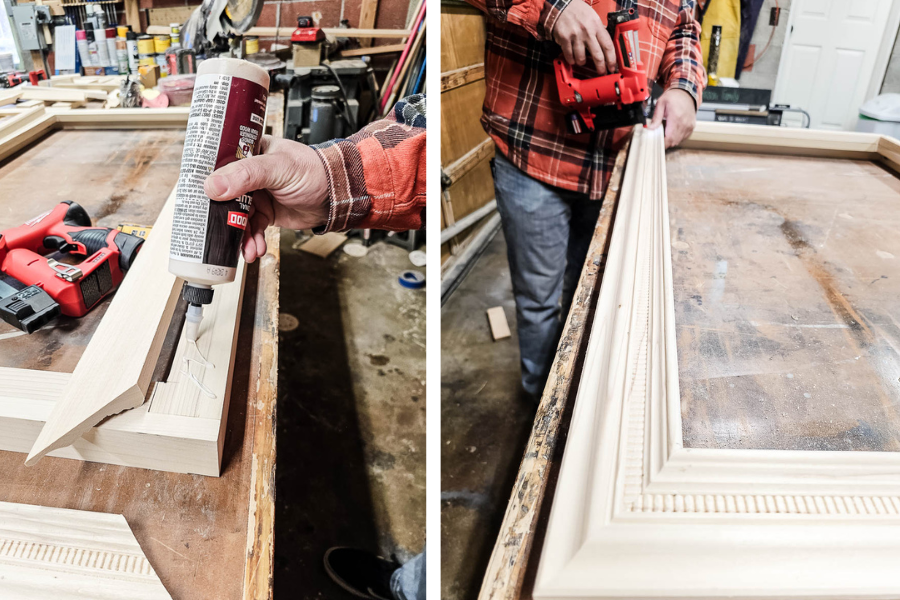
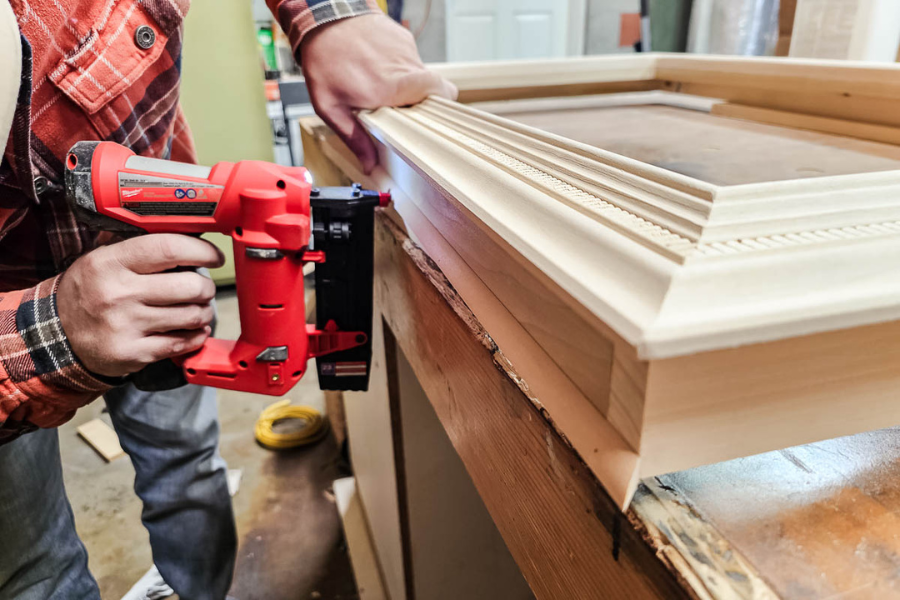
Attach the frame frame molding
What we used for the front of the frame was actually “chair rail molding”, but it serves the purpose well. This type of trim is very delicate so you’ll want to avoid using clamps here. If you do use clamps be sure to have plenty of padding. Start applying wood glue to both the front surface of the frame & nailer board and the back of the molding. Carefully line up your 45-degree angles and start securing with a pin nailer. Using 1” pin nails try to place them in areas that aren’t easily seen.
-
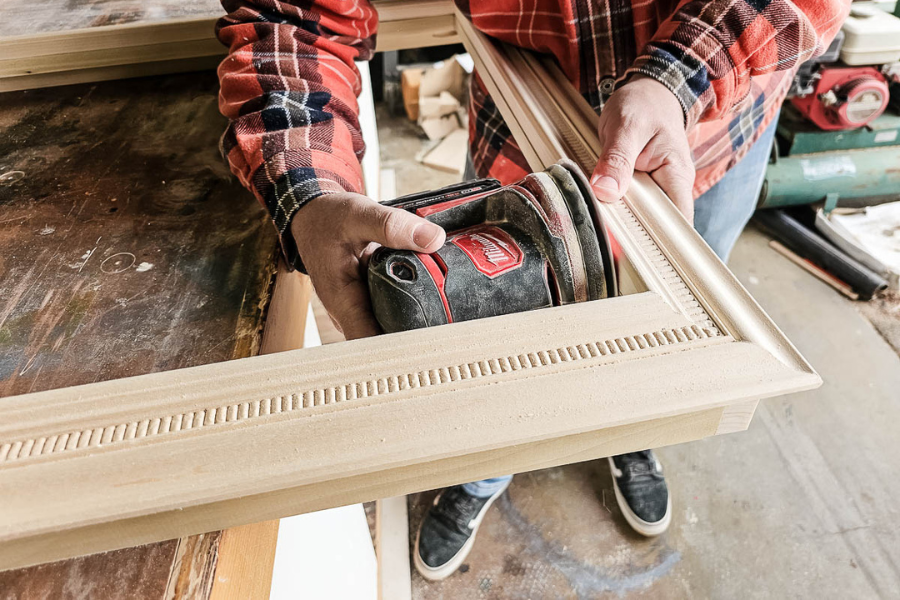
Sand
Once the wood glue is dry, with the orbital sander sand the inside edge of the frame starting with 80-grit, then 150-grit, and finally 220-grit sandpaper to be completely flush with the molding. Next, holding 220-grit sandpaper in your hand very carefully hit the front surface of the mitered corners of the face frame so they are seamless. You don't want to put any sanding scratches into your finished frame.
-
Attach quarter round
Next attach the quarter round trim on the back edge of the frame (where it will sit on the wall) with the 1" pin nails using the pin nailer
-
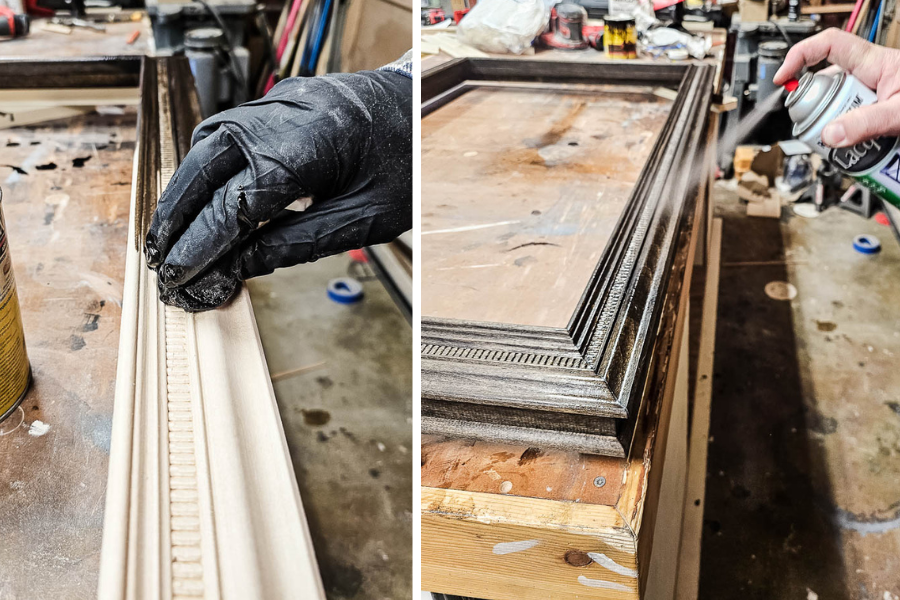
Stain and seal
Dust the frame off then stain with the stain color of your choice. We used Minwax Dark Walnut. After the stain has dried, fill mitered joints with wood putty that matches your wood stain. Then seal with spray lacquer after the stain has dried fully.
-
Hang on TV
Next place the frame on your TV. We didn’t need to secure it any more than simply setting it into place. If there are any buttons or controls that bump out on the edge of your TV, you may need to chisel out a small section for these on the inside edge of the frame.