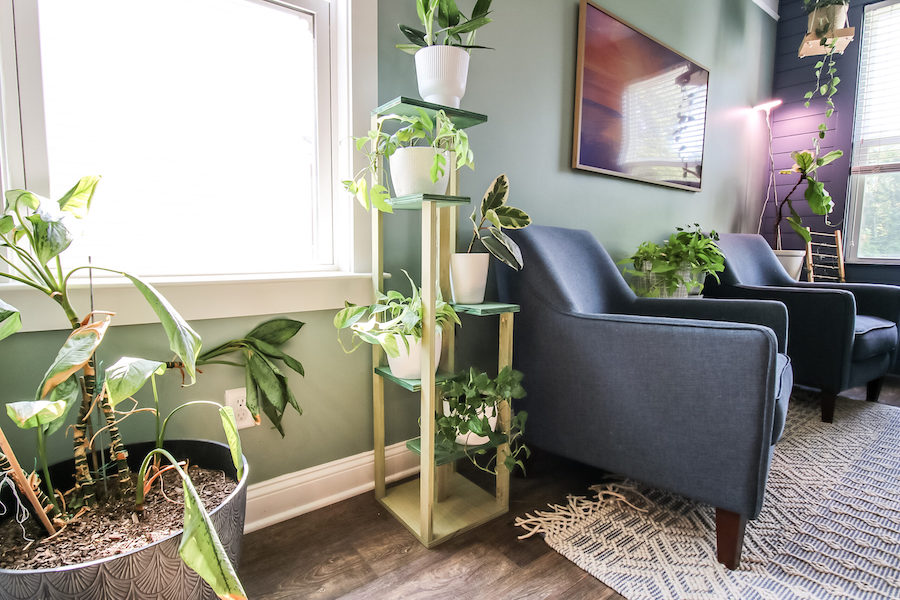
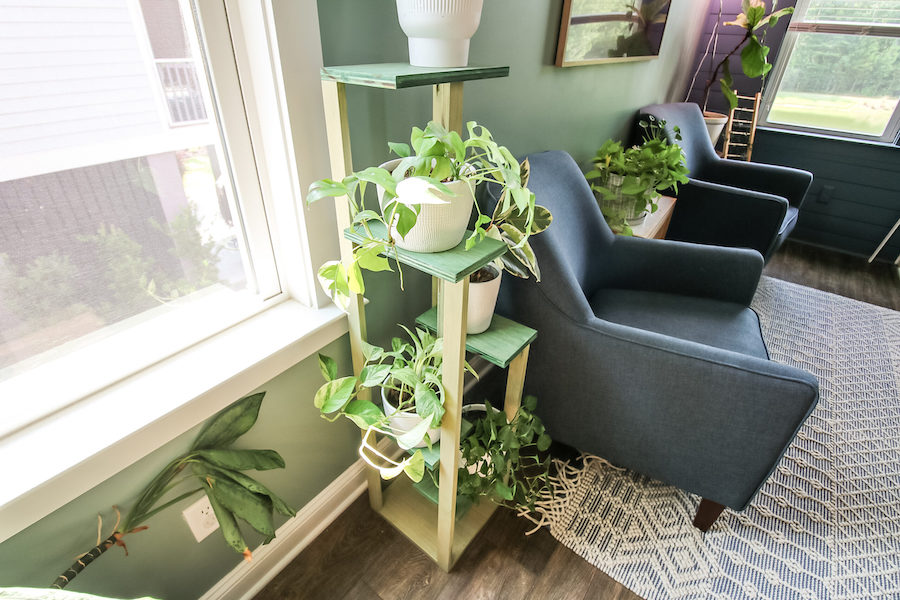
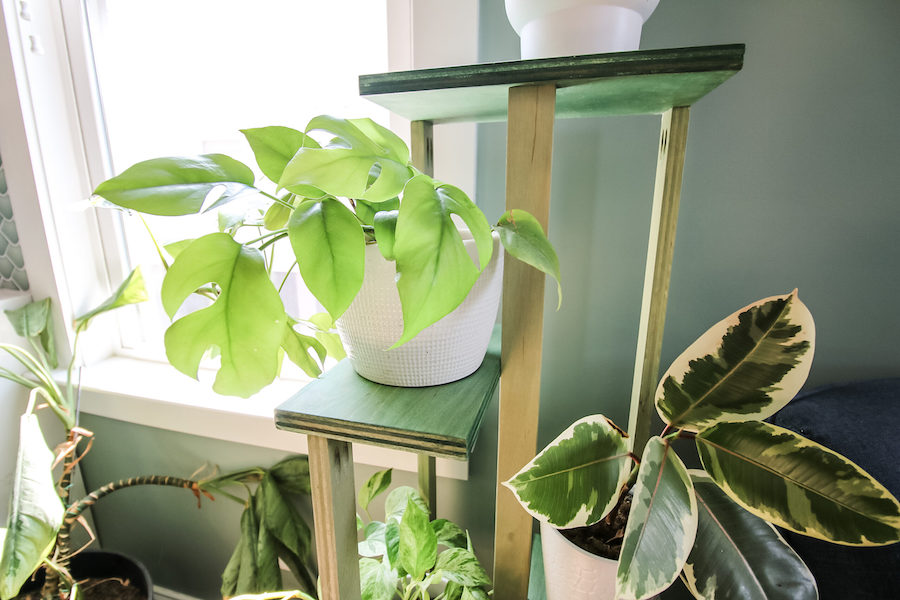


Need to fill the corner of a room with plants? Try building this tiered plant stand tower that adds vertical height and holds tons of potted plants!
Tools
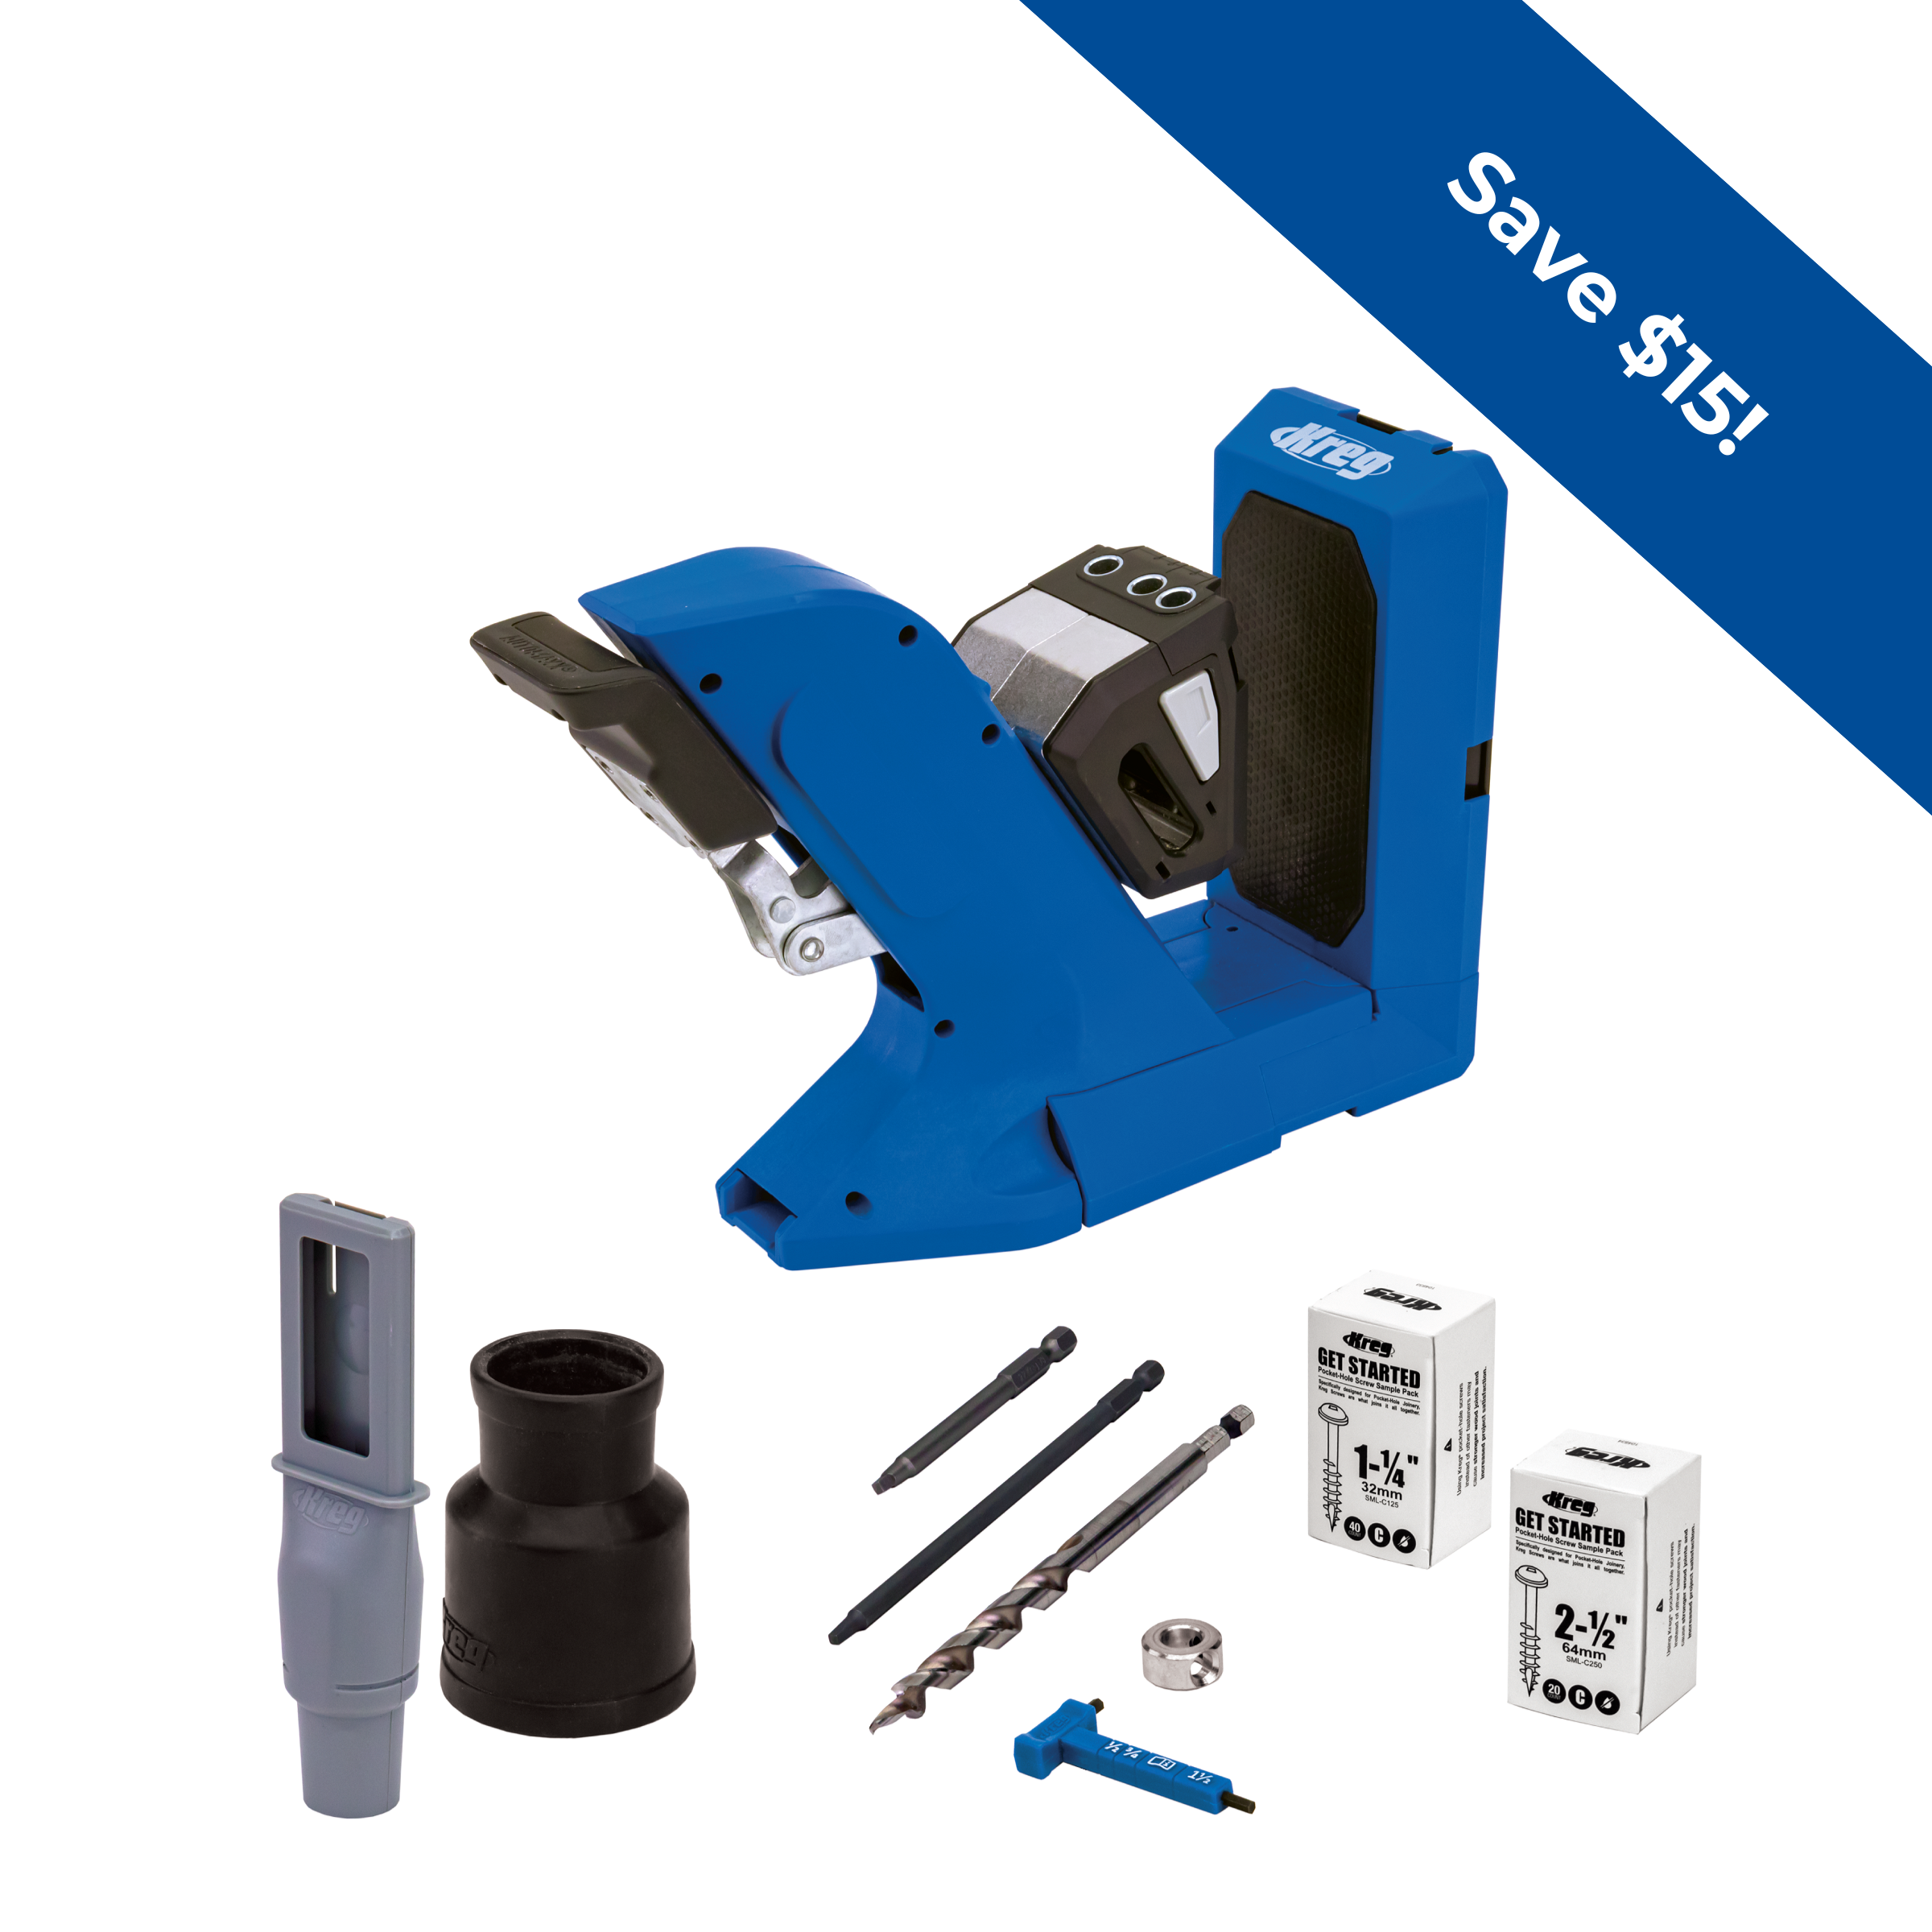
Kreg Tools

Other Tools
-
Table Saw

Materials
Wood Products
- 1 3/4" plywood , 4'x8'
Hardware & Supplies
- 30 1 1/4" Kreg screws
- 1 Wood glue
- 1 Stain or paint of choice
- 1 Polyurethane
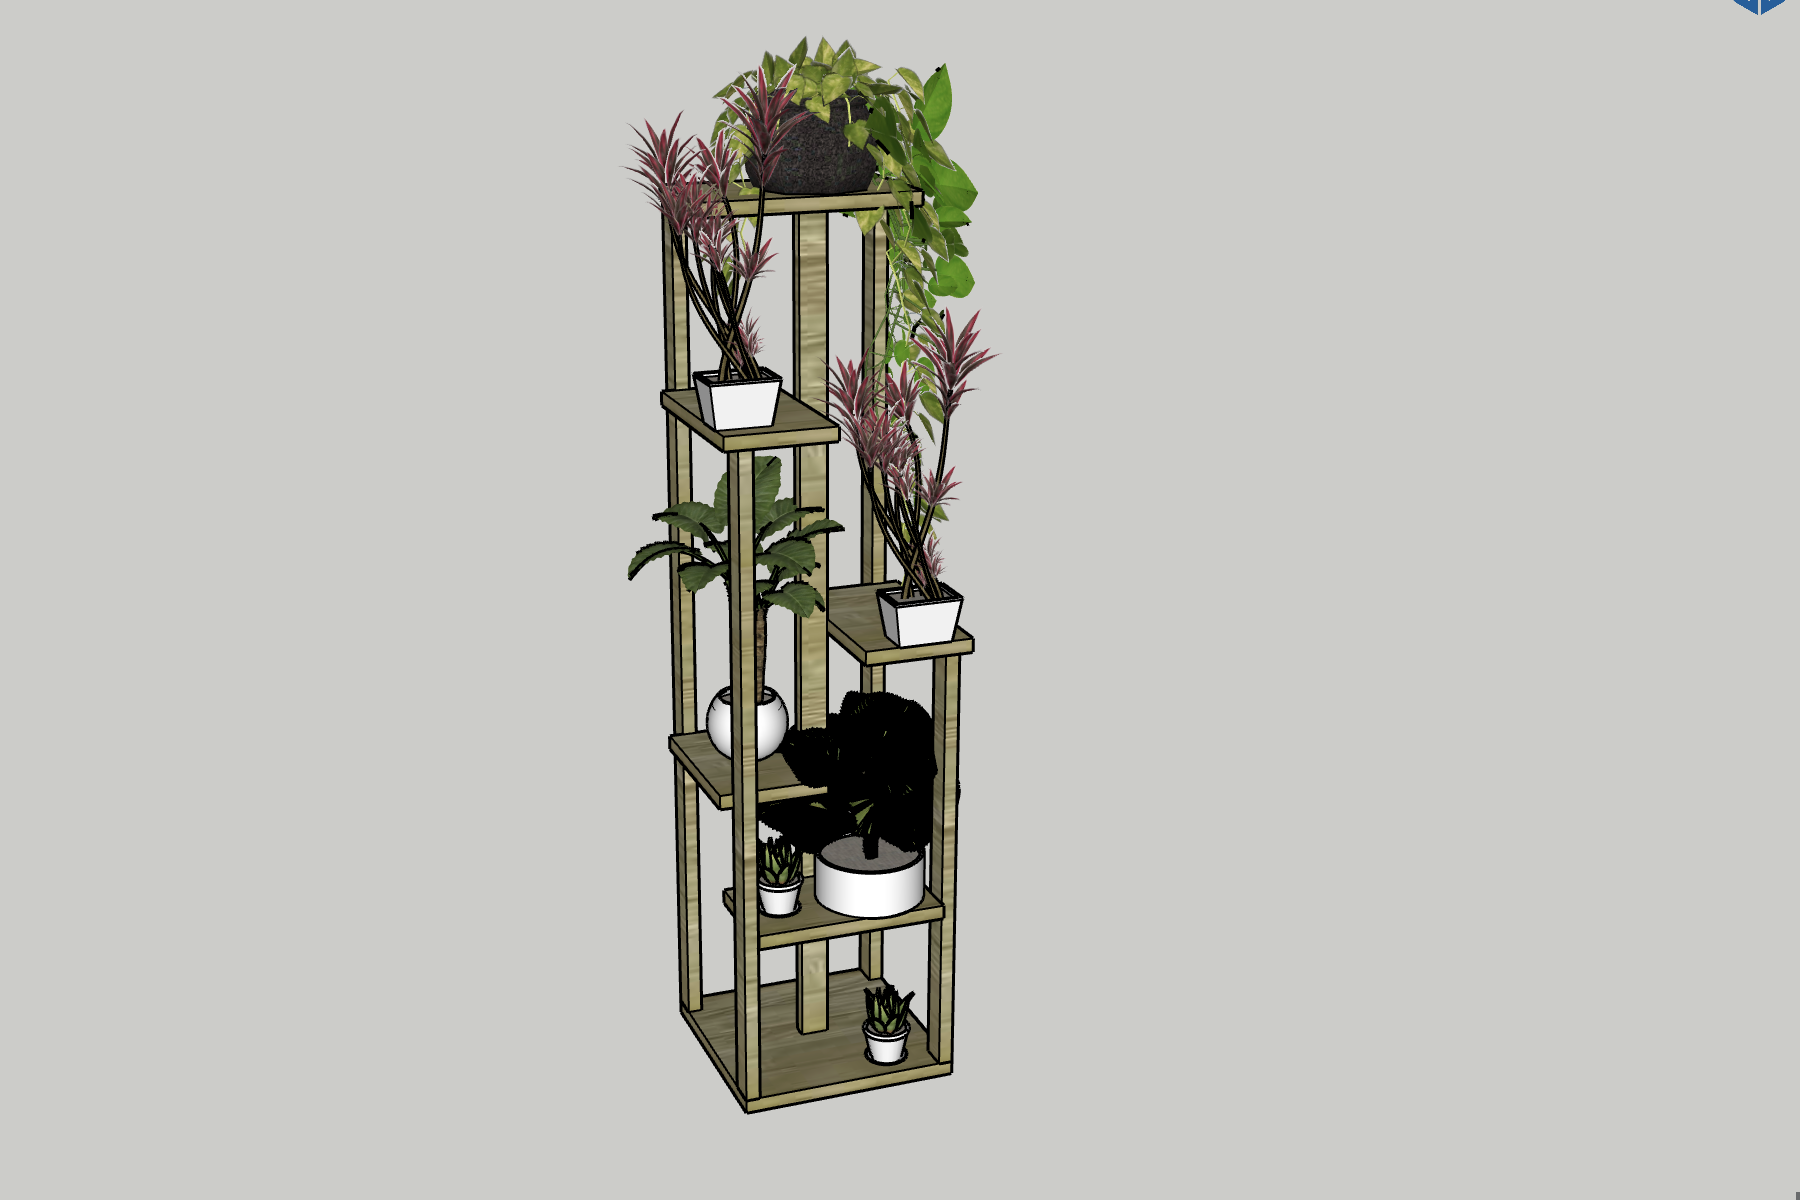
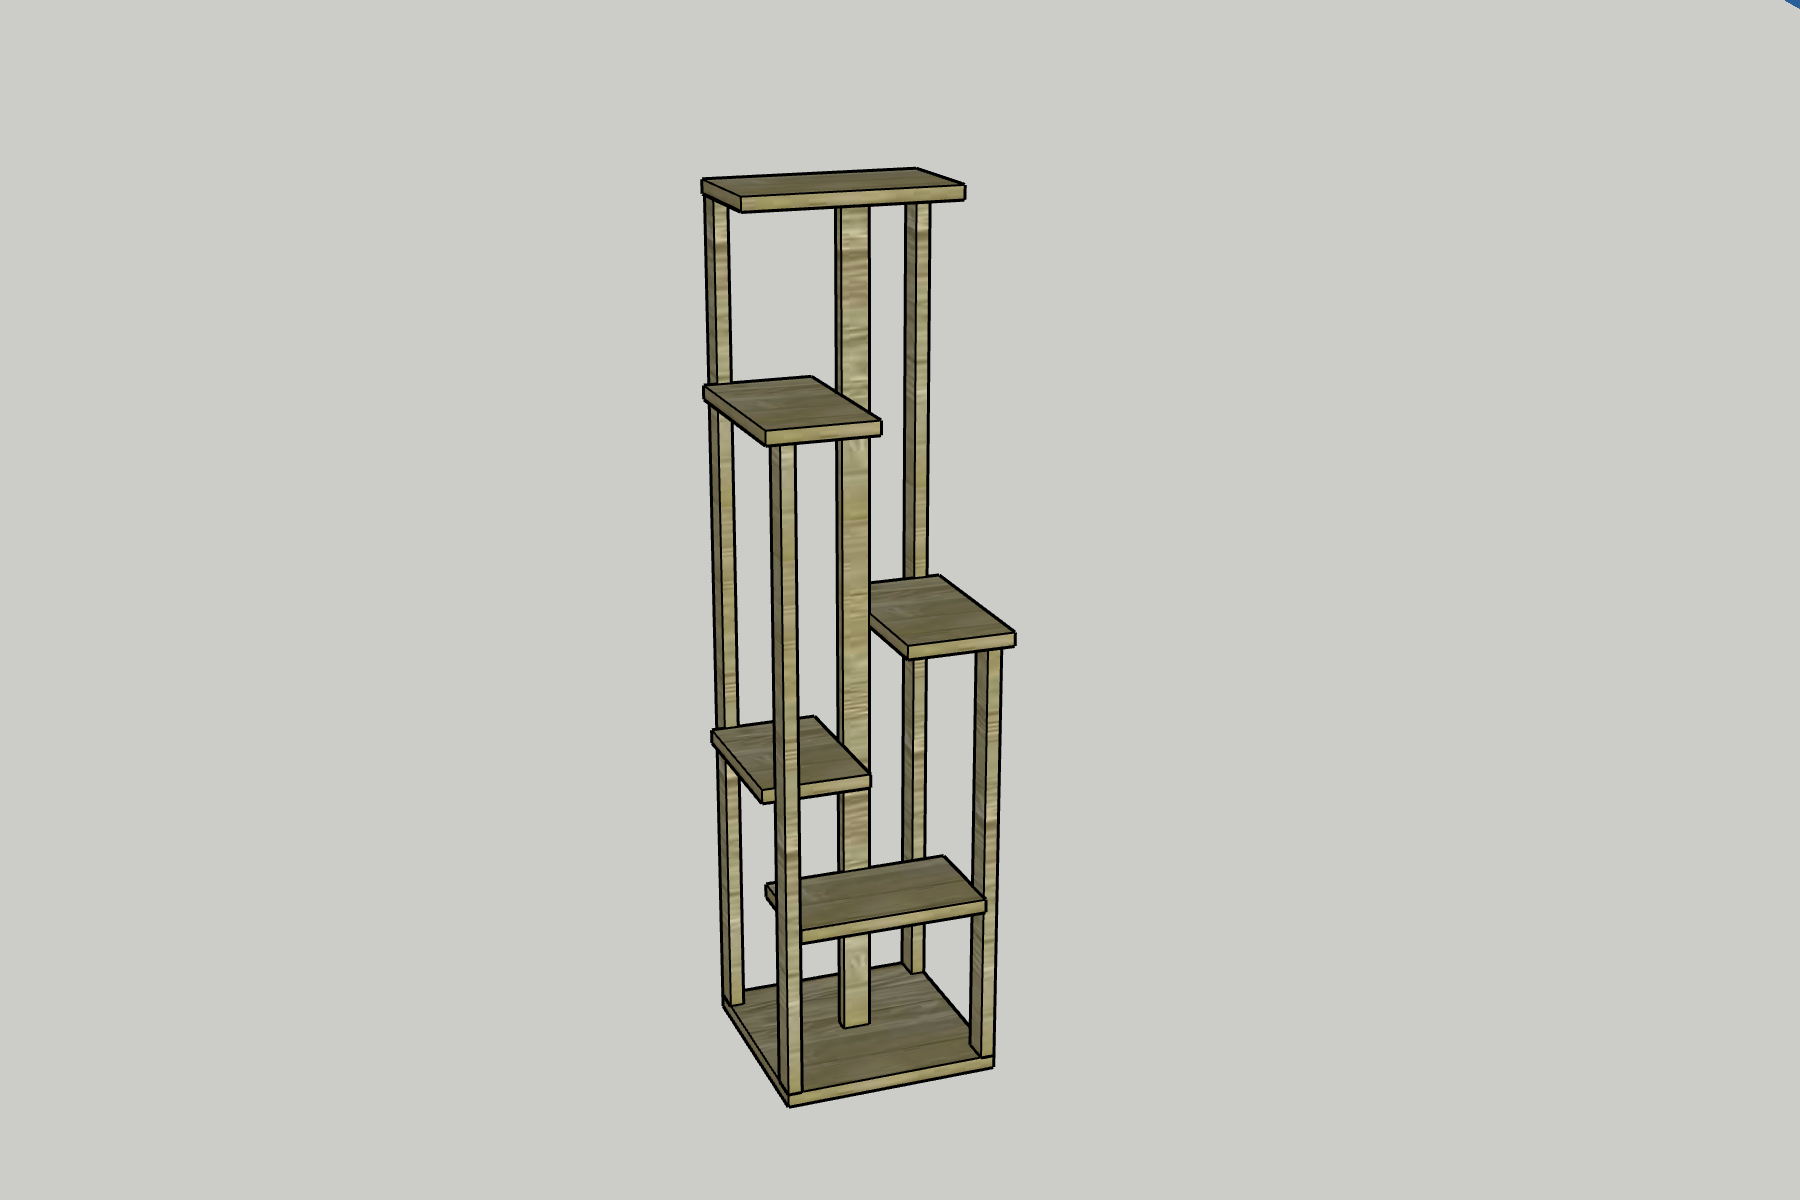
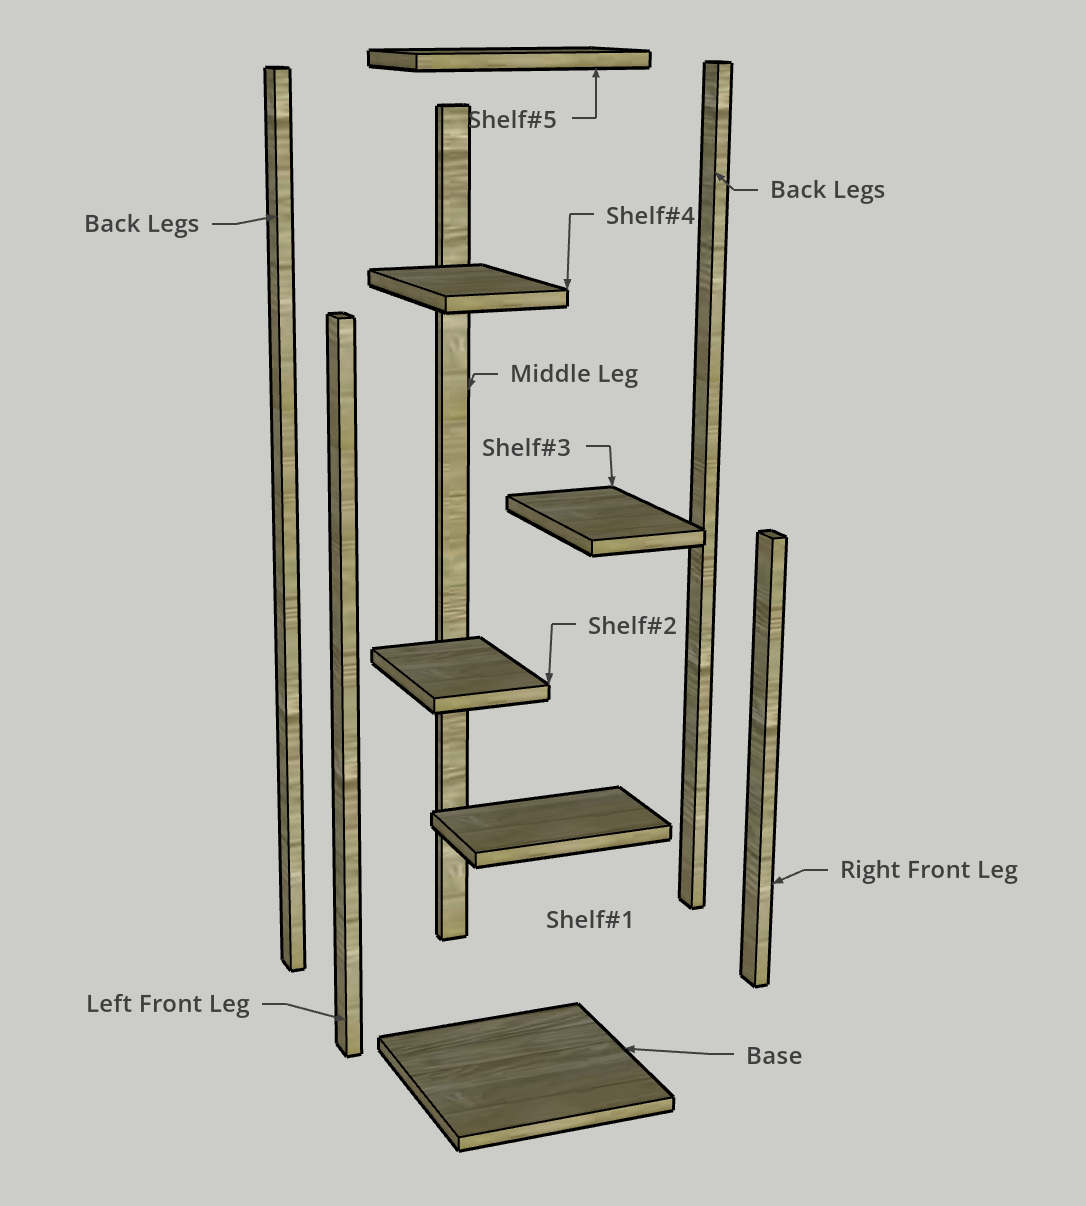
Cut List & Parts
- 1 Base , 12" x 12"
- 2 Back Legs , 46 1/2" x 1 1/2"
- 1 Middle Leg , 46 1/2" x 1 1/2"
- 1 Front Left Leg , 36" x 1 1/2"
- 1 Front Right Leg , 24" x 1 1/2"
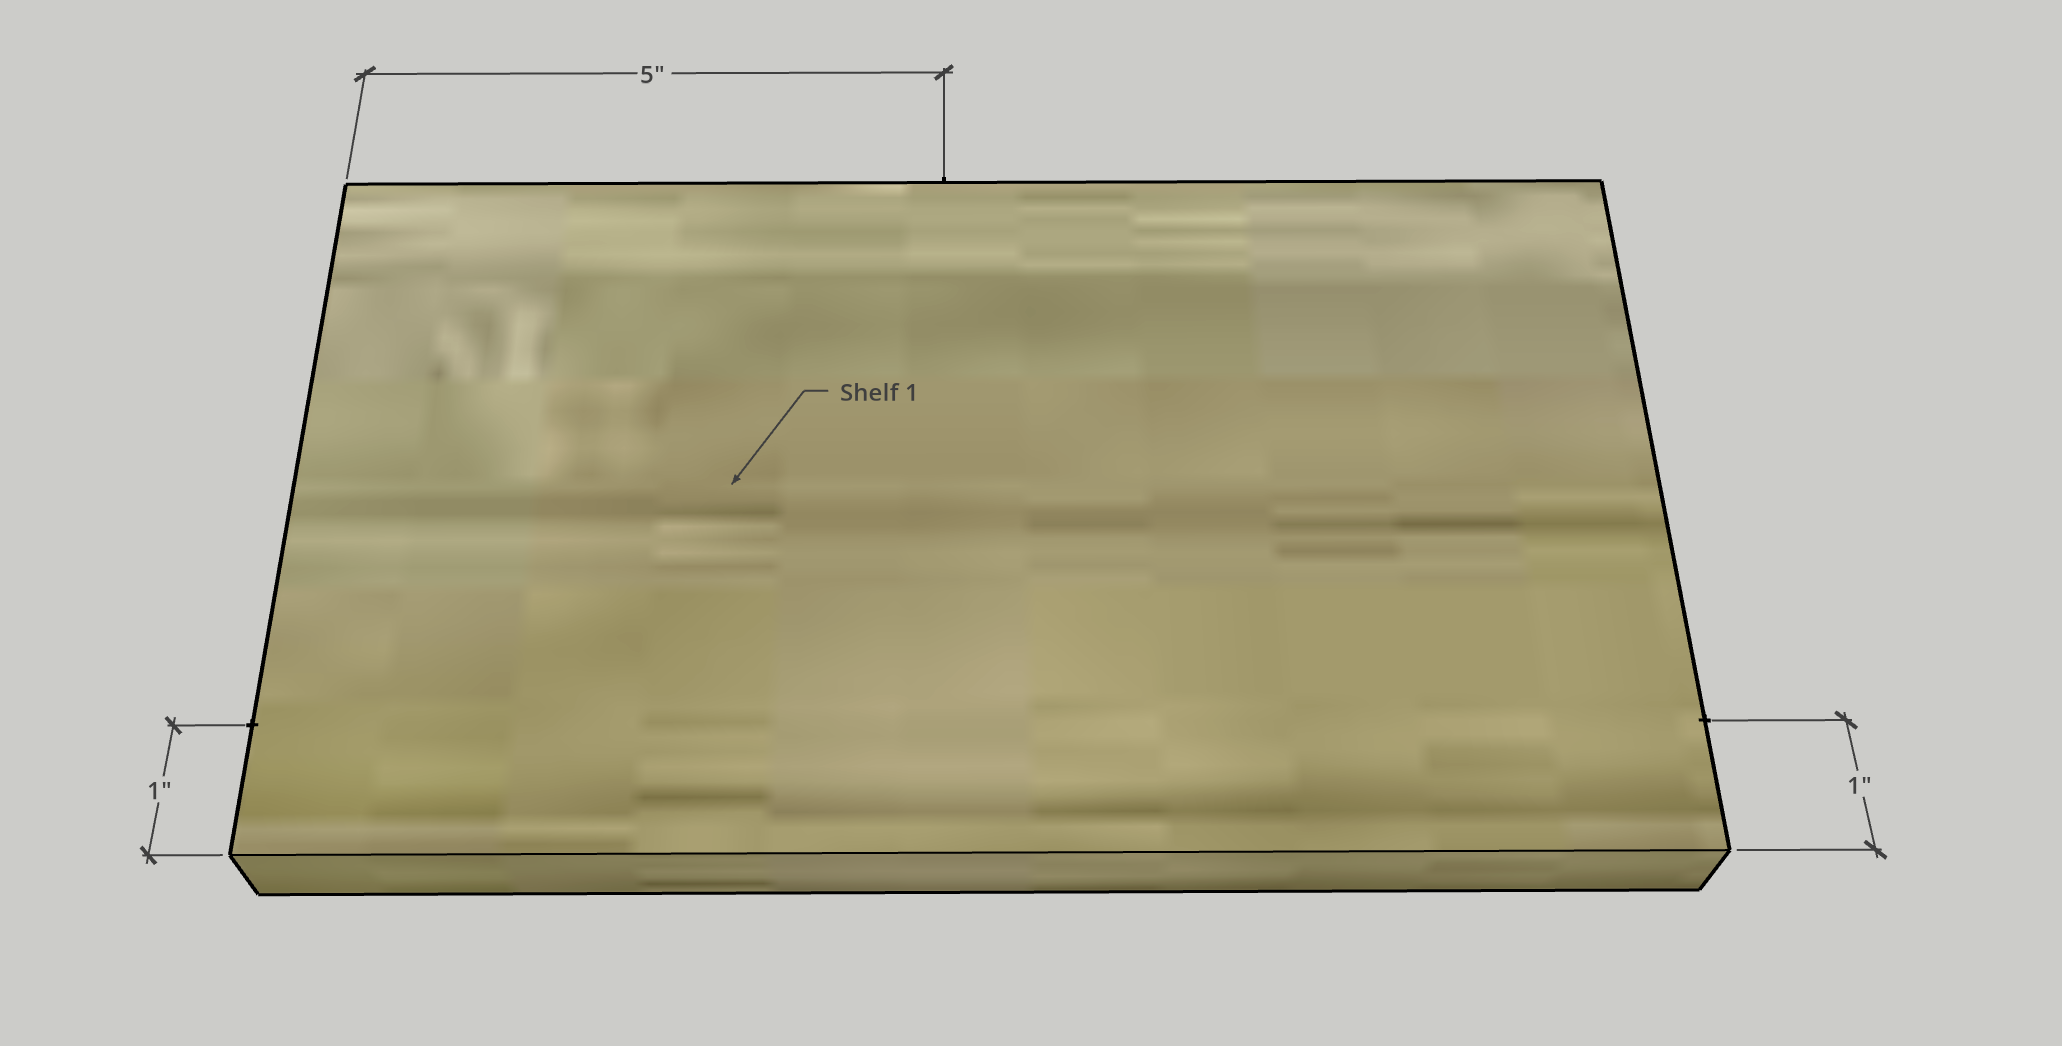
- 1 Shelf 1 , 10 1/2” x 6”
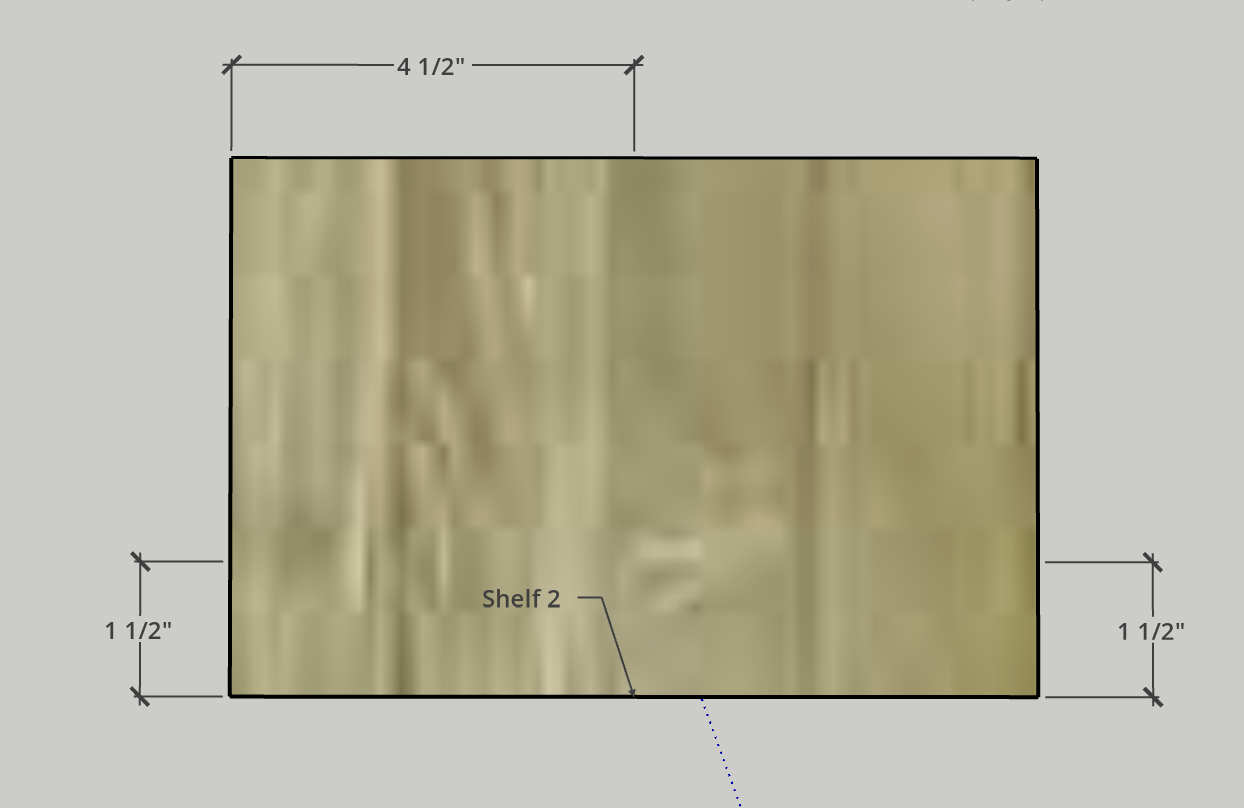
- 1 Shelf 2 , 9” x 6”
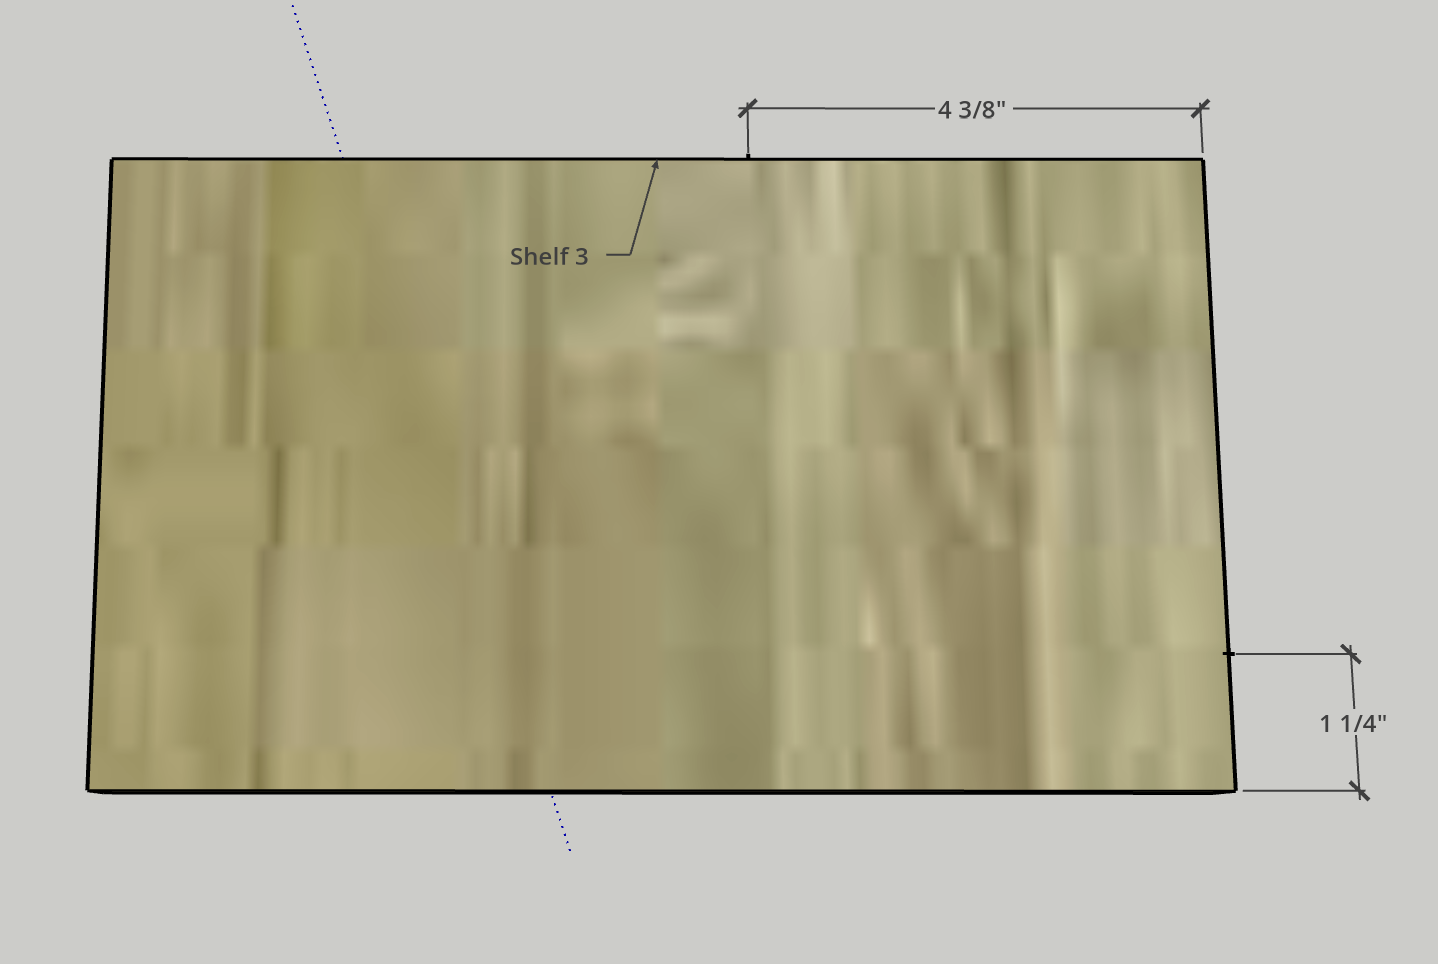
- 1 Shelf 3 , 10 1/2” x 6”
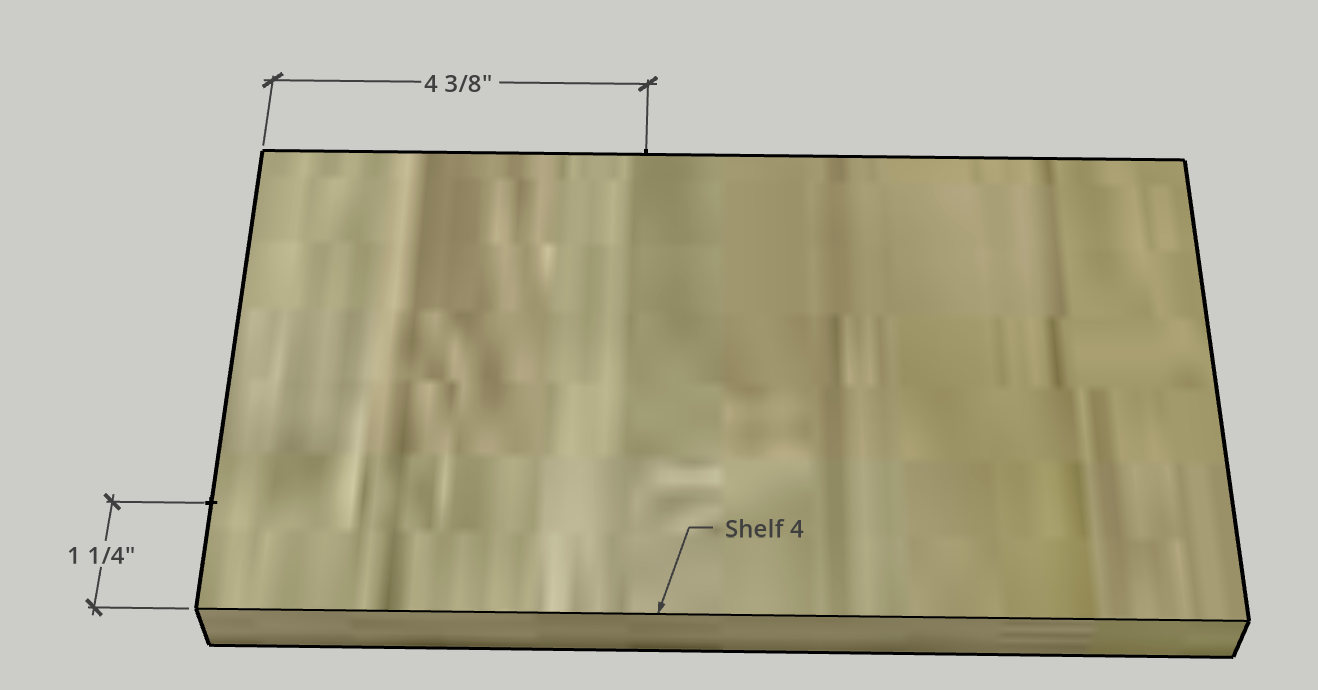
- 1 Shelf 4 , 10 1/2” x 6”
- 1 Shelf 5 , 12" x 6 3/4"
Directions
-
Drill Pocket Holes
Drill pocket holes on each of the following pieces:
- Back Legs- 2 on each end
- Middle Leg- 2 on each end
- Front Left Leg- 2 on each end
- Front Right Leg- 2 on each end
- Shelf 1- 1" from the front edge on both sides, 5" from left side on back edge
- Shelf 2- 1 1/2" from the front edge on both sides, 4 1/2" from left side on back edge
- Shelf 3- 1 1/4" from the front edge on right side, 4 3/8" from right side on back edge
- Shelf 4- 1 1/4" from the front edge on left side, 4 3/8" from left side on back edge
You can use these measurements, but you may be more comfortable drilling pocket holes on the shelves after you have the Legs and Shelf 5 in place, just in case your build is slightly different. If you do this, set the shelves where they go, and mark where they align with the Legs.Pocket hole locations
To see an image of the pocket hole locations on the shelves, see the images in the Cut List and Parts section.
-
Attach Legs
- Using wood glue and pocket hole screws, attach the Legs to the base.
- Start by attaching the two Back Legs into the back two corners of the Base with the pocket holes facing in toward each other.
- Next, attach the Front Left Leg to the front left corner of the Base and the Front Right Leg to the front right corner of the Base with the pocket holes facing in toward each other.
- Finally, attach the Middle Leg exactly centered on the Base with the pocket holes facing the back. Centered would be 5 1/2” from the front and back and 5 1/4” from the sides.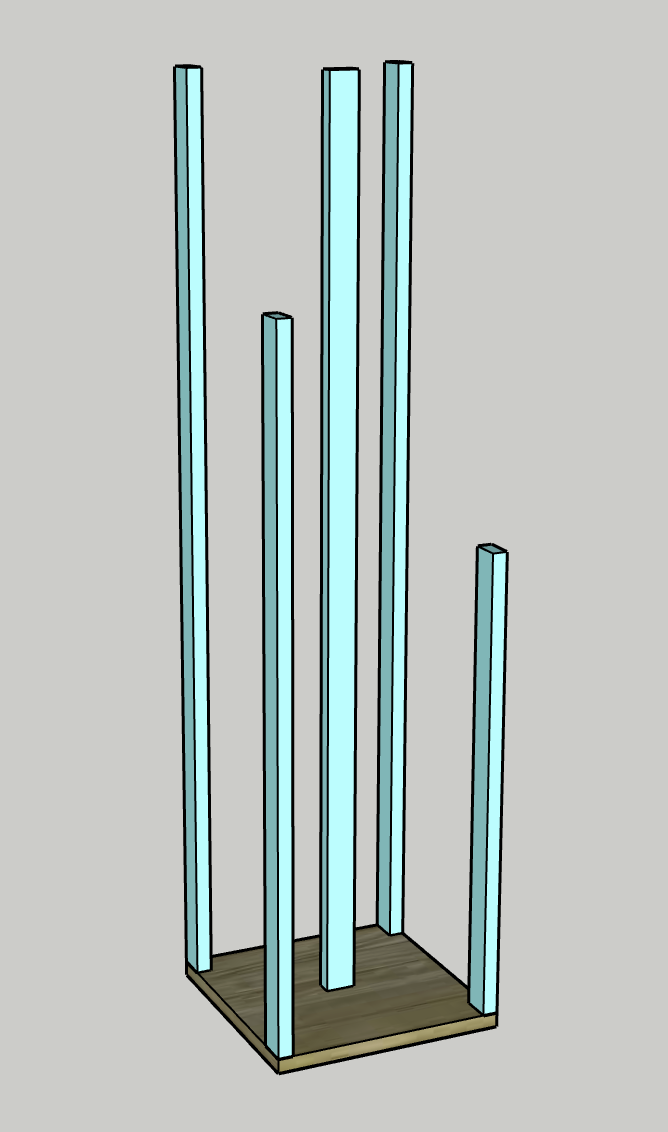
-
Attach Shelf 5
- Using wood glue and pocket hole screws, attach Shelf 5 on top of the three Legs in the back.
- The shelf should be attach with the side edges even with the outside edges of the Back Legs and the front edge even with the front edge of the Middle Leg.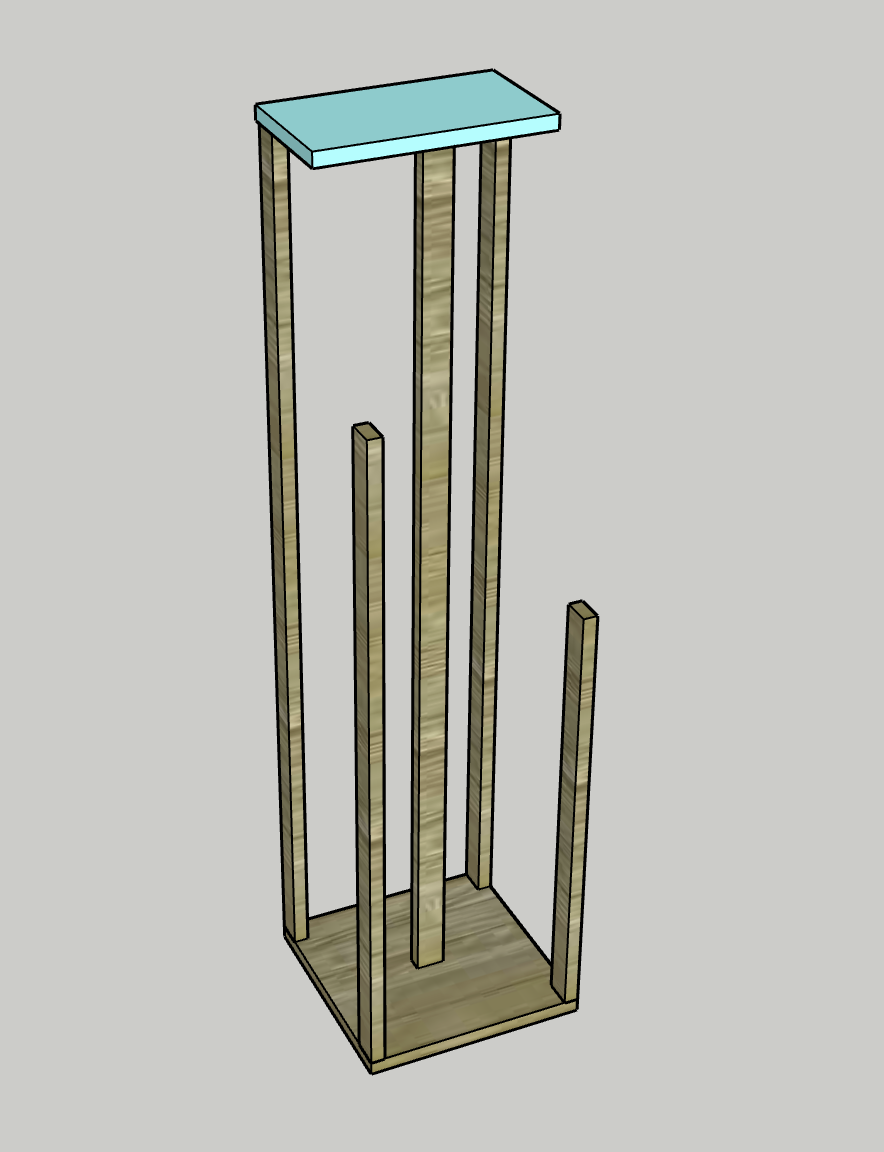
-
Attach Shelf 4
- Using wood glue and pocket hole screws, attach Shelf 4 on top of the Front Left Leg and into the Back and Middle Legs.
- The shelf should be aligned so the long edge pocket hole screws into the side of the Middle Leg and the short edge pocket hole screws into the side of the Back Leg.
- Start by attaching the pocket holes from the Front Left Leg into the underside of the shelf, then screw in pocket holes into the Back and Middle Legs once assuring it is aligned and level.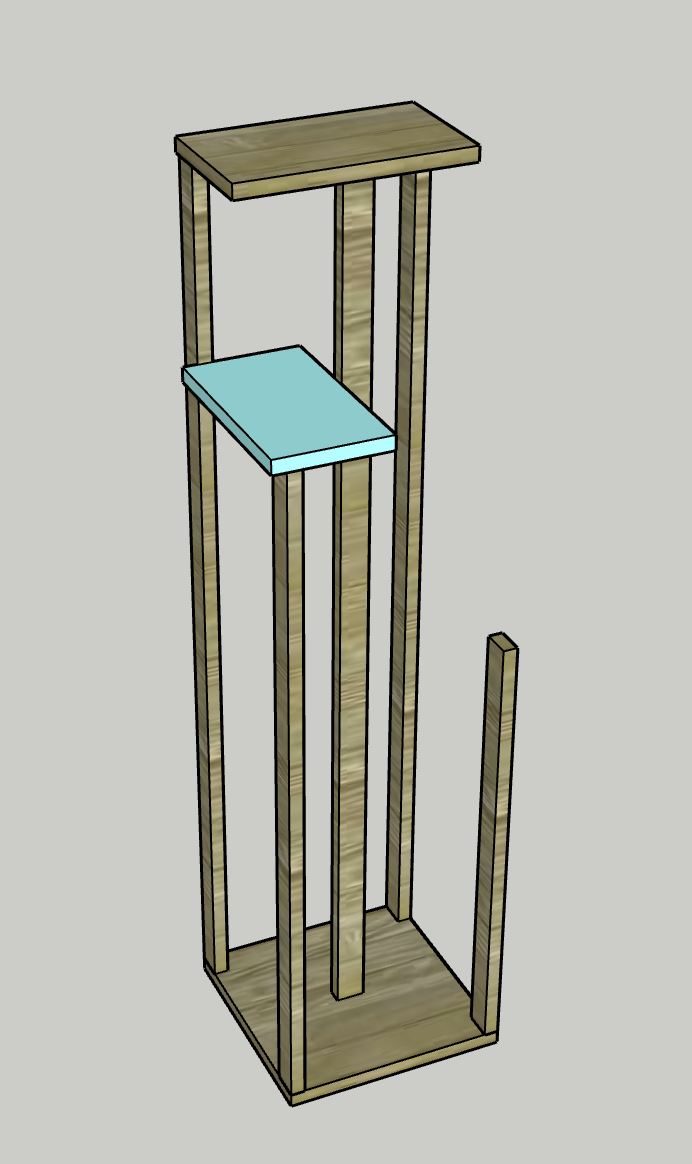
-
Attach Shelf 3
- Using wood glue and pocket hole screws, attach Shelf 3 the same way as Shelf 4 except on top of the Front Right Leg.
- Align the pocket holes with the Back and Middle Legs and attach from the Front Right Leg into the underside of the shelf first.
- Once level, screw in the other pocket hole screws.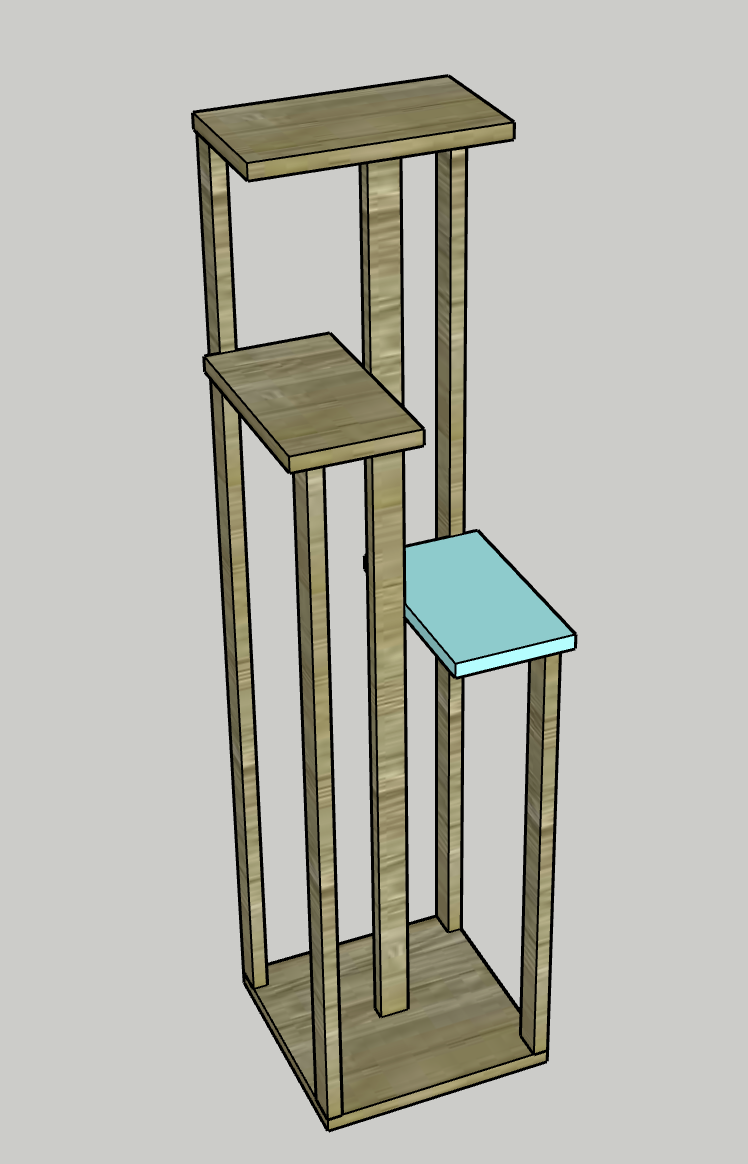
-
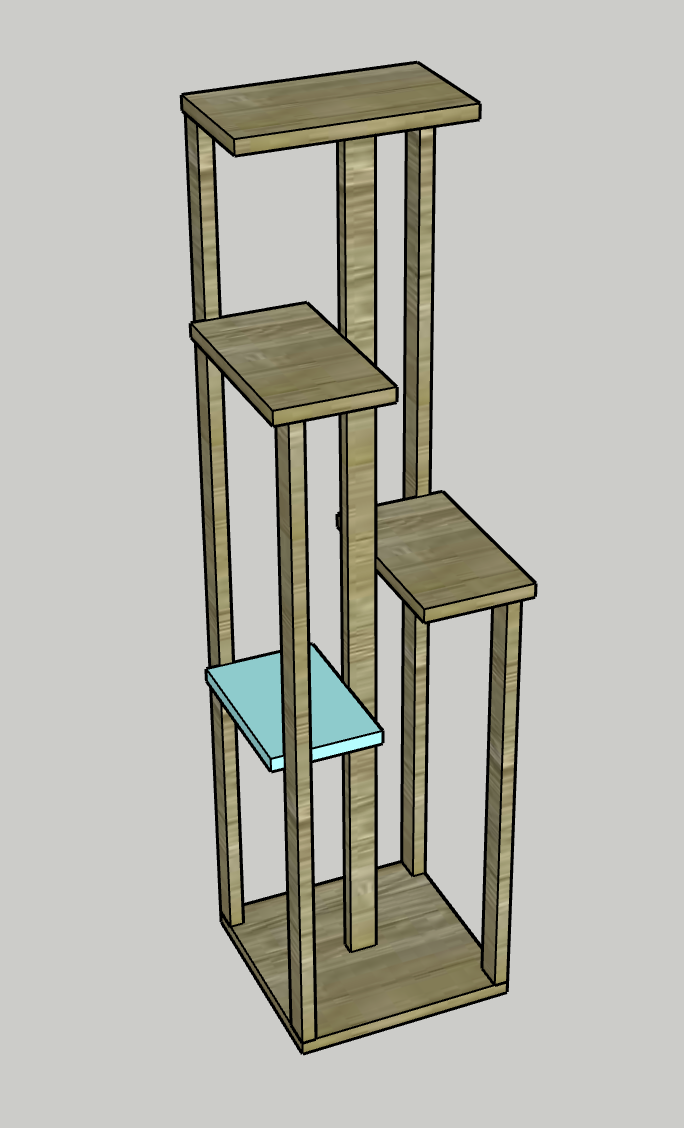
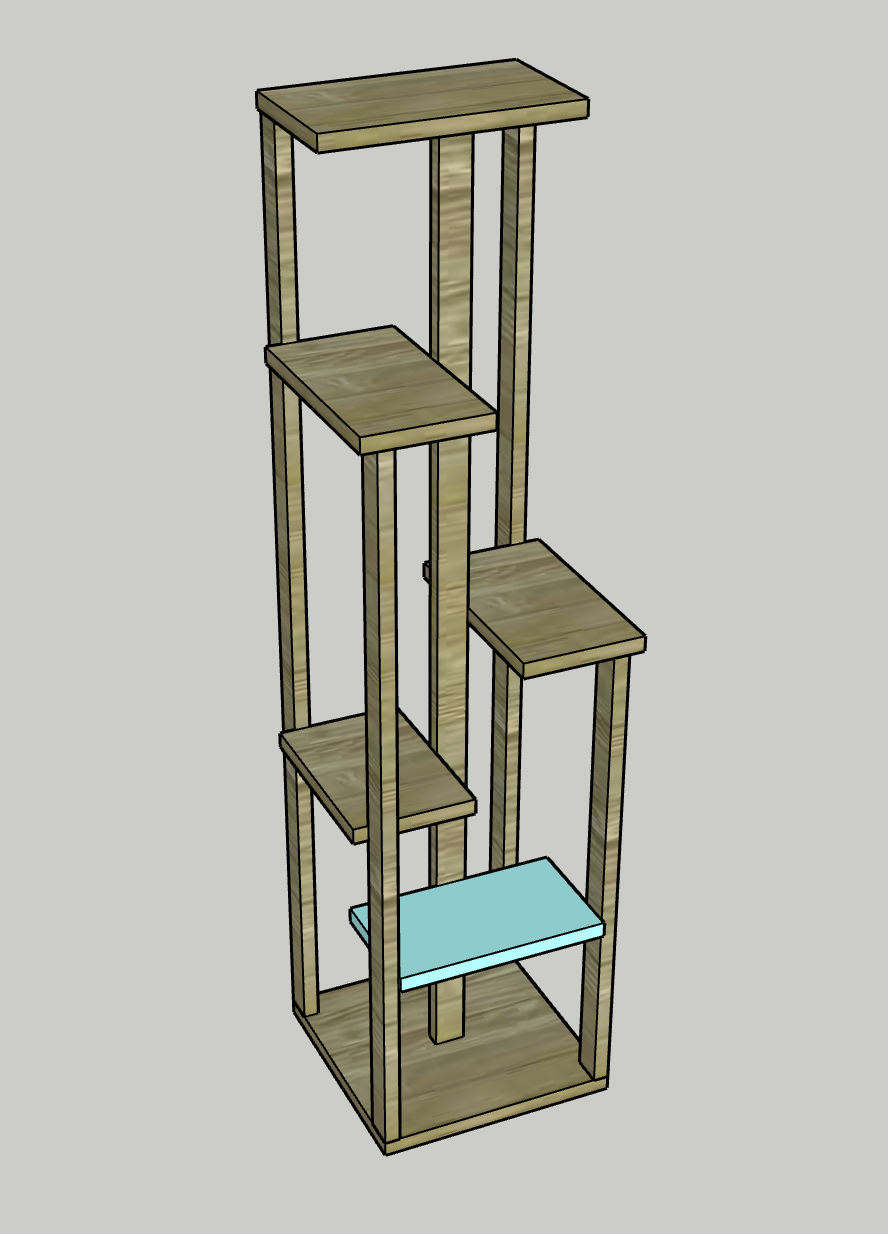
Attach Shelf 2
- Using wood glue and pocket hole screws, attach Shelf 2 between the left Back Leg, Front Left Leg, and Middle Leg 16 1/2” up from the Base.
-
Attach Shelf 1
- Using wood glue and pocket hole screws, attach Shelf 1 between the Front Left Leg, Front Right Leg, and Middle Leg 9” up from the Base.
-
Stain or Paint
- Add a coat of stain or paint before assembly if you want to do a two-toned look.
- If you want to make it all one color, you can do this step now.
- When finished, add a coat of protective polyurethane.
-
Fill
Cover your plant tower with all your favorite potted plants! It’s perfect for a variety of tall, small and vining plants!
-
Enjoy!
Enjoy your handiwork and tag @CharlestonCrafted on Instagram with a picture!