

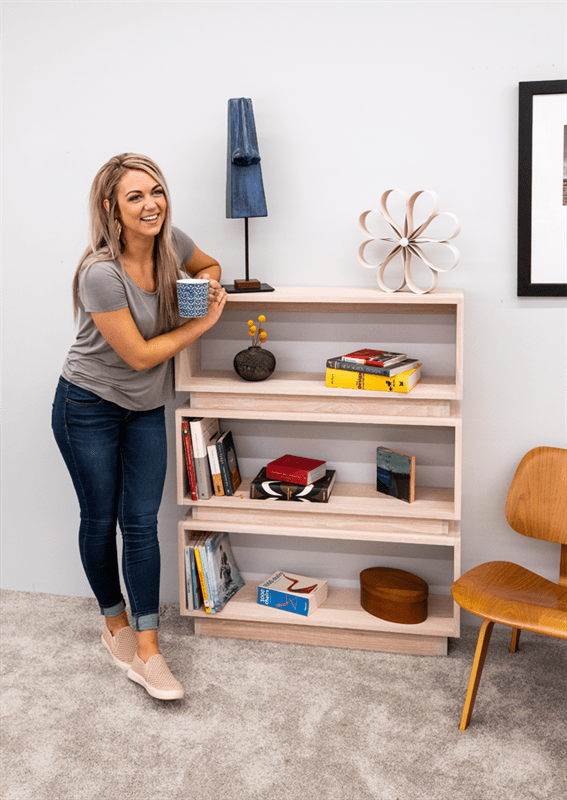
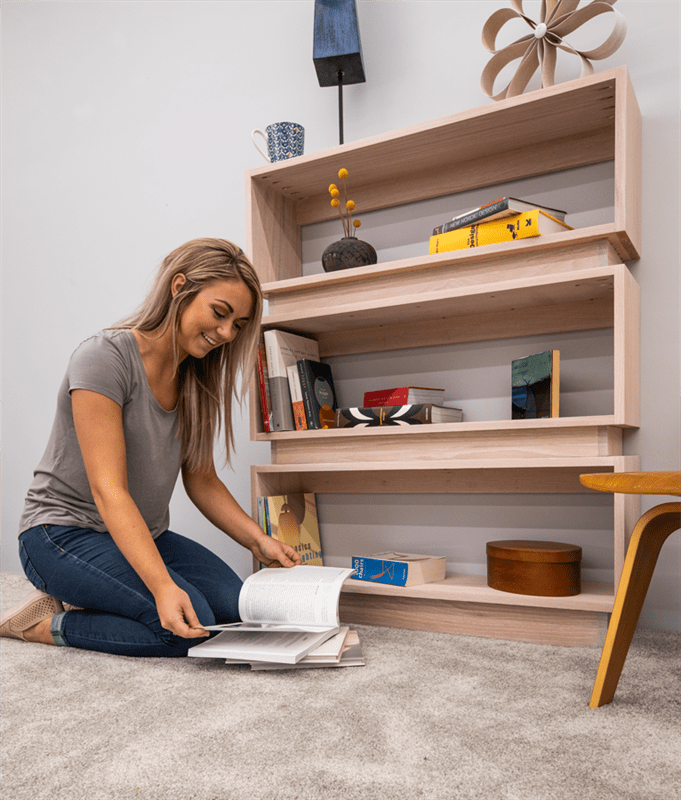
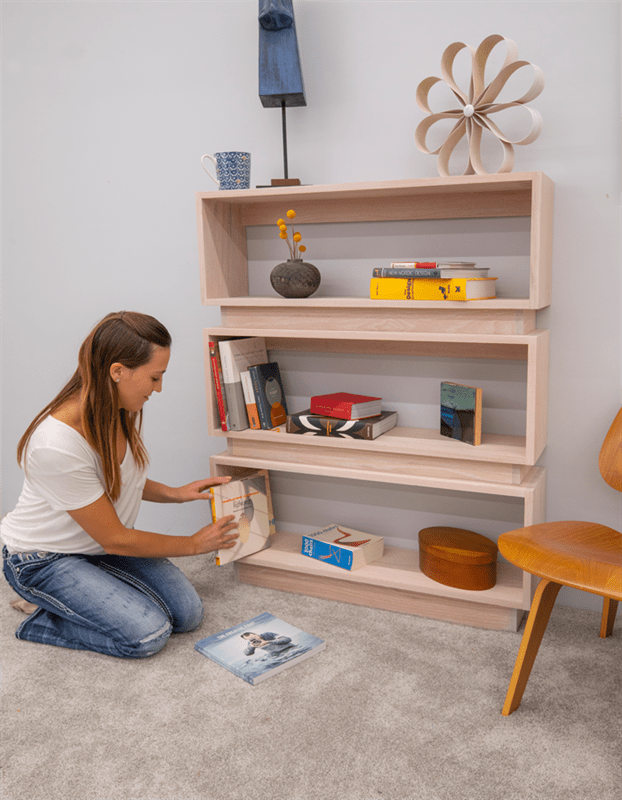


The stacking design of this bookcase looks great and makes it easy to customize it to suit your needs. Build three sections like we did, or build more or fewer sections to fit your space and your storage demands. All you’ll need are a few boards, a few basic tools, and a Kreg Jig.
Tools
Kreg Tools


Other Tools
-
Miter Saw

-
Square
-
Tape Measure
Materials
Wood Products
- 3 Board , 1x3 , 96"
- 1 Board , 1x3 , 72"
- 1 Board , 1x4 , 96"
- 3 Board , 1x10 , 96"
Hardware & Supplies
- 1 100-count box of 1 1/4" Kreg fine-thread pocket-hole screws
- 1 Wood glue
- 12 1 1/2" flat-head wood screws
- 1 #8 countersink drill bit
- 1 White wood stain
- 1 Anti-tip kit
Cut List & Parts
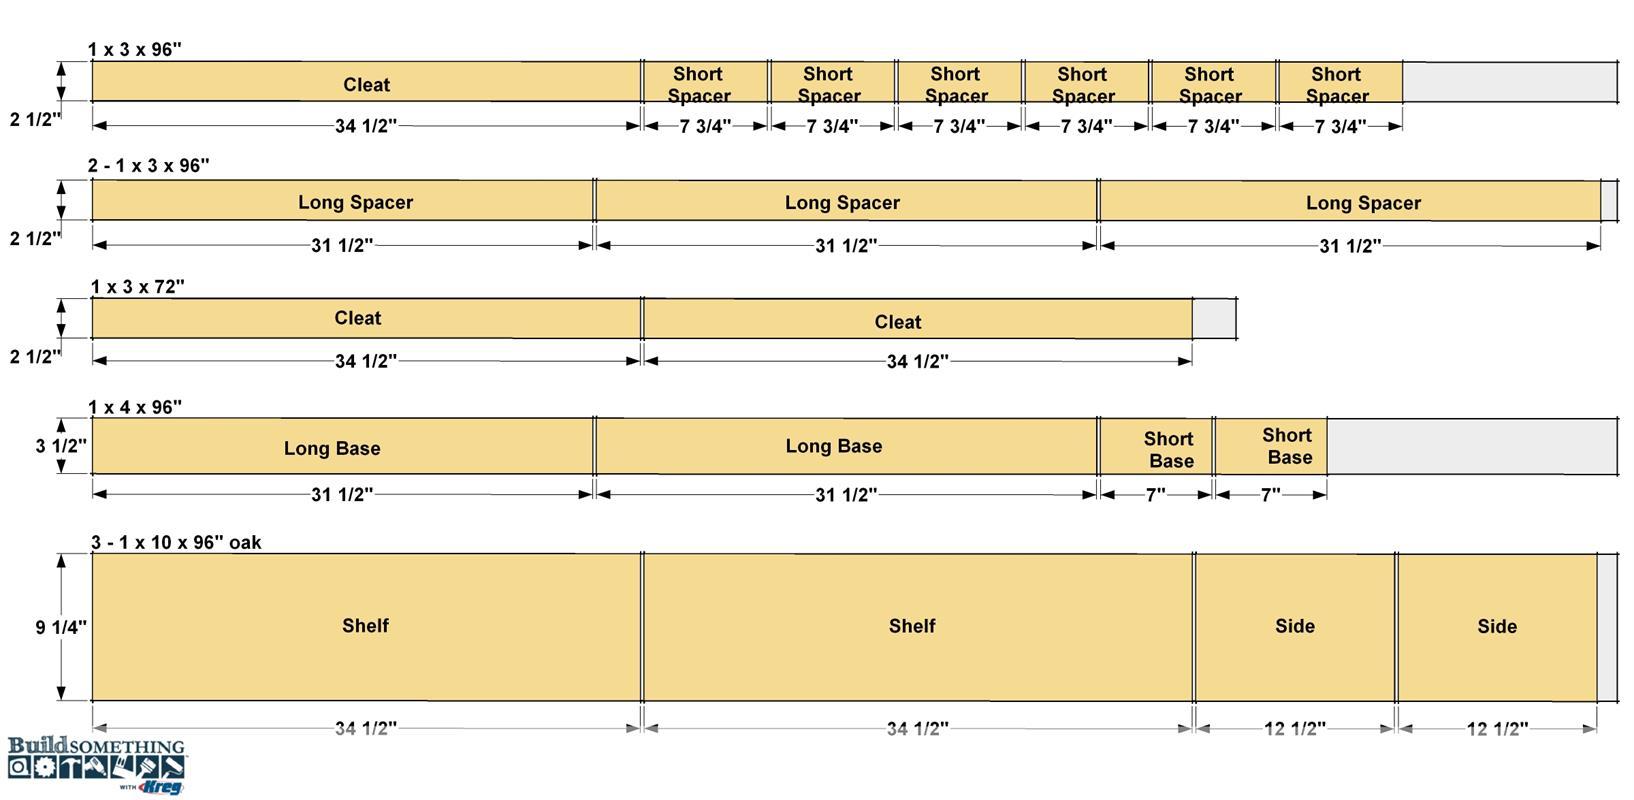
- 6 Shelf , 3/4" x 9 1/4" x 34 1/2" oak
- 6 Side , 3/4" x 9 1/4" x 12 1/2" oak
- 3 Cleat , 3/4" x 2 1/2" x 34 1/2" oak
- 4 Long Spacer , 3/4" x 2 1/2" x 31 1/2" oak
- 4 Short Spacer , 3/4" x 2 1/2" x 7 3/4" oak
- 2 Long Base , 3/4" x 3 1/2" x 31 1/2" oak
- 2 Short Base , 3/4" x 3 1/2" x 7" oak
Directions
-
Make the Shelves and Sides
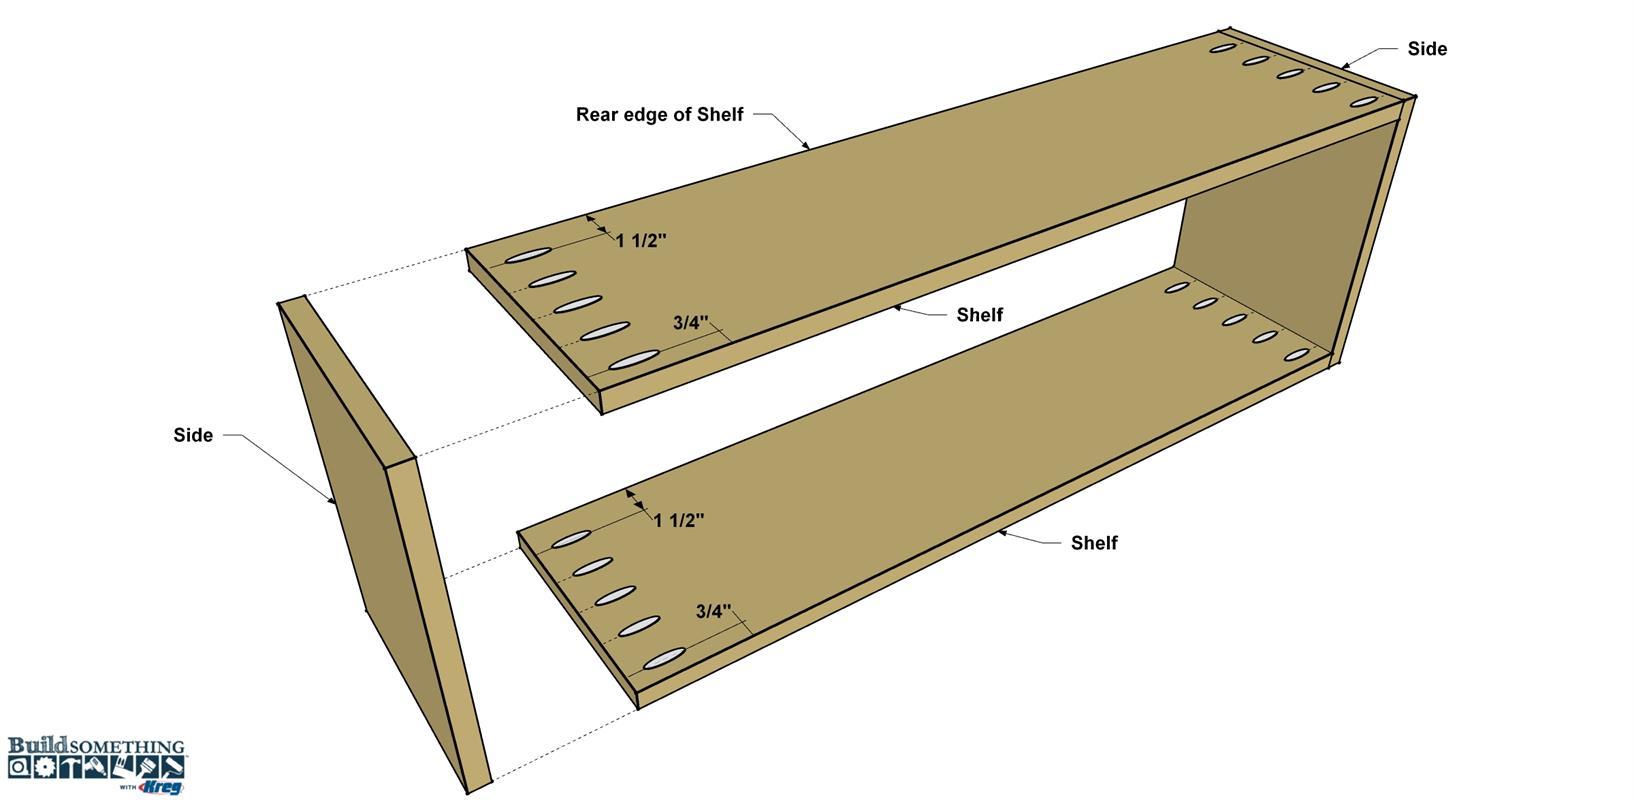
Start by cutting the six Shelves and Six Sides to length from 1x10 boards, as shown in the cutting diagram. We used oak boards for our bookcase, but you could choose another hardwood, from plywood, or from a softwood like pine. If you choose pine, select the best grade so that the wide boards will be flat and less likely to warp. Once you have your boards, set your Kreg Jig for 3/4"-thick material, and then drill pocket holes in each Shelf at the locations shown. Don’t drill the other holes shown in the illustration. They only get drilled in a couple of the Shelves during final assembly of the bookcase. After drilling the pocket holes, sand the Shelves and Sides smooth.

-
Assemble the Shelves and Sides
Starting with two Shelves and two Sides, apply glue to the pocket-hole end of the Shelves, and then secure them to the Sides, as shown, using 1 1/4" Kreg Screws. In this illustration, the assembly is upside down. Note how the pocket holes are oriented. This helps hide them in the completed project. The oak we used is a hardwood, so we used fine-thread screws. If you are building your bookcase from pine, poplar, or plywood, use coarse-thread screws. Note You can attach the remaining Shelves and Sides in the same way to create three complete assemblies.
-
Make the Cleats
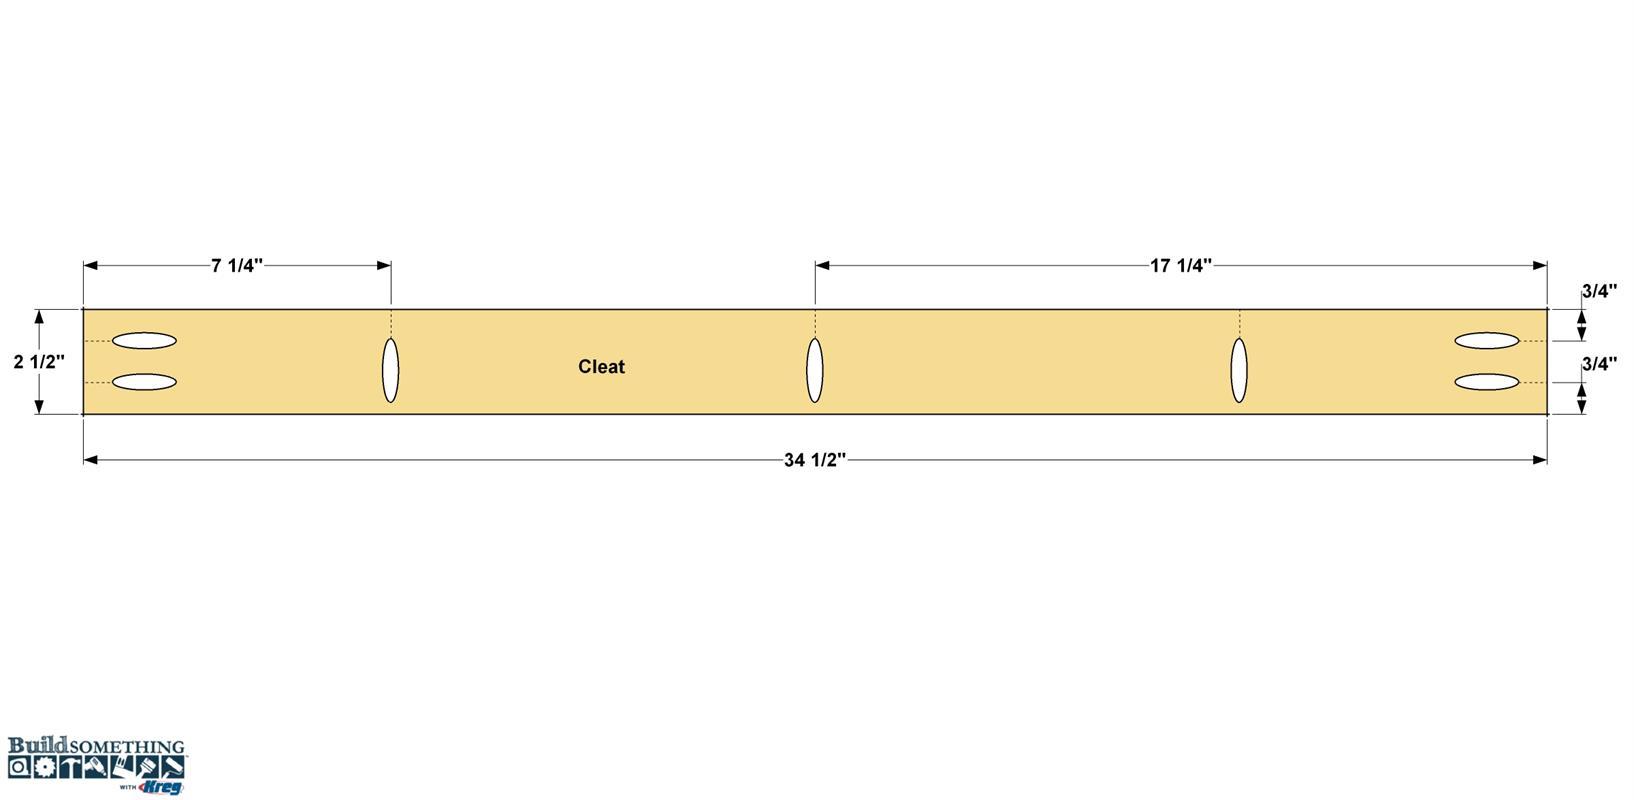
Cut three Cleats to length from 1x3 boards to length, as shown in the cutting diagram. Drill pocket holes at the locations shown. Sand the Cleats smooth.
-
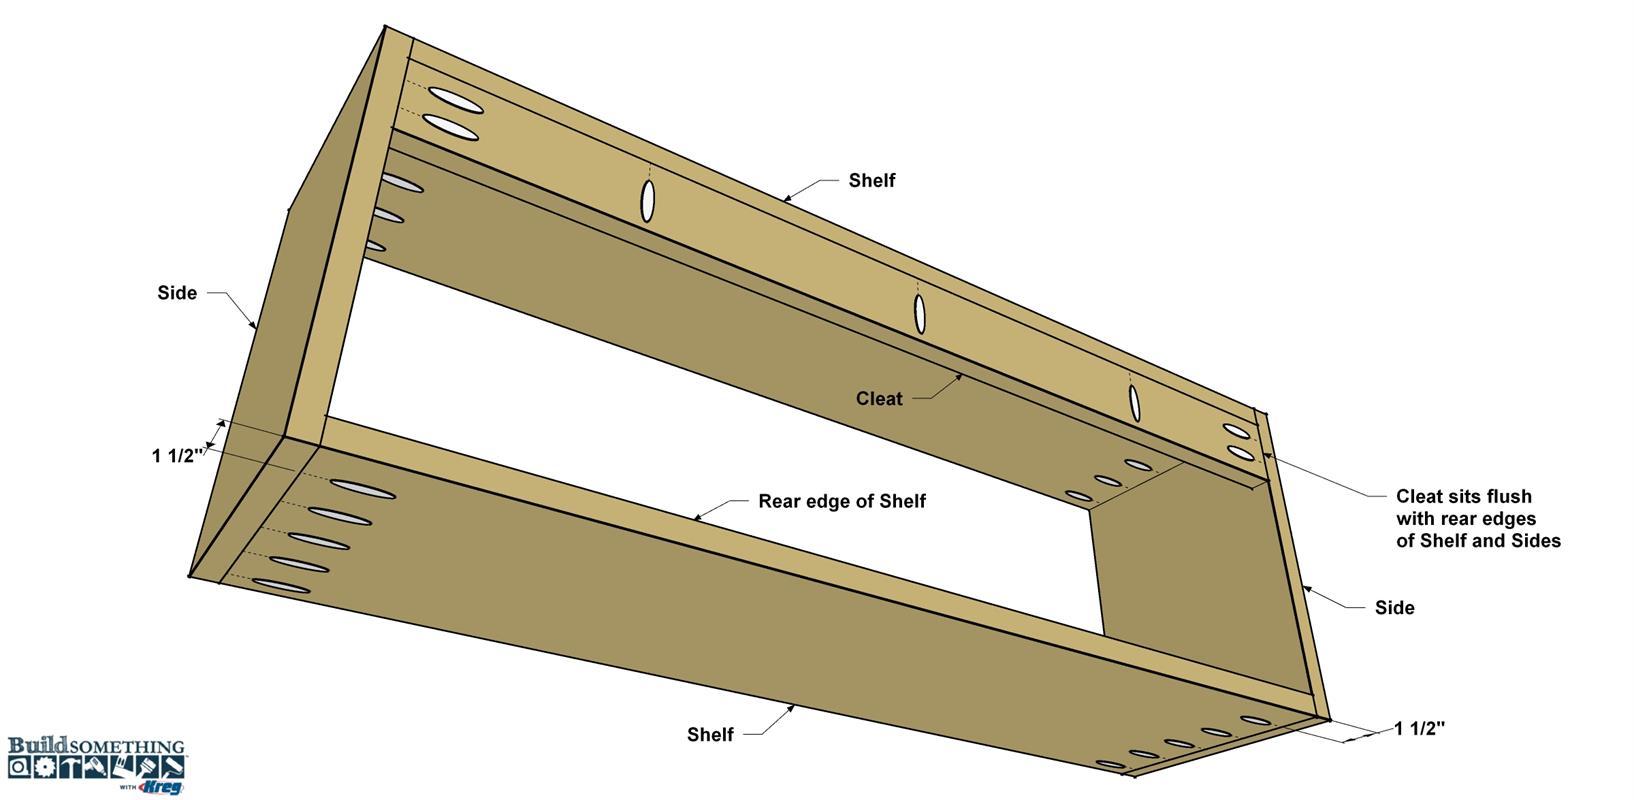
Attach the Cleats
Apply glue to the pocket-hole ends and the upper edge of each Cleat. The upper edge is the one the pocket holes point toward. Position each Cleat in a shelf assembly, as shown, making sure the Cleat sits flush with the rear edge of the assembly, and that the pocket holes are pointing in the correct direction. Secure each cleat using 1 1/4" Kreg Screws.
-
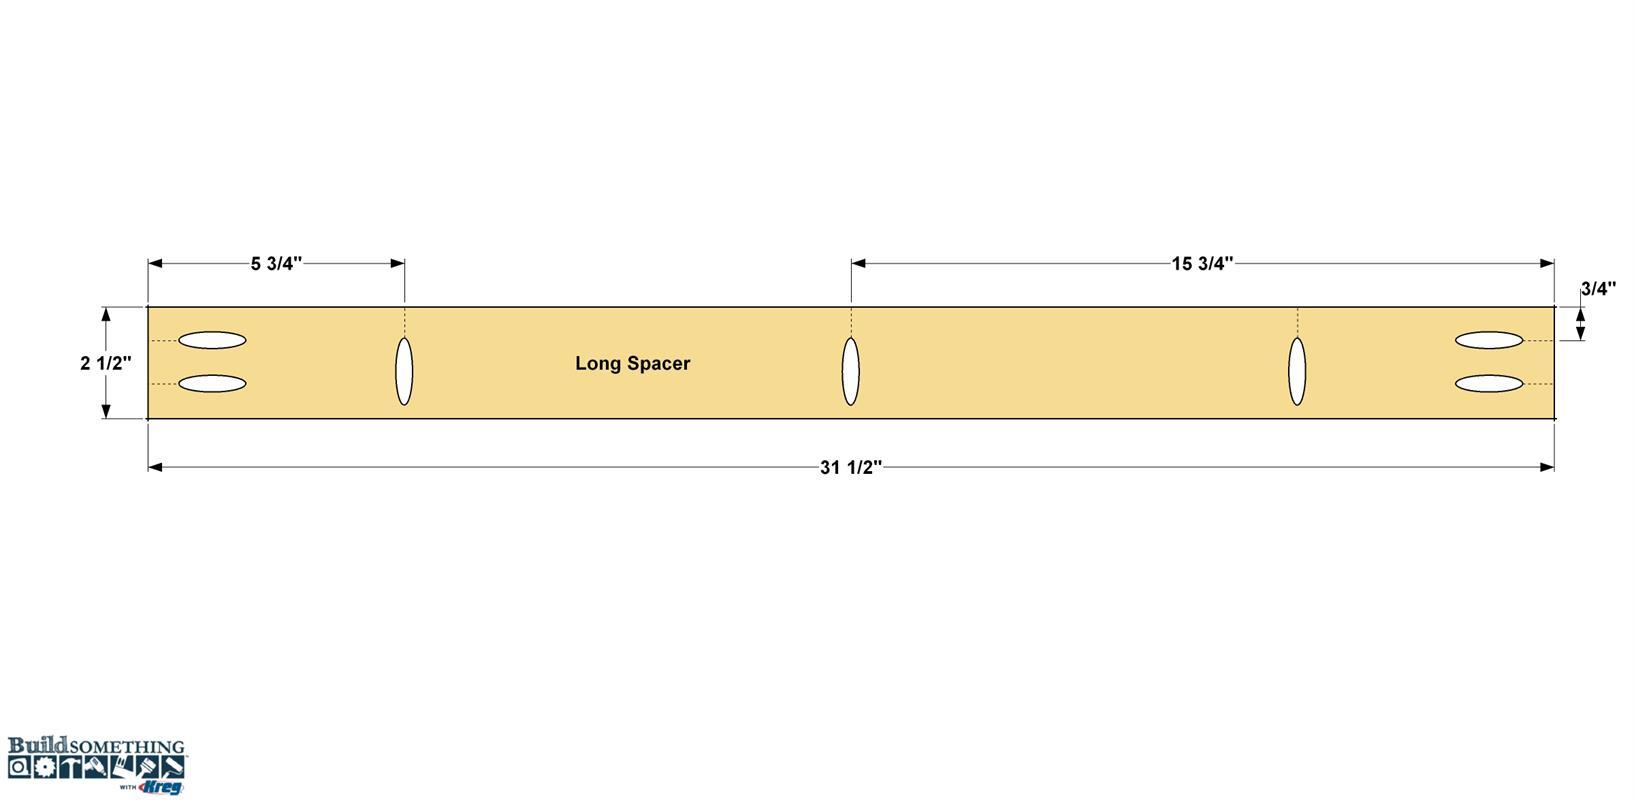
Make the Spacers
The stacked look of these shelves comes from the assemblies that fit in between: Two Spacers, and a Base at the bottom. Start by making the Spacers. From a 1x3 board, cut four Long Spacers and four Short Spacers to length as shown in the cut diagram. Drill pocket holes in the Long Spacers at the locations shown. Sand the Spacers.
-
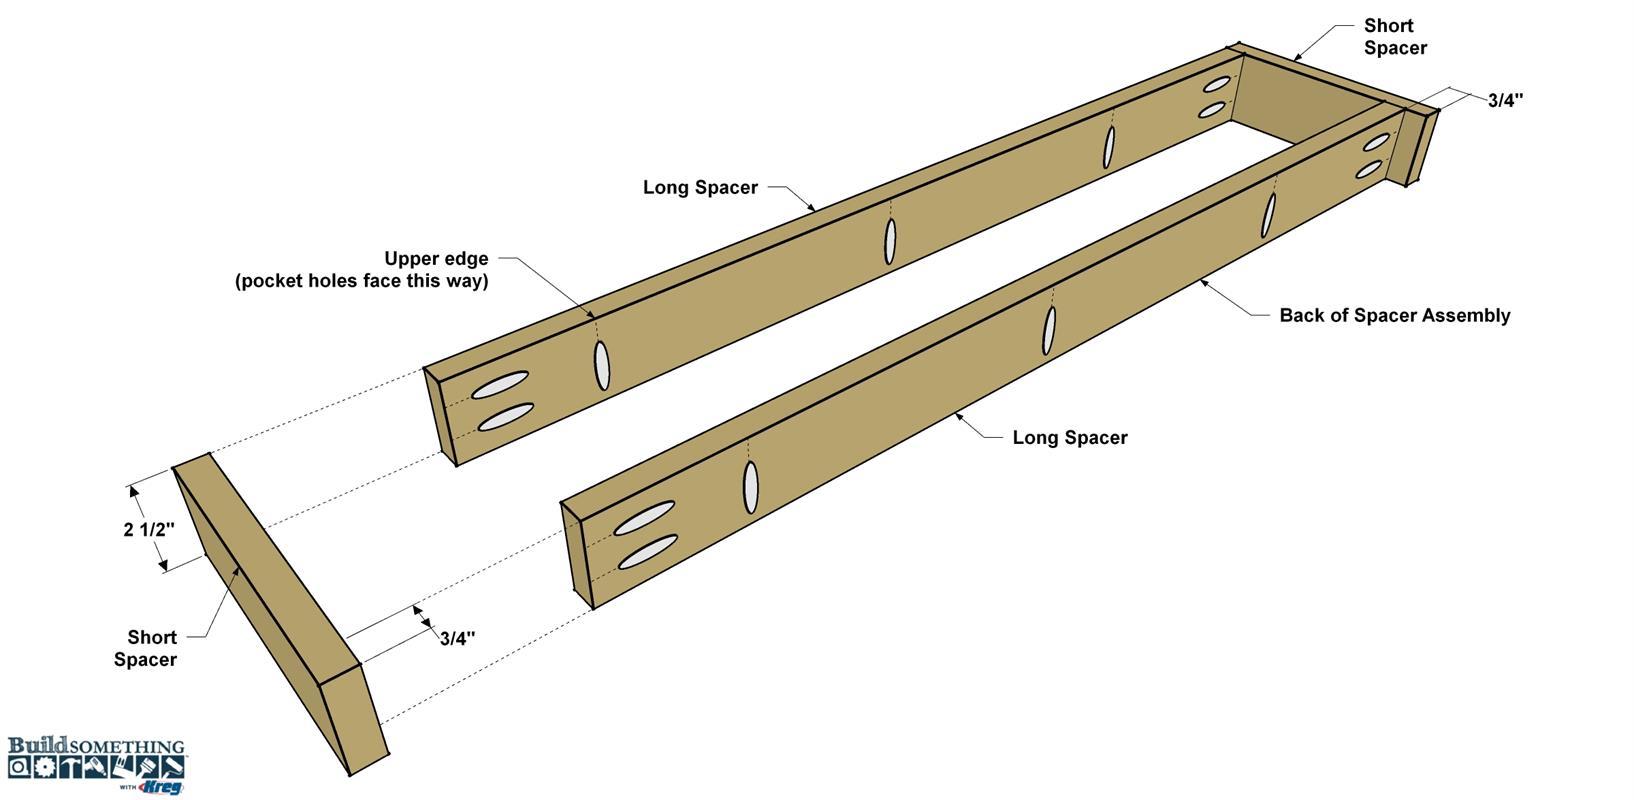
Assemble the Spacers
Apply wood glue on the pocket hole ends of the Long Spacers and position the first one flush to the ends of the Short Spacers, as shown. Make sure the pocket holes along the edge of each Long Spacer are oriented as shown. Secure the Long Spacer to the Short Spacers using 1 1/4" Kreg Screws. Now position the second Long Spacer as shown, so it’s inset 3/4" from the ends of the Short Spacers. Secure it using glue and 1 1/4" Kreg Screws. Repeat this process to create the second spacer assembly.
-
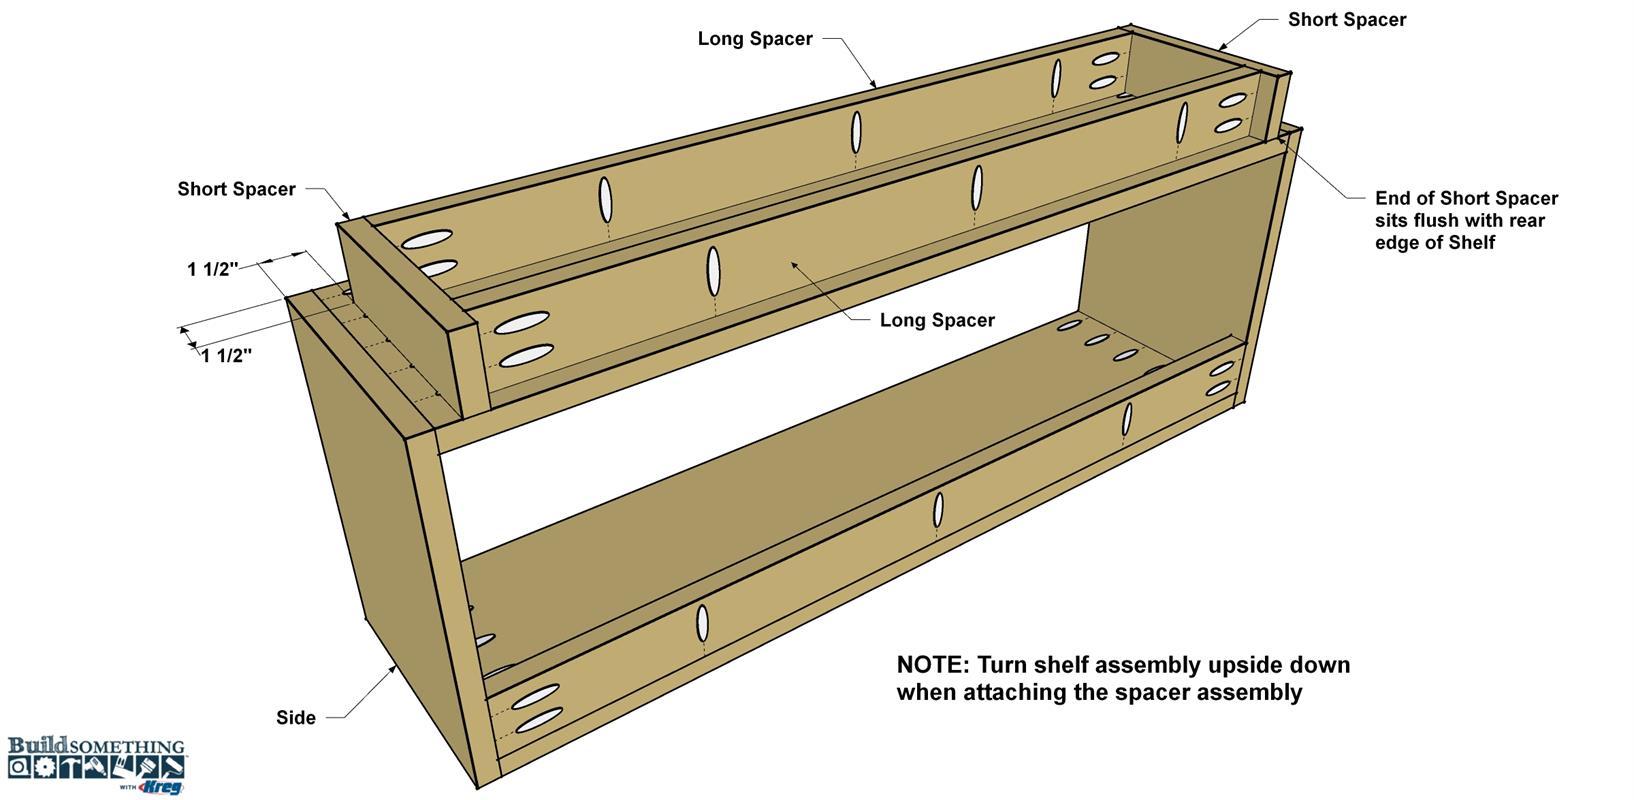
Add the Spacers to the Shelves
Place one of the assembled shelves on a work so its sitting on its top. That means the pocket holes in the Shelves will be facing up, as shown. Position the spacer assembly on the Shelf so that the back of the spacer assembly (with the inset) is flush with the rear edge of the shelf. Also make sure the shelf assembly overhangs the spacer assembly equally on each end. Secure the spacer assembly using 1 1/4" Kreg screws. Repeat this process to add the other spacer assembly to one other shelf assembly.
-
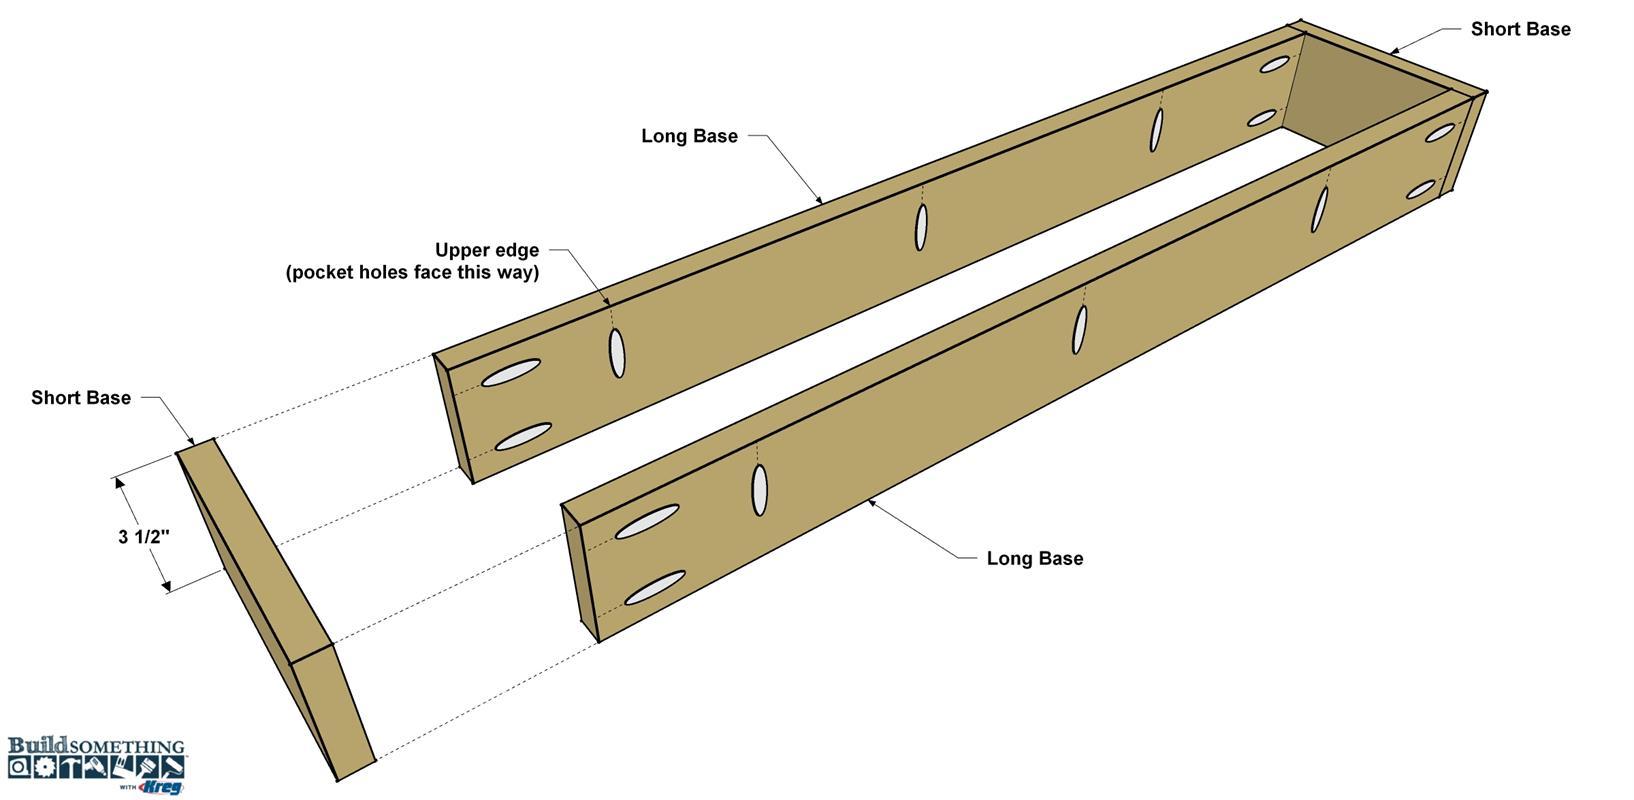
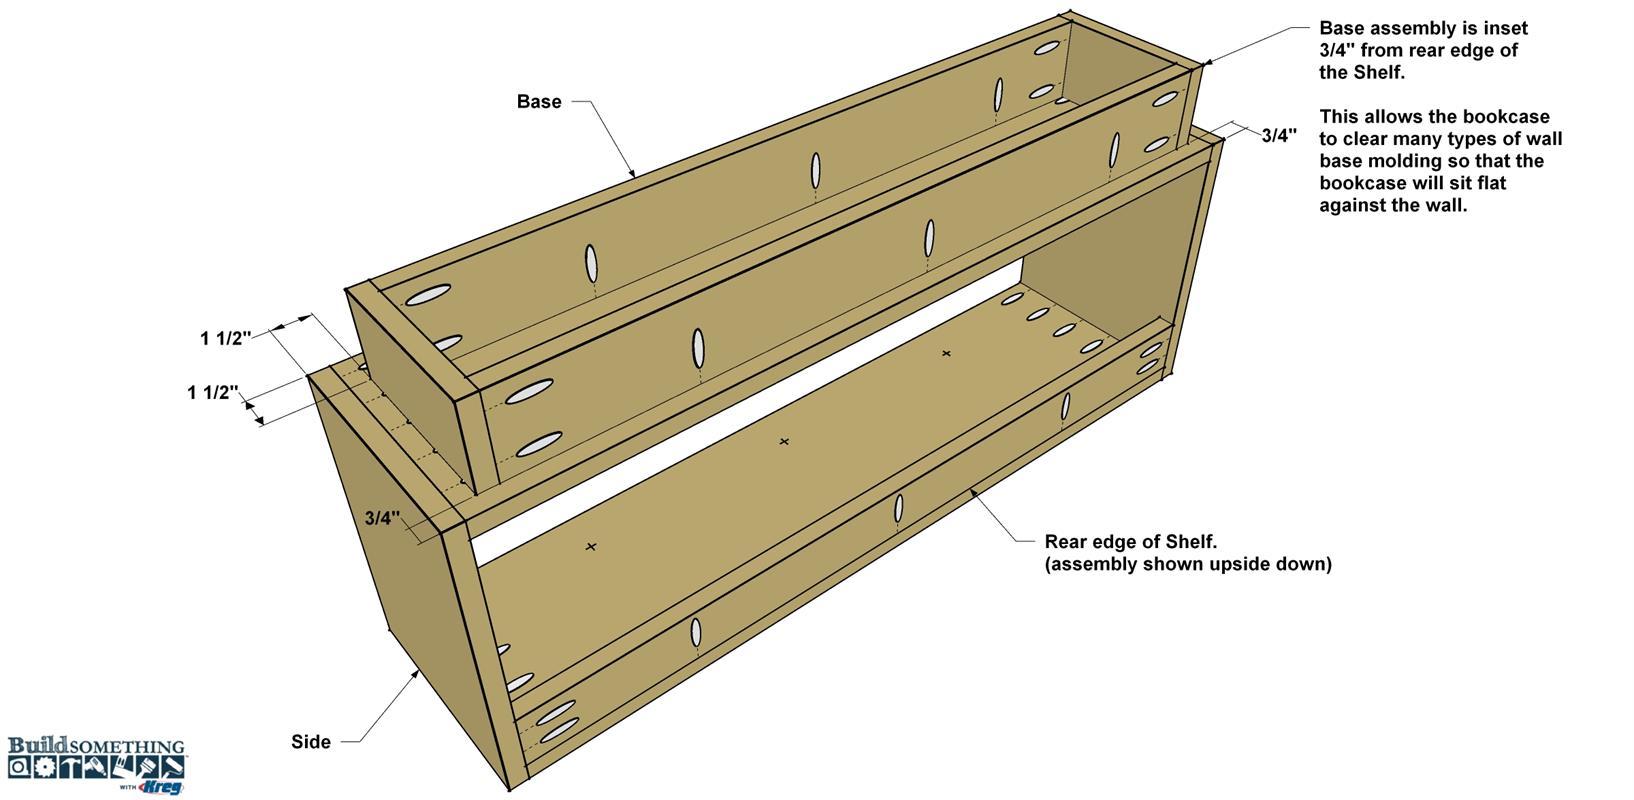
Make the Base Parts
Now it’s time to make a base for the bookcase. It’s a lot like the spacers but has a couple differences. First, the base is made from 1x4 boards so that it will be a little taller than the spacers. That way, the base will sit higher than most moldings used at the base off walls. Second, the base doesn’t have one of the long pieces inset like the spacers. Instead, the Short Bases are cut to a shorter length. When the base assembly installed, this will again help the base clear molding on a wall. You’ll see this clearly in Step 10. For now, cut two Long Base and two Short Base parts to length from a 1x4 board, as shown in the cutting diagram. Drill pocket holes in the Long Base boards, as shown. Then sand all the base parts smooth.

-
Assemble the Base
Apply wood glue on the pocket hole ends of the Long Base parts and position them flush to the ends of the Short Bases, as shown. Secure the Long Bases to the Short Bases using 1 1/4" Kreg screws.
-
Attach the Base
Place the last assembled shelf on a work surface so it’s sitting on its top (pocket holes facing up). Position the base assembly on the Shelf so it’s inset 3/4" from the back edge of the shelf, and the shelf assembly overhangs the base assembly equally on each end, as shown. Secure the base to the Shelf with 1 1/4" Kreg screws.
-
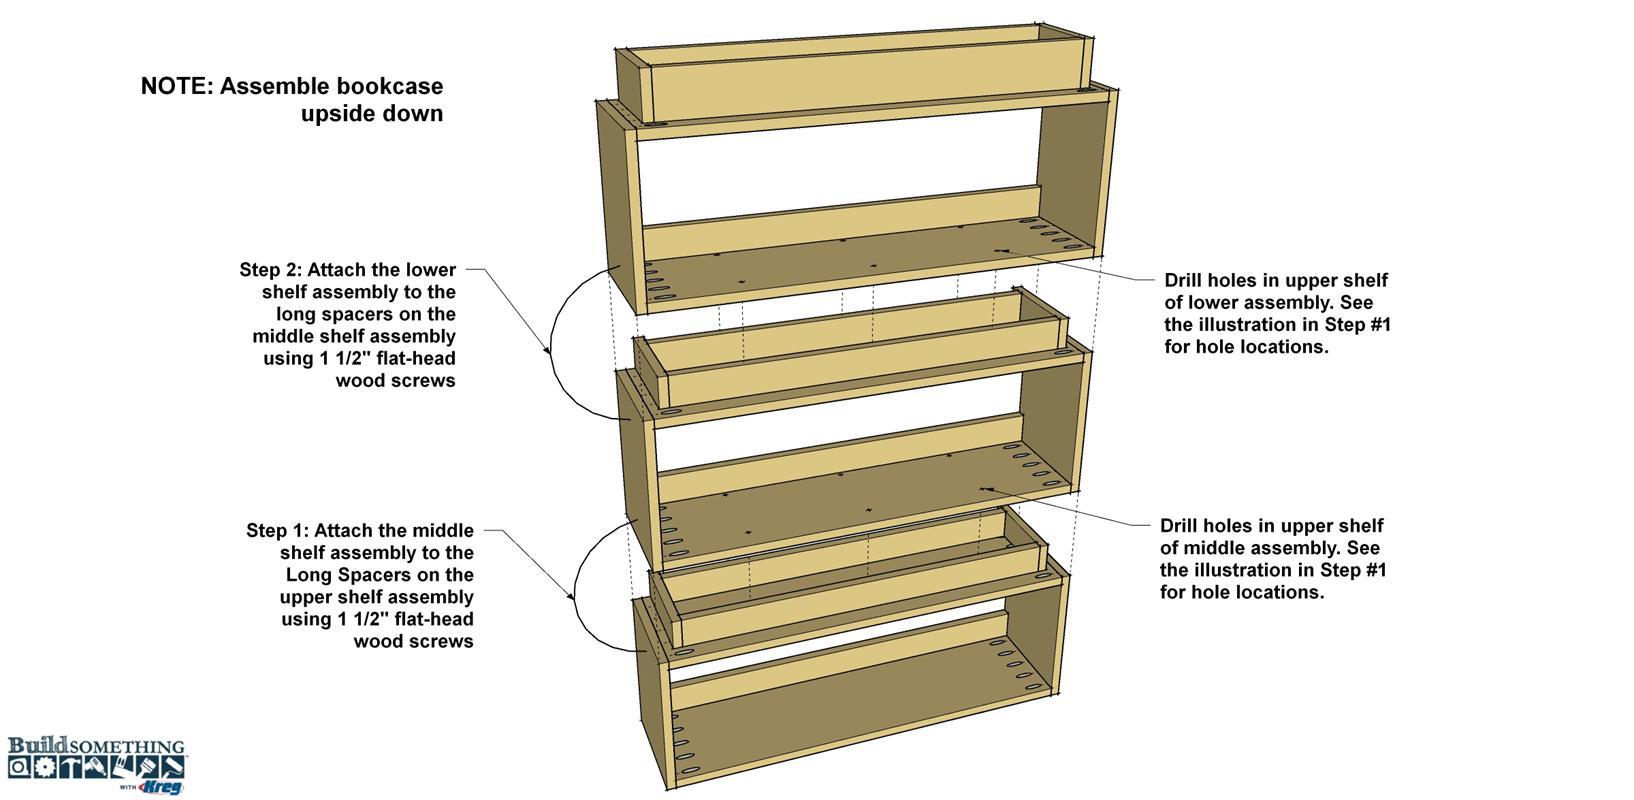
Assemble the Bookcase
Set the uppermost shelf/spacer assembly on a flat worksurface with the Spacer facing up. Now, in the other shelf/spacer assembly, drill countersunk pilot holes in the upper shelf for screws that will attach this assembly to the spacer on the upper shelf. Use the illustration in Step 1 to locate the holes. Set this assembly on the upper one in the same orientation. Make sure that all the surfaces are aligned. Secure the two units together with 1 1/2" flat-head wood screws. Repeat this process to attach the last shelf assembly that has the base attached.
-
Apply the Finish
With everything assembled, you can stand the bookcase upright. Do any touchup sanding that’s needed, and then apply the finish. We used a white stain that we applied by wiping it on, and then wiping most off to create the “whitewashed” look. Let the stain dry, and then apply a topcoat finish. We applied two coats of a wipe-on polyurethane in a stain sheen. When that dries, you can place the bookcase where you want it. With any tall project like this, especially if you have kids around, it’s a good idea to install an anti-tip kit, which attaches to the bookcase and the wall to prevent it from tipping if a child tries to climb it.