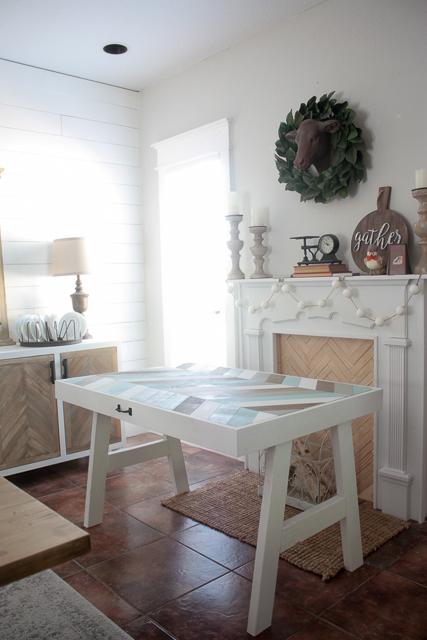
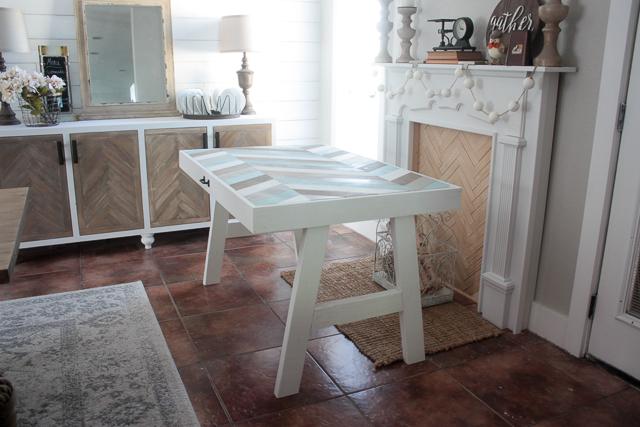


Do you need a spare table but don't even want to have to think about finding a place to store it? With the Holidays around the corner, I built this table to hang on the wall as art, until family and friends show up and you need extra seating, just unfold the legs and viola...extra table!!
Tools
Kreg Tools


Other Tools
-
Miter Saw

-
Table Saw
-
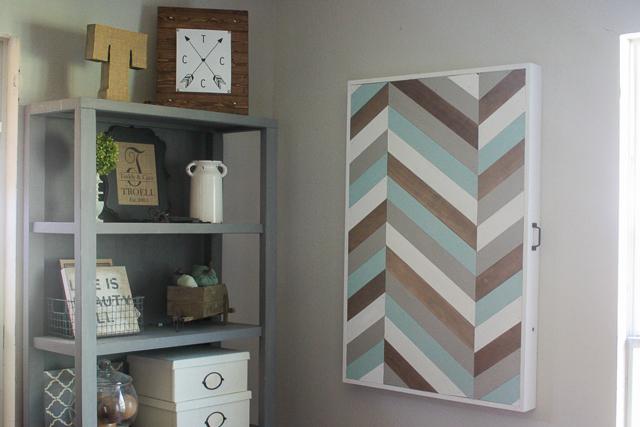
Tape Measure
-
Clamps
-
Nail Gun
Materials
Wood Products
- 1 Plywood , 1/2" Thick , Full Sheet
- 2 Board , 1x4 , 96"
- 1 Dowel rod , 1/2" Thick , 48"
- 2 Board , 2x4 , 96"
- 1 Board , 2x2 , 96"
Hardware & Supplies
- 2 Utility handles
- 3 Sets of 2 1/2" utility hinges
- 1 1" Kreg Screws
- 1 5/8" brad nails
- 1 2 1/2" Kreg Screws
- 1 Large frame hanging hardware
Directions
-
Step 1
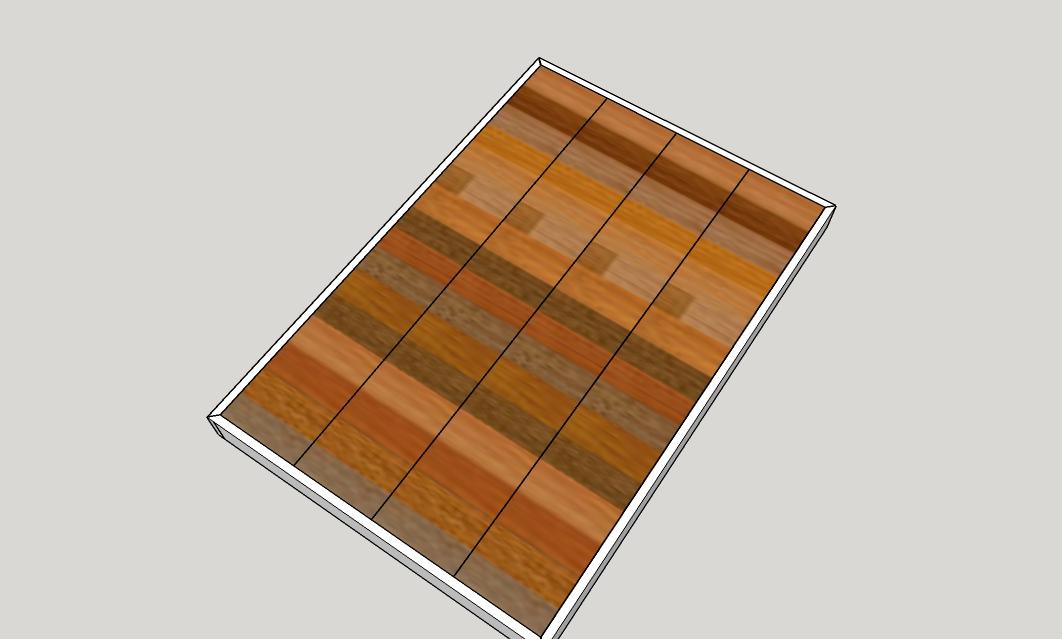
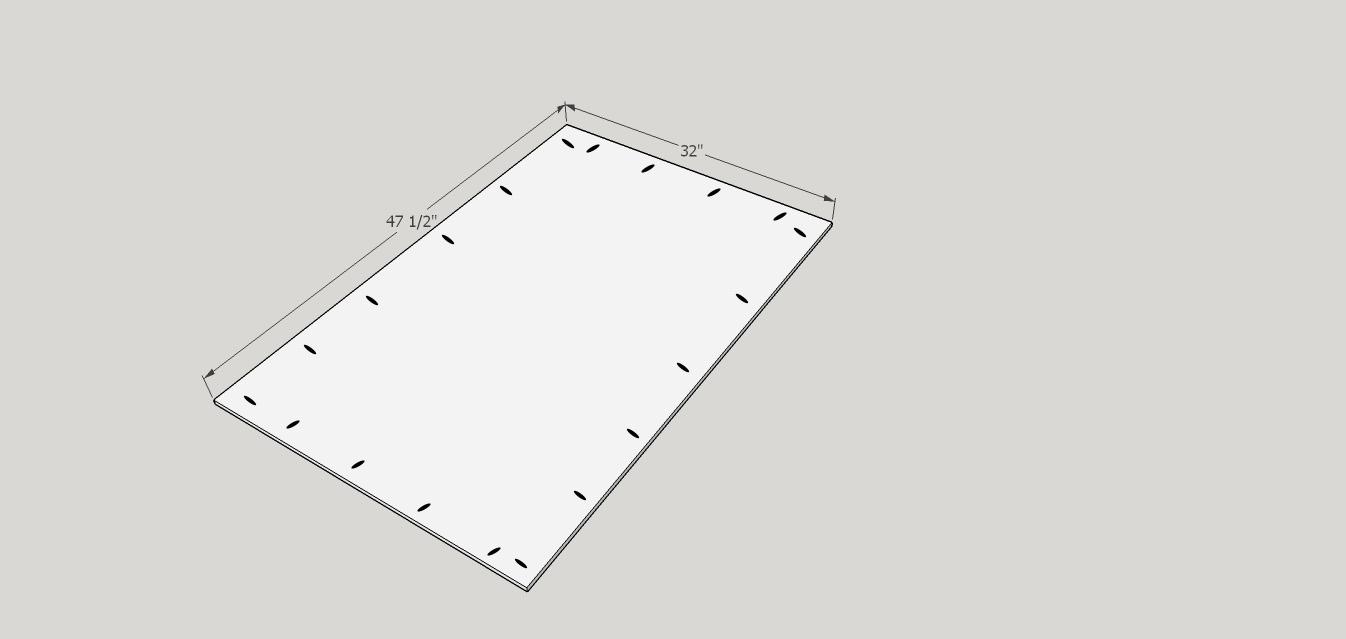
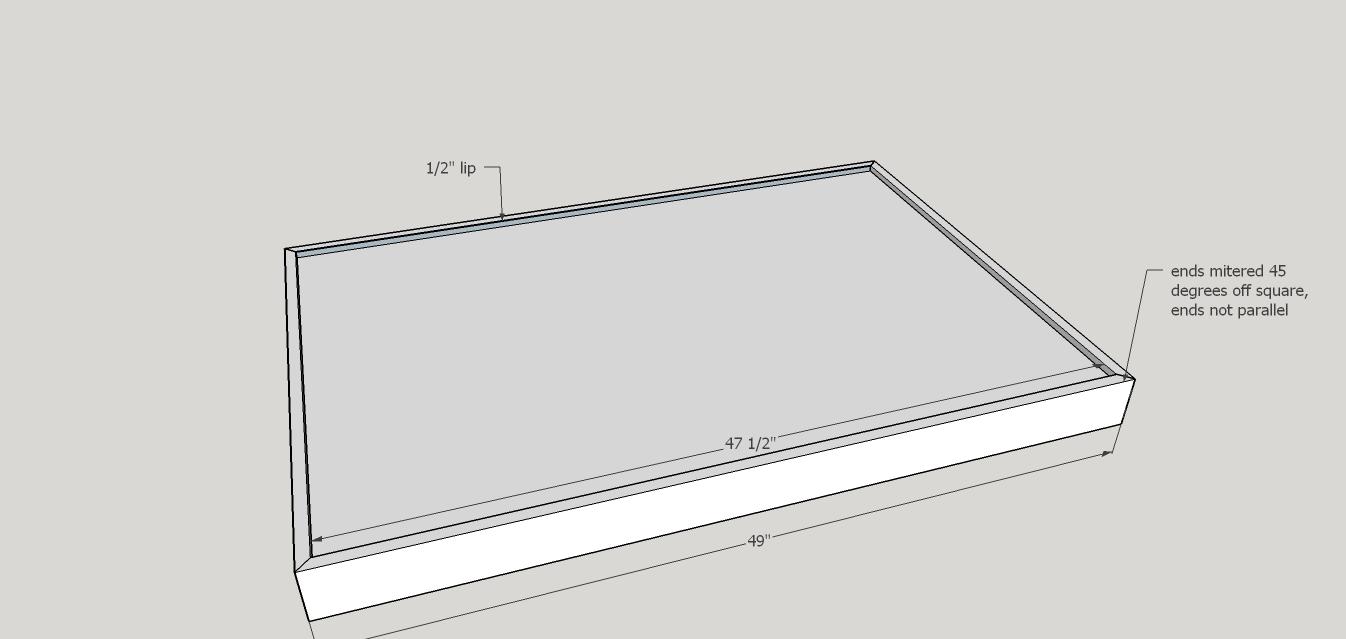
Cut your plywood down to size. It is a 32" x 47 1/2" rectangle. A Kreg Accucut works great to do this job for you!! Go ahead and drill 1/2" pocket holes all around the edge of your plywood now to attach the boards in the next two steps!
-
Step 2
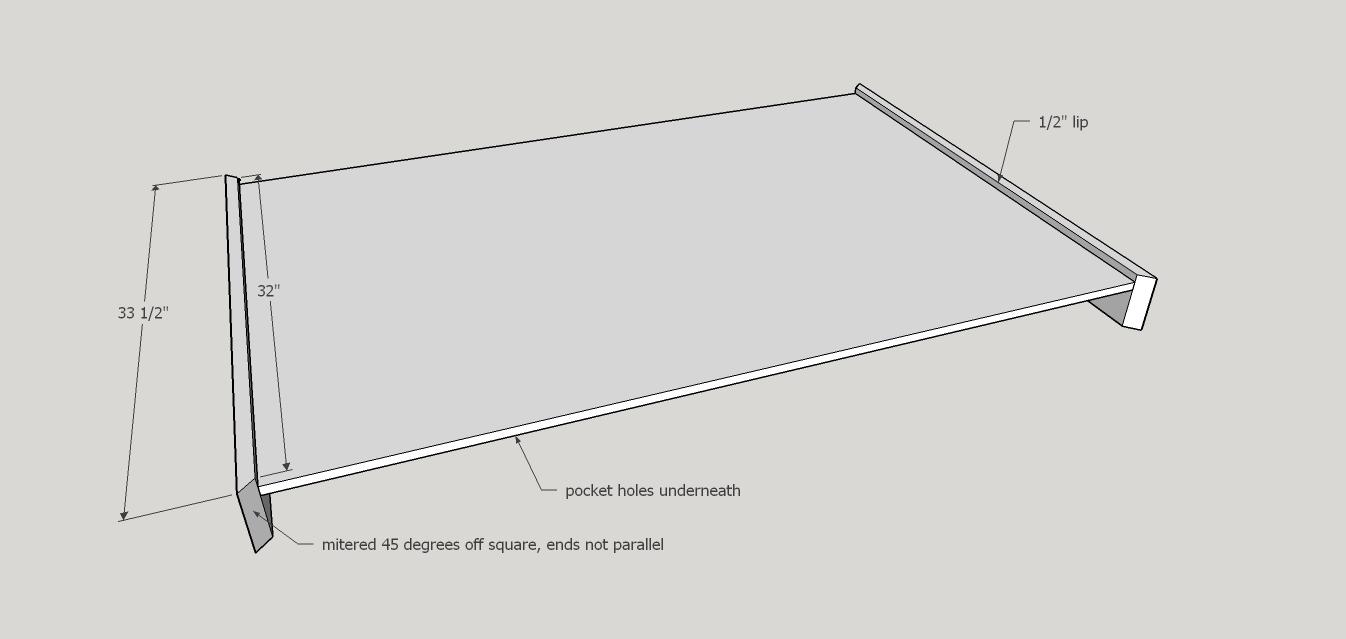
Add your table frame short sides and attach using the pocket holes drilled in the last step, making sure to use glue and 1" pocket hole screws! Make sure and leave a 1/2" lip so you can add a decorative touch on top of this piece of plywood! Also the boards are beveled 45 degrees off square, both ends, and they are not parallel. Make sure the smallest ends of the beveled boards meet up with the ends of the plywood so you will have perfect and pretty corners!!
-
Step 3
Add the table frame long sides using the same 1" pocket holes screws as in the last step. Make sure and use glue as well! Boards are beveled at 45 degrees off square and should meet up perfectly with your other beveled boards from the last step!
-
Step 4
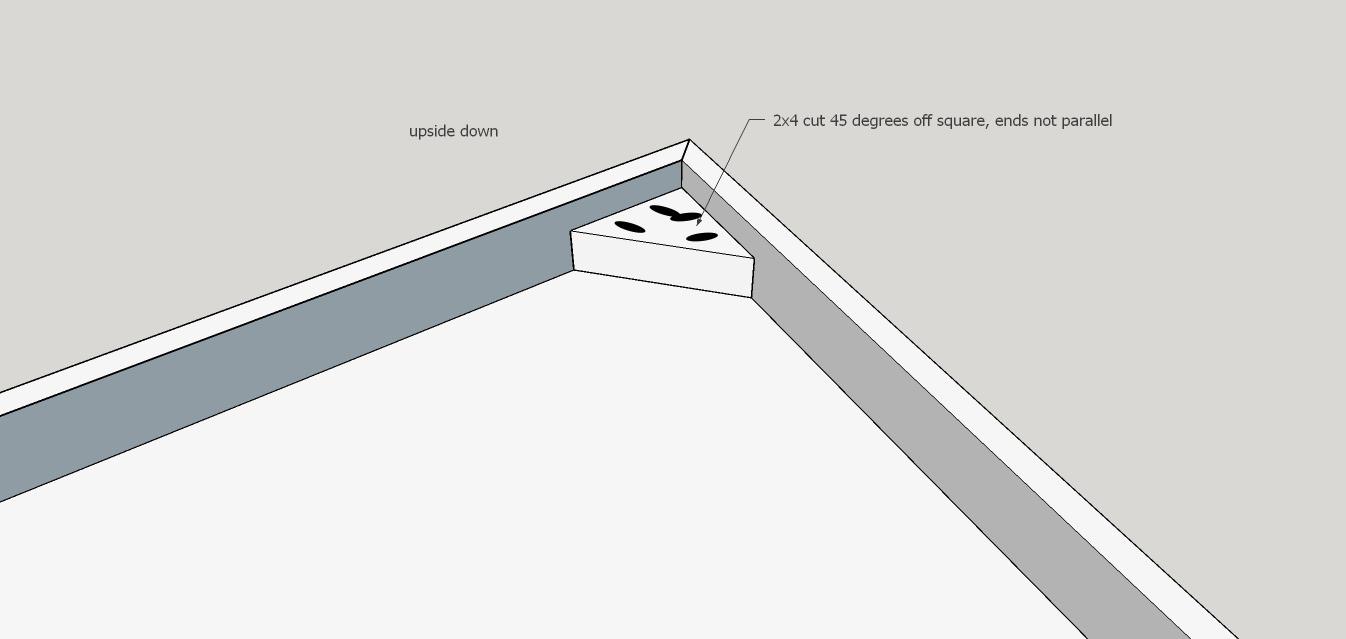
Add the small mitered 2x4s to the corners for extra support! Attach using 1 1/2" pocket holes and 2 1/2" pocket hole screws and glue...of course!
-
Step 5
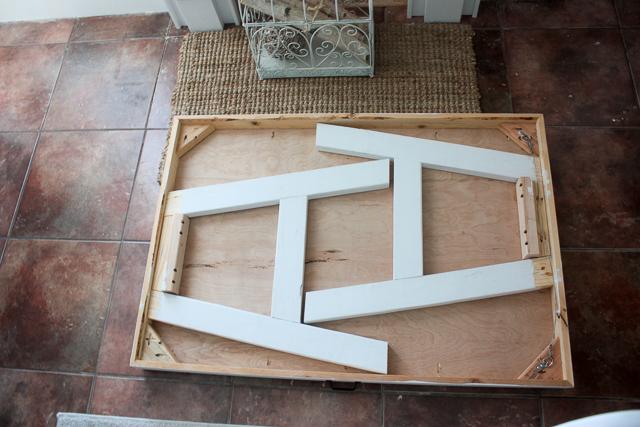
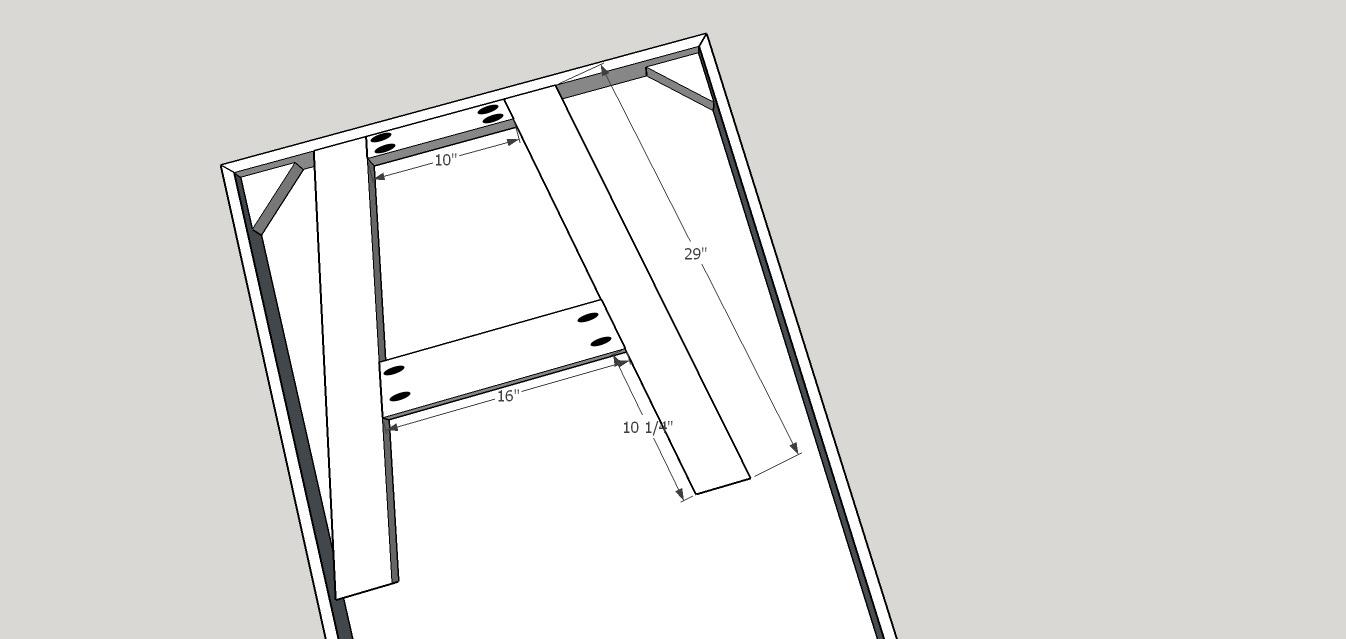
Build the legs! Using the leg rails and stiles, form an A shape with the top rail flush with the top of the leg stiles. The bottom rail will be about 10 1/4" up from the bottom of the legs. Drill 1 1/2" pocket holes and attach with 2 1/2" screws and glue! All boards for the legs are mitered 10 degrees off square, the stiles are parallel at the ends and the rails are not! Repeat this step to make second leg!
-
Step 6
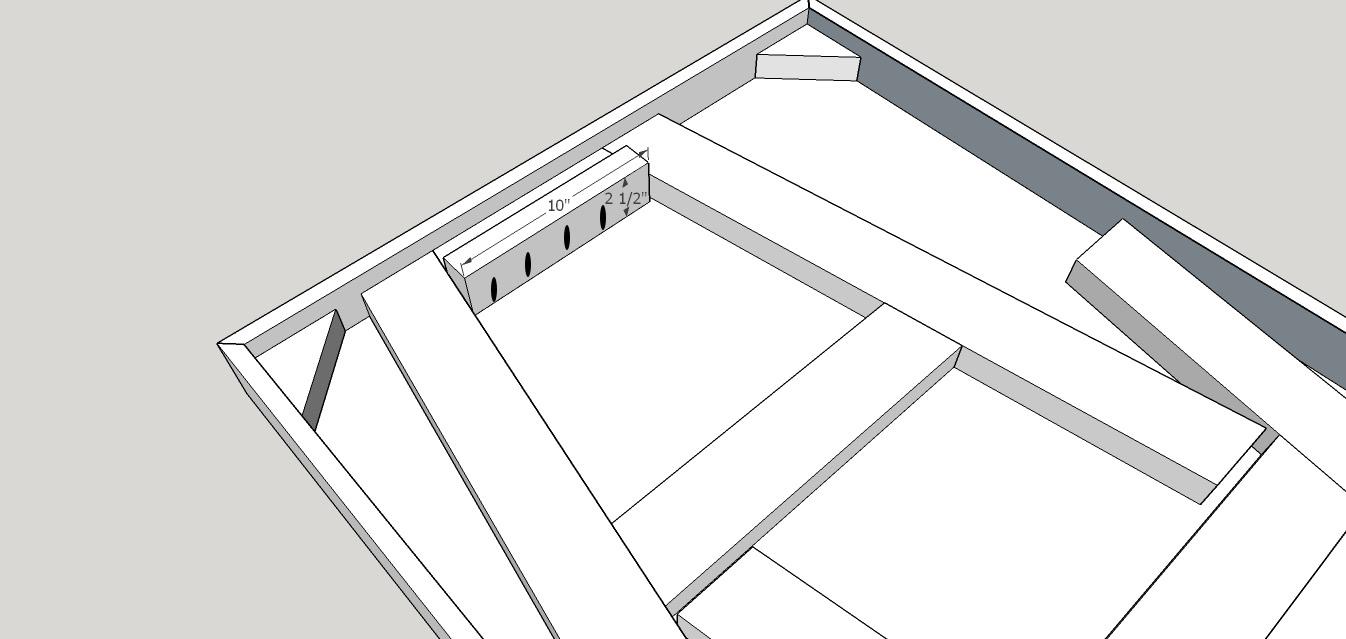
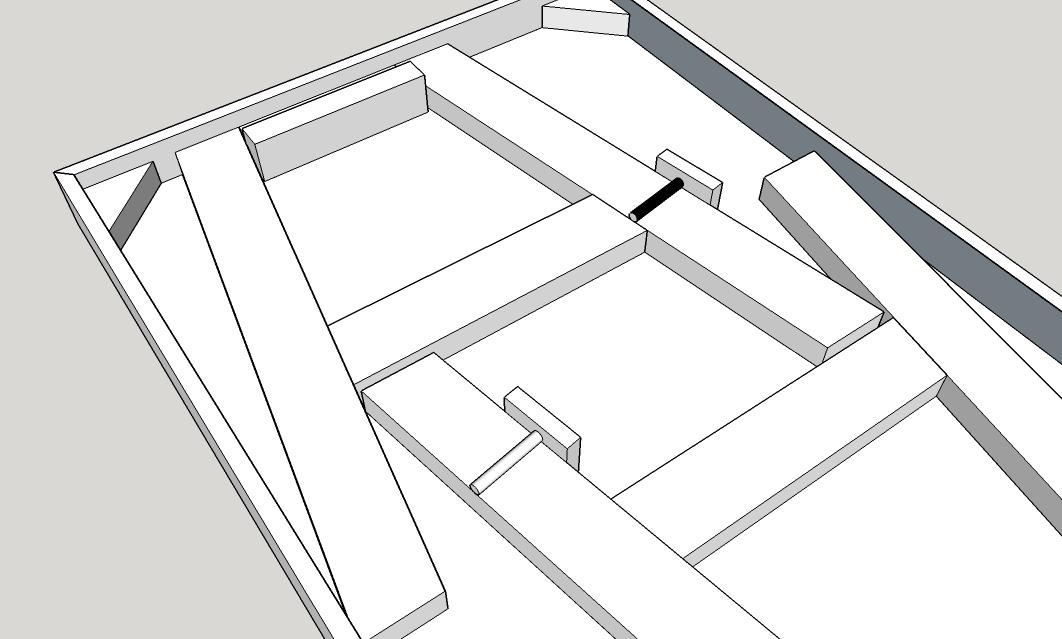
To hold the legs in place when using as a table, pocket hole a 2x4 ripped down to 2 1/2" or you can use a 2x3 if they sell them near you, behind the top rail of the leg! Use 1 1/2" pocket holes with 2 1/2" screws and glue! You want to make sure you have the leg in place (like in the picture) when you attach this leg support to make sure it is tight so your table doesn't wobble!
-
Step 7
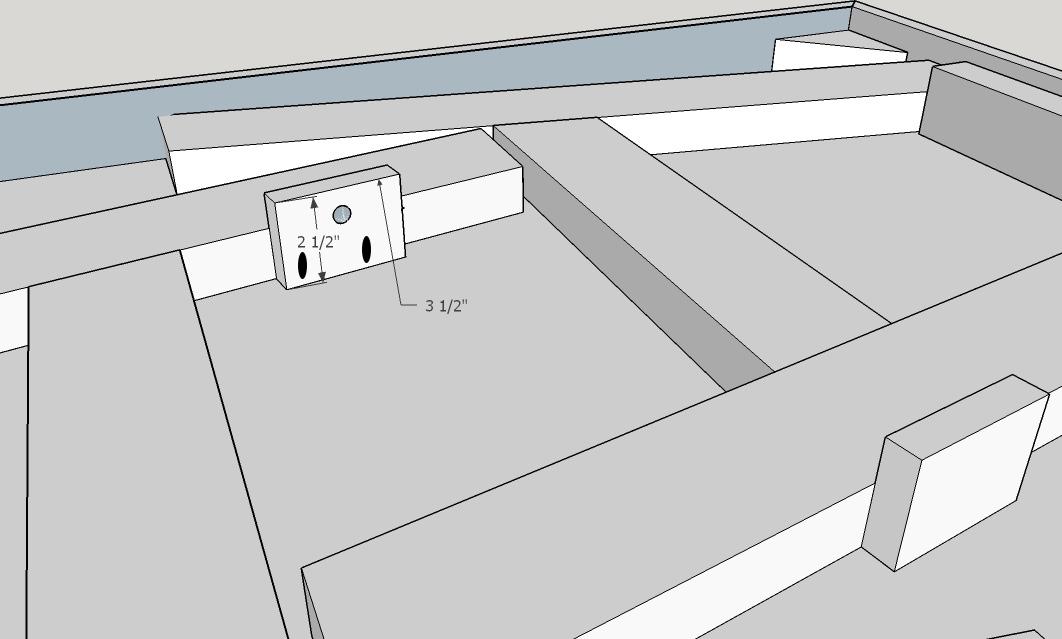
To keep the legs from falling out when you are not using it as a table, take a scrap 1x4 cut at 2 1/2" and drill a 1/2" hole 1 1/2" up from the bottom of it. Attach this along the leg somewhere with 3/4" pocket holes and 1 1/4" screws with some glue! You can use two or four of them depending on how tight you did your top leg support!
-
Step 8
Slide the dowel rods in to act like pins to hold the legs in!
-
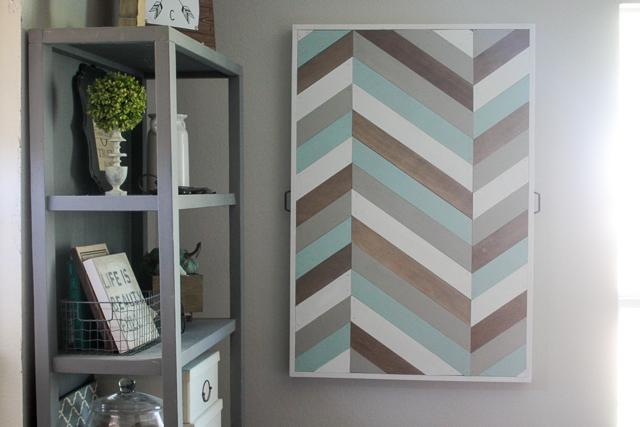
Step 9
Now comes the fun part, making the front look like any kind of art work you want! I just cut 3" wide strips of the leftover 1/2" plywood and made a chevron pattern but you can go crazy here and do something you like! I thought of painting it like a game board and it would look cute on the wall but also could be used as a game board! I also thought about just painting a saying on it that I love and it would look like a large sign! The ideas are endless! I can't wait to see how you customize this table!! Also you can pick hanging hardware that you are comfortable with, I went with a cleat that holds 200 lbs! I have all the paint/stain colors I used on my blog!! Make sure and visit to see more great building plans!