

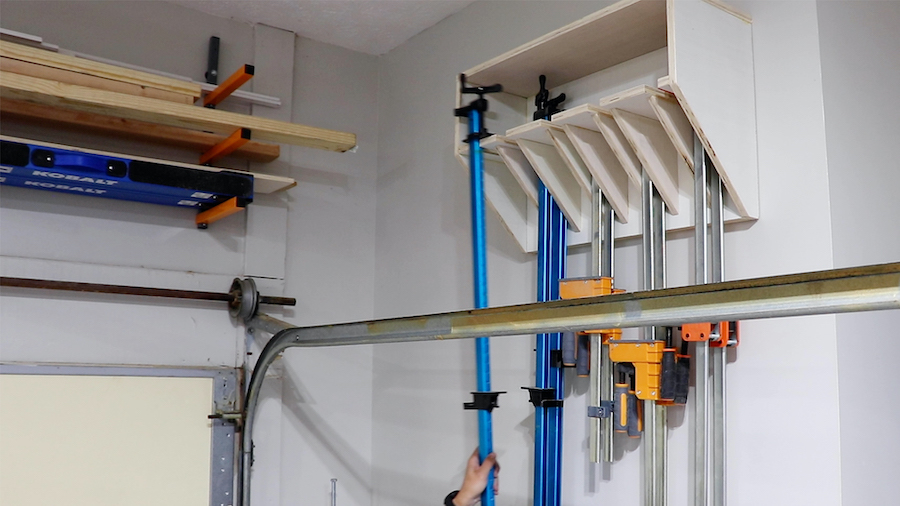


This workshop essential will simultaneously de-clutter your shop and increase your productivity. By having a place to store all of your large parallel and bar clamps - you can spend more time building projects instead of looking for them. This clamp rack design can fit up to (12) parallel clamps and (8) bar clamps but can be modified or expanded to fit your exact needs.
Tools
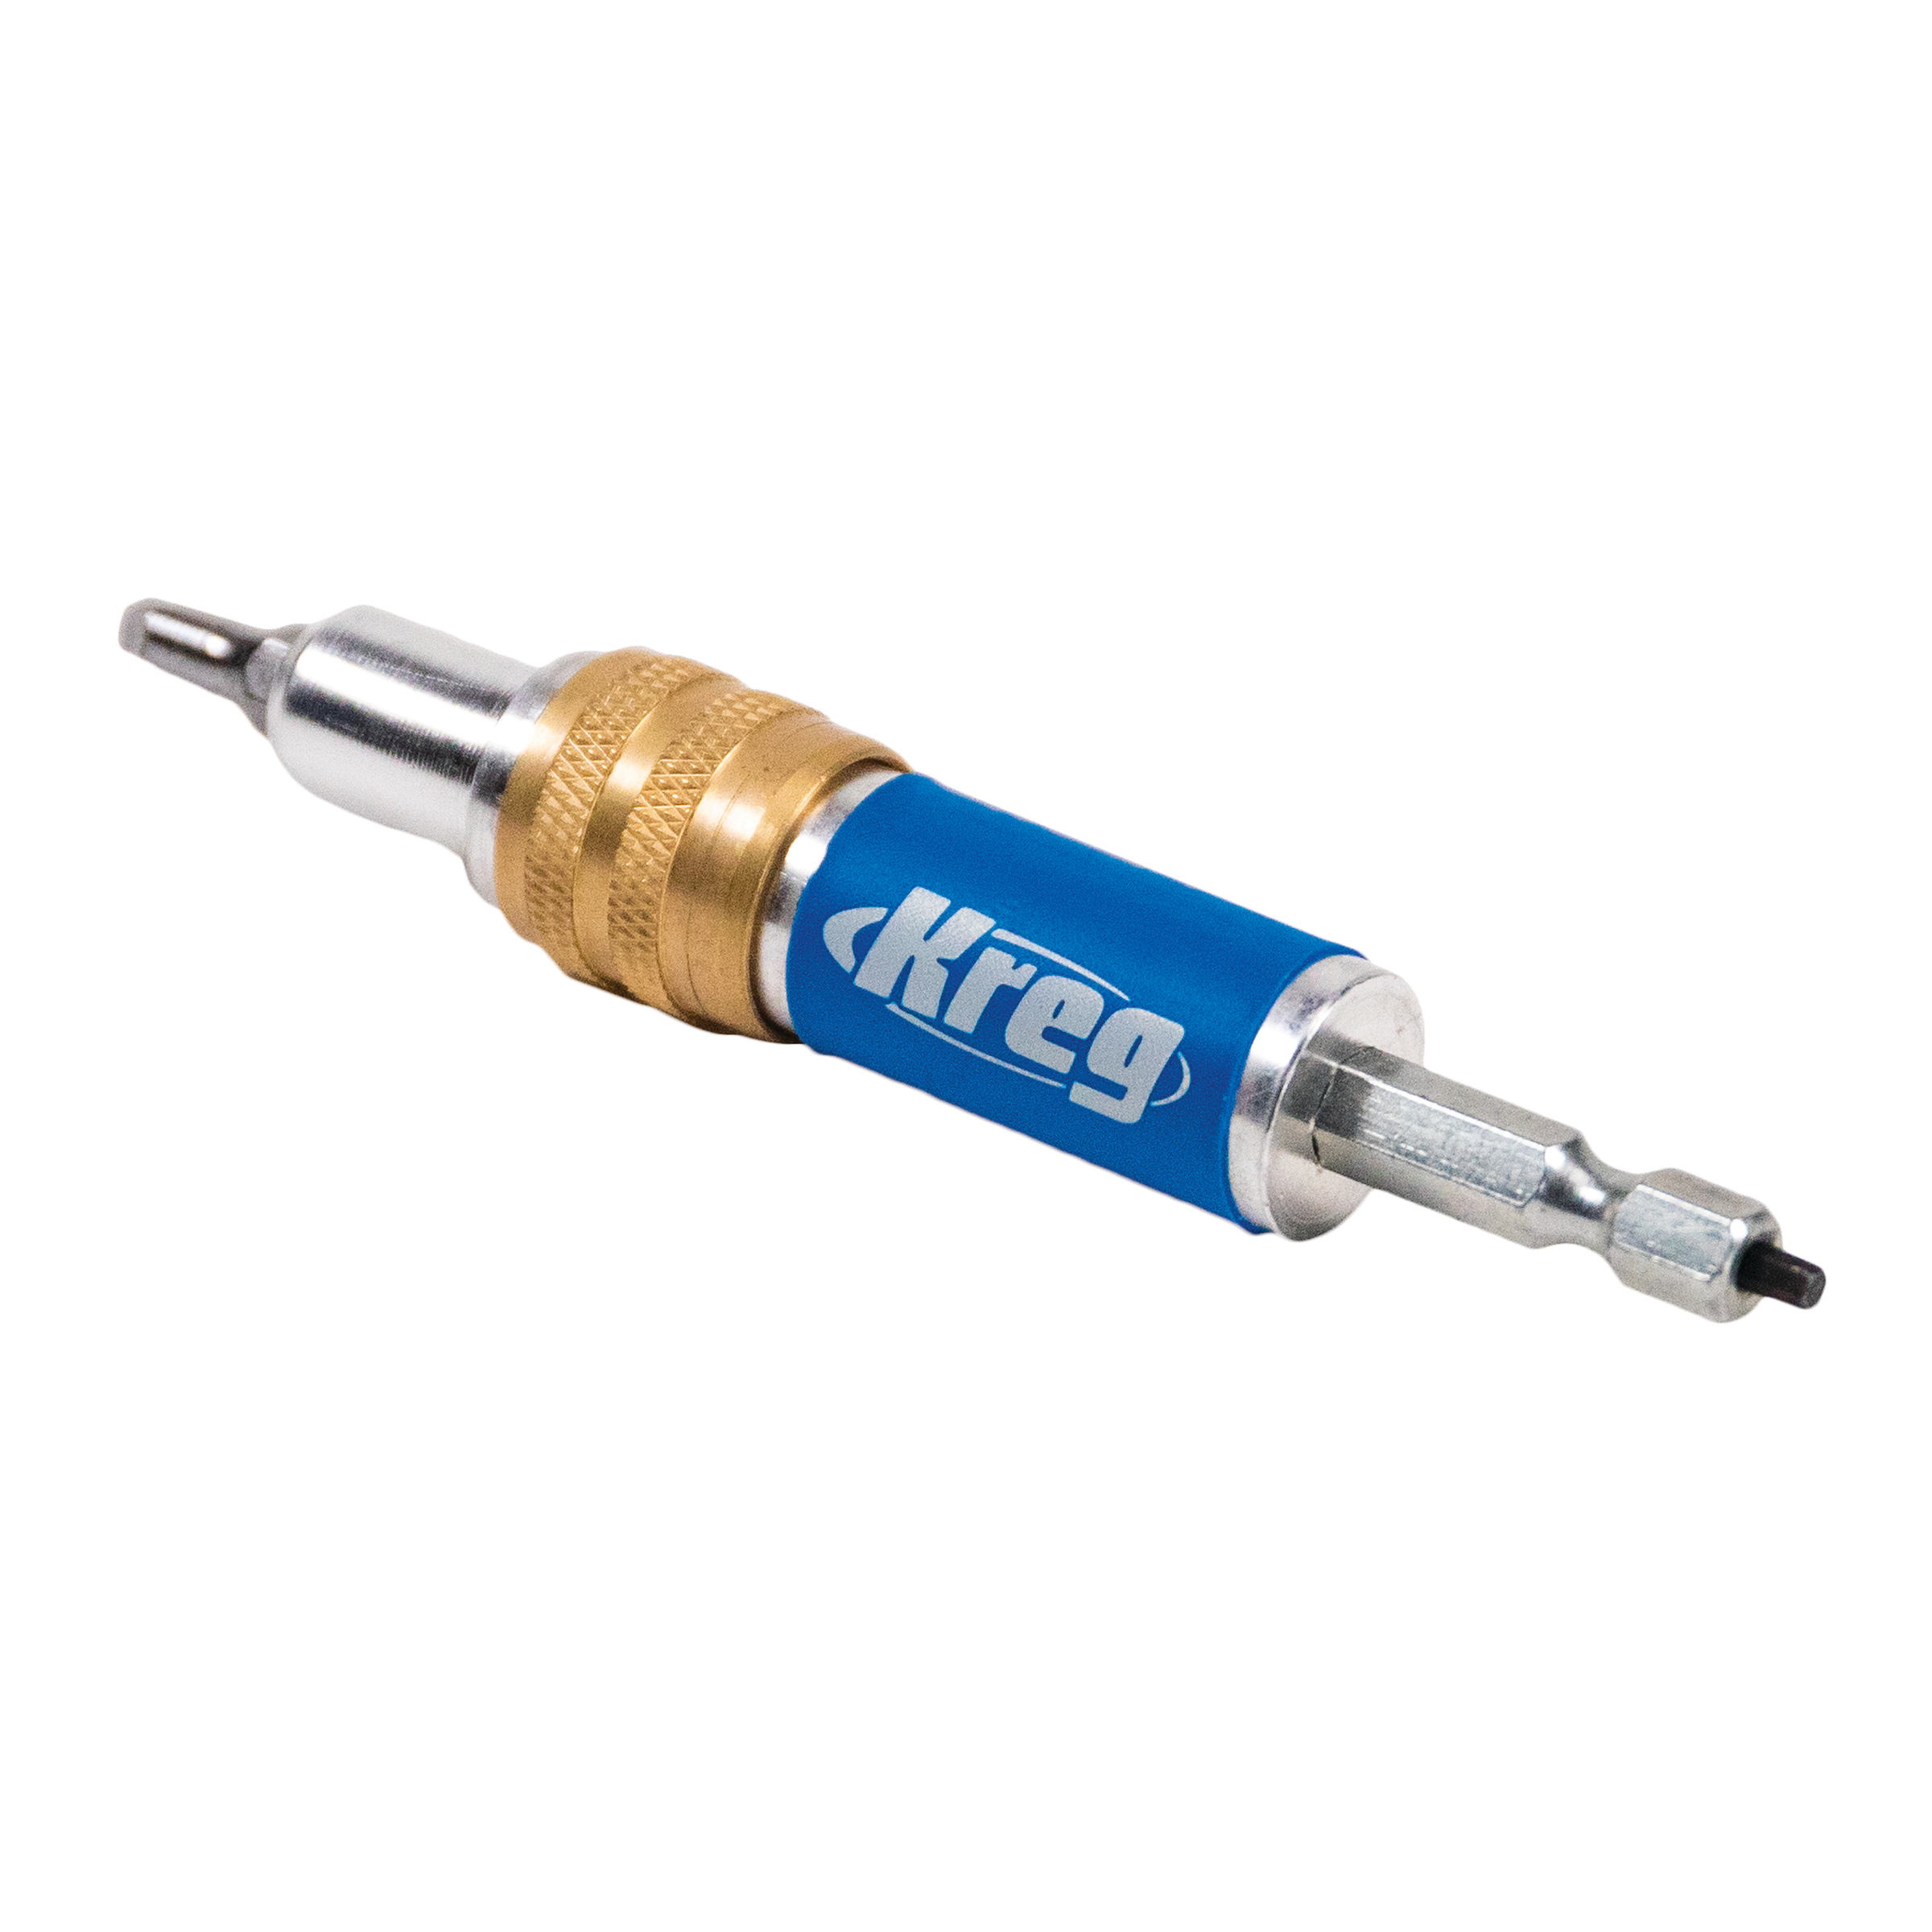
Kreg Tools


Other Tools
-
Brad nailer

-
Miter saw
Materials
Wood Products
- .5 Sheet plywood , ¾”
Hardware & Supplies
- 1 Box of 1-1/4” Kreg Pocket Hole Screws (See tools list)
- 1 Box of 1-1/4” Brad Nails
- 1 Wood glue
Directions
-
Watch the Build Video!
Seeing this built before you build it will give a better idea of how things go together and how you can modify if needed.
-
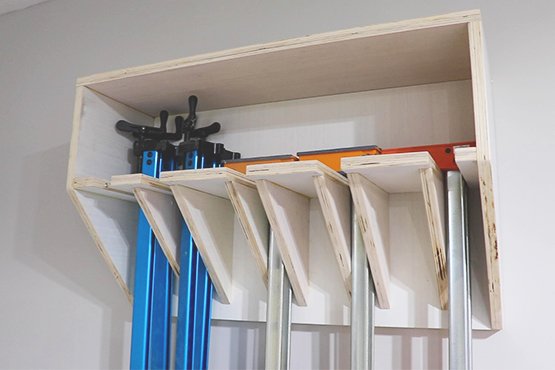
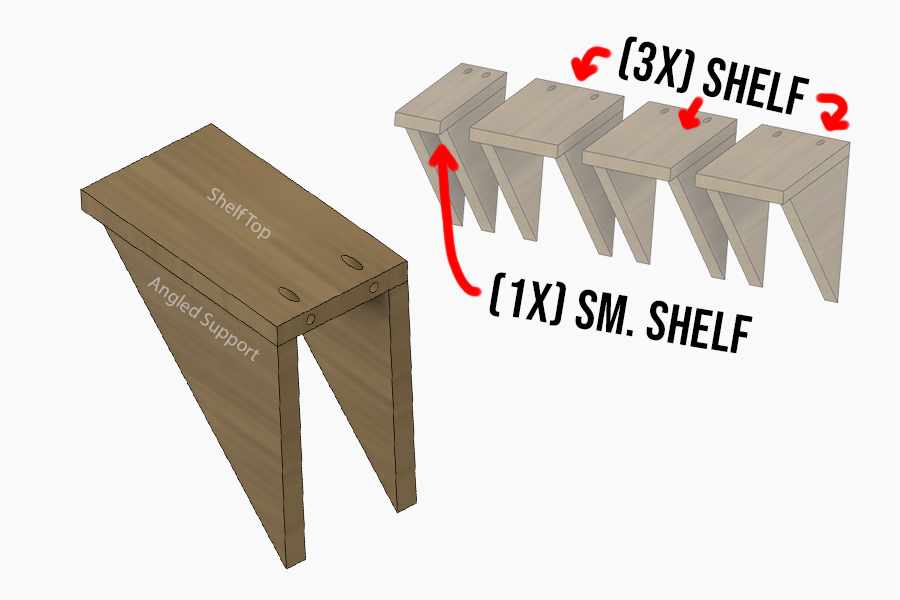
Shelves Assembly
The first step for the shelves will be drilling (2) pocket holes on one short end of each shelf top ( 3x shelf top, 1x sm. Shelf top). Next you will need to attach (2) angled supports to the underside of each shelf top. Make sure the pocket holes are facing UP (as shown). You can attach these with glue and brad nails.
-
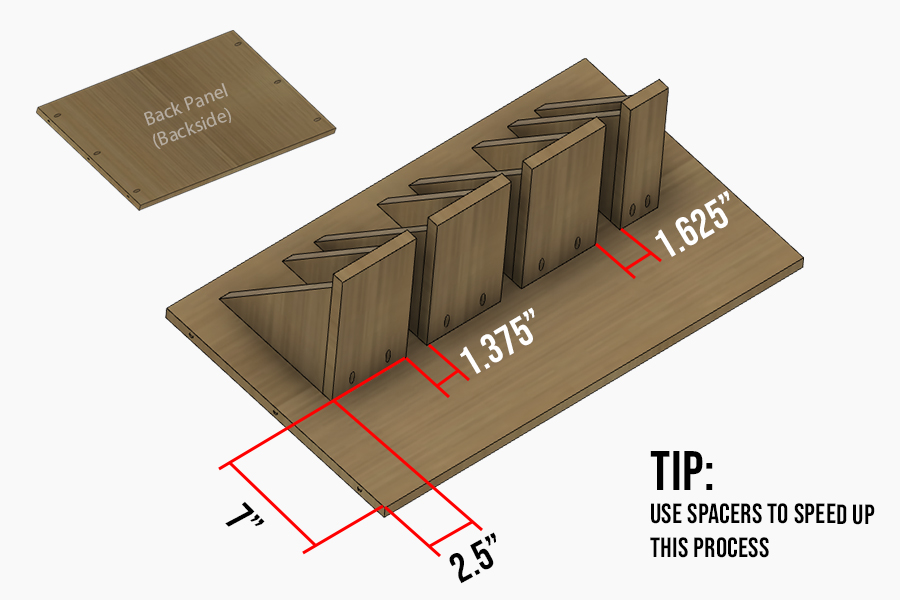
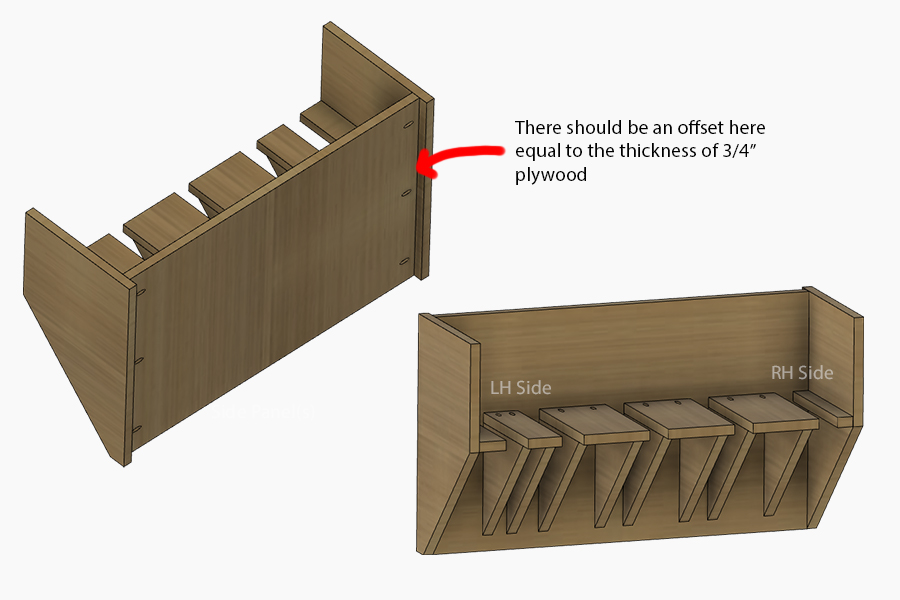
Shelf Installation
Before starting this step each short end of the back panel will need (3) pocket holes drilled. This will be the BACKSIDE of the unit. With the back panel flipped back over (pocket holes facing down) carefully place each shelf assembly using the necessary spacer. Secure in place with glue and 1-1/4” pocket hole screws. Flip over the back panel and drive in either screws or brad nails into the angled supports as well.
-
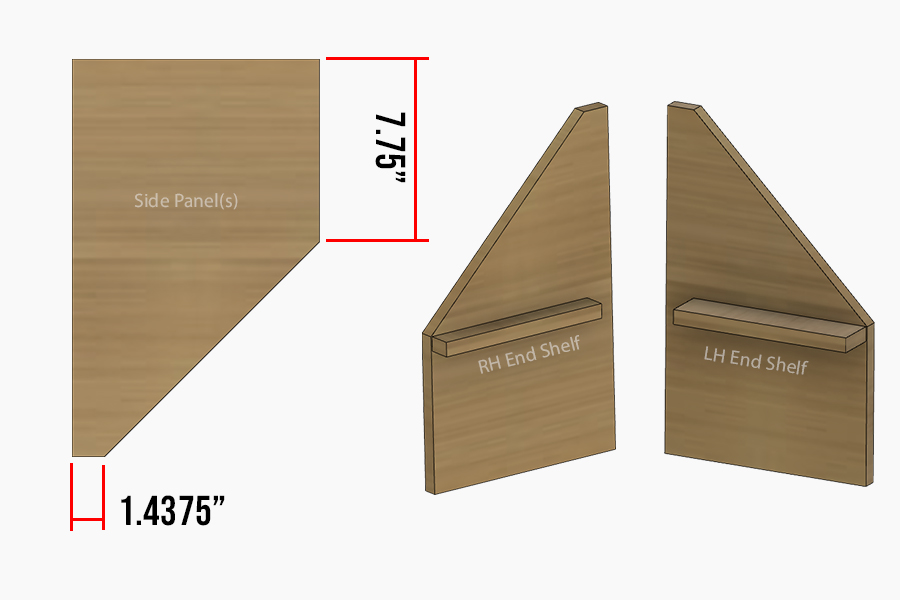
Side Assembly
First cut out the angled section from each side panel as shown. Then attach the RH and LH End Shelf onto each side panel with countersunk screws, ideally from the INSIDE so that we don’t see any fasteners from the outside.
-
Attach the Side Panels
Apply glue to the joint and attach the side panels using 1-1/4” pocket hole screws from the back on each side.
-
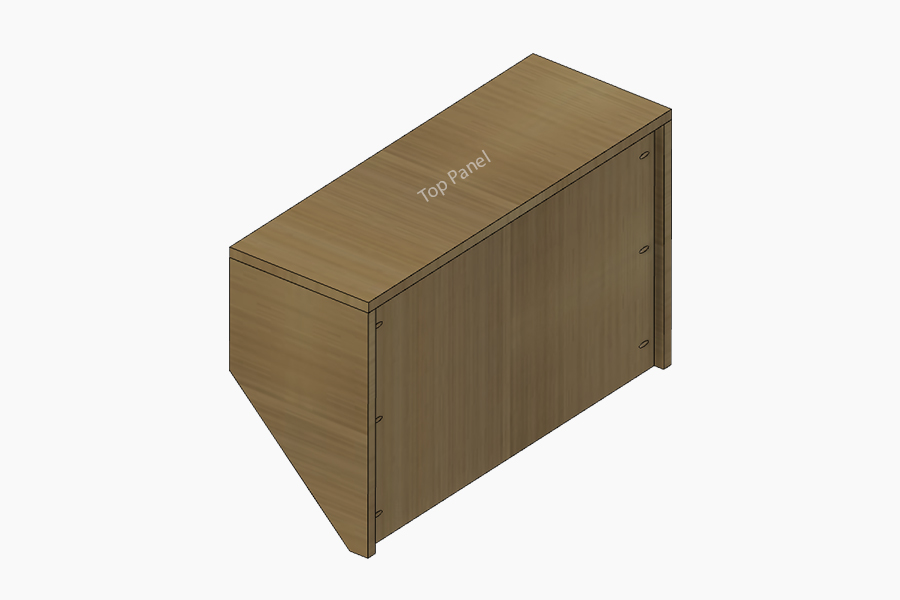
Attach the Top Panel
Apply glue to the joint and secure the top in place with either screws or brad nails. This will pull the side panels into square with the rest of the clamp rack!
-
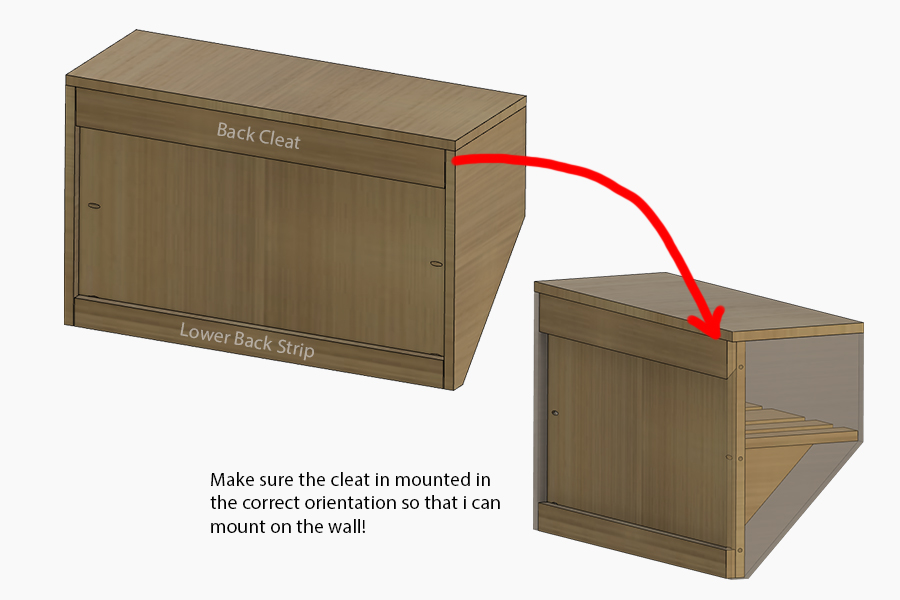
Mounting
Attach one of the cleats to the top edge of the BACKSIDE of the clamp rack with glue and either brad nails or screws. Attach the lower back strip along the bottom edge of the BACKSIDE in the same manner. Finally, attach the other cleat (in the opposite orientation) onto the wall tying into (2) studs using appropriate screws.
Check out the video on YouTube: https://youtu.be/ywonkkdN8_g
Shop Nation website – https://www.shop-nation.com
Shop Nation store – https://www.etsy.com/shop/ShopNationStore