

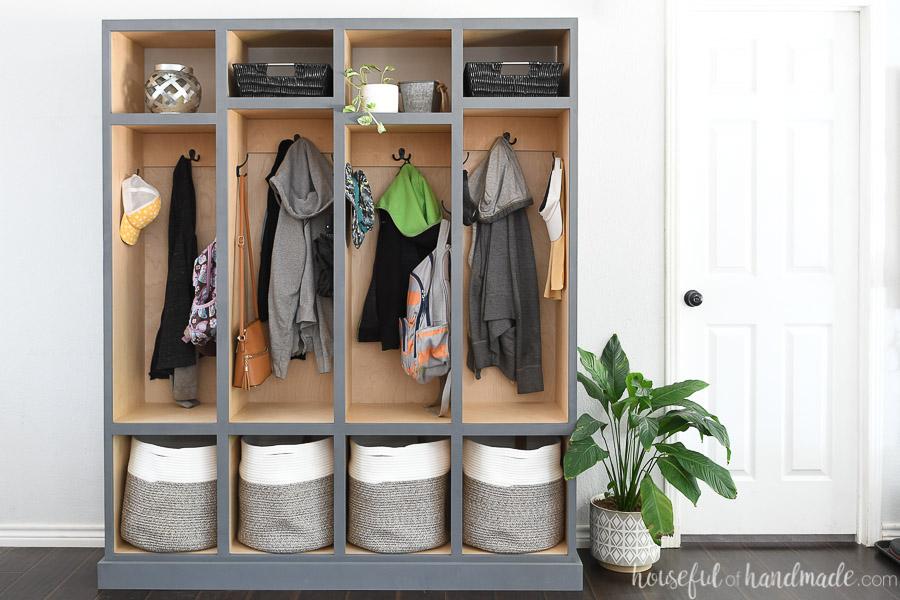
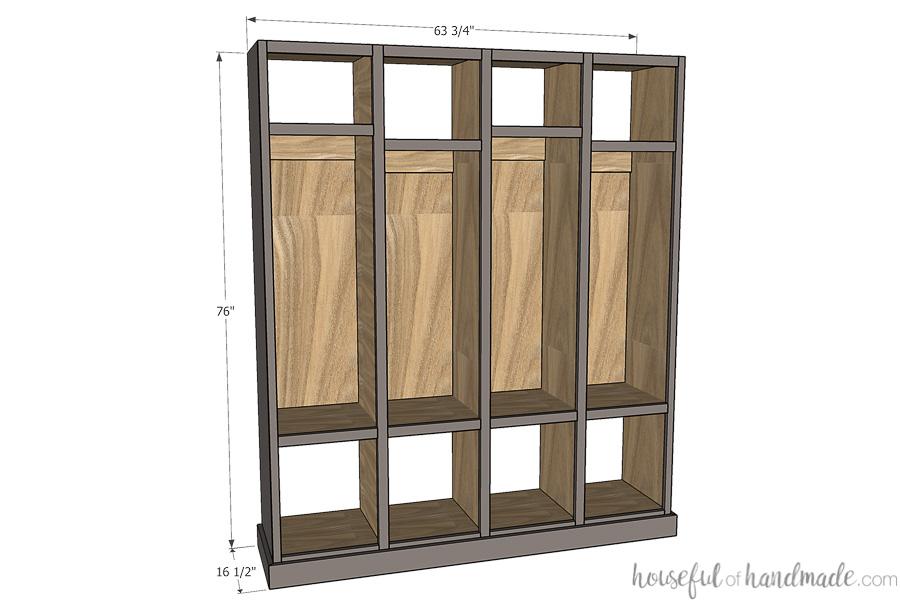


Create the perfect drop zone for your family with these simple mudroom lockers. The plan makes a locker-room style cabinet with 4 compartments, but you can easily add more as needed for your family.
Tools
Kreg Tools


Other Tools
-
Miter Saw

-
Table Saw (optional)
-
Brad Nail Gun
Materials
Wood Products
- 2 Full sheets plywood , ¾”
- 1 Half sheet plywood , ¾”
- 7 8' boards , 1x2
- 1 8' board , 1x4
- 1 2' board , 1x4
- 1 Full sheet plywood , ¼”
Hardware & Supplies
- 150 1 ¼” pocket hole screws
- 50 1 ¼” long brad nails
- 50 5/8” long brad nails
- 1 Wood Glue
- 12 Coat Hooks
Cut List & Parts
- 5 Side pieces , ¾” x 15” x 76”
- 8 Top & bottom pieces , ¾” x 15” x 15”
- 8 Shelf pieces , ¾” x 15” x 15 ½”
- 4 Upper supports , ¾” x 15” x 4”
- 5 Lower supports , ¾” x 15” x 2-3”
- 5 Face frame stiles , ¾” x 1 ½” x 76”
- 16 Face frame rails , ¾” x 1 ½” x 14 ¼”
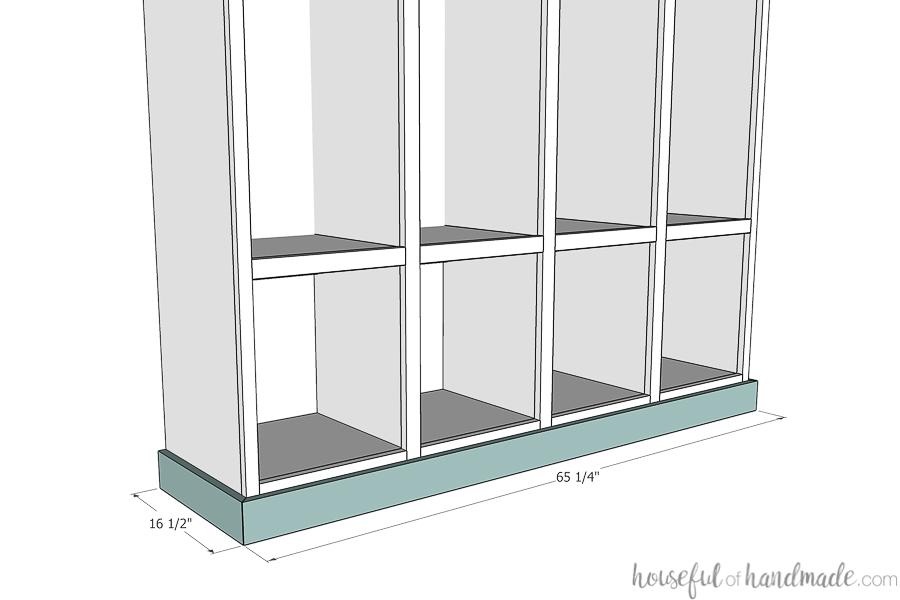
- 1 Base front , ¾” x 3 ½” x 65 ¼”
- 2 Base sides , ¾” x 3 ½” x 16 ½”
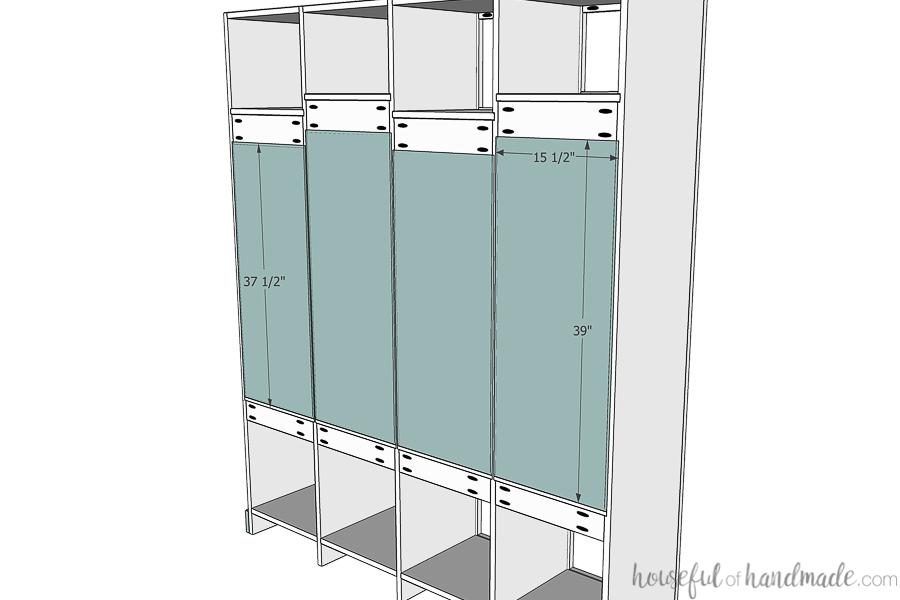
- 2 Large back pieces , ¼” x 15 ½” x 39”
- 2 Small back pieces , ¼” x 15 ½” x 37 ½”

Directions
-
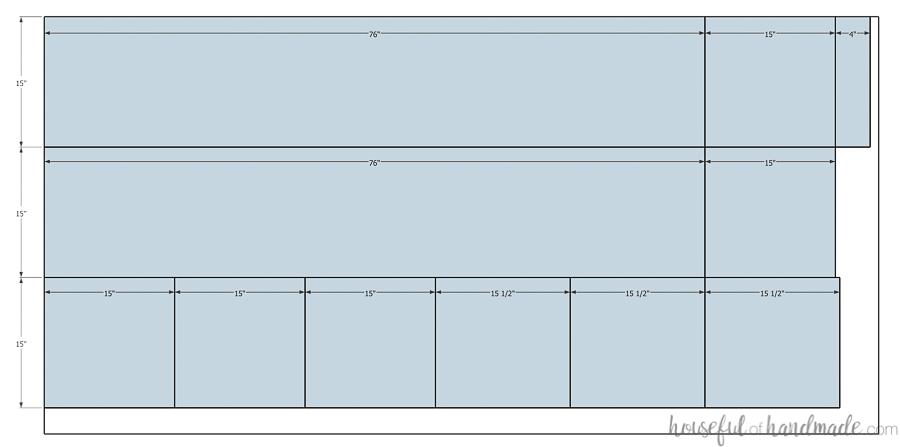
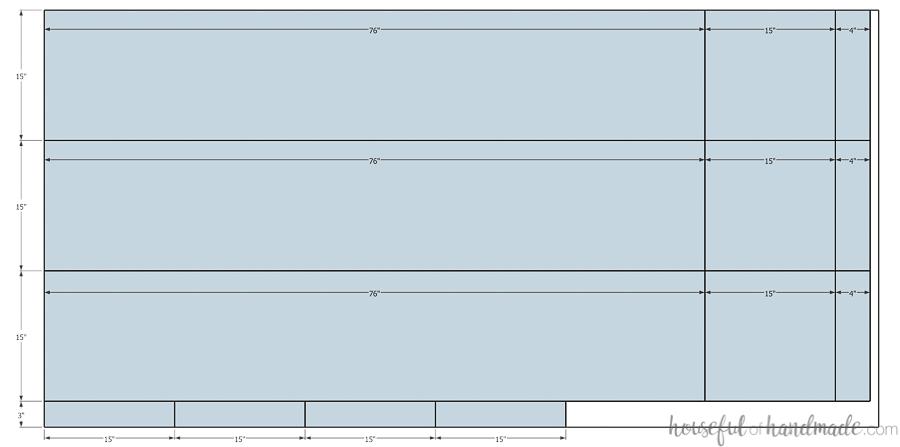
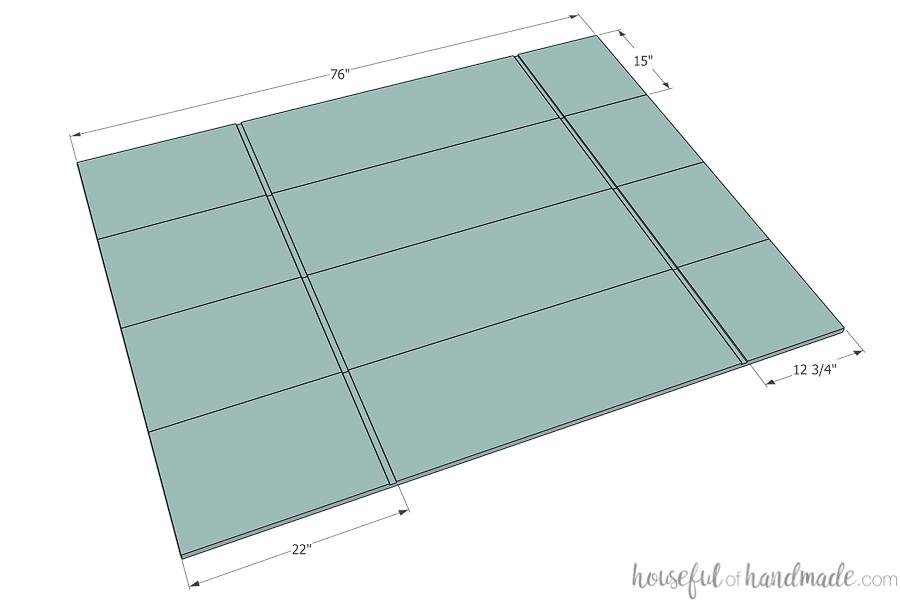
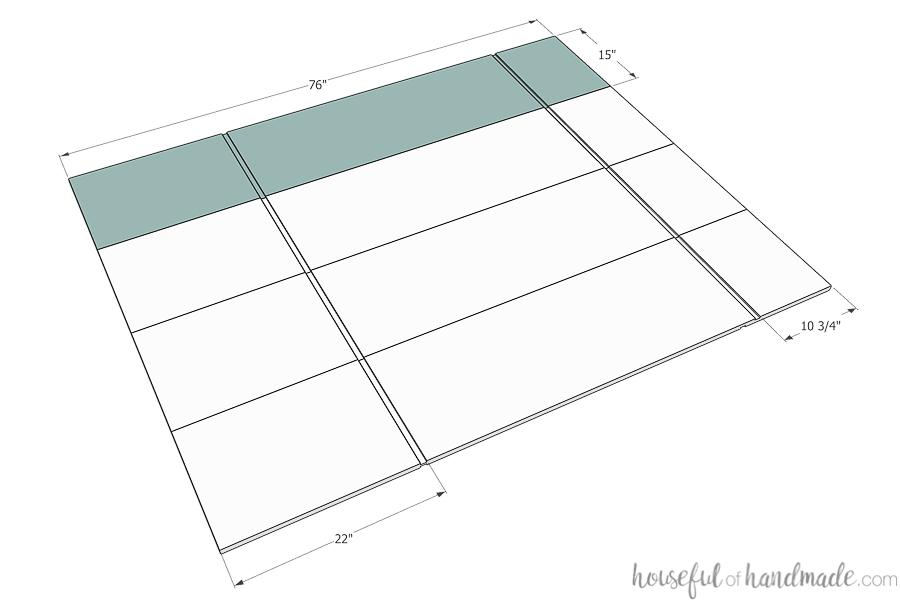
Cut out plywood
Cut out all the pieces from the plywood according to the cut diagrams. Make sure to square off the edges of the plywood before you cut. Then rip the plywood into 15” wide long strips before cutting them down to the final size.
I like to breakdown my plywood with a combination of my table saw and circular saw. The new Kreg Straight Egde Guide makes it easy to square off and cut down large sheets of plywood with the circular saw. You can continue to cut down all the pieces with it or use the table saw to cut down the smaller pieces.
-
Router first set of shelf dados
Mark the lines for the first set of dados on 4 of the 5 side boards. The top one is 12 ¾” down from the top and the bottom is 21 ¾” up from the bottom. Clamp the Kreg Straight Edge Guide to the boards lined up to the marks. Using a router, cut a ¼” deep dado along all the boards.
I lined all 4 of the pieces up and clamped them together. Using the Kreg Straight Edge Guide XL, I was able to router the dado along all the boards in one pass.
-
Router the second set of shelf dados
Remove one of the boards you have already routed dados in and replace it with the 5th side board. Flip the remaining 3 boards with dados in over. Router the second set of shelf dados in these 4 boards. For the second set of dados, the top dado will be 10 ¾” below the top and the bottom is the same (21 ¼” up from the bottom).
You will end up with 3 boards with dados on both side and two boards with dados on one side. Be careful when moving the boards with double sided dados since the bottom dados leave a weak spot until the shelves are glued into them.
-
Drill pocket holes
Set your pocket hole jig for ¾” thick material. Drill 3 pocket holes in both ends of all 8 top & bottom pieces. Also drill pocket holes in both ends all 4 upper supports and all 4 lower supports.
-
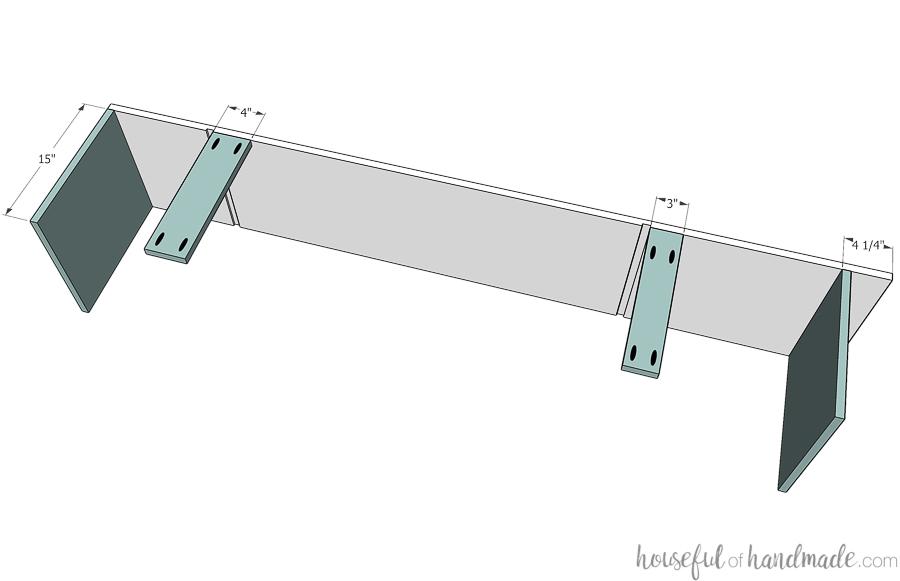
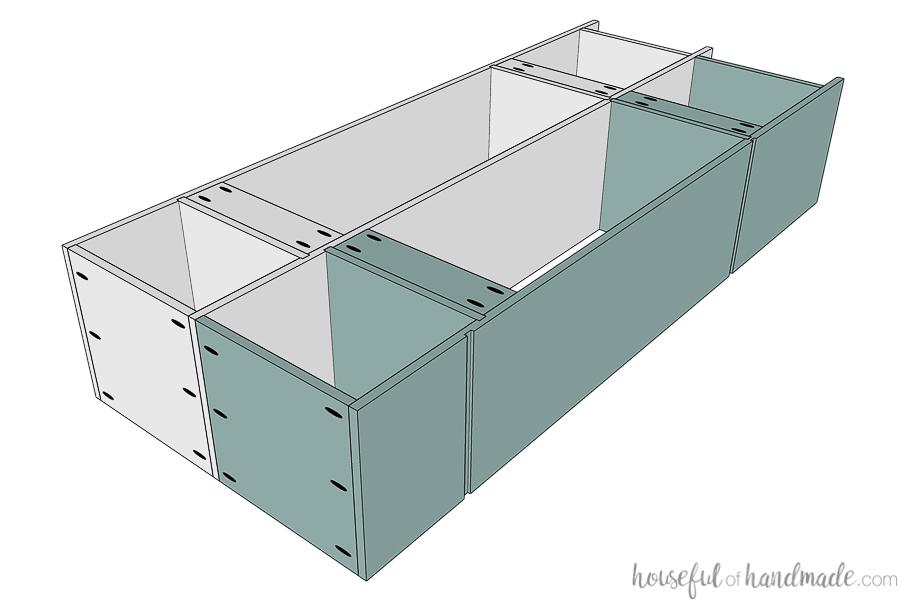
Assemble first half of the first locker section
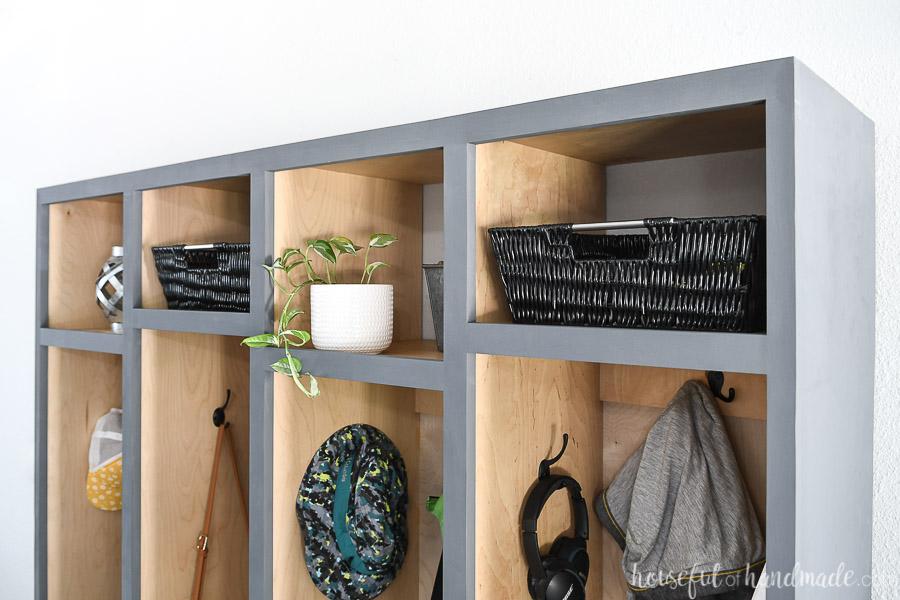
Using one of the side pieces with dados on only 1 side and one piece with dados on both sides, assemble the first section. First attach a top piece and a bottom piece to one side piece with 1 ¼” pocket hole screws and wood glue. The top should be flush with the top of the side piece and the bottom piece should be 4 ¼” up from the bottom. Next, attach the two support pieces so they are right under the shelf dados. The larger one needs to be on the top so you have room to attach a coat hook.
-
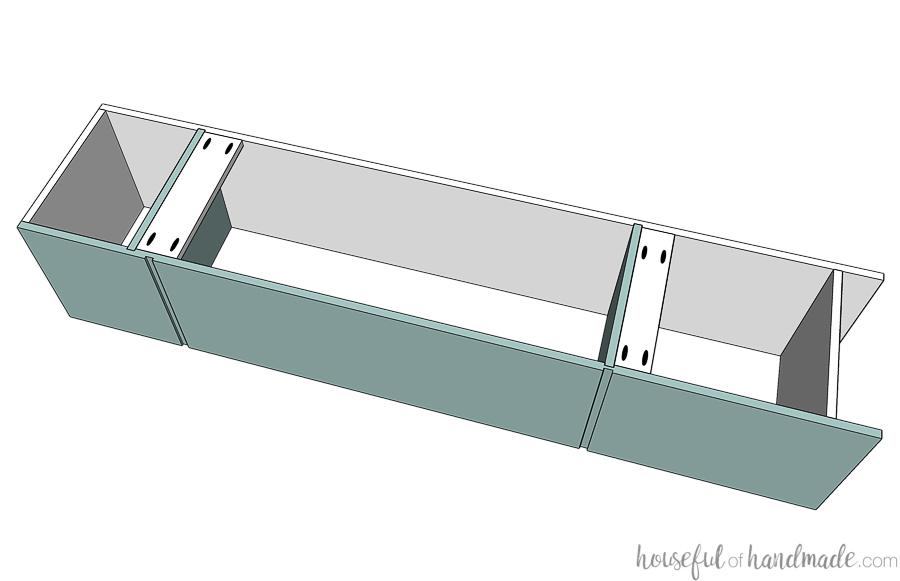
Finish the first locker section assembly
Add wood glue to the dados for the shelves and place the shelves into the grooves. Attach the other side piece to the side of the locker with 1 ¼” pocket hole screws making sure to square up the top and bottom and shelves.
-
Add the second locker section
Attach a top and bottom piece to the next side piece with dados on both sides. Make sure to pay attention up the top dados so you alternate the upper shelf. Then attach the upper and lower support pieces. Use wood glue and 1 ¼” pocket hole screws to attach them. Glue in the shelves then line it up with the dado end of the assembled locker section and attach it.
-
Repeat for the remaining locker sections
Continue to add the remaining locker sections in order until you have added all 4.
-
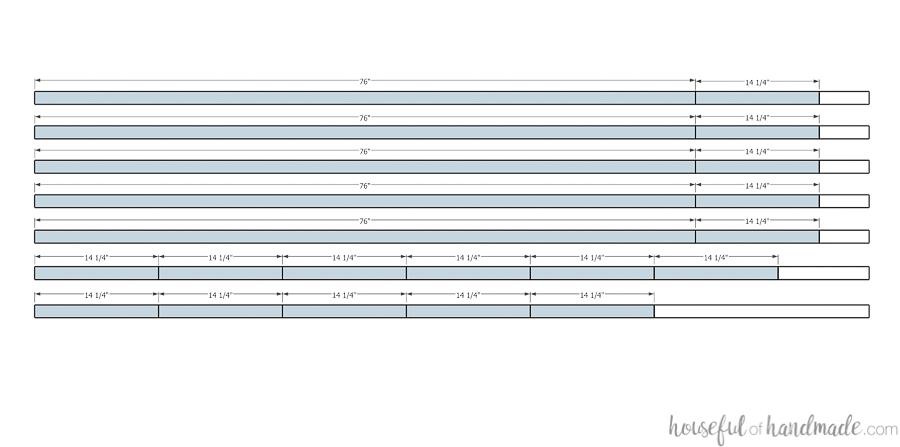
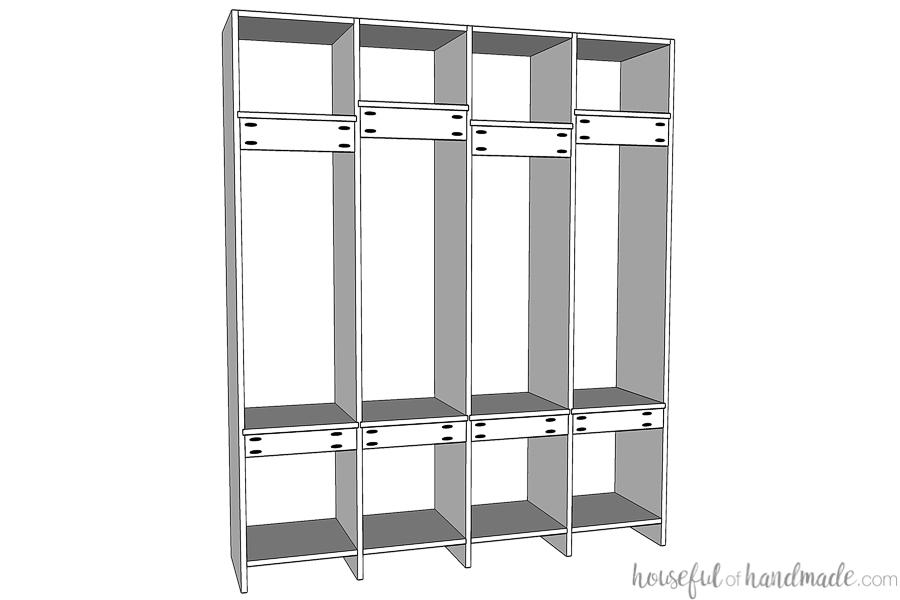
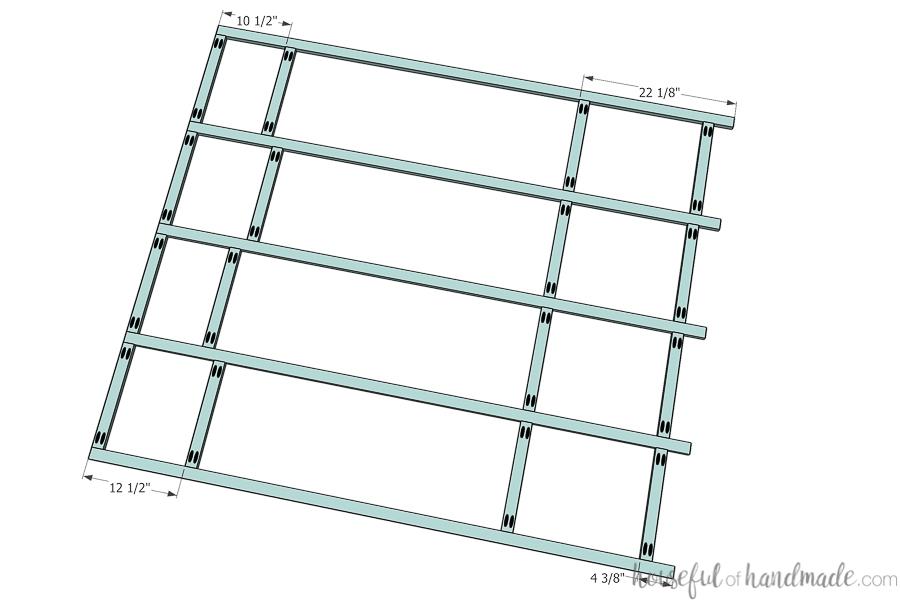
Build the face frame
Add pocket holes set for ¾” thick material to each end of all the face frame rail pieces. Attach them between the face frame stiles so they cover the front of the plywood. The rail in front of the upper shelf is raised ¼” and the rails in front of the middle and lower shelf are raised ⅛” to ensure the front of the plywood is covered.
-
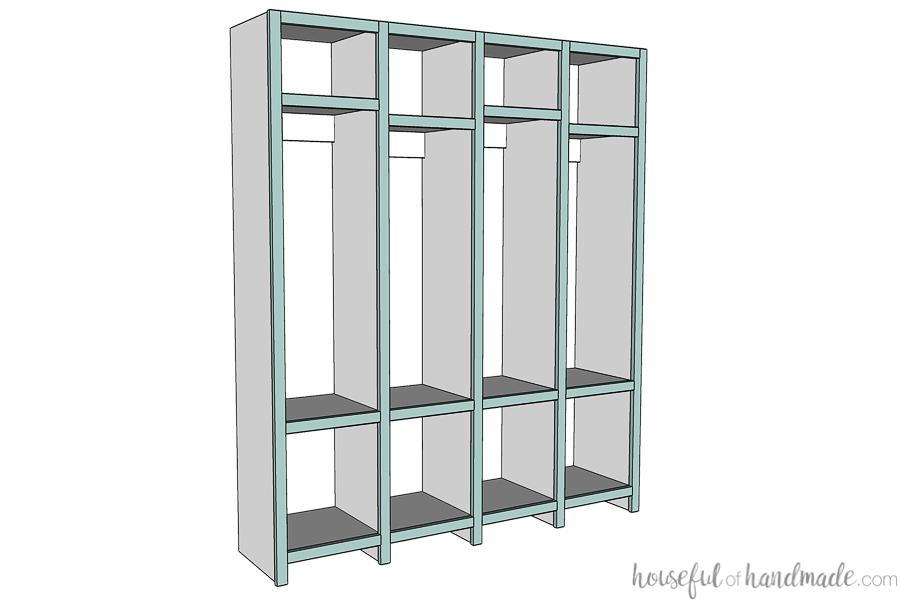
Attach the face frame
Line up the face frame to the cabinet. The frame should be flush with the top and bottom but it will hang over the edges approximately ⅜”. Attach with wood glue and 1 ¼” brad nails. Then use a flush cut bit on the router to remove the overhang on each side and cut the face frame flush with the cabinet. Since there is ⅜” to remove, take multiple passes removing a small amount each time.
-
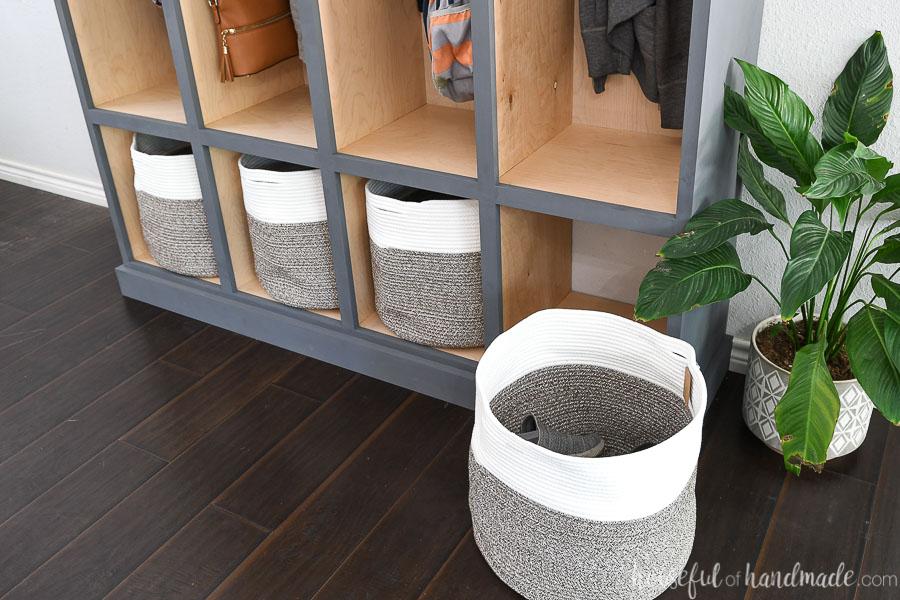
Attach the base
The cut list for the cabinet base is based on true ½” measurement and most plywood is slightly thinner. So measure the front of the cabinet once assembled, then cut the base to fit. Cut both ends of the base front at 45 degree angles and one end of the base sides at a 45 degree angle to give the base a mitered corner. Attach with wood glue and 1 ¼” brad nails.
-
Attach the back
Adding a back to the lockers is optional. If you are painting the cabinet, you can skip the back, attach it to the wall and paint the wall behind it to match. For a stained/wood cabinet, you will want to add a back panel to the hanging section of the lockers. Router a ¼” deep by ¼” wide groove around the center openings in the back. Place the back pieces in the groove and secure with ⅝” long brad nails.
-
Finish & install the lockers
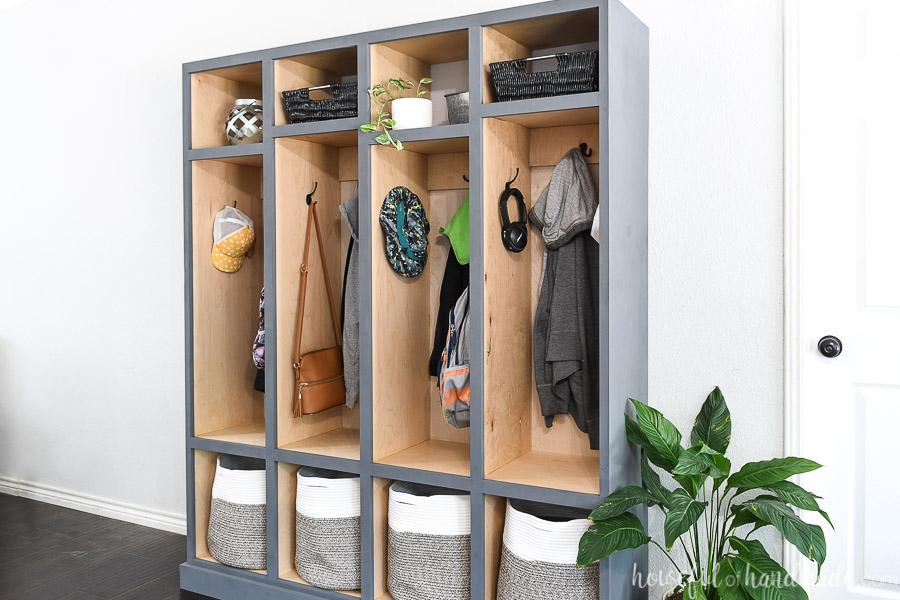
Sand and finish the mudroom lockers. If you want the inside a contrasting color to the outside (like I did my lockers), it is easier to finish the inside of the locker and paint the face frame before attaching, then you just have to touch up the face frame and paint the outside after flush cutting the sides. Attach the lockers to the wall into studs through the support pieces in the back.
-
Enjoy!
Install hooks on the back in the upper support piece and on the sides for hanging storage. Add baskets and bins to the cubbies for shoes and more. And make sure to visit me at Housefulofhandmade.com for more amazing DIYs for the home!