

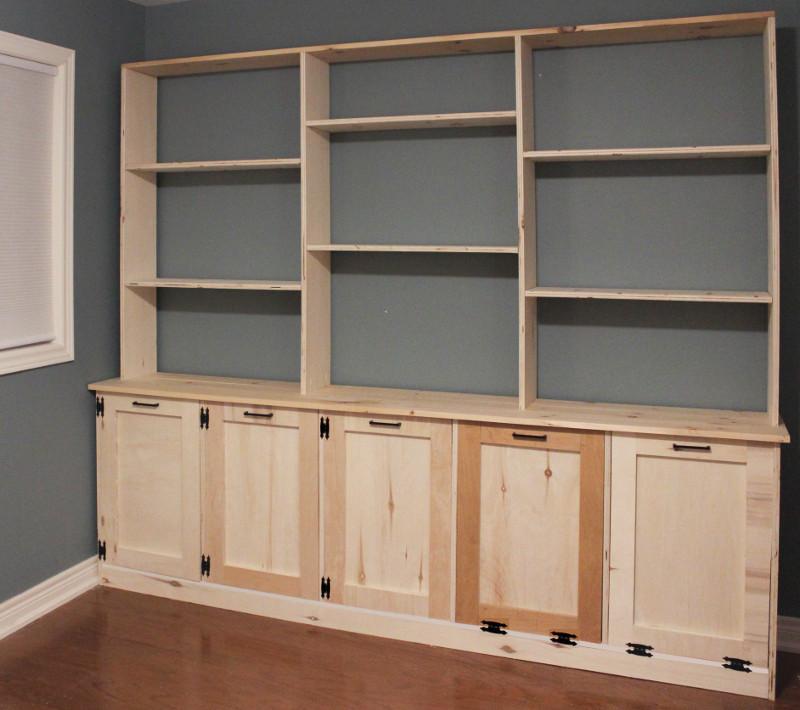
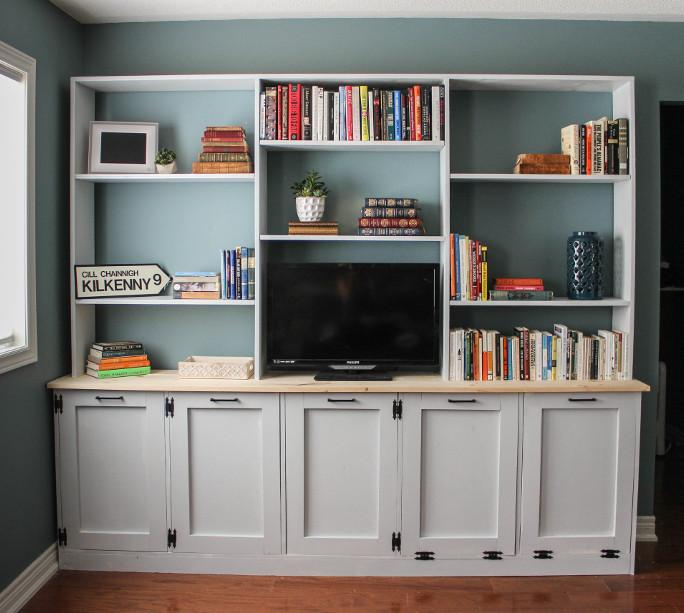


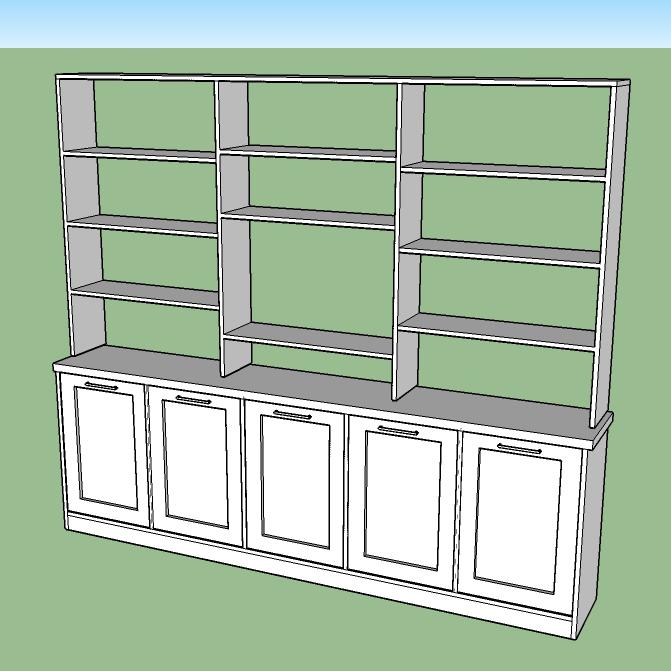
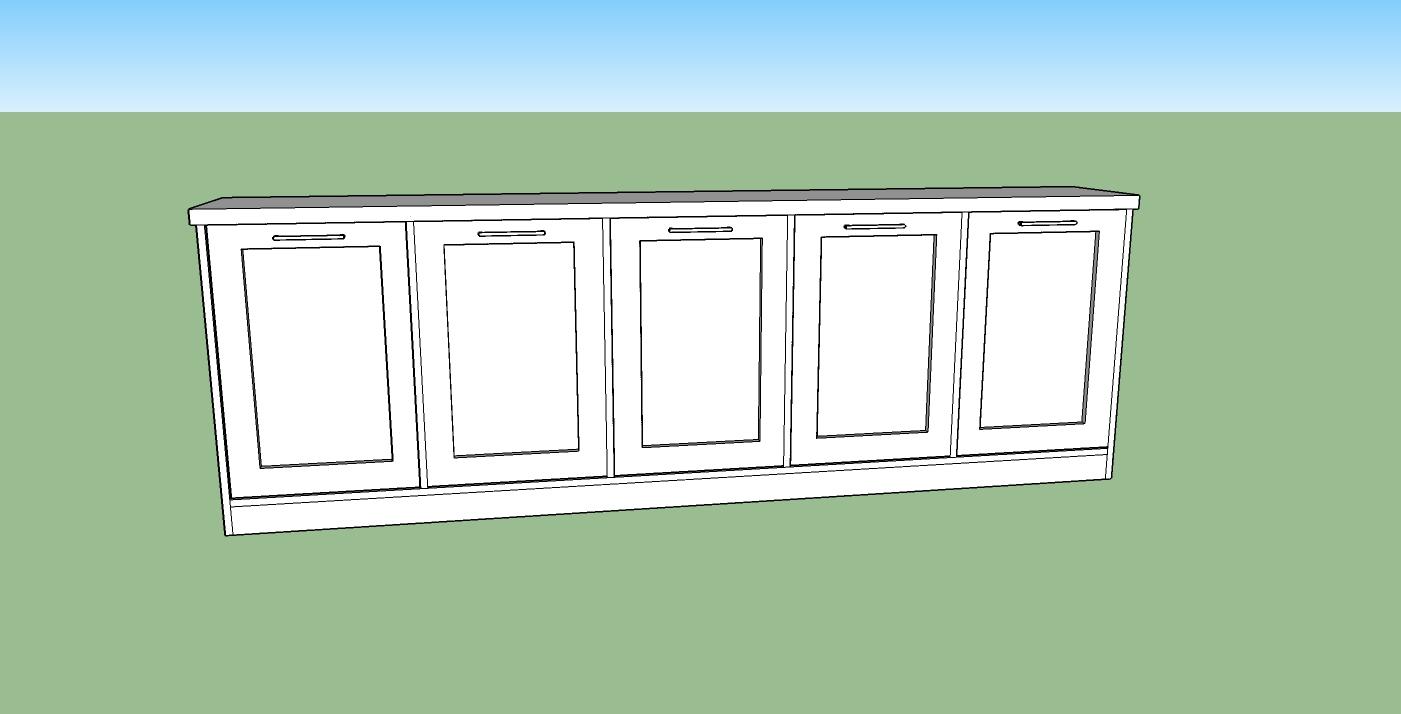
A large multi-function storage unit with open upper shelves, lower cabinets and two tilt-out laundry units.
Tools
Kreg Tools


Other Tools
-
Miter Saw

Materials
Wood Products
- 2 Plywood , 3/4" Thick , Full Sheet
- 1 Plywood , 1/4" Thick , Full Sheet
Hardware & Supplies
- 5 Hinges
- 5 Pulls
- 6 Shelf Pins (4 per shelf)
Directions
-
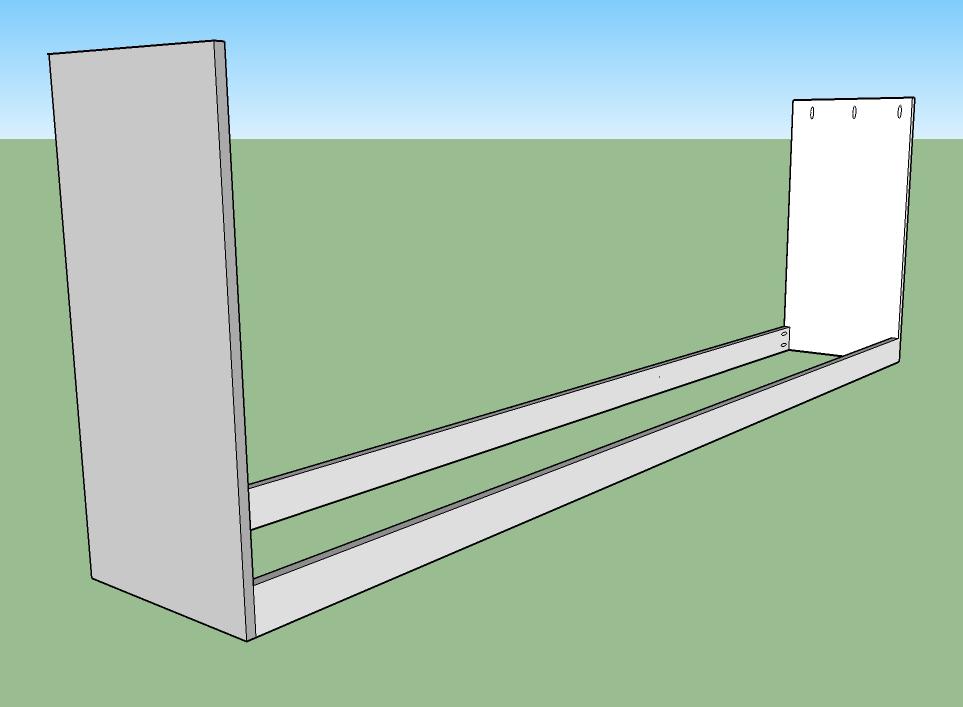
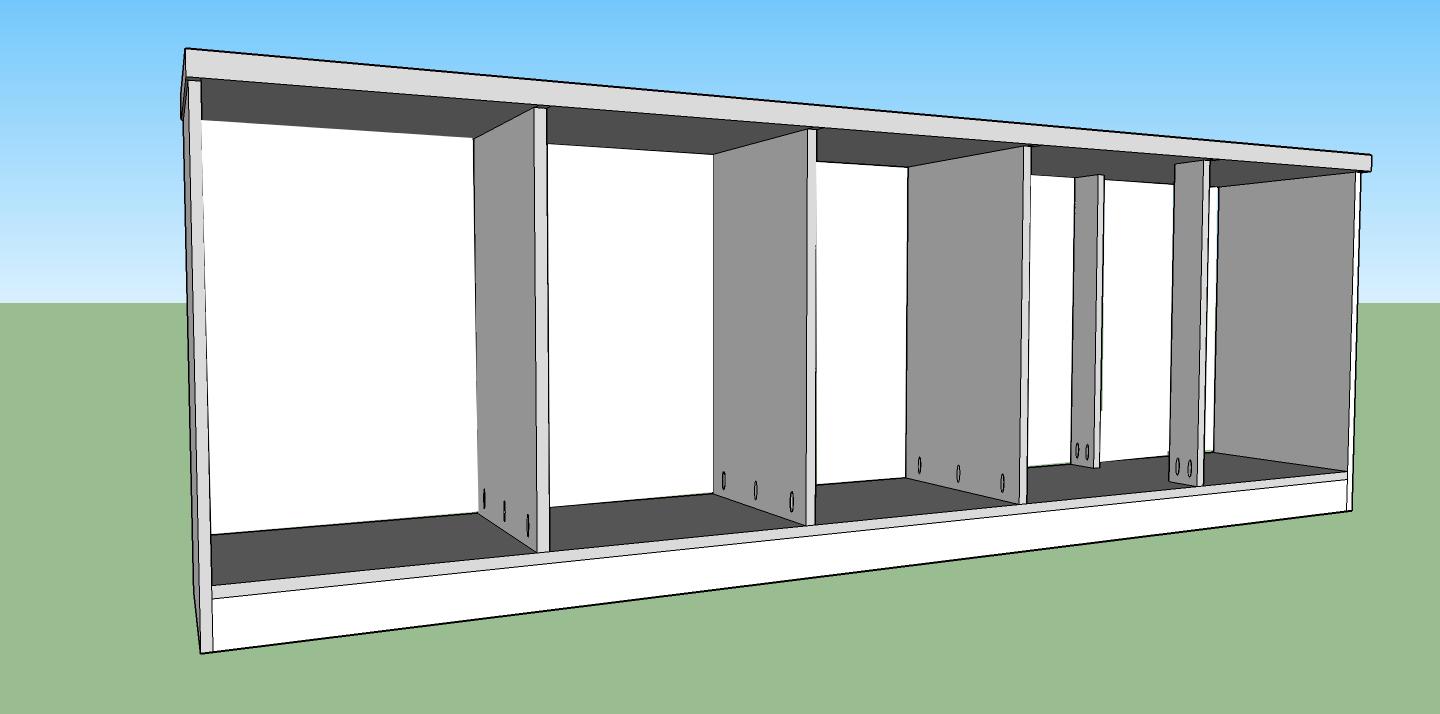
Create Base Frame
Attach front and back 3" toe kick boards to the base unit side pieces keeping the pocket holes to the inside of the unit.
-
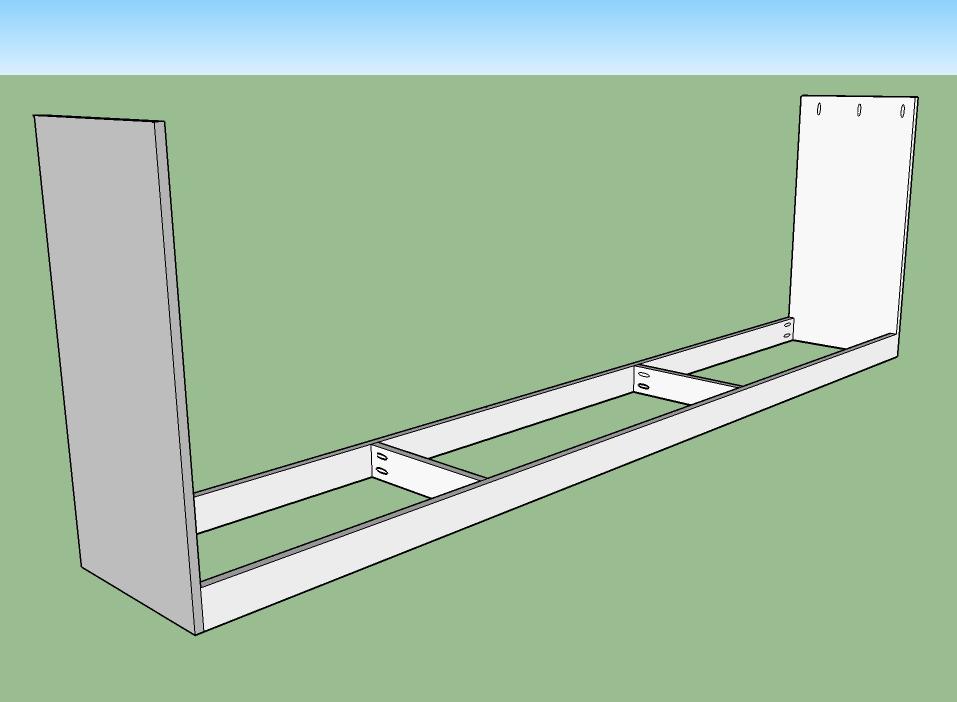
Install Support Braces
To add more support to the floor of the cabinet, install two brace pieces dividing into three equal sections.
-
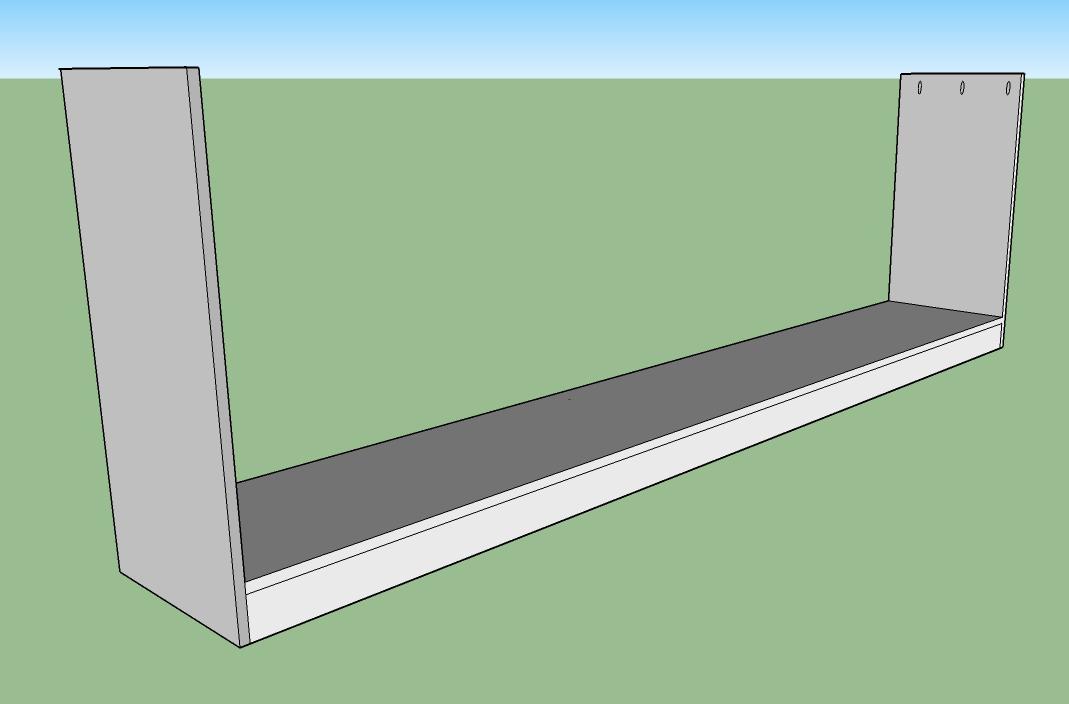
Install Bottom Shelf
Attach bottom shelf on top of the support pieces.
-
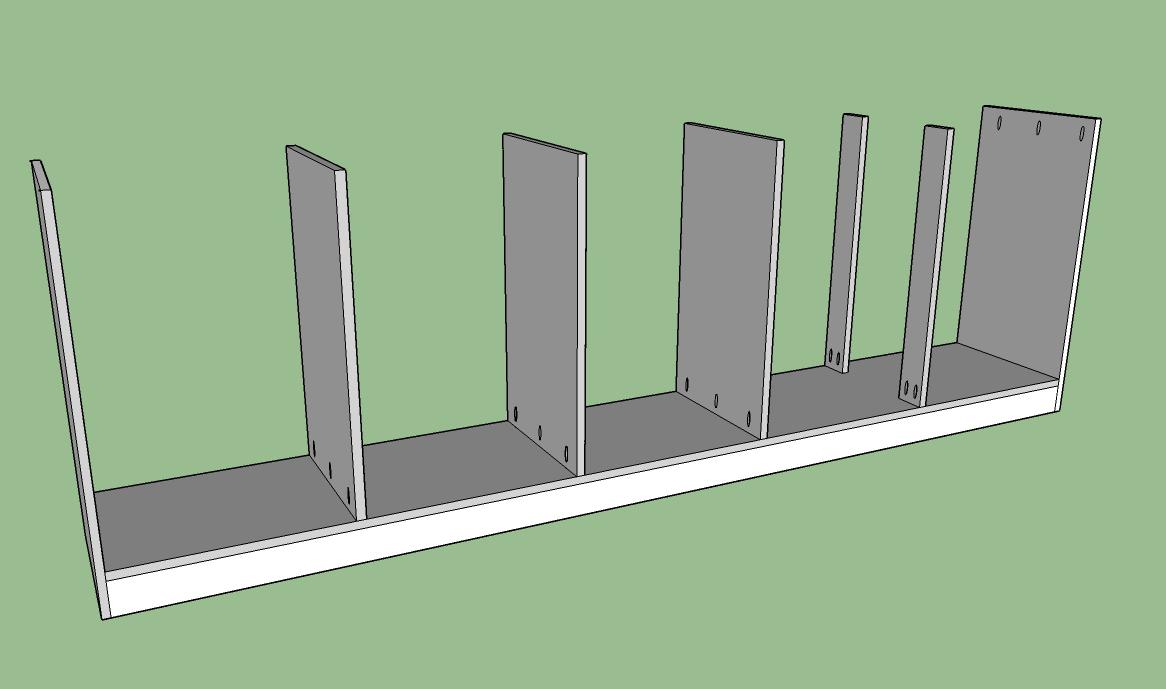
Install Cabinet Dividers
Install cabinet divider uprights equal distance apart down the length of the bottom shelf.
Use the 3" strip uprights between the two laundry units (where a full divider is not necessary). Adjust the width of your laundry units as needed to fit your baskets and divide the other three units equally.
-
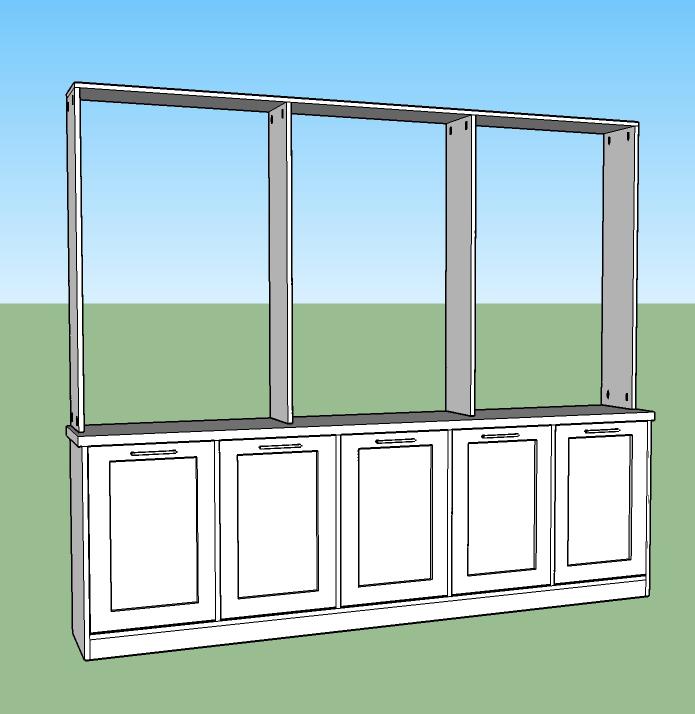
Install countertop
Fasten counter to the tops of the cabinet dividers using pocket hole screws in the top of the base unit uprights. Make sure to keep the uprights straight.

-
Add Backing
Attach 1/4" plywood backing to the back of the cabinet using nails.
-
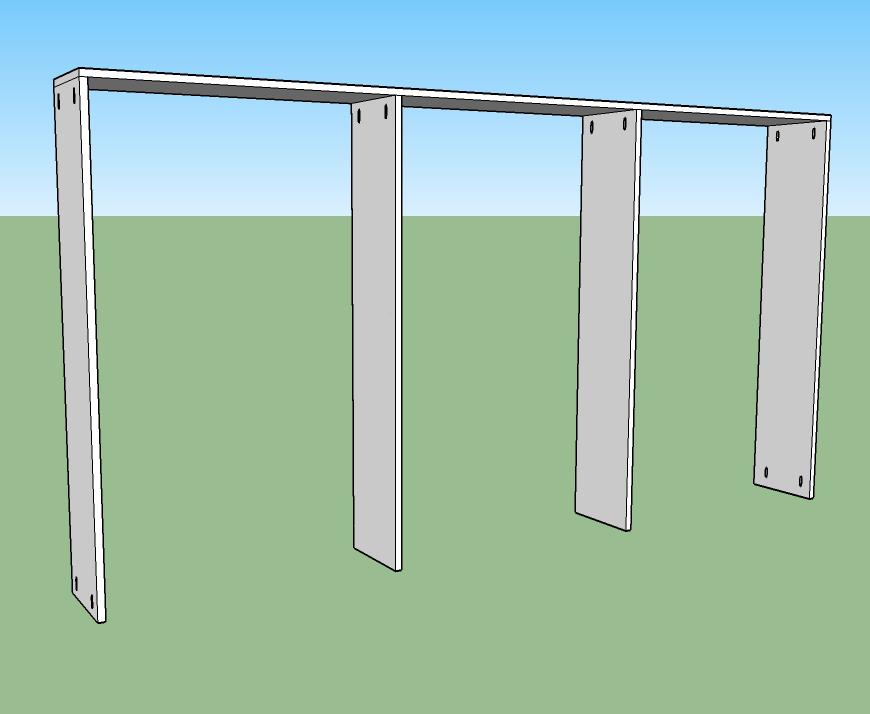
Assemble Upper Shelving Unit
Attach upper uprights to the top shelf using pocket hole joins.
-
Lift Upper unit and Attach to Base
With a partner, lift the upper shelving unit onto the base and attach making sure the uprights are straight.
-
Drill Holes for Shelf Pins
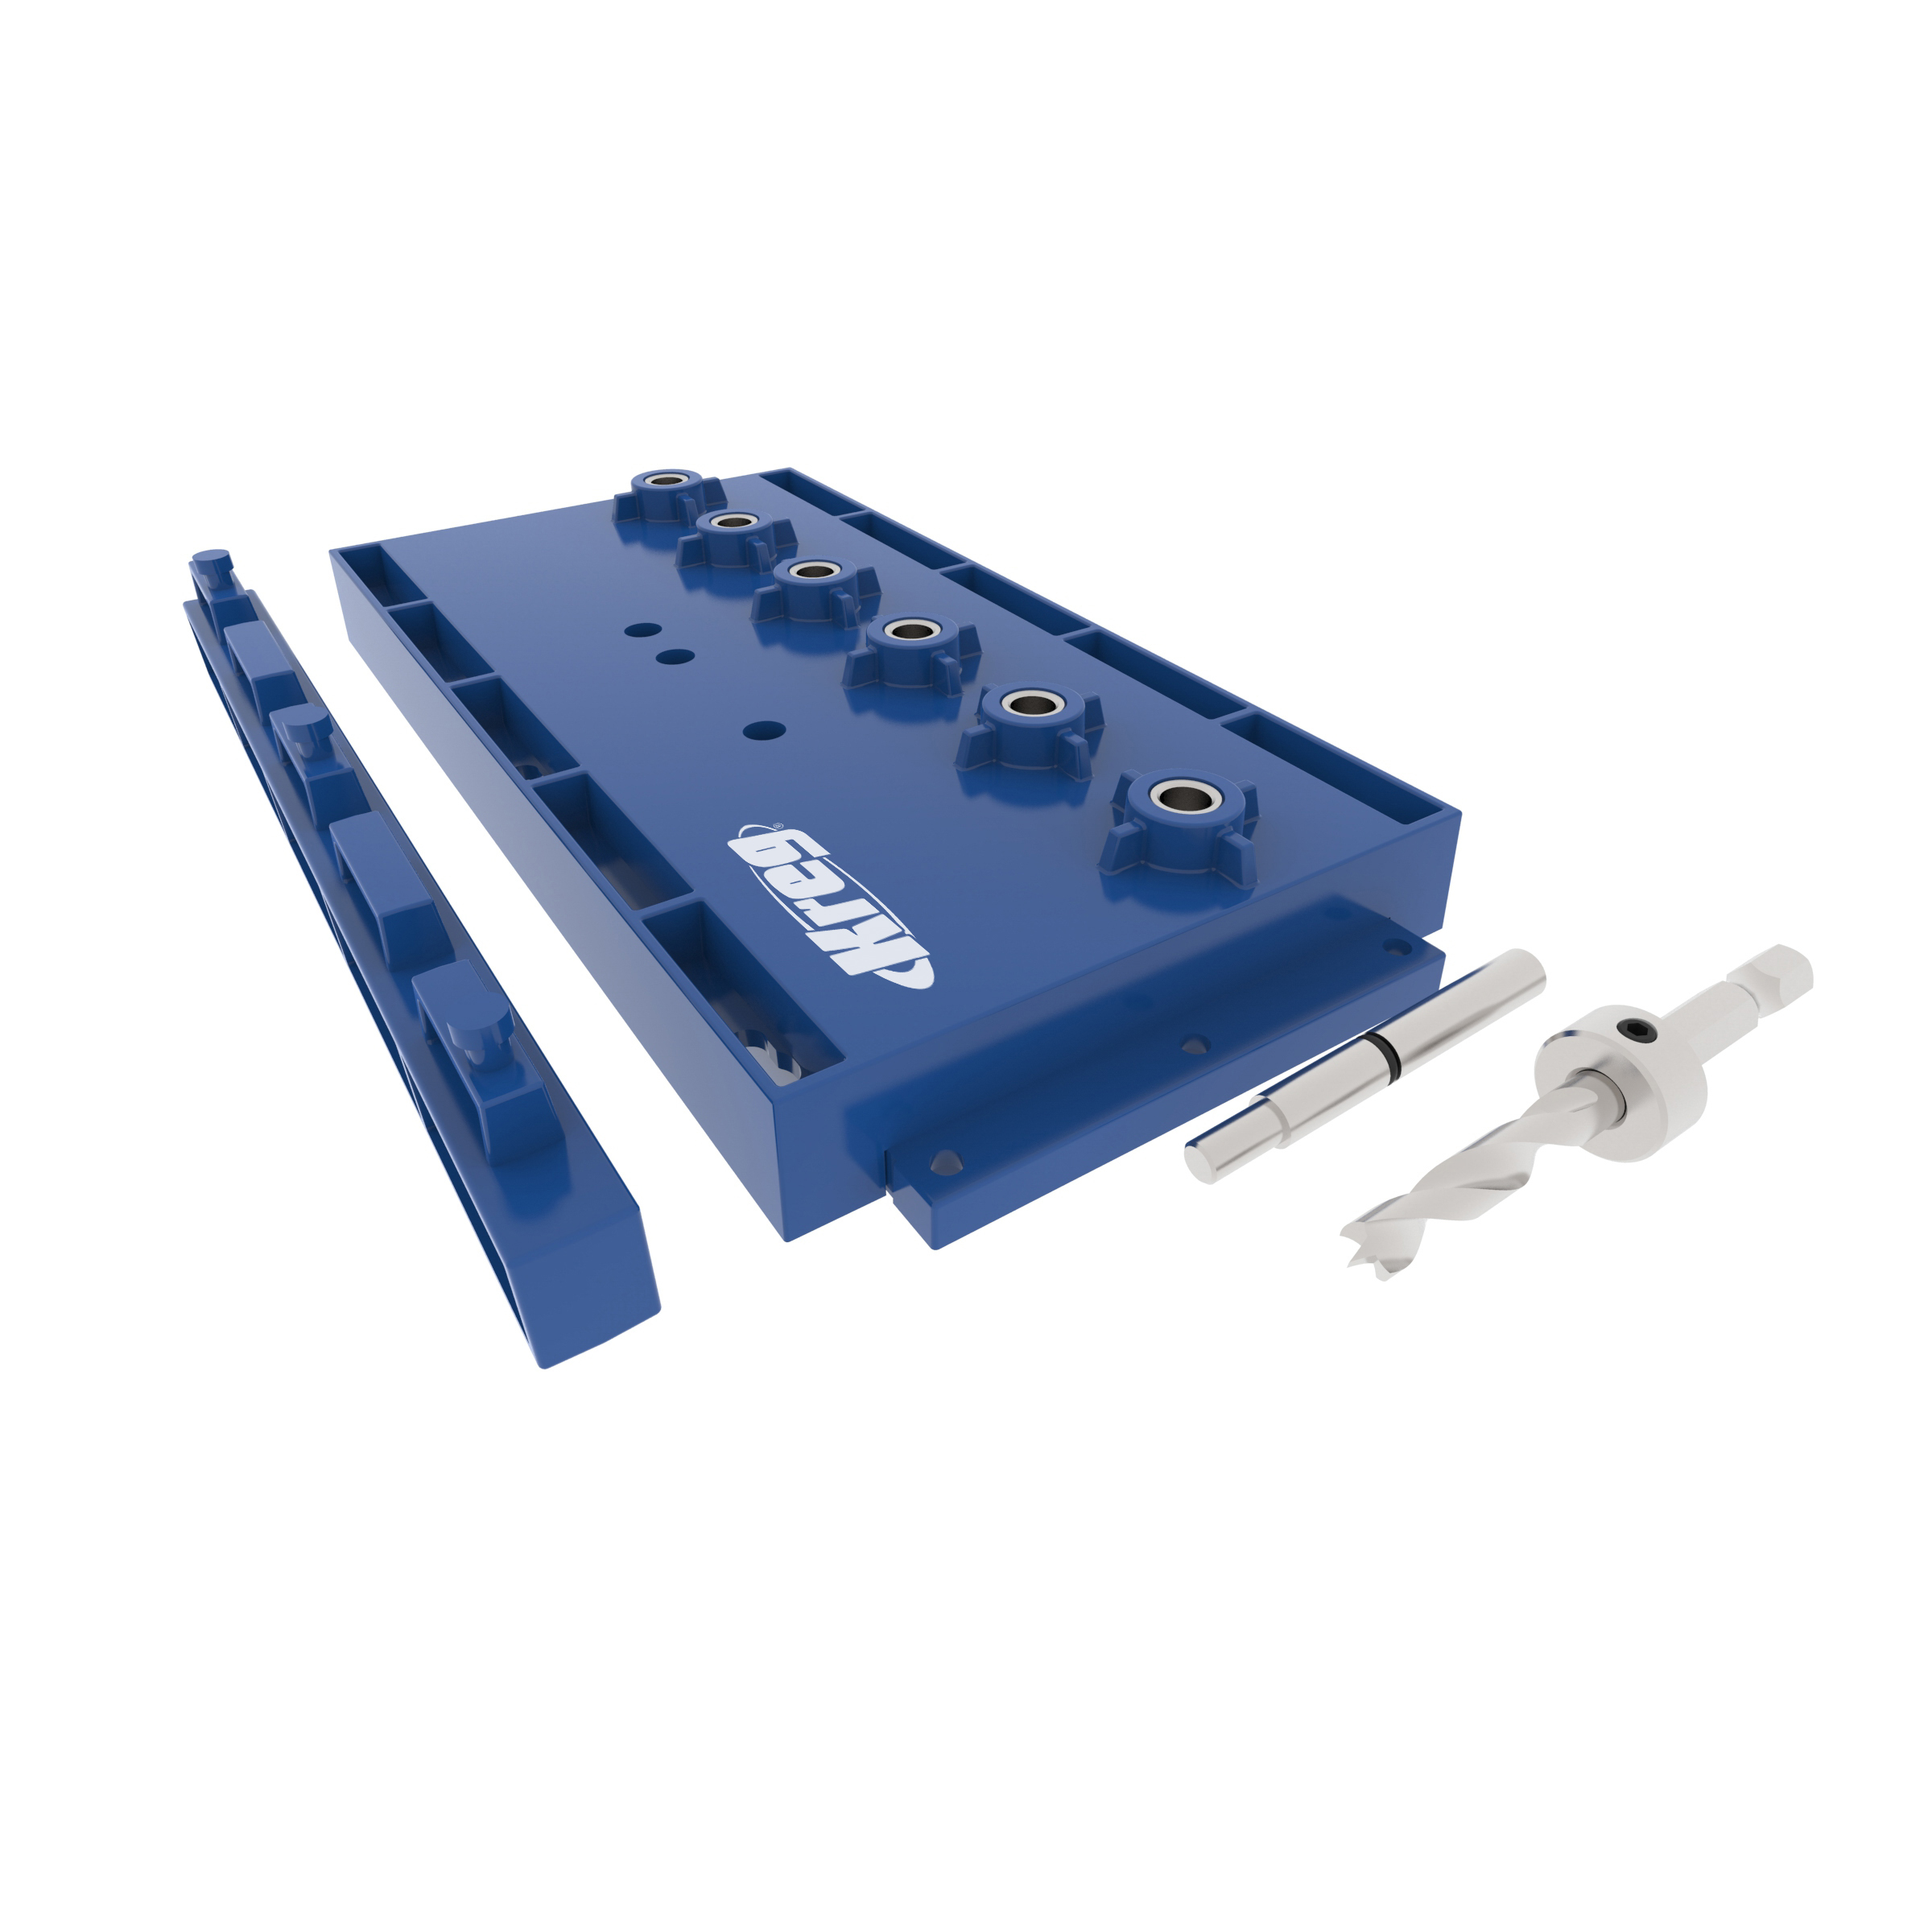
Determine your ideal spacing and using the Kreg jig to drill holes for your shelf pins and then add shelves.
-
Assemble Cabinet Doors
Using your favourite method, make doors for each of your cabinet sections (five in total).
-
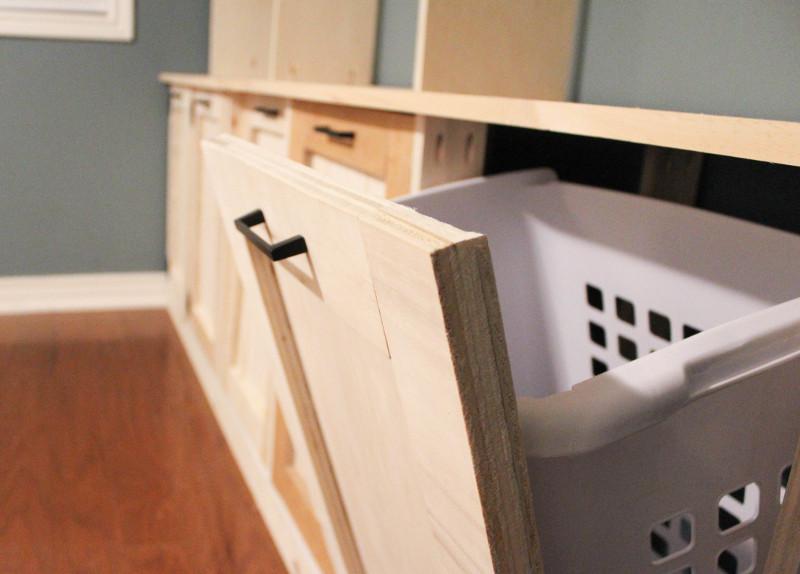
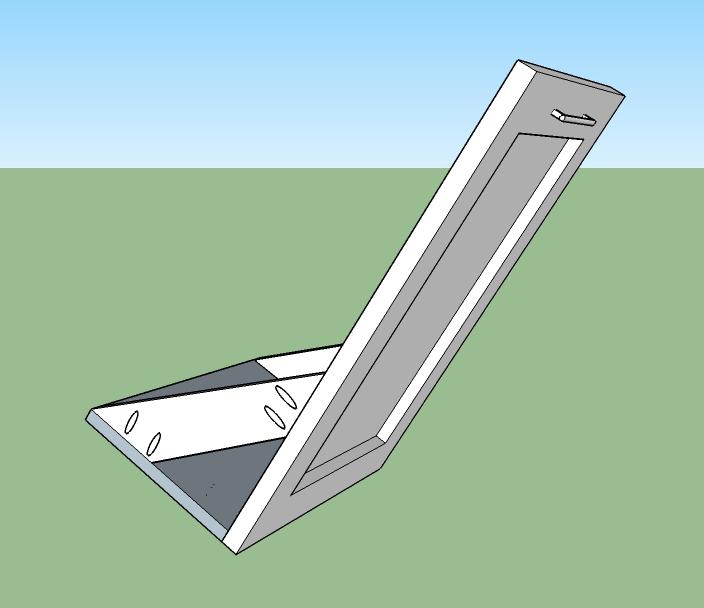
Build Tilt-Out Laundry Units (2)
Attach laundry unit base to the bottom of the door. Add extra supports using two 3" pieces cut on the diagonal.
-
Install Cabinet Doors
Install your three regular cabinet doors using the hinges of your choice. Install the hinges for the laundry units to the base unit at the bottom of the doors instead of at the side. Small pieces of chain can be added at the sides to prevent the laundry units from falling forwards.
-
Make Cuts and Prepare Pocket Holes
Using the cut list provided make all necessary cuts. Use the Kreg Pocket Hole Jig to add pocket holes to all pieces as indicated in the diagrams.
For the base unit dividers and shelving uprights I like to drill my pocket holes on the opposite sides of the boards at the top and bottom. With the exception of the end boards which should always have the pocket holes on the inside.