Rustic Sliding/Barn Door
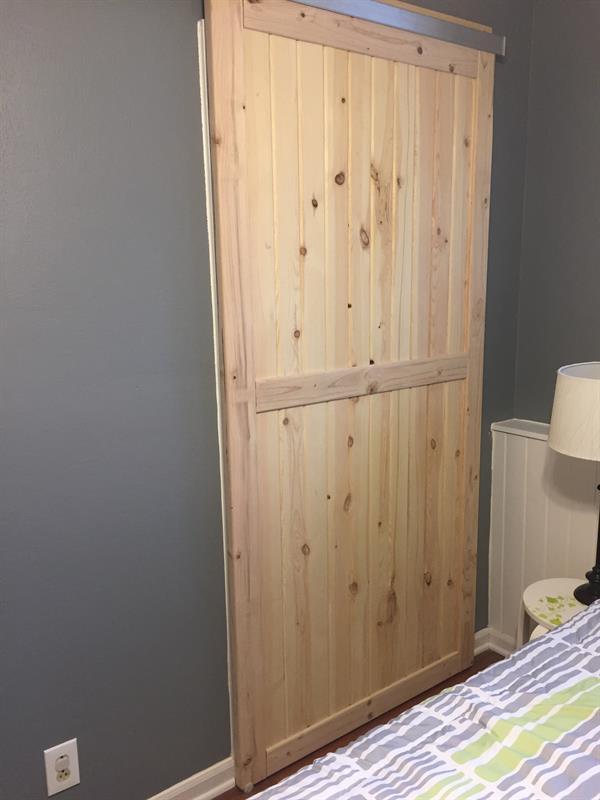
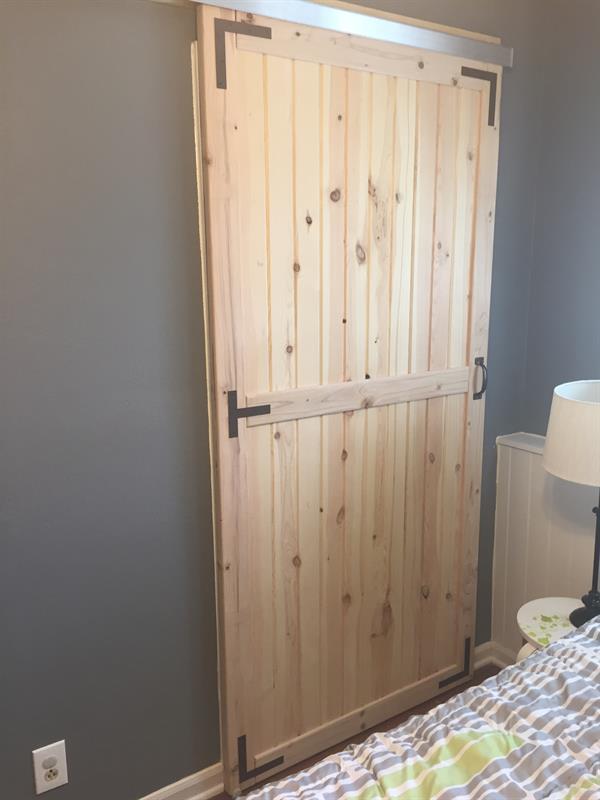
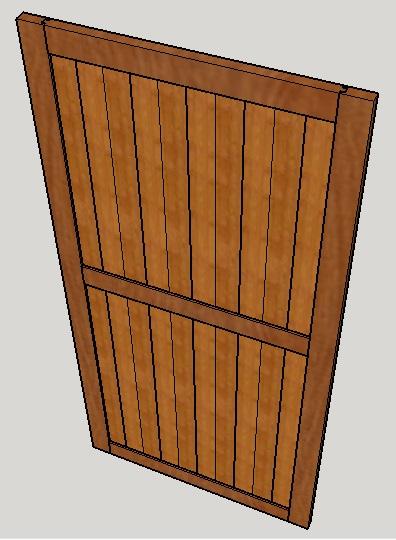
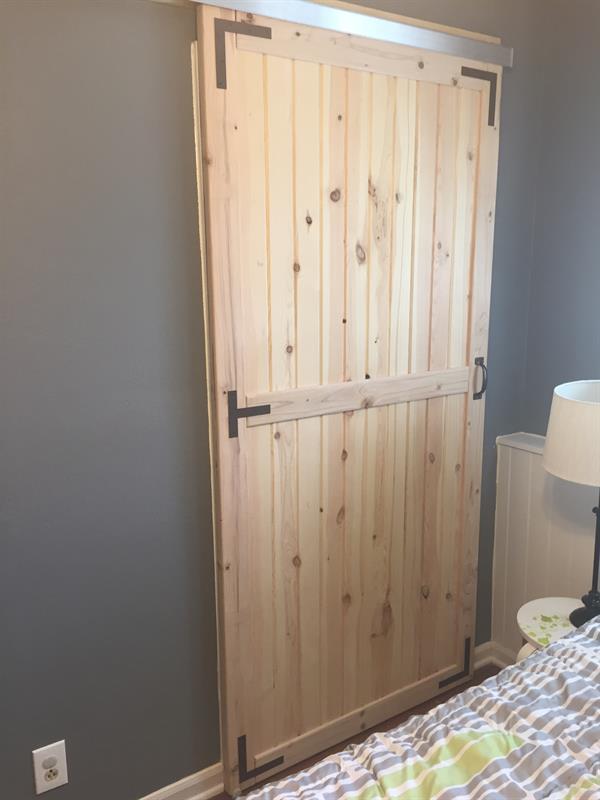
By fryguyA sliding door is a great option, especially when space is tight. This plan shows you one way to build a rustic style door. Finish and trim to blend with your décor and you'll have a great looking custom door that will add lots of character to your house!
Directions
-
Cut Frame Rails and Stiles
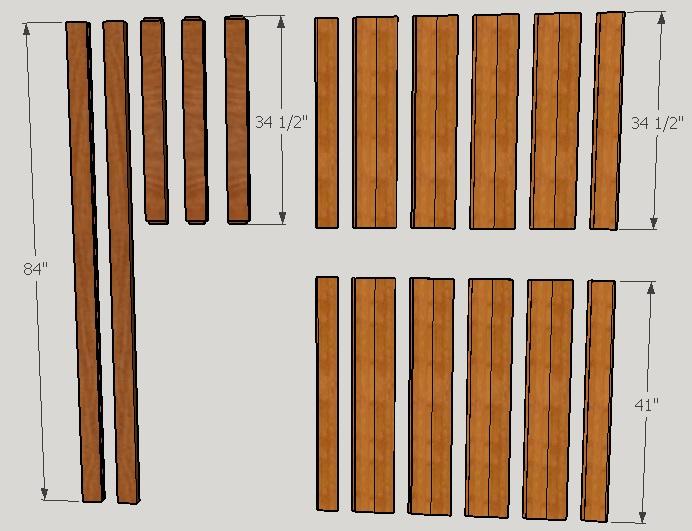
Using the cut list, cut the frame rails and stiles to length from the 2x4 stock.
-
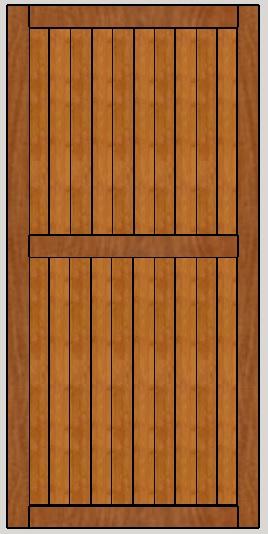
Router Grooves into Frame
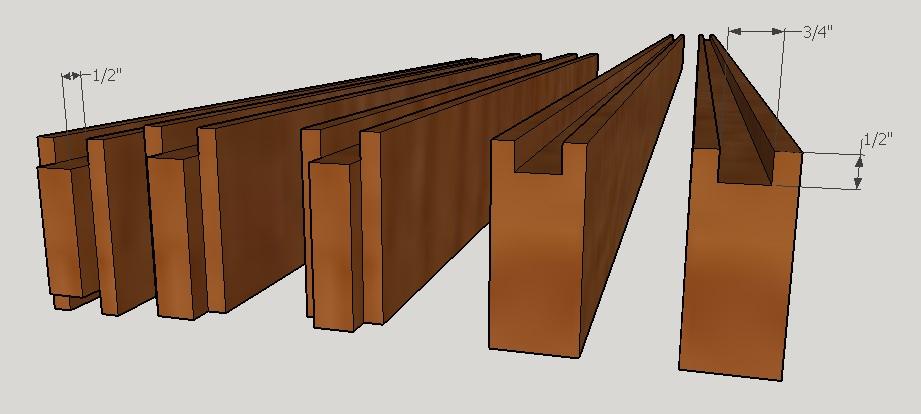
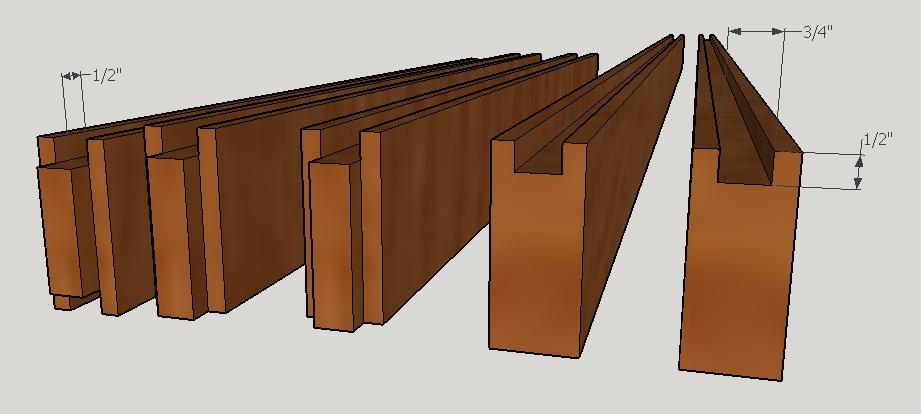
Once the frame components have been cut to length, use a router to cut a 3/4" wide by 1/2" deep groove into the frame components as shown. Note that the Middle Frame Rail will have a groove in both edges, where all other Frame components will have a groove in only one edge. Use a 1/2" straight cut router bit. This is best accomplished by setting your router bit cutting edge 3/8" from the fence and the depth to 1/4". Make one pass on each side (left and right) to get a 3/4" wide x 1/4" deep groove on all components. Then set final depth to 1/2" and make a second pass to complete the cuts. Use a scrap piece to test your settings. The wood plank panels will need to fit in the groove, so test and adjust as necessary.
-
Router Tongues into Frame Rails
All 3 Frame Rails (top, middle, and bottom) will need to have tongues on both ends so they fit tightly into the grooves of the Frame Stiles. The tongues will be 3/4" wide x 1/2" deep. Use the same 1/2" straight cut router bit and set your depth to 3/8" and set your cutting edge even with the fence. Test your cut on a scrap piece of wood to make sure you have a good fit before making the final cuts.
This is a great time to sand the Frame components.
-
Cut Bottom Panels to Length
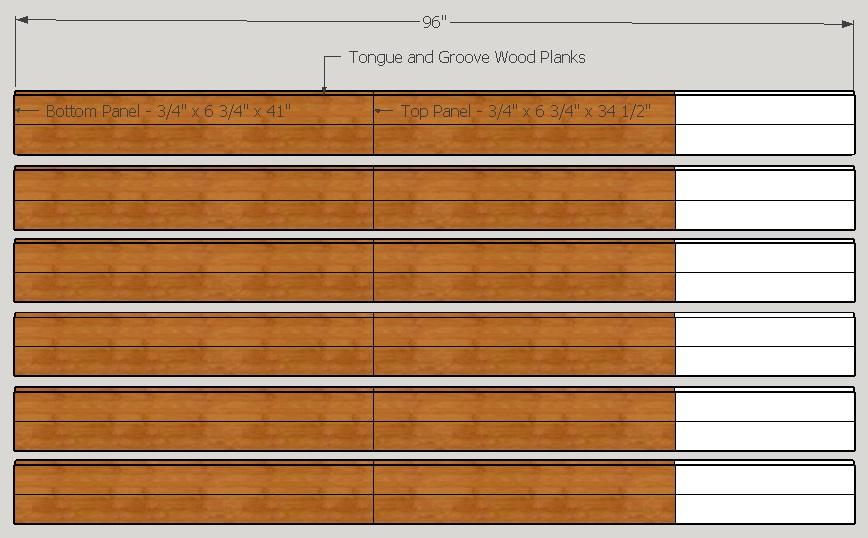
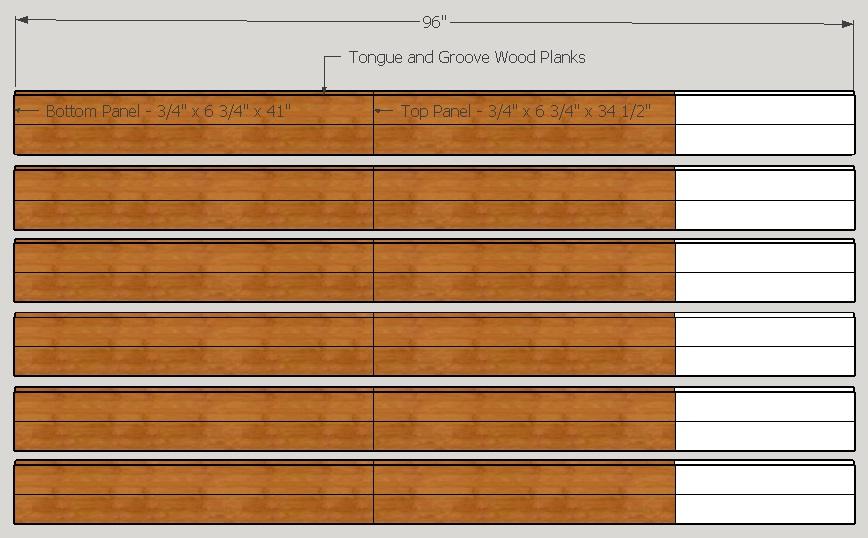
Using the cut list, cut your bottom panels to length from the tongue and groove wood planks.
-
Assemble the Bottom Panels
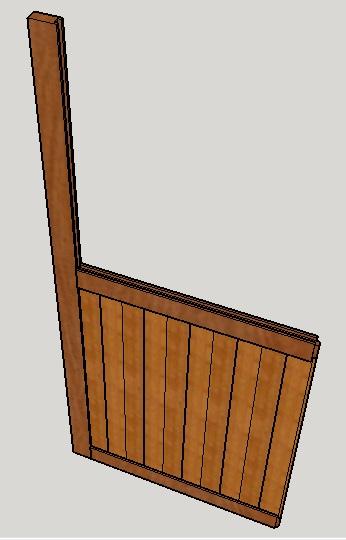
Once you get the bottom panels cut to length and width, assemble them along with the Left Frame Stile, Bottom Frame Rail, and Middle Frame Rail. You will likely have to use a rubber mallet to tap them into place. I started by sliding the assembled panels into the Left Frame Stile and then tapping the Bottom Frame Rail on, followed by tapping the Middle Frame Rail on. You can also slide the panels in one at a time and tap them into place. You'll have to find what works best for you.
-
Cut Top Panels to Length
To get the final length of your top panels, slide the Top Left Panel into the Left Frame Stile and Middle Frame Rail. Assuming the depth of your grooves are 1/2", it will need to be 3" shorter that the end of the Left Frame Stile to allow for the Top Frame Rail to slide into place.
-
Assemble the Top Panels
Duplicate the steps taken to assemble the bottom panels to assemble the top panels, sliding them into the Left Frame Stile, Middle Frame Rail, and Top Frame Rail. At this point you will also slide on the Right Frame Stile.
-
Glue Right Side
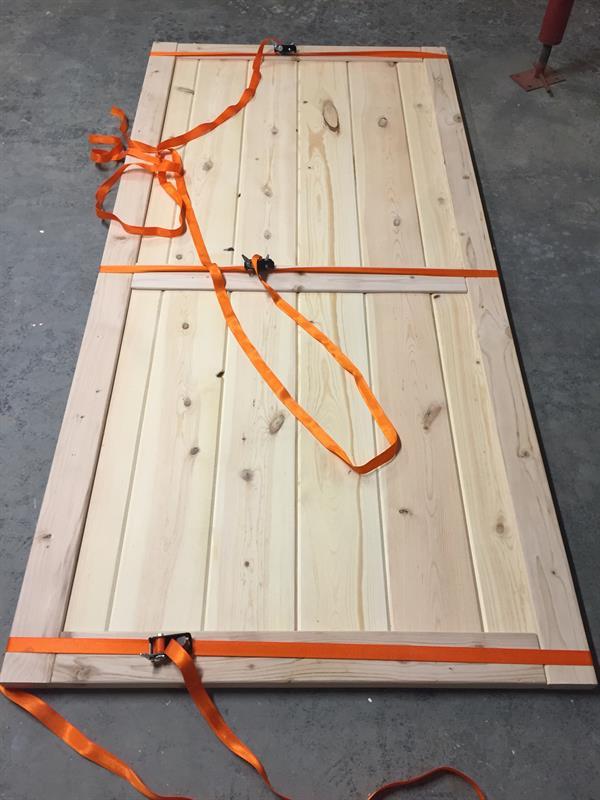
After checking final fit, remove the Right Frame Stile and apply wood glue to the entire groove and to the tongues and ends of the panels. Slide the Right Frame Stile back on and use either banding straps or clamps to hold in place. Check square and make any adjustments using a rubber mallet and then tighten the clamps. Let dry overnight.
-
Glue Left Side
Remove the straps/clamps and slide the Left Frame Stile off. Apply wood glue to the entire groove and to the tongues and edges of the panels. Slide the Left Frame Stile back on and clamp/strap tightly. Let dry overnight.
-
Final Sanding
Do a final sanding and wipe with a sticky cloth to remove any dust.
-
Finish As Desired
I left mine unfinished, but applied a door handle and some trim pieces to fit with the décor of the house, but you can also paint or stain as desired at this point.
-
Hang the Door
There are a lot of sliding/barn door hardware options available. After you find one that you like, follow the instructions from the manufacturer to hang the door.
-
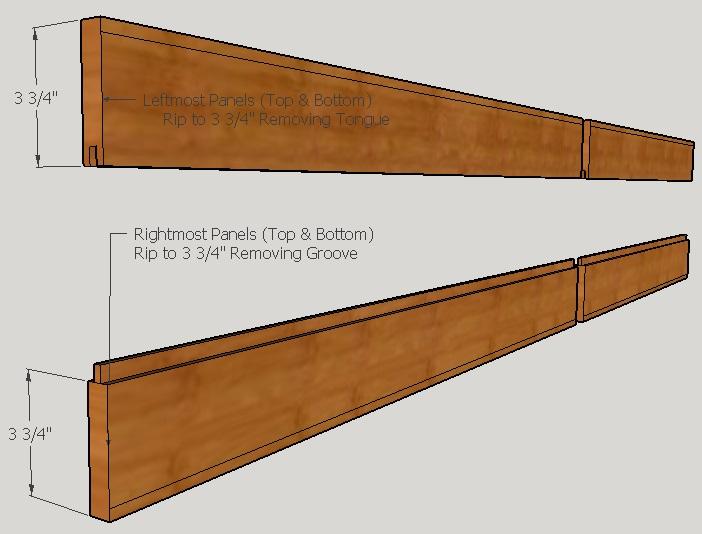
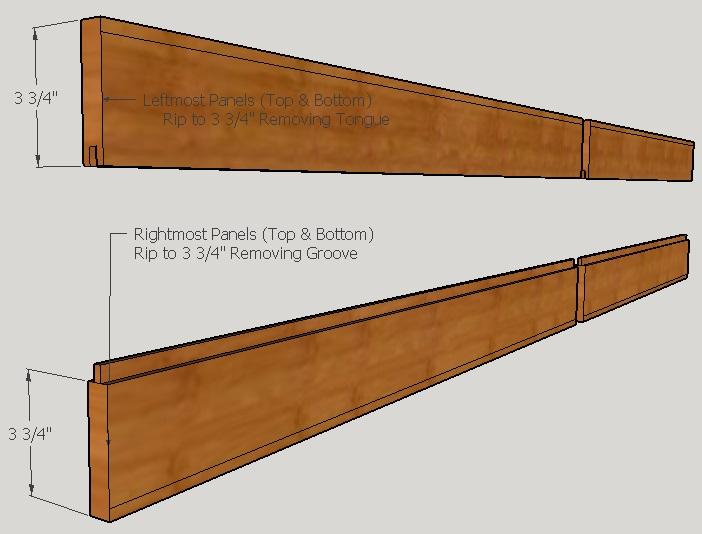
Cut Left and Right Panels to Width
I recommend putting the cut bottom panels together tightly (sliding the tongues into the grooves), and then setting the Bottom Frame Rail centered on top to get your final panel width. Mark the left and right panels at the end of the tongue on each end of the rail and cut to width using the table saw. You may want to cut them 1/16" short on each side to account for any bowing that may be present.
I recommend cutting the respective top panels to the same width at the same time since you'll have the table saw already setup for each cut.
This is a great time to sand the top and bottom panels.
-
Determine the Dimensions
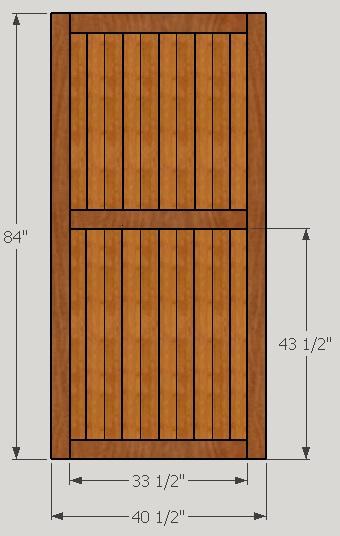
My specific door is 40 1/2" wide by 84" tall, but you should measure the dimensions of your door opening to customize these plans for your specific needs. I went from the outside edges of the door trim to get my width and wanted to go a few inches above the top of the trim. Just remember to leave at least a 1/2" gap between the bottom of the door and the floor, depending on the type of flooring.


