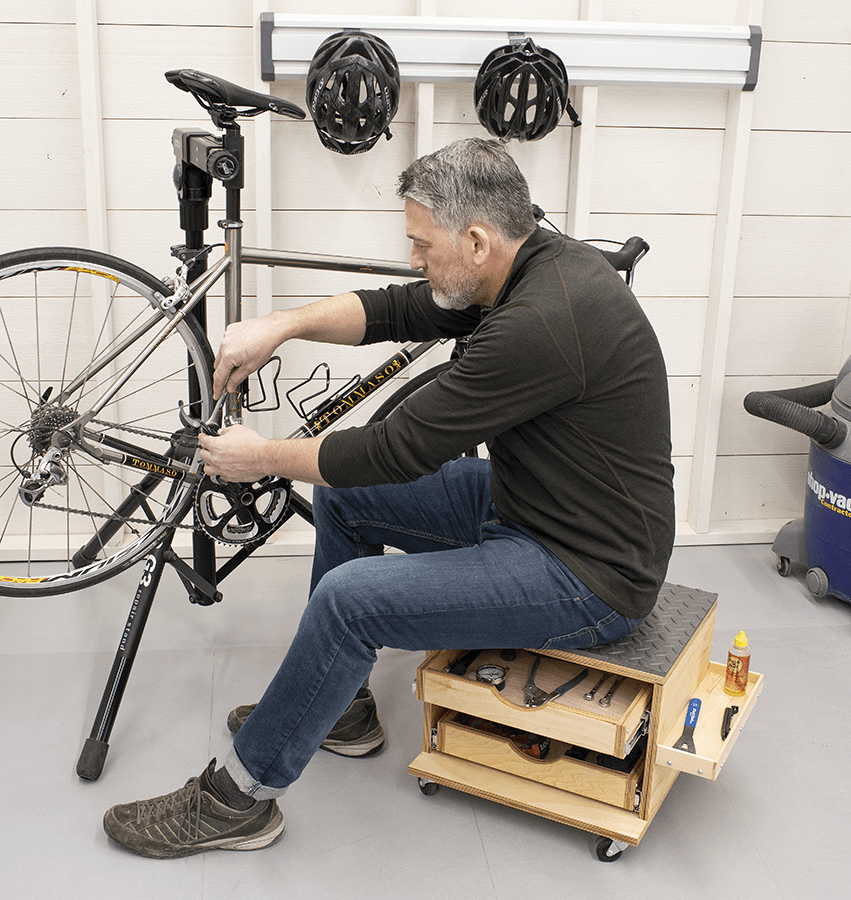
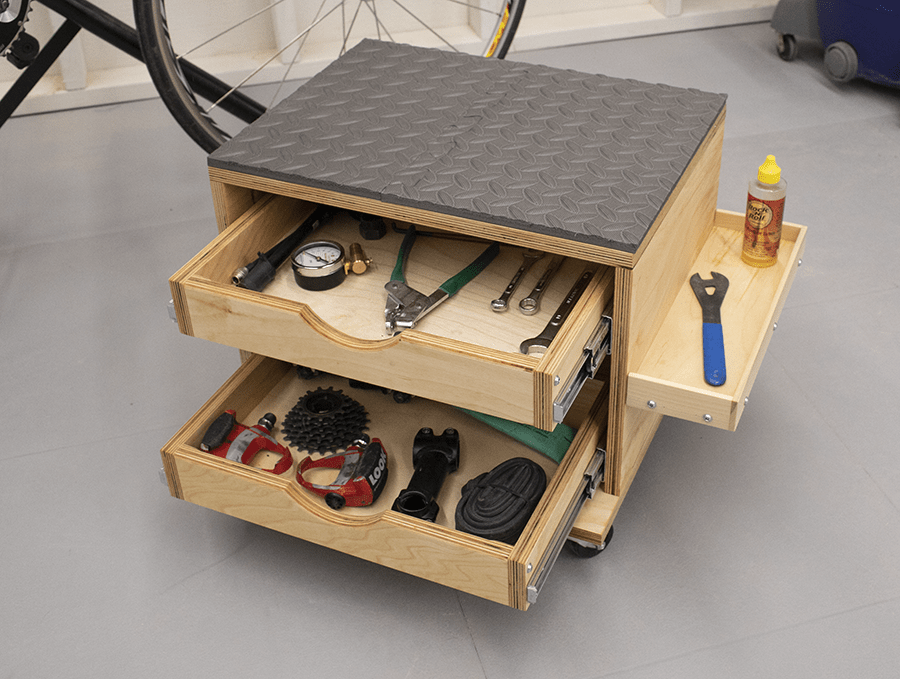
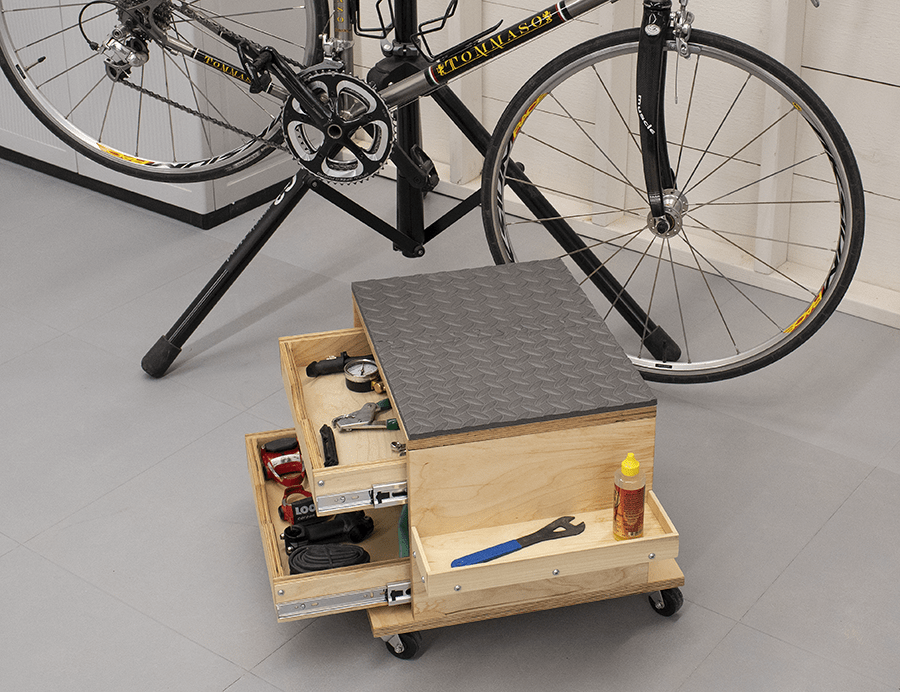
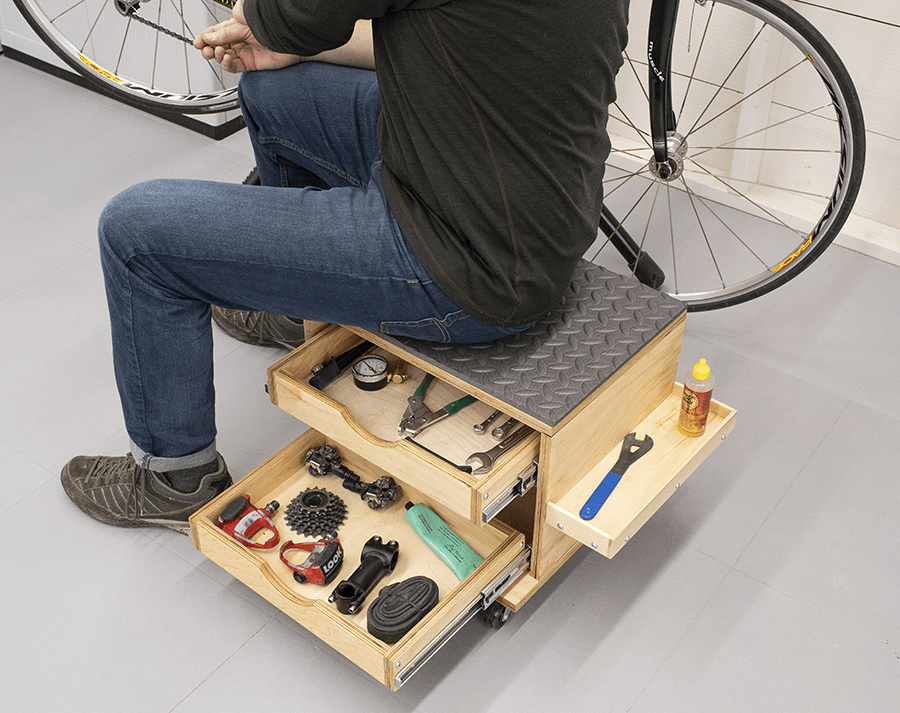
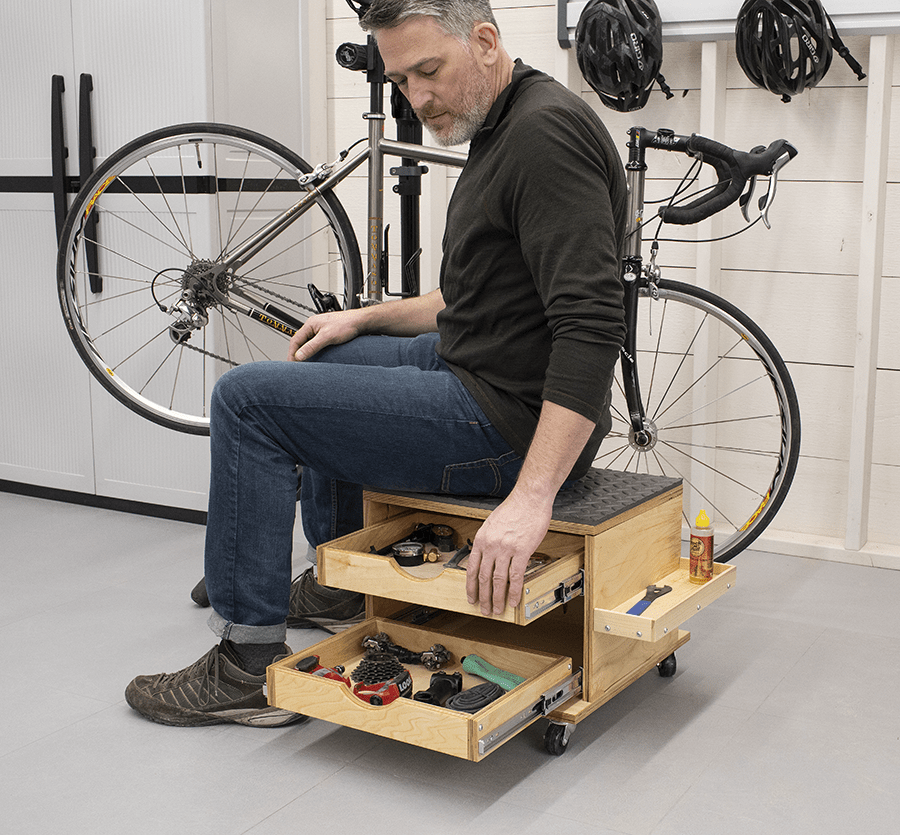


Whether you’re building a DIY project or working on something else, sometimes it’s great to have a place to sit while you work. This rolling work seat lets you work in comfort and still move around easily, it offers storage drawers and a small shelf to hold the tools and supplies you need.
Tools
Kreg Tools


Other Tools
-
tape measure

Materials
Wood Products
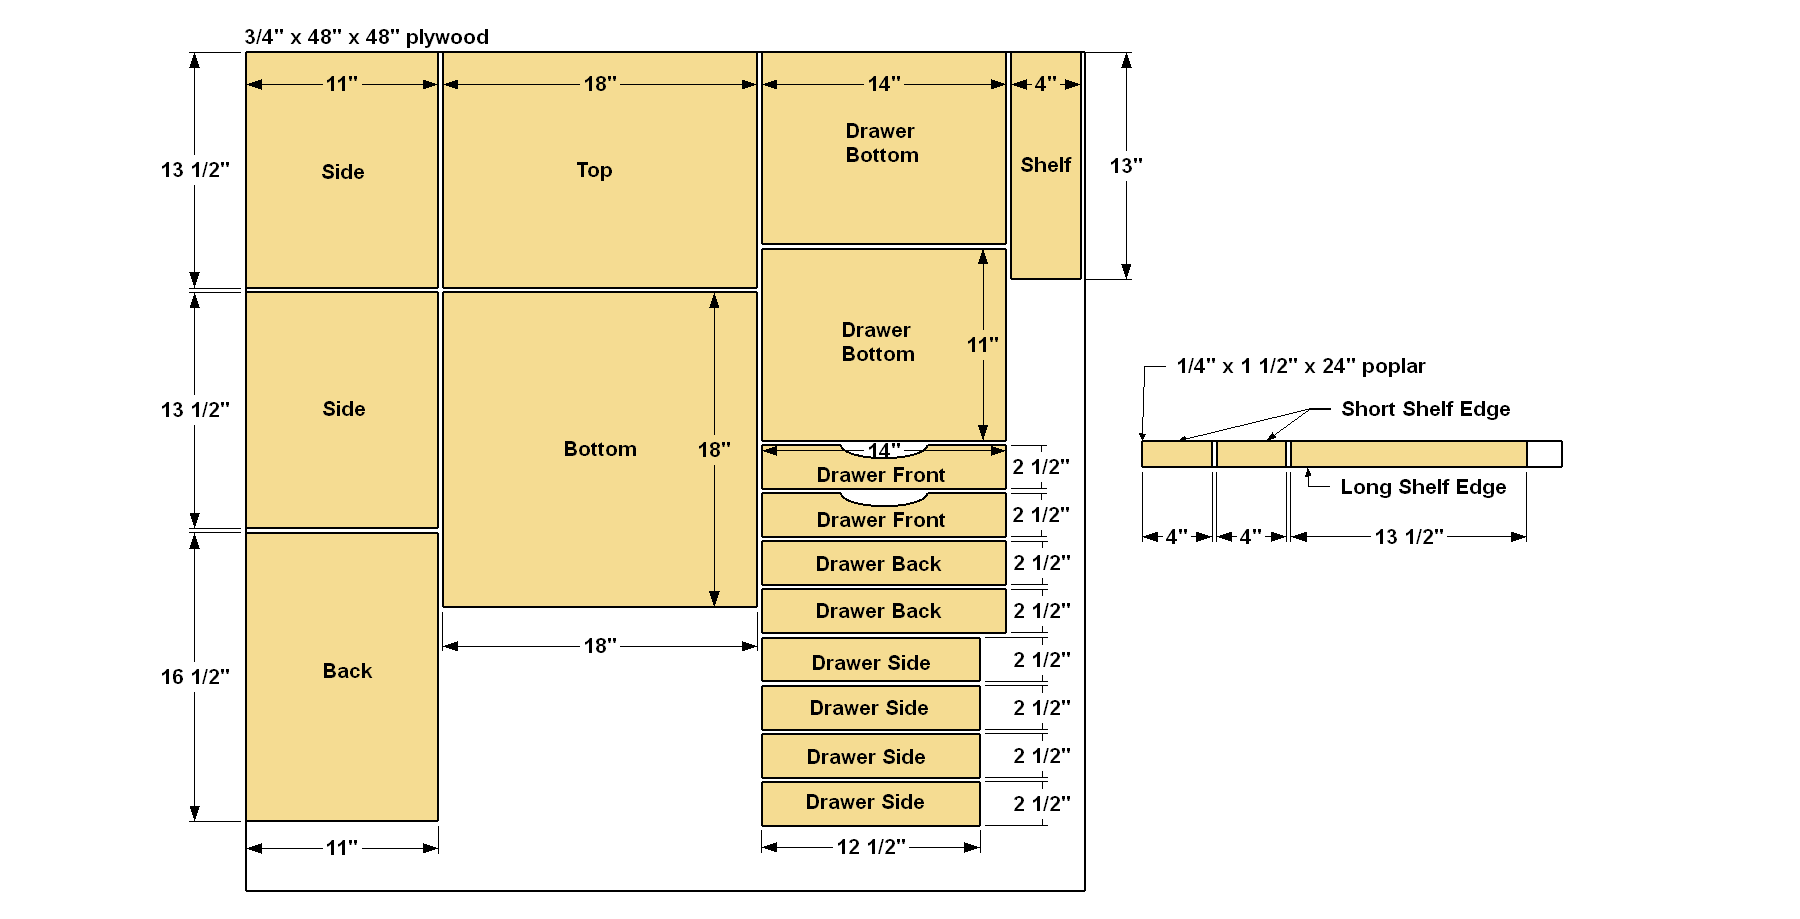
- 1 Plywood , 3/4" x 48" x 48"
- 1 Board , 1/4" x 2" (1 1/2" actual width) x 24"
Hardware & Supplies
- 53 1 1/4" coarse-thread Kreg Pocket-Hole Screws
- 1 Wood glue
- 2 Pair of 12" full-extension drawer slides
- 4 2" swivel casters
- 16 #10 x 3/4" panhead screws
- 1 Foam floor mat (or equivalent for seat)
- 1 Spray adhesive
Cut List & Parts
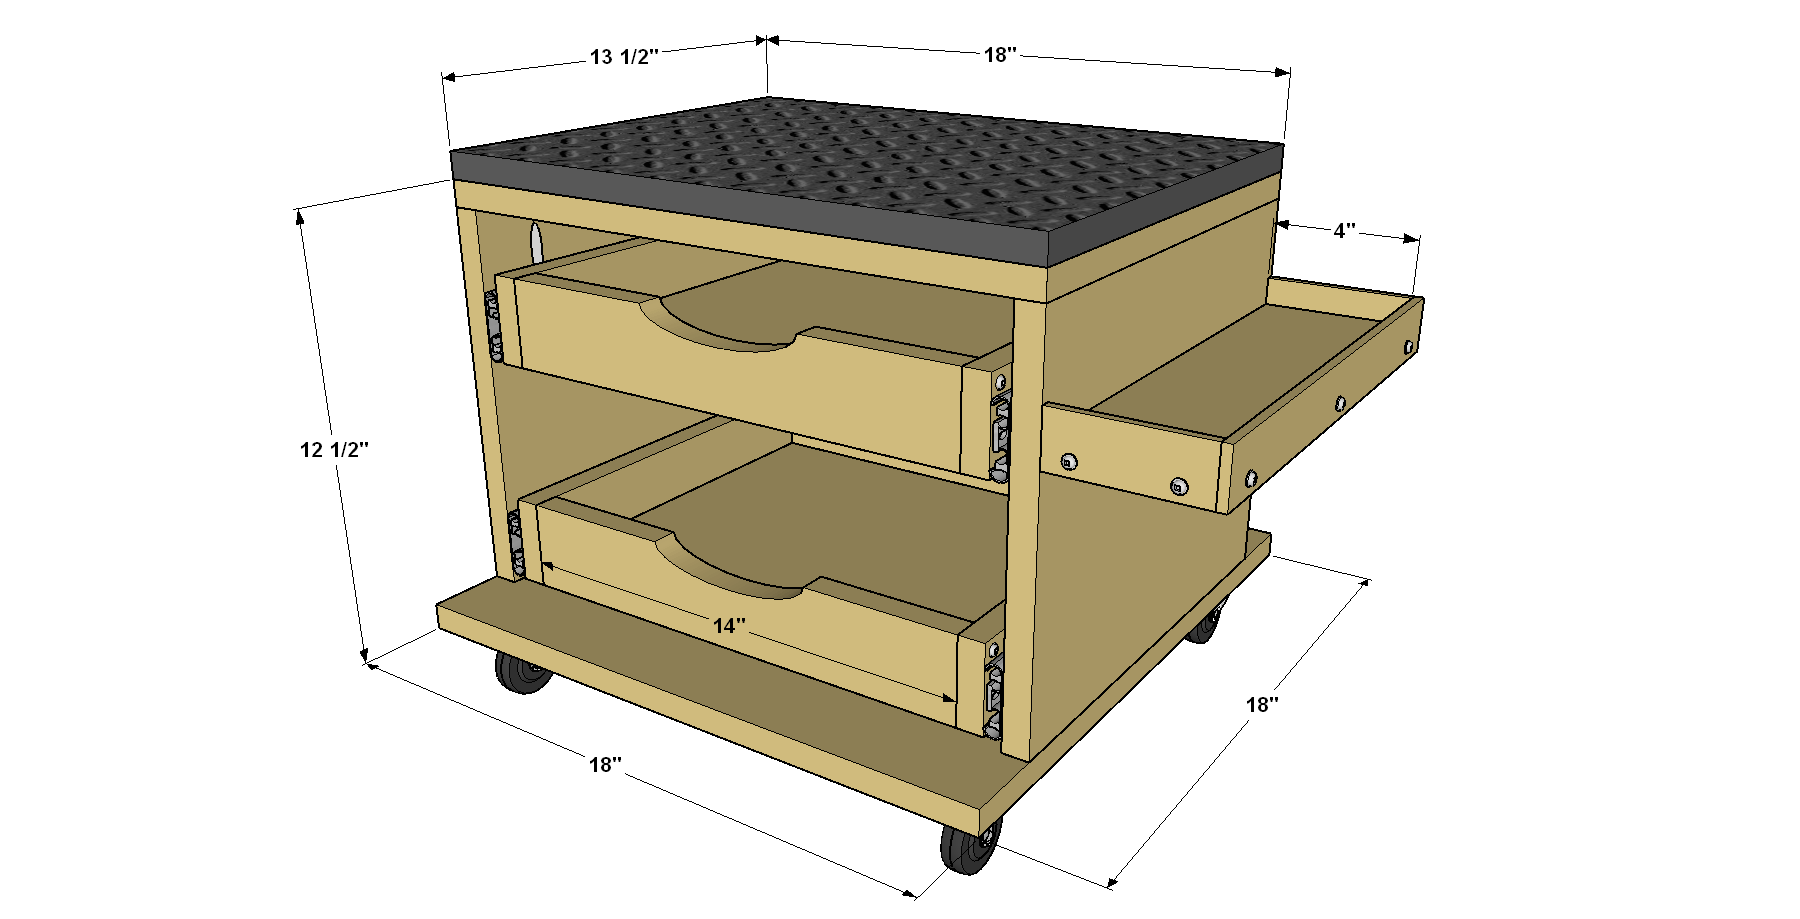
- 2 Side , 3/4" x 11" x 13 1/2"
- 1 Back , 3/4" x 11" x 16 1/2"
- 1 Bottom , 3/4" x 18" x 18"
- 1 Top , 3/4" x 13 1/2" x 18"
- 2 Drawer Bottom , 3/4" x 11" x 14"
- 2 Drawer Front , 3/4" x 2 1/2" x 14 "
- 4 Drawer Side , 3/4" x 2 1/2" x 12 1/2"
- 2 Drawer Back , 3/4" x 2 1/2" x 14"
- 1 Shelf , 3/4" x 4" x 13"
- 2 Short Shelf Edge , 1/4" x 1 1/2" x 4"
- 1 Long Shelf Edge , 1/4" x 1 1/2" x 13 1/2"
Directions
-
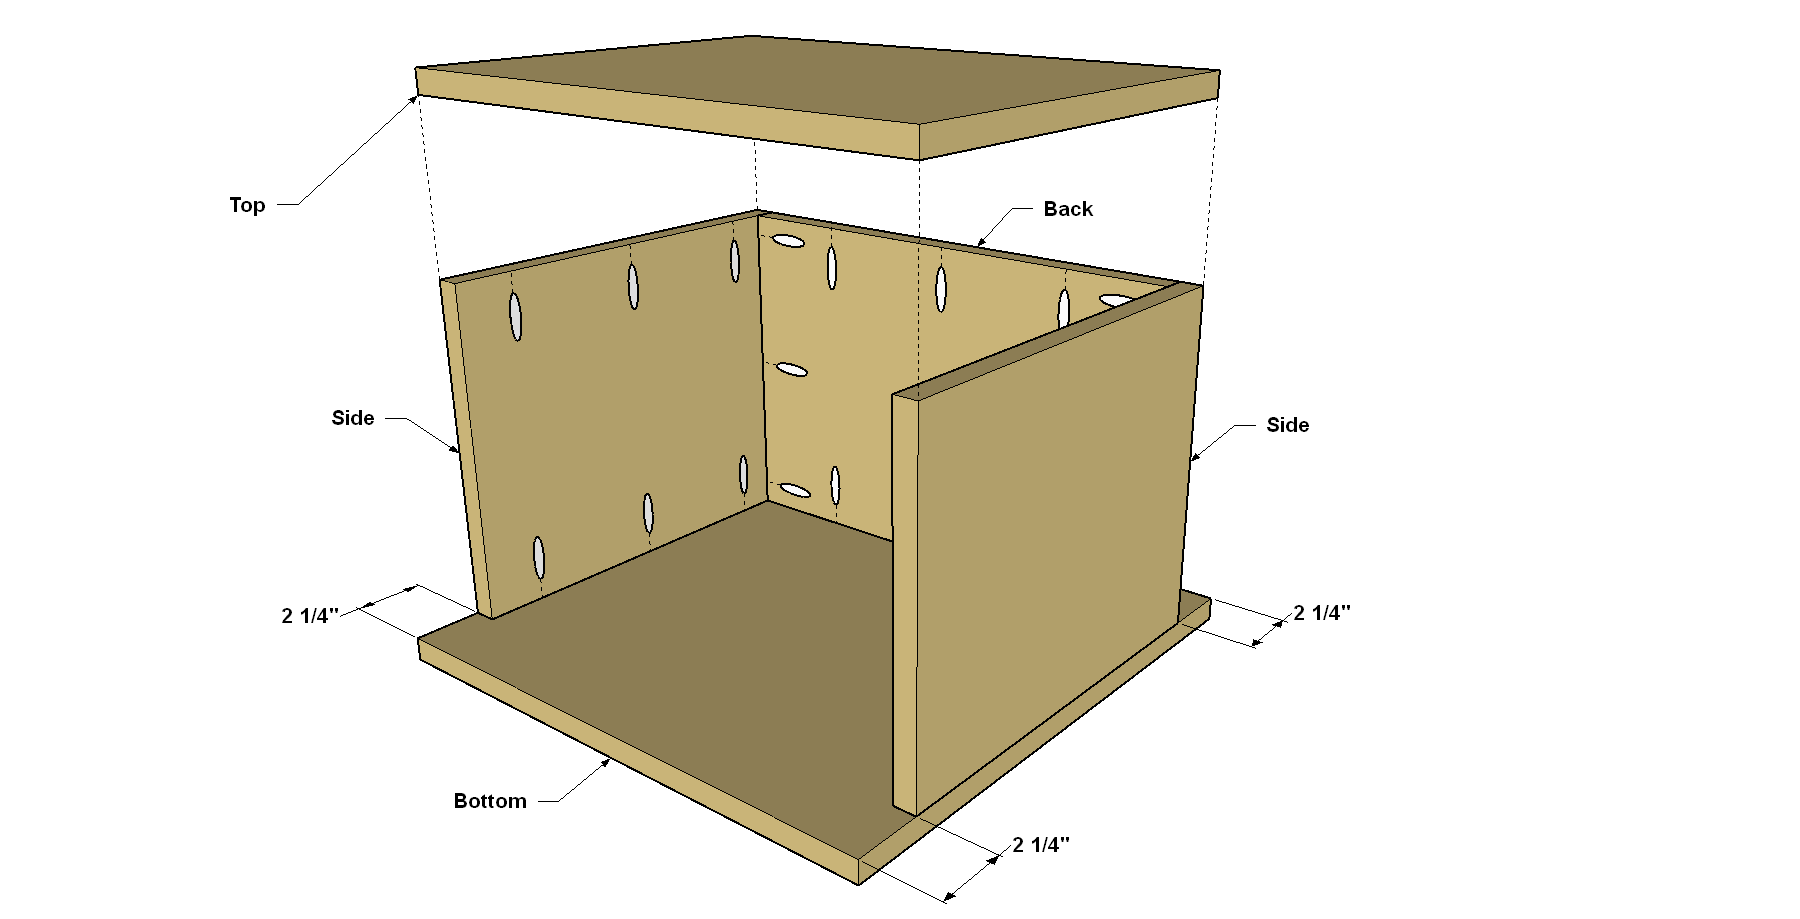
Make the Sides and Back
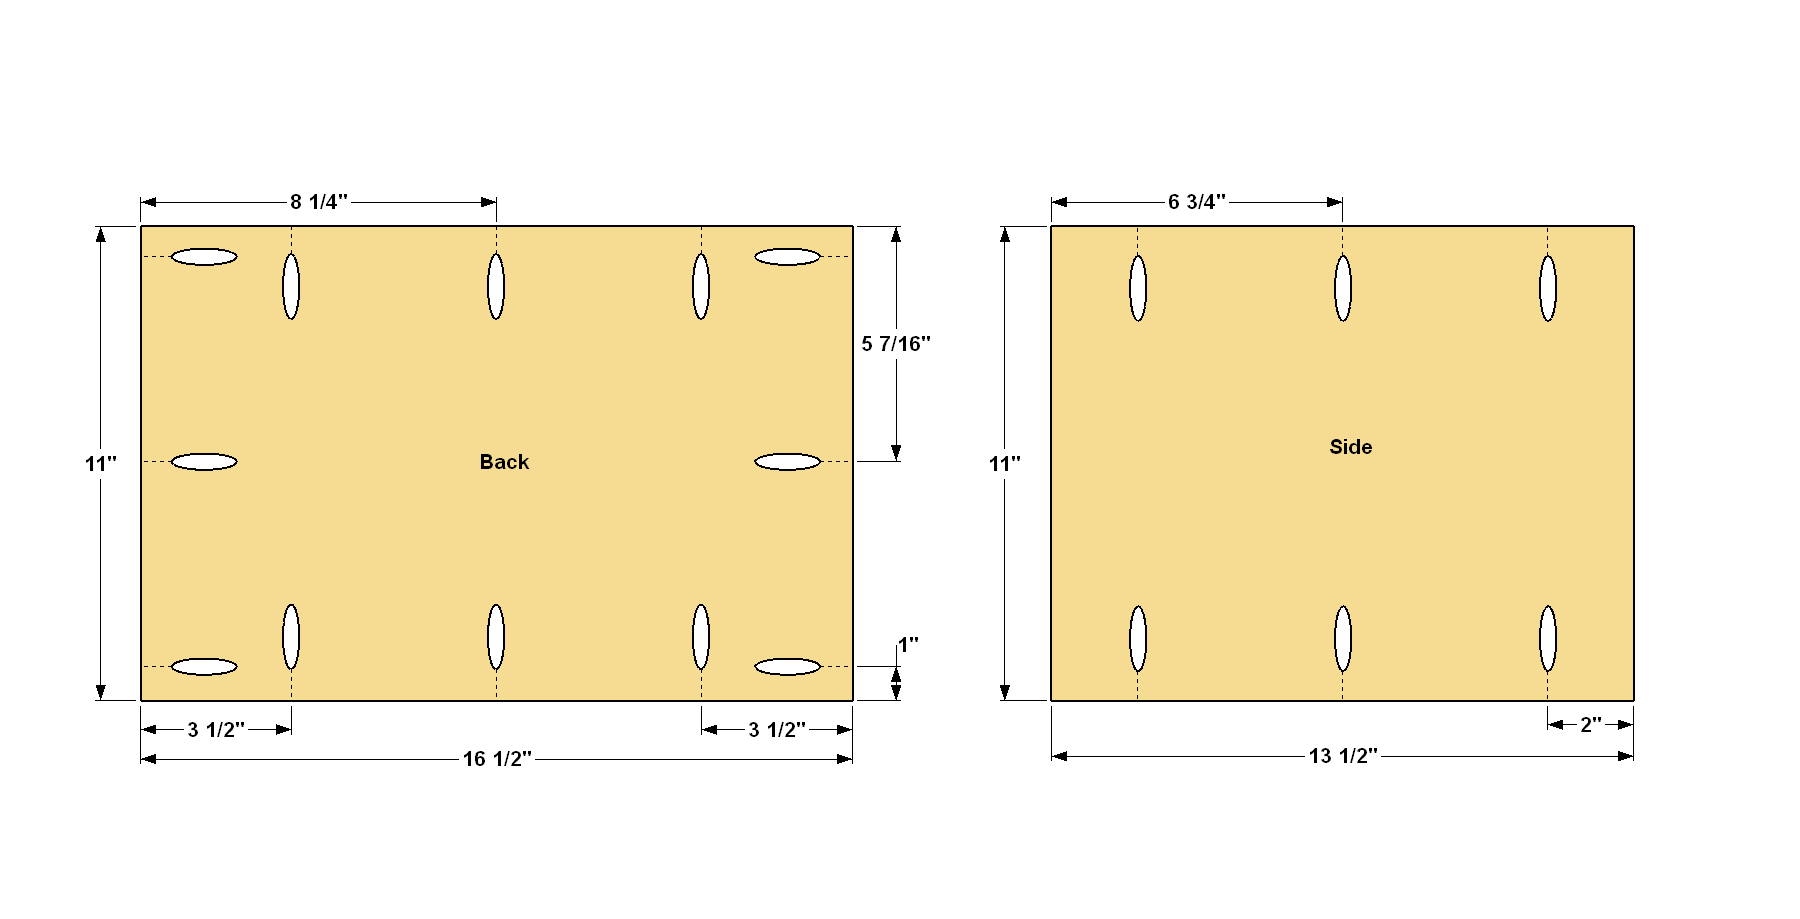
Start by cutting two Sides and one Back to size from 3/4" plywood. All three parts share the same width, so you can simplify making them by first cutting an 11"-wide strip from a half sheet of plywood, as shown in the cutting diagram. A cutting guide for your circular saw simplifies making this cut accurately. Then cut the two Sides and the Back from this strip. Set your Kreg® Pocket-Hole Jig for 3/4"-thick material, and then drill pocket holes in the Sides and the Back at the locations shown. After drilling the pocket holes, sand these pieces smooth.
-
Assemble the Sides and Back
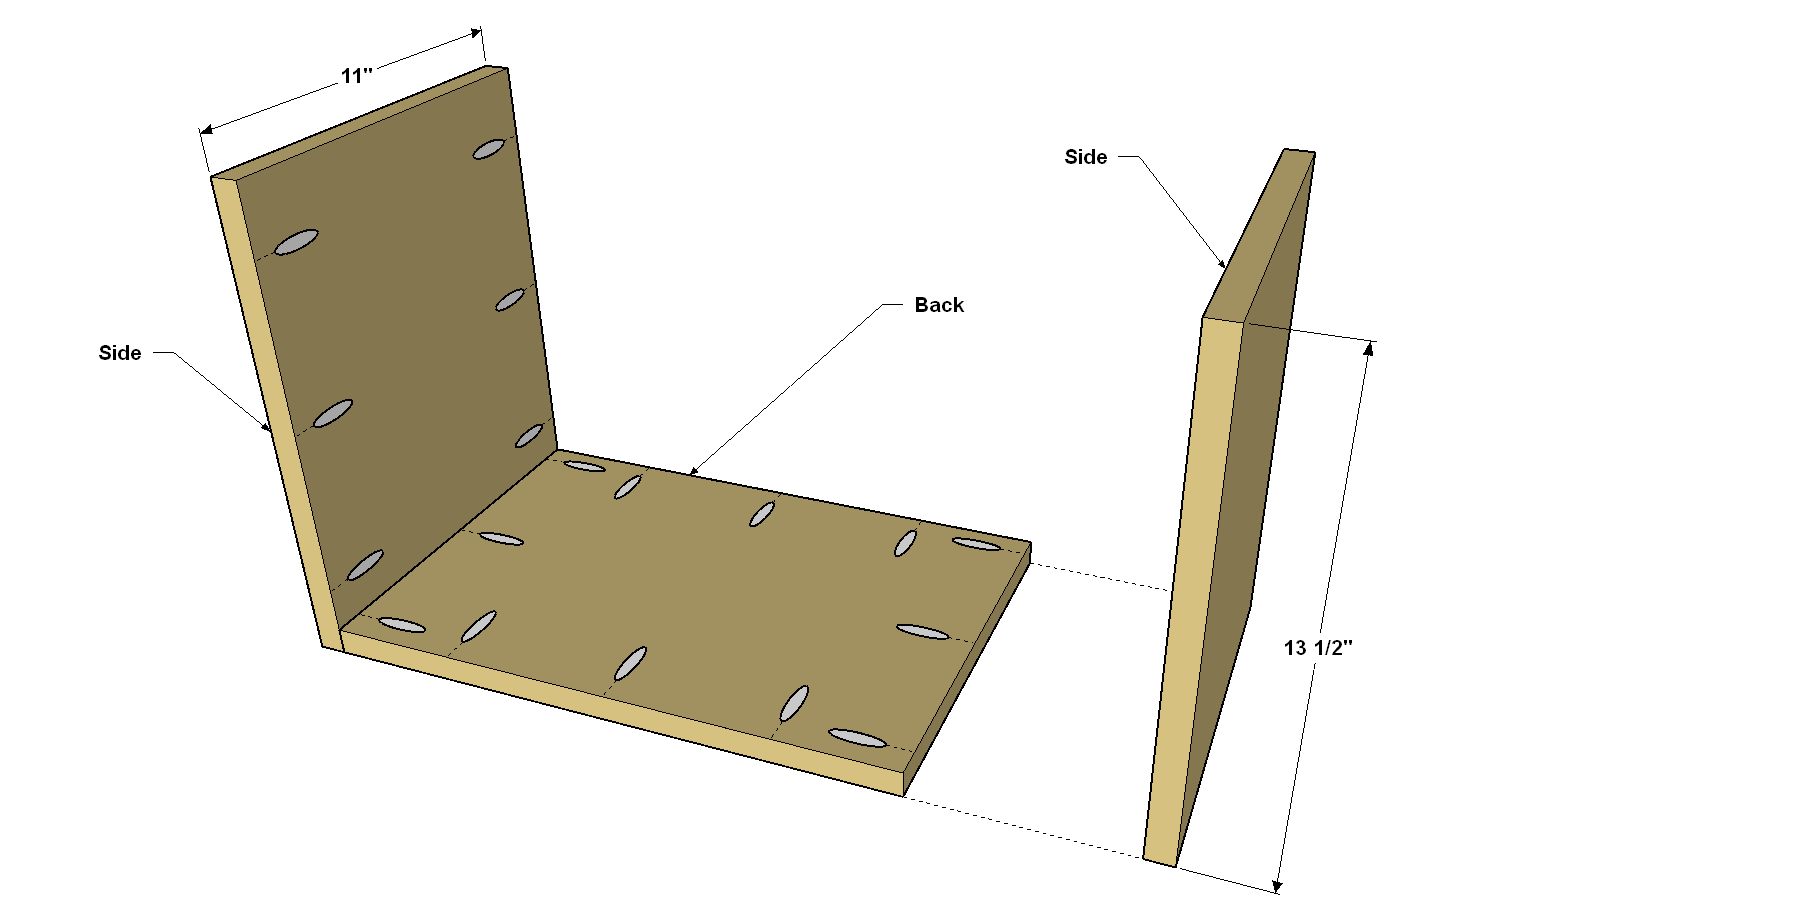
Lay the Back flat on a work surface, and then spread glue on the two edges that will mate with the Sides. Position the Sides as shown, and then connect them to the Back using glue and 1 1/4" coarse-thread Kreg Pocket-Hole Screws.
-
Cut the Top and Bottom
Now, cut the Top and Bottom to size, as shown in the cut diagram. These parts don’t require pocket holes, so you can sand them smooth after cutting.
-
Add the Top and Bottom
Spread glue on the lower edges of the Side/Back assembly, and then position the assembly on the Bottom, as shown, so that the Bottom overhangs equally at the front and back. Attach the Back/Side assembly using 1 1/4" coarse-thread Kreg Pocket-Hole Screws. Next, spread glue on the upper edges of the Side/Back assembly. Position the Top so it’s flush on the three sides. Because the space is tight, you won’t be able to get a full-size drill and a standard 6"-long Kreg square-drive bit into the opening to drive the pocket-hole screws. The Kreg 90° Pocket-Hole Driver is a great solution. Secure the Top with 1 1/4" coarse-thread Kreg Pocket-Hole Screws, as shown.
-
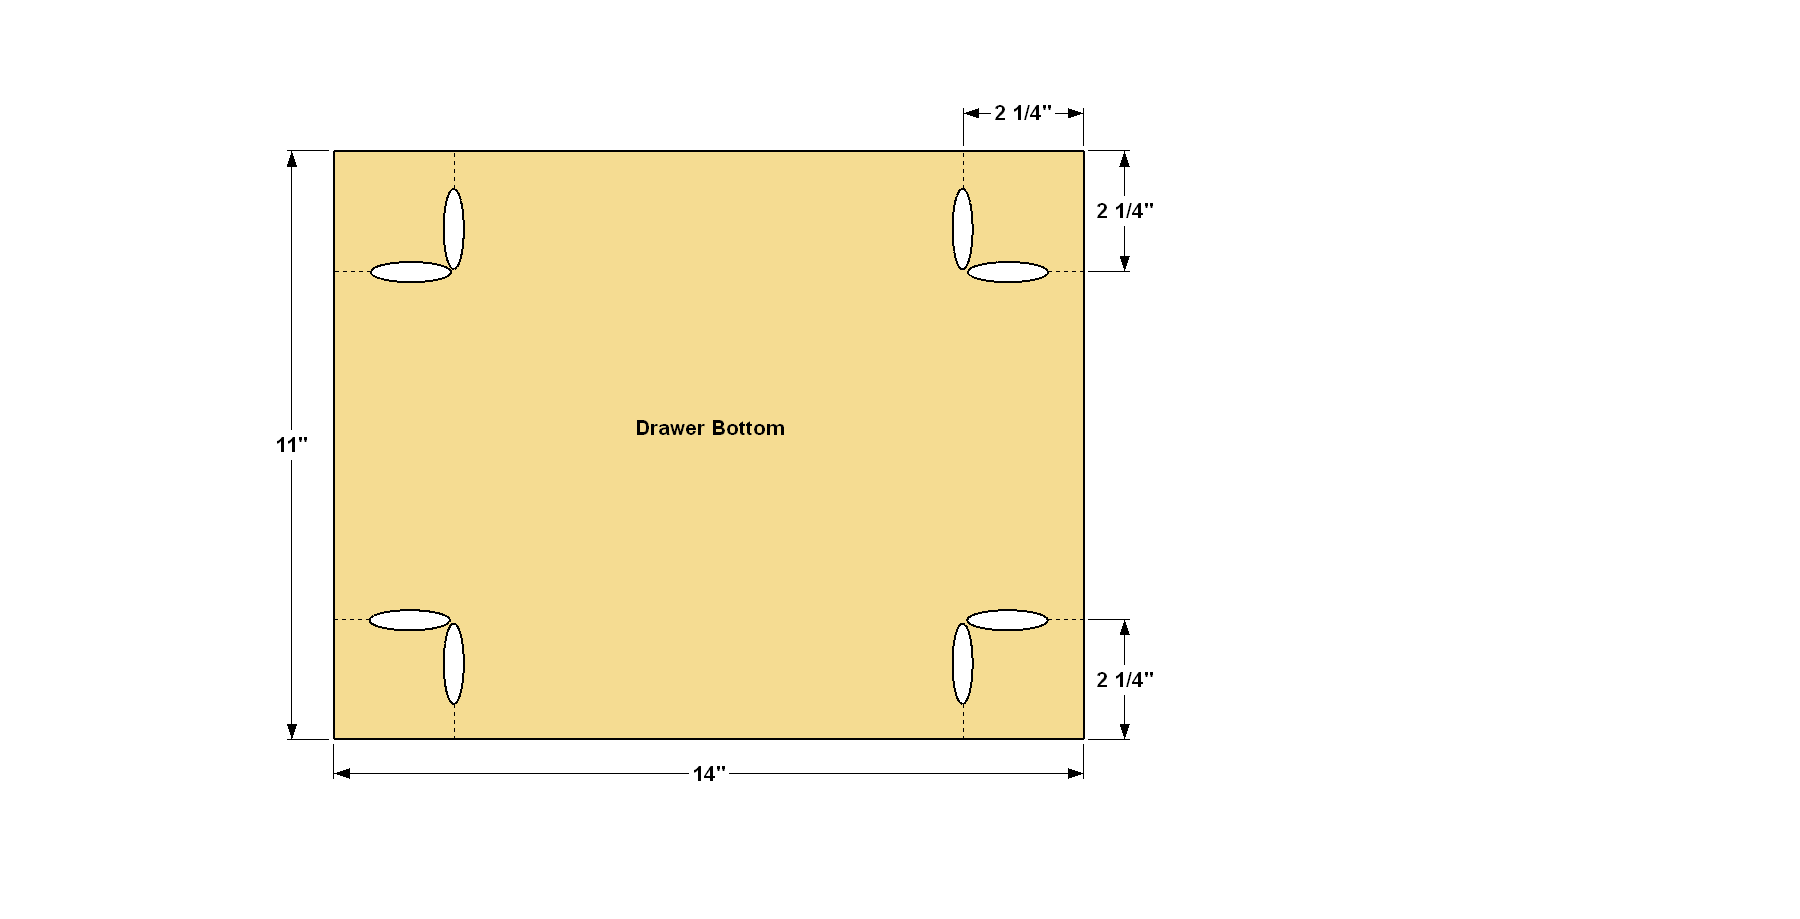
Make the Drawer Bottoms
Cut the two Drawer Bottoms to width and length, as shown in the cutting diagram, and then drill pocket holes at the locations shown. Sand the Drawer Bottoms smooth.
-
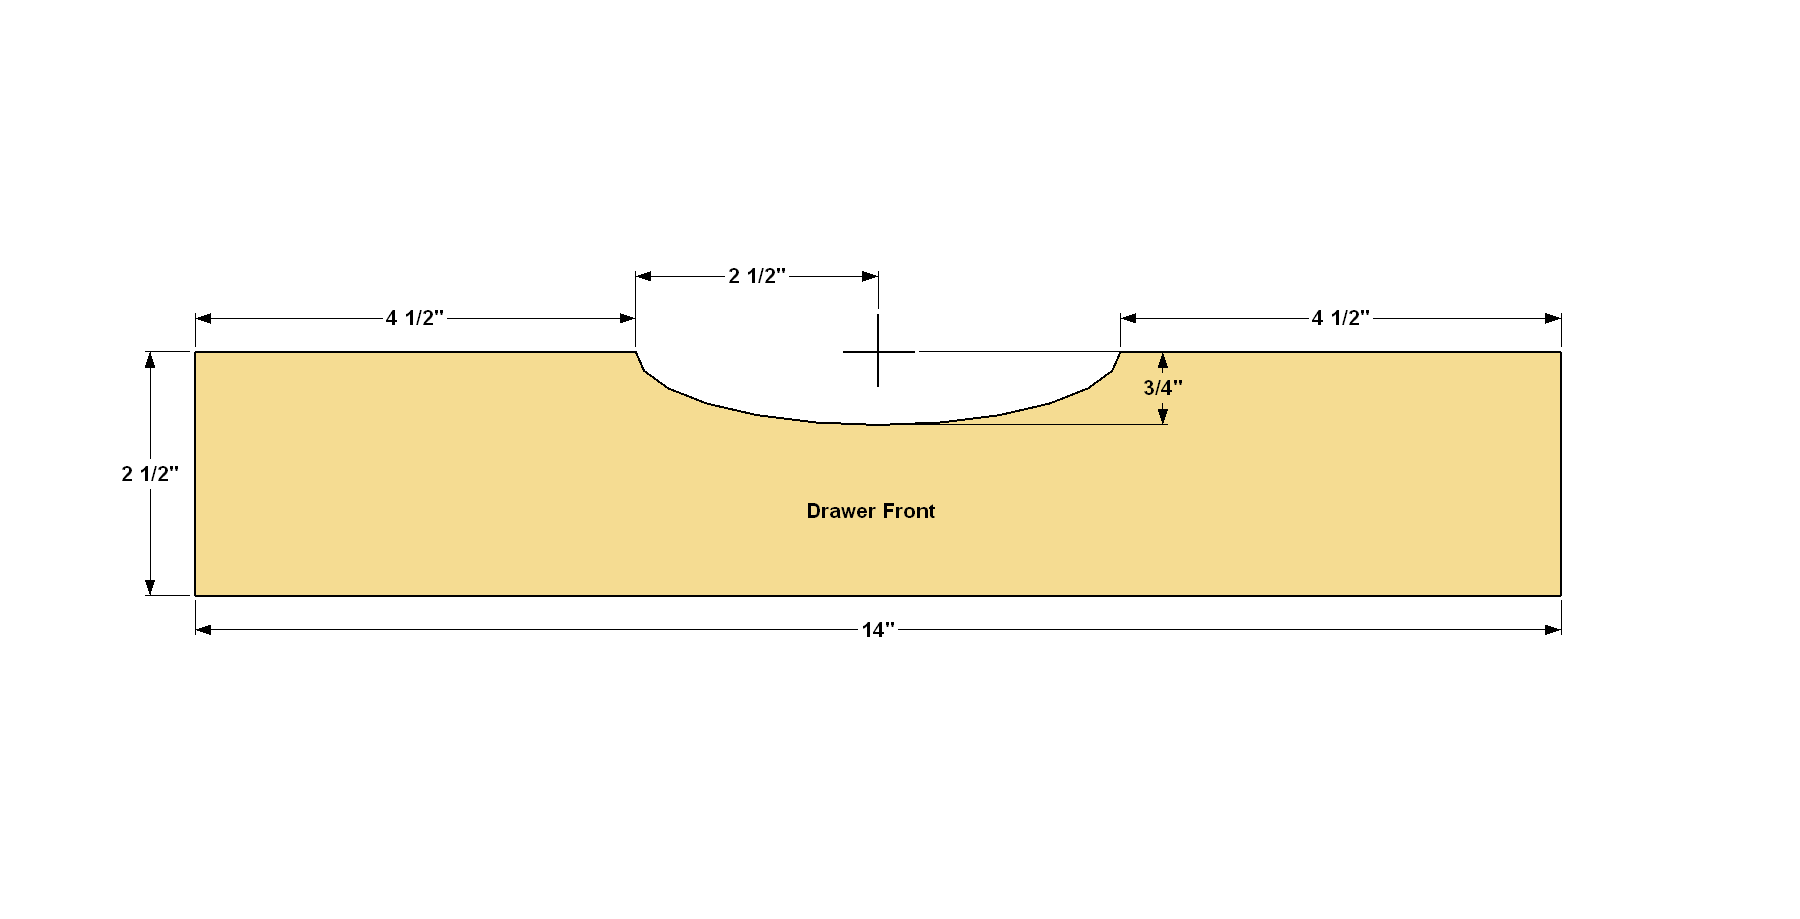
Make the Drawer Fronts
Cut the two Drawer Fronts to width and length, as shown in the cut diagram. Lay out the arched drawer-pull cutout on the top of each Drawer Front and then cut it out using a jigsaw. Sand the cut edges of the Drawer Fronts, as well as the faces, smooth.
-
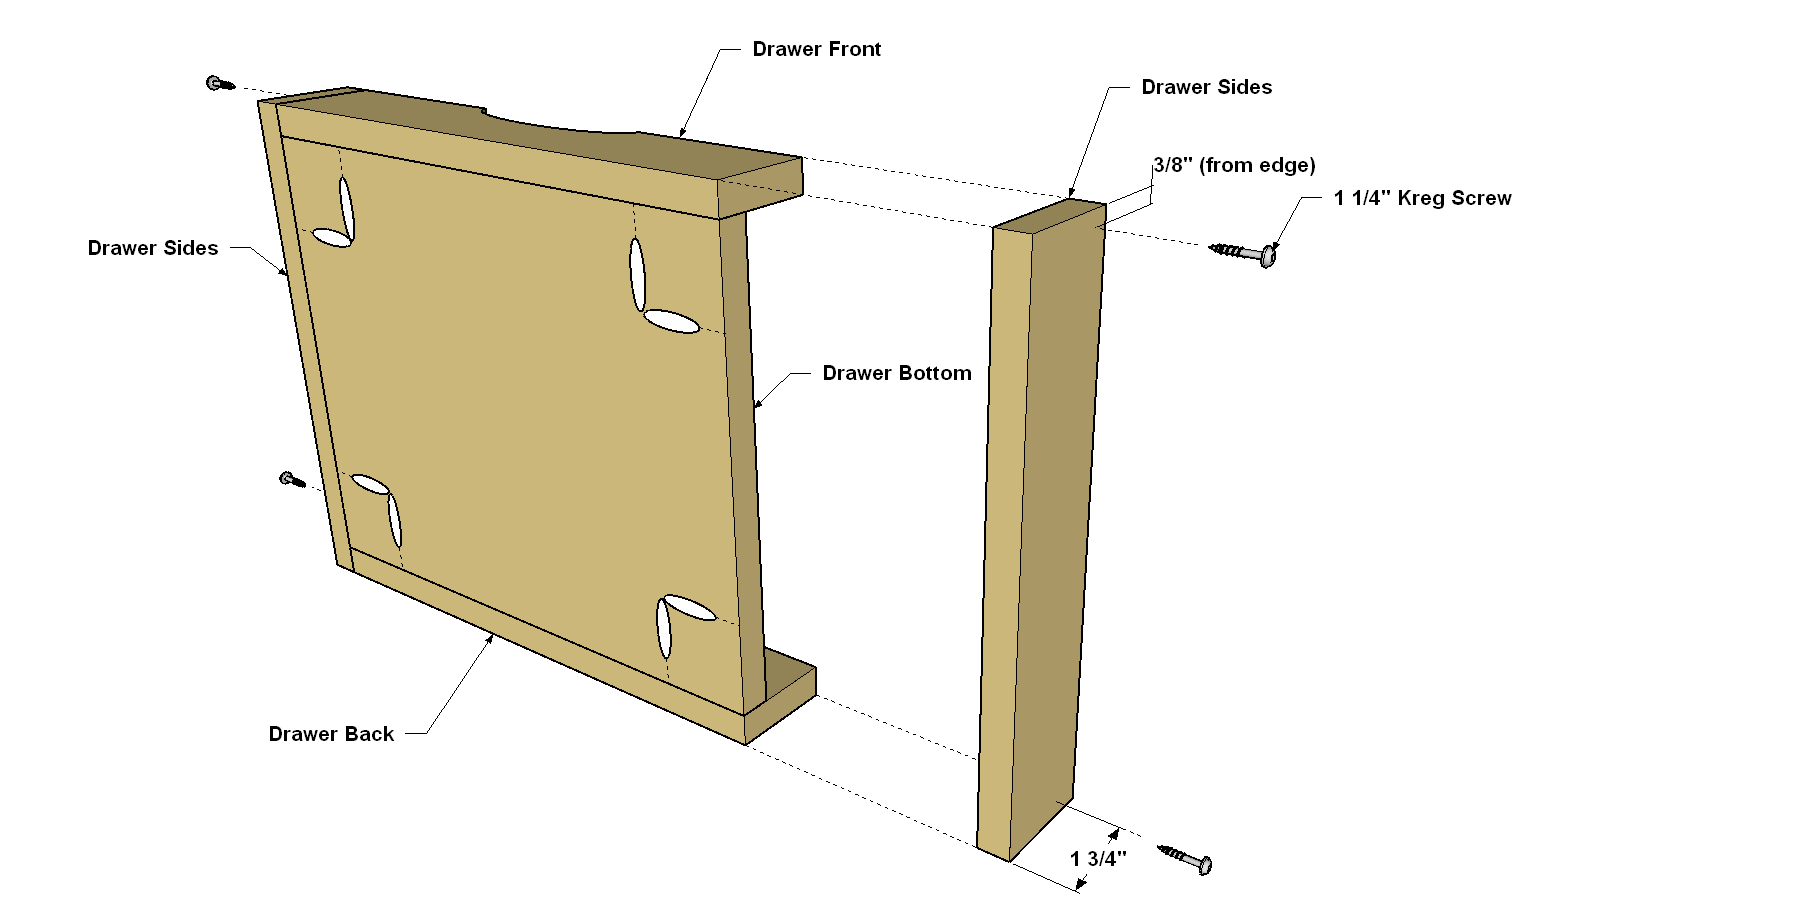
Make the Drawer Sides and Back
Next, cut two Drawer Backs and four Drawer Sides to width and length, as shown in the cutting diagram.
-
Assemble the Drawers
Attach one Drawer Front and one Drawer Back to the first Drawer Bottom using glue and 1 1/4" Kreg Pocket-Hole Screws, as shown. Make sure the bottoms and ends of the Front and Back are flush with the Bottom. Next, add the sides to the Drawer and secure them with glue and screws, as well. Finally, add a single Kreg screw at the top corner of each Side for added strength. Repeat this process for the second Drawer.
-
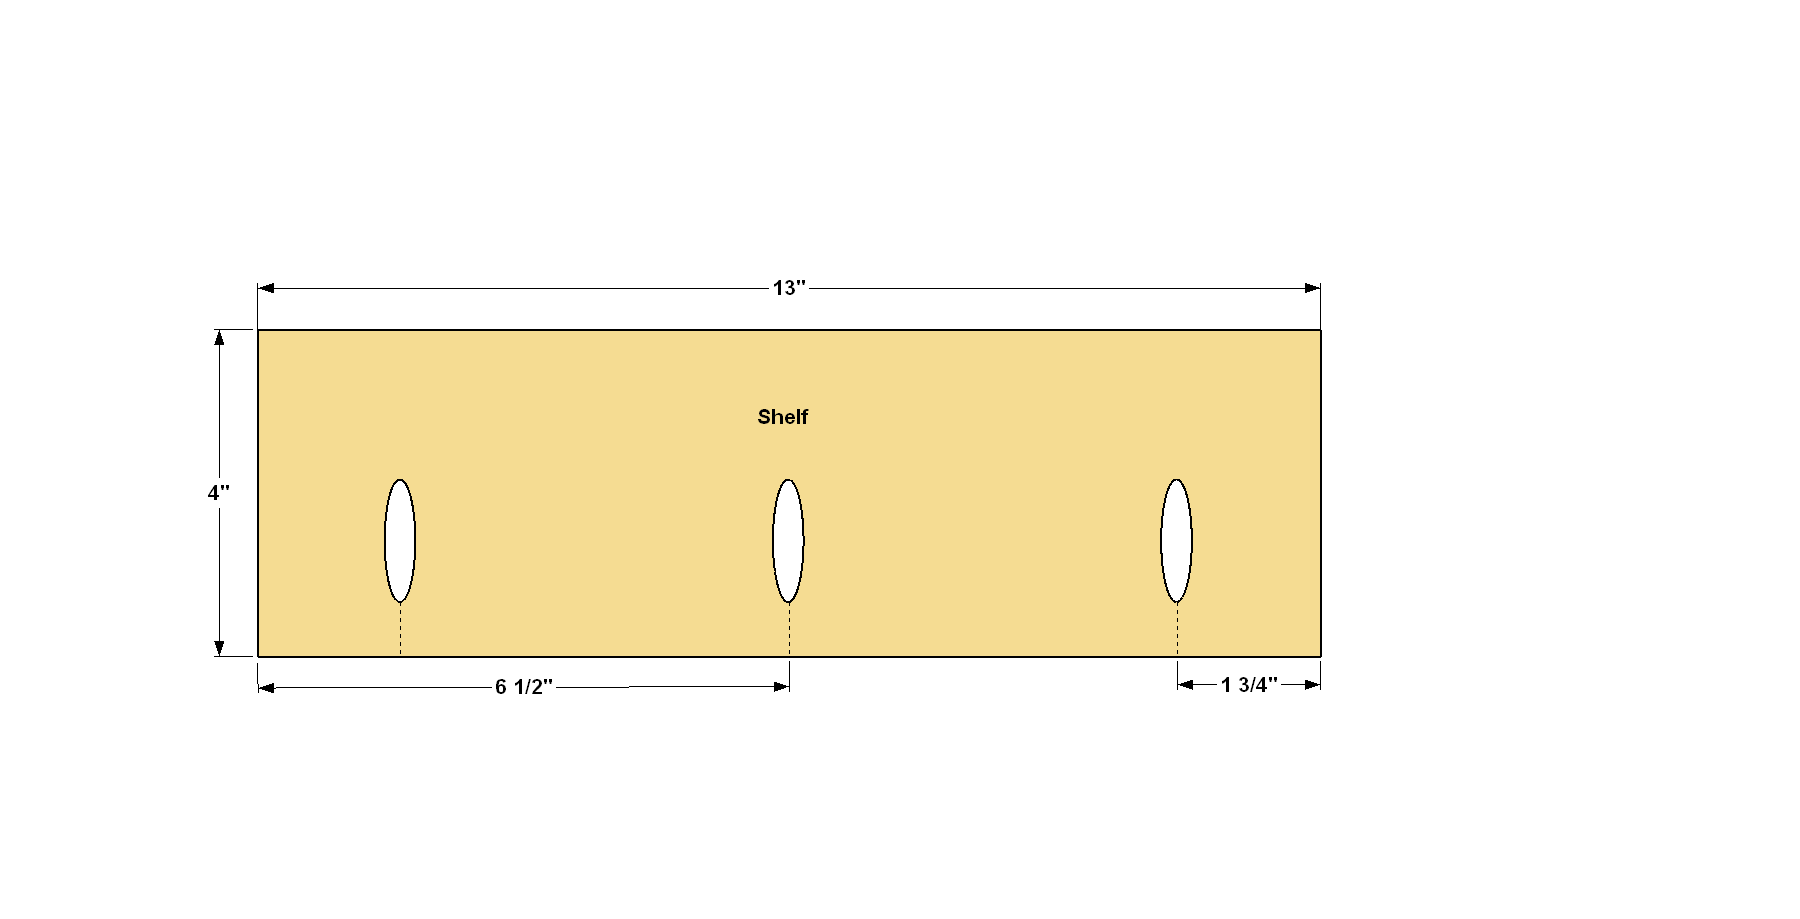
Make the Shelf
Cut the Shelf to size from the remaining plywood material. Drill pocket holes at the locations shown, and then sand the Shelf smooth.
-
Cut the Shelf Edges
From a 1/4" x 2 (1 1/2" actual width) poplar board, cut two Short Shelf Edges and one Long Shelf Edge to length, as shown in the cut diagram.
-
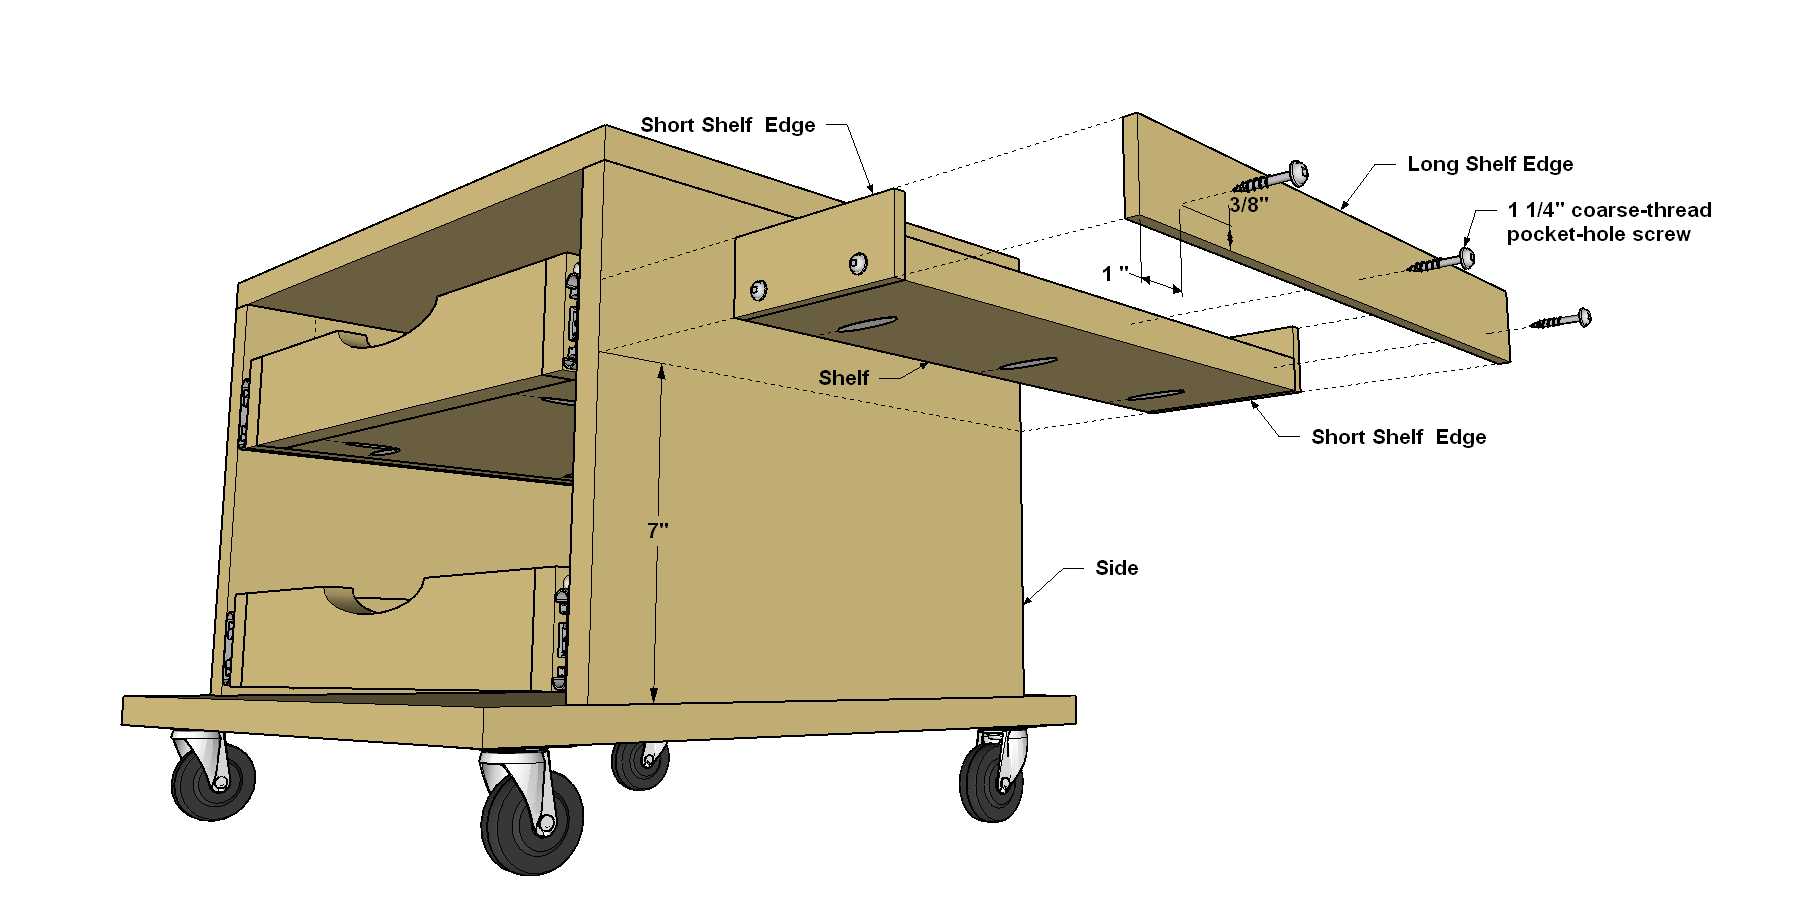
Install the Shelf and Shelf Edges
Apply glue to the ends of the Shelf, and then glue the Short Edges to the Shelf, as shown. Clamp or tape the Short Edges in place while the glue dries. Next, spread glue along the edge of the Shelf that doesn’t have pocket holes, as well as on this same end of the Short Edges. Then clamp the Long Edge in place, as well. One the glue dries, sand the Edges and shelf smooth, as needed. To strengthen the Edges and add an industrial look to the project, add a few 1 1/4" Kreg Pocket-Hole Screws at the general locations shown. To prevent splitting the 1/4" Edge wood, drill a 1/8" pilot hole 1 1/4" deep for each screw. Finally, attach the shelf assembly to the Side, at the height that best suits your needs, using 1 1/4" Kreg Pocket-Hole Screws, as shown.
-
Sand and Finish
Do any touch-up sanding that’s needed, and then wipe away dust. Now you can apply your favorite finish. We used a natural oil to protect the plywood a to give it a nice, warm color. Because we glued a pad to the top, we didn’t apply oil to the upper surface of the Top.
-
Mount the Casters, Drawers, and Mat
Mount the casters at the corners of the Bottom by drilling pilot holes and then driving in screws. Then, following the manufacturer’s instructions, install 12" drawer slides to mount the drawers. Finally, you can add a cushion to the top for comfort. We used a foam floor mat, and we attached it with spray adhesive.