


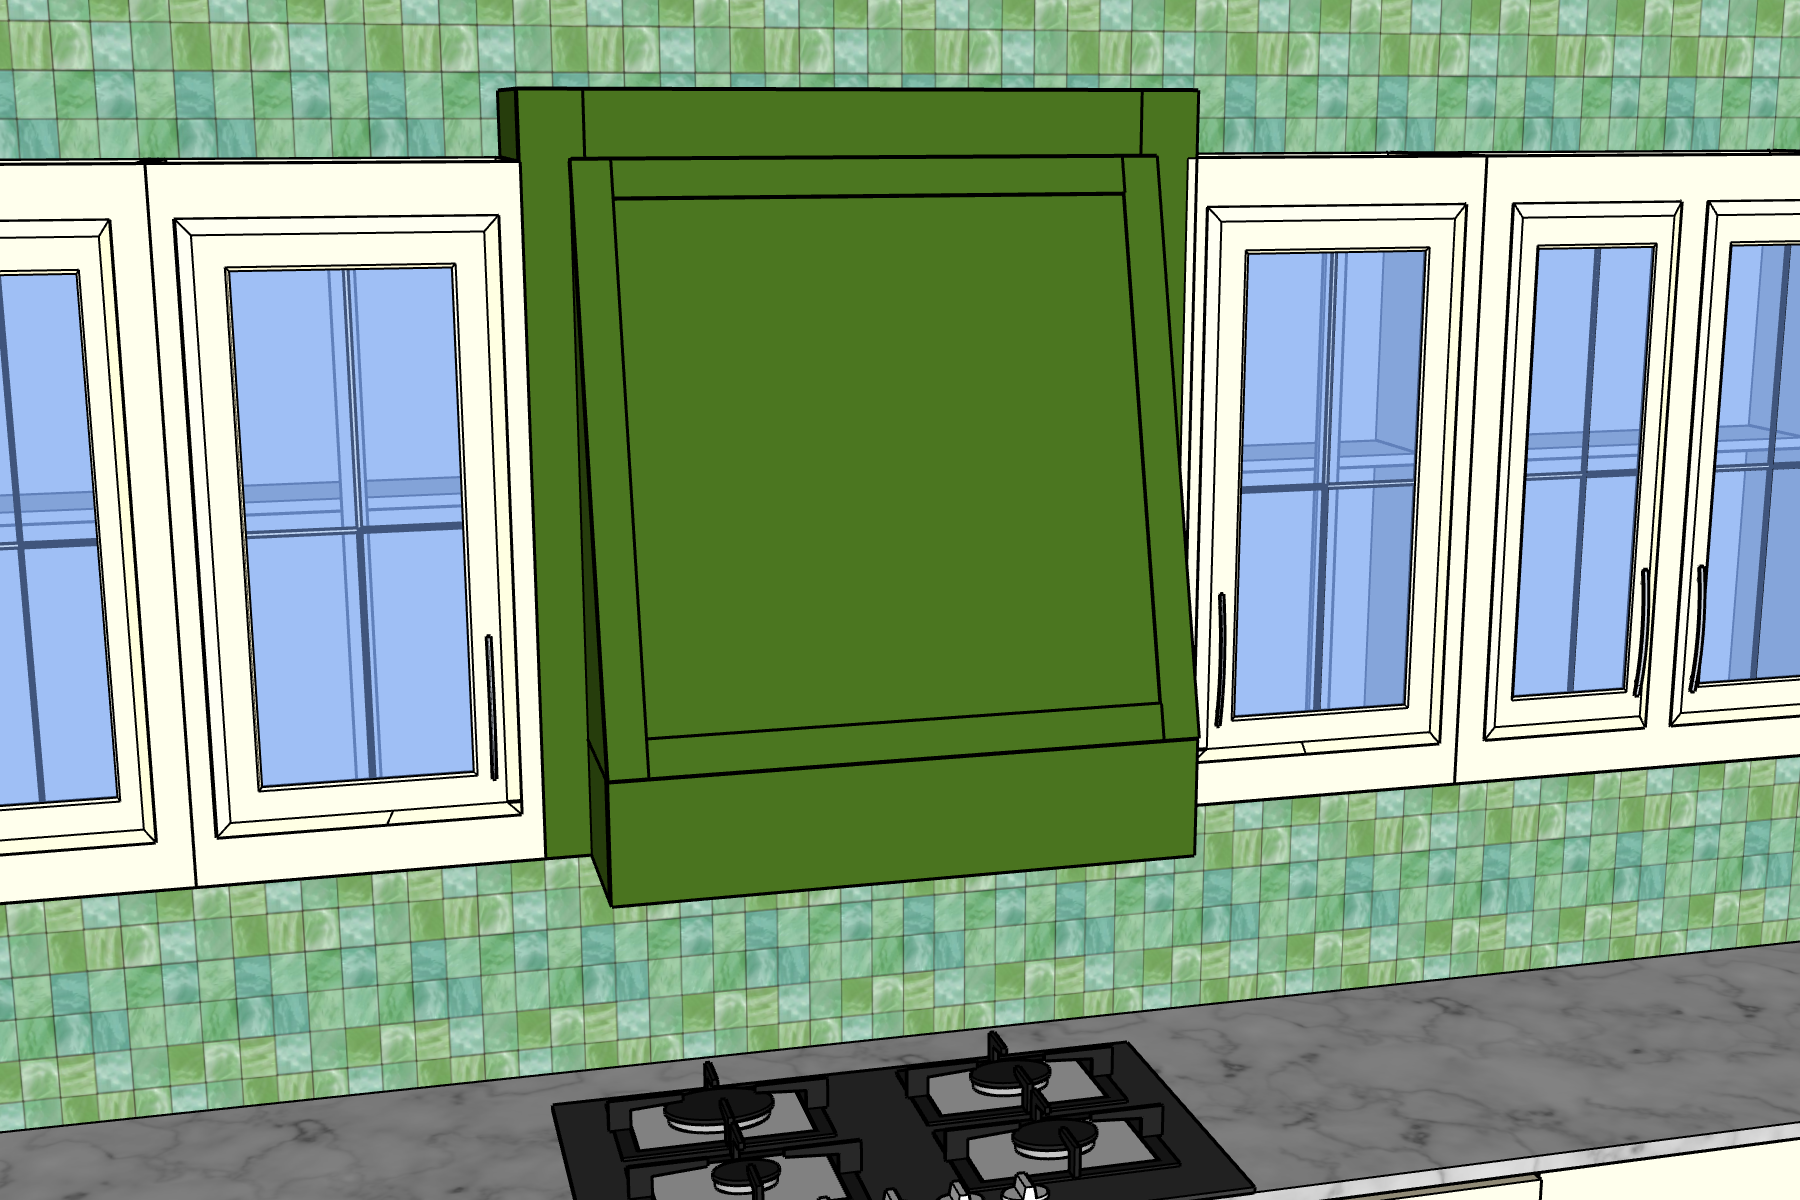

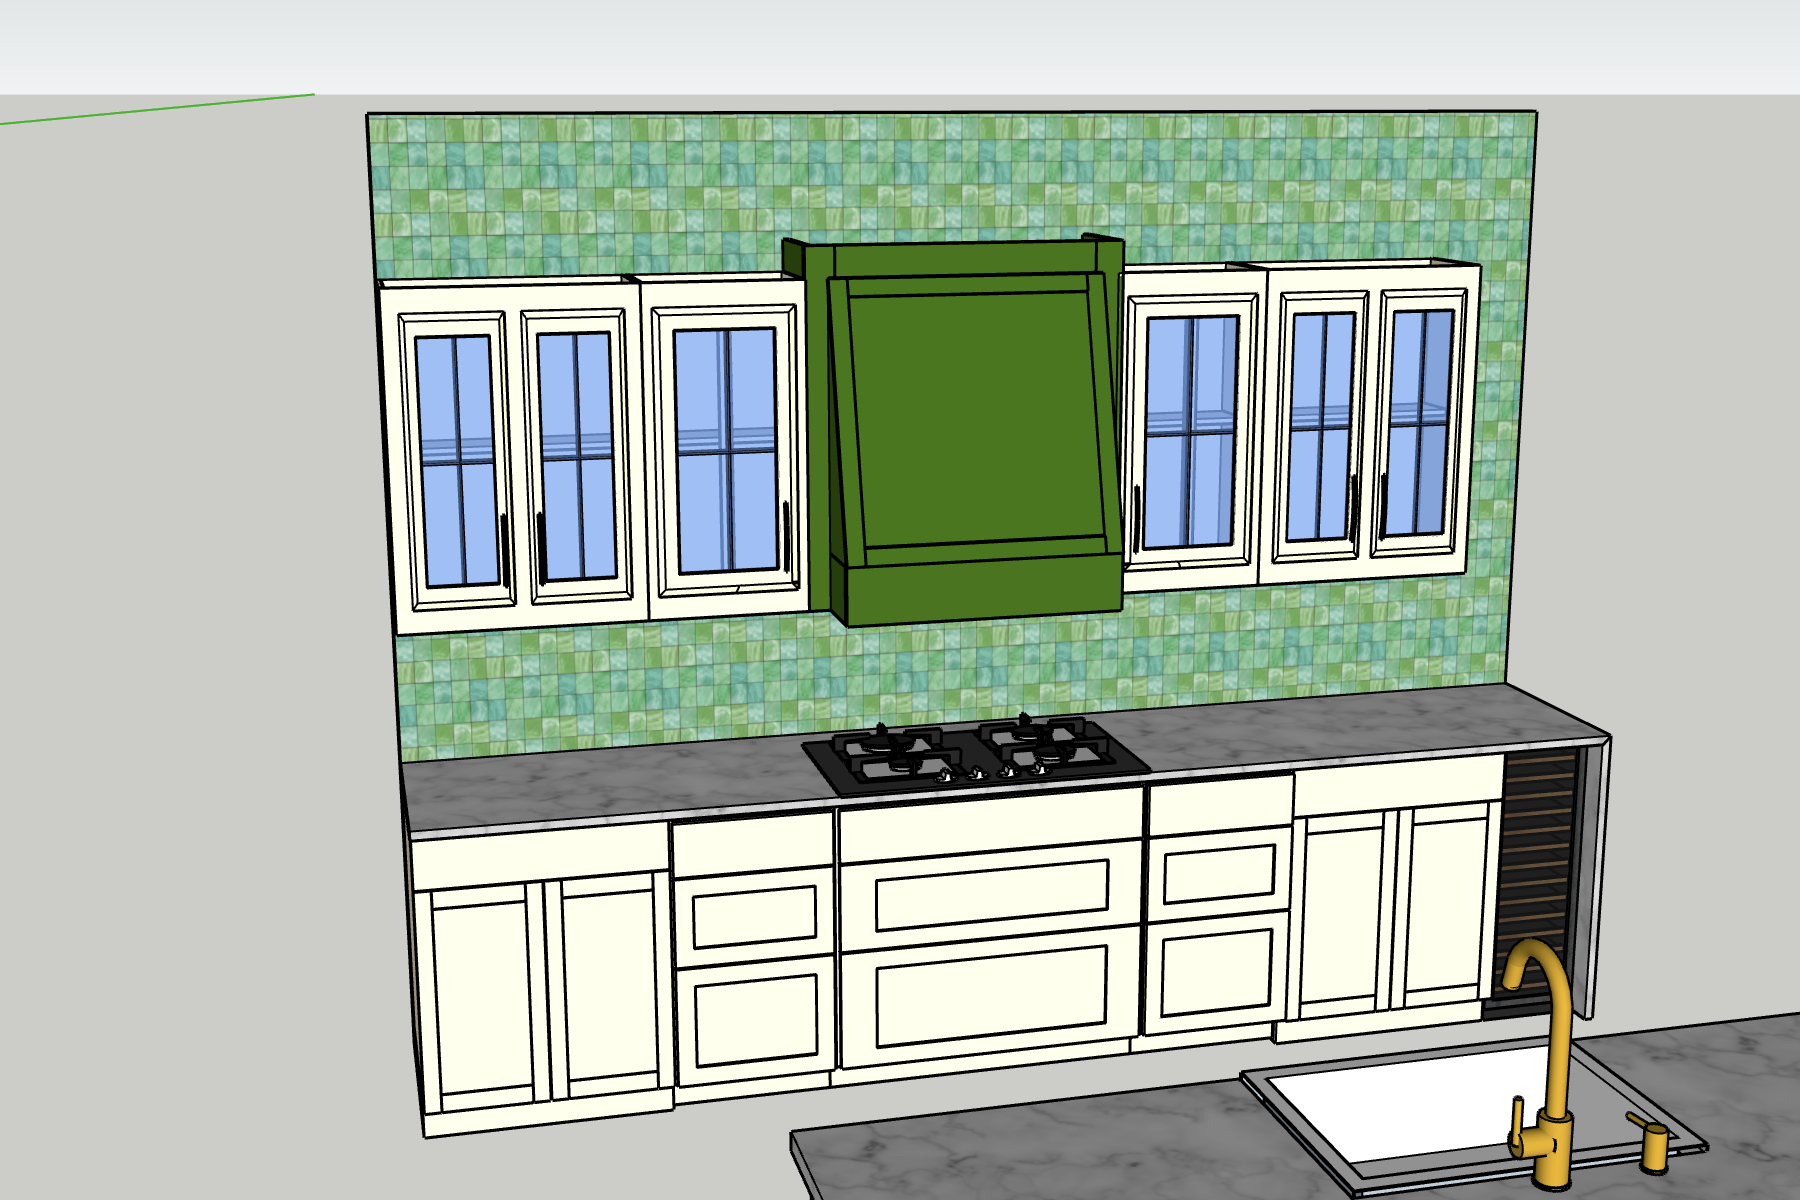


We had to build a new range hood cover for our kitchen renovation so we made this one and wanted to share the process. Adding a custom hood vent cover to your kitchen renovation is a great way to add a statement piece with your own style. Here's how to make one!
Tools
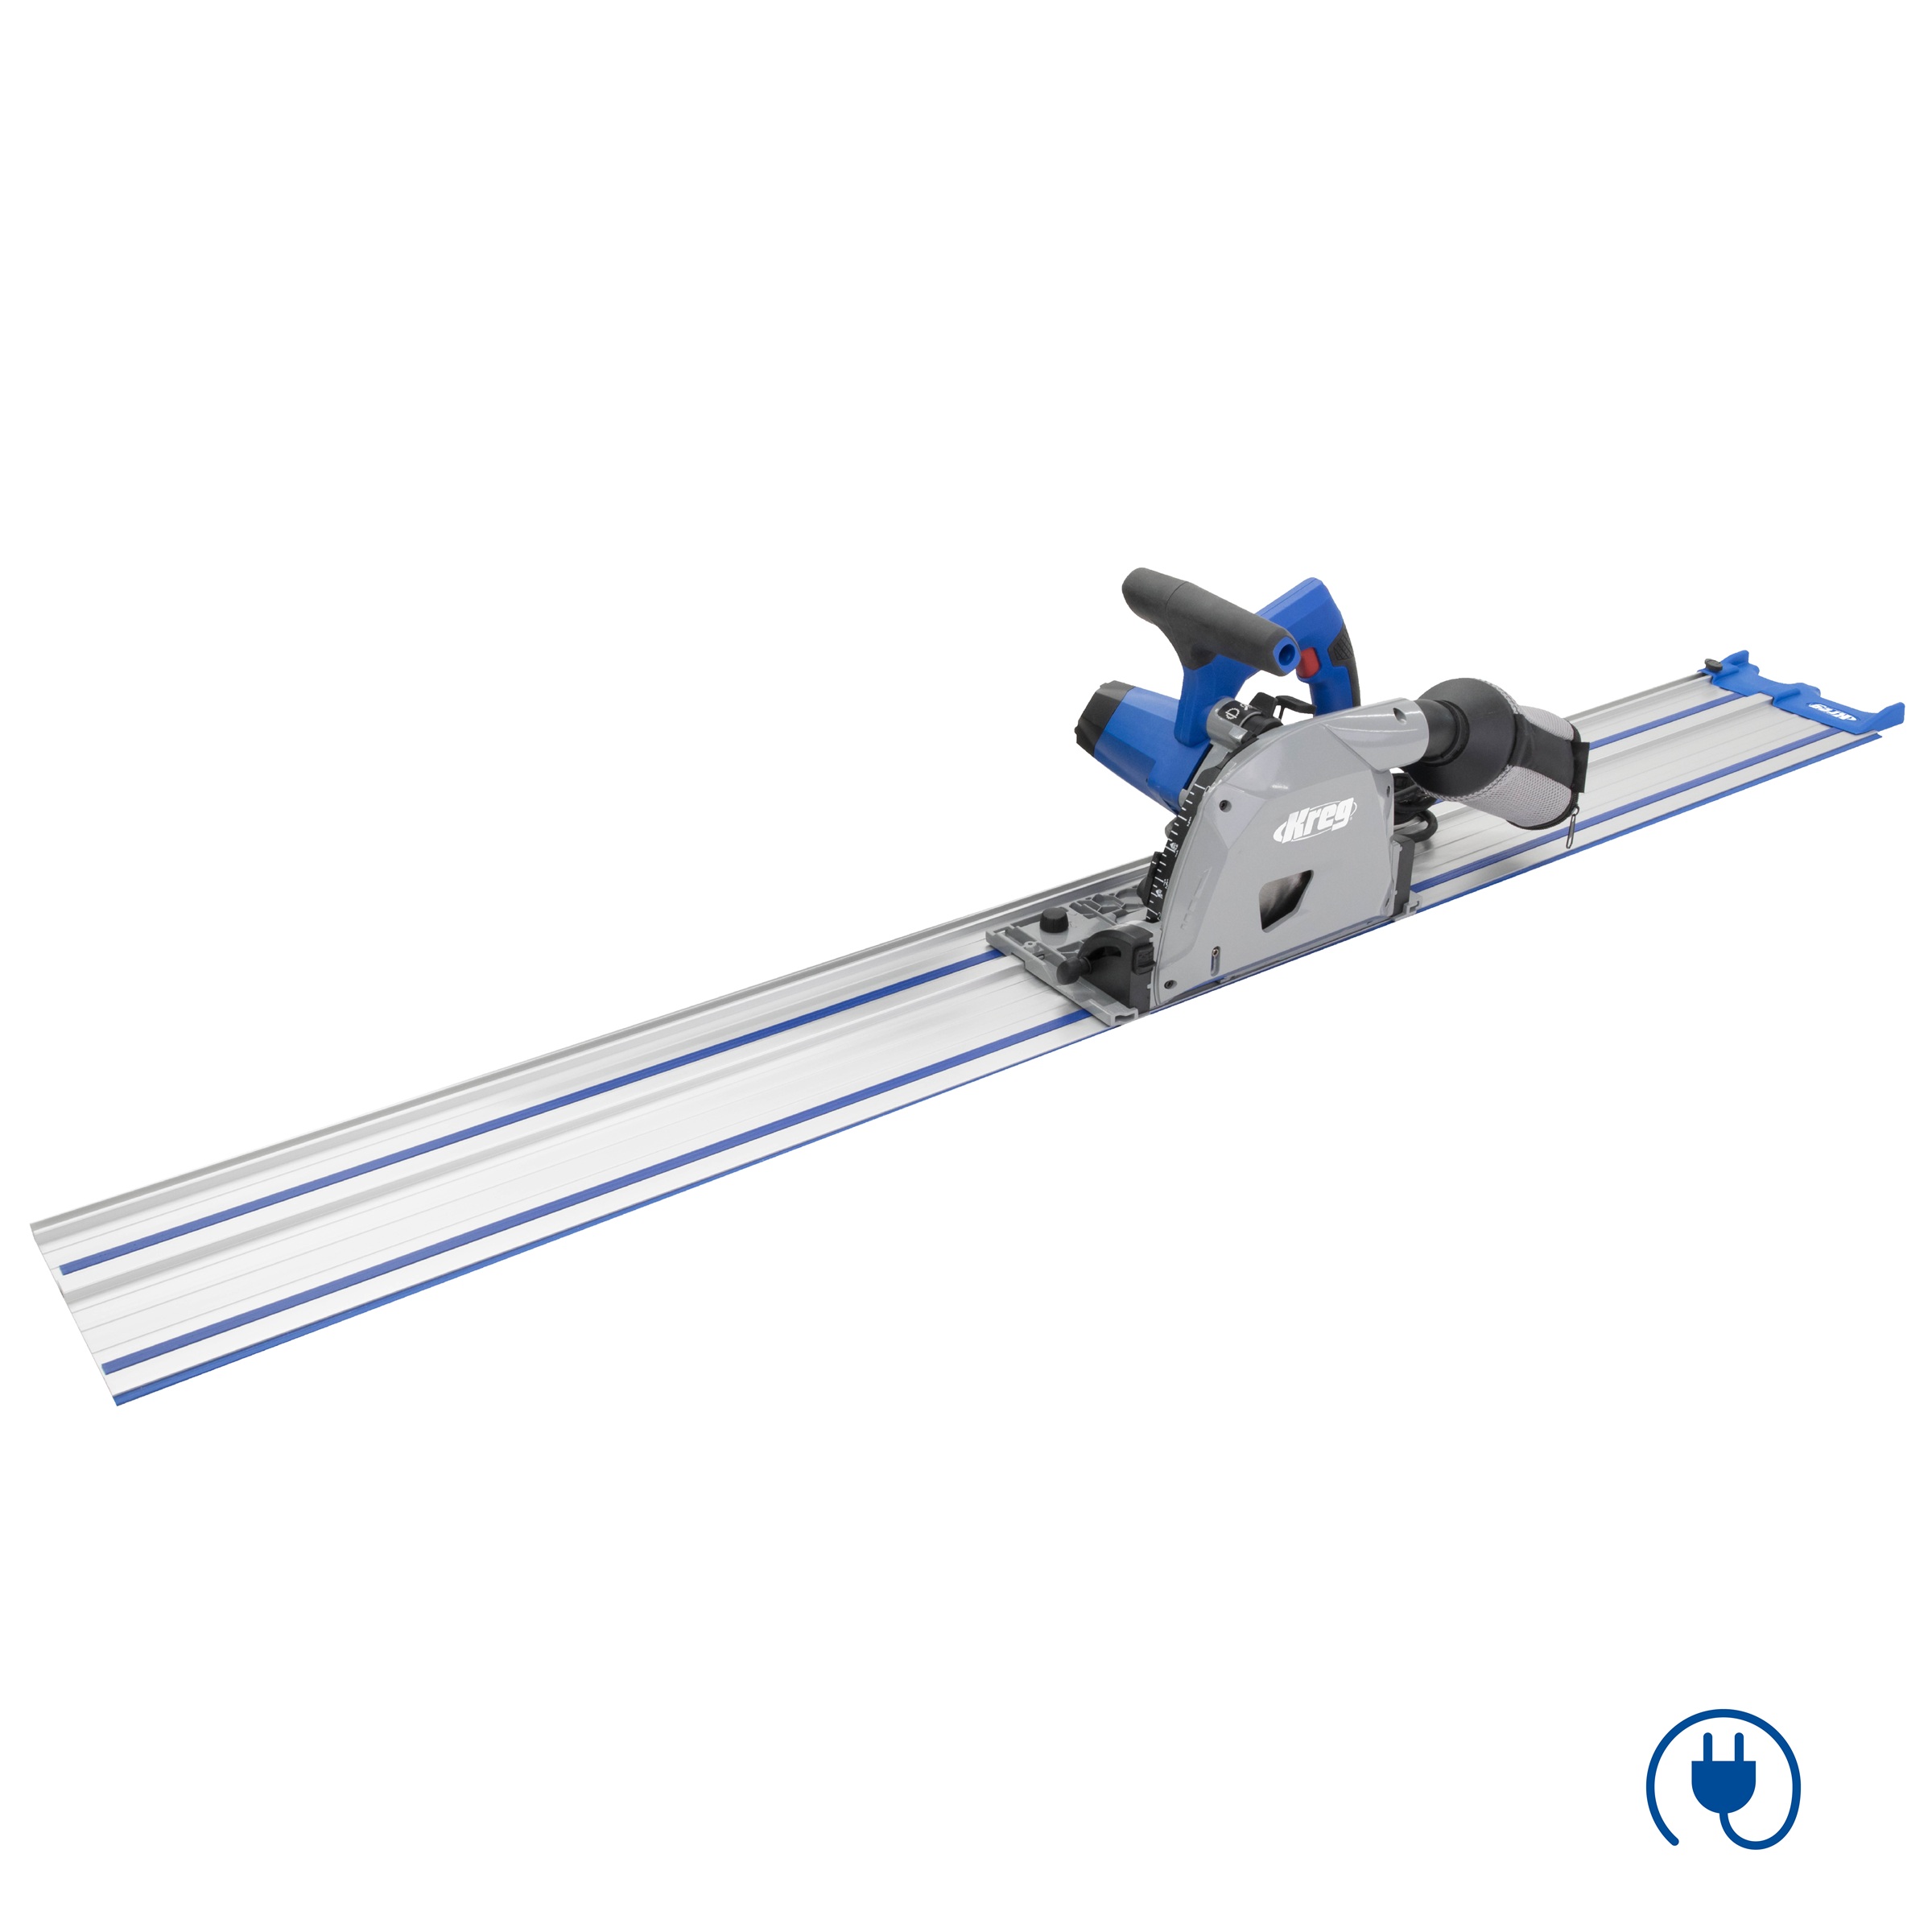
Kreg Tools


Other Tools
-
Miter Saw

-
Brad nailer
Materials
Wood Products
- 1 3/4" plywood , 4'x8'
- 1 1/4" plywood , 4'x4'
Hardware & Supplies
- 1 1" brad nails
- 40 1 1/4" Kreg screws
- 1 Wood glue
- 1 Wood filler
- 1 Stain or paint
- 1 Range Hood
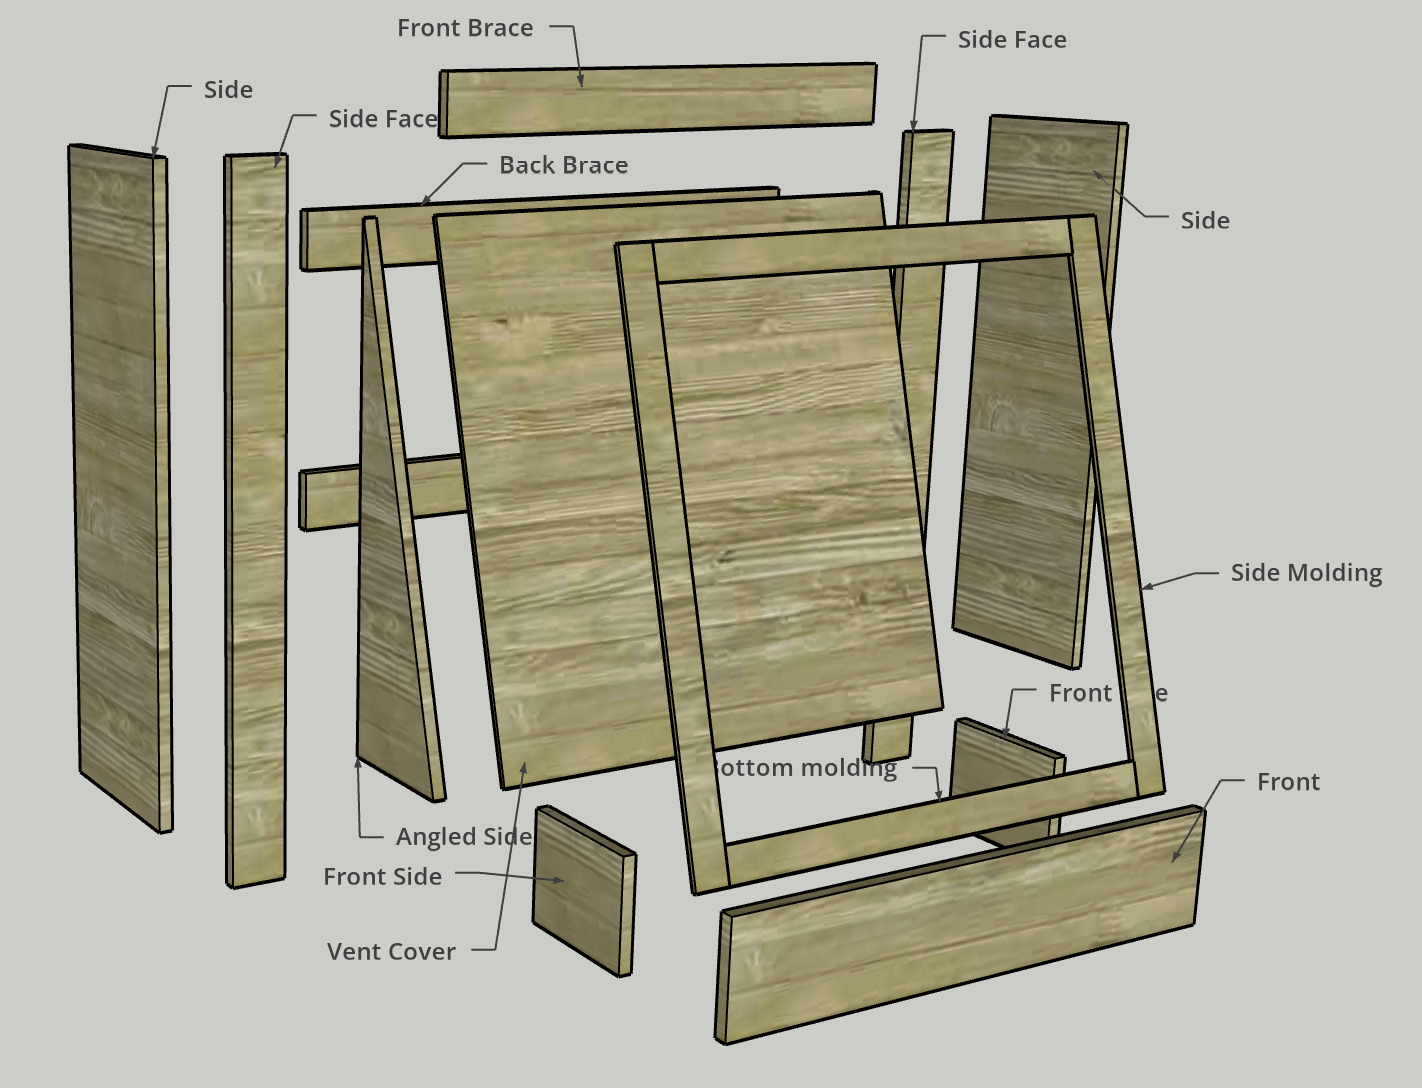
Cut List & Parts
- 2 Sides , 11 1/4" x 37 1/4" x 3/4"
- 2 Side Faces , 3 1/4" 40 1/2" x 3/4"
- 2 Front Sides , 7 3/4" x 6 1/2" x 3/4"
- 1 Front Face , 31 1/2" x 6 1/2" x 3/4"
- 1 Front Brace , 30" x 3 1/2" x 3/4"
- 2 Angled Sides , 8 1/4" x 30 1/2" x 3/4"
- 1 Hood Face , 31 1/2" x 31 1/2" x 1/4"
- 2 Back Brace , 35" x 3 1/2" x 3/4"
- 2 Side Molding Strips , 31 1/2" x 2" x 1/4"
- 2 Top/Bottom Molding Strips , 27 1/2" x 2" x 1/4"
Directions
-
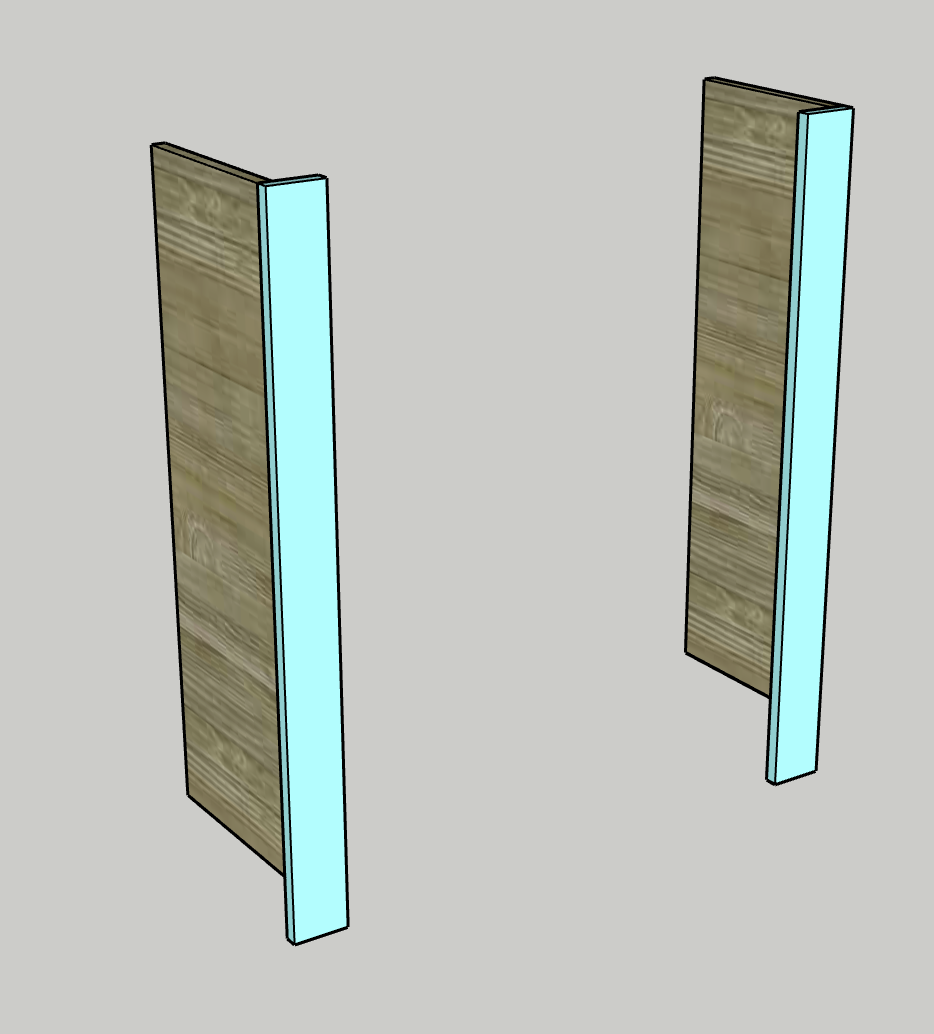
Assemble Sides
- Drill four pocket holes along one long edge of each of the Sides.
- Using wood glue and pocket hole screws, attach the Sides into the Side Faces on their outer edge, aligned at the top of the Side Faces so the gap is at the bottom.
- Repeat for the second Side and Side Face.How to make pocket holes
Here's our tips on how to make pocket holes!
-
Assemble front
- Drill two pocket holes in each end (6 1/2" side) of the two Front Sides.
- Using wood glue and pocket hole screws, attach the two Front Sides into the Front on its outer edges.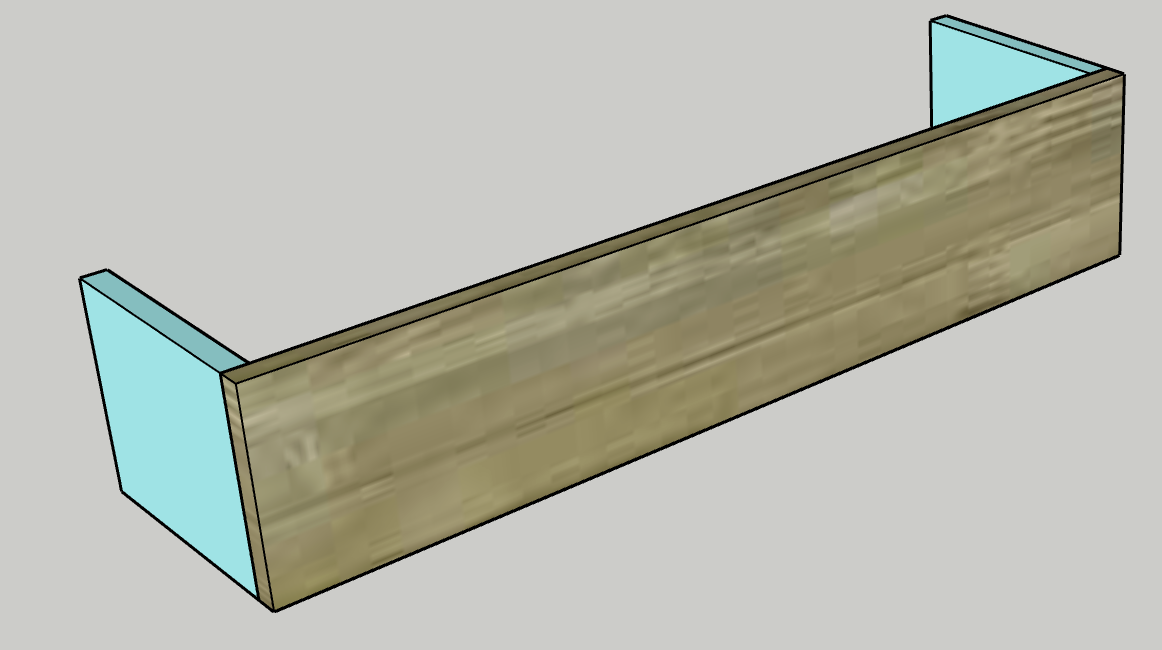
-
Attach front
- Using wood glue and pocket hole screws, attach the Front Sides into the Side Faces at the base.
- Using wood glue and pocket hole screws, attach the Front Brace between the two Side Faces at the top.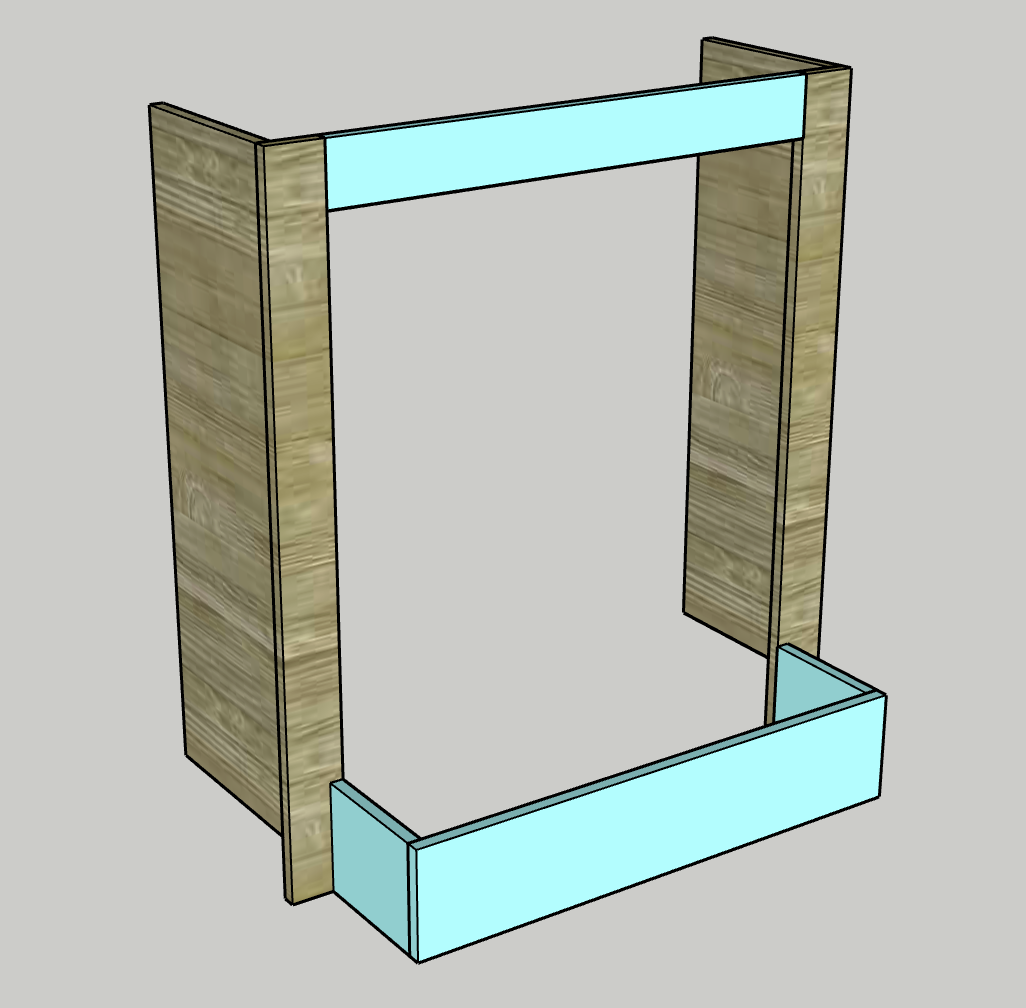
-
Add Back Braces
- Drill two pocket holes in each end of the Back Braces.
- Using wood glue and pocket hole screws, attach the Back Braces between the Sides on the back edge.
- Attach one at the top and one appropriately spaced down so as not to come in contact with your range hood.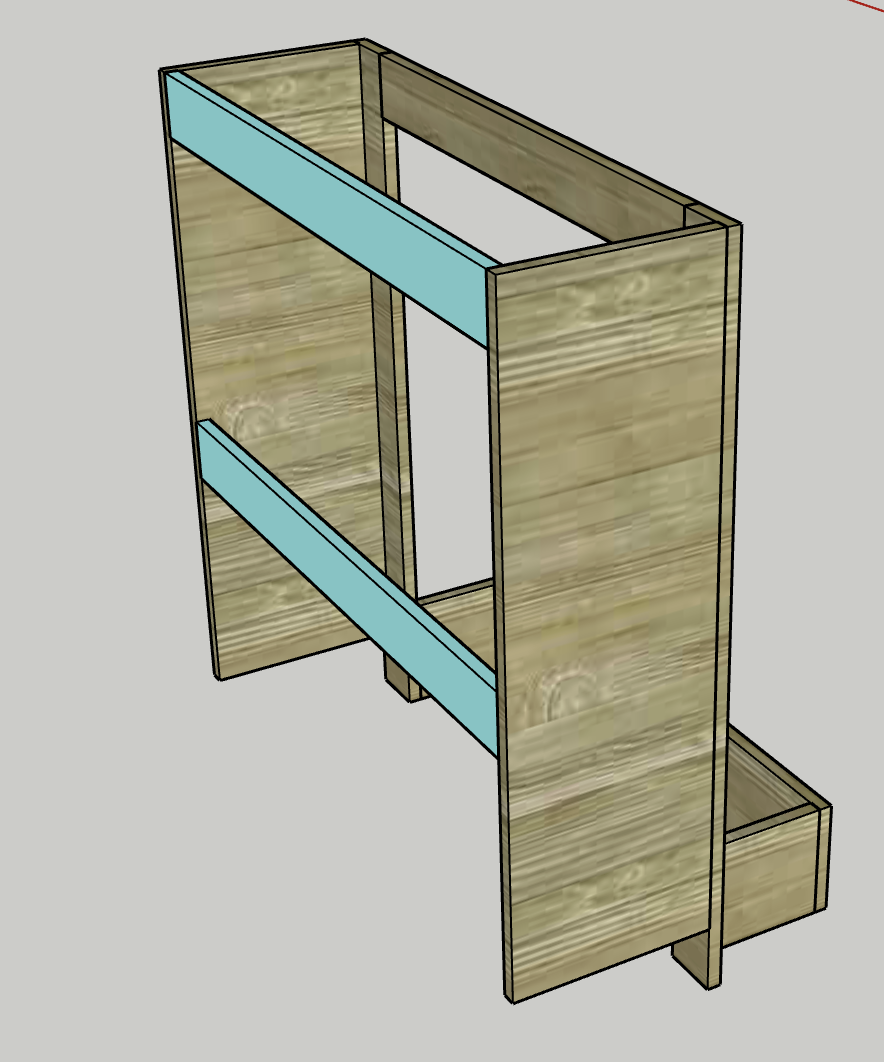
-
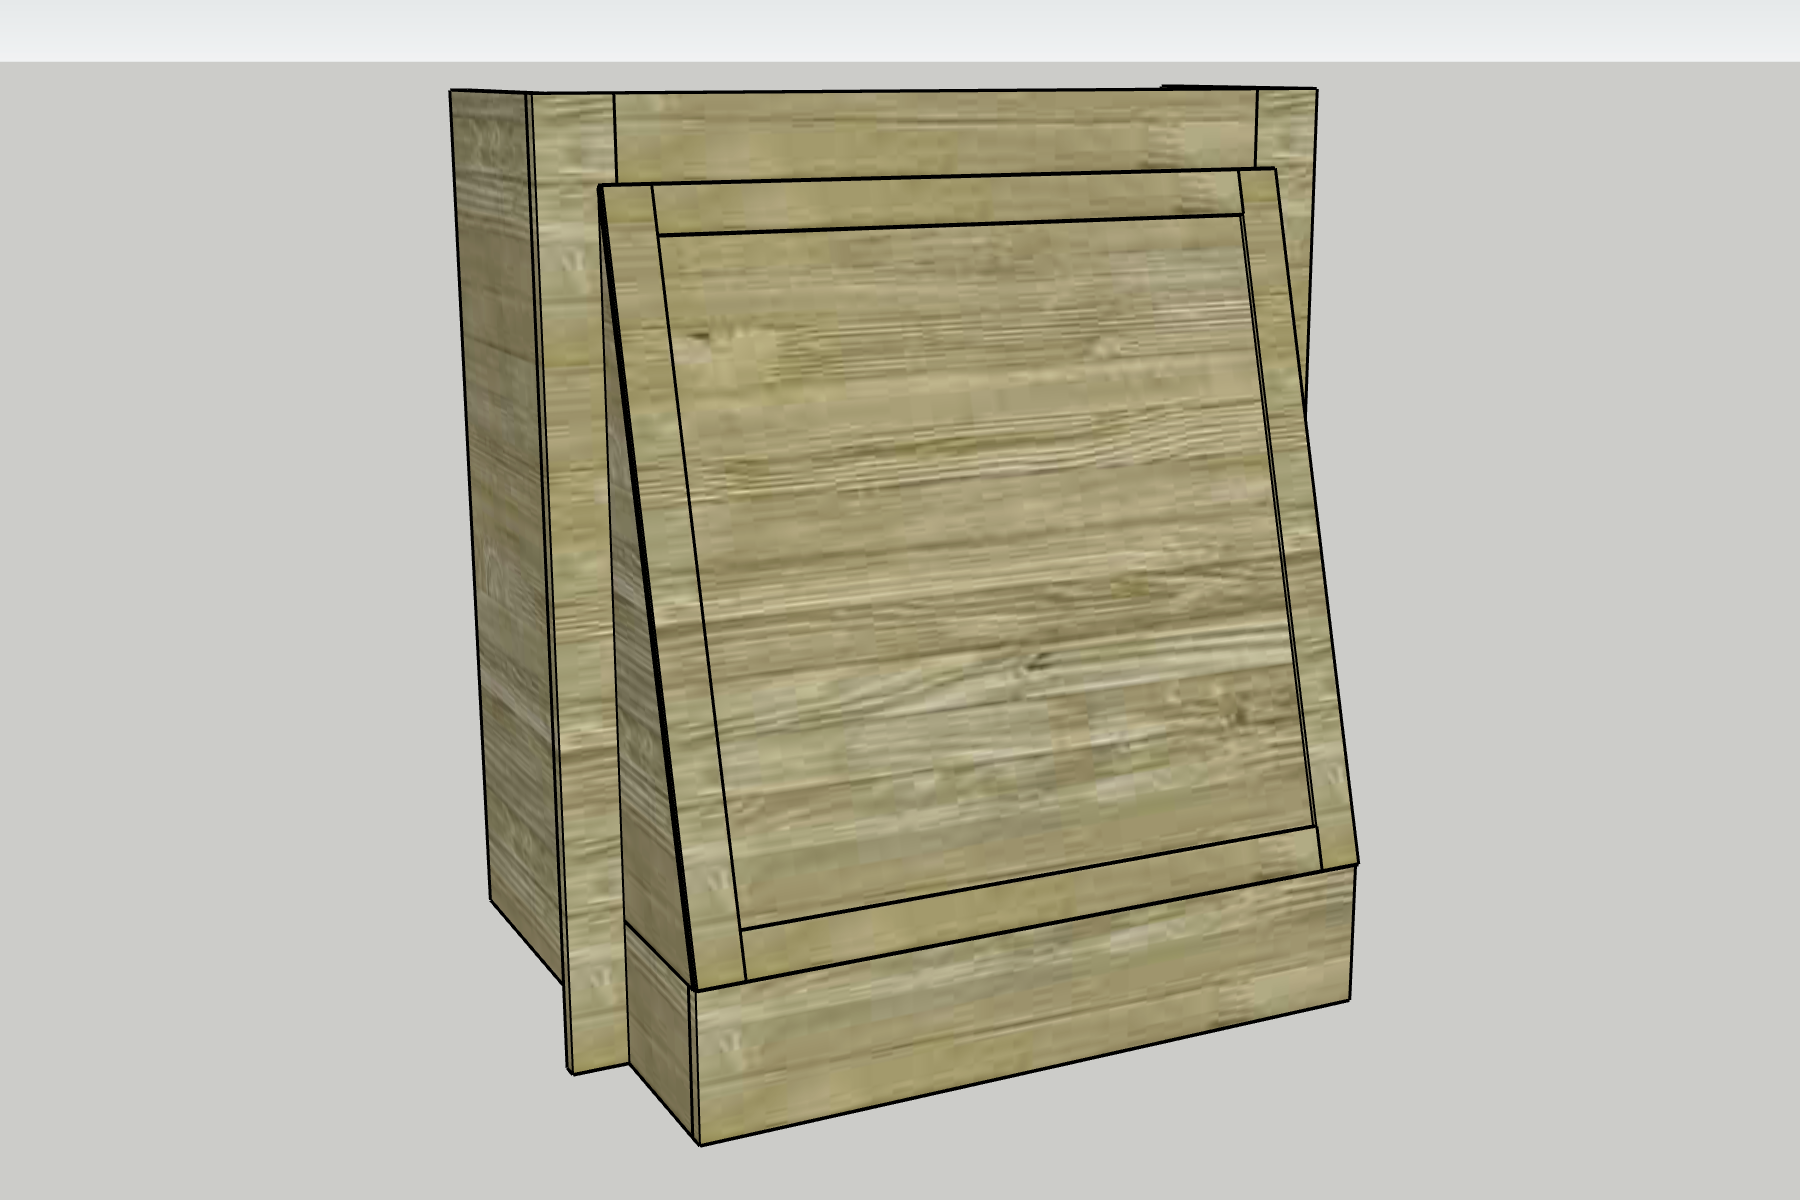
Add angled sides
- Draw a line from two opposing corners of the Angled Side Boards. Cut along that line so you have a right angle triangle.
- Drill four pocket holes on the long non-angled edge of the Angled Sides and two on the bottom edge (make sure you drill these on opposing sides of the wood from each other.
- Using wood and pocket hole screws, attach the Angled Sides into the top of the Front Sides and front of the Side Faces.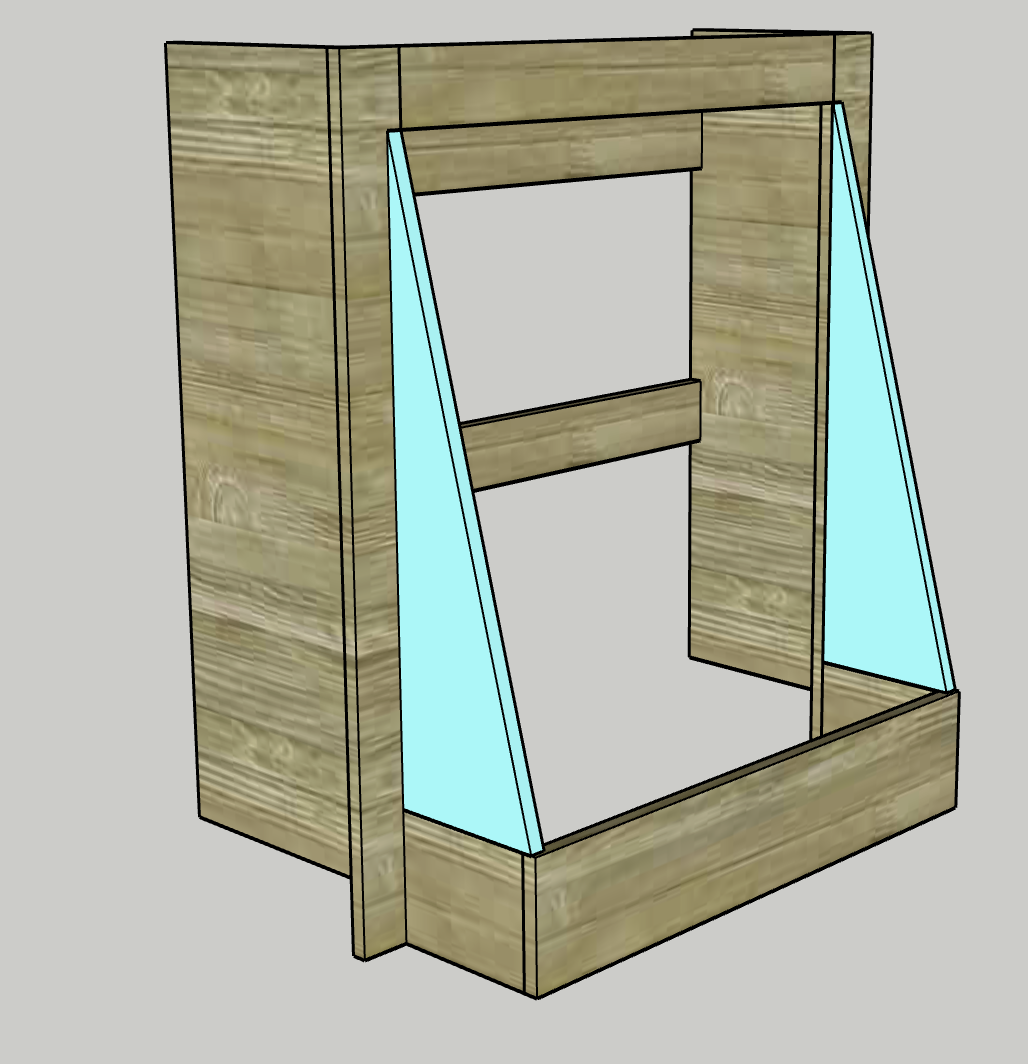
-
Attach vent cover
- Using wood glue and nails, attach the Vent Cover to the Angled Sides.
- Note- If you want to secure this to the studs on the back wall, you may need to insert the hood cover as it is now to attach the braces to the wall. After you add the cover, it would be difficult to attach to the wall, however you can still attach it through the cabinets next to it.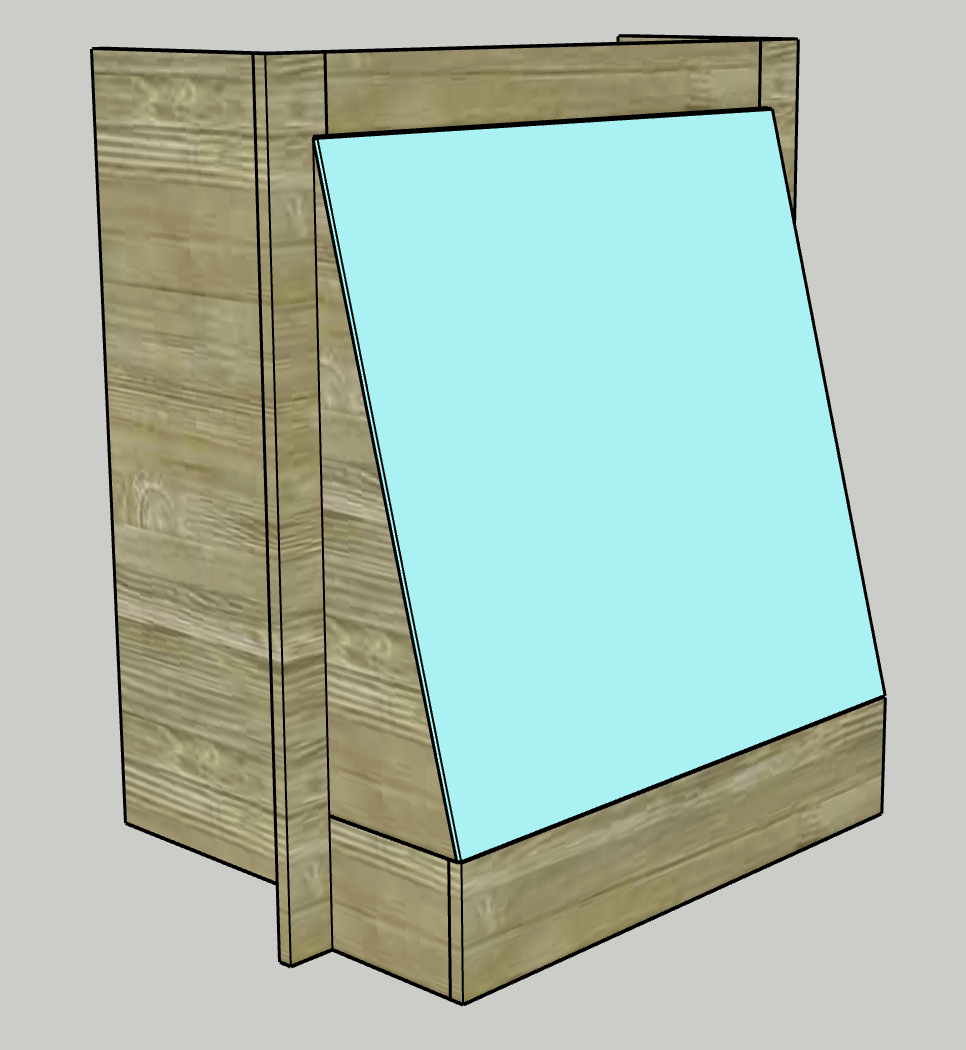
-
Add molding
- Using wood glue and nails, attach the Side Molding to the face of the Vent Cover along the outside edges.
- Repeat to add the Top and Bottom Molding between the tops of the Side Molding.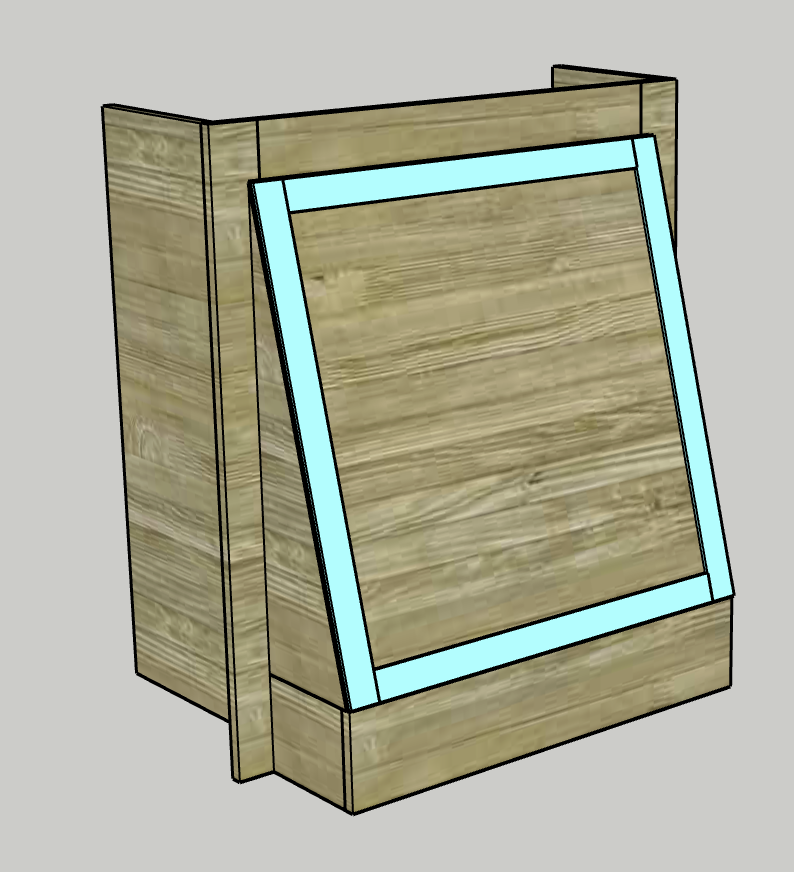
-
Paint or stain
- Make sure you go around and fill any nail holes or small gaps with wood filler, then let dry and sand.
- Apply paint or stain to the hood to match your aesthetic.
- Add a coat of sealant to protect the hood from grease stains.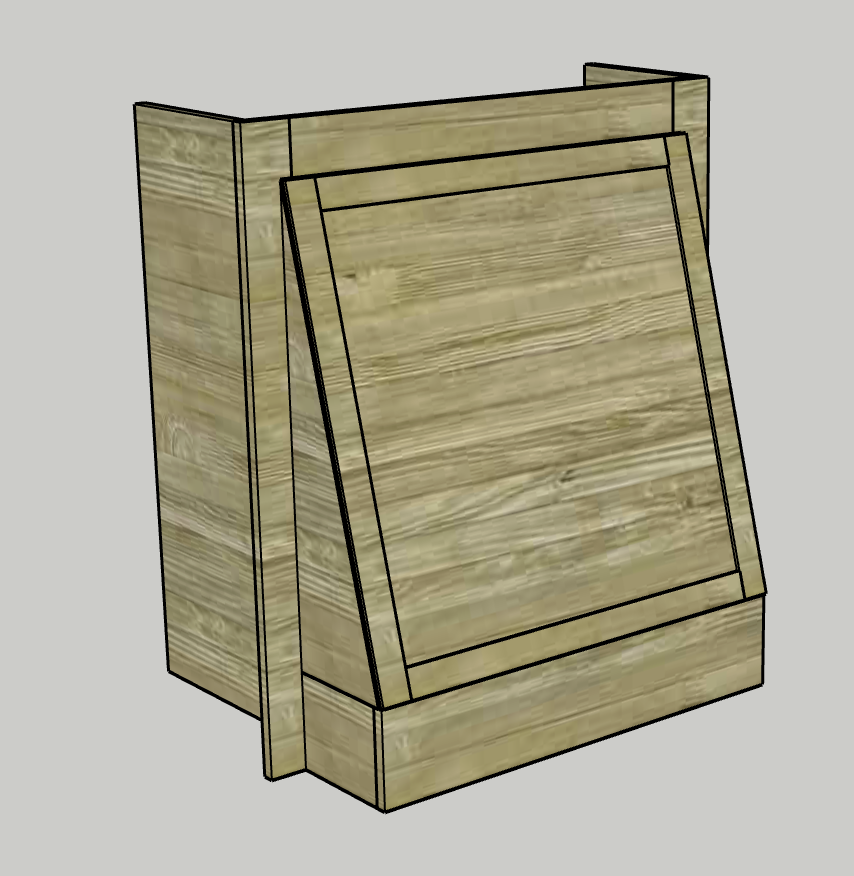
-
Install
- Install your range hood cover using screws through the Back Braces into studs in the wall.
- You can also attach to the cabinets next to it using screws through the cabinets into the sides of the range hood cover.
-
Enjoy!
Enjoy your handiwork and tag @CharlestonCrafted on Instagram with a picture!