Radley Hidden Shoe Cabinet
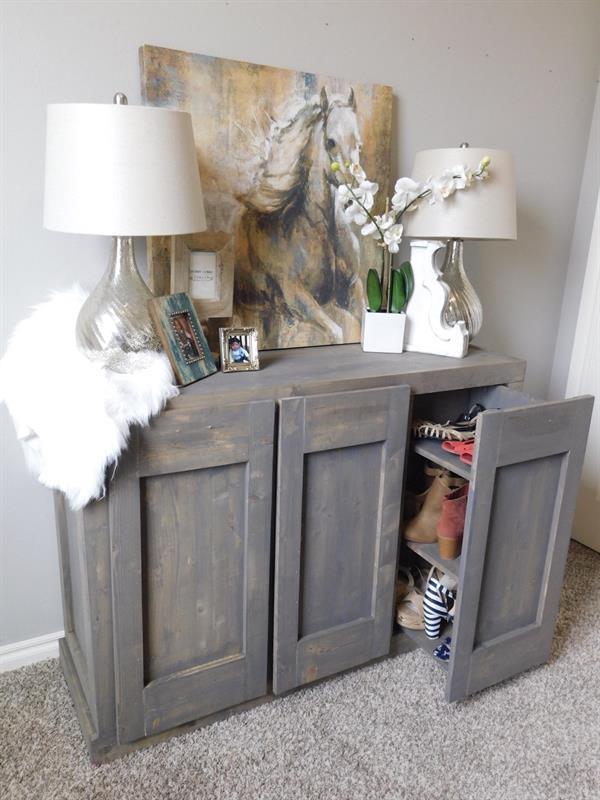
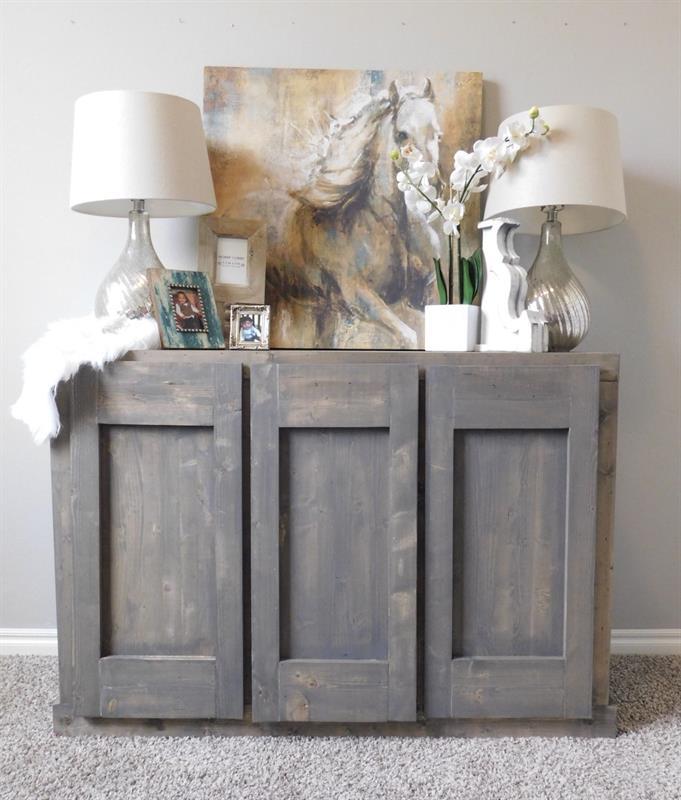
By Smashing DIYCalling all shoe lovers! Showcase your shoes in this awesome Radley Hidden Shoe cabinet. First glance, this lovely cabinet looks like a regular chic furniture piece but the pull out drawers have plenty of space to hold all of those dancing shoes.
Directions
-
Attach Vertical Side Braces
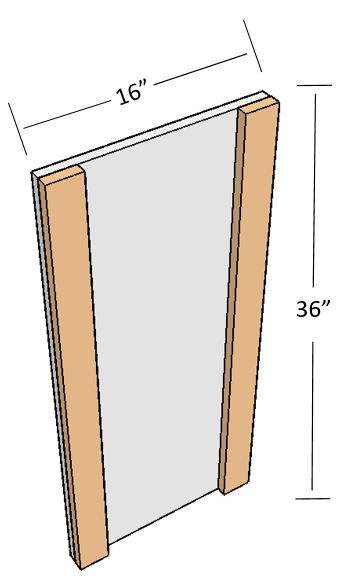
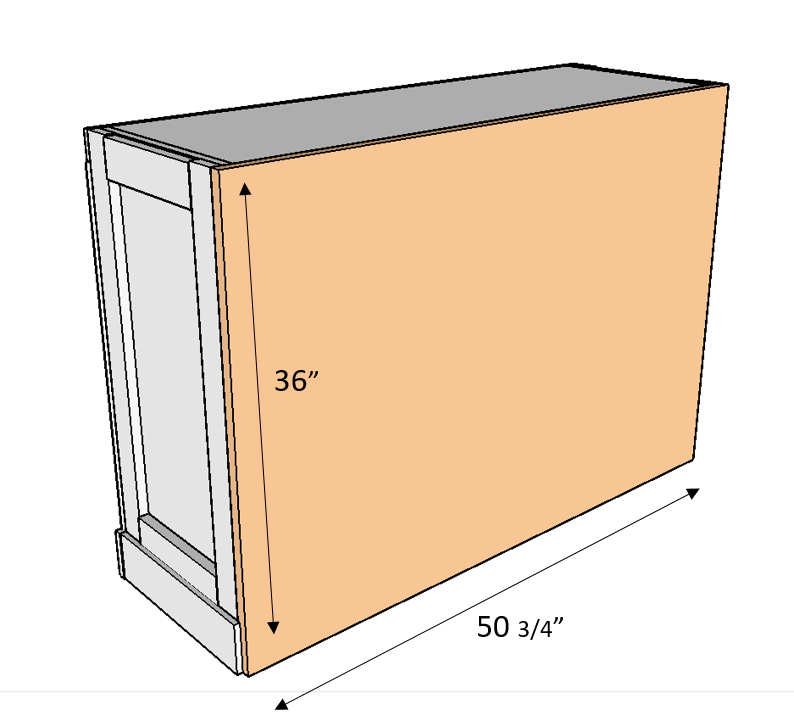
Attach the two 36" 1x3 vertical braces to the 16"x 36" side board using a brad nailer and 1 1/4 finish nails. Be sure to measure your 1x3 board before making your cut for the best fit. Make two of these for the two ends of the cabinet.
-
Attach Horizontal Side Brace
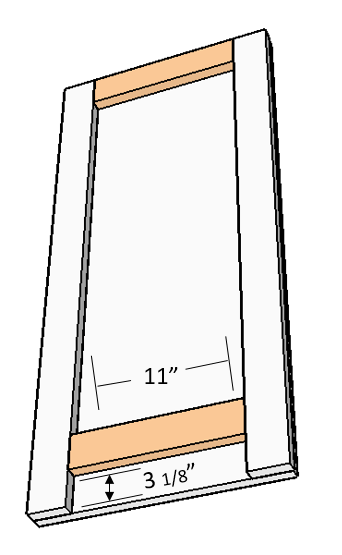
Attach the two 11" 1x3 horizontal braces to the 16"x 36" side board using a brad nailer and 1 1/4 finish nails. Be sure to measure your 1x3 board before making your cut for the best fit. Make sure to place the bottom 1x3 board 3 1/8" above the bottom end. Make two of these for the two ends of the cabinet.
-
Attach Top Shelf
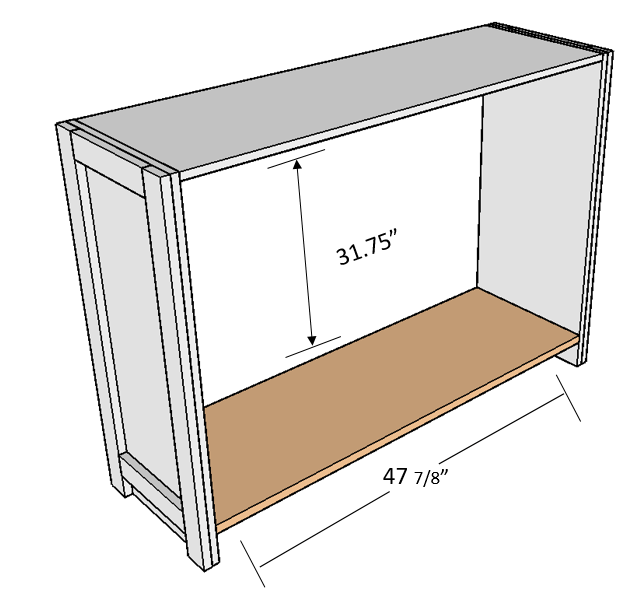
Attach the top shelf (16" x 47 1/8") to the two side boards using a Kreg Jig on a 3/4" setting, with 1 1/4" pocket hole screws to attach along with wood glue
-
Attach Bottom Shelf
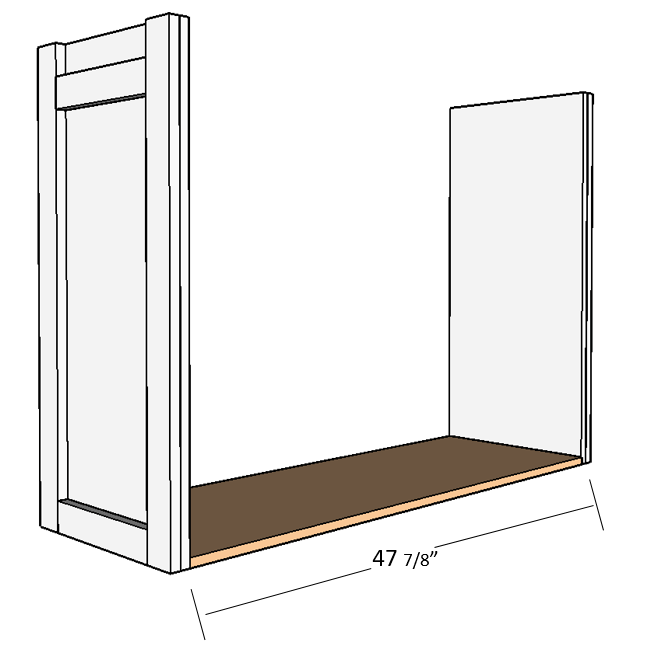
Attach the bottom shelf (16" x 47 1/8") to the two side boards using a Kreg Jig on a 3/4" setting, with 1 1/4" pocket hole screws to attach along with wood glue. Make sure the side with pocket screws is facing down
-
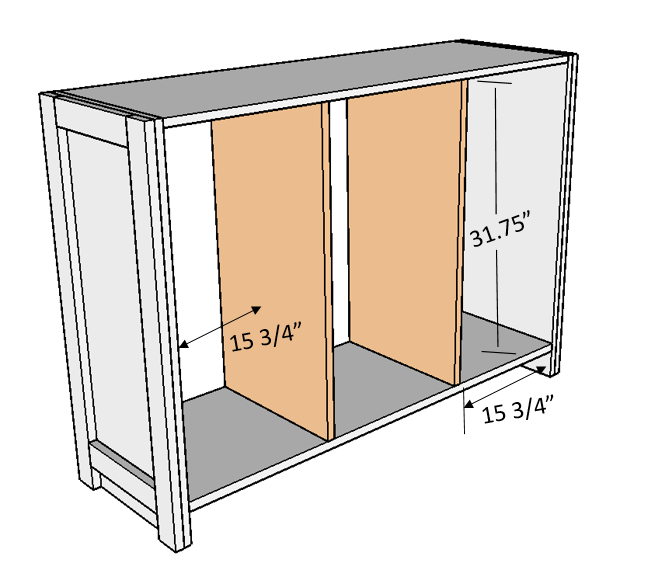
Attach Cabinet Dividers
Attach the middle dividers (16" x 31 3/4") to the square cabinet using a Kreg Jig on a 3/4" setting, with 1 1/4" pocket hole screws to attach along with wood glue. The space between the first and last divider should be 15 3/4"
-
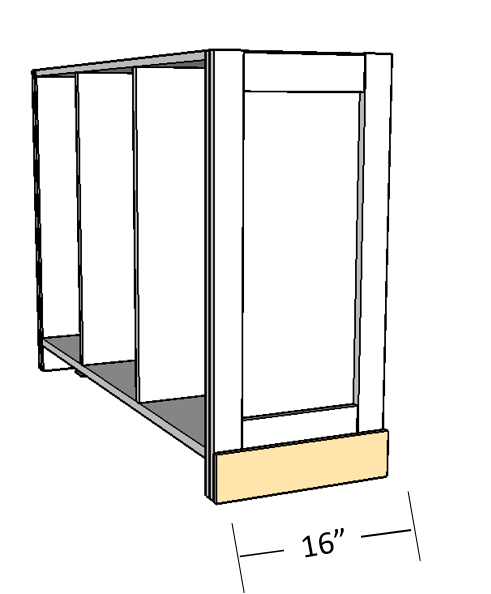
Attach 1x4 Side Trim
Attach the 1x4 bottom side trim to both sides of the cabinet using wood glue, a brad nailer and 1 1/4" finish nails. Be sure to measure board against cabinet before making your cut for best fit.
-
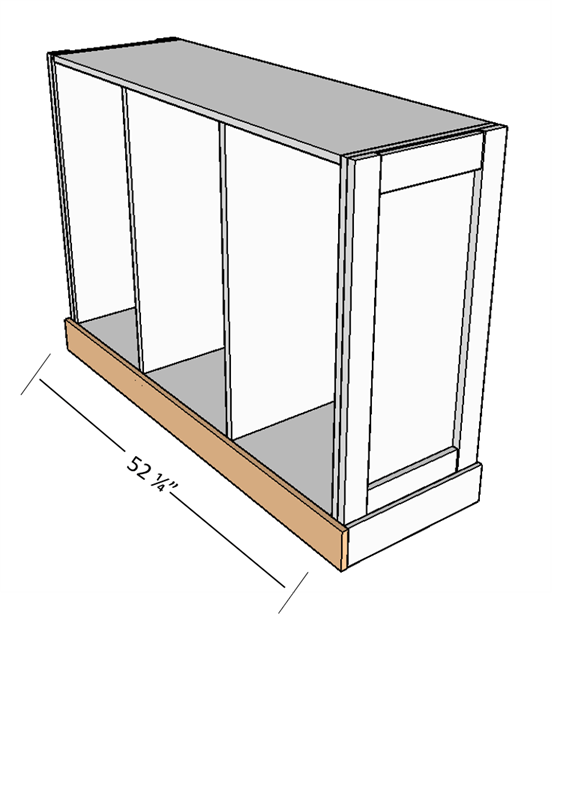
Attach 1x4 Front Trim
Attach the 1x4 bottom front trim to the front of the cabinet using wood glue, a brad nailer , and 1 1/4" finish nails.
The 1x4 should be flush with the bottom shelf.
Be sure to measure the board against the cabinet before making your cut for best fit.
-
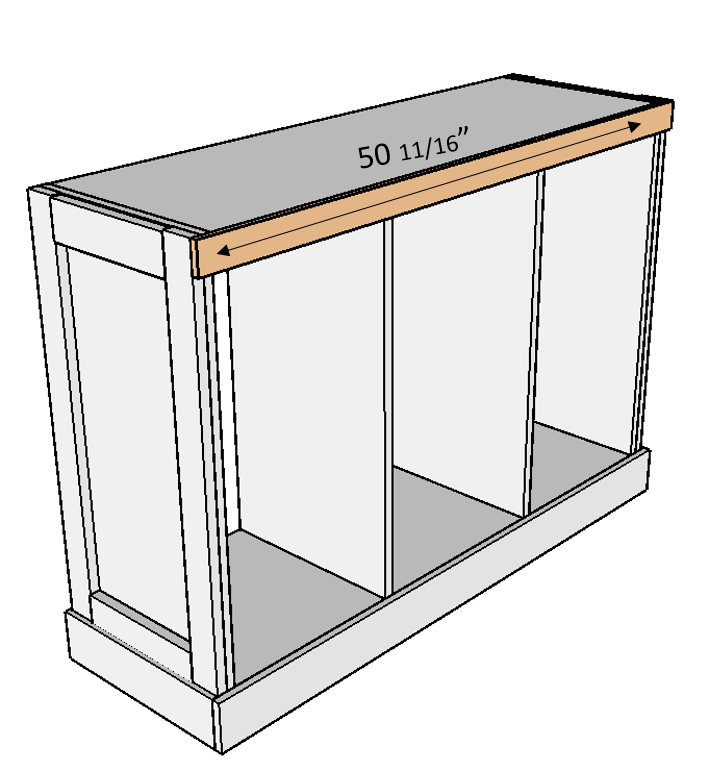
Attach 1x3 Top Front Trim
Attach the 1x3 top front trim to the front of the cabinet using wood glue, a brad nailer , and 1 1/4" finish nails.
The 1x3 boards should be flush with the top shelf.
Be sure to measure the boards against the cabinet before making your cut for best fit.
-
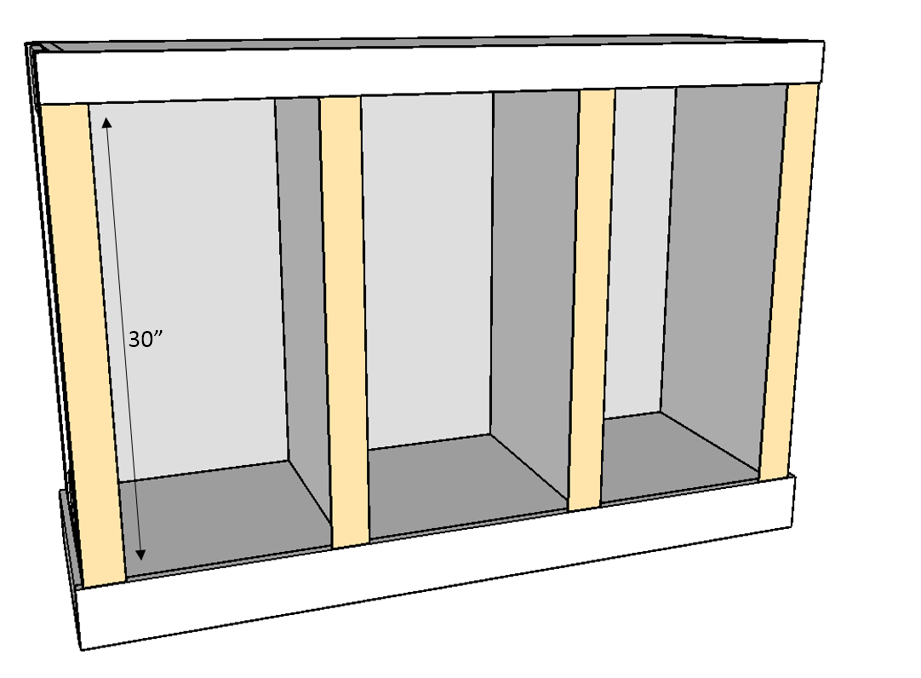
Attach Front 1x3 Vertical Braces
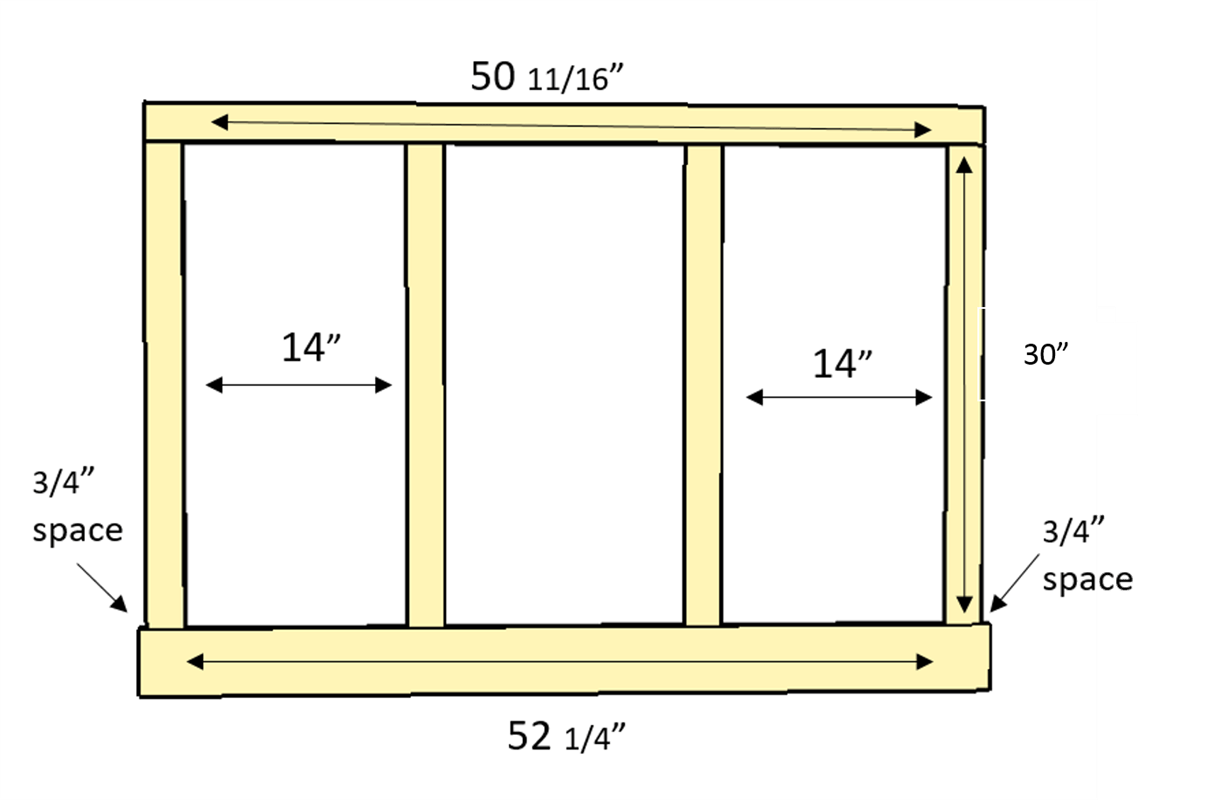
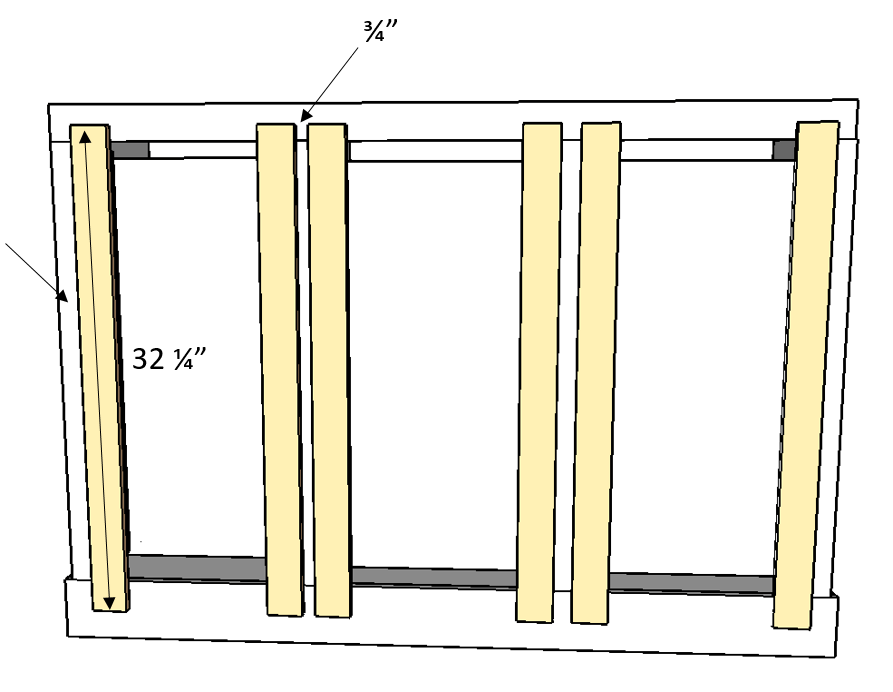
Attach the four 1x3 vertical front trim pieces to the front of the cabinet using wood glue, a brad nailer , and 1 1/4" finish nails.
The two middle 1x3 boards should be centered on the cabinet dividers. The outer two 1x3 boards should be flush with the outside side of the cabinet.
Be sure to measure the boards against the cabinet before making your cut for best fit.
-
Alternative Step for 7-9
Attach the front top 1x3 trim and bottom 1x4 trim together with the 1x3 vertical trim using a Kreg Jig on a 3/4" setting, with 1 1/4" pocket hole screws to attach along with wood glue.
Once face trim is assembled, attach to the cabinet with wood glue and a brad nailer , using 1 1/4 finish nails.
-
Add 1x4 Shelf Supports
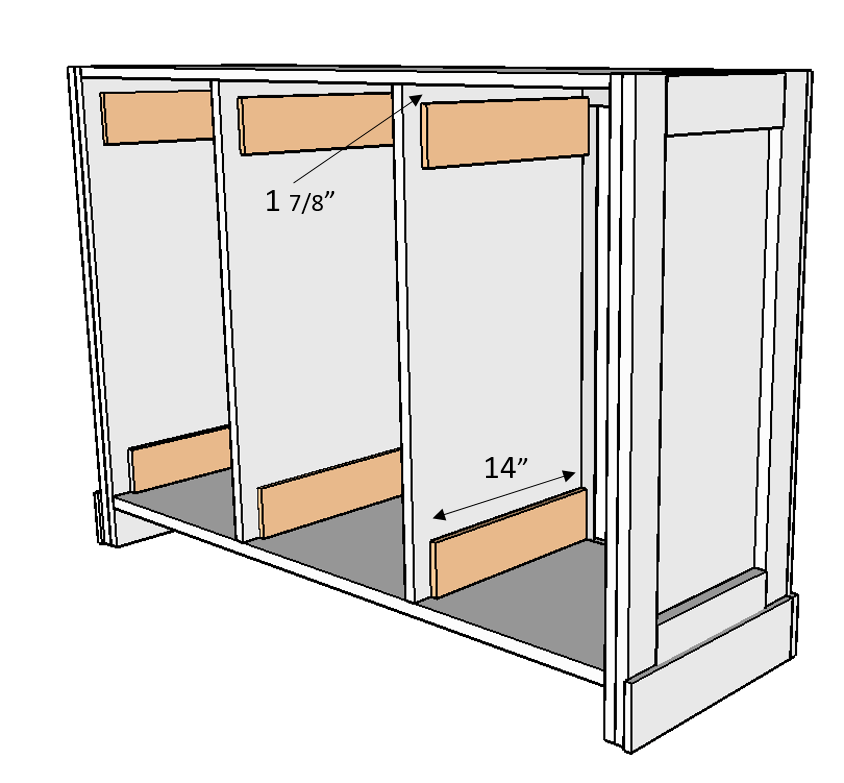
Using a brad nailer, wood glue and finish nails, attach the 1x4 shelf supports to the right side of the cabinet.
These 1x4 will go right up against the vertical 1x3 front boards.
The top 1x4 supports will be inset by 1 7/8 of an inch.
-
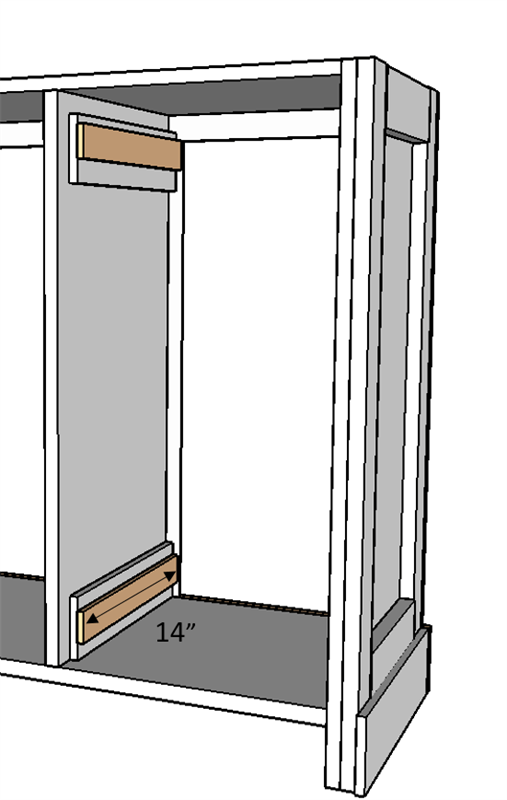
Add 1/2" Shelf Supports
Using a brad nailer, wood glue and finish nails attach the 1/2" supports to the 1x4s.
The top 1/2" supports will be flush with the cabinet opening. The bottom 1/2" supports will be placed directly in the center of the 1x4 supports.
-
Assemble Two Outer Drawers
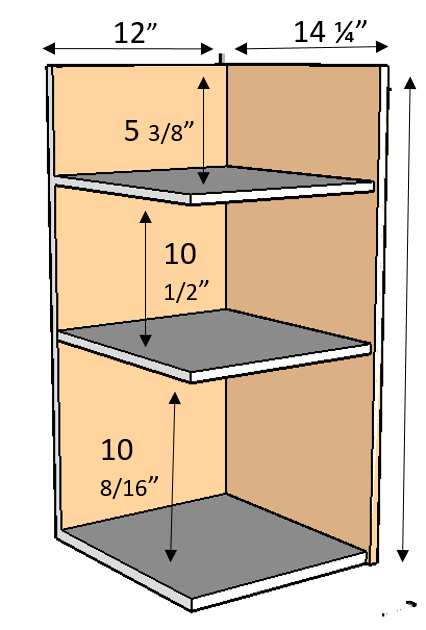
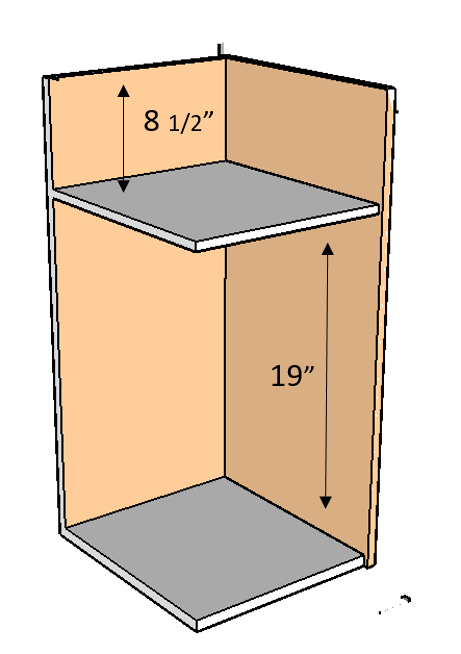
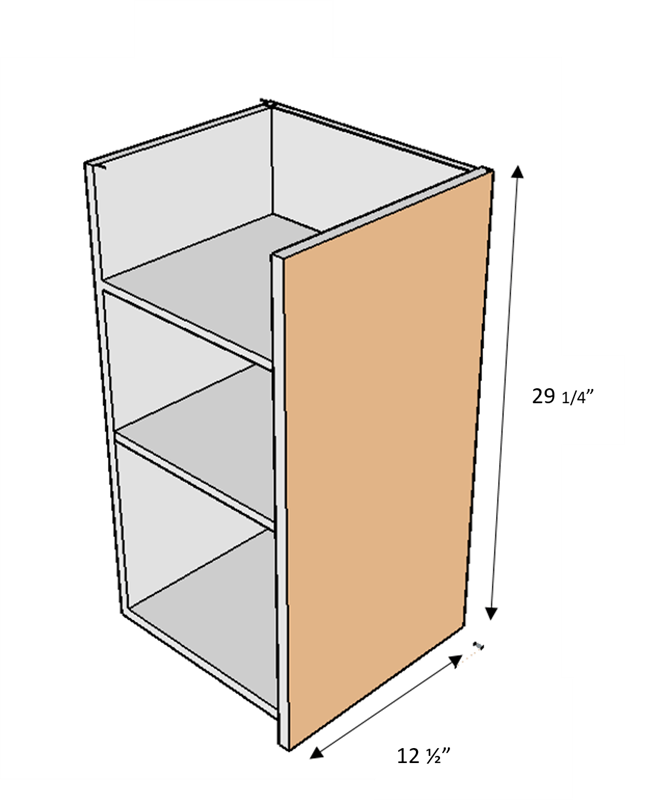
Assemble drawer shelves by first attaching the (12"X29 1/4") 3/4" back drawer to the (14 1/4" X 29 1/4") 3/4" side drawer using a Kreg Jig on a 3/4" setting, with 1 1/4" pocket hole screws to attach along with wood glue.
Then attach the 3 14 1/4" 1x12 shelves to the drawer.
Be sure to add pocket holes to the 1x12 shelves on the side that will be connected to the drawer face (this is how you will attach the drawer face
-
Assemble Middle Drawer
Assemble drawer shelves by first attaching the (12"X29 1/4") 3/4" back drawer to the (14 1/4" X 29 1/4") 3/4" side drawer using a Kreg Jig on a 3/4" setting, with 1 1/4" pocket hole screws to attach along with wood glue.
Then attach the 2 14 1/4" 1x12 shelves to the drawer.
Be sure to add pocket holes to the 1x12 shelves on the side that will be connected to the drawer face (this is how you will attach the drawer face
-
Add Drawer Slides
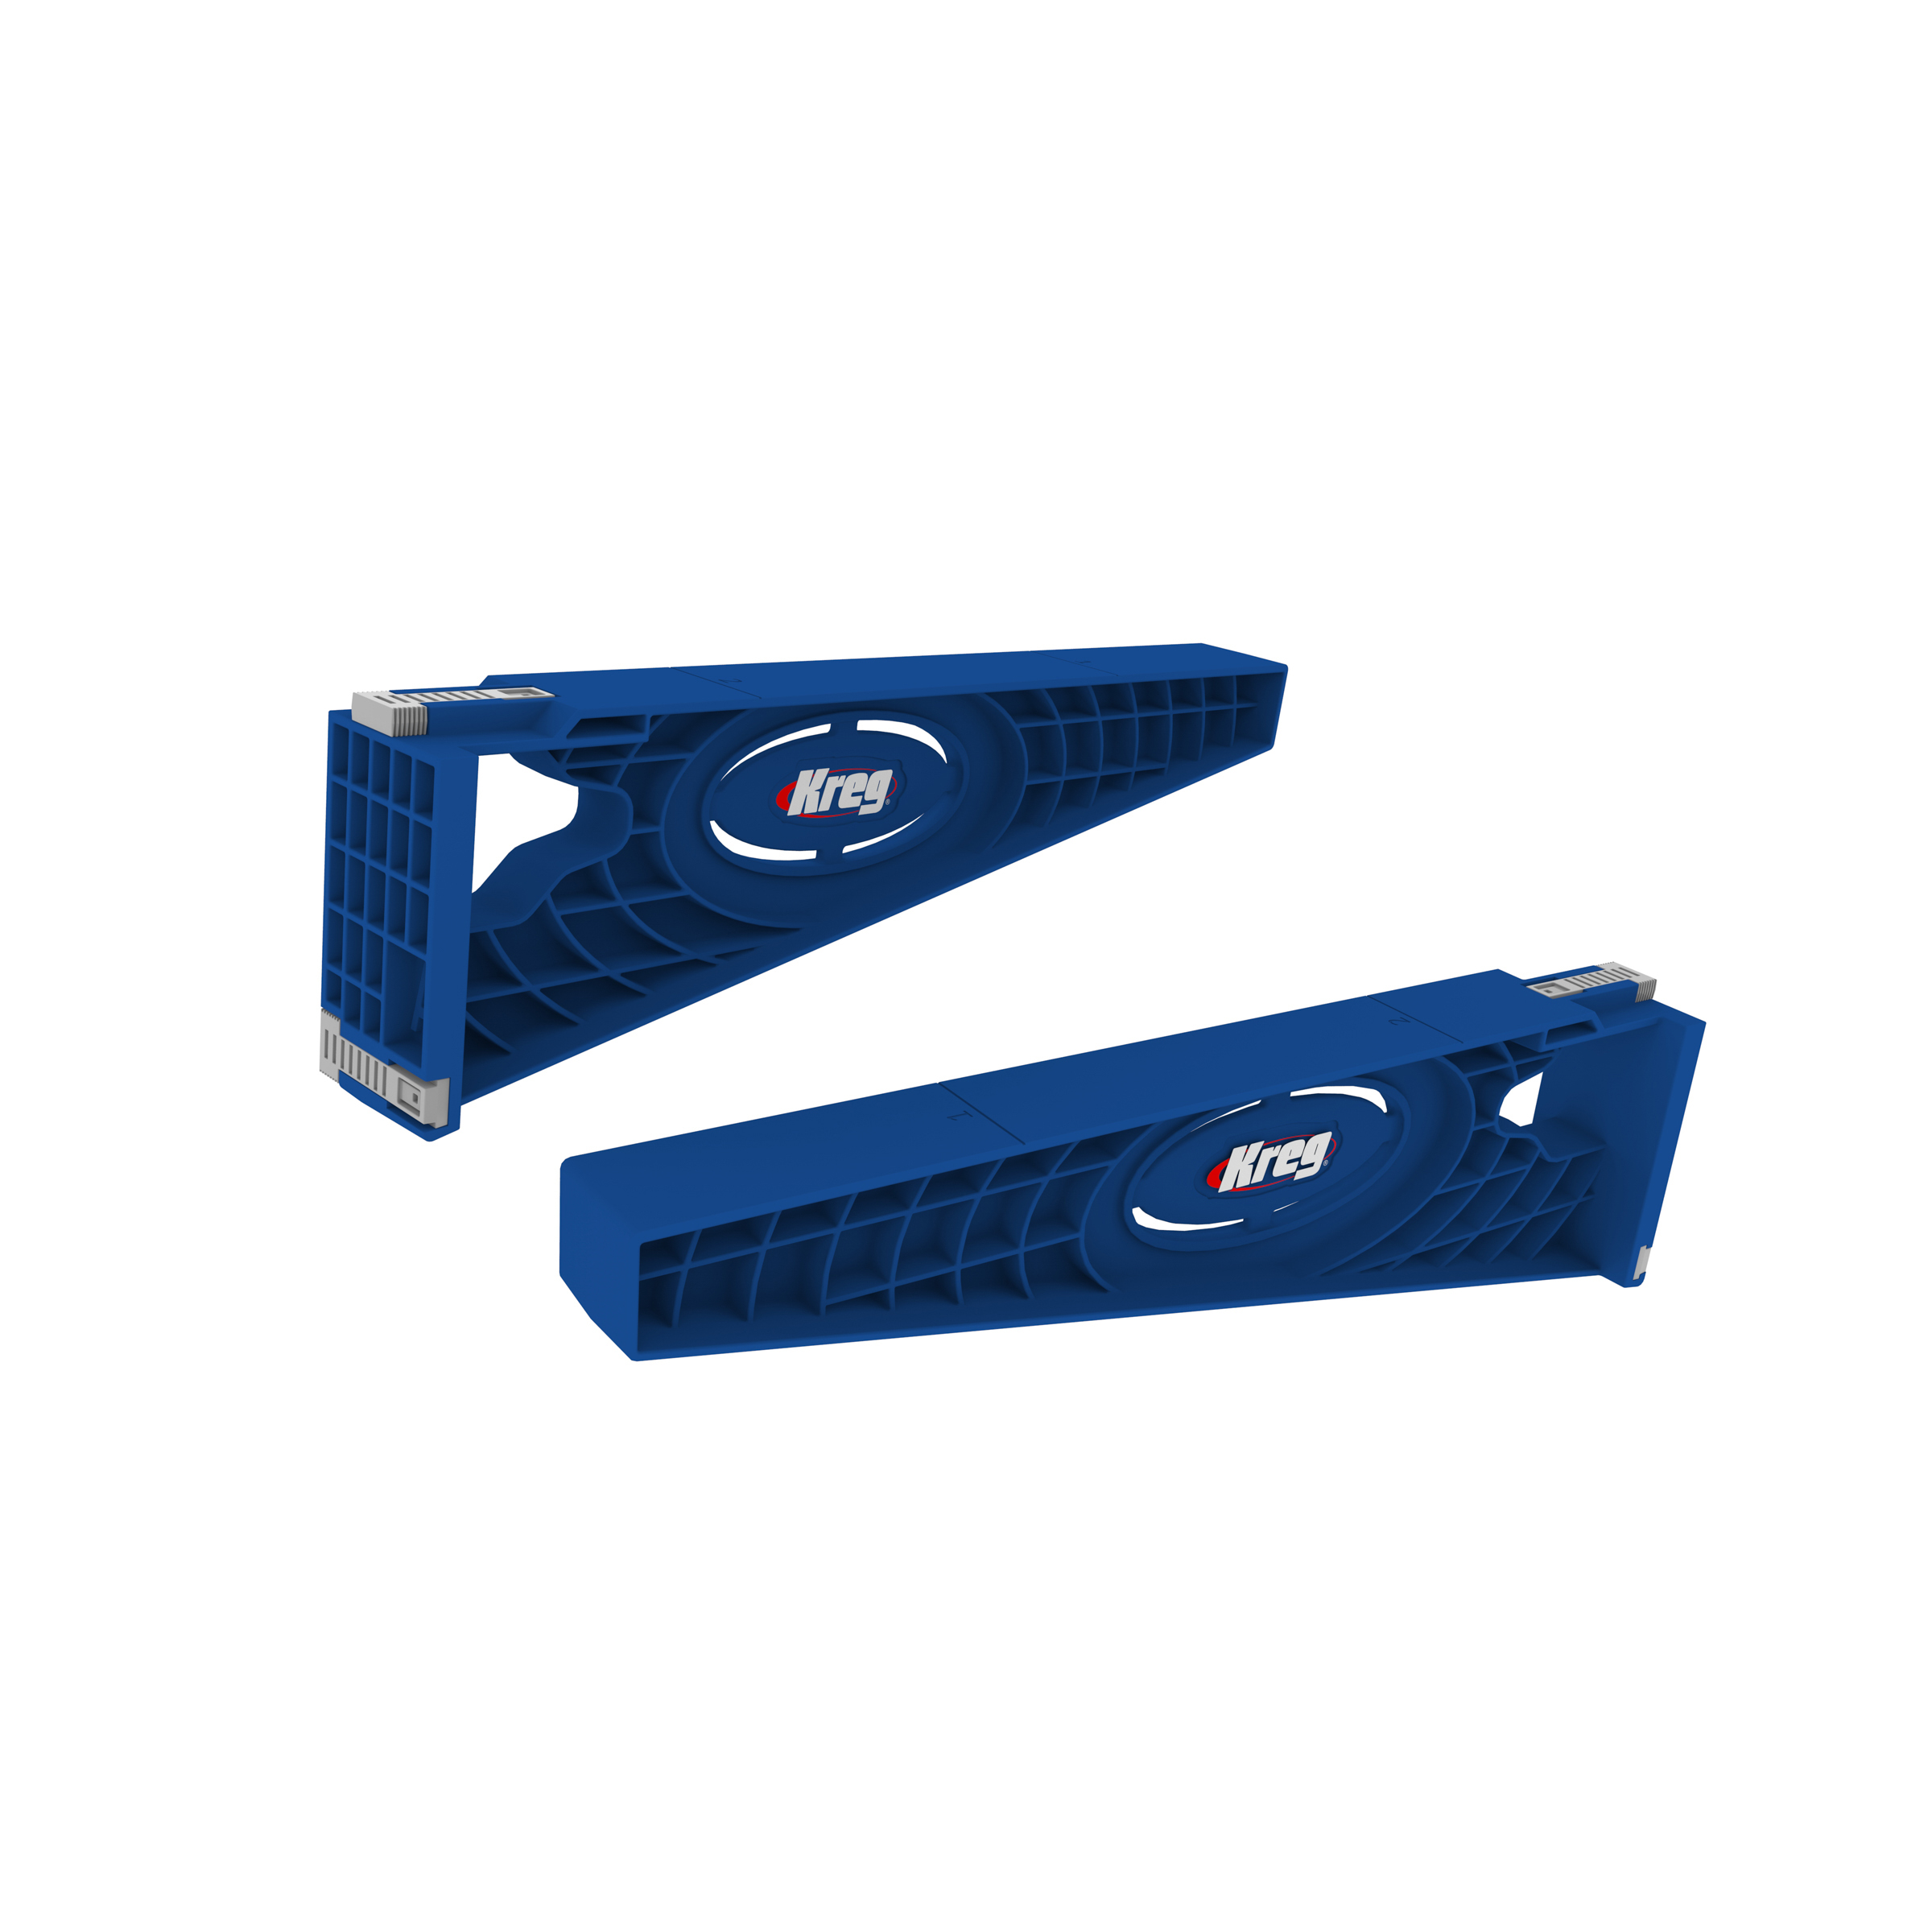
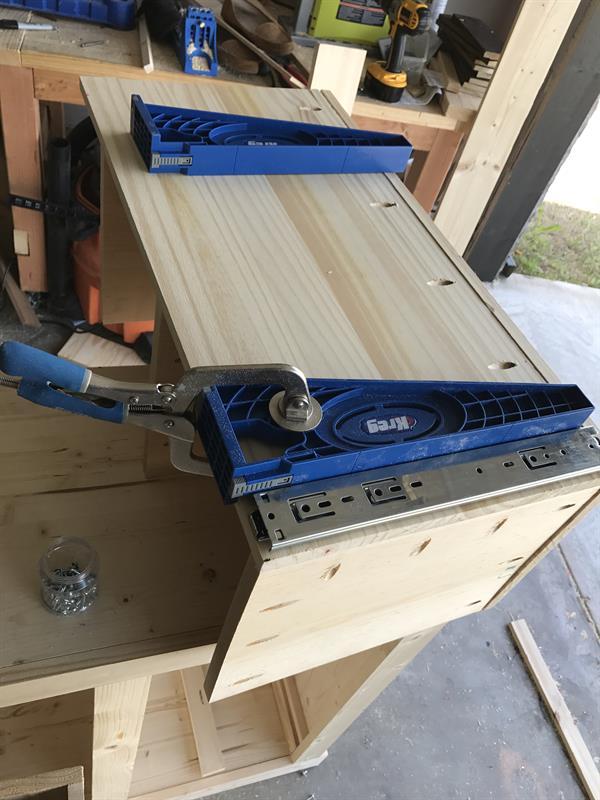
Using Kreg's Drawer Slide Jigs attach drawer slides to drawers. The bottom drawer slide can be flush with the bottom of the drawer the top drawer slide will go 1 1/2" from the top.
-
Add Drawers to Cabinet
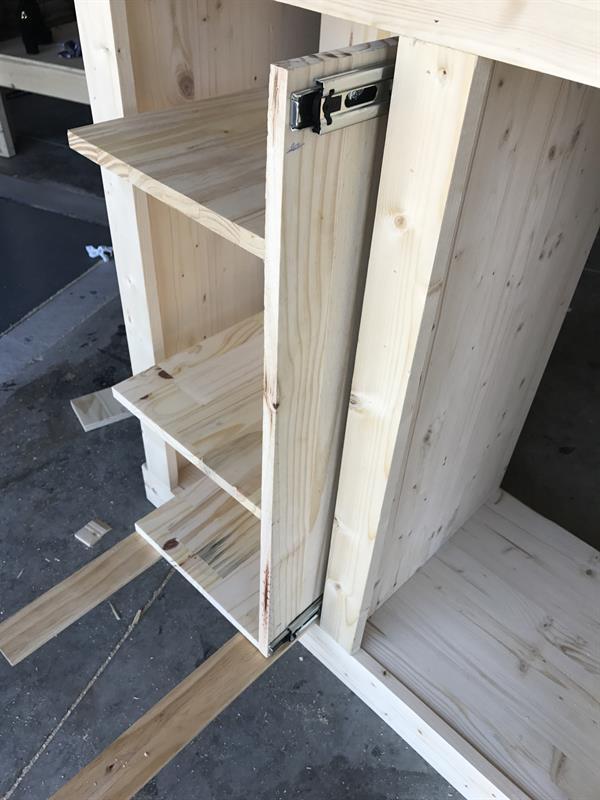
Place two 1x2s underneath the pull-out drawer and slide it in the cabinet opening. From the back carefully open the drawer slide inch by inch while screwing it to the 1/2" shelf support.
Do this for all three pull-out drawers.
-
Add Drawer Faces
Hold the 3/4" drawer face (12 1/2" x 21 1/4") up to the pull out drawer. The Right side of the drawer face should be flush with the drawer pulls and the face should be 1" higher than the pull out drawer.
This is definitely a two person job. Hold the drawer face up to the pull out drawer to make sure it fits through the cabinet opening and have someone mark from the back where it should go.
Once marked, turn the cabinet on its side and attach drawer faces using pre-drilled pocket holes.
-
Add Vertical Drawer Face Trim
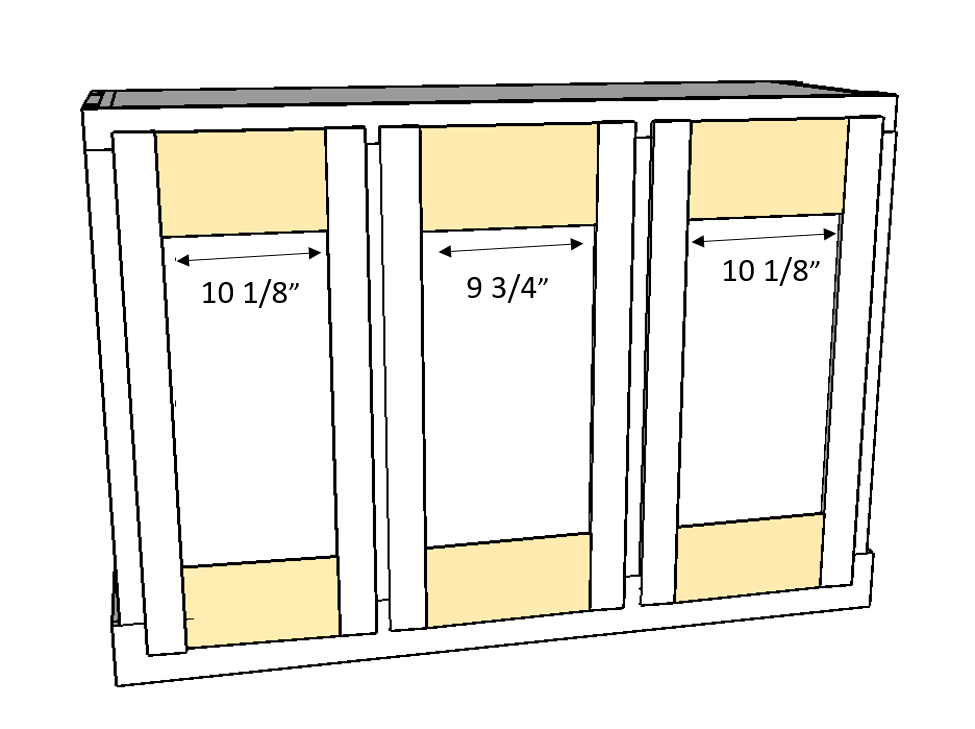
Add vertical 1x3 drawer face trim to drawer faces using a brad nailer, wood glue and finish nails.
-
Add 1x6 Horizontal Drawer Face Trim
Add horizontal 1x6 drawer face trim trim to drawer faces using a brad nailer, wood glue and finish nails.
-
Add 1/4" Plywood Backing
Add 1/4" plywood backing to the cabinet using a brad nailer, wood glue and finish nails.
-
Visit Handmade-Haven.com
For more free plans, projects and more
Visit www.Handmade-Haven.com


