PB Teen-Inspired Dresser
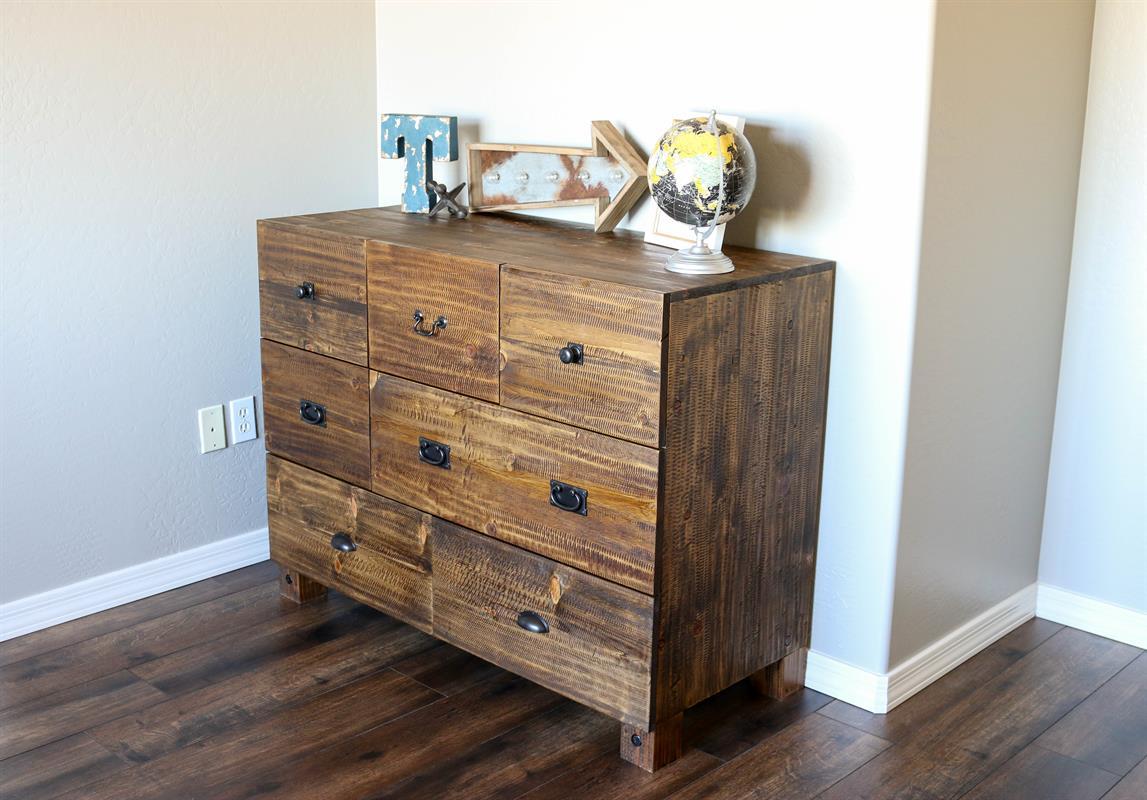
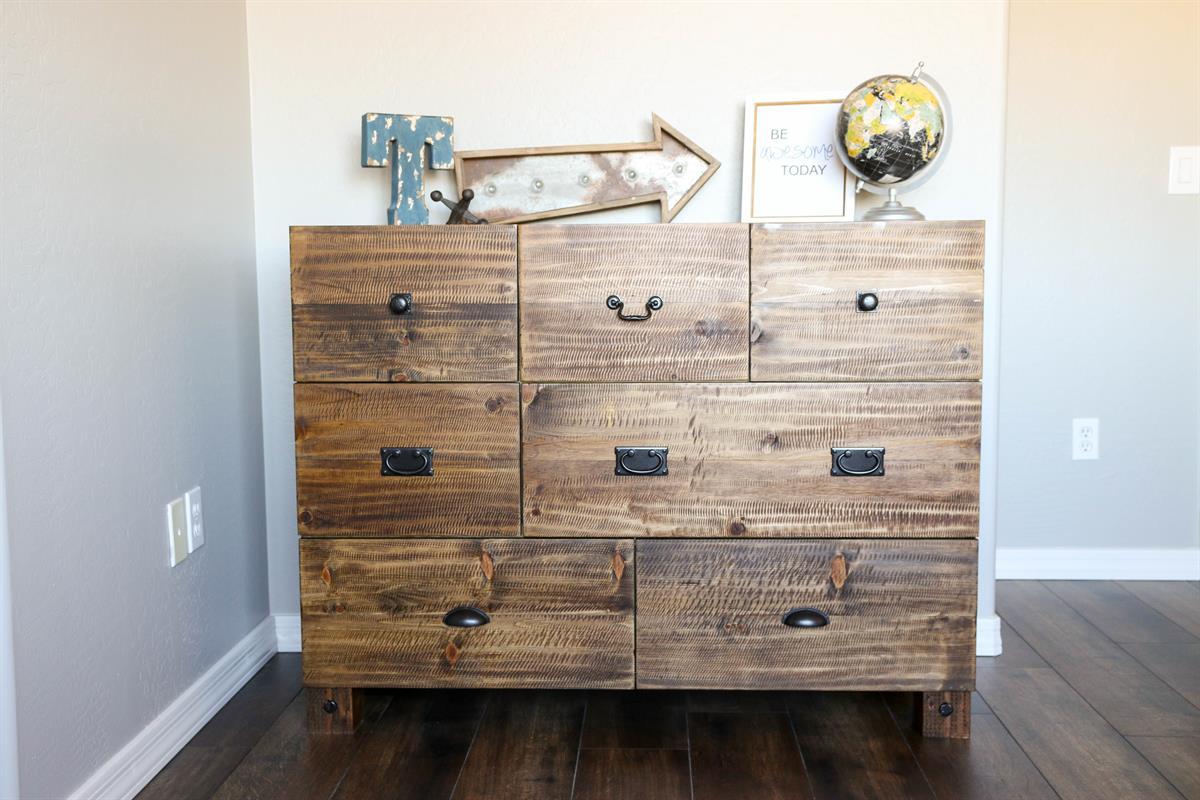
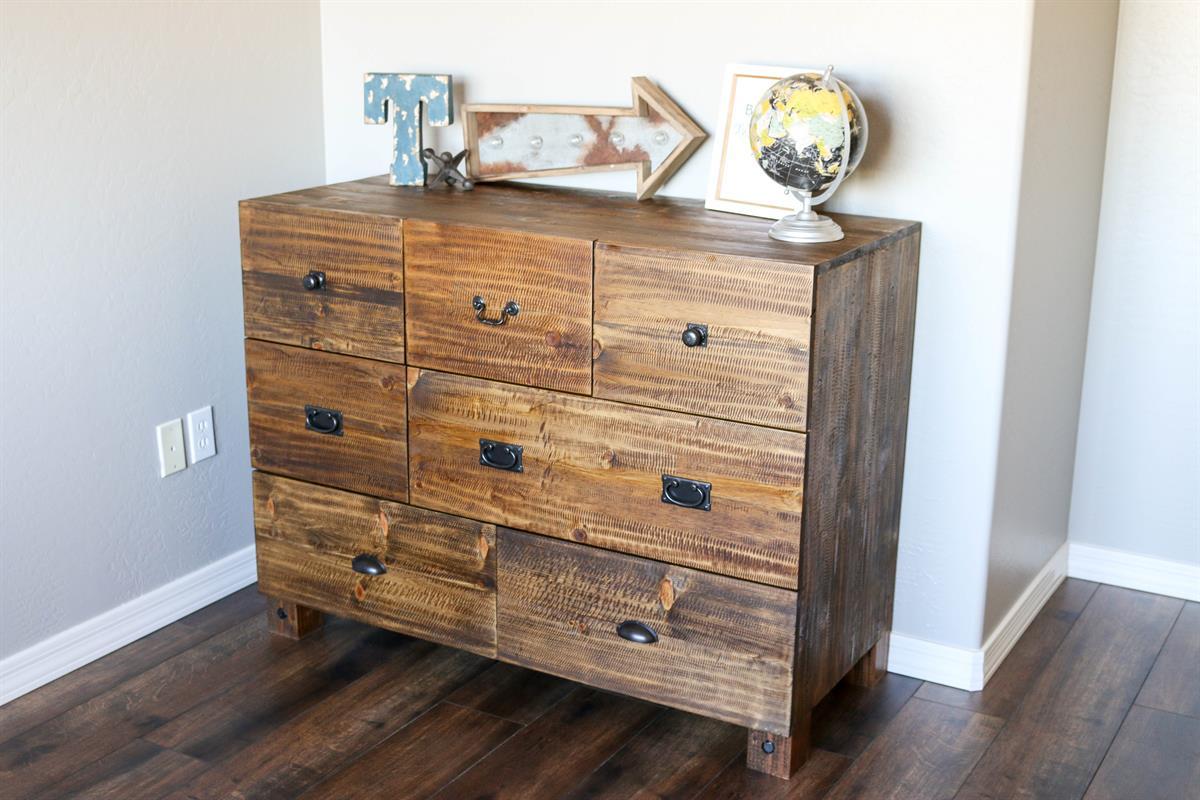
By Addicted 2 DIYThis PB Teen-Inspired dresser holds plenty of clothes for growing kids and has a beautiful, rustic look. For the plans for the bed and nightstand, as well as a tutorial on how I distressed the wood, visit the link in the "extras" tab.
Directions
-
Review Plans
Review all steps before beginning. Items on cut list with an asterisk (*) should be cut to fit. To make the sanding process easier, sand components as they are cut and/or joined together. Dimensional lumber will often be slightly off in width. Drawer faces should measure 10 7/8" high. If needed, use a jointer or table saw to rip excess. Run lumber through planer, if desired.
-
Step 1
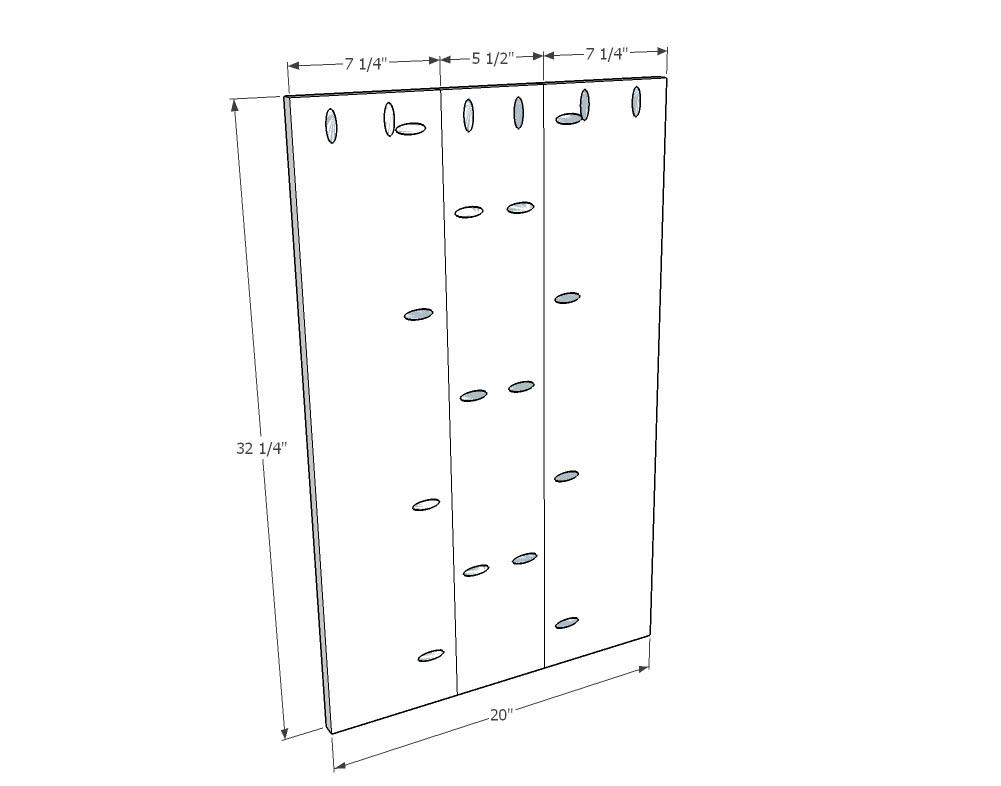
Cut side pieces, top pieces, and drawer fronts. Drill 3/4" pocket holes into side pieces, top pieces and drawer fronts. Join together with wood glue and 1 1/4" pocket screws. Drill vertical pocket holes into tops of side pieces in order to attach the top.
-
Step 2
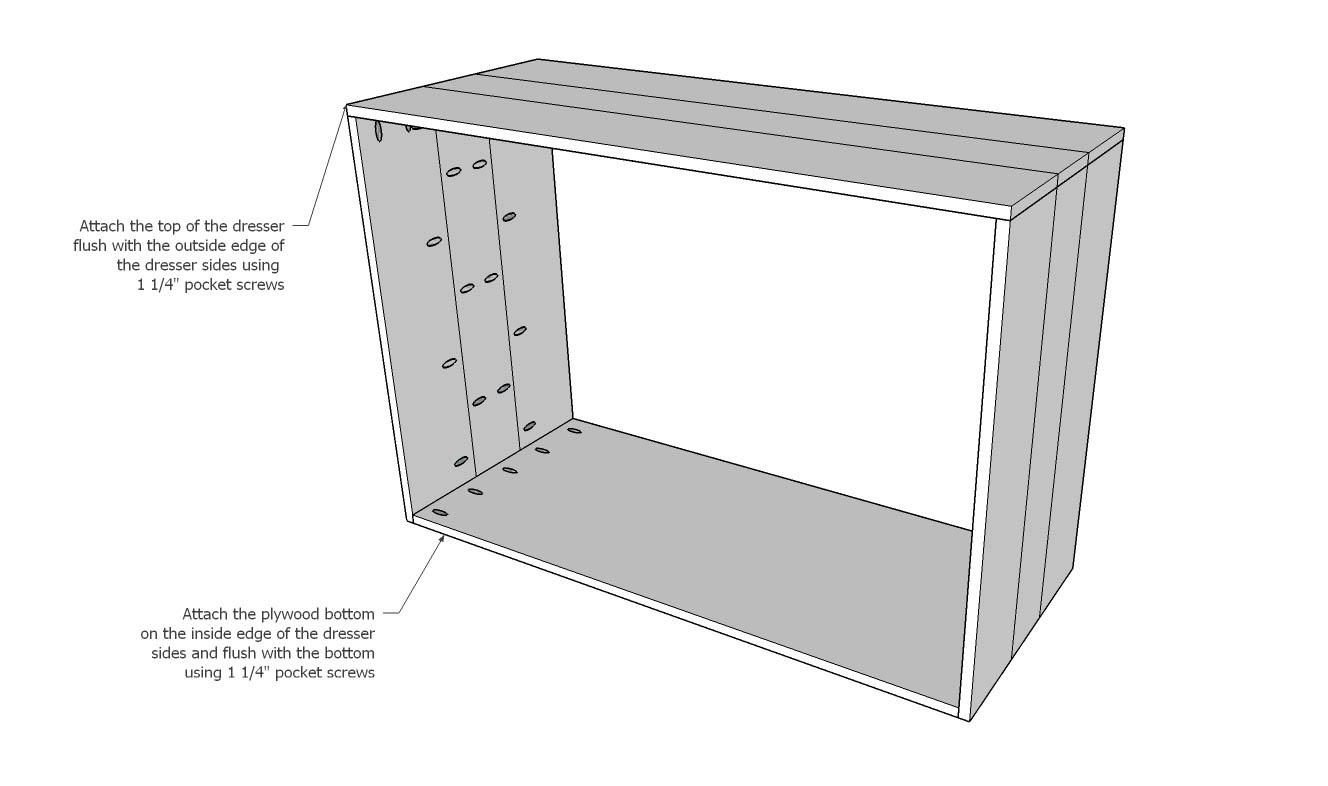
Cut plywood bottom. Drill 3/4" pocket holes into plywood bottom. Attach to the inside face of the dresser sides, flush with the bottom, using wood glue and 1 1/4" pocket screws. Attach the top so that ends of the top piece are flush with the outside face of the dresser sides. Attach with wood glue and 1 1/4" pocket screws
-
Step 3
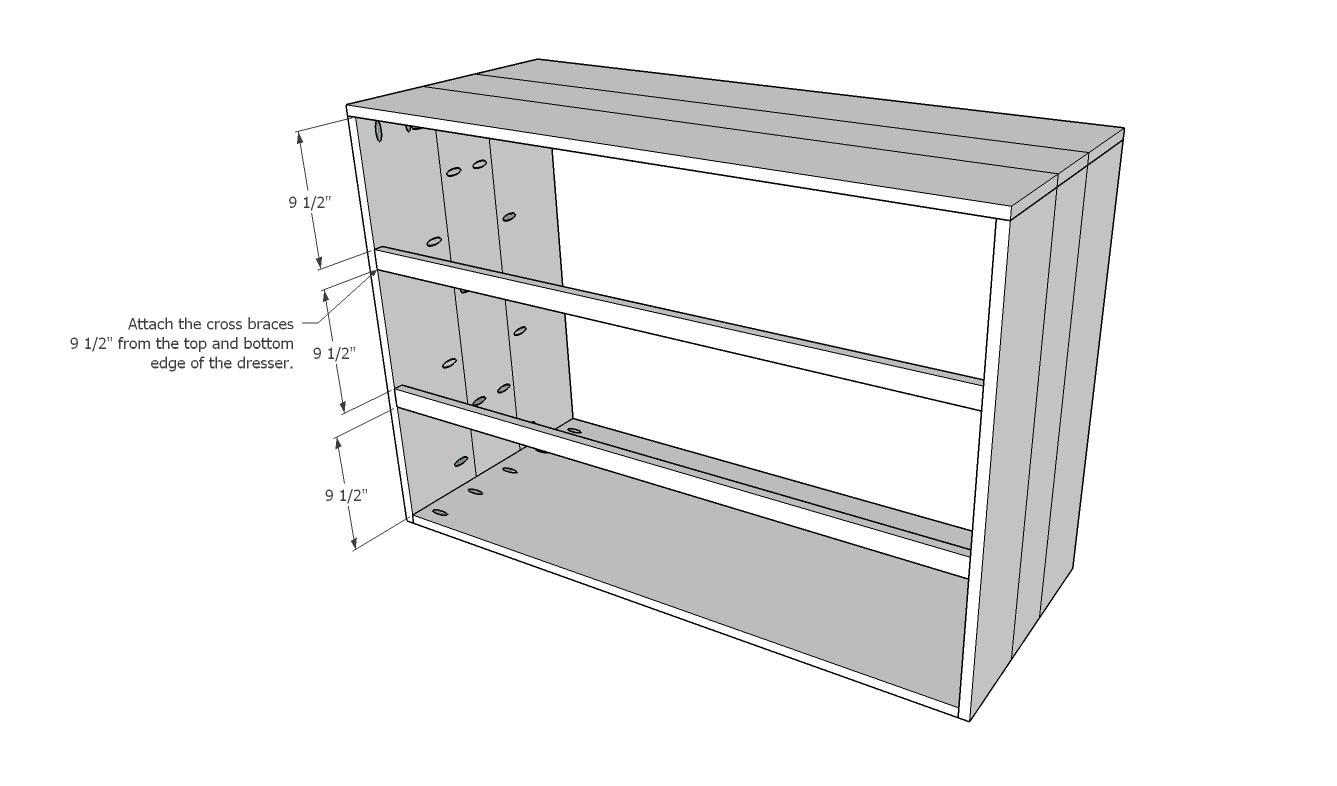
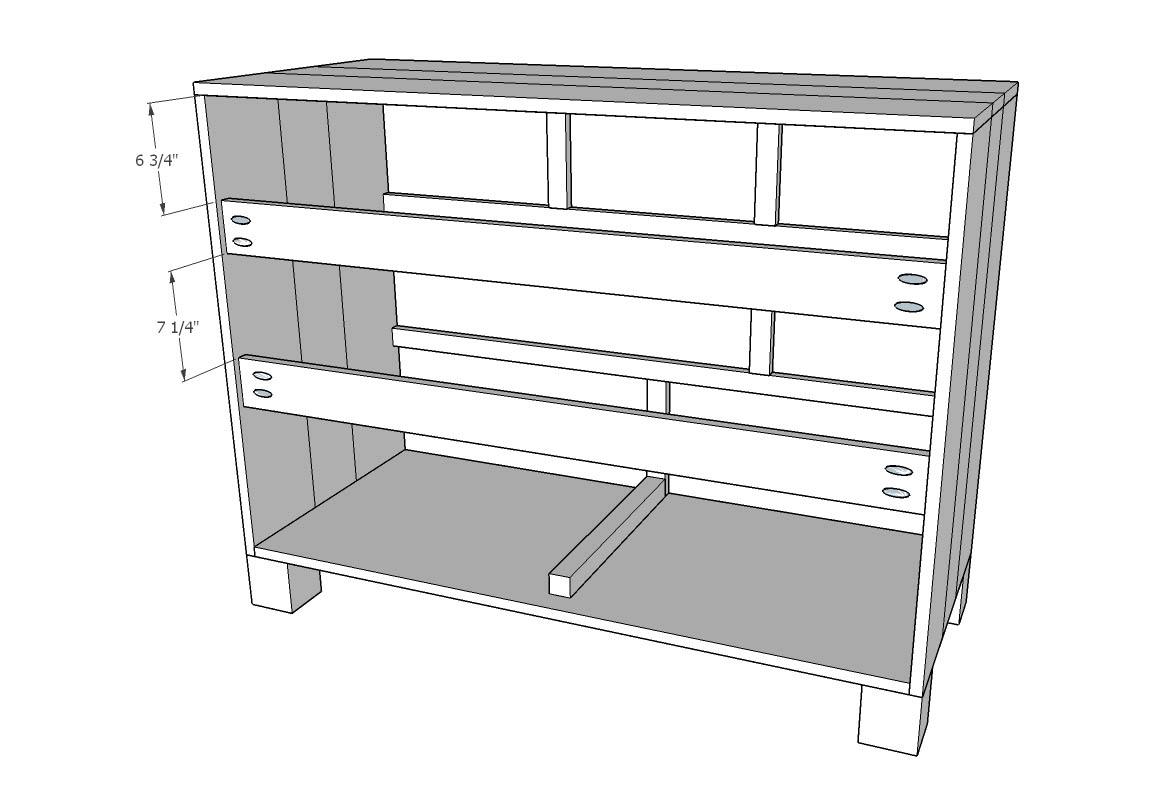
Cut horizontal 1x2 drawer frame pieces to size and drill two 3/4" pocket holes into each end of the boards. Attach the boards 9 1/2" from the inside top to the top of the 1x2 and the inside bottom to the bottom of the 1x2. This will give 9 1/2" of space between all horizontal drawer frame pieces.
-
Step 4
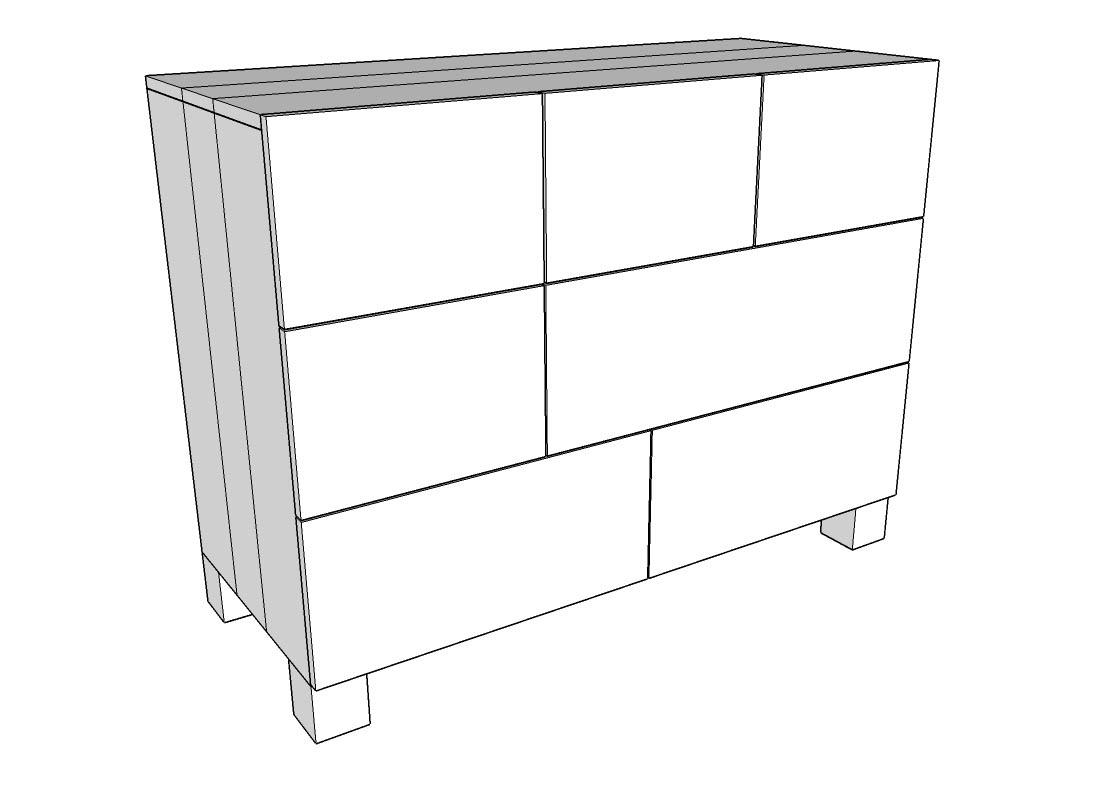
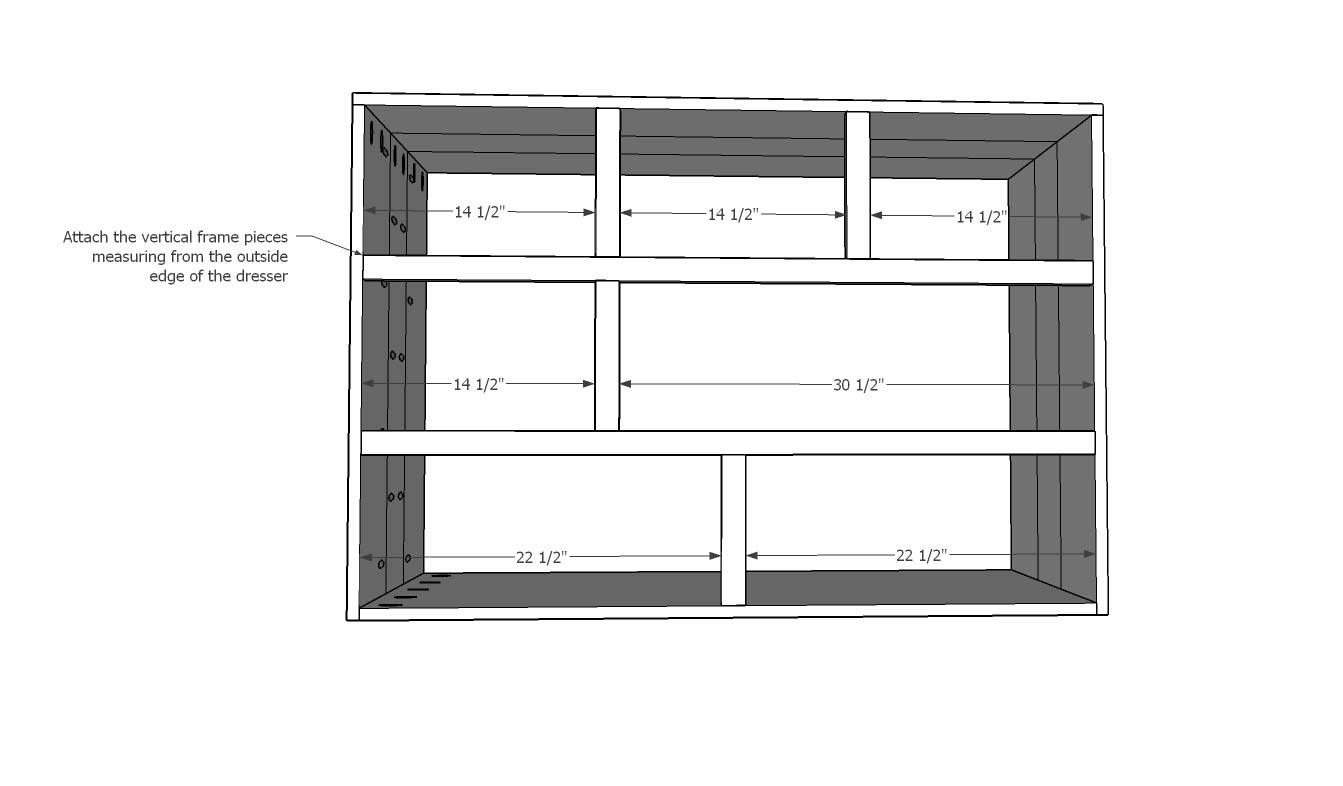
Cut the vertical frame pieces and drill two 3/4" pocket holes into each end of the pieces. Set them according to the measurements in the illustration and attach with 1 1/4" pocket screws.
-
Step 5
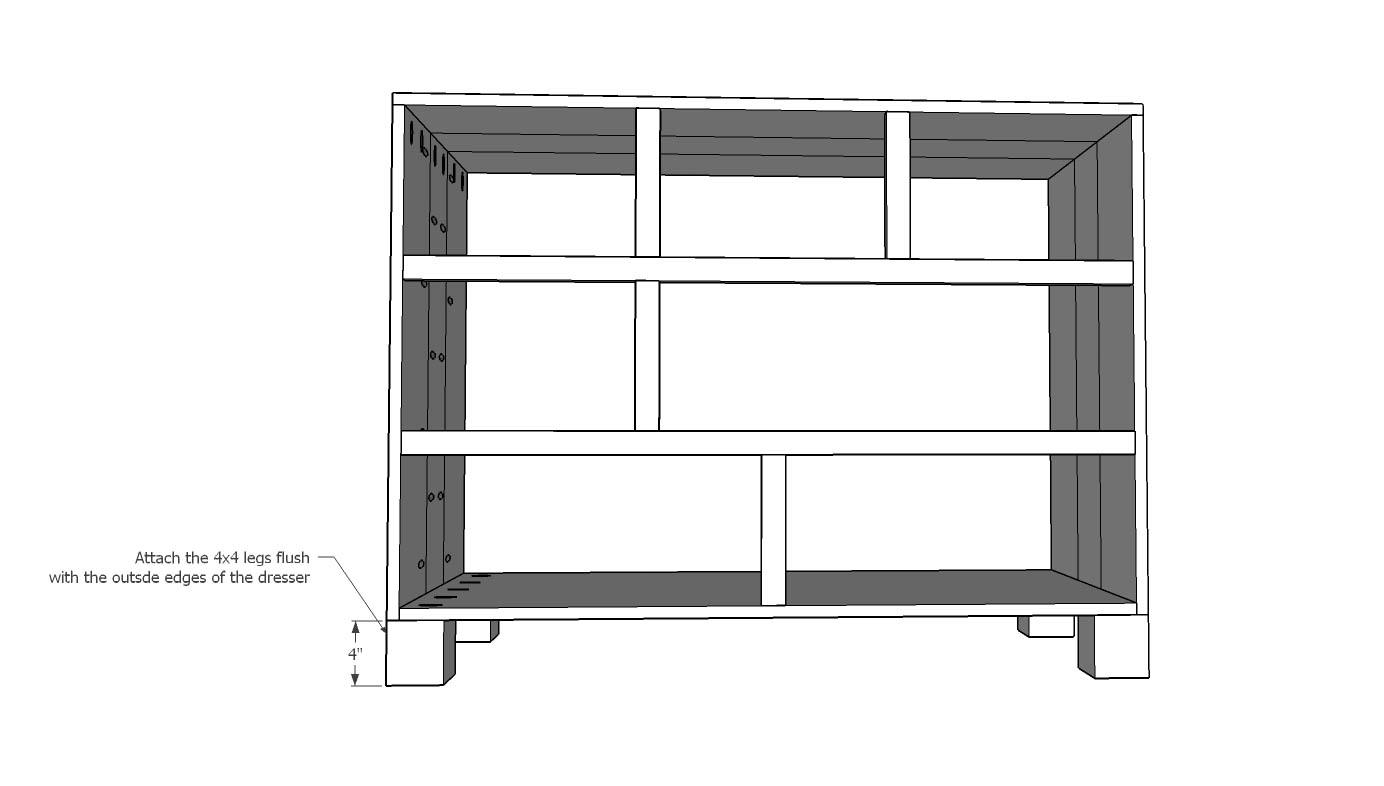
Cut the 4x4 legs and attach flush with each corner of the dresser body using wood glue and 2 1/2" wood screws through the plywood bottom.
-
Step 6
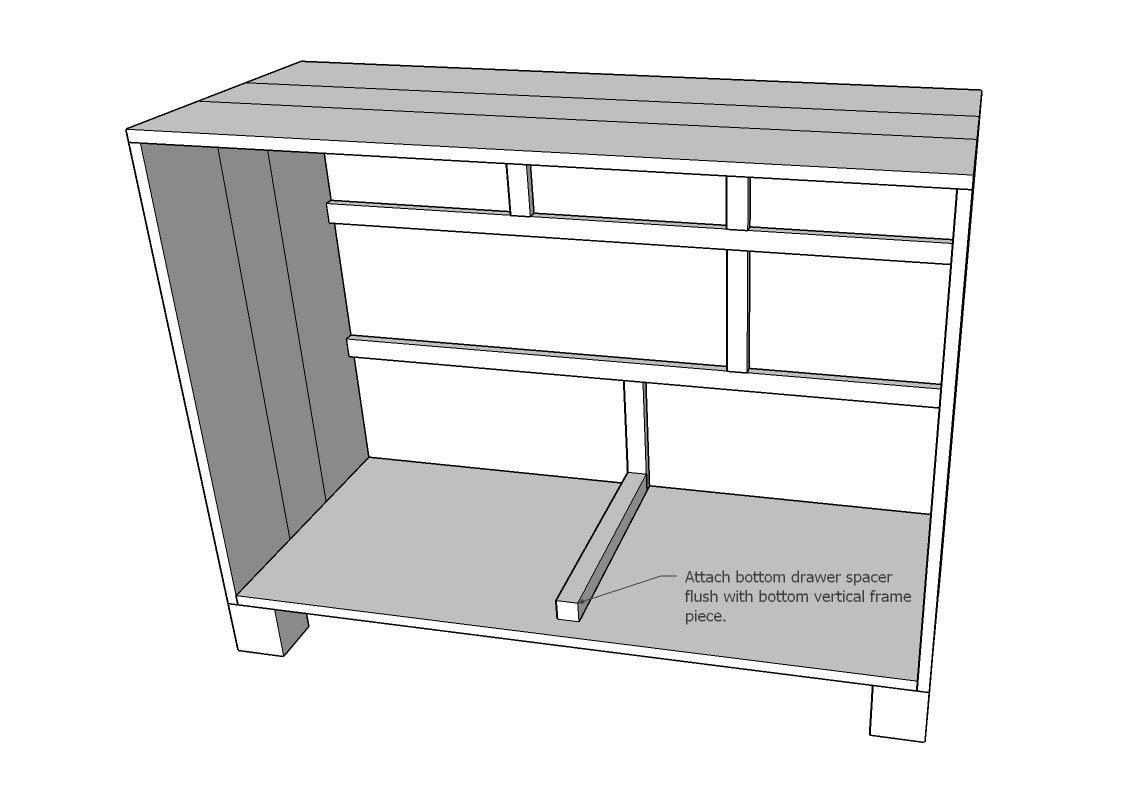
Cut and attach the 2x2 bottom drawer spacer with wood glue and 2" brad nails.
-
Step 7
Cut the 1x4 rear drawer bracket supports to size and drill 3/4" pocket holes into each end. Attach using the measurements in the illustration with 1 1/4" pocket screws.
-
Step 8
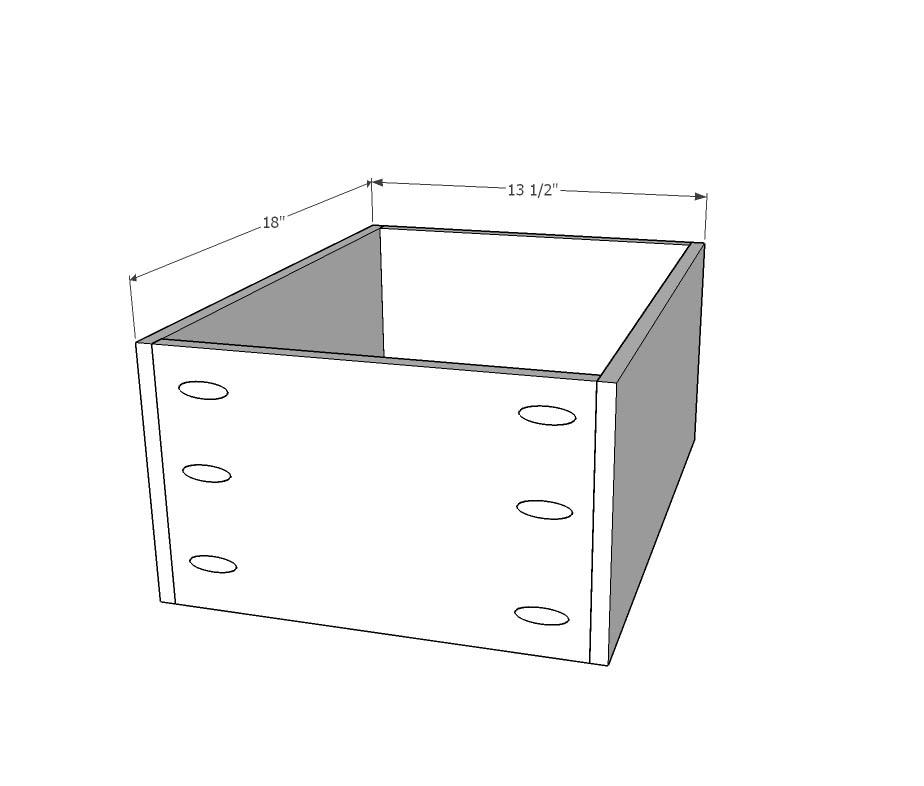
Rip a 4x8 sheet of 1x2" veneer plywood into 7 3/4" strips. Cut all of the drawer pieces. Drill 1/2" pocket holes into the fronts and backs of each drawer. Build four drawers using 2 - 18" sides and 2 - 12 1/2" fronts and backs, each. Build two drawers using 2 - 18" sides and 2 - 20 1/2" fronts and backs, each. Build one drawer using 2 - 18" sides and 2 - 28 1/2" fronts and backs. Attach all drawers together using 1" pocket screws.
-
Step 9
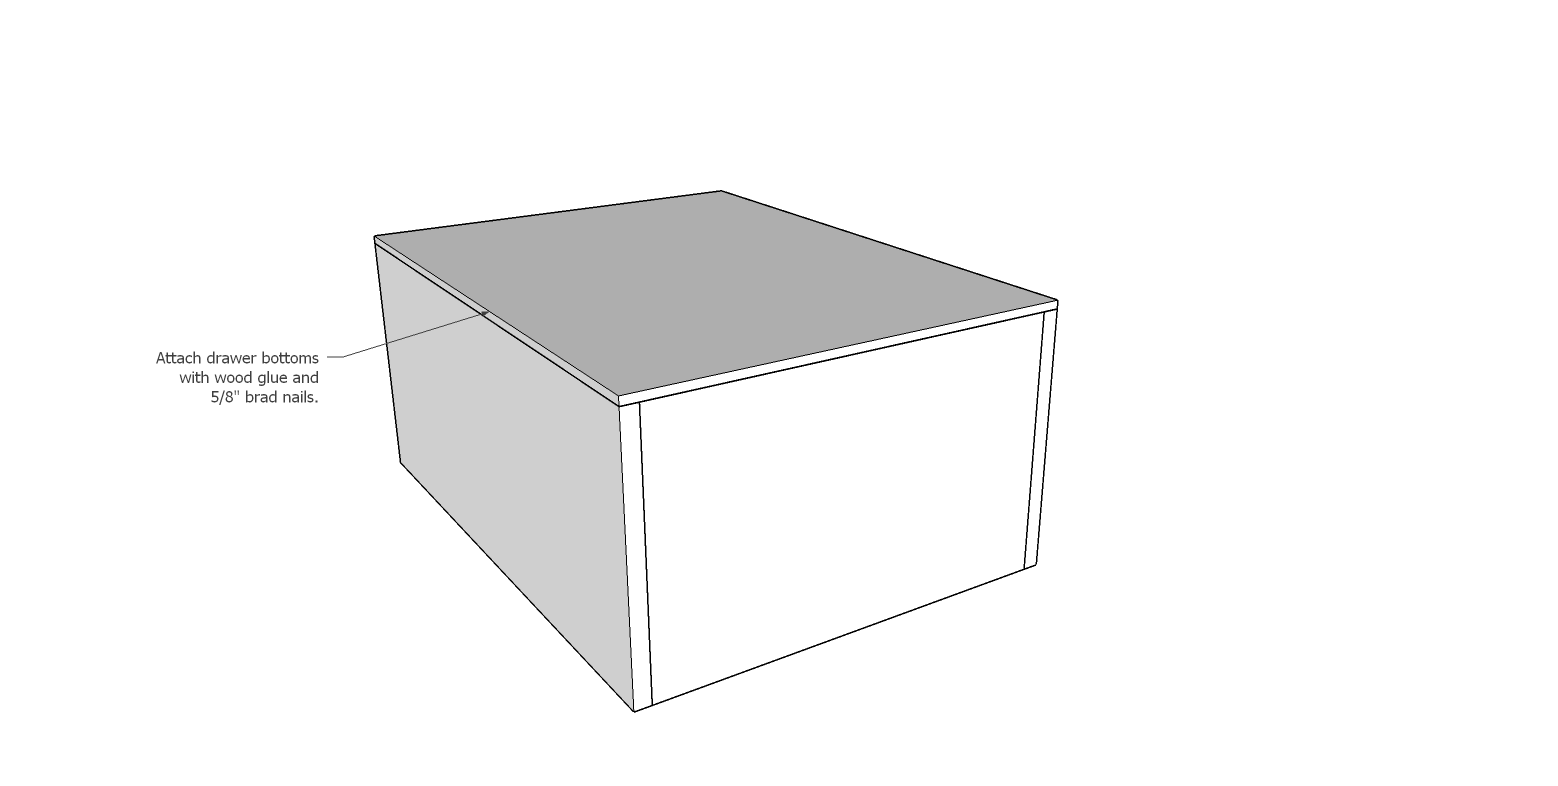
Attach drawer bottoms to each drawer using wood glue and 5/8" brad nails.
-
Step 10
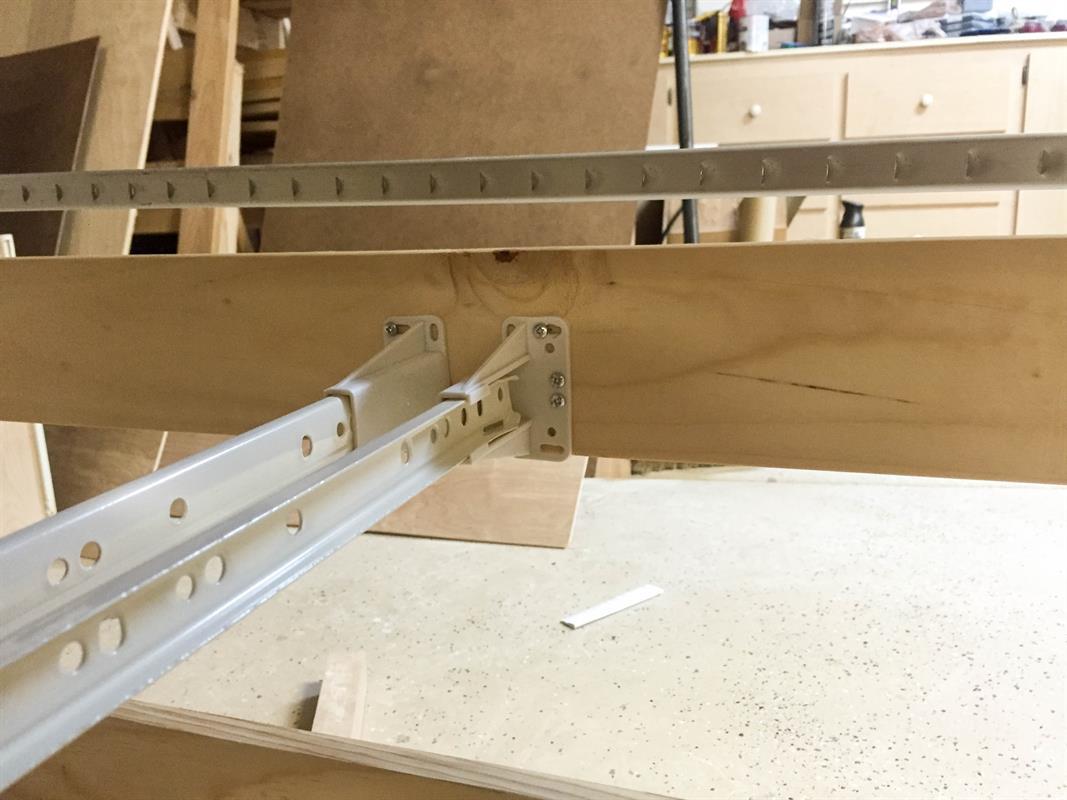
Attach all drawer slides. For drawer sides going along solid sides of dresser, attach as normal. For drawer slides needing rear brackets, follow manufacturer instructions on rear drawer slide brackets for spacing and attach to 1/4" rear braces. For middle drawer slides on bottom of dresser, attach to center divider.
-
Step 11
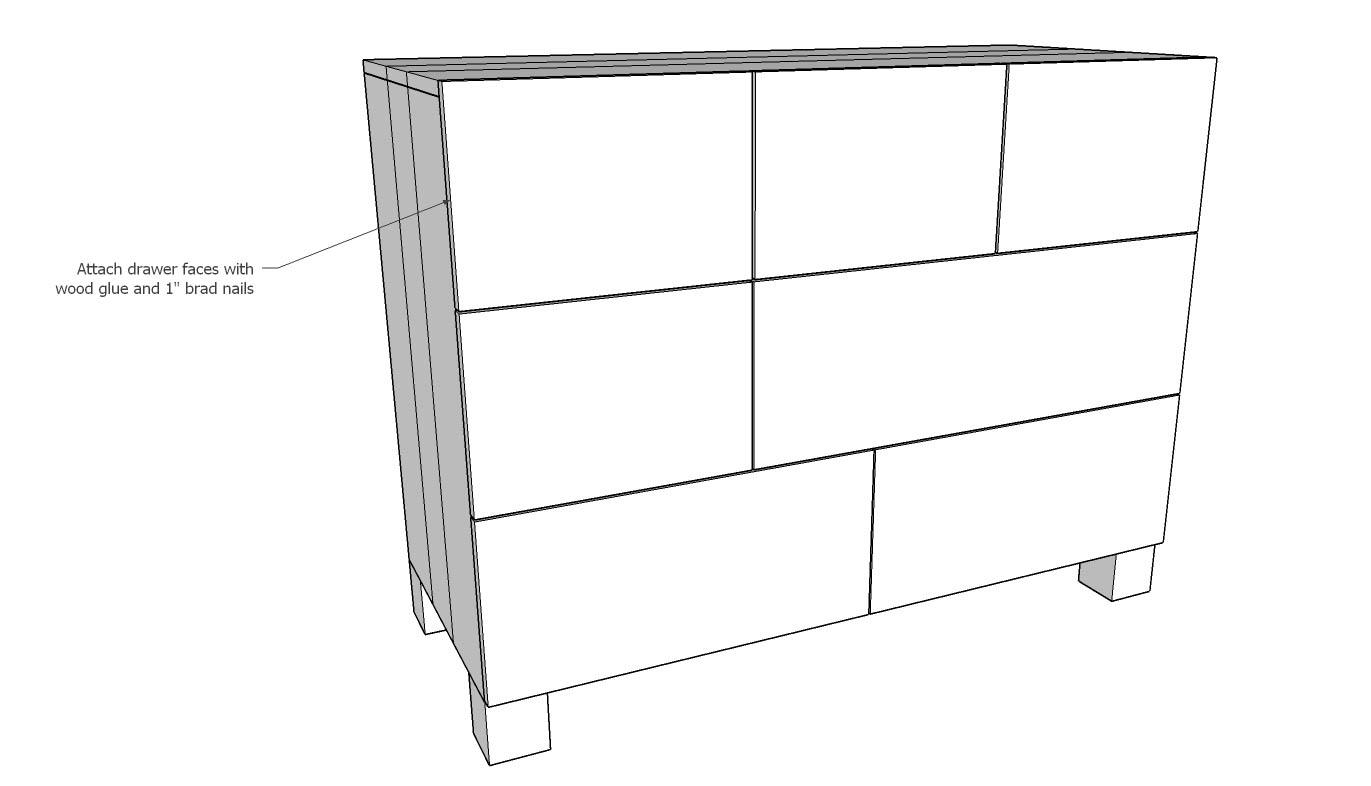
Slide drawers into dresser and attach drawer fronts using wood glue and 1" brad nails. Attach top row of drawer fronts first. Attach end drawers flush with the top and sides of the dresser. Glue and nail two 1" brad nails into front of drawer to secure in place. Pull out drawers and nail 1" brad nails from the inside of the drawer to permanently secure in place. Evenly space top middle drawer and attach the same way. Position remaining drawer fronts approx 1/8" down from top row of drawers and 1/8" apart. Attach in the same manner as the top drawers.
-
Sand and Finish
Distress dresser if desired. Give the entire dresser a final sanding, then finish as desired with paint or stain. Attach drawer pulls and knobs after finishing.


