

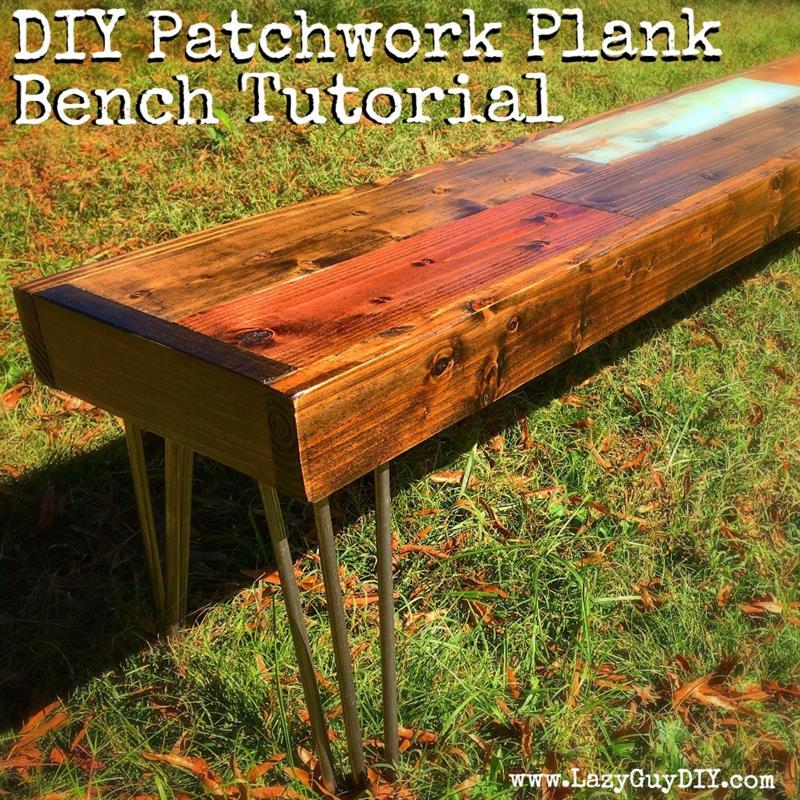
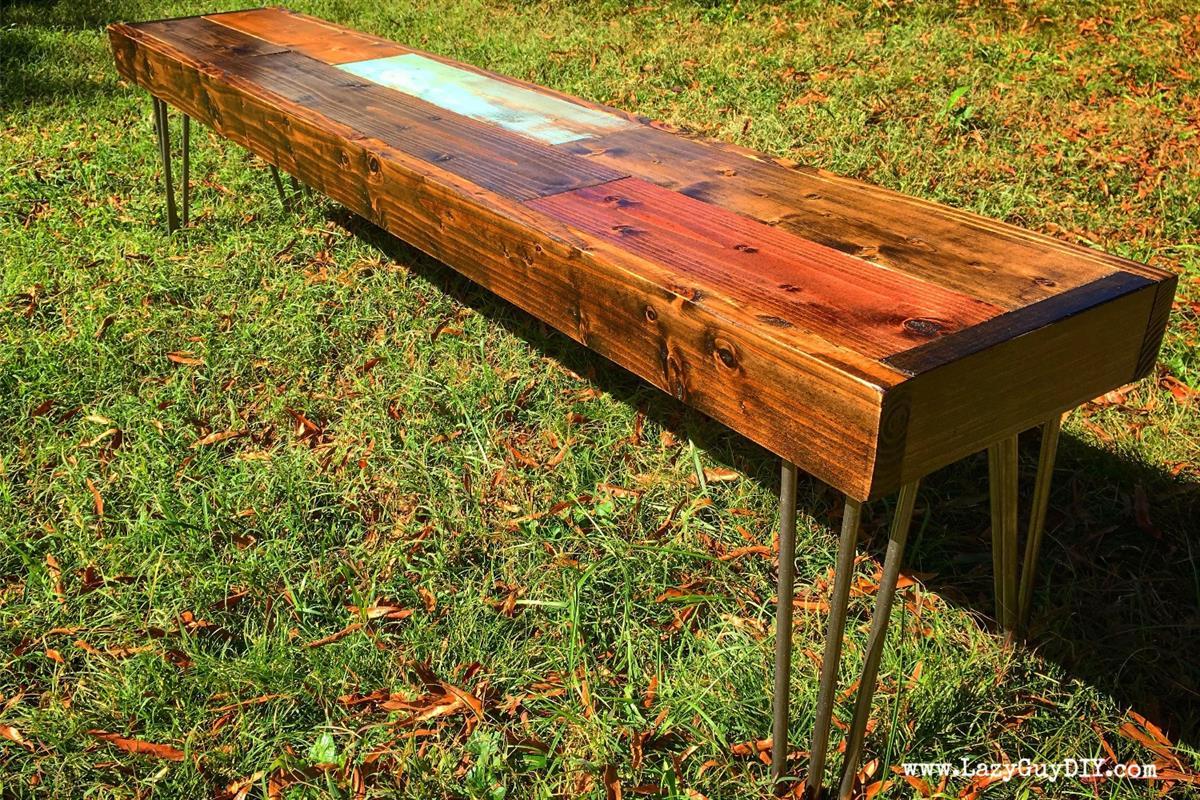


This 75″ Patchwork Plank Bench is the perfect companion for the Patchwork Plank Dining Table previously posted. This is a quick and easy build with the help of a few Kreg Jig pocket holes! You can find plans for the table build here: http://bit.ly/2ebZtfM
Tools
Kreg Tools


Other Tools
-
Miter Saw

-
Square
-
Tape Measure
-
Thickness Planer
-
Clamps
-
Shop Vacuum
Materials
Wood Products
- 2 Board , 1x6 , 72"
- 3 Board , 2x4 , 72"
- 1 Board , 2x6 , 24"
Hardware & Supplies
- 4 16" 3 Rod Hairpin Legs
- 1 1-1/4" pocket screws
- 1 2-1/2" pocket screws
Cut List & Parts
- 3 Planks , 1x6x24"
- 2 Planks , 1x6x18"
- 1 Plank , 1x6x36"
- 2 Side Apron , 2x4x75"
- 2 End Apron , 2x4x11"
- 4 Middle Support , 2x4x11"
- 2 Leg Support , 2x6x11"
Directions
-
Prepping the Planks
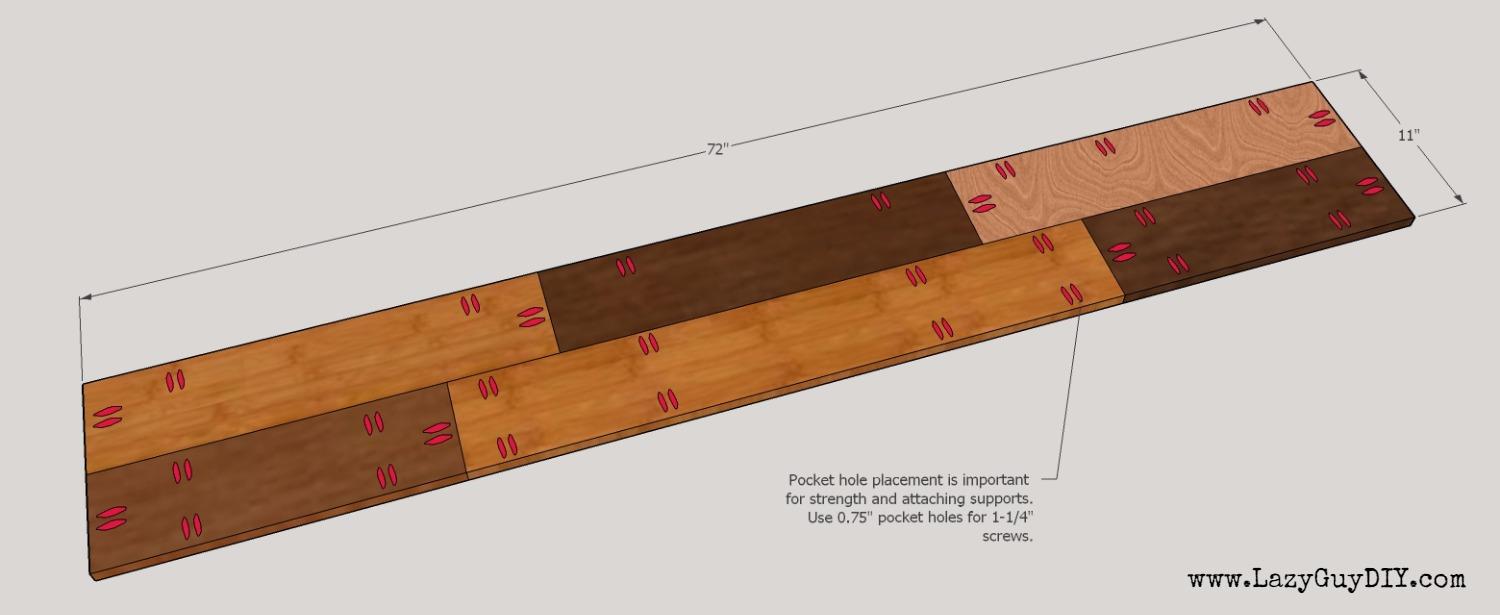
Pick the prettiest side of your 1x6's that you want to use. Remember to change the order or side of your plank to break up the wood grain.
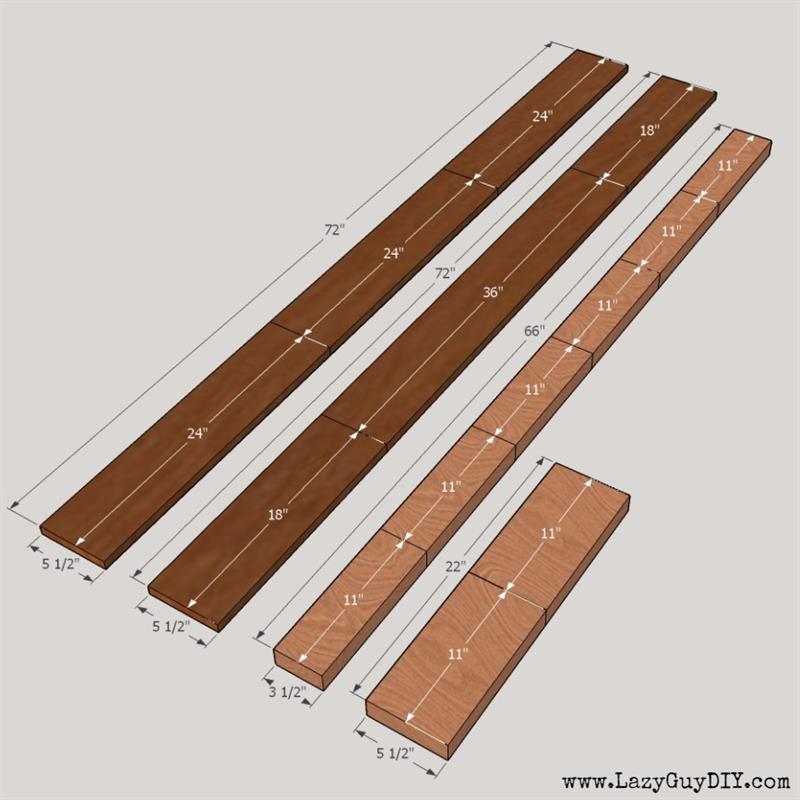
I went with the following break down of cuts:
Row 1 (1x6) - 24", 24", 24"
Row 2 (1x6) - 18", 36", 18"I also ran the 2x4's to be used for aprons through my planer to remove the rounded edges.

-
Stain Your Lumber
Stain your planks and your 2x4 side and end aprons. You only have 6 planks to stain this time so you have to watch your similar stain tones. The colors were slightly similar in my first run, so I had to add an additional layer of stain before I sealed my planks up. Again, I went with Jacobean for the aprons.
-
Pocket Holes Galore!
Pull out your favorite Kreg Jig and follow the attached layout, it should help with the structure and no misplaced holes that butt up against each other ineffectively. The good news is that you're only drilling 62 pocket holes this time at 0.75" depth for the 1-1/4" pocket screws. Not too bad. After you're all pre-drilled, get to gluing and screwing your planks together. As I mentioned in the table build, it's very important to make sure the face down side is flush so you're going to have to use a healthy dose of clamps (you can never have too many!) to have a smooth reveal.
-
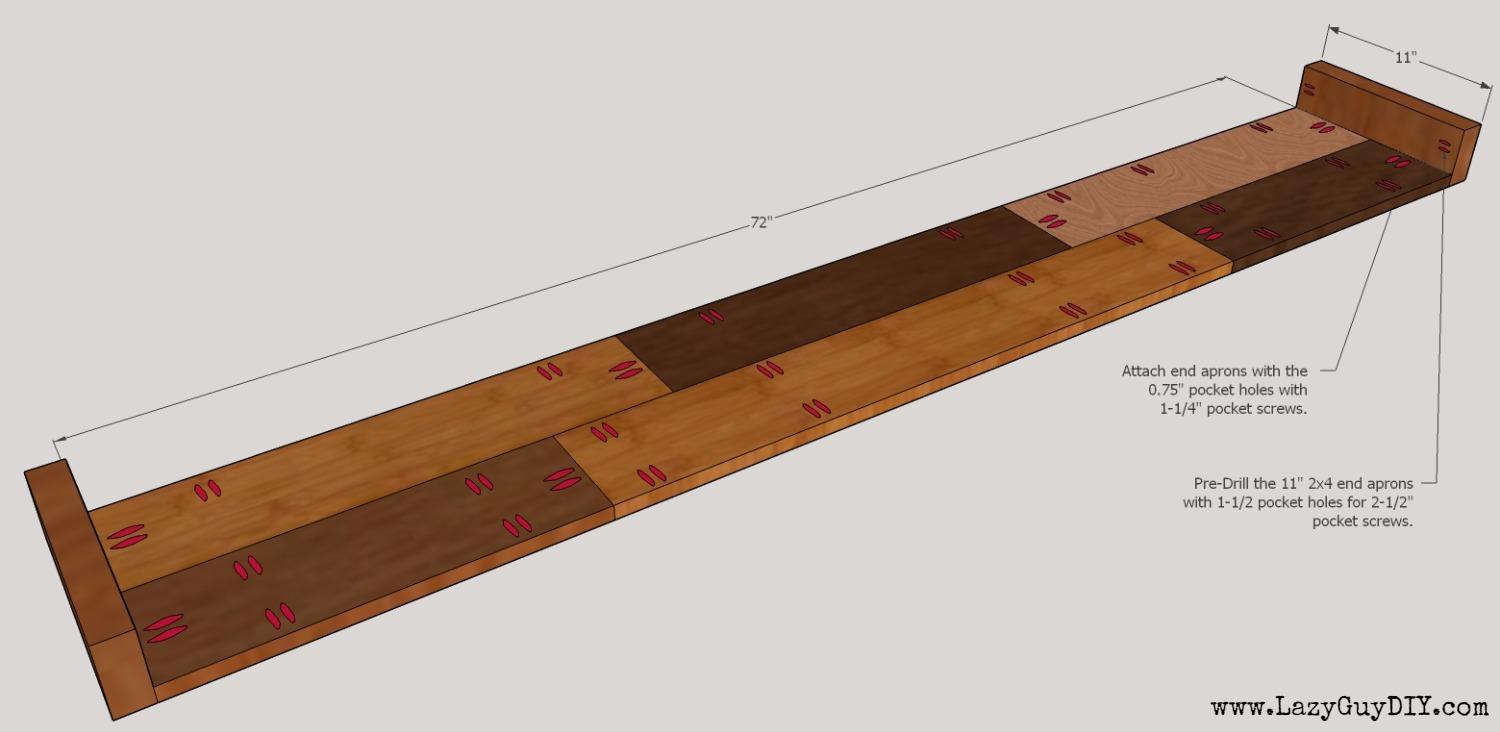
Attach End Aprons
Your combined planks should create a bench top that is 11" wide. Cut two 2x4's to length for your end aprons. Before you attach them, add two 1.50" pocket holes on each end that will attach the side aprons.
Glue and screw the end aprons with the 0.75" pre-drilled holes at the end of each plank. Attach with 1-1/4" pocket screws. The aprons should be flush with the sides and the bench top. Makes sure you have a flush edge on the ends of your bench top before you attach the end aprons. You can easily trim off excess with a circular saw or router with a flush trim bit.
-
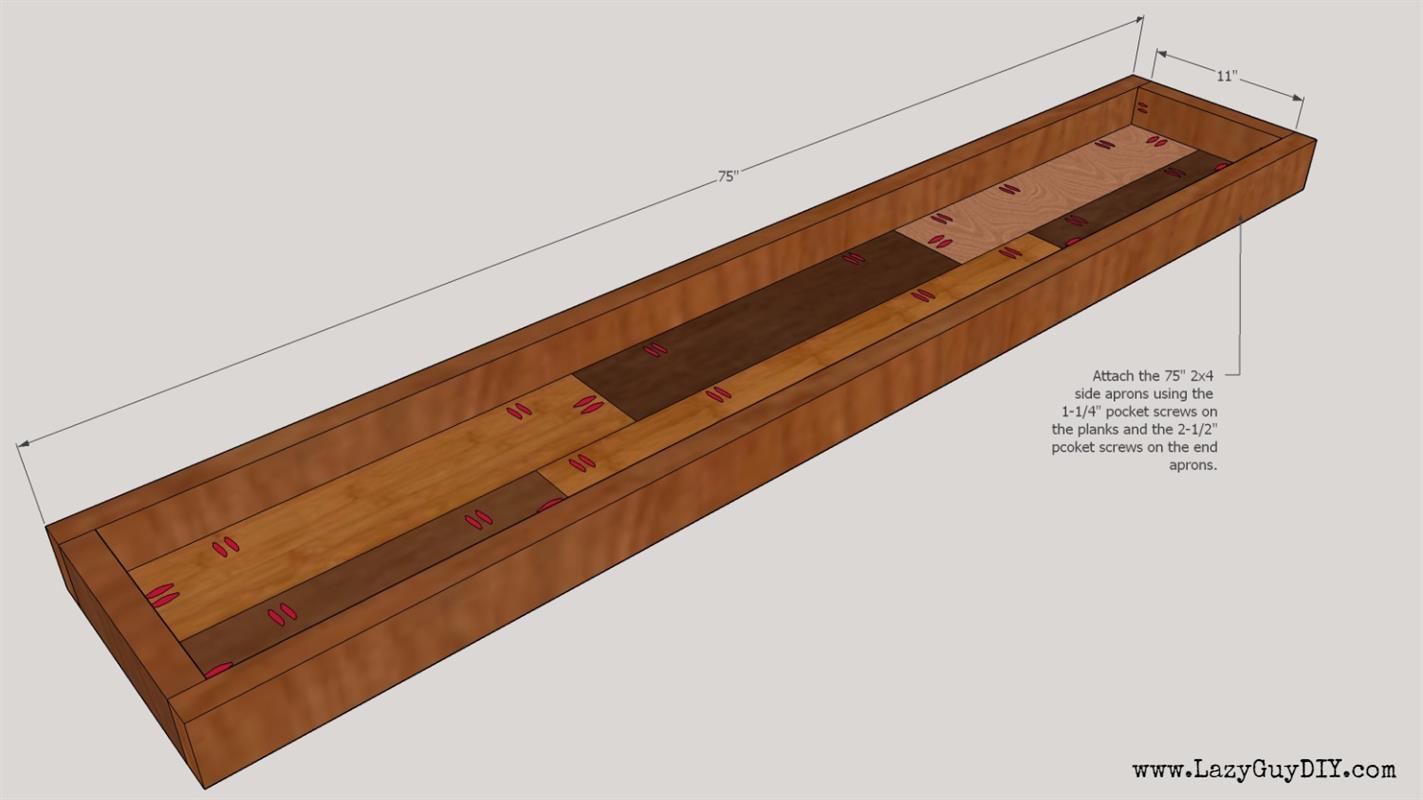
Attach Side Aprons
Measure the bench from end to end, it should be 75". Cut your two 2x4's to length that will be the side aprons. Attach to the end aprons first with 2-1/2" pocket screws. You will need to use a few clamps and spacers to get the aprons flush with the table top before you attach them with the 1-1/4" pocket screws.
-
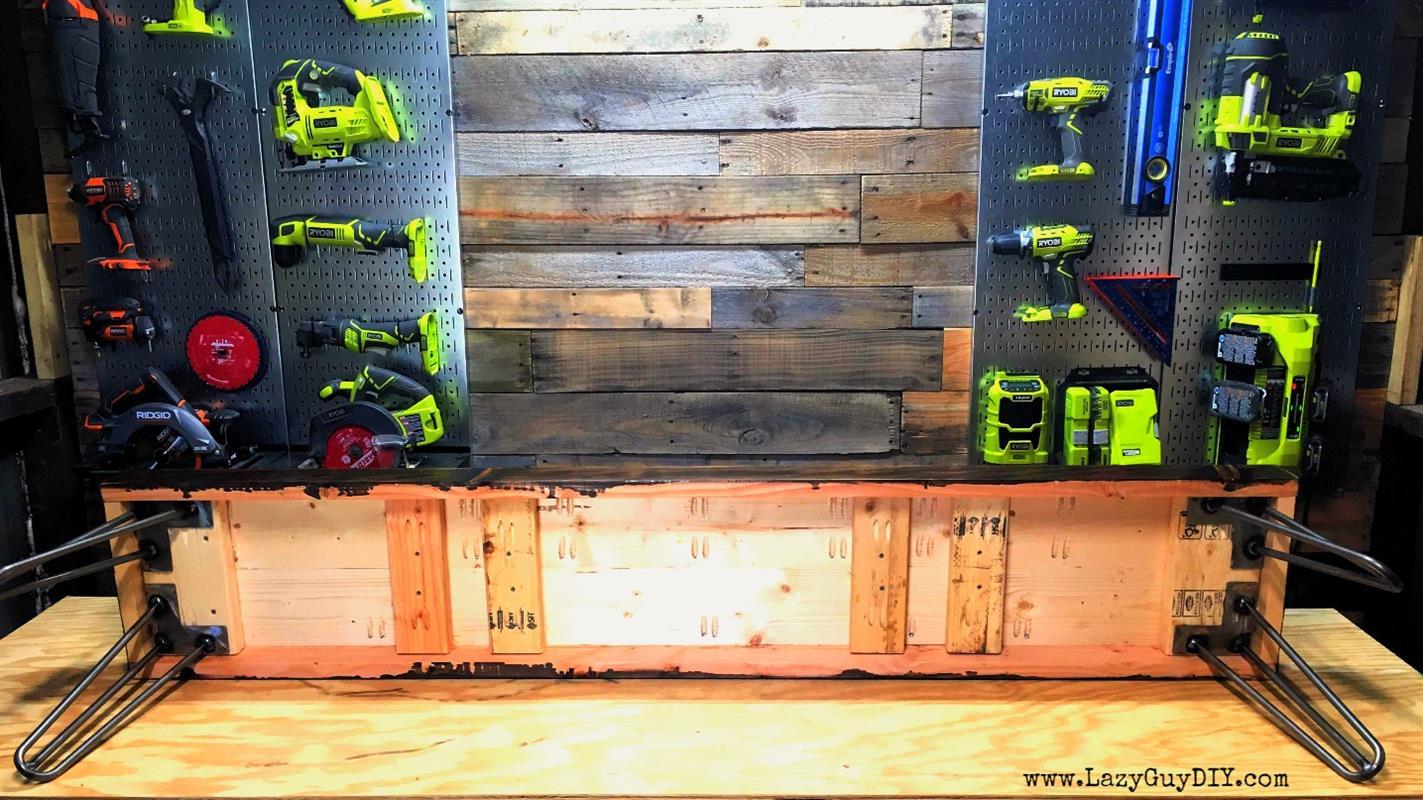
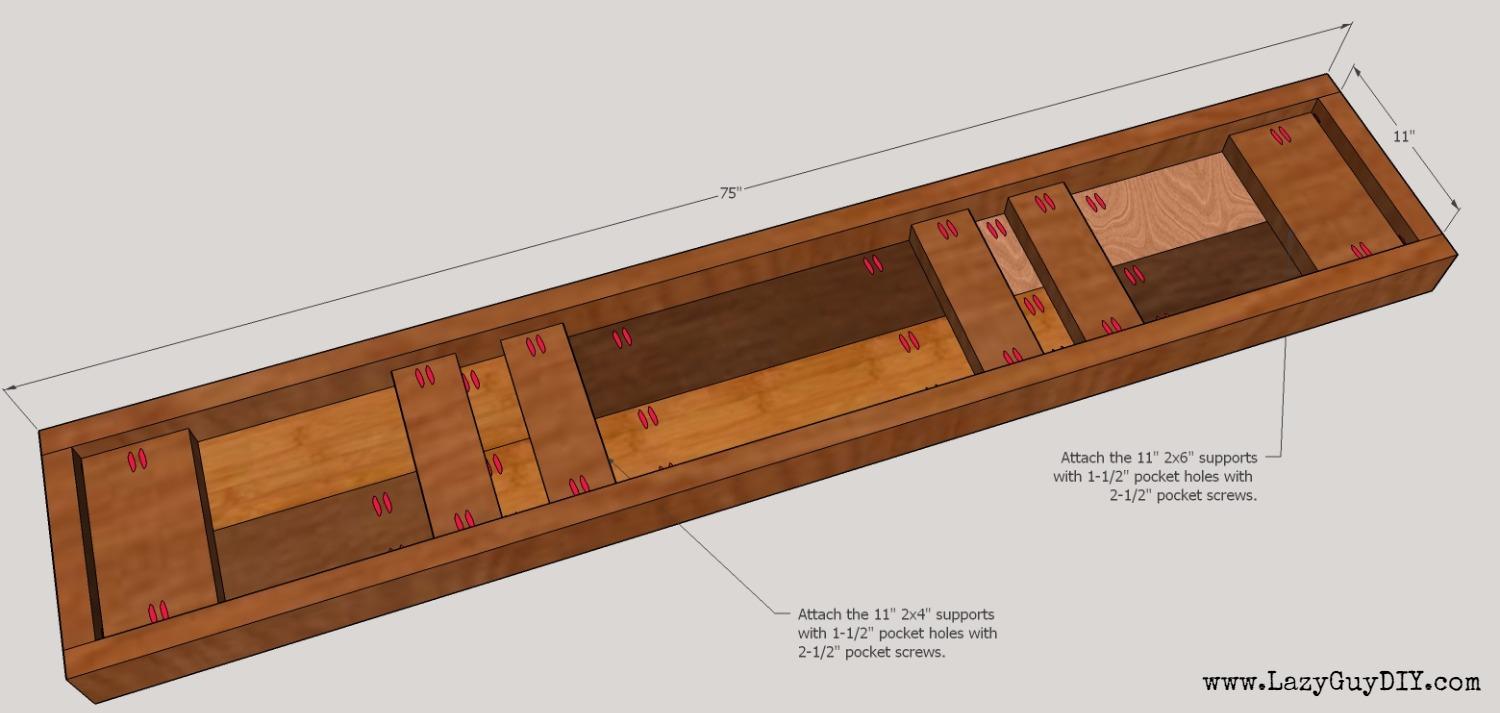
Attach Frame Supports
With your aprons attached, measure the distance for your supports. It should be right around 11". This time it's okay if you're slightly off, you will most likely end up with something just short of 11" that best fits. Cut your two 2x6's to length that will be butted against the end aprons. In addition, cut the four 2x4's to length that will serve as your middle supports. Before you attach them, pre-drill 1.50" pocket holes on the ends of all 6 boards. Glue the bottoms and sides and attach with 2-1/2" pocket screws. The 2x4's need to be spaced covering the joints of the planks for added strength.
-
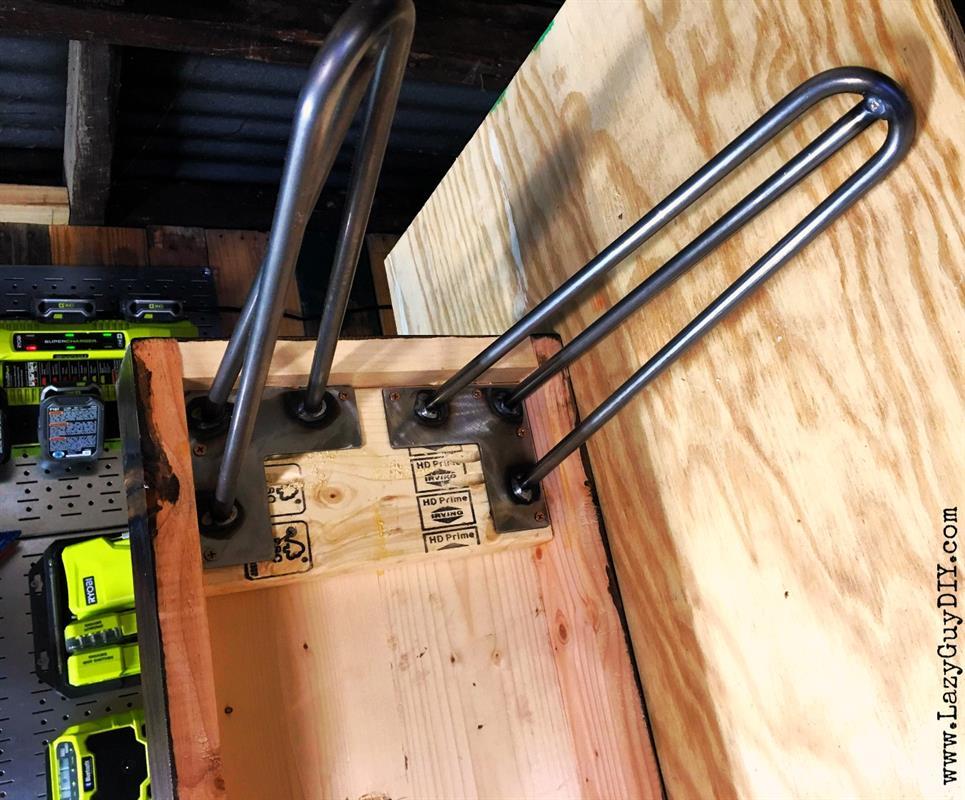
Attach the Hairpin Legs
As you can see, you absolutely need to use a 2x6 for the support against the end apron because anything thinner and you'll run out of real estate very quickly on your install. Also, DO NOT ATTACH the legs directly to your plank top. You want the legs to have a little meat to bite into which is where the 2x6's come into play. Hopefully you had some scrap 2x6 to add to the build.
-
Finish the Surface
I again used MinWax Semi-Gloss poly. I upped the count to 5 coats this time. People are going to be rubbing their tushes all of this thing so I want it to hold up. Remember to hand sand with a high grit sandpaper between coats for a smooth finish. Then you're done my friend.
