


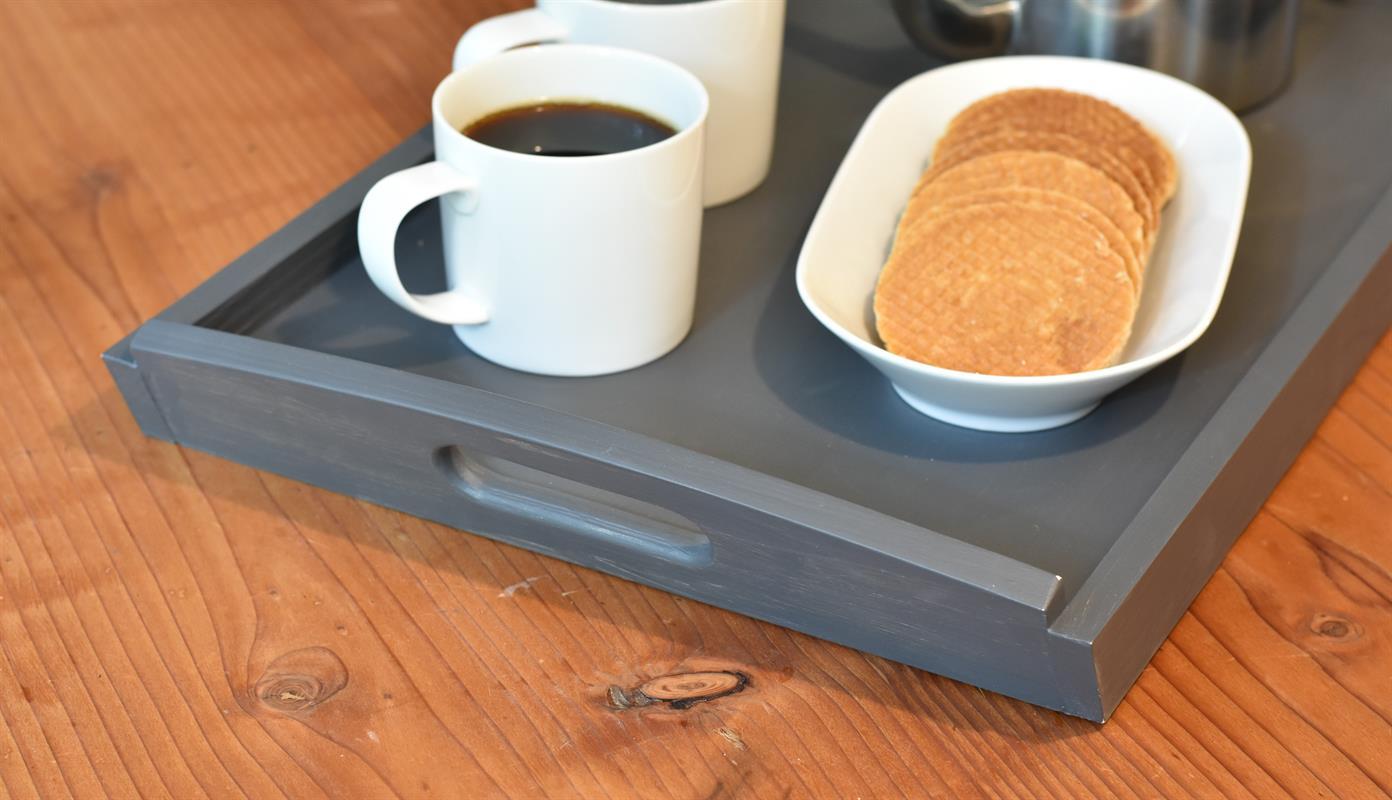
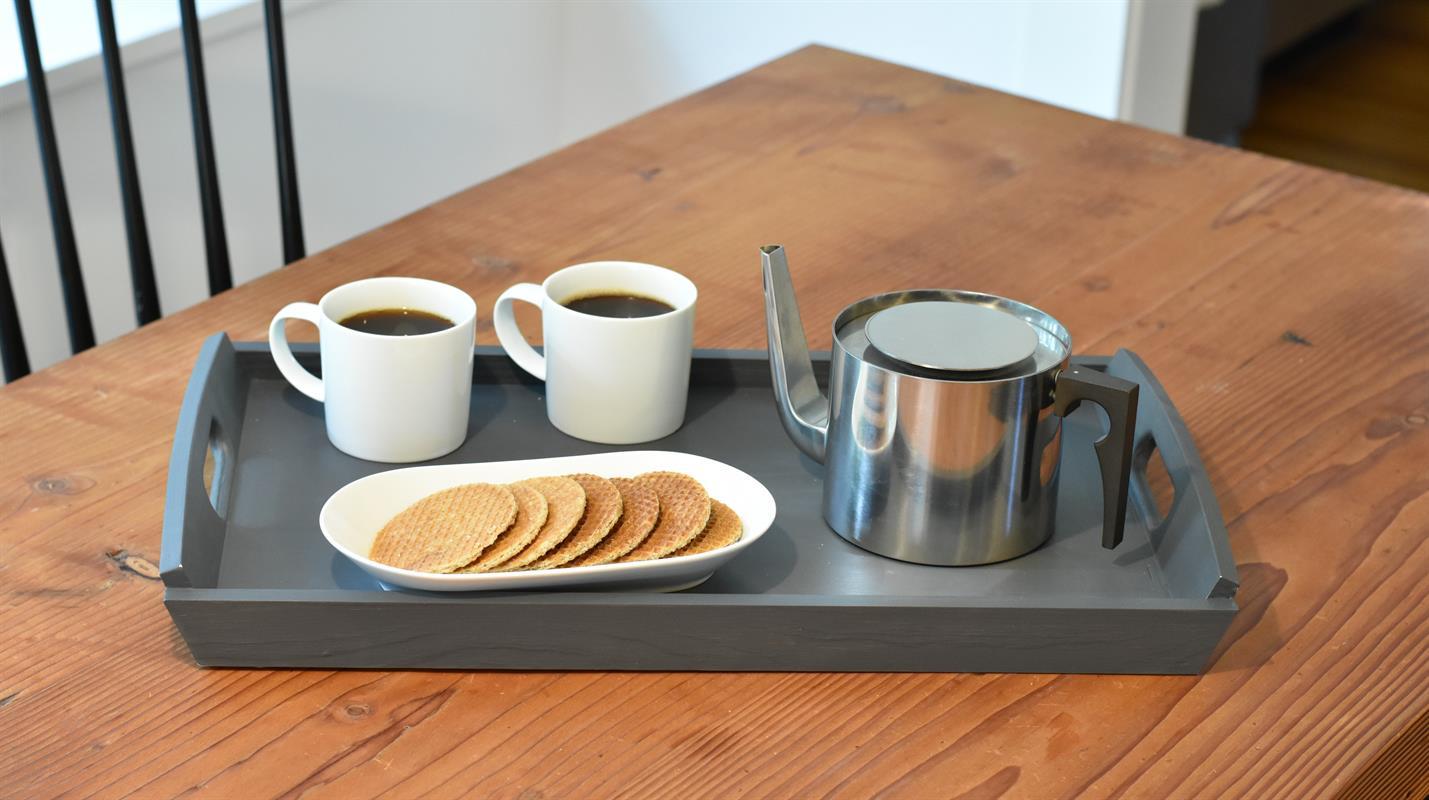


Serve up some goodies with this simple yet elegant serving tray. Made 1/2"-thick plywood and pine boards, and assembled with a few pocket-hole screws, the tray is lightweight so you can load it up with treats for your guests and still carry it easily.
Tools
Kreg Tools


Other Tools
-
Miter Saw

-
Square
-
Tape Measure
Materials
Wood Products
- 2 Board , 1/2" x 1 1/2" , 36"
- 1 Board , 1/2" x 2 1/2" , 36"
- 1 Plywood , 1/2" Thick , 24" x 24"
Hardware & Supplies
- 12 3/4" coarse-thread Kreg pocket-hole screws
- 1 Wood Glue
- 1 General Finish Milk Paint - 1 pint
- 1 1" drill bit
Cut List & Parts
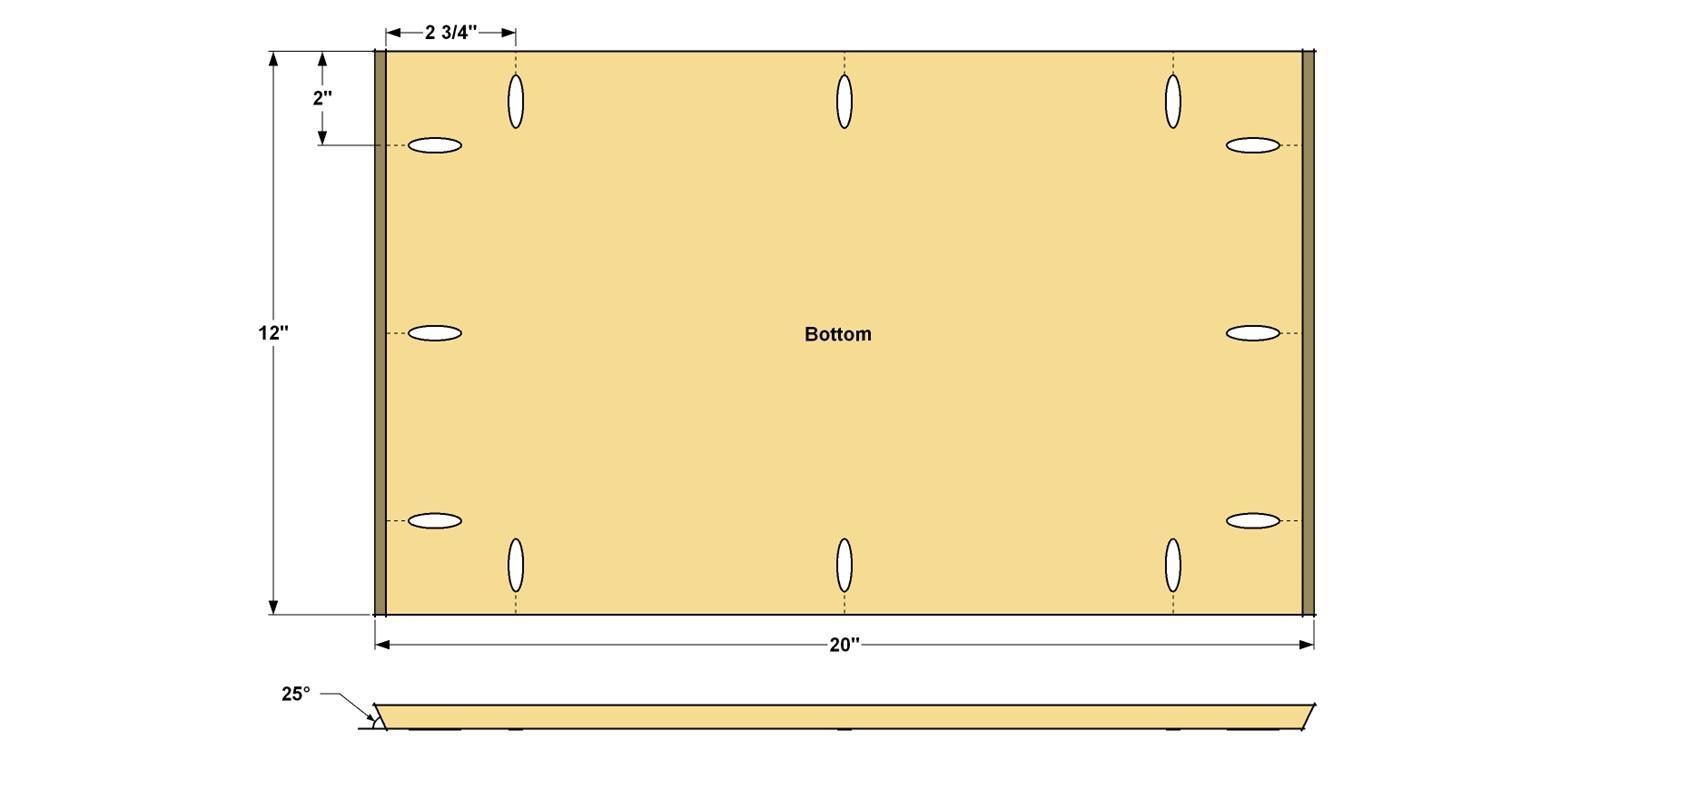
- 1 Bottom , 1/2" x 12" x 20"
- 2 End , 1/2" x 2 1/2" x 12"
- 2 Side , 1/2" x 1 1/2" x 21 3/4"

Directions
-
Cut the Bottom
Start by ripping 1/2" plywood to width, as shown in the cut diagram. Then you can cut the Bottom to length. Before you do this, though, note that the cut on the both ends are bevel-cut at 25°. Set your saw angle and make the first end cut. Next, mark the final length of the Bottom and make the second cut. The how-to video below will show you how to get straight, smooth cuts in plywood by using a saw guide.
-
Drill the Pocket Holes
Set up your Kreg® Pocket-Hole Jig for 1/2"-thick material, and then drill pocket holes along ONLY the long edges of the Bottom. The pocket holes on the beveled ends require a setup change before drilling. To compensate for the bevel angle, and to keep the drill bit from coming through the edge of the Bottom panel, you’ll want to change the depth setting of the jig. Adjust the depth of the jig only to 3/4" but keep the drill bit setting at 1/2". Now drill the pocket holes at each beveled end of the Bottom, as shown. Then you can sand the faces of the Bottom panel smooth
-
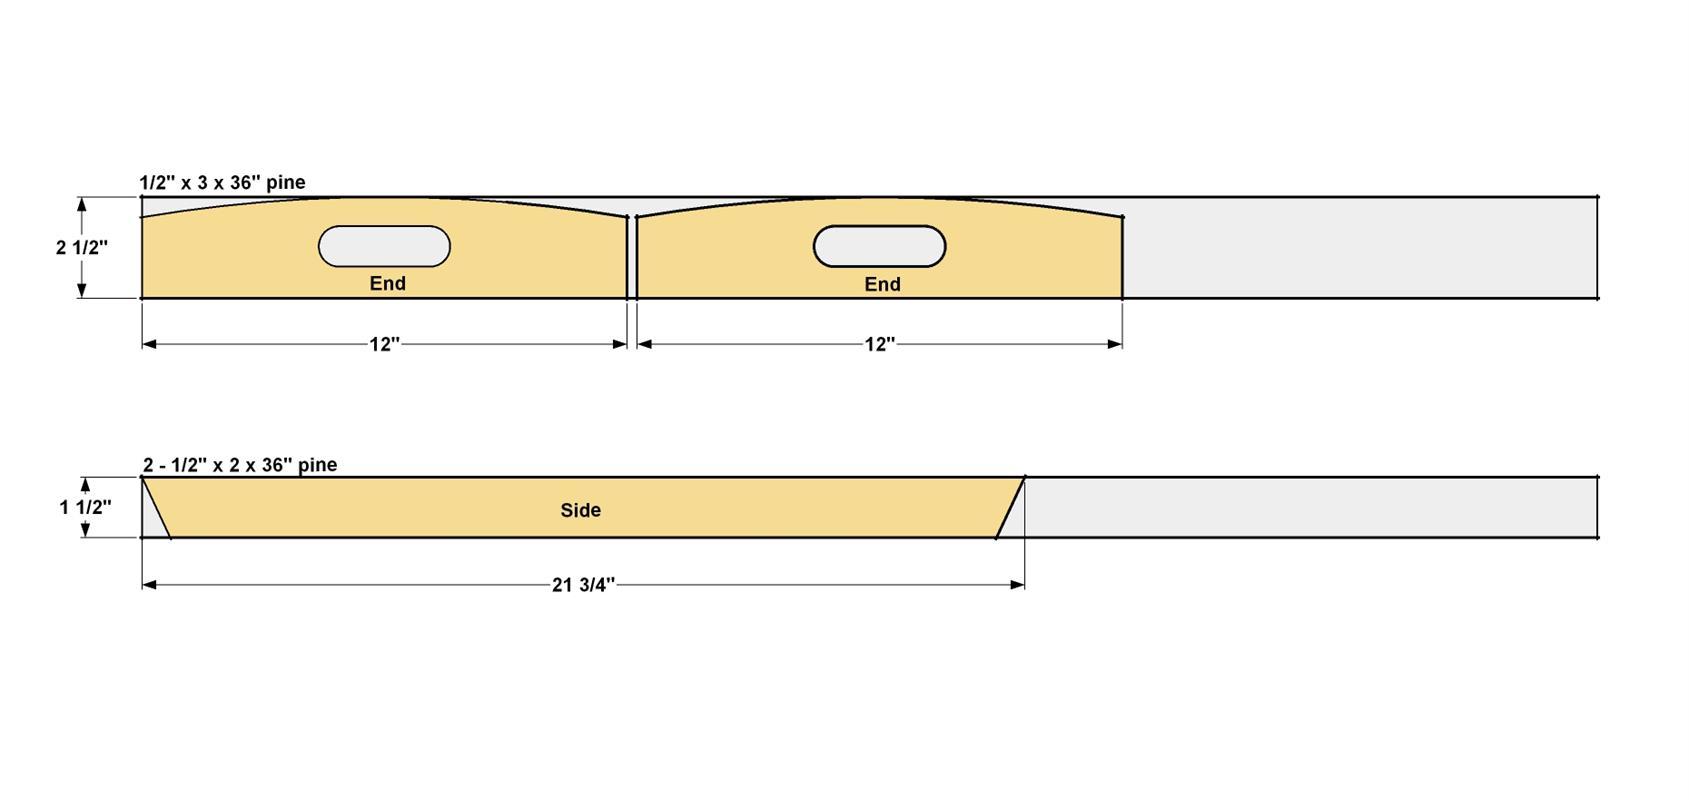
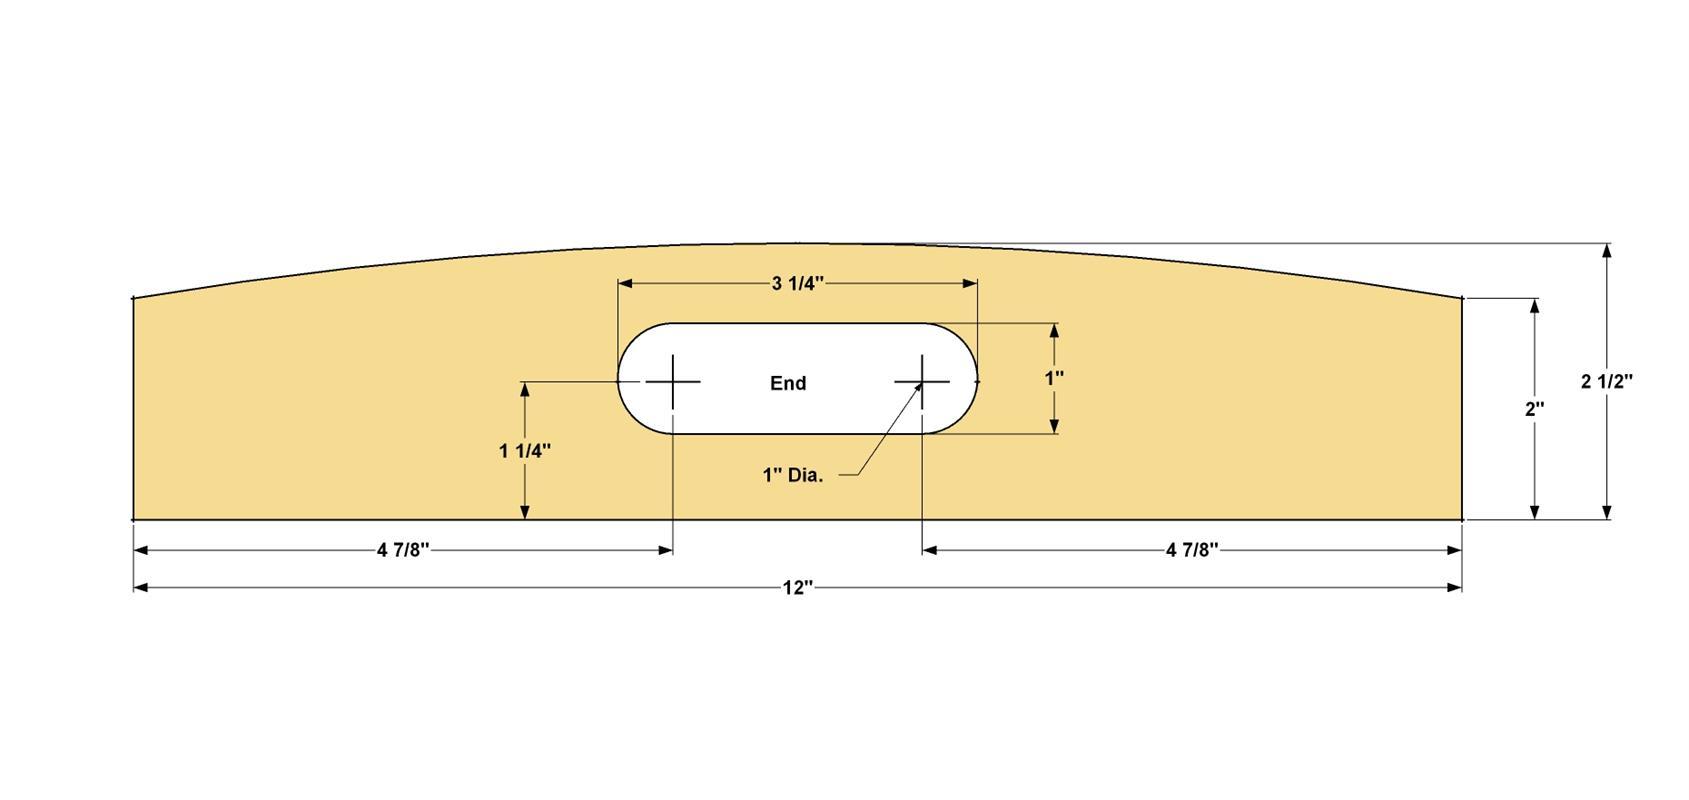
Make the Ends
First, cut two Ends to length from 1/2" x 3 board, as shown in the cutting diagram. Then, drill two – 1" holes at the locations shown. With a pencil and a straight edge, draw lines between the holes where the edges of the handle will be. Next, using a jigsaw, cut along the lines to finish the handle cutout. For best success, cut just to the waste side of the line, and then sand the cut edge up to the line to smooth it out. Finally, lay out the curved upper edge on one of the Ends. Then cut the curve with a jigsaw and sand it smooth. Now use this curve End to trace the curve onto the second wing. Then cut and sand it to match. Finally, sand the faces smooth.
-
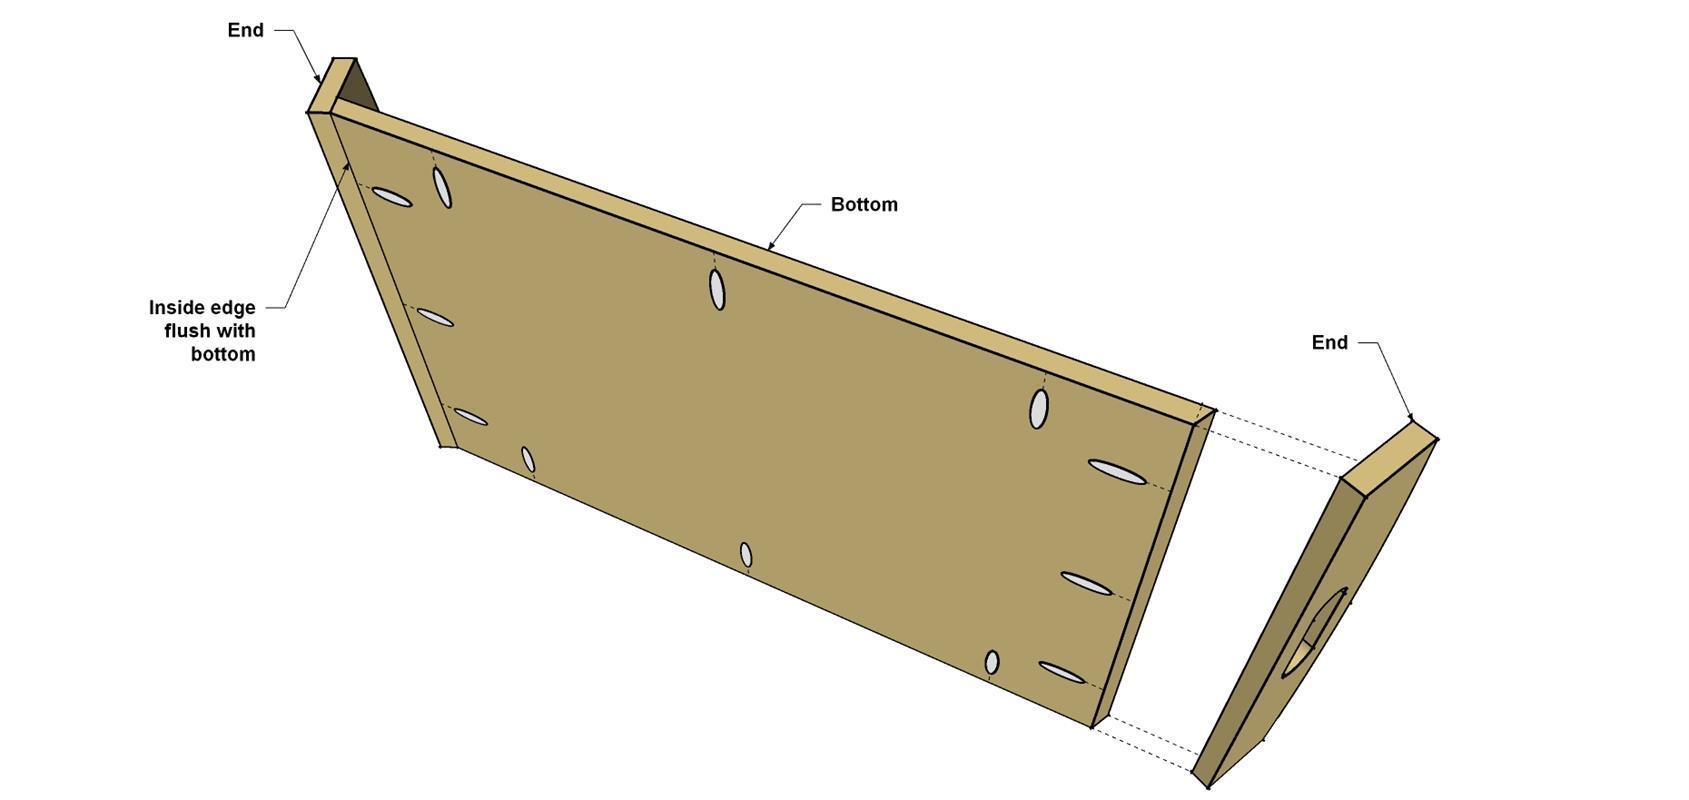
Attach the Ends
Apply glue to the beveled ends of the Bottom. Then align the inside edge of the End so it is flush with the Bottom, as shown. Because of the odd angle, it will be tough to clamp the end in place. Slowly drive 3/4" coarse-thread Kreg Pocket-Hole Screws to secure the End to the Bottom. Repeat this process for the other End.
-
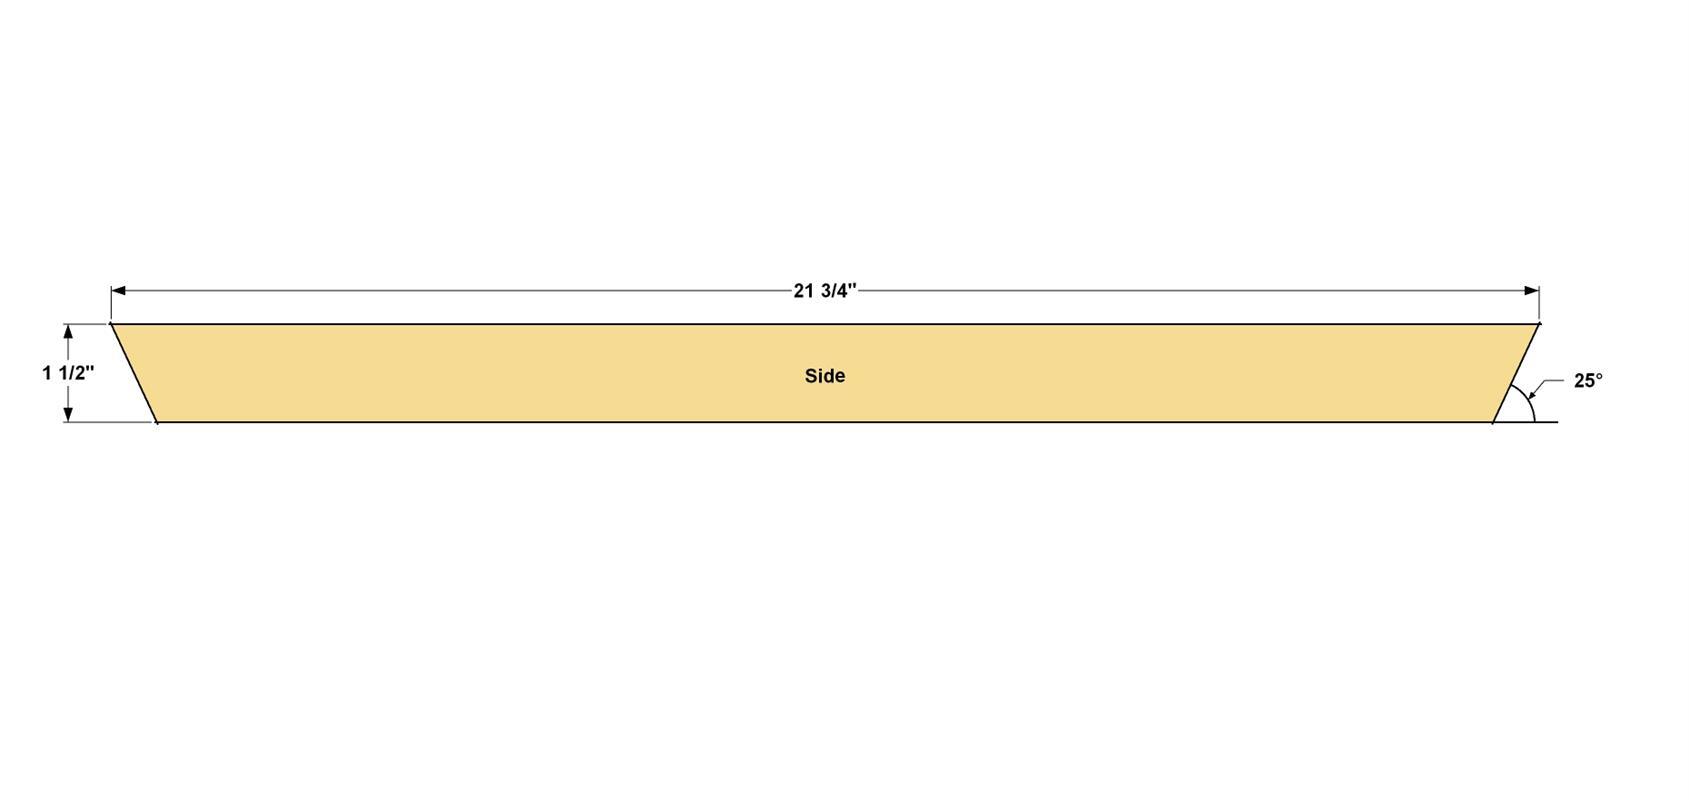
Cut the Sides
From a 1/2" x 2 board, cut the sides to length, as shown, by mitering each end at opposing 25° angles. Note that the overall length is measured on the longer edge of the part. After you cut the Sides, you can sand the faces smooth.
-
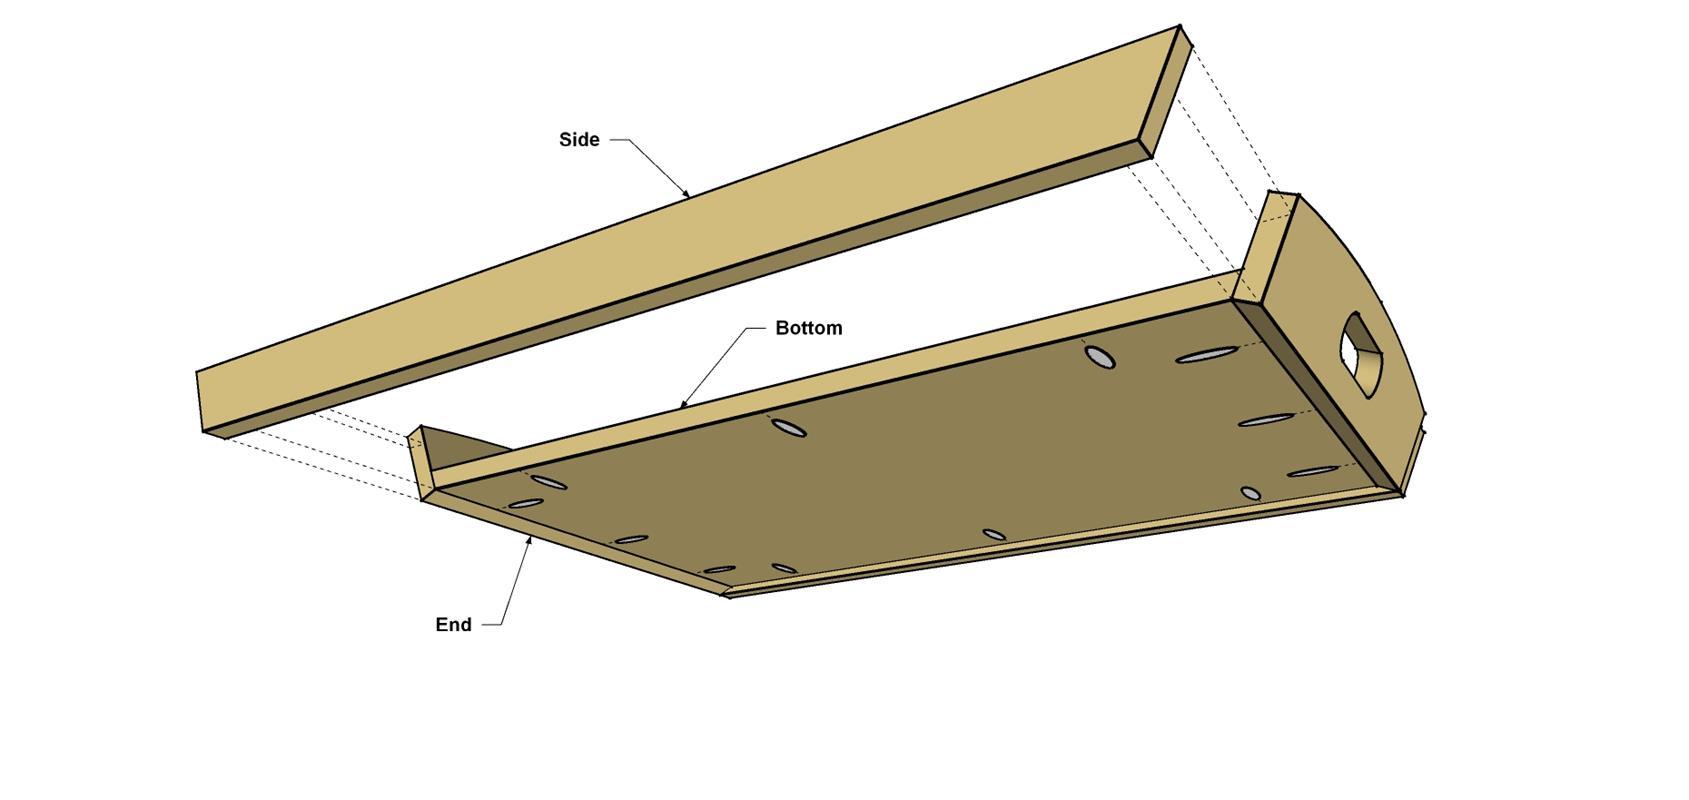
Attach the Sides
Test fit the Sides, noting that they hang below the underside of the Bottom panel in order to align with the lower edge of the Ends. Apply glue to only the portions of the Ends that the Sides will cover, and then apply glue along the edges of the Bottom panel. Clamp the Sides in place, and then secure them using 3/4" coarse-thread Kreg Pocket-Hole Screws.
-
Sand and Finish
After the glue firms up, but before it hardens completely, scrape away any excess that has squeezed out of the joints. Now give the project a final sanding, paying extra attention to creating smooth seems where the Sides meet the Ends. Wipe away all dust. Then you can stain or paint your Serving Tray. We chose matte grey milk paint and applied it with a foam brush. Apply the paint according to the manufacturer’s recommendations. Once you start using the serving tray the paint will wear nicely and eventually develop a beautiful patina.