Outside Corner Bench
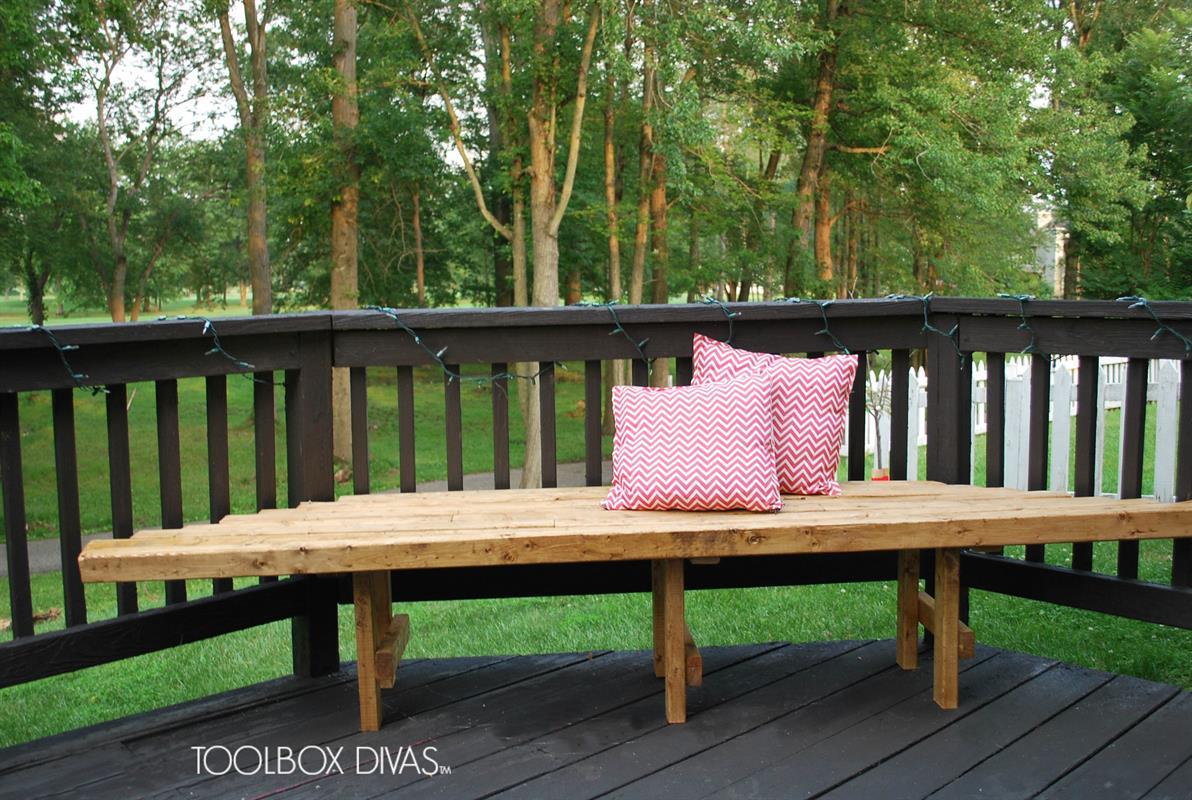
By Toolbox DivasA simple outside corner bench perfect for a deck or porch. This project involves very simple straight cuts.
Directions
-
Cut the 2x3 To Size
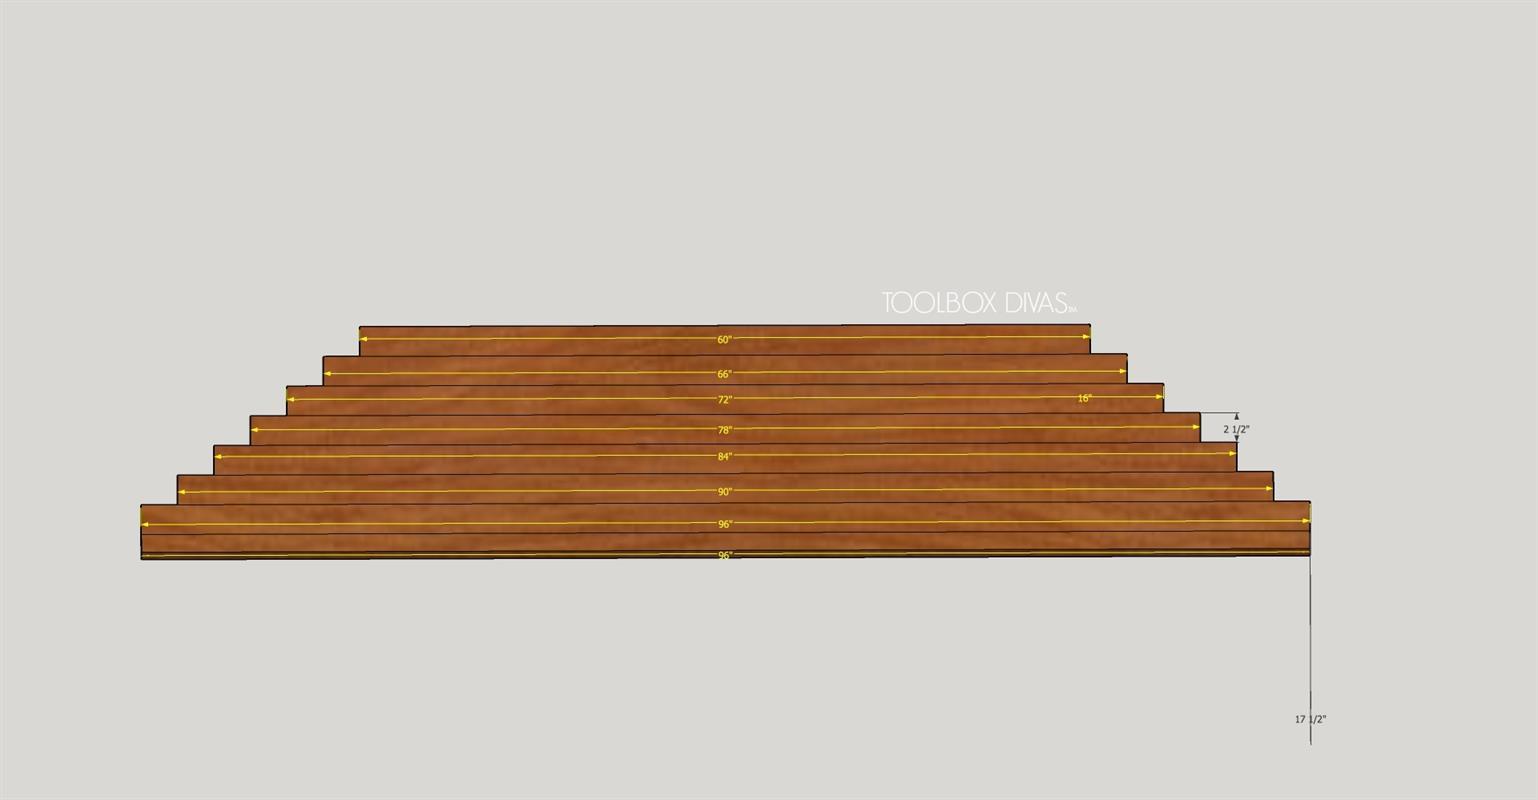
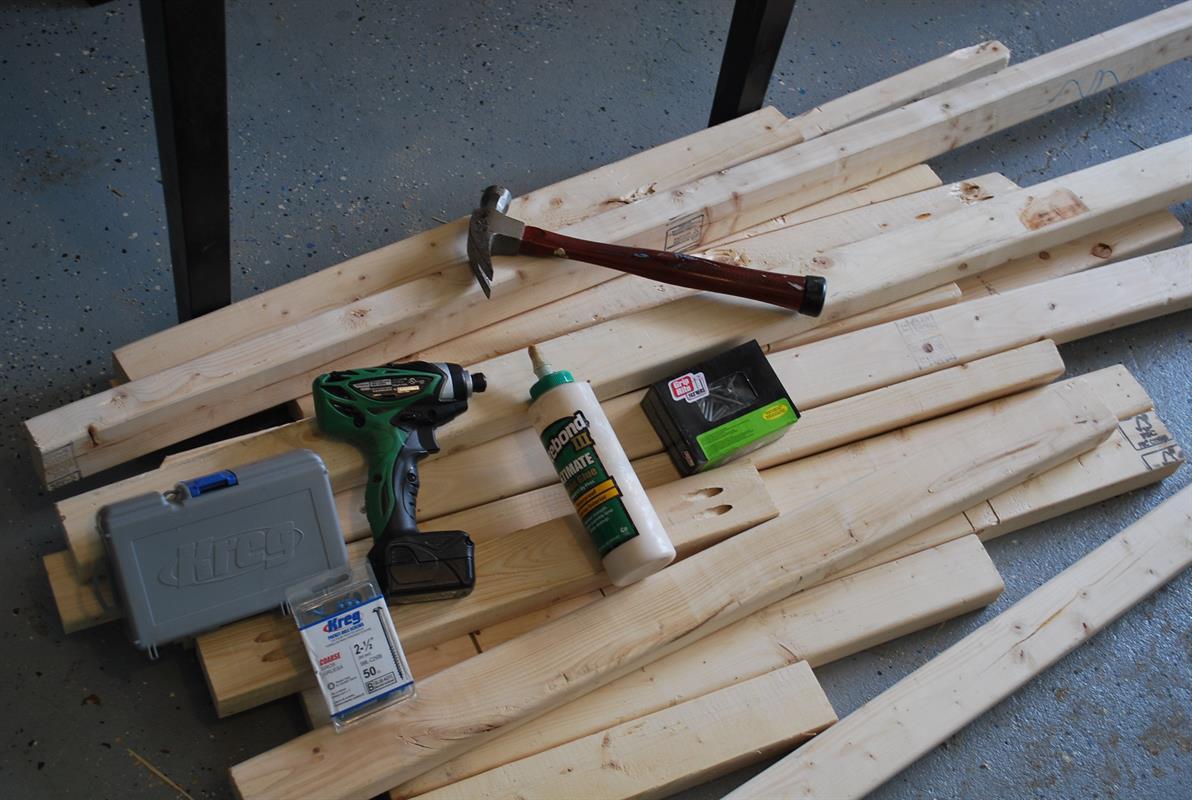
Simply cut the 2×3 for the seat to size as listed below in the cut list.
Cut List:
Seat Top:1 – 60″, 1 – 66″, 1 – 72″, 1 – 78″, 1 – 84″, 1 – 90″, 2 – 96″,
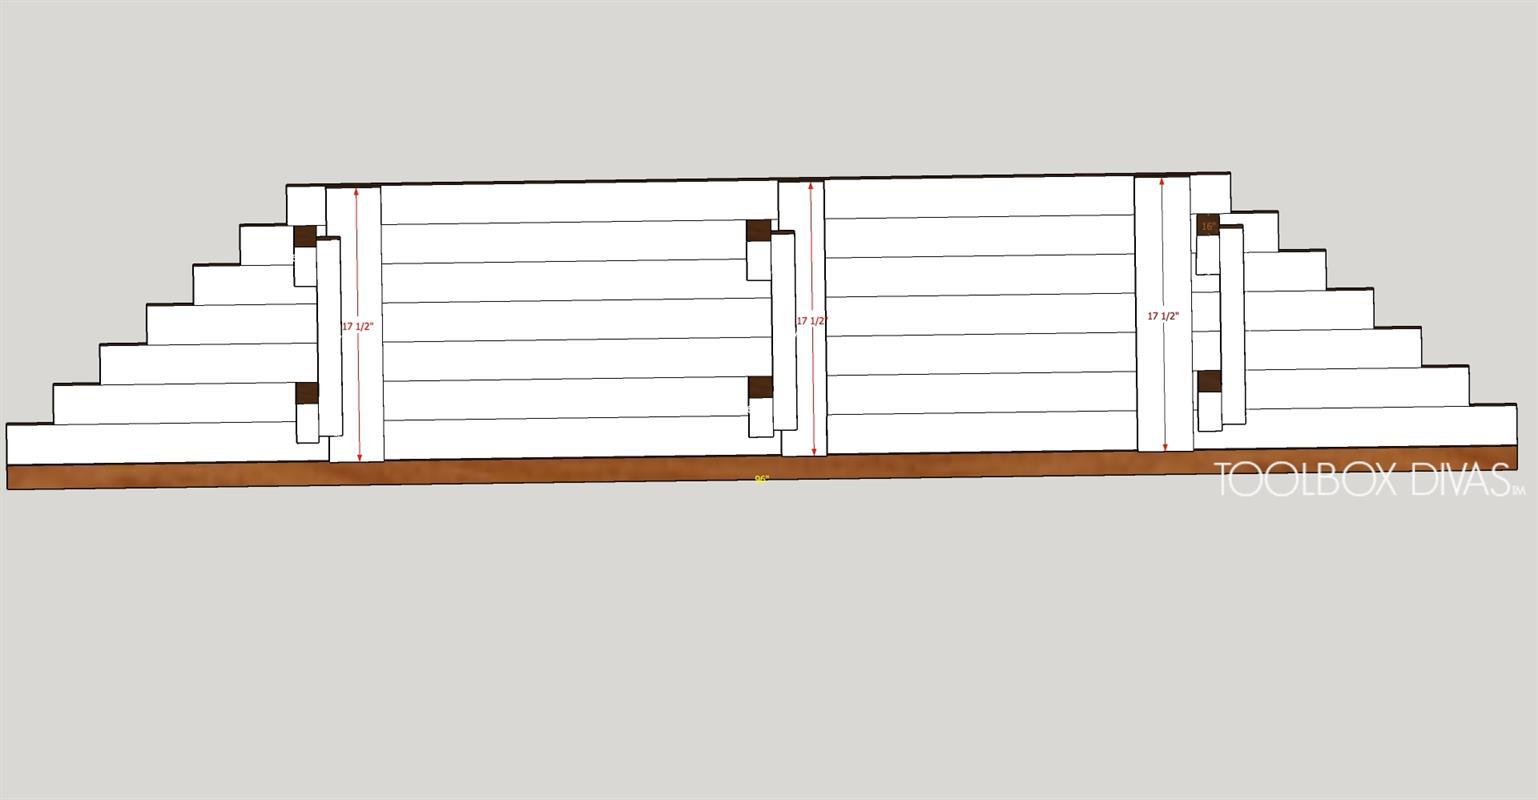
Seat(Under Support beams): 3 – 17 1/2″
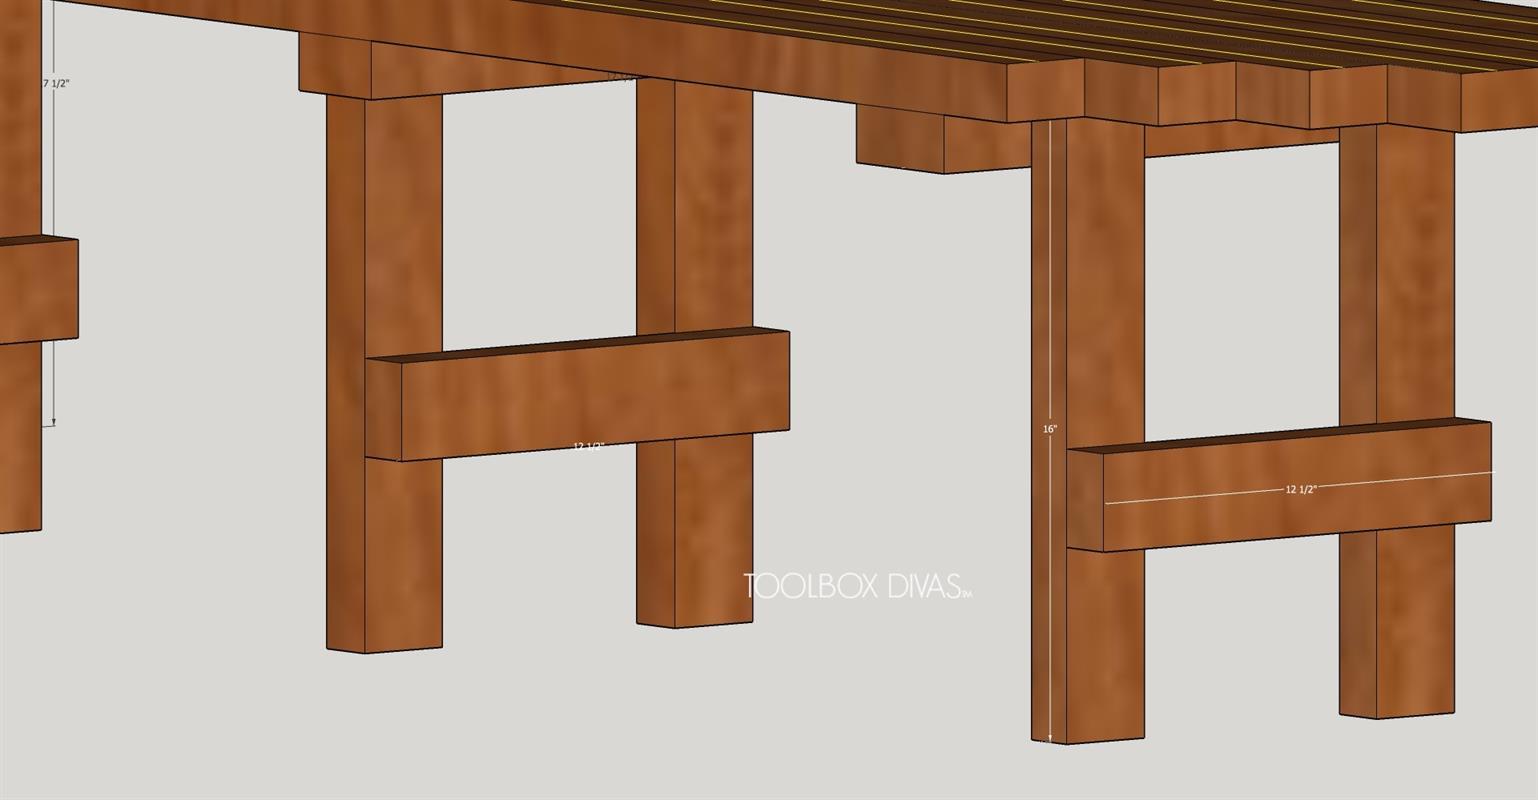
Legs(each): 2 – 16″, 1 – 12 1/2″ -
Assemble Seat
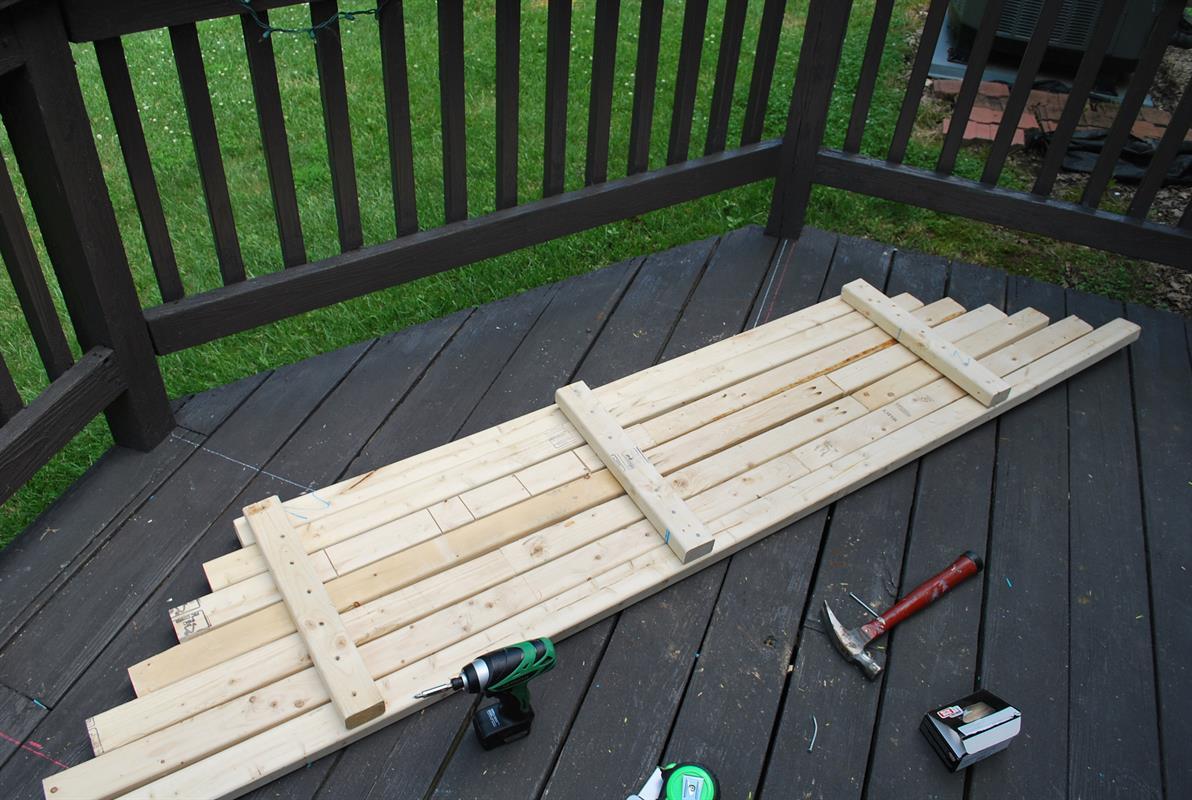
Once the seat boards are cut its time to lay it out and attach. Using wood spacers (I cut 10 – 1/4″ pieces of the wood to act as spacers) lay out the boards and attach the seat support beams. To make this process go smoothly and reduce board movement as I nailed everything in place, I screwed the middle support beam in place then nailed the remaining areas. Each board should be staggered 3 inches on either ends of the boards.
-
Attach Legs
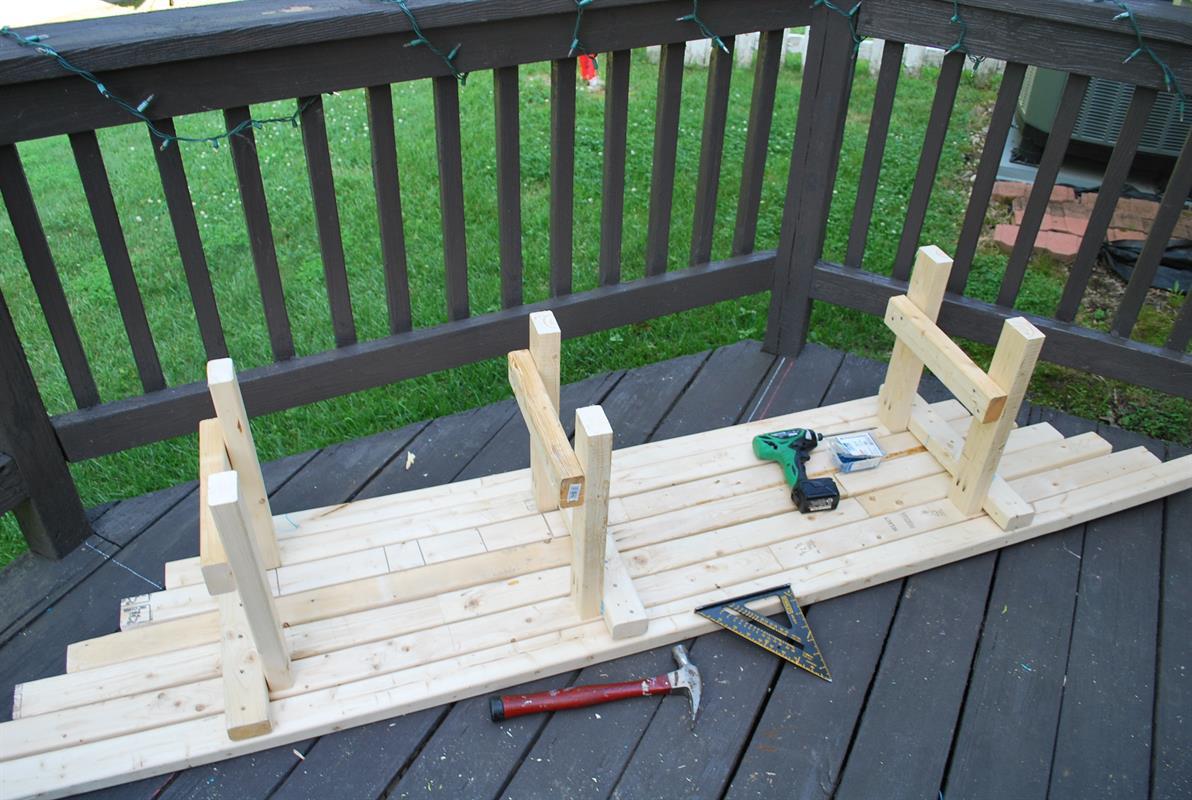
Once the support beams are in place its time to make the legs. Create the legs by joining the two 16″ pieces together with the 12 1/2″ piece of 2×3. Then using pocket screws attach under the seat next to each support beam. The middle leg should be placed in the middle about 27″ over from side legs.
-
Finish Seating
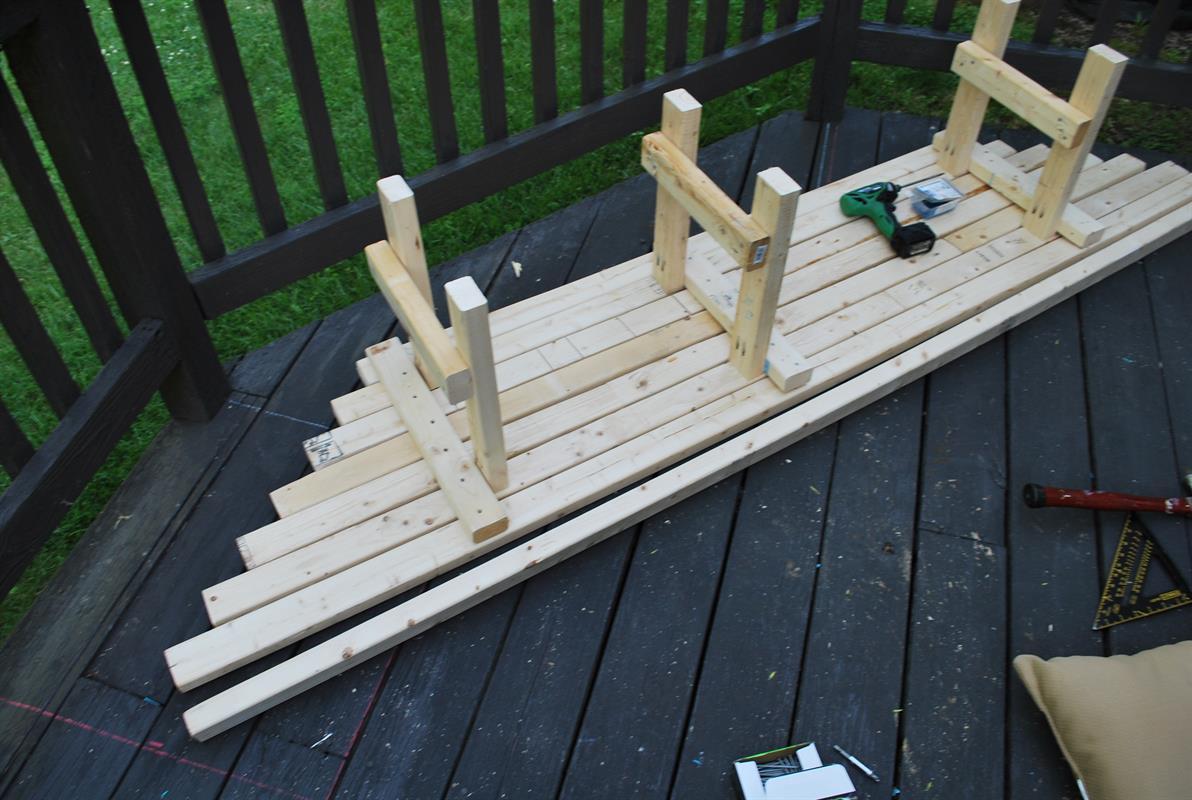
Cap off the front of the seat by placing the 2nd 2x3x96 flat face up against the other 2x3x96 board. Finally, flip over and your bench because you are done.
-
Sand and Seal
Sand to smooth out any splinters and imperfections in the wood. The last thing you’d want is for your guests to sit on any splinters or scratch themselves on any rough points.
Stain and seal with a waterproofing sealant. Secure to the deck using corner brackets on the floor.


