

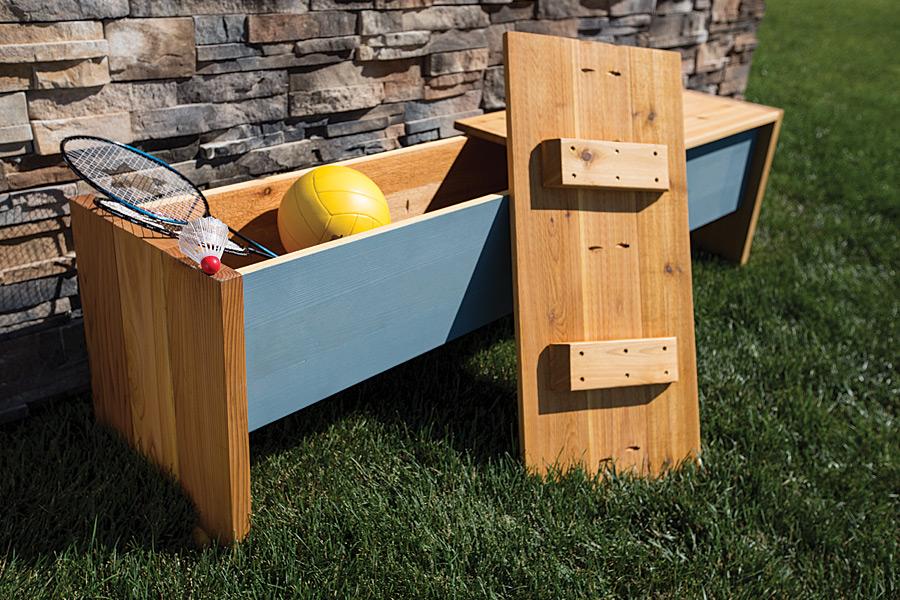
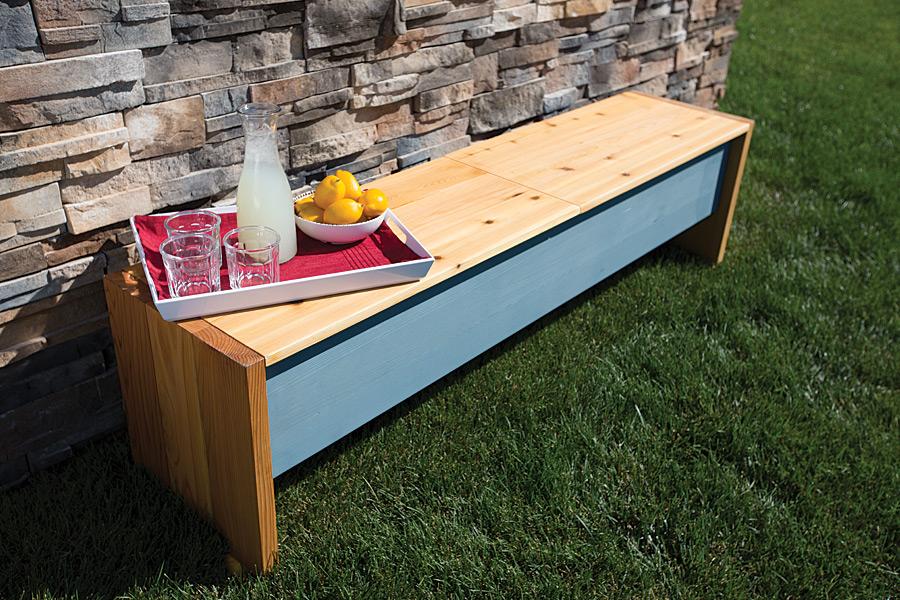
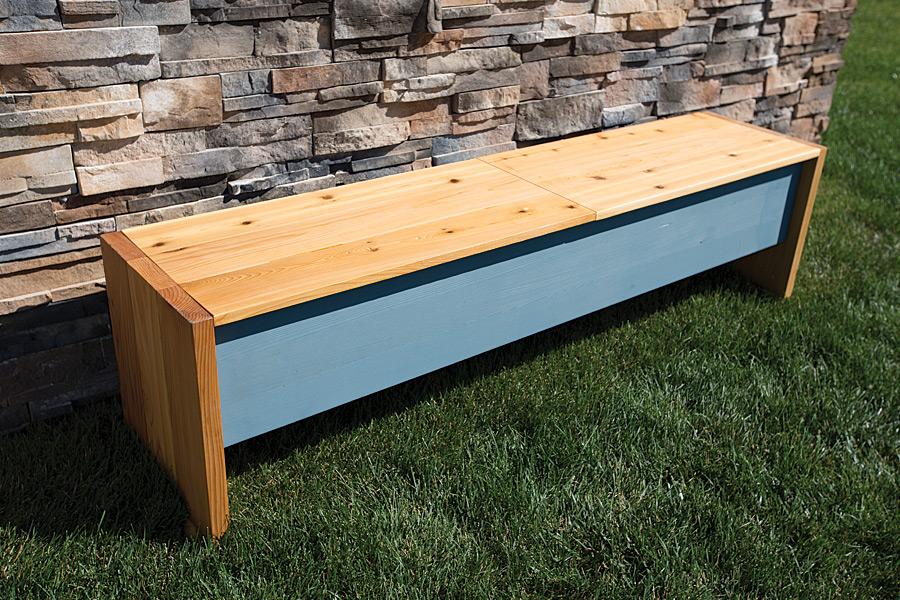


This project brings three big wins for your deck or patio: seating, storage, and style. It’s built from cedar boards that look great and will hold up to the elements outdoors. Lift-off panels simplify construction and eliminate hardware that could rust, and it goes together using pocket-hole screws.
Tools
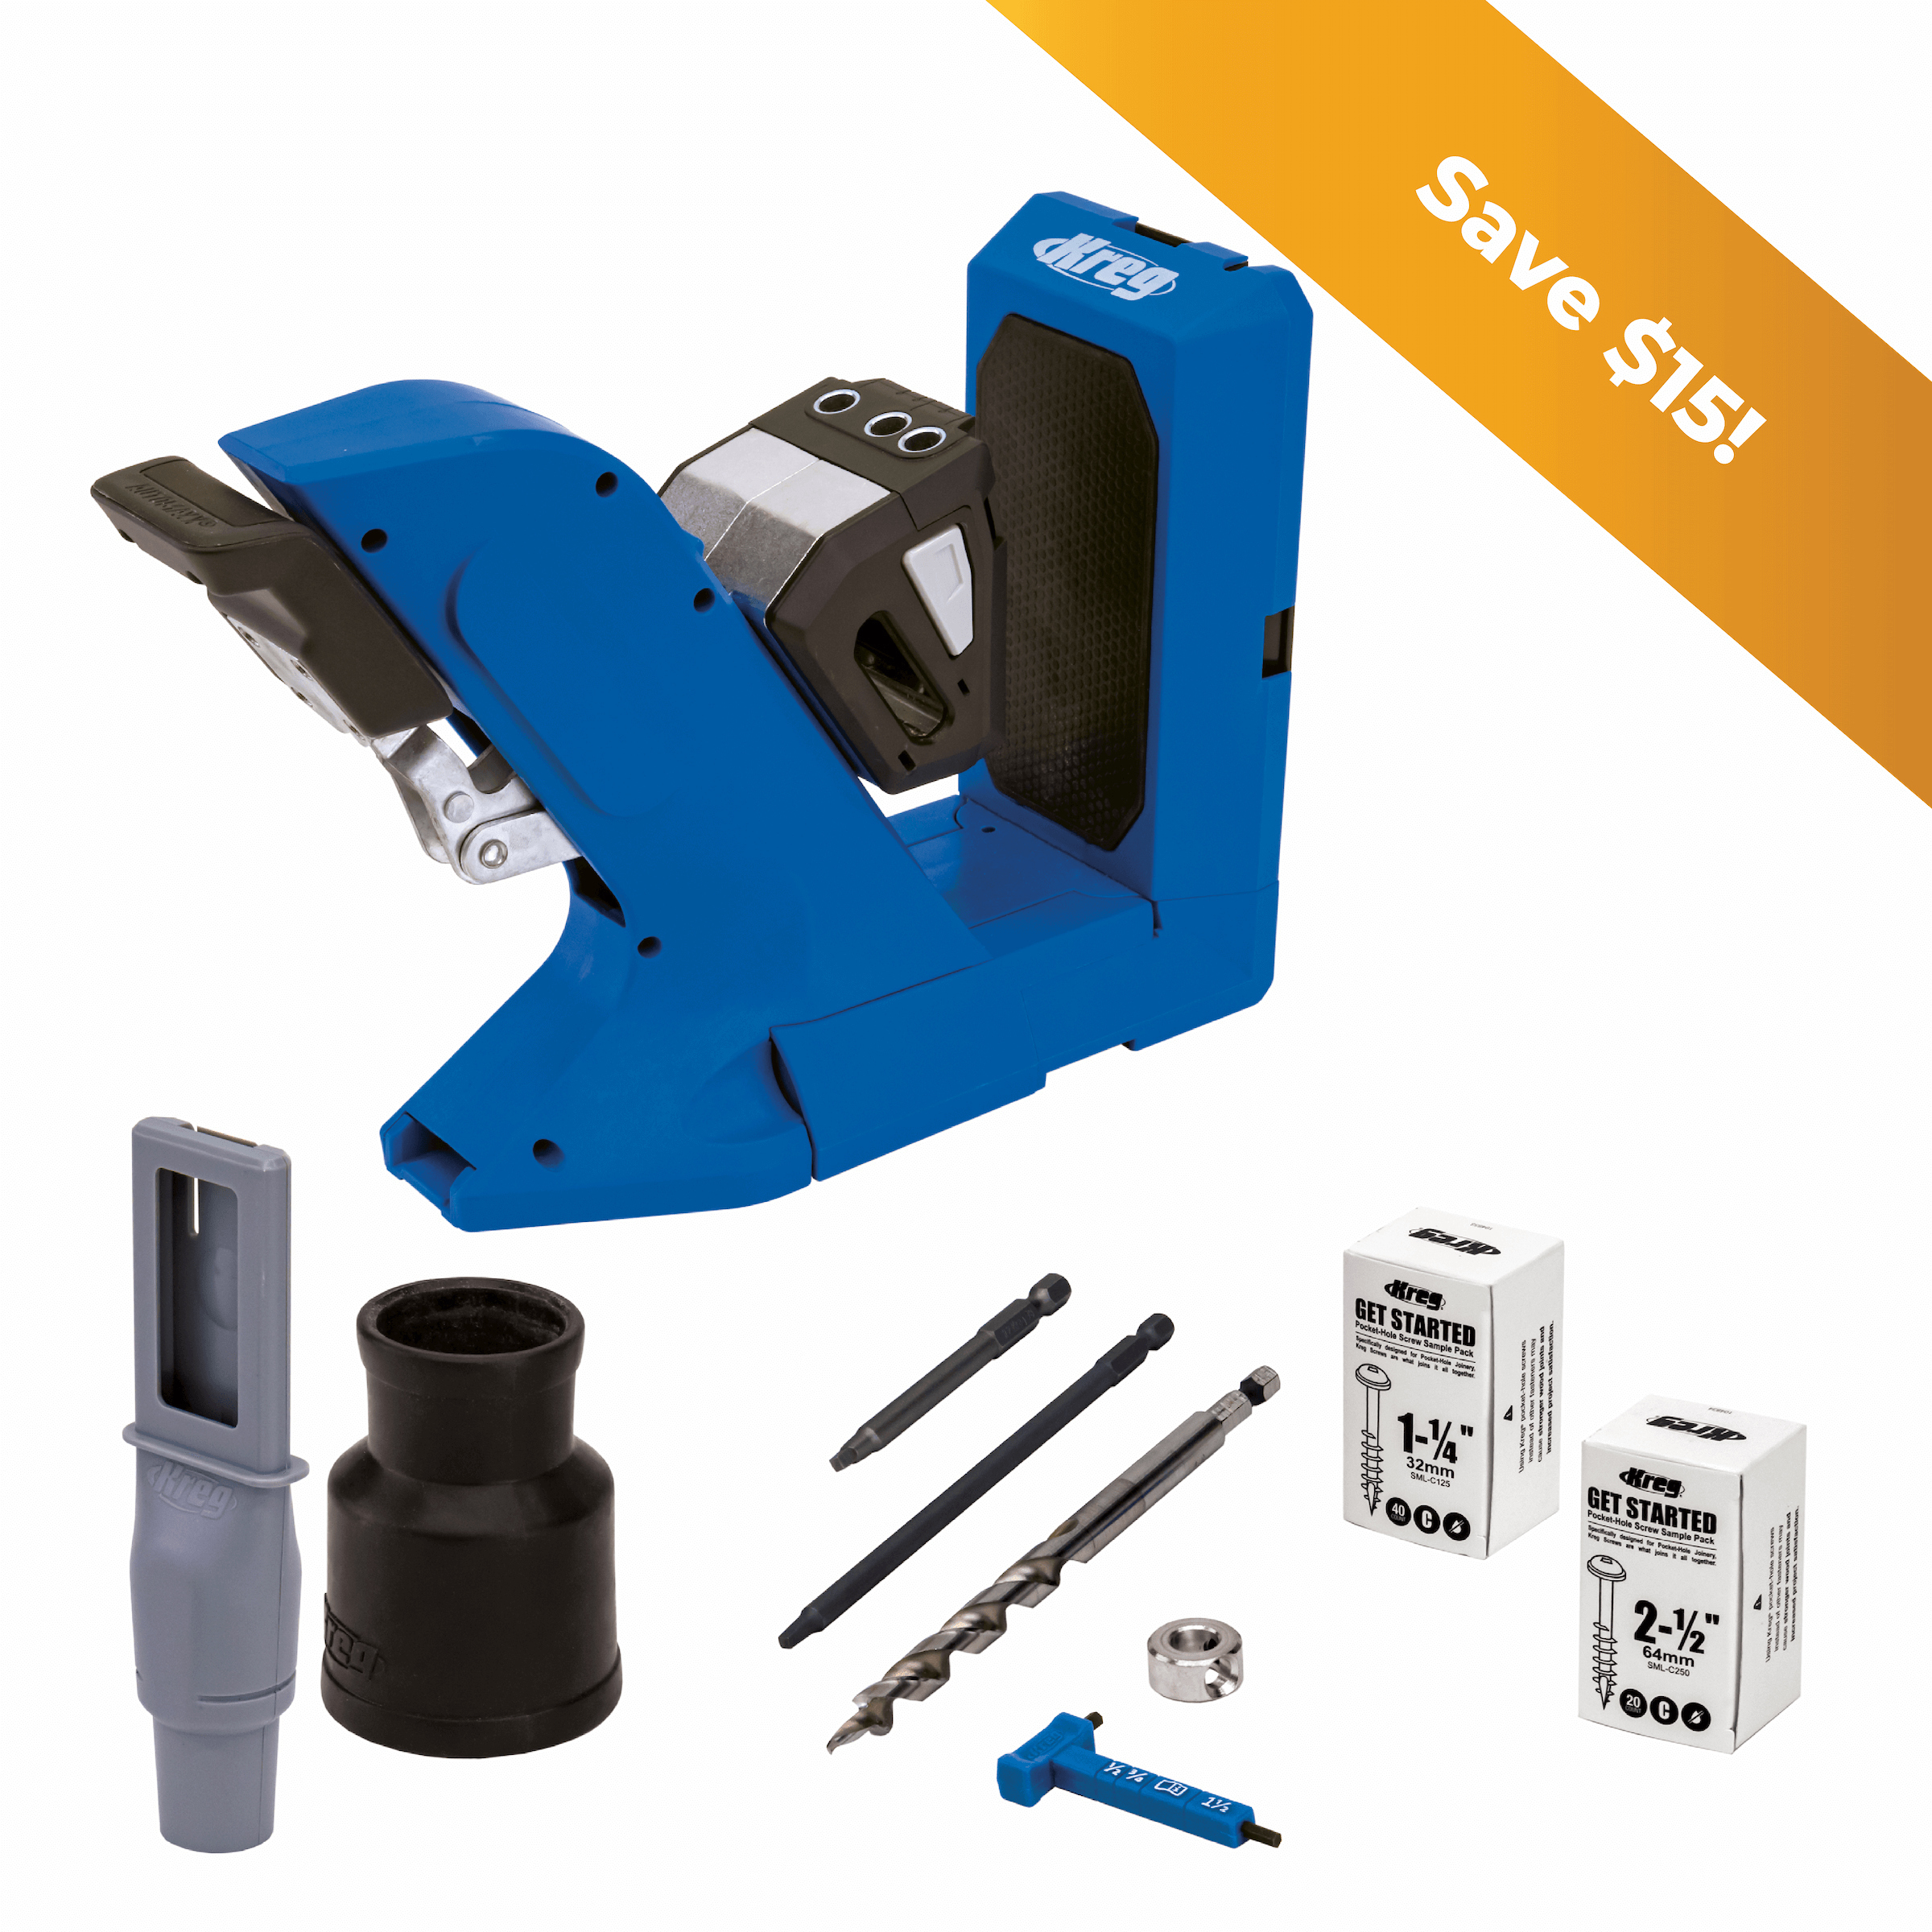
Kreg Tools

Other Tools
-
Miter Saw

-
Tape Measure
-
Drill (cordless)
-
Sander
Materials
Wood Products
- 6 Board , 1x4 , 96"
- 5 Board , 1x6 , 96"
- 2 Board , 2x6 , 96"
Hardware & Supplies
- 16 2 1/2" exterior pocket-hole screws
- 114 1 1/4" exterior pocket-hole screws
- 24 2" flat-head deck screws
- 1 Exterior wood glue
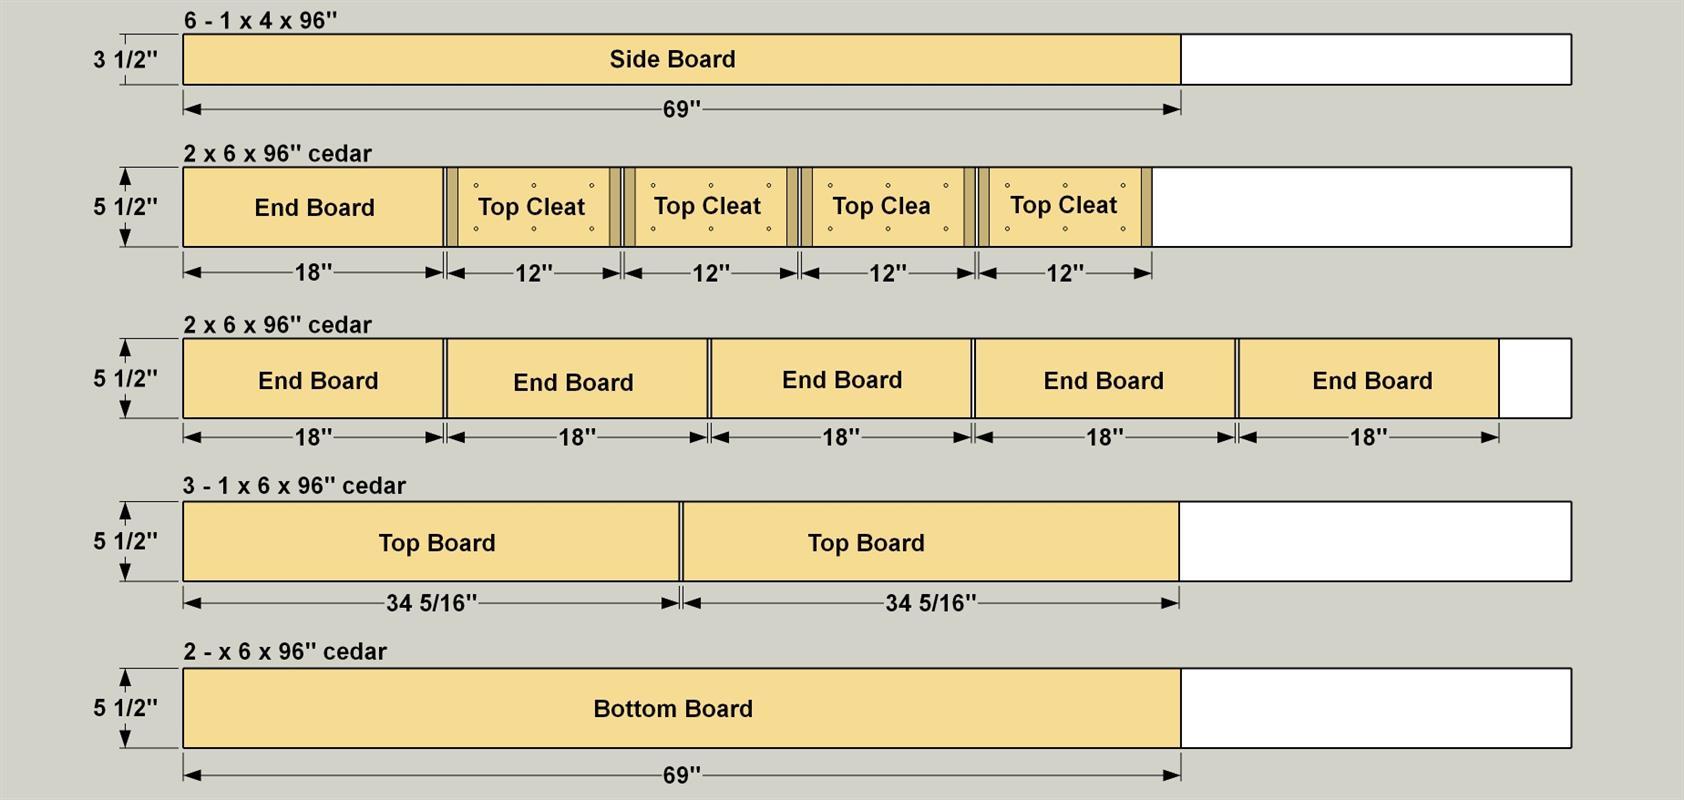
Cut List & Parts
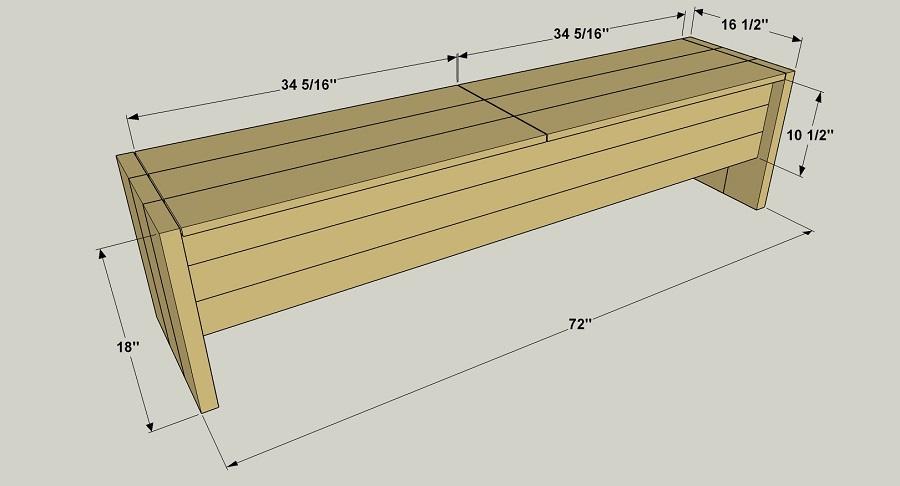
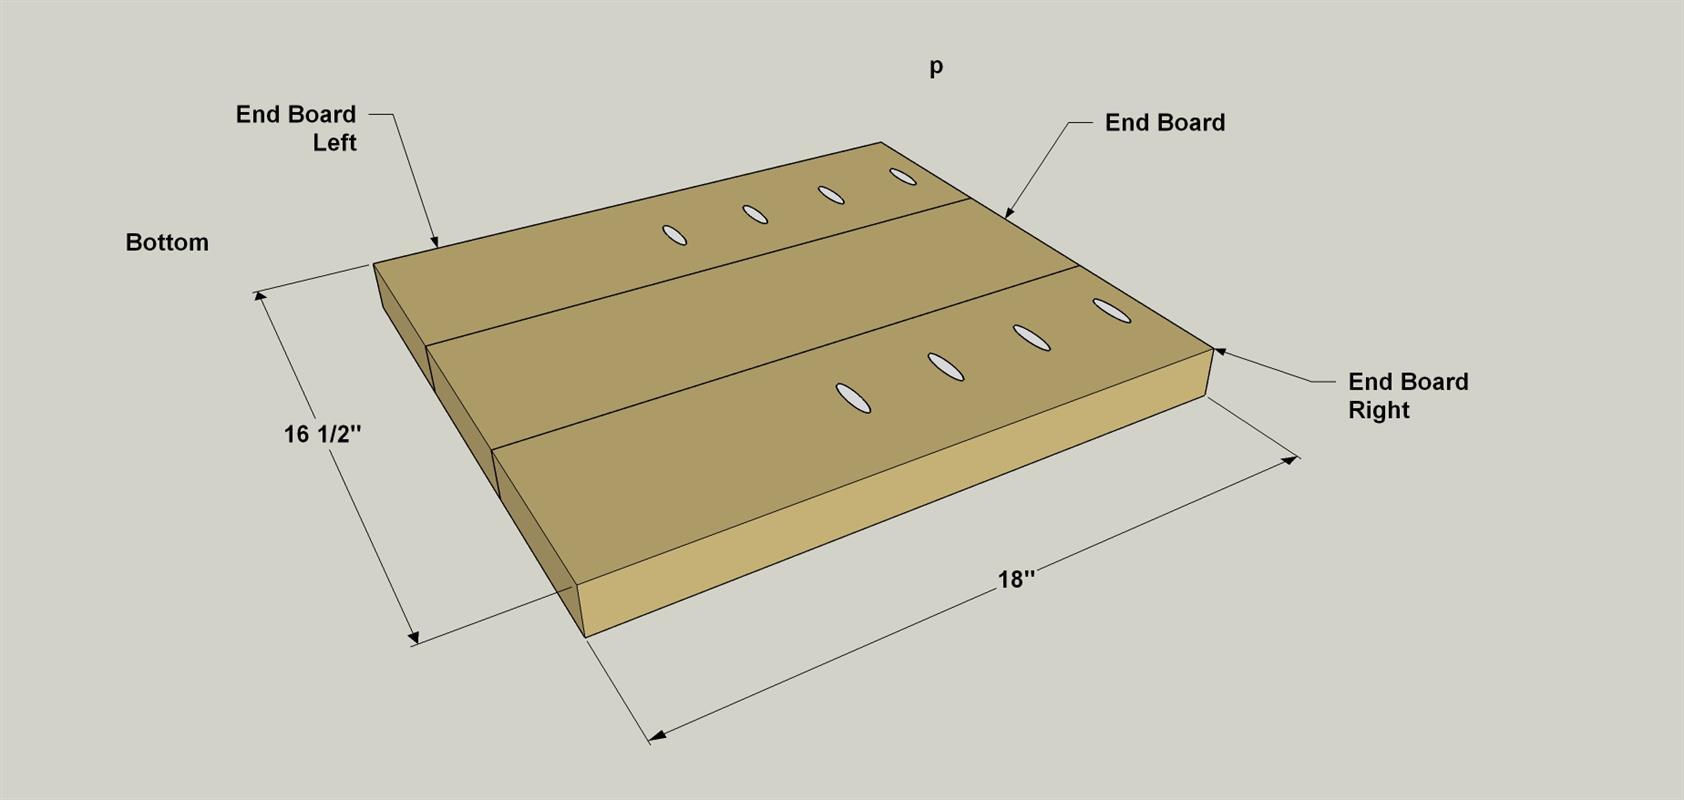
- 6 End Board , 1 1/2" 5 1/2" x 18"
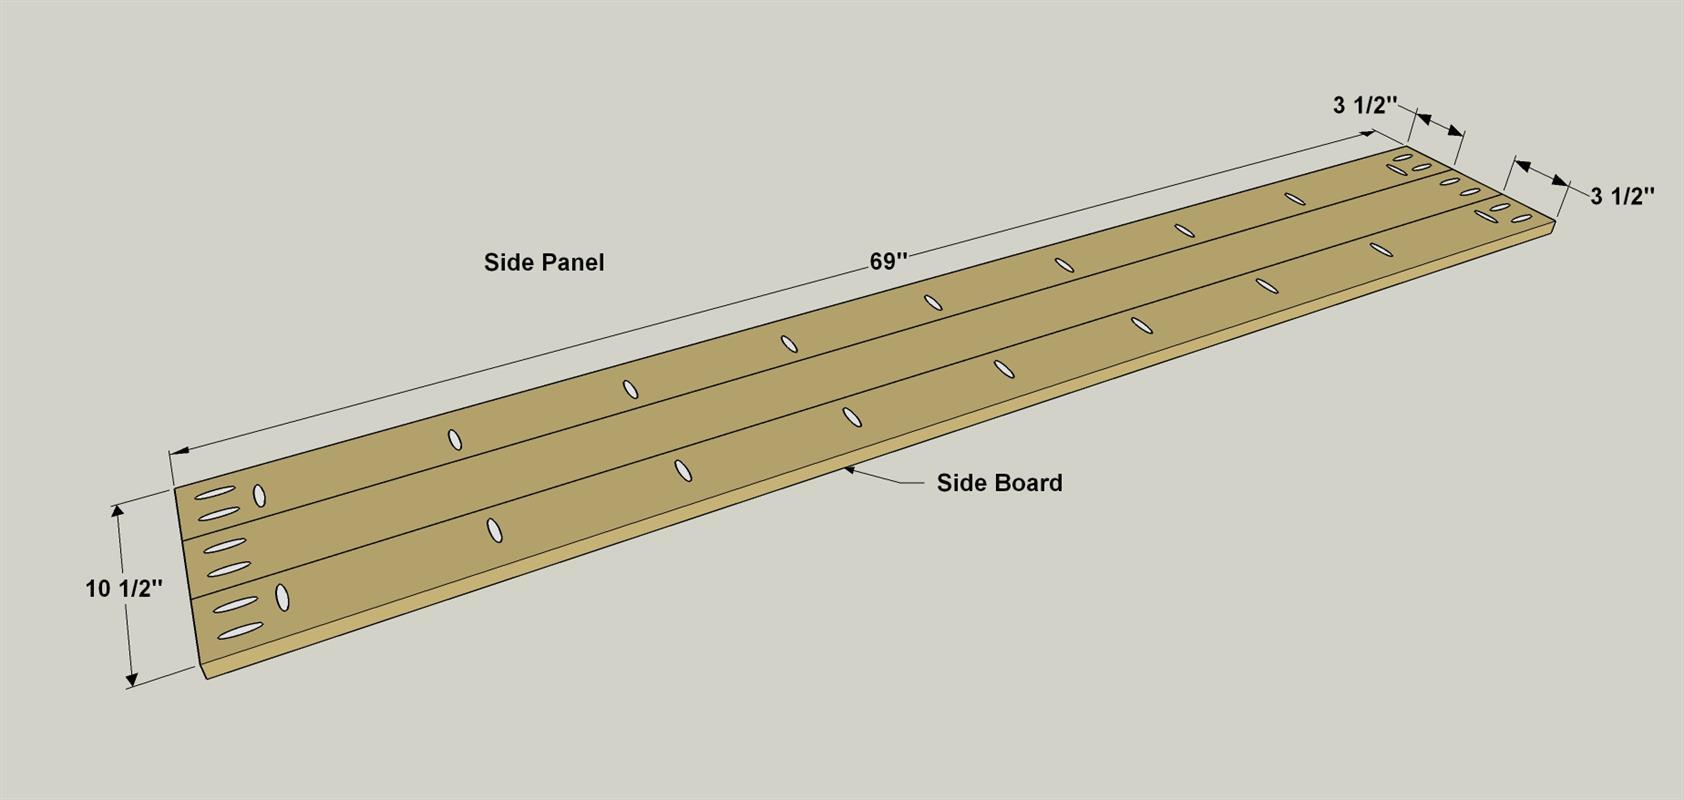
- 6 Side Board , 7/8" x 3 1/2 " x 69"
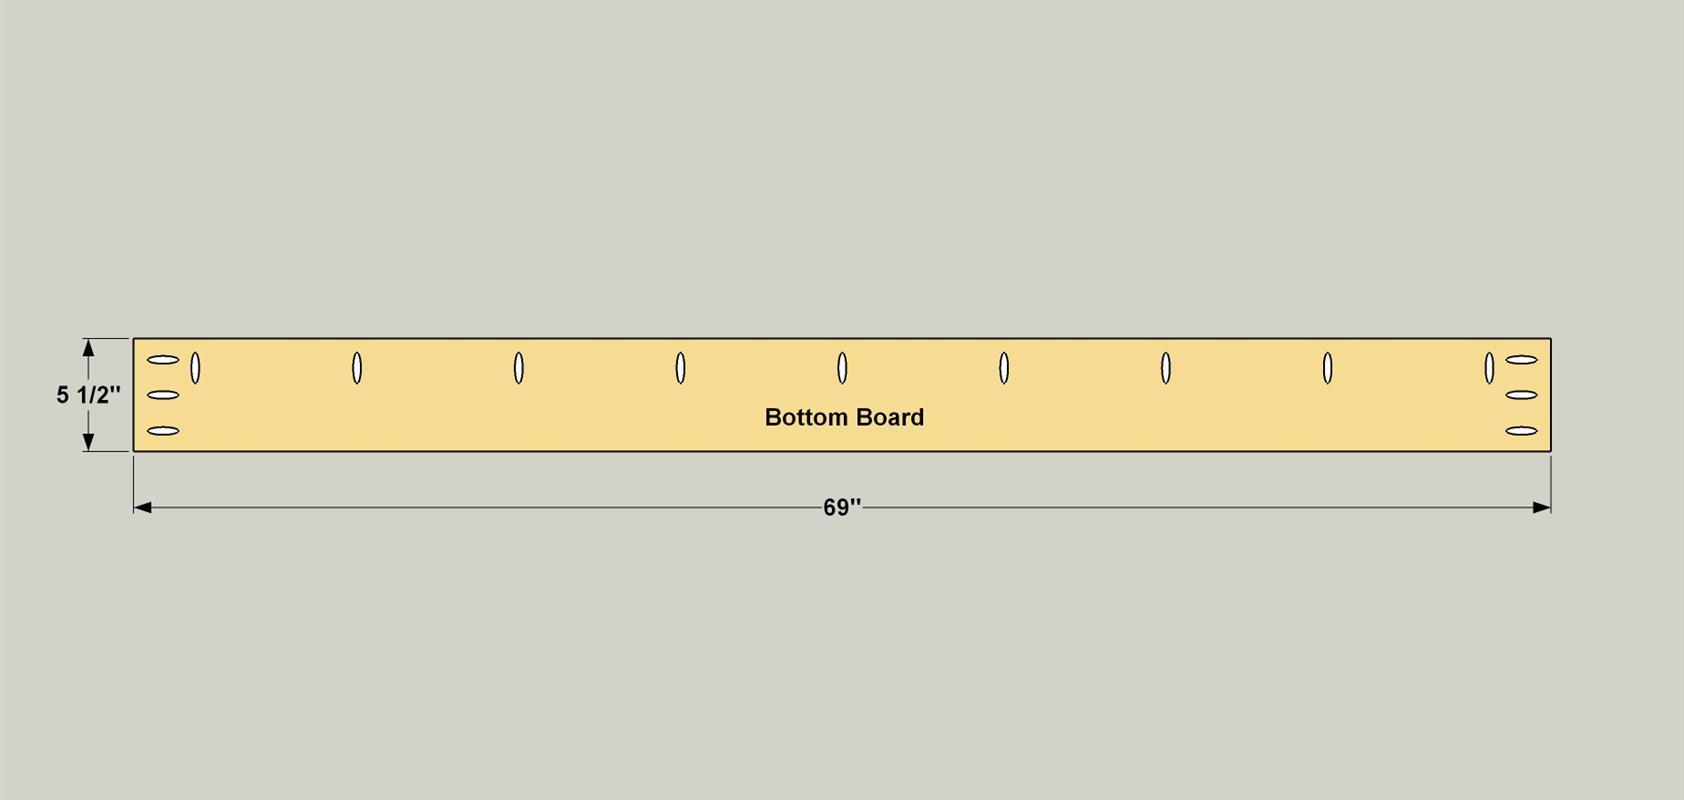
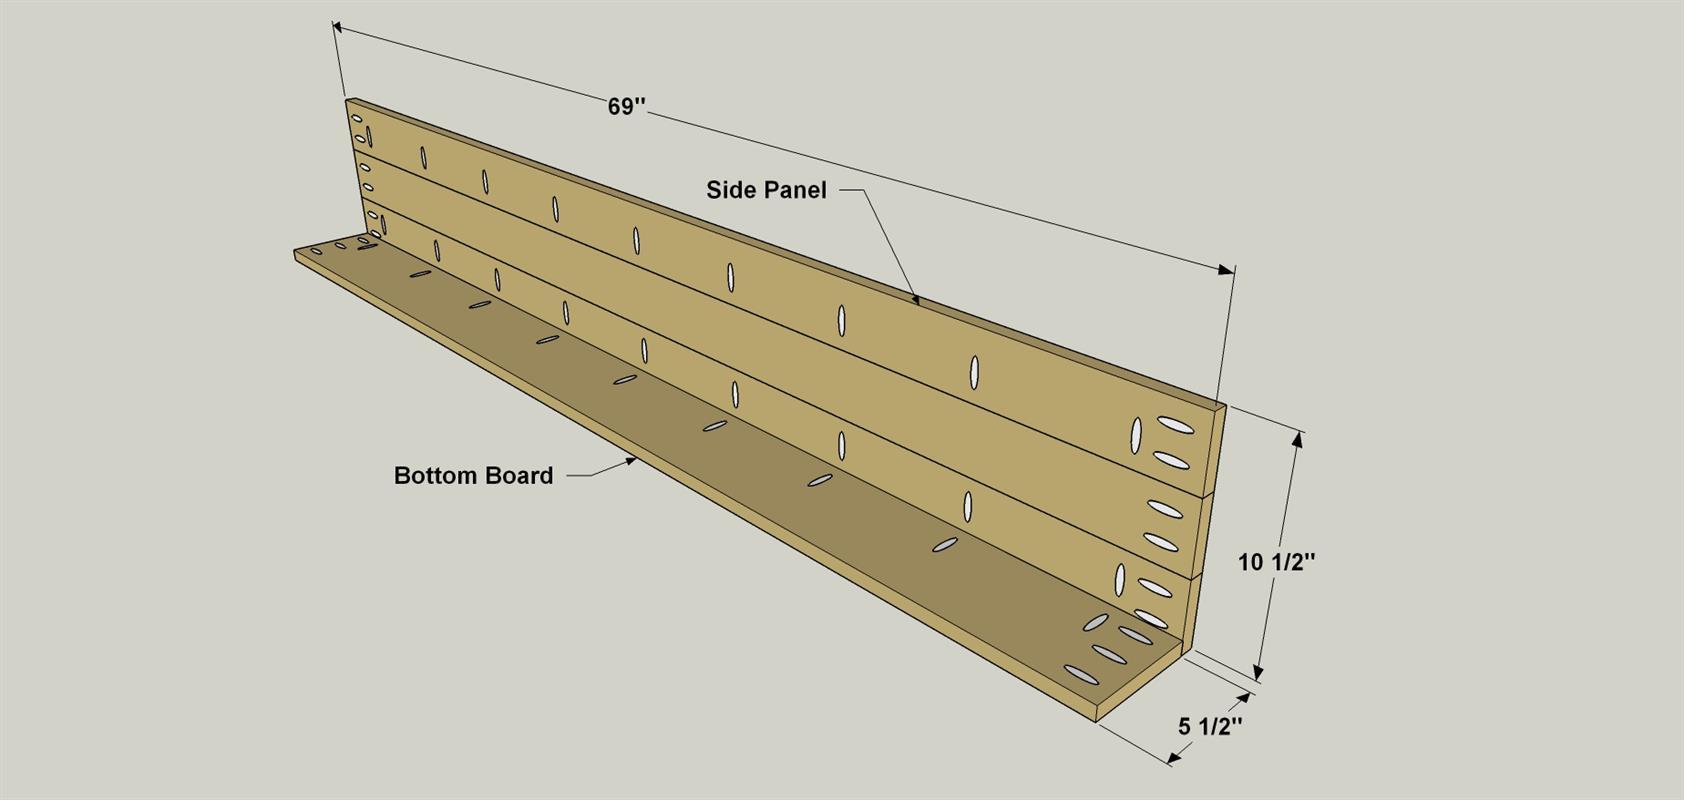
- 2 Bottom Board , 7/8" x 5 1/2 " x 69"
- 6 Top Board , 7/8" x 5 1/2 " x 34 5/16"
- 4 Cleat , 1 1/2" x 5 1/2" x 12"
Directions
-
Make the End Boards
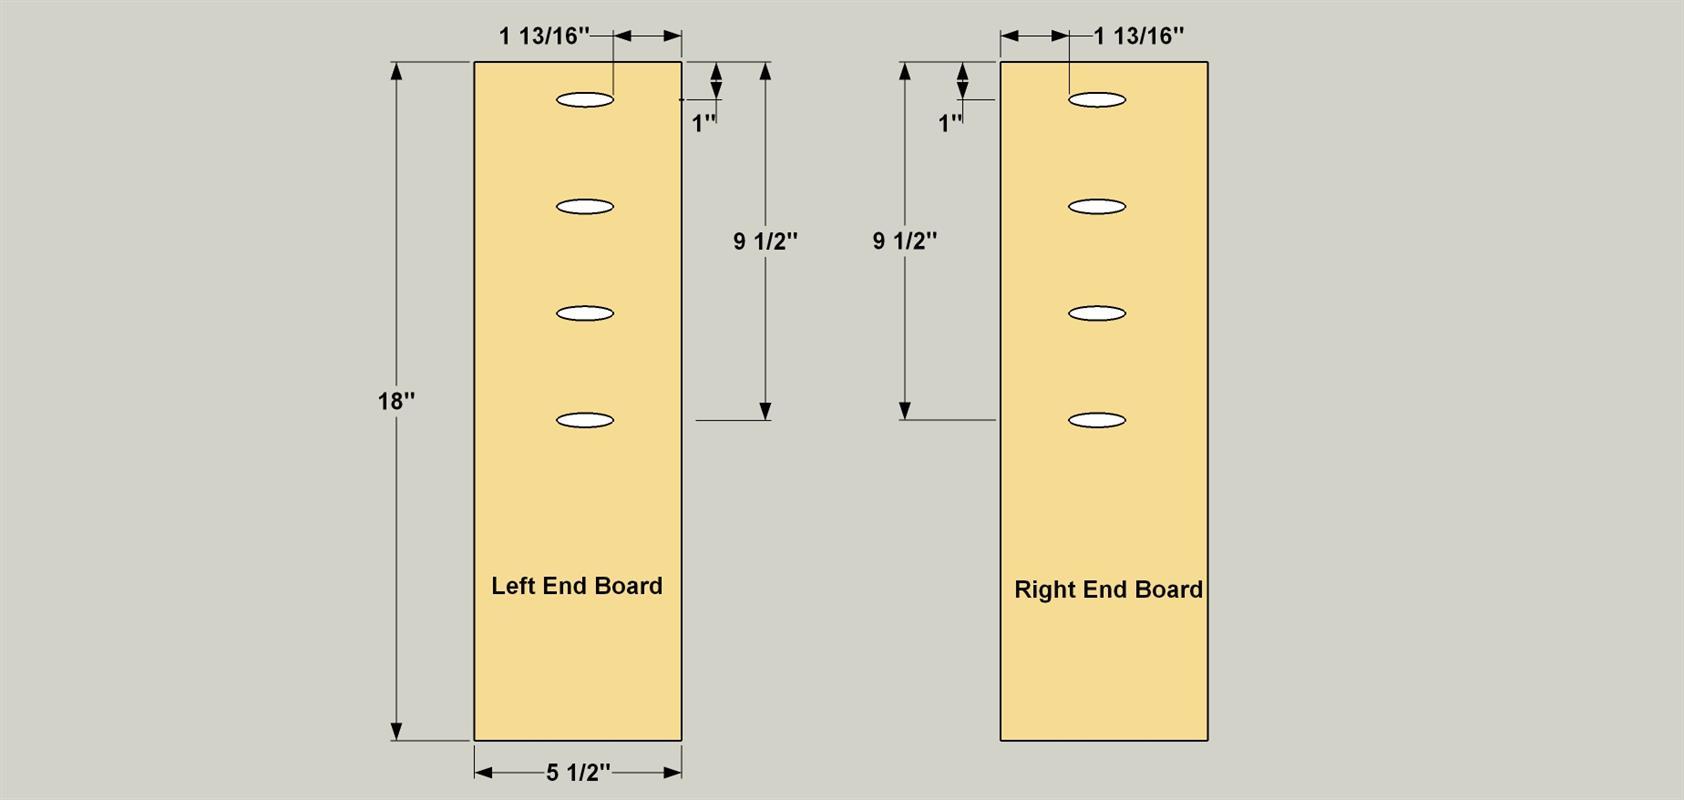
Cut six End Boards to length from 2 x 6 cedar boards as shown in the cutting diagram. Set your pocket-hole jig for 1 1/2" thick material and drill pocket holes on four of the six boards as shown. Make sure to note there should be two right side and two left side boards with pocket holes. The two leftover boards will become the center of the End Panels.
Tip: Face the Smooth Side Out
Cedar 1x dimensional lumber is typically 7/8" thick, and the boards are rough on one side and smooth on the other. This may vary in your area. This design is intended to show the smooth side of the lumber facing out.
-
Assemble the End Panels
On a flat surface, glue and clamp three End Boards together, as shown. Be sure to use exterior-rated water-resistant glue. Screw them together with 2 1/2" exterior pocket-hole screws. Complete the same process for the other End Panel.
-
Make the Side Boards
From 1x4 cedar boards, cut six Side Boards to length as shown in the cutting diagram. Set up your pocket-hole jig (and drill bit stop collar) for 3/4"-thick material, and then drill pocket holes where shown.

-
Assemble the Side Panels
On a flat surface, glue and clamp three Side Boards as shown. Screw them together with 1 1/4" exterior pocket-hole screws. Complete the same process for the other Side Panel.
-
Make the Bottom Boards
From 1x6 cedar, cut two Bottom Boards to length as shown in the cutting diagram. With your jig set for 3/4"-thick material, drill pocket holes in both boards at the locations shown.
-
Attach a Bottom Board to One Side
Glue and clamp one Bottom Board to one assembled side panel. Make sure the Bottom Board is flush with the lower edge of the Side Panel, and then secure it with 1 1/4" exterior pocket-hole screws. Assemble the second side the same way.
-
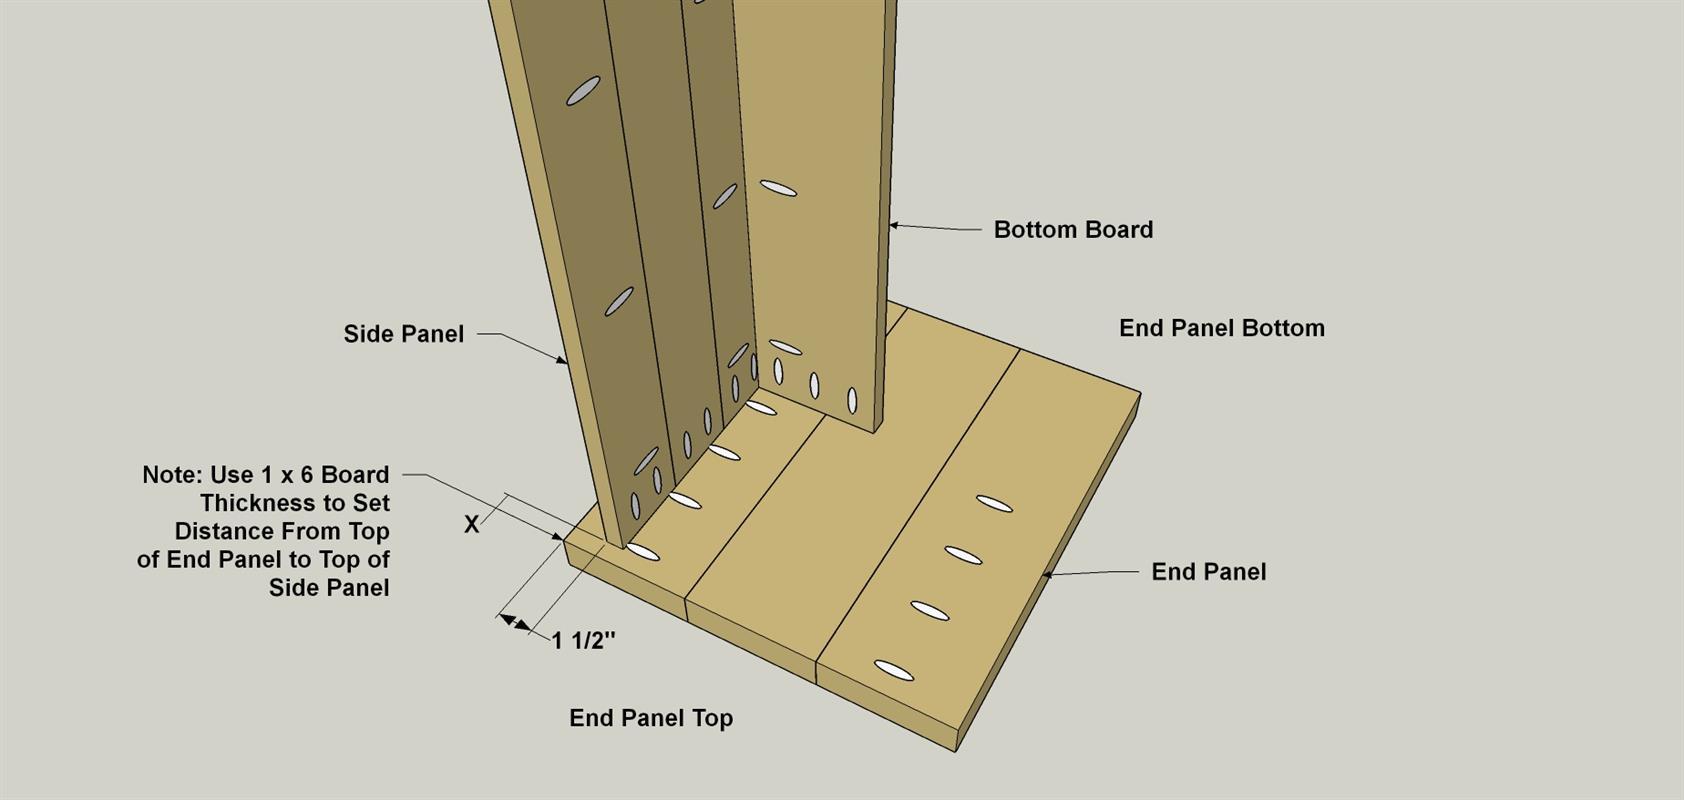
Add An End Panel
Lay one End Panel flat on the ground with the pocket holes facing up, and set a side panel/bottom assembly in place, as shown. Using a scrap piece of 1 x 6, set the distance from the top edge of the end panel to the top of the side panel. Mark the location then apply some glue to the edge of the side assembly and set it back in place on the end panel. Secure it in place with 1 1/4" exterior pocket-hole screws.
-
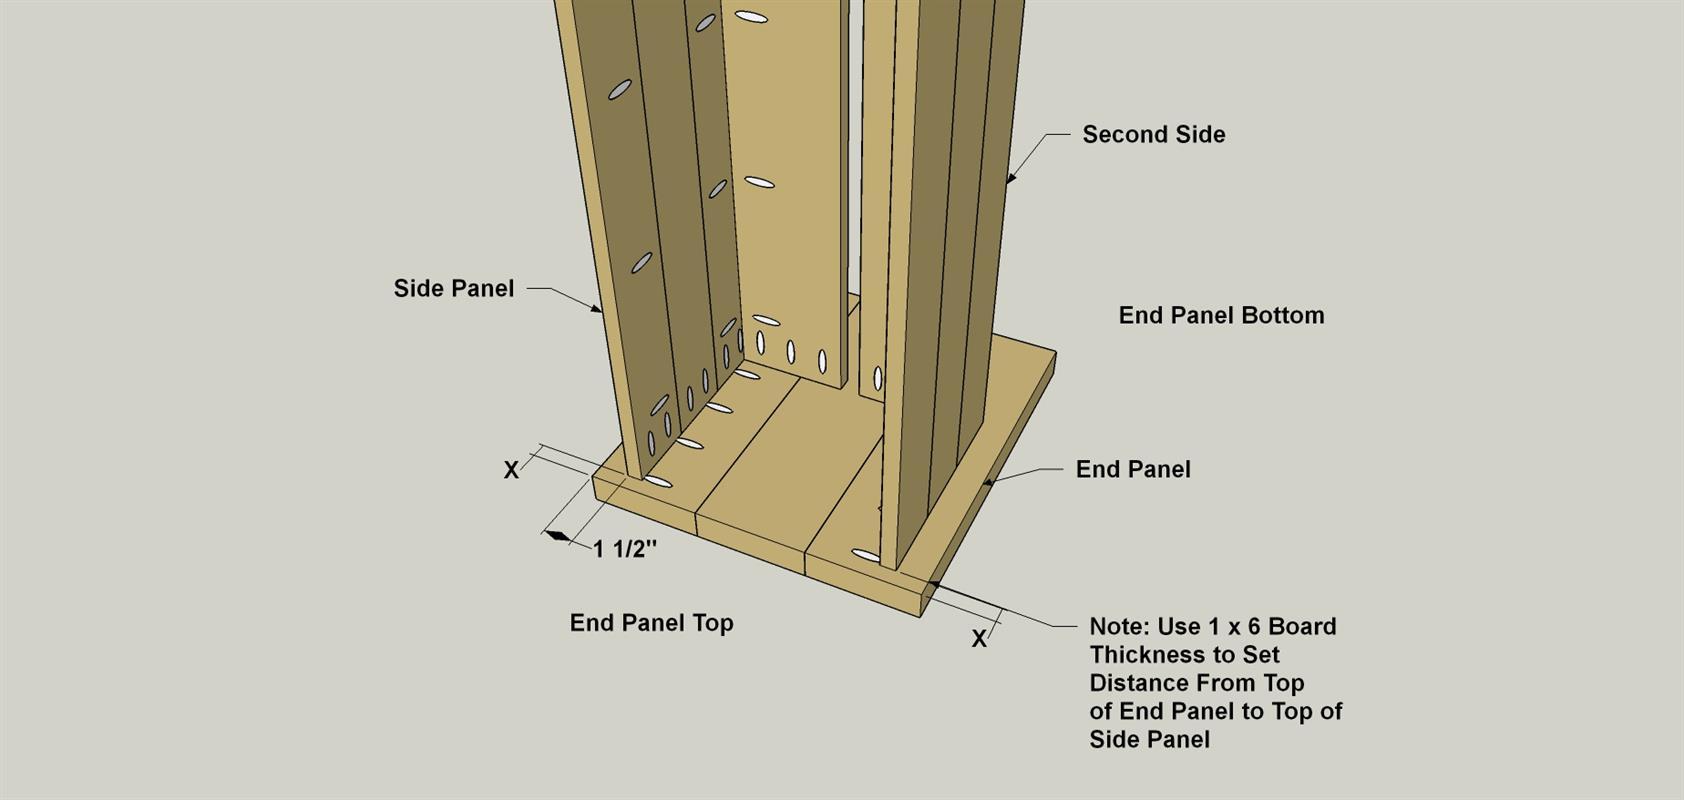
Add the Second Side
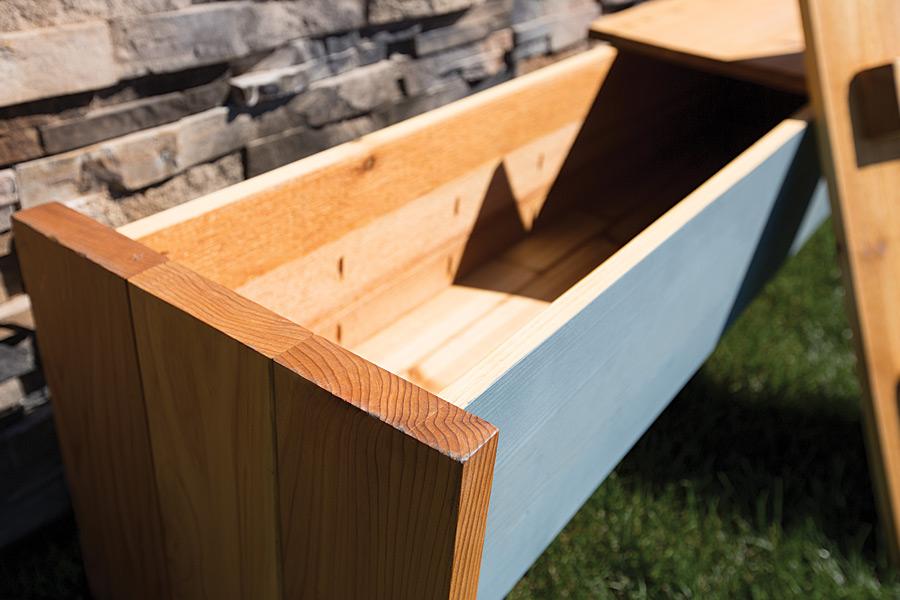
Secure the second side assembly in the same manner as the first. Note that there is a gap between the Bottom Boards. This allows moisture to escape.
-
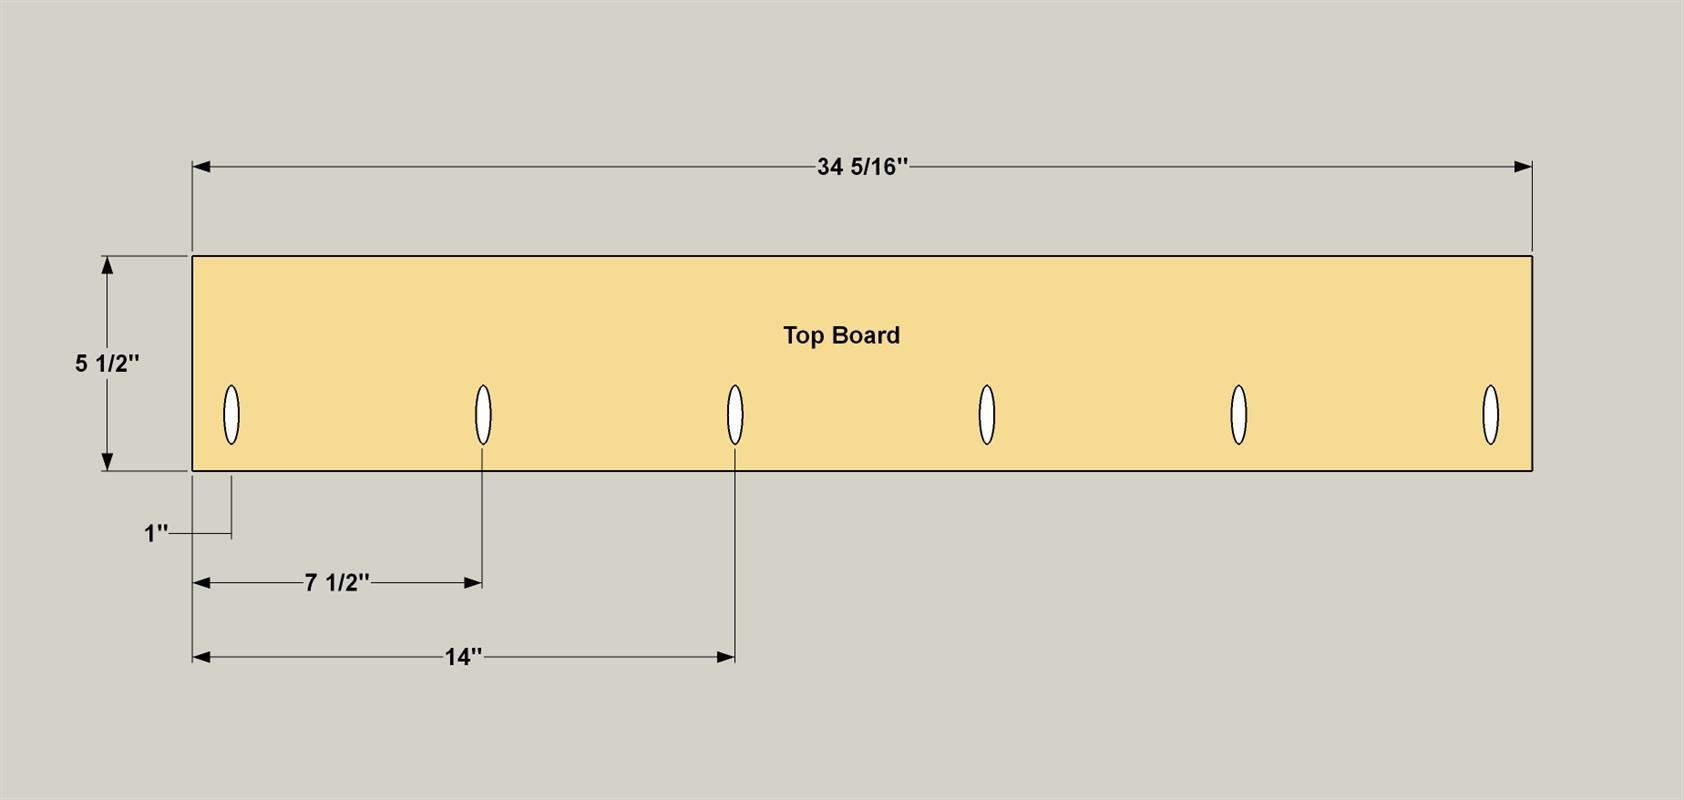
Make the Top Boards
Cut six Top Boards to length from 1x6 cedar boards as shown in the cutting diagram. With your pocket-hole jig still set for 3/4" thick material, drill pocket holes in four of the Top Boards, as shown.
-
Add the Second End
With the two side assemblies secured to one end panel, go ahead and repeat the same process for the second End Panel.
-
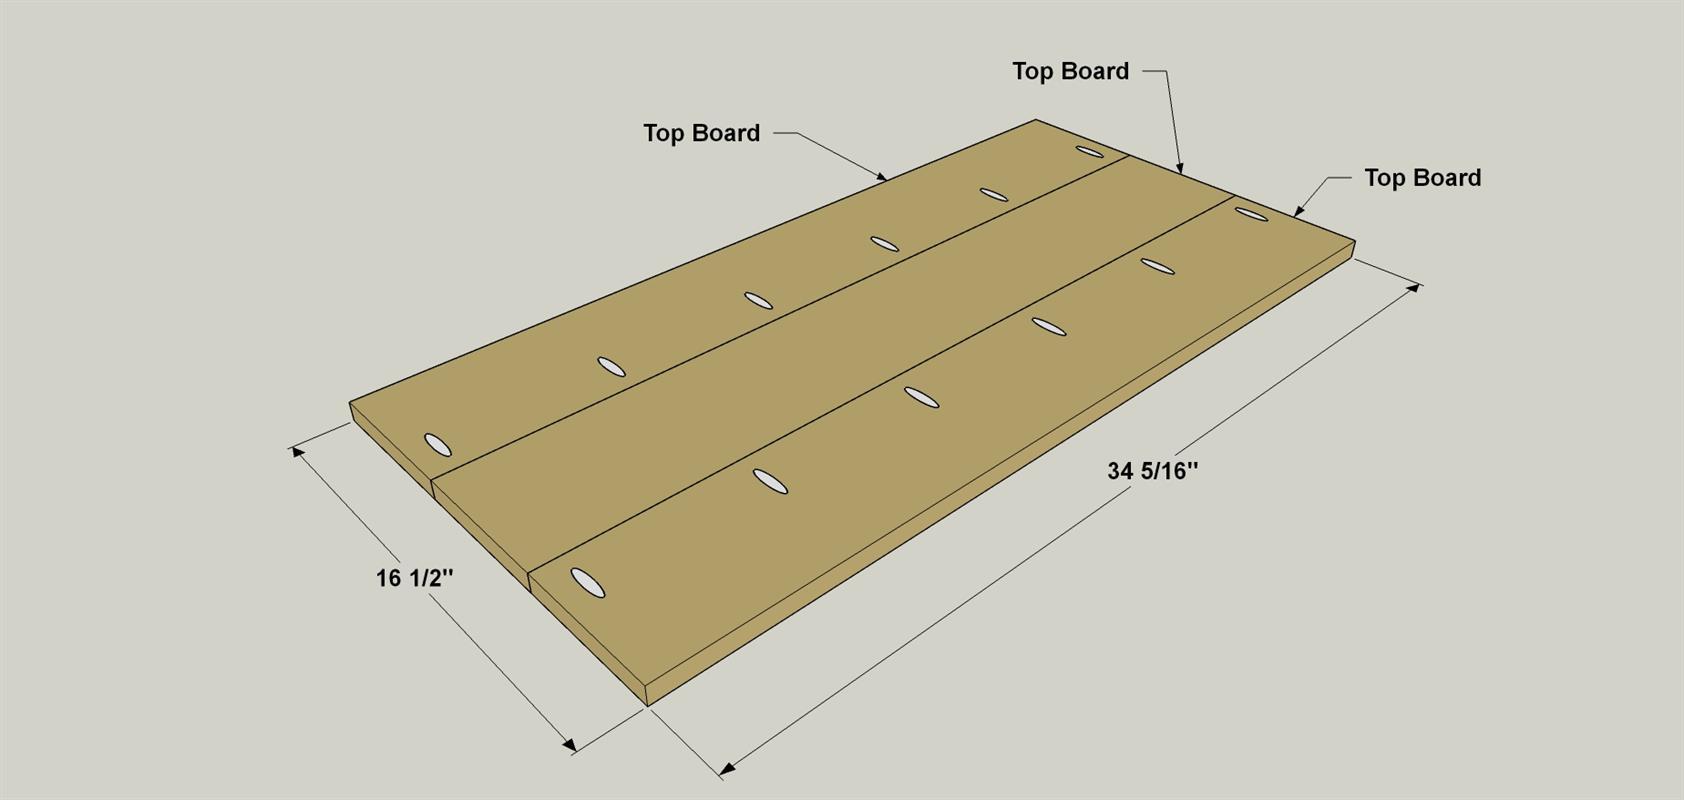
Assemble the Top Panels
Glue and clamp three Top Boards together as shown. Screw them together with 1 1/4" exterior pocket-hole screws. Complete the same process for the other Top Panel.
-
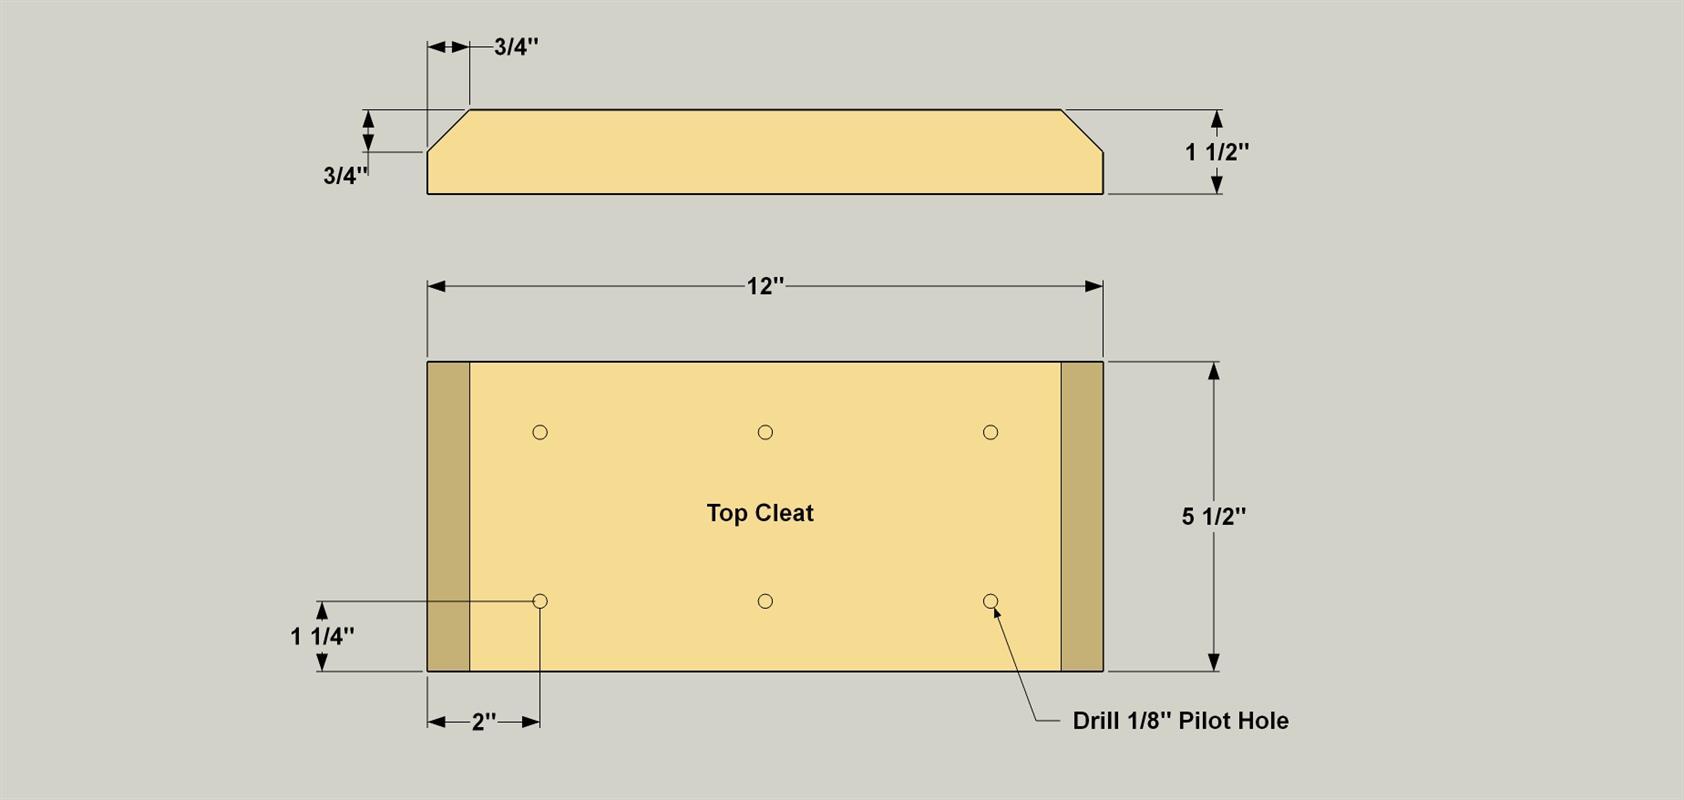
Make the Cleats
From 2x6 cedar boards, cut four Cleats to length as shown in the cutting diagram. Miter the ends of each Cleat and then lay out the locations for the screw holes on each Cleat. Drill a 1/8" pilot hole at each location.
-
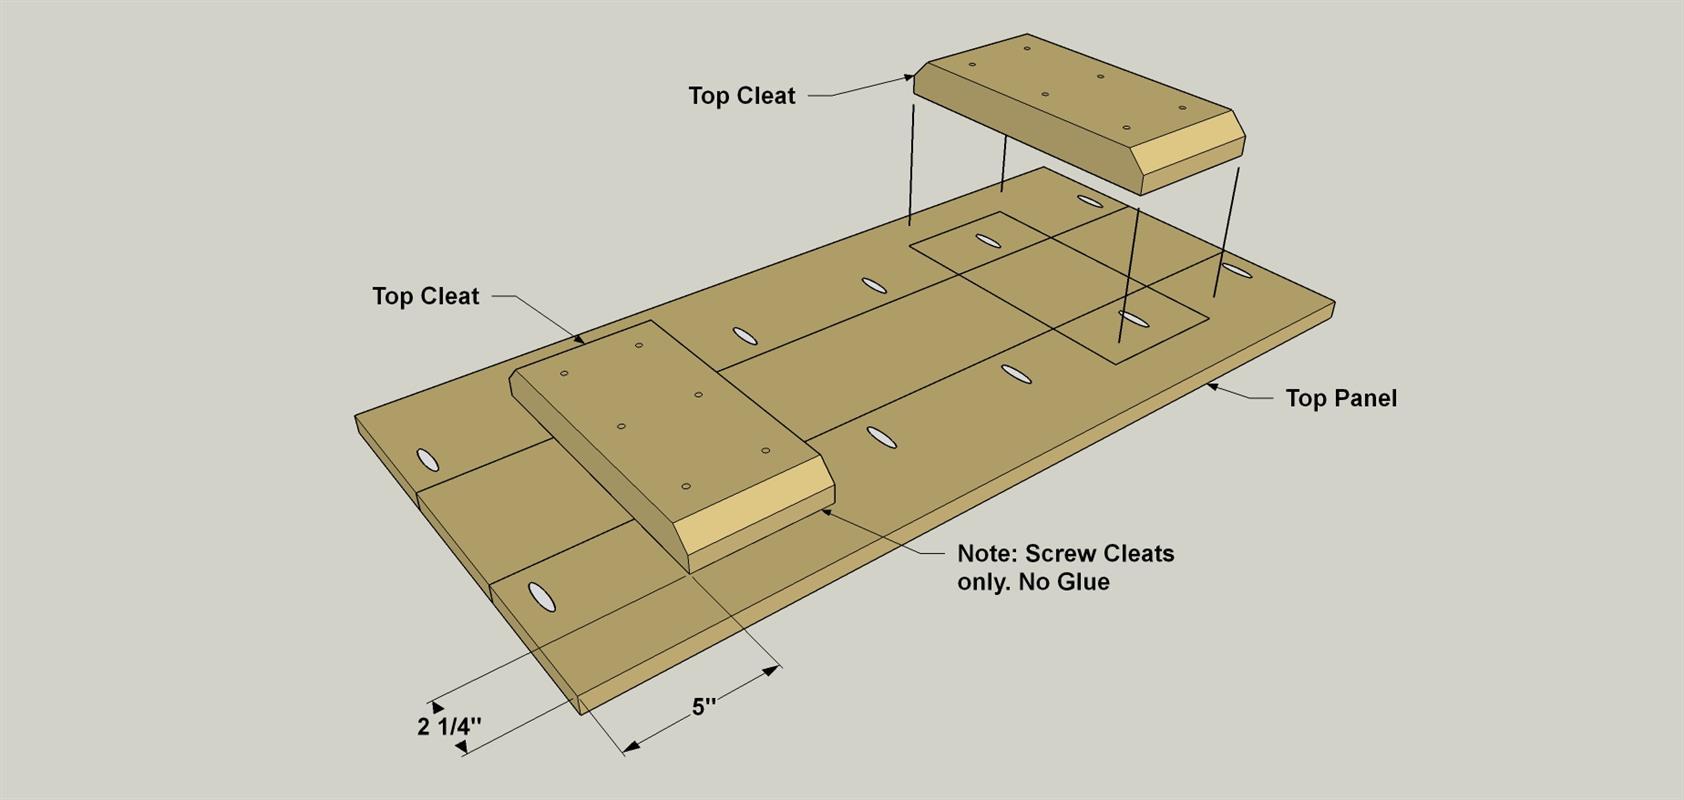
Attach the Cleats
Attach the Cleats to the underside of each assembled Top Panel using 2" exterior deck screws. Don’t use glue at this location.
-
Add a Finish
Once everything is assembled, finish sand all of the surfaces, wipe away all of the dust, and then apply an exterior oil or stain. We chose to paint the side panels, and then finish the remainder using a “natural cedar” toned deck stain.