Outdoor Bar Stool – Metric
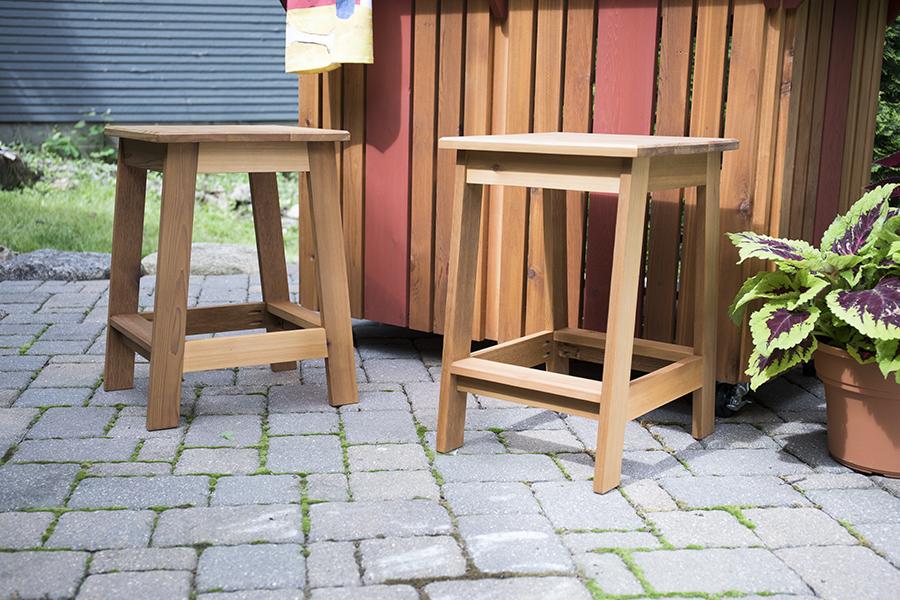
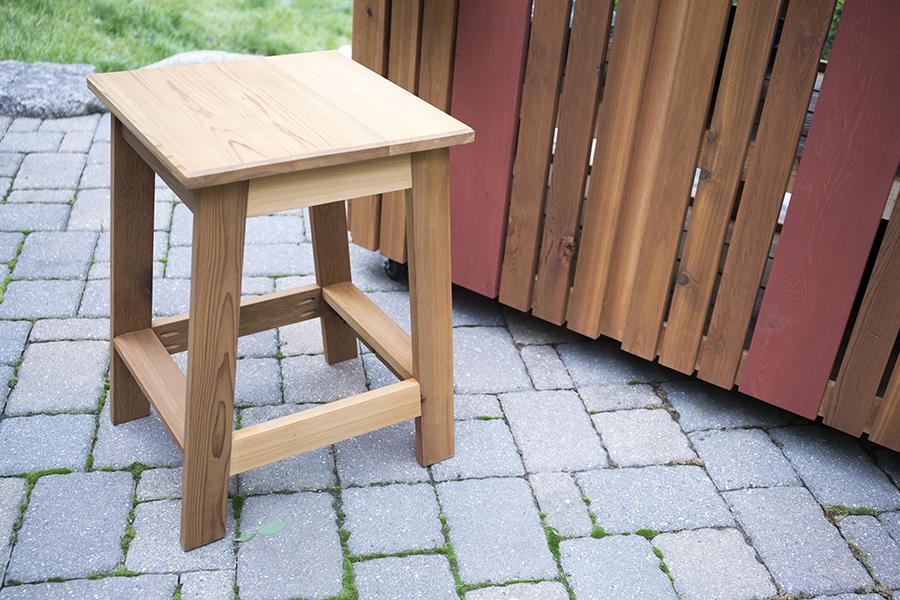
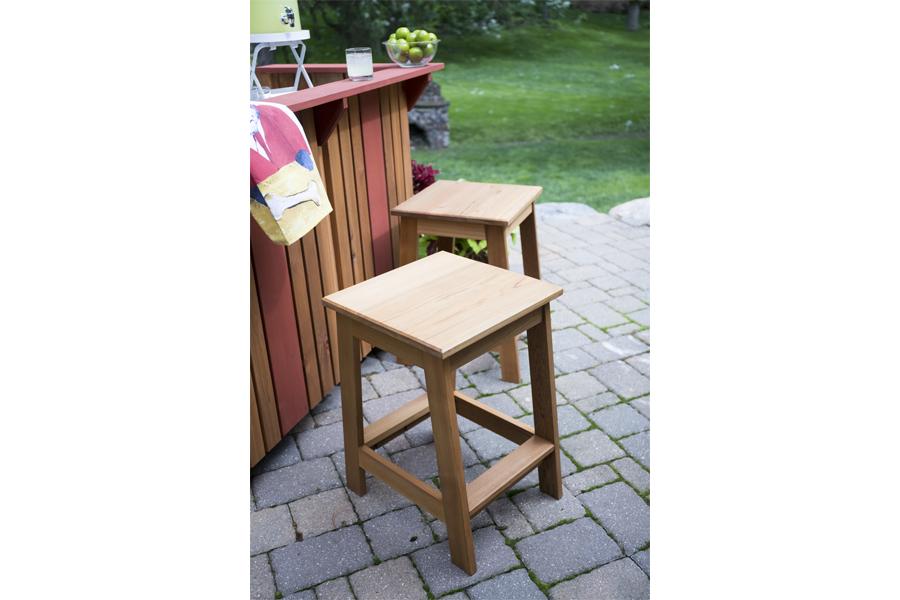
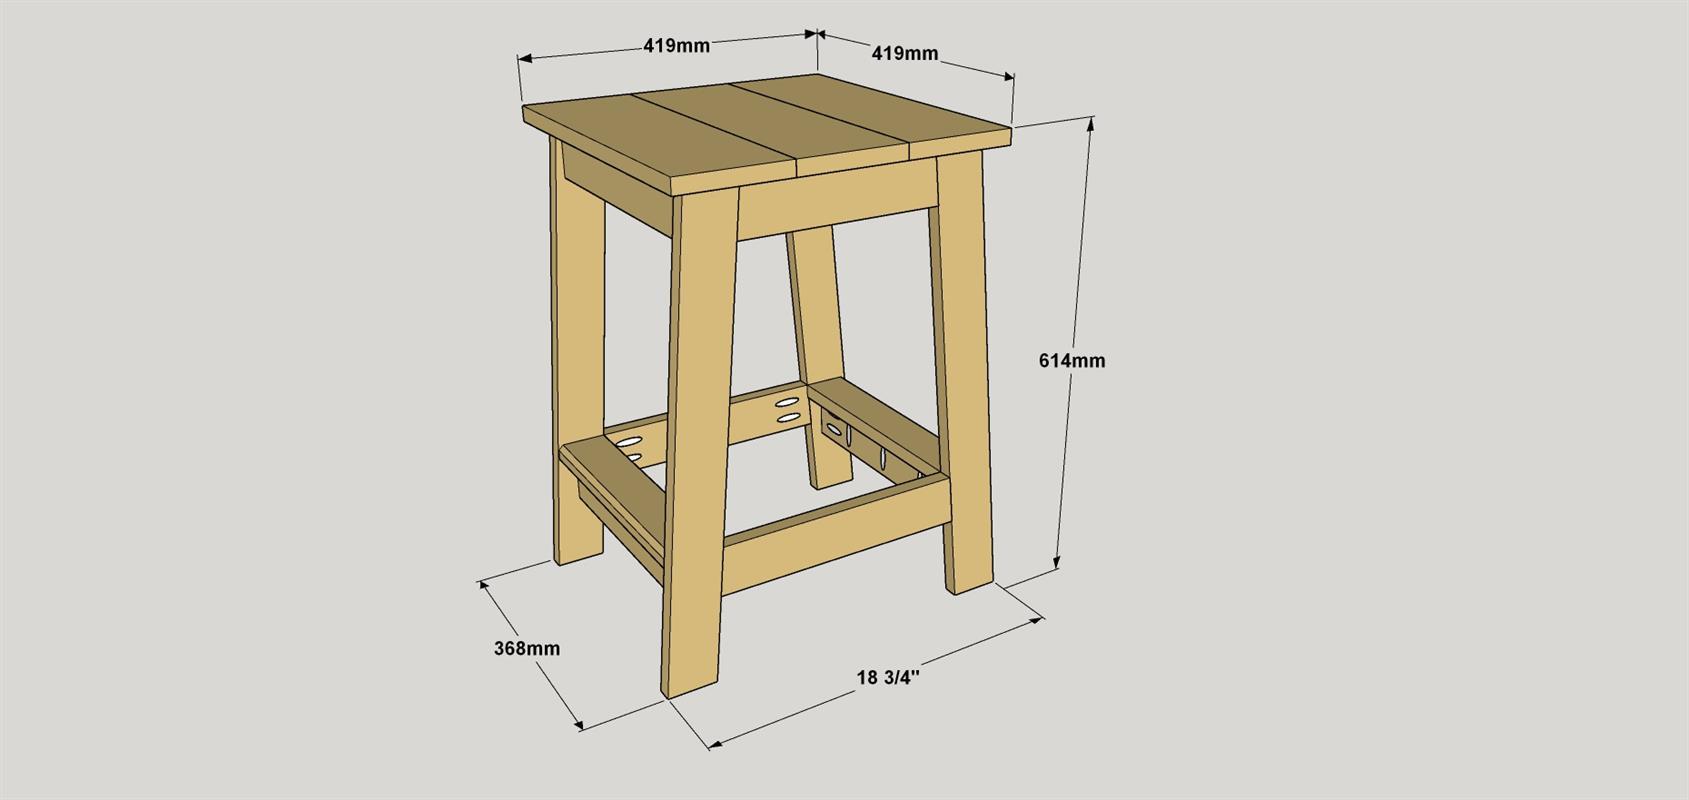
By Kreg ToolThis handsome stool makes a perfect companion to any outdoor bar height table, but it would also be great in lots of other places. At just about 610mm tall, the stool is just right for a standard-height counter or island. You can build one from just four boards—we chose cedar boards for outdoor us
Directions
-
Gather Your Materials
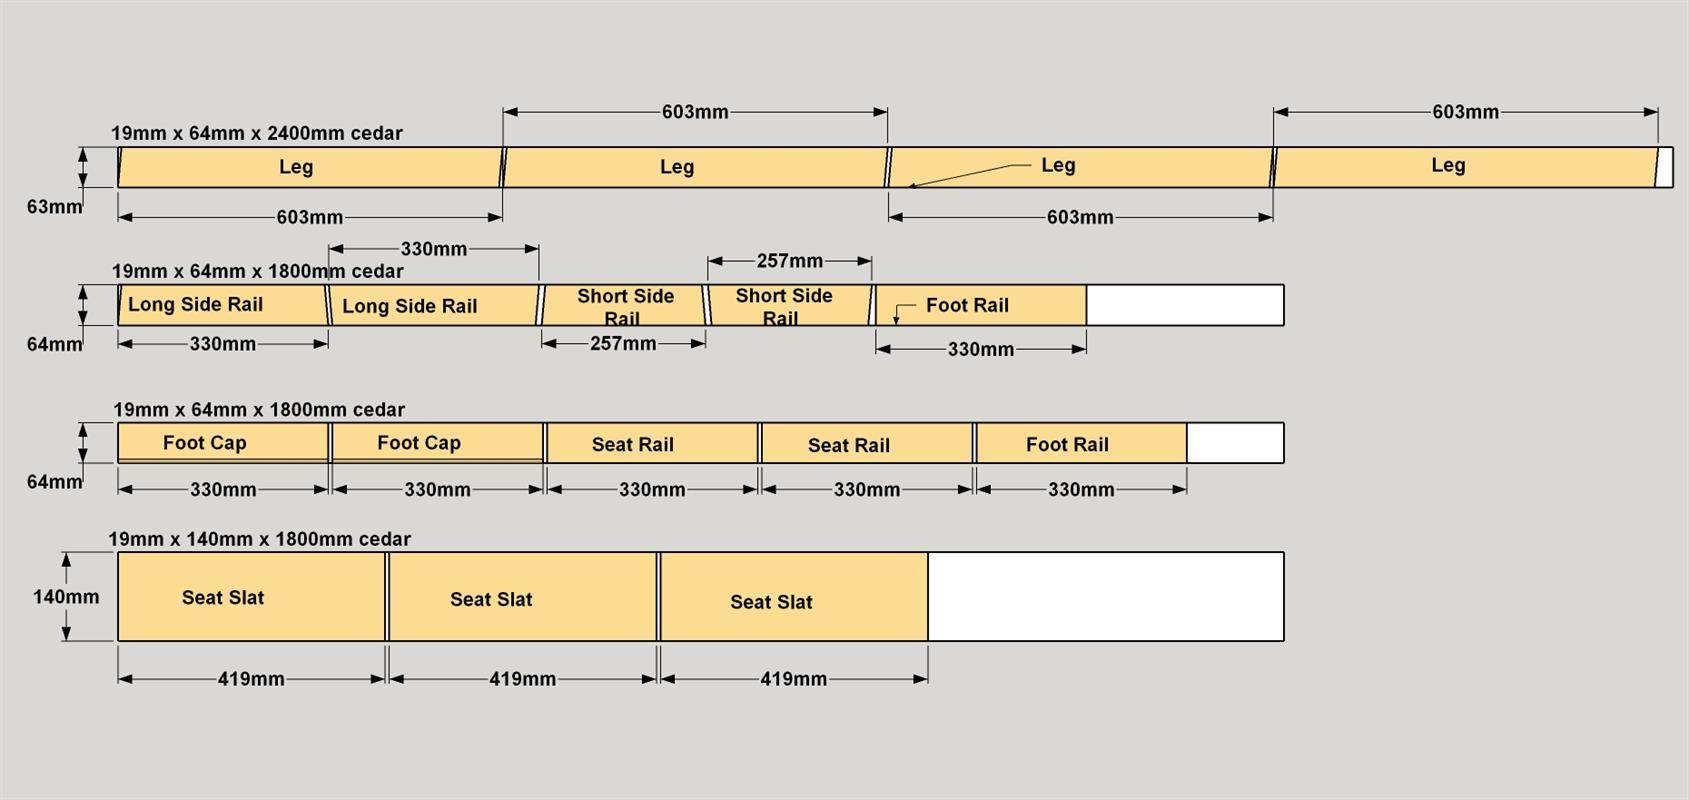
Before you go get your lumber and supplies, decide how many stools you want to make. The materials list and cutting diagram show what you’ll need to build one stool. So, if you’re building two stools, you’ll need twice as many boards. Each stool also requires about 60 pocket-hole screws, so we specified one 100-count box. You’ll need to get more screws, as well, if you’re building more stools. Speaking of the screws, we used Kreg® Blue-Kote™ screws, which are designed to resist moisture for outdoor use. Also be sure to choose waterproof, or at least water-resistant glue. Standard wood glue won’t withstand moisture outdoors.
-
Cut the Legs
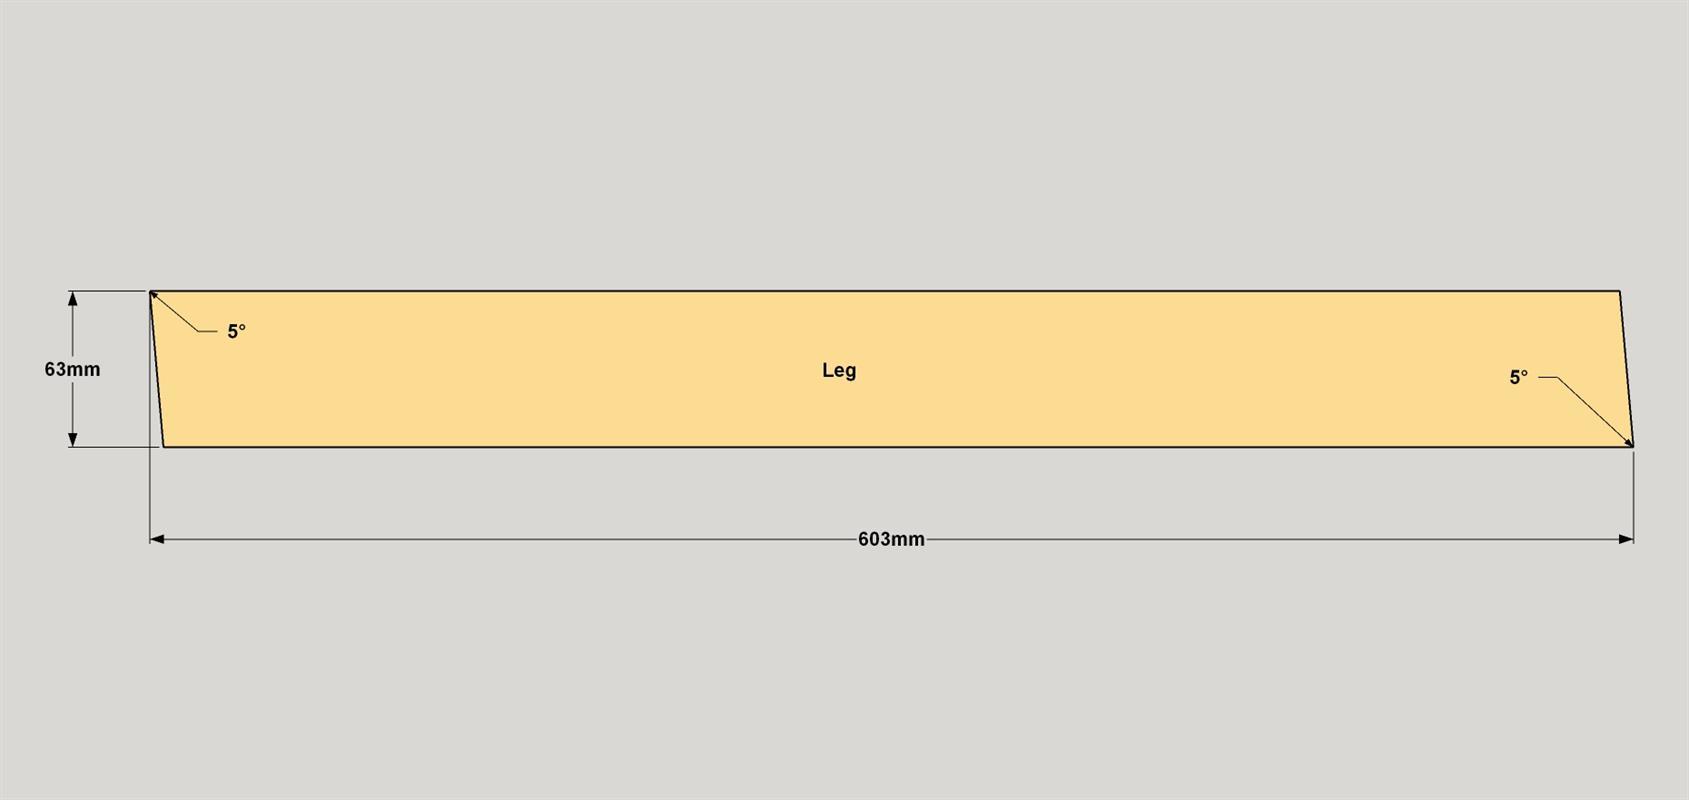
Set your miter saw to 5°, and then cut four Legs to length from a 19mm x 64mm board, as shown in the cut diagram. Note that the leg measurement is shown from long end to long end. Also, for the legs, the angles on the ends should be parallel. By the way, if you’d like to make taller stools, you could make the legs longer.
-
Make the Side Rails
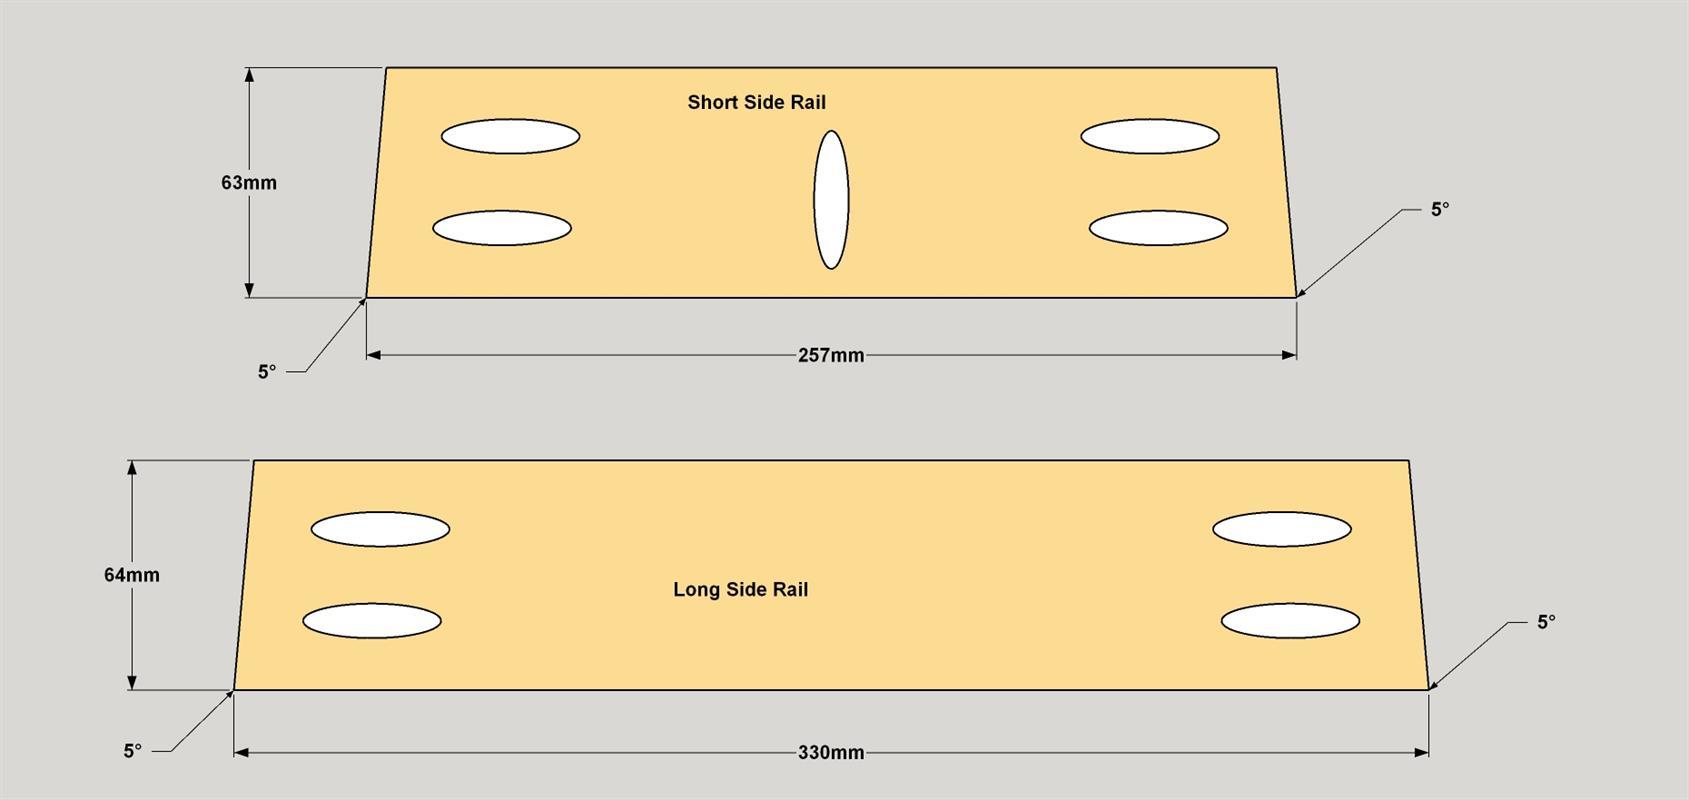
Cut two Long Side Rails and two Short Side Rails to length from a 19mm x 64mm board, as shown in the cut diagram. Note that this time, the angles on the ends aren’t parallel. They’re opposed to create a “wedge” shape. When cutting, you’ll need to cut one end, and then swing your miter saw 5° in the other direction before cutting the other end. Or you can flip the board over—so the opposite edge is against the fence for the second cut. Once you have the pieces cut, set your pocket-hole jig for 19mm thick material, and then drill pocket holes in each of the Rails, as shown. Cedar typically has one smooth face and one rougher face. For the best look for this project, drill the pocket holes in the rough face of the rails—and in the rest of
-
Assemble the Sides
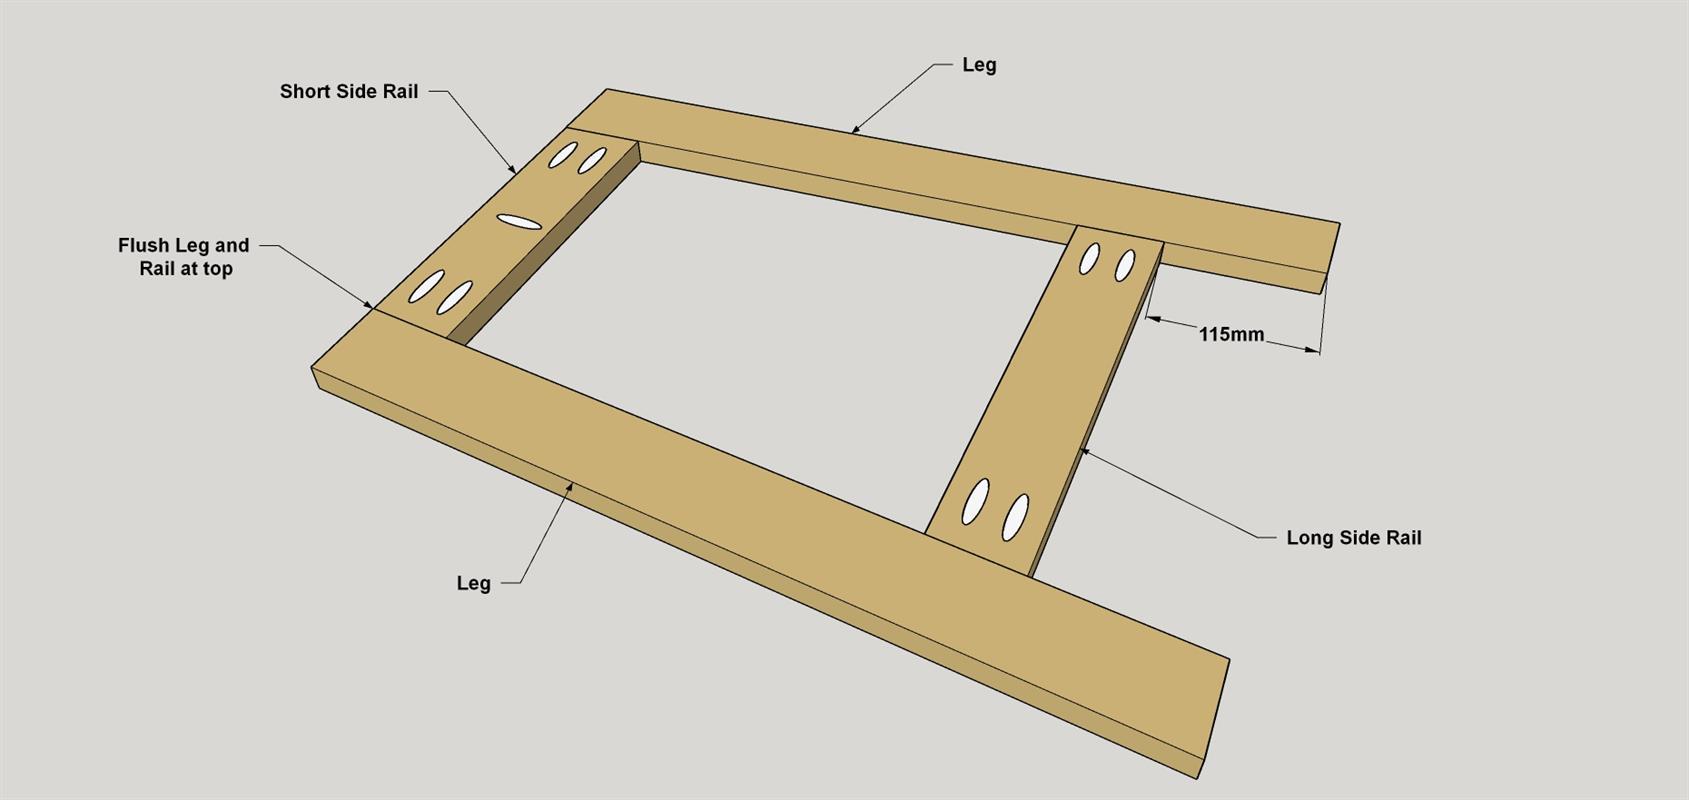
Set the one Long Side Rail against one first Leg at the location shown, making sure that the Leg is oriented correctly. Assemble the parts using waterproof exterior wood glue and 32mm Blue-Kote™ Kreg Screws. Next, set the Short Side Rail flush with the upper end of the Leg, as shown, and secure it with glue and screws. Next, add the second Leg to complete one stool side. Repeat this to create the stool side. Sand the outside face of each side as needed, and sand the inside face enough to remove just the loose wood fibers.
-
Make the Foot Rails and Caps
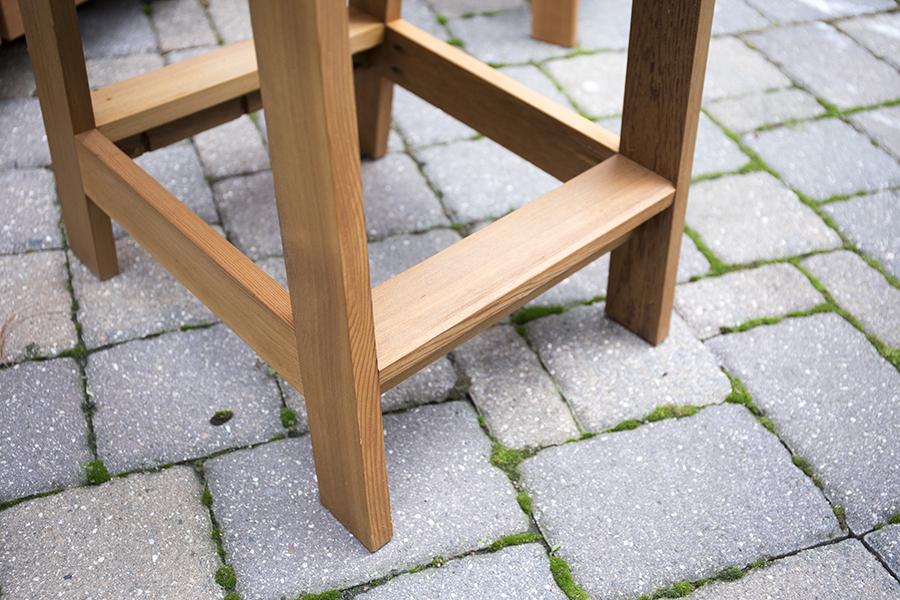
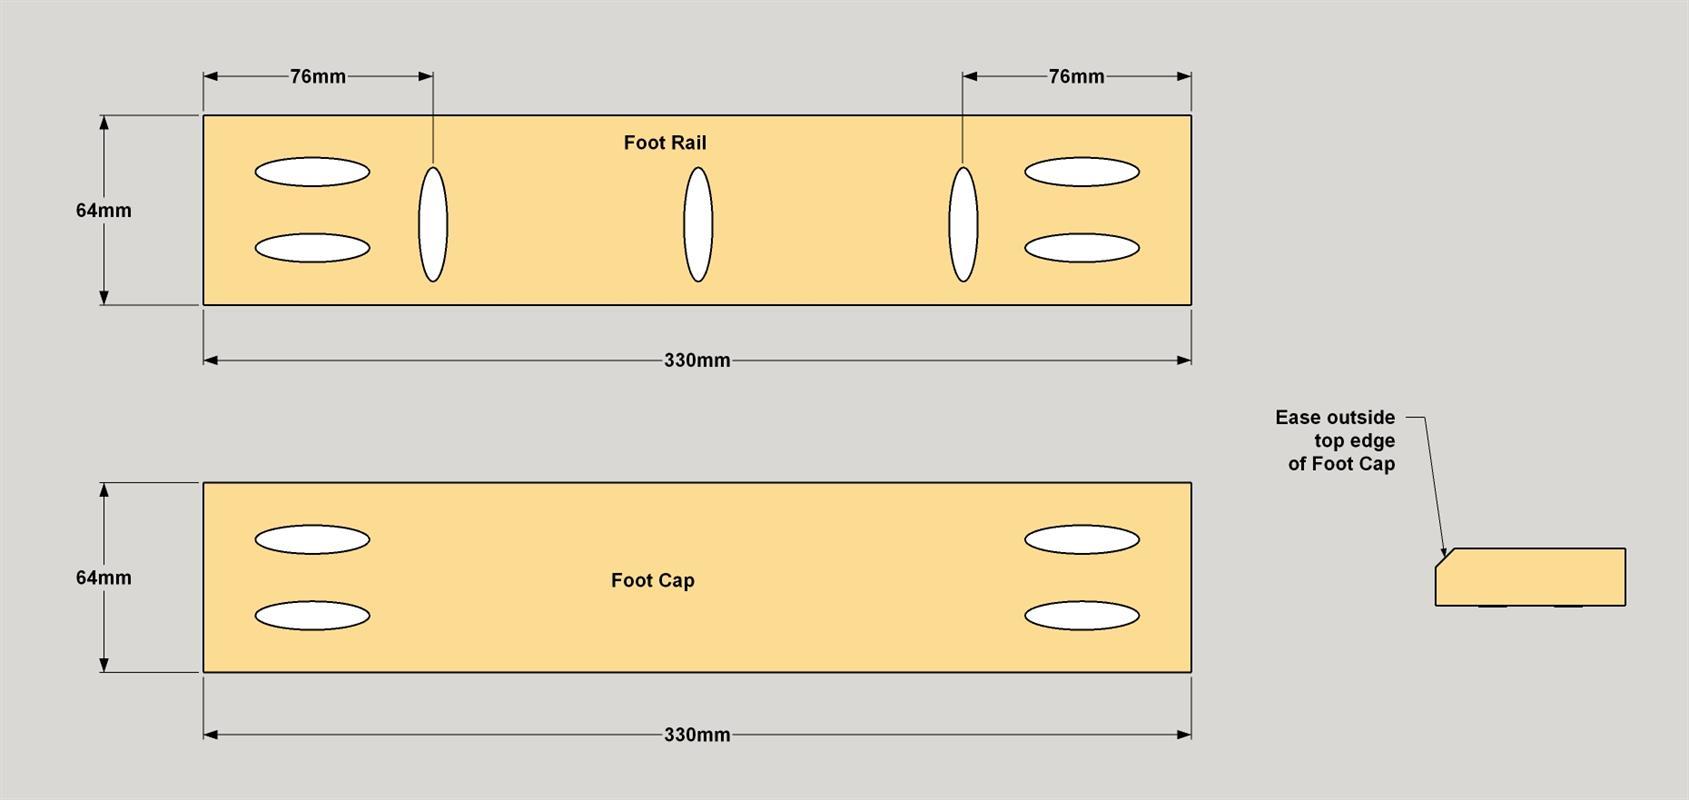
Cut two Foot Caps and two Foot Rails to length from a 19mm x 64mm board, as shown in the cut diagram. Drill pocket holes at the locations shown. On each Foot Cap, ease one long top edge, as shown. If you have a router, you can do this with chamfer bit. If you don’t have a router, you can sand the cedar quickly to shape.
-
Make the Seat Rails
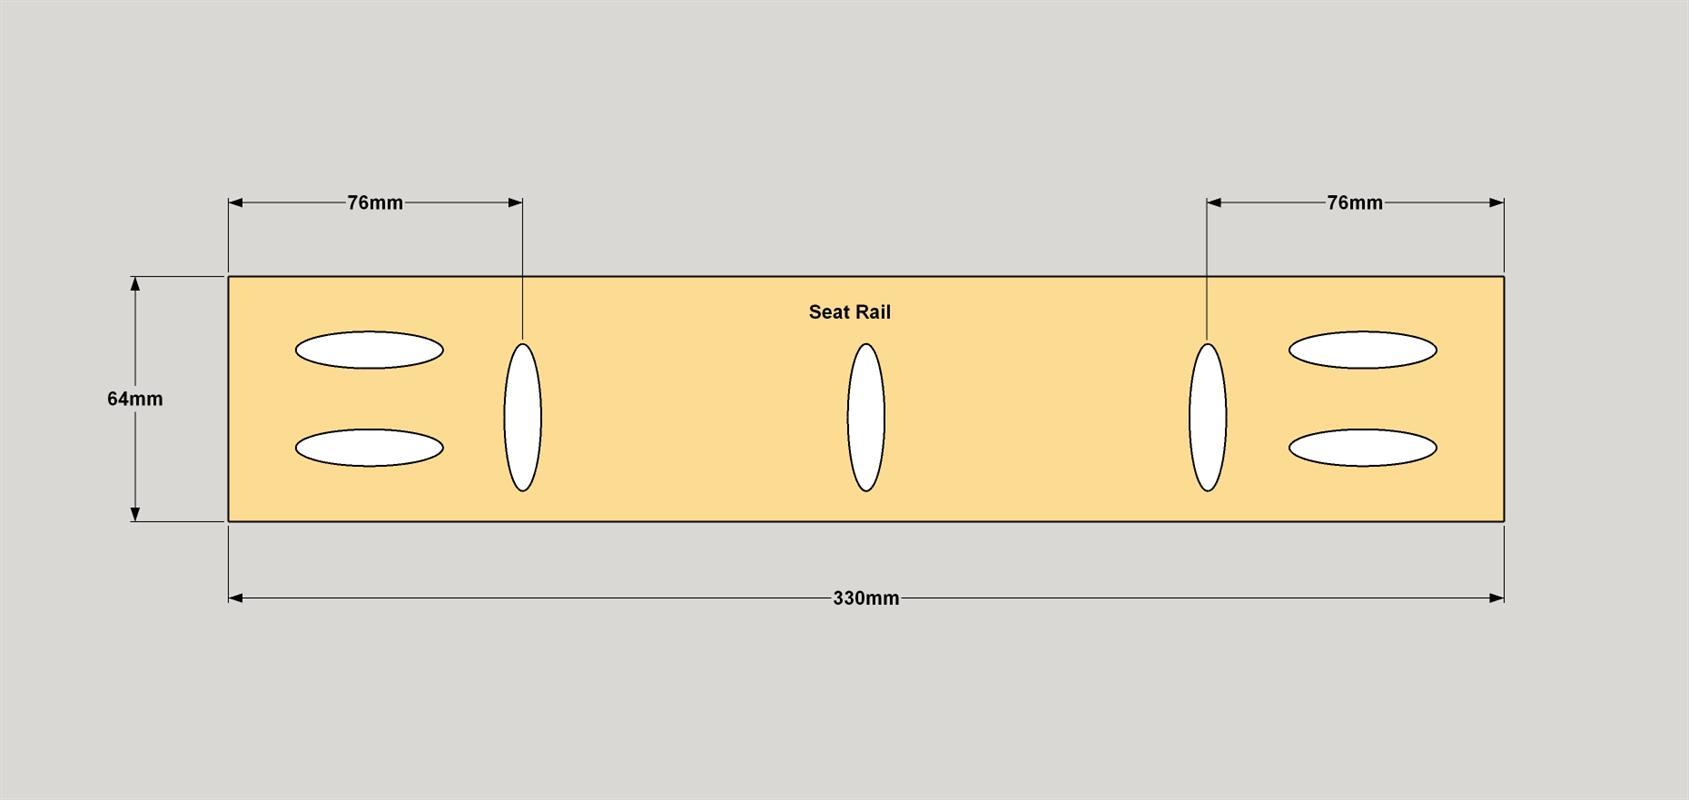
Cut two Seat Rails to length from a 19mm x 64mm board, as shown in the cutting diagram. Drill pocket holes at the locations shown. Sand the pieces as needed—but don’t sand the ends.
-
Attach the Foot Cap and Rails
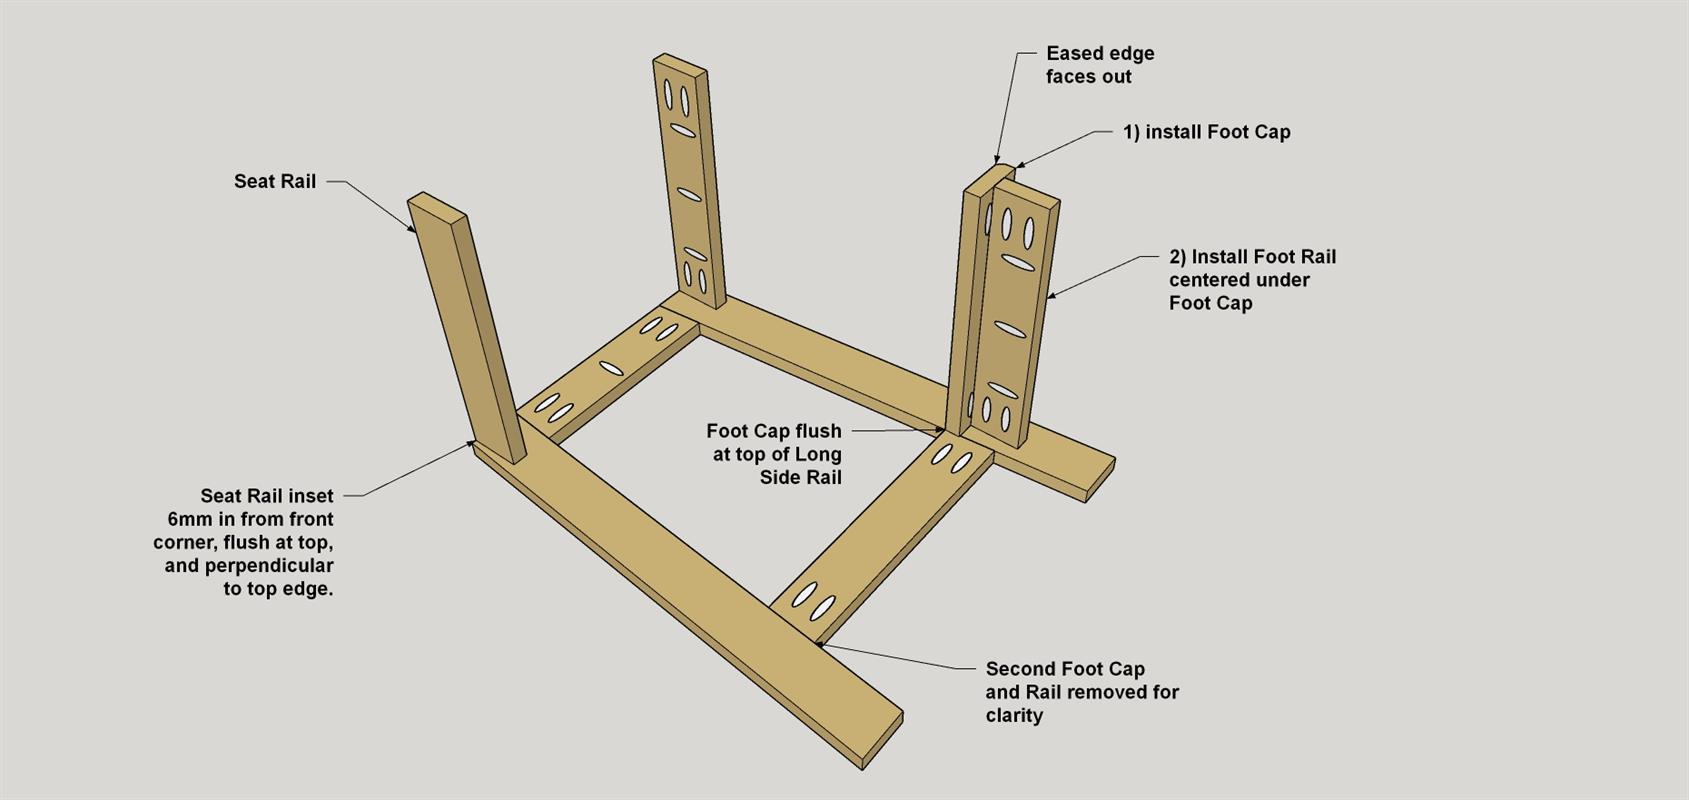
Lay one of the side assemblies on a work surface with the pocket holes facing up. First, set a Foot Cap in position so the upper face is flush with the upper edge of the Long Side Rail, as shown. The eased edge should point outward. Attach the Foot Cap to the Leg using glue and 32mm Blue-Kote™ Kreg Screws. Next, position the Foot Rail so it is centered under the Foot Cap, and then glue and screw it to the Leg and the Foot Cap. Repeat this to attach the other Foot Cap and Rail. Then position the Seat Rails as shown and secure them to the Legs with glue and screws.
-
Add the Second Side
Attach the other Side frame assembly to the Rails and Cap the same way as the previous step to complete the base.
-
Make the Seat Slats
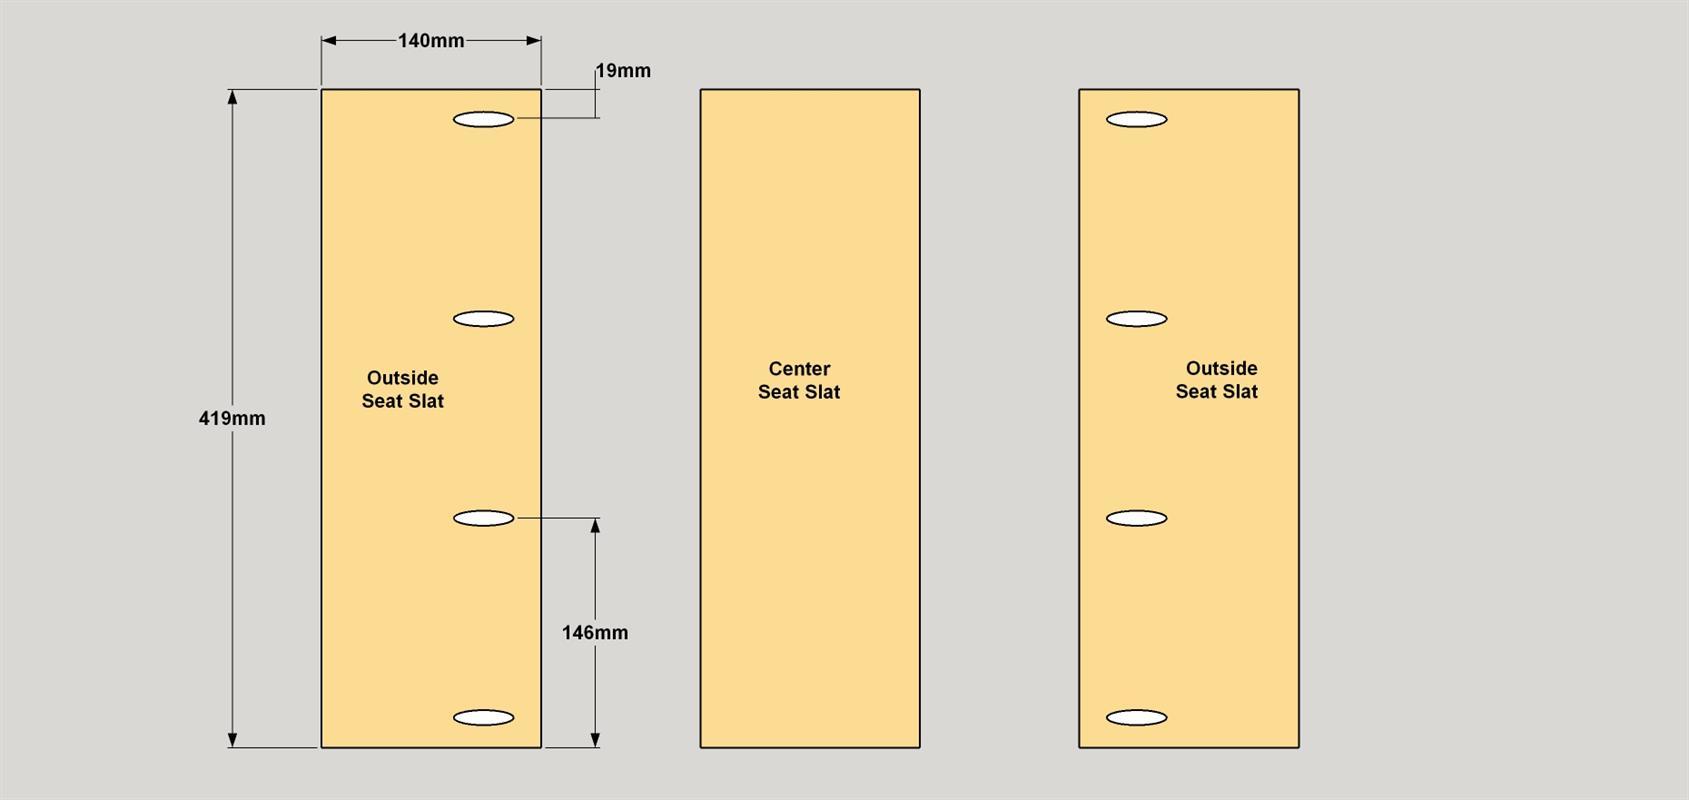
Cut three Seat Slats to length from a 19mm x 140mm board, as shown in the cut diagram. Drill pocket holes at the locations shown in just two of the three Slats.
-
Assemble the Seat
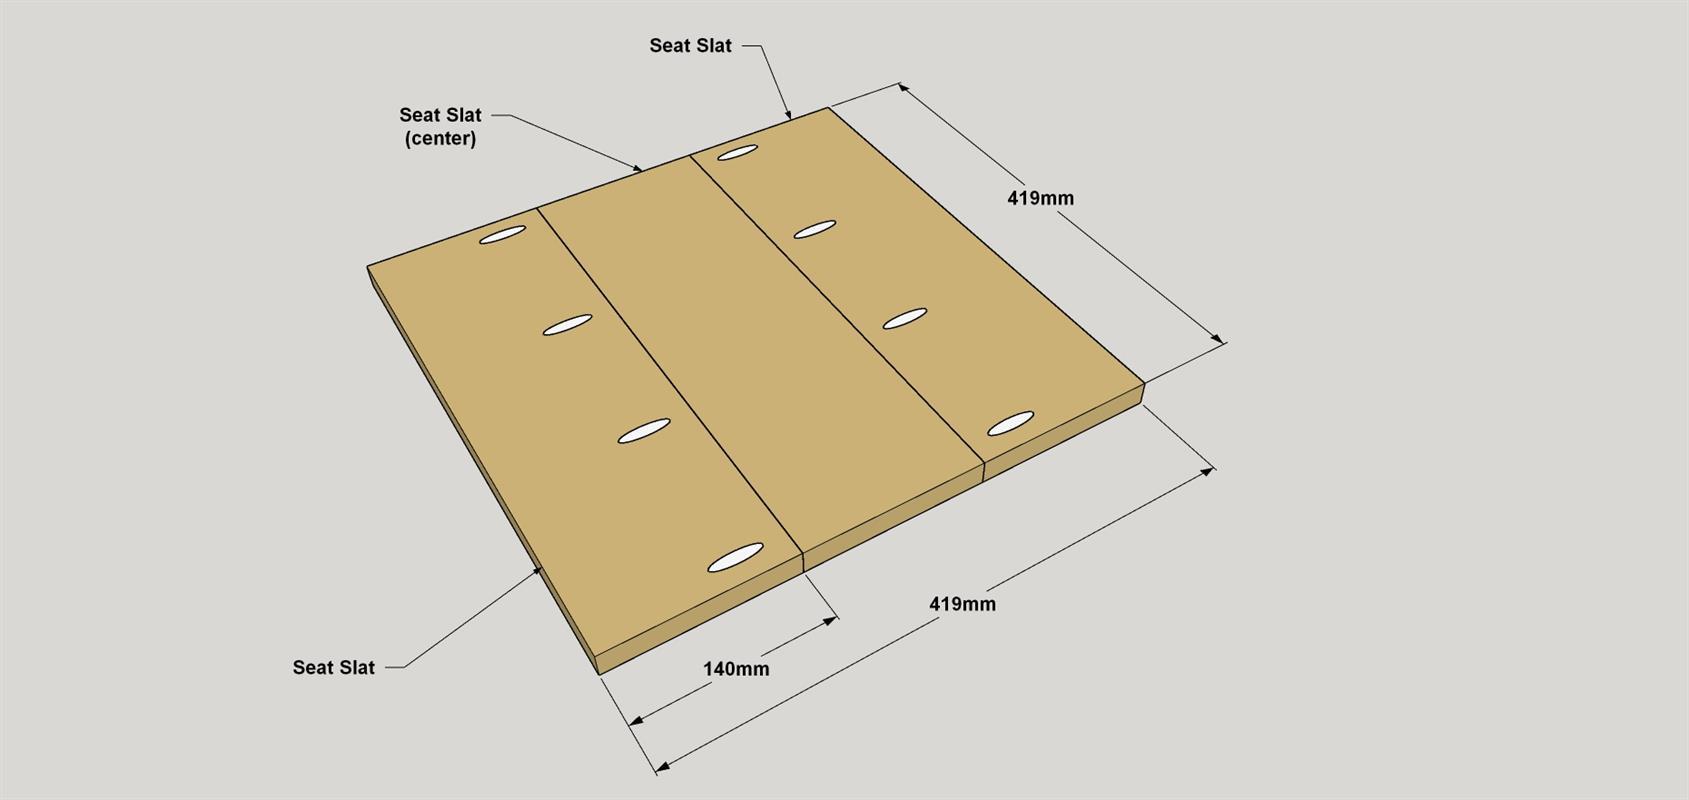
Glue and clamp the three Seat Slats together shown. Secure the three boards together using 32mm Blue-Kote™ Kreg Screws. Sand the seat flat as needed.
-
Install the Seat
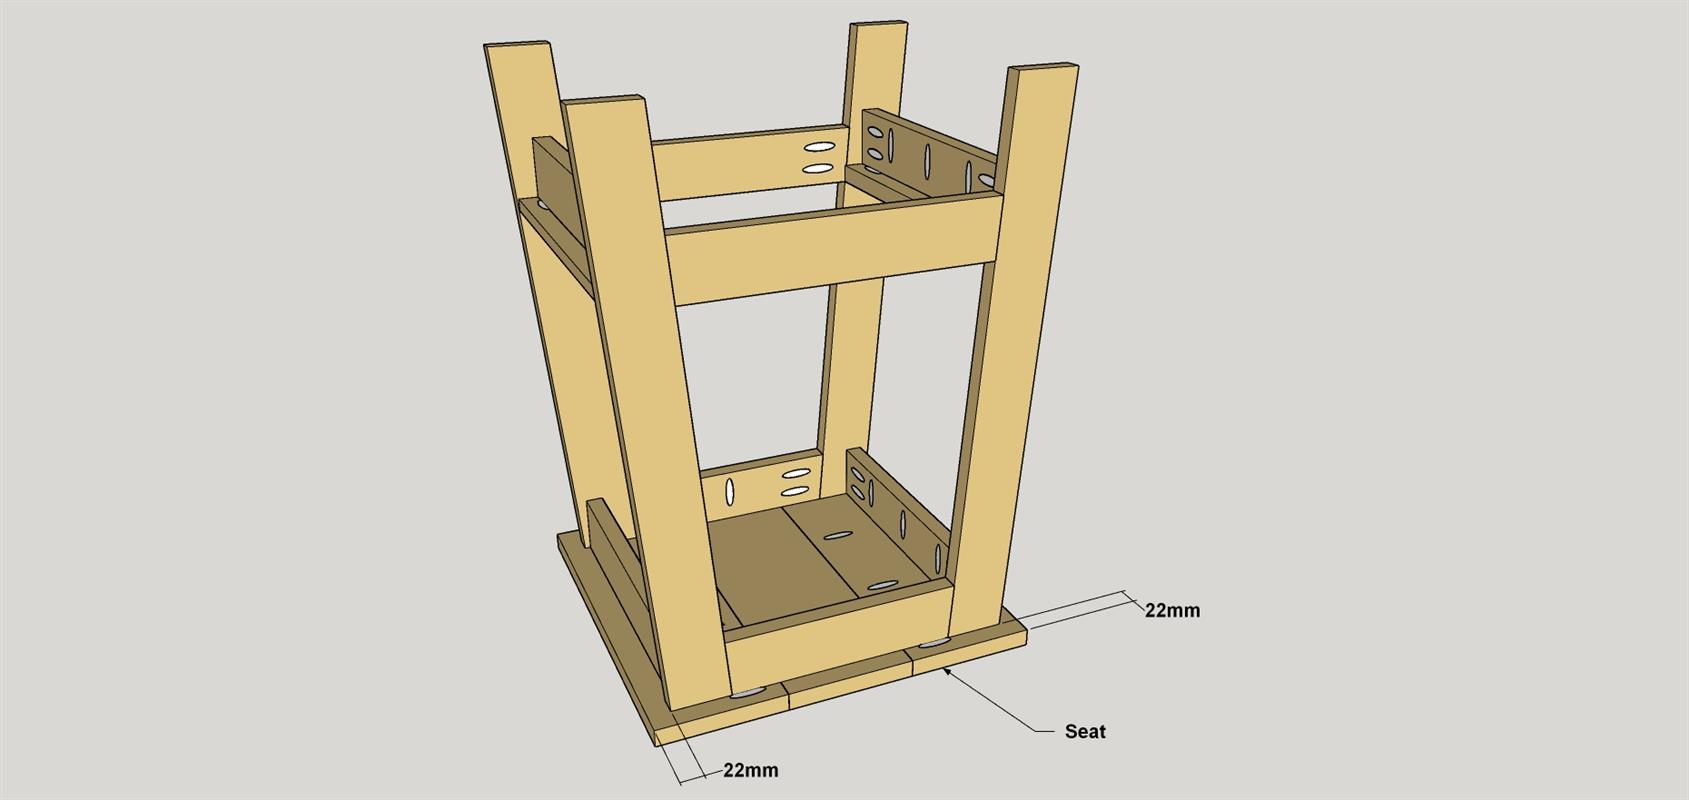
Lay the seat assembly on a flat work surface with the pocket holes facing up. Flip the stool base assembly upside down and place it on the seat so that it’s centered, as shown. Then secure the frame to the seat using glue and 32mm Blue-Kote™ Kreg Screws.
-
Apply the Final Finish
Complete any final sanding, clean the stool, and then apply a quality exterior finish. We used “Cedar Natural tone” stain (transparent).


