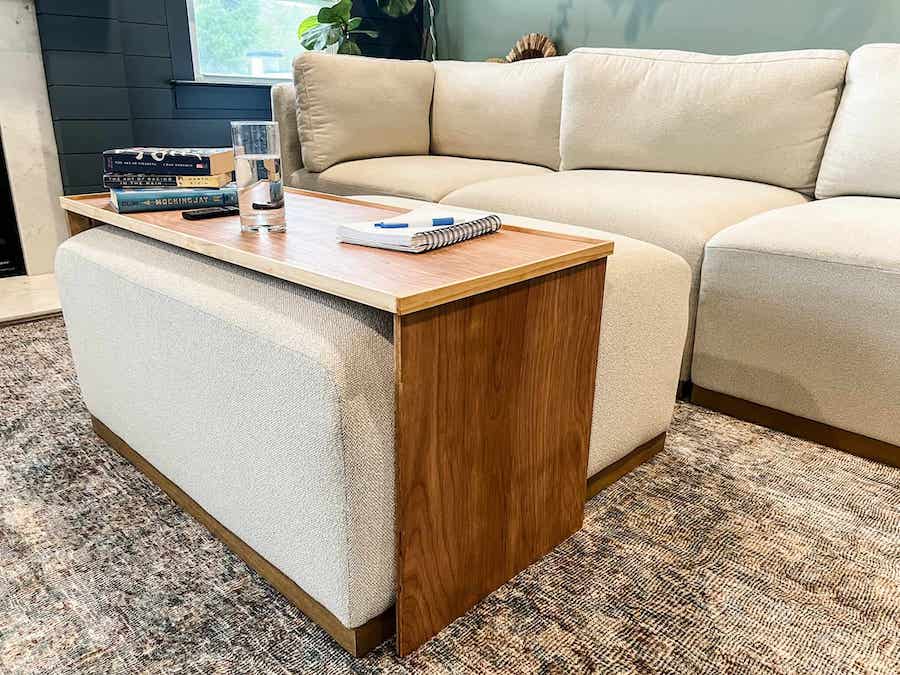
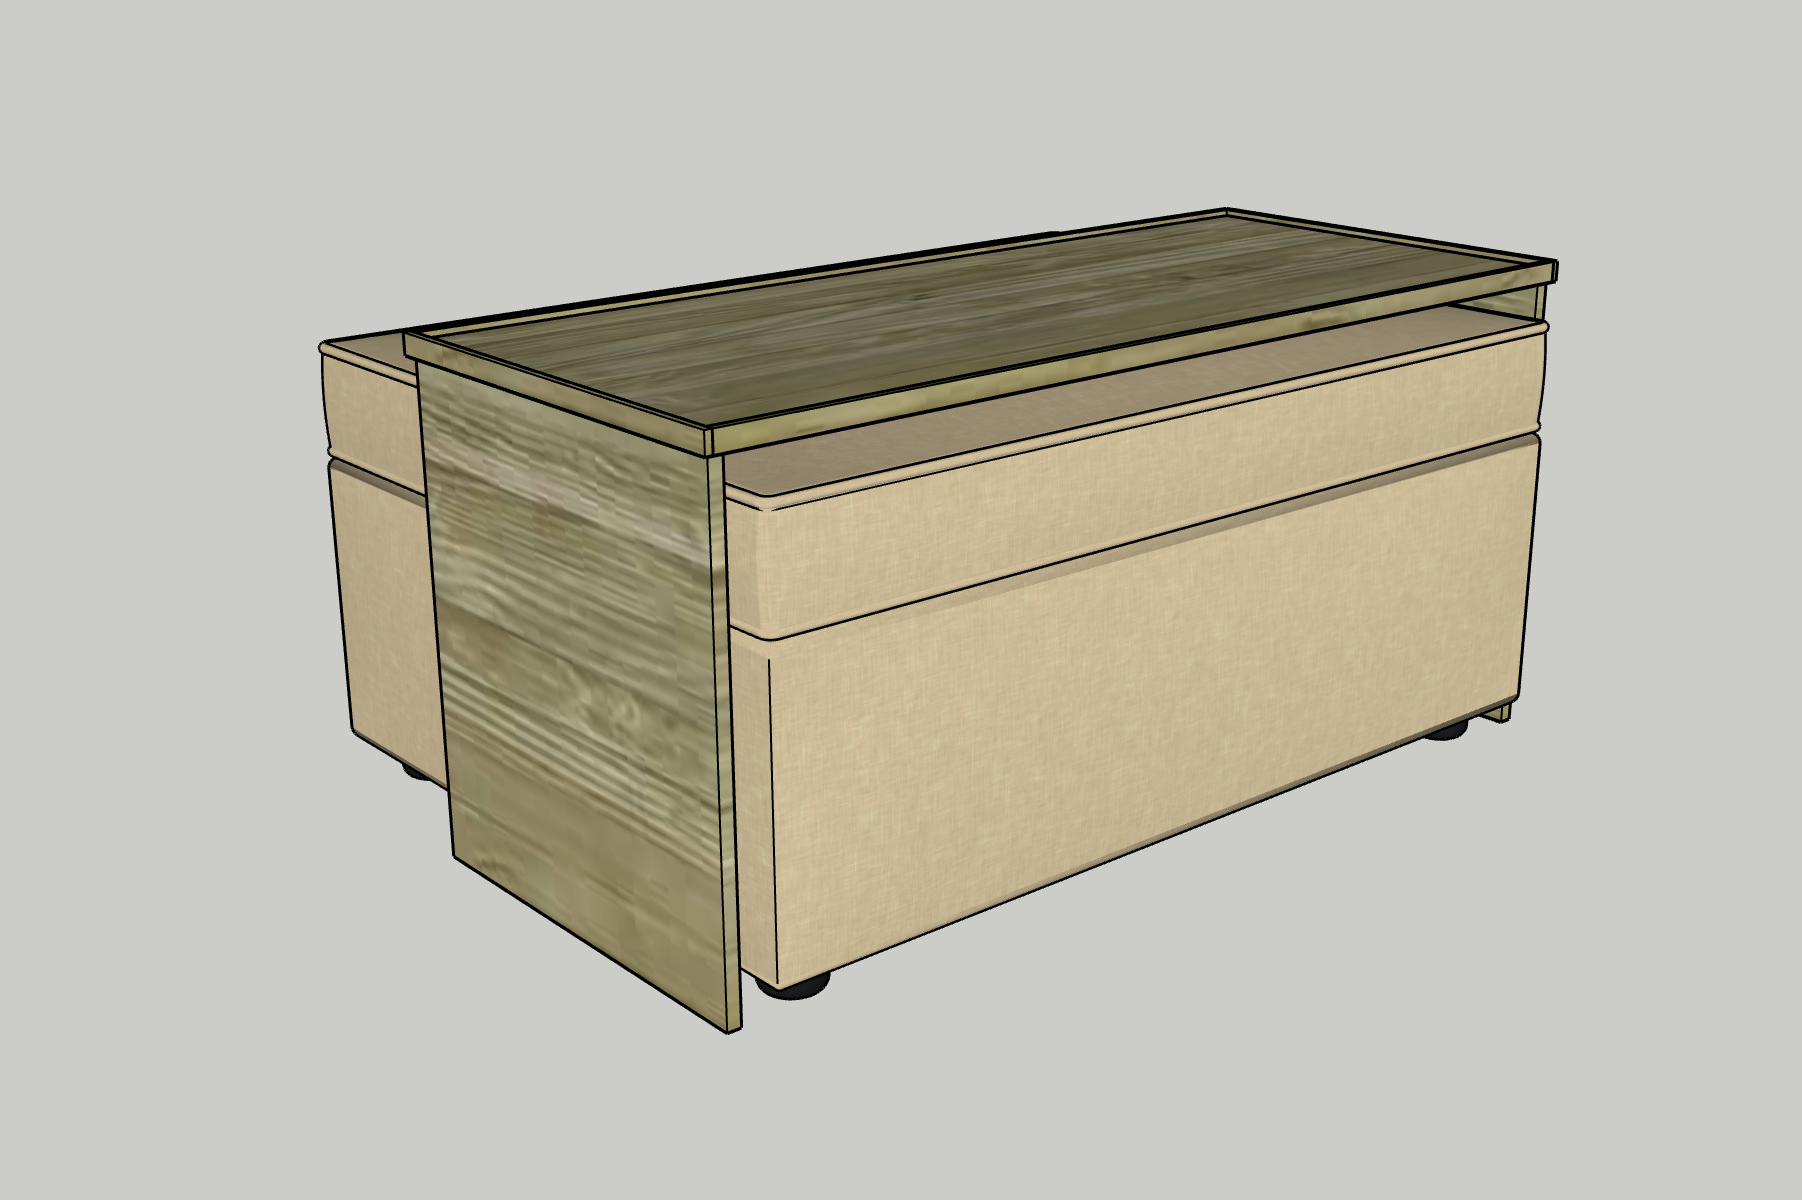
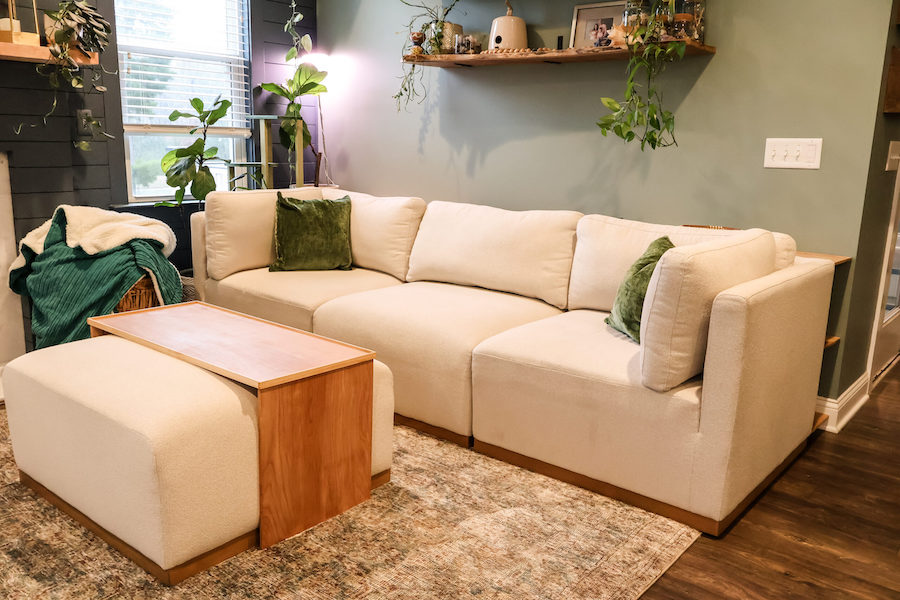
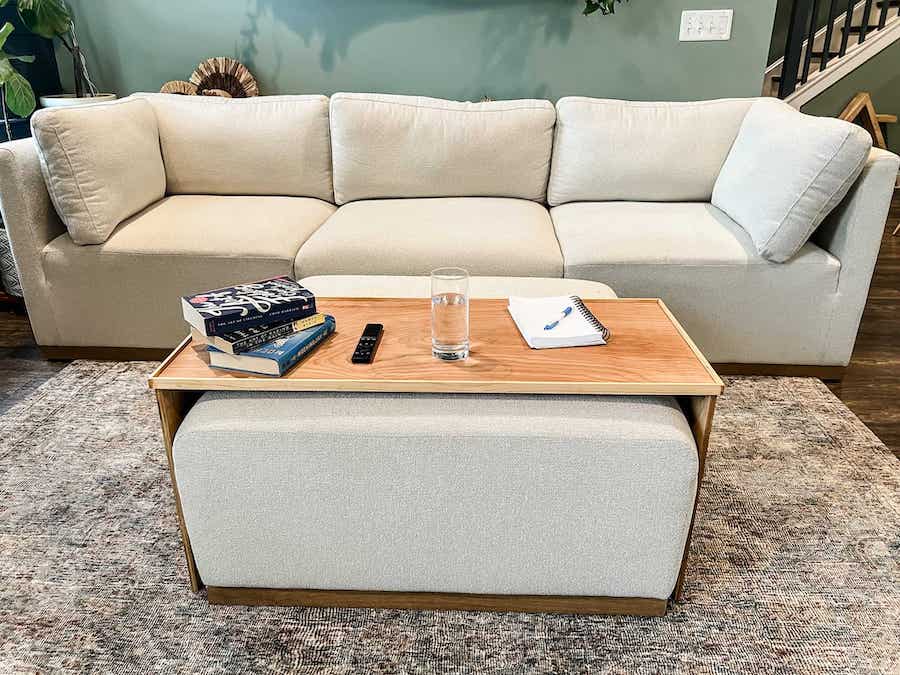


Have a cushioned ottoman but really still want that solid surface coffee table? Build this wraparound coffee table that slides back and forth over your ottoman to give you the best of both worlds!
Tools
Kreg Tools


Other Tools
-
Nailer

Materials
Wood Products
- 1 1/2" plywood , 4' x 8'
- 1 Strips , 1/4" x 3/4"
Hardware & Supplies
- 6 1" Kreg screws
- 12 1" nails
- 1 Wood glue
- 1 Stain
- 1 Polyurethane
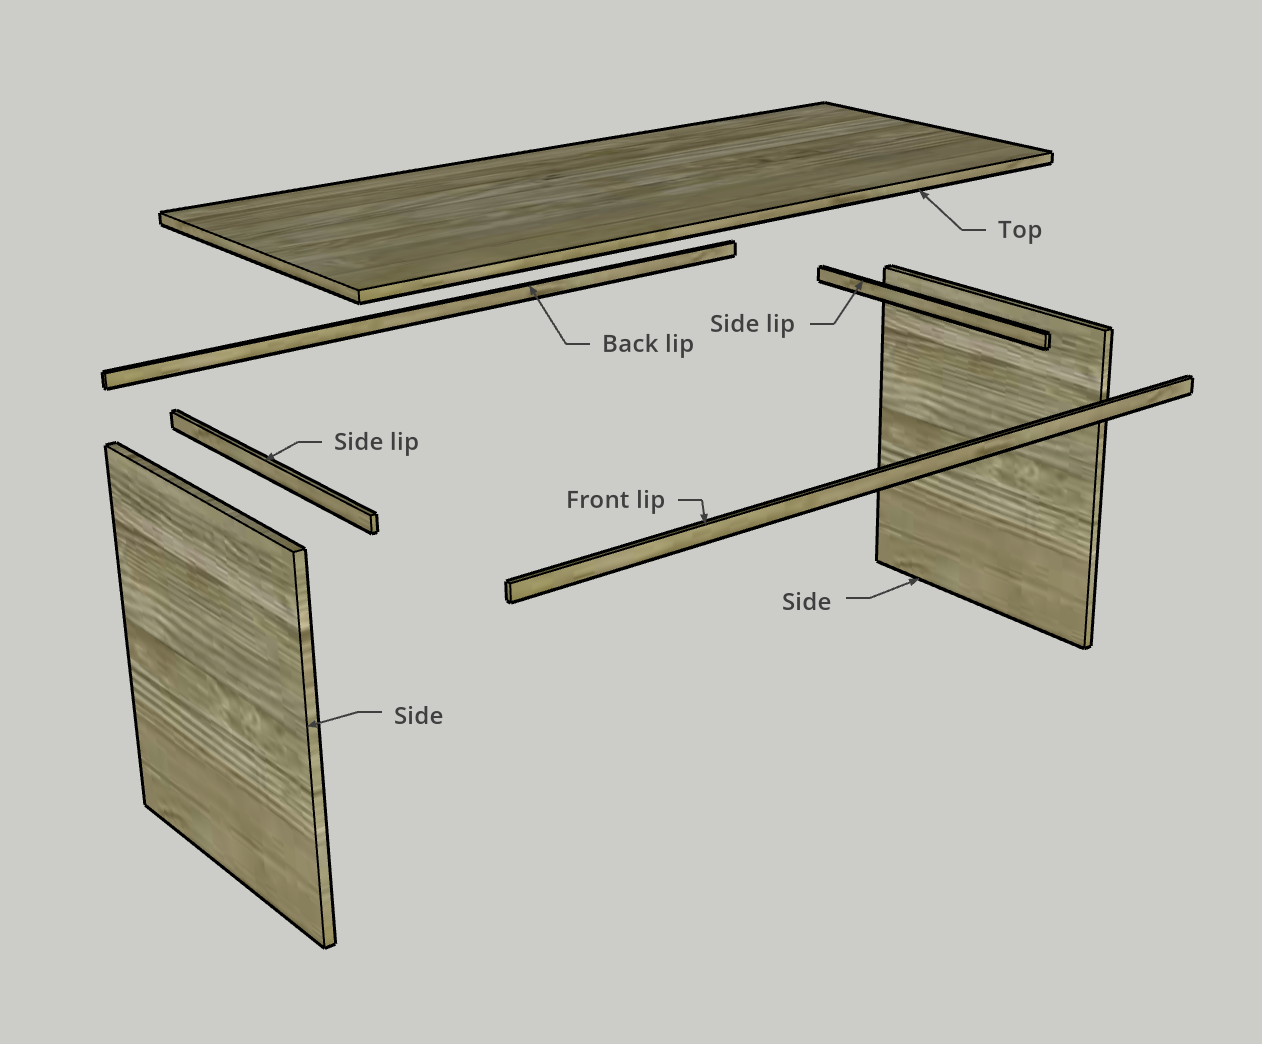
Cut List & Parts
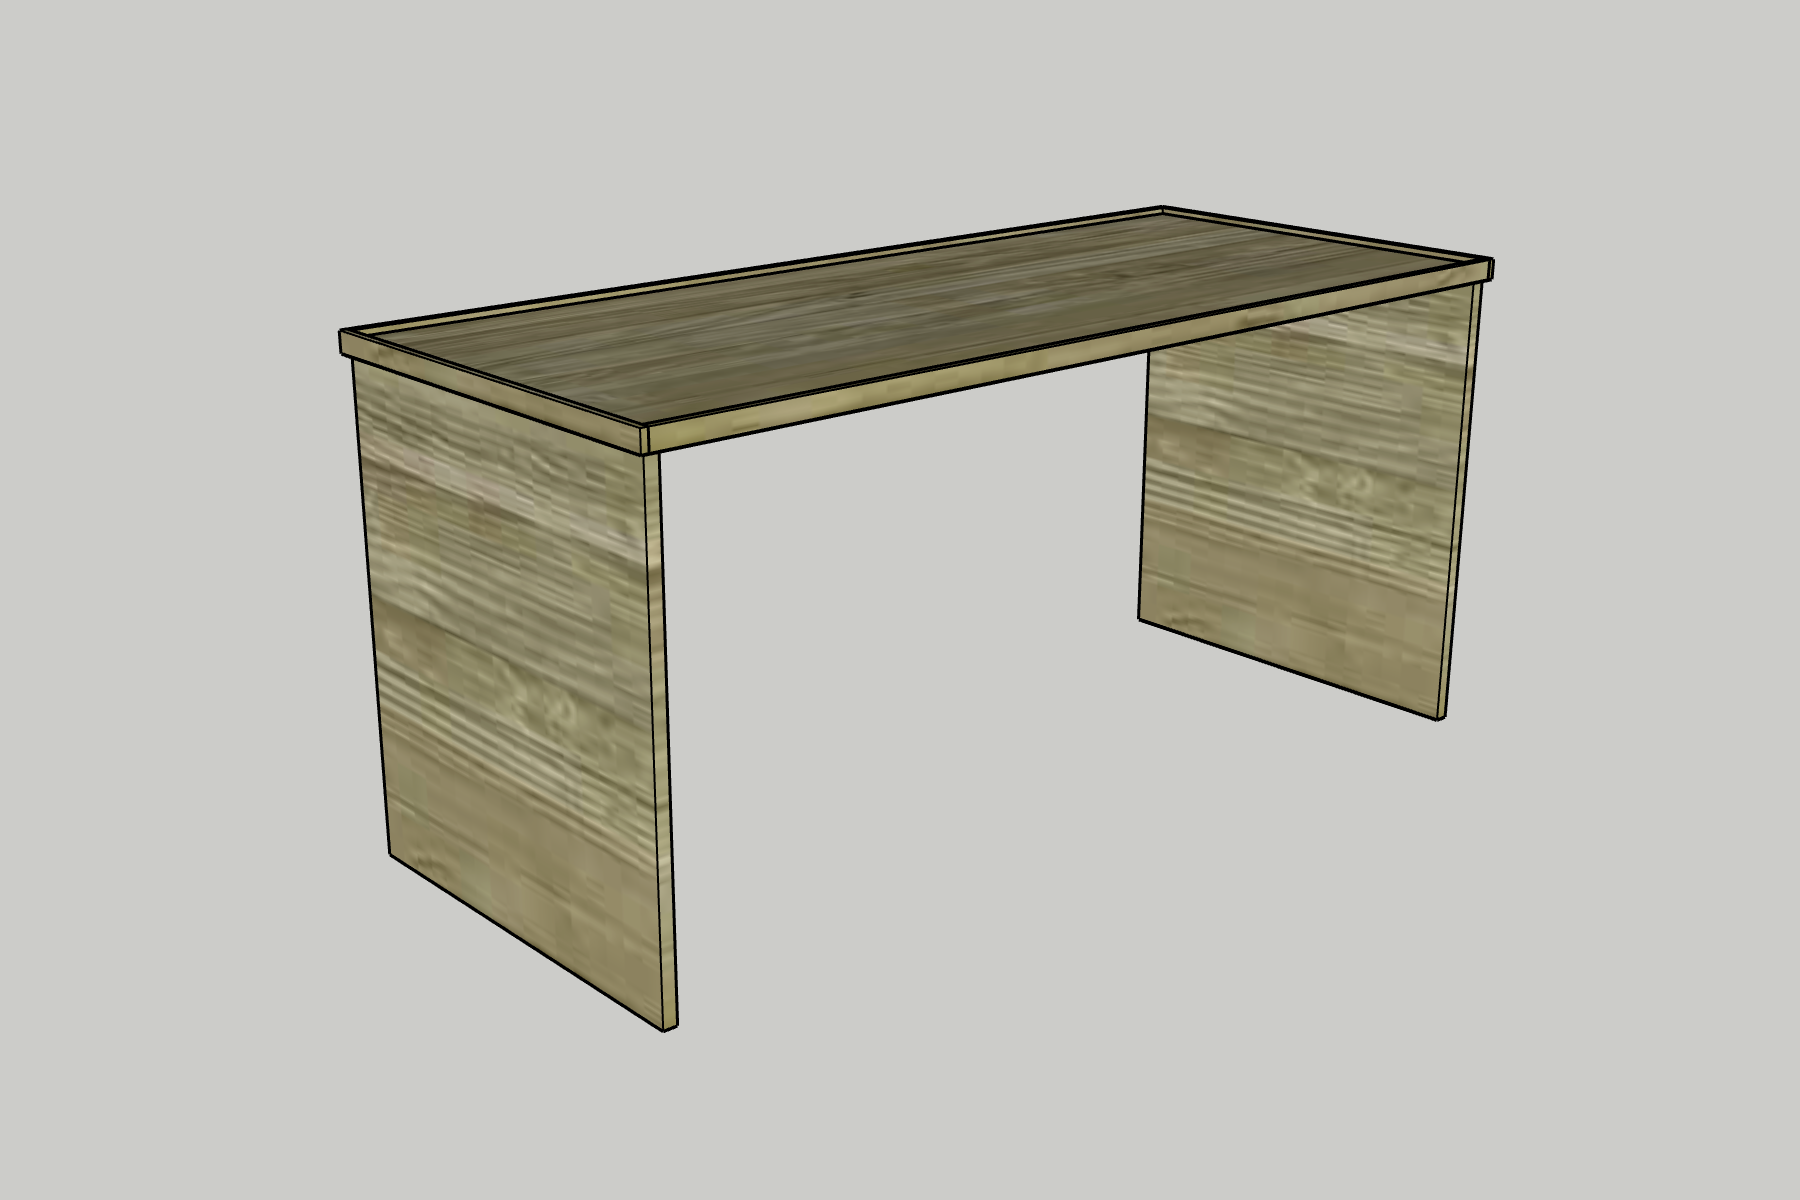
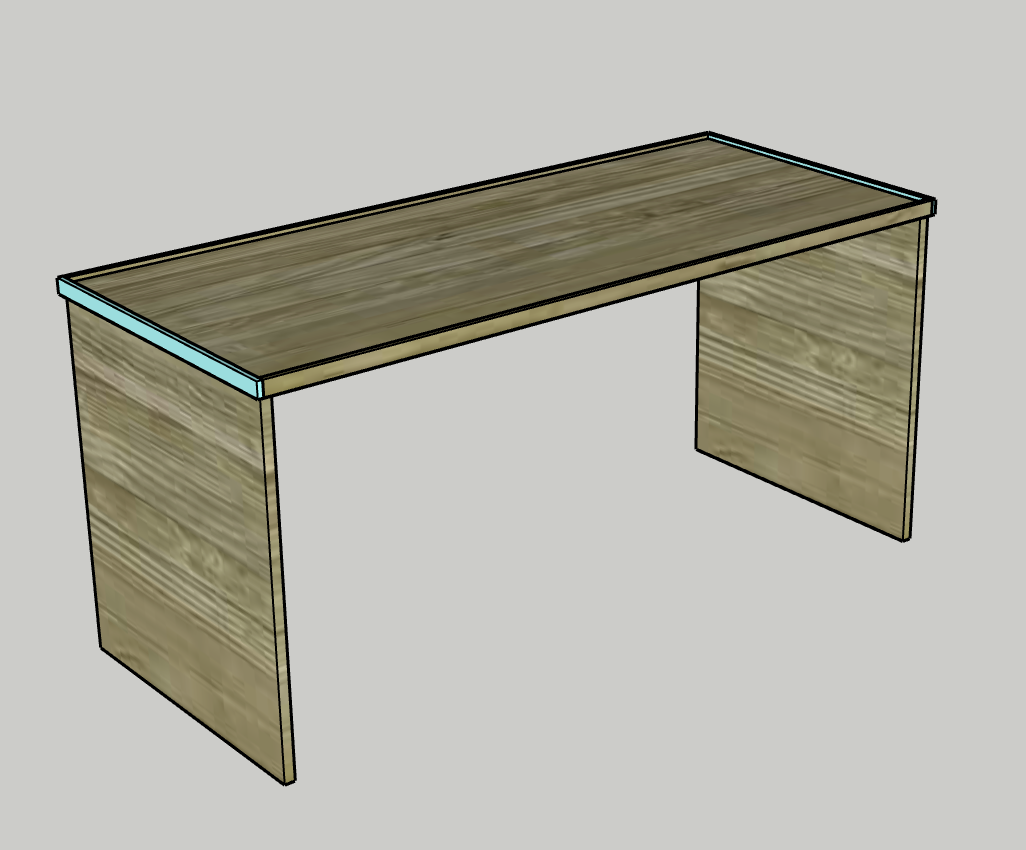
- 1 Top , 16" x 38" x 1/2“
- 2 Sides , 16" x 18 1/4" x 1/2“
- 2 Long Edge , 38" x 3/4" x 1/4“
- 2 Short Edge , 16 1/2" x 3/4" x 1/4“
Directions
-
Determine measurements
- The measurements for this plan are for my specific ottoman, but you might need to adjust yours based on the height and width of yours.
- Measure the height and width of your ottoman with the following method. It might be easy, but if your ottoman has bulging sides from padding, follow these steps the make sure you get the exact measurement.
- Place a level on top of your ottoman, hanging over the edge. Measure from the ground to the level to get the height.
- Then, place a board against both sides of the ottoman, make sure they are vertically level, then measure between them to get the length of the top, then add 1" to account for the Sides.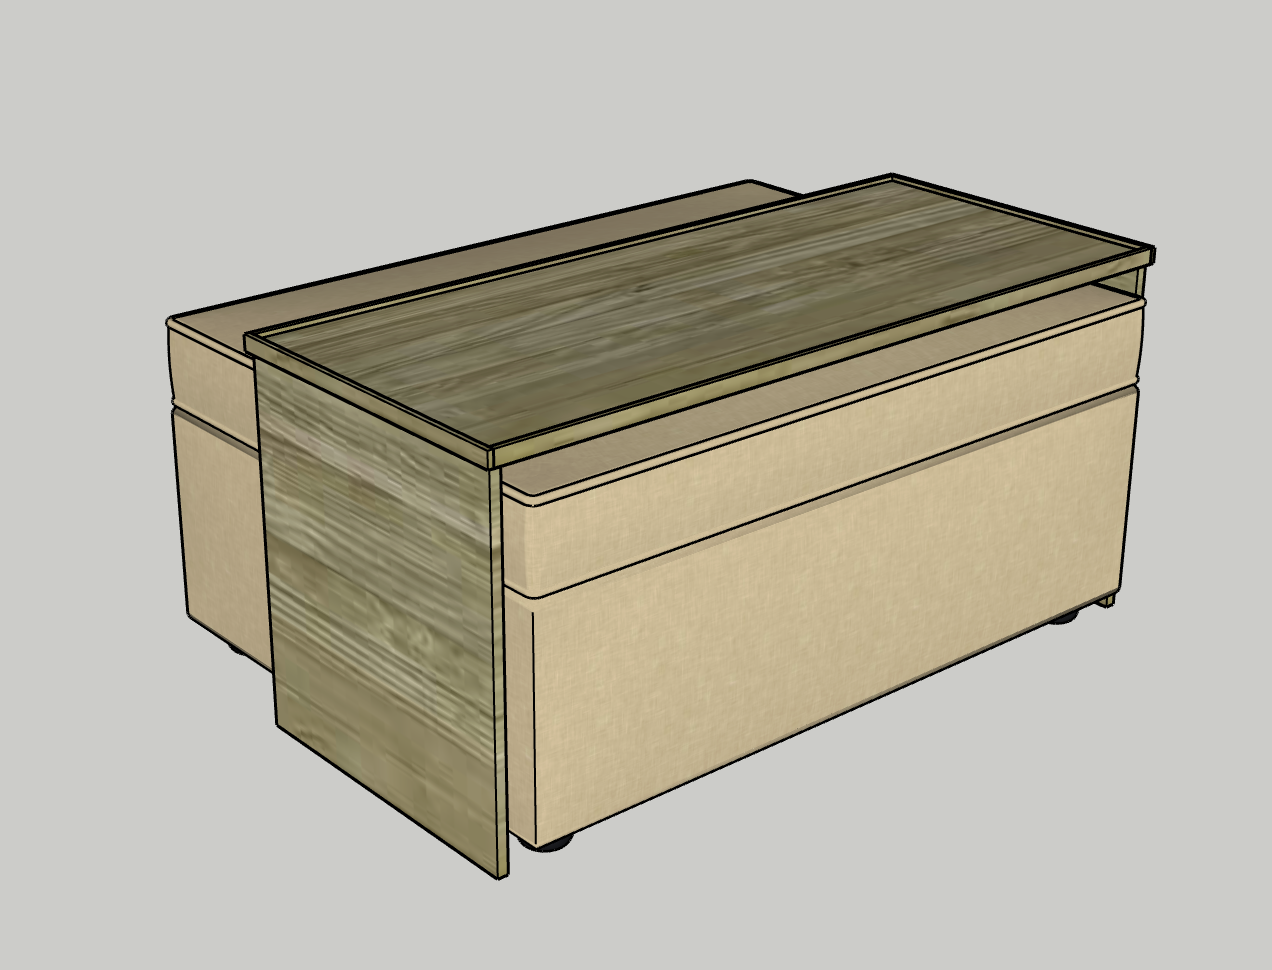
-
Drill pocket holes
- Start by drilling three pocket holes on one short end of each Side.
- Sand down all boards and edges to 220 grit.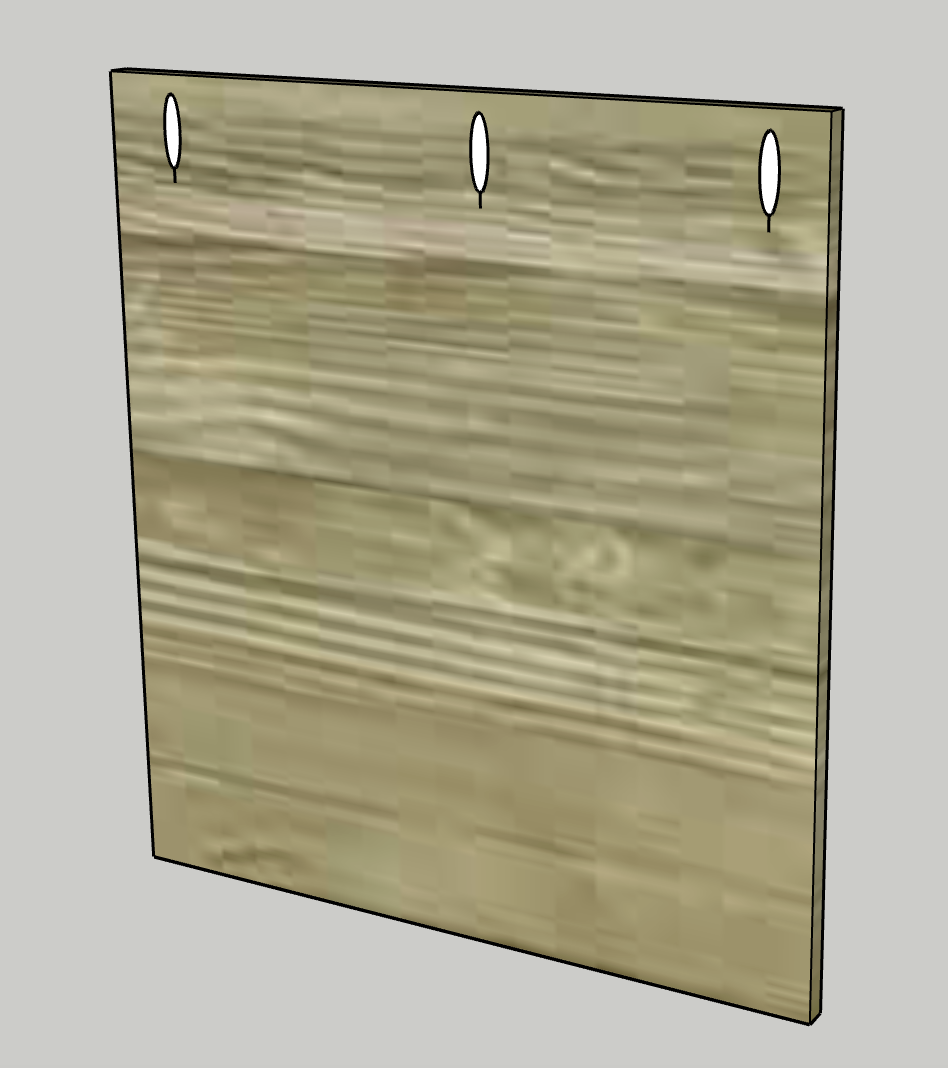
-
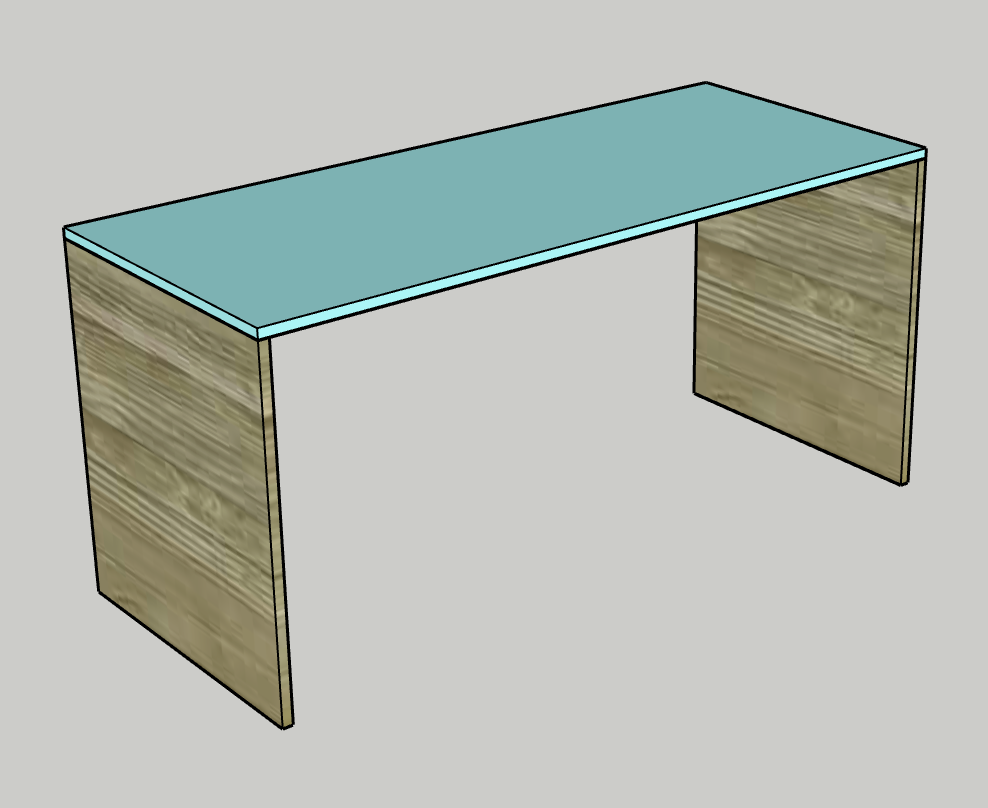
Connect top
Using wood glue and pocket hole screws, attach the Sides to the bottom ends of the Top, flush on the edges.
-
Attach long edges
- Using wood glue and optional nails, attach the Long Edges to the long edge of the Top.
- The Long Edge should be set flush with the bottom of the Top so it sticks up 1/4" to form a lip around the Top.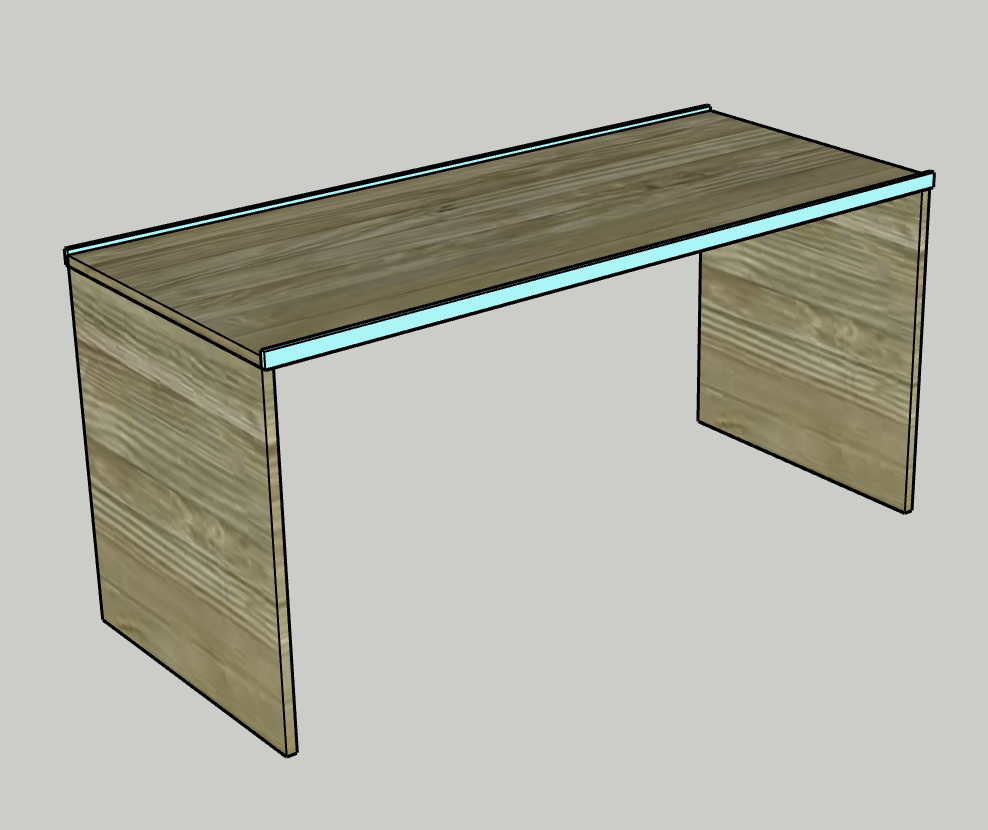
-
Attach short edges
Repeat to attach the Short Edges on the ends the same as the Long Edges.
-
Stain and poly
- Apply stain or paint to your piece to give it some character if you’d like.
- Add a coat of polyurethane to protect it from any liquid that may splash down onto the top.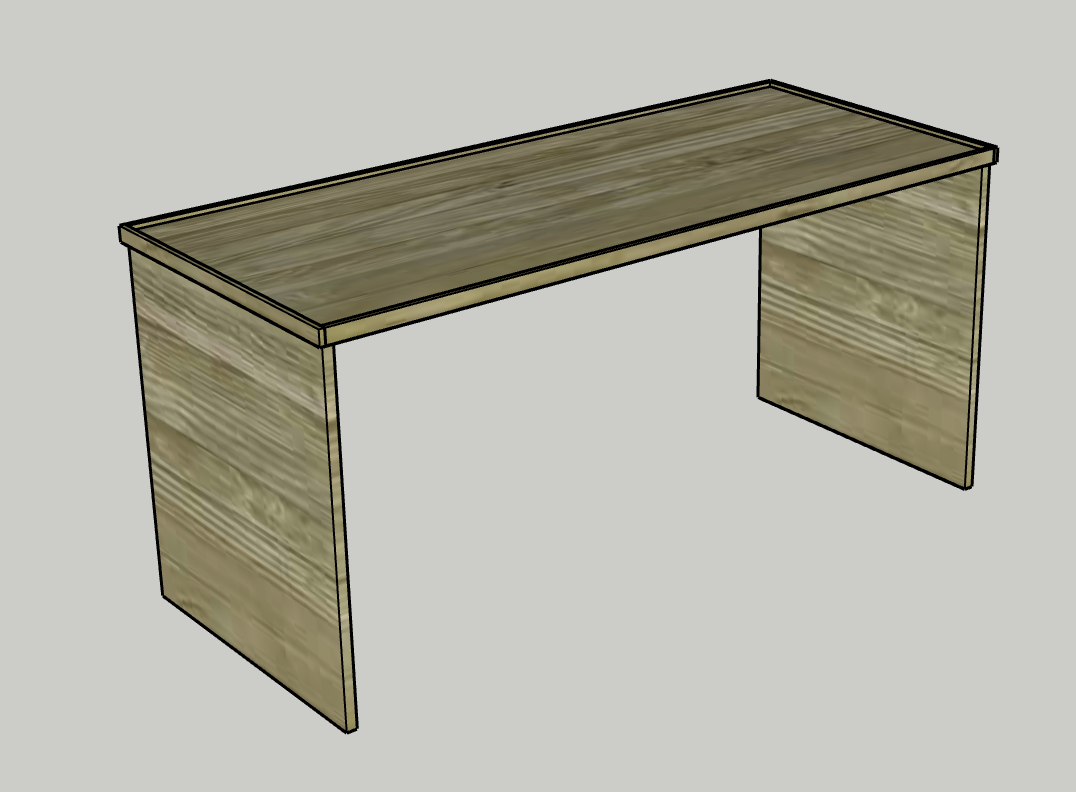
-
Enjoy!
Enjoy your handiwork and tag @CharlestonCraftedBuilds on Instagram with a picture!