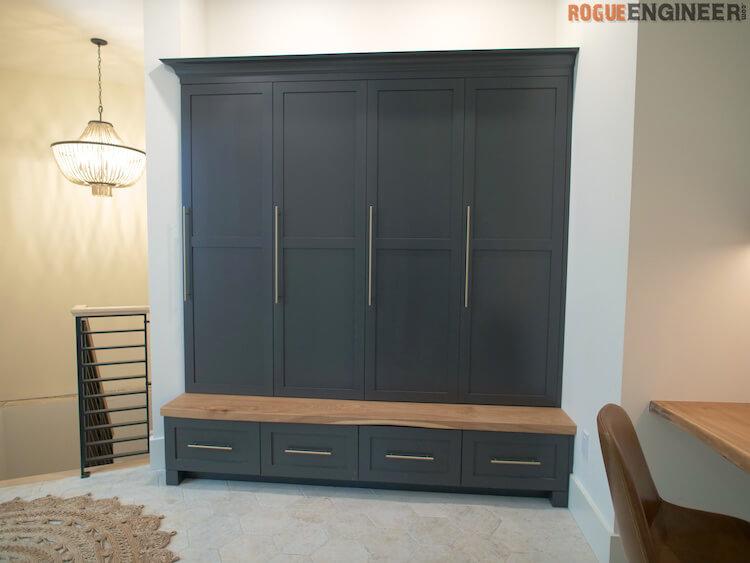
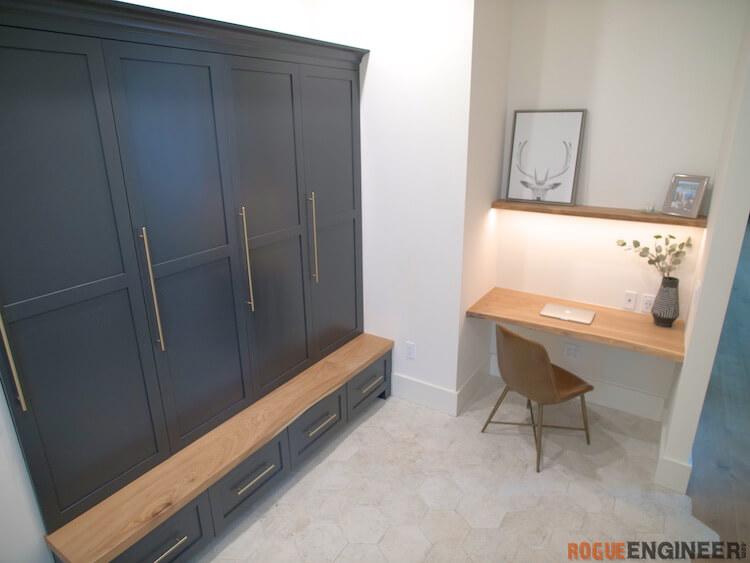


These mudroom lockers were built to sit on top of the custom built in bench we recently made. With this mudroom being a main throughway in our house, we wanted these lockers to look nice, be functional, and hide all of our daily crap.
Tools
Kreg Tools


Other Tools
-
Miter Saw

-
Table Saw
-
Tape Measure
-
Nail Gun
Materials
Wood Products
- 2 Plywood , 3/4" Thick , Full Sheet
- 1 Plywood , 1/4" Thick , Full Sheet
- 1 Board , 1x3 , 12"
Hardware & Supplies
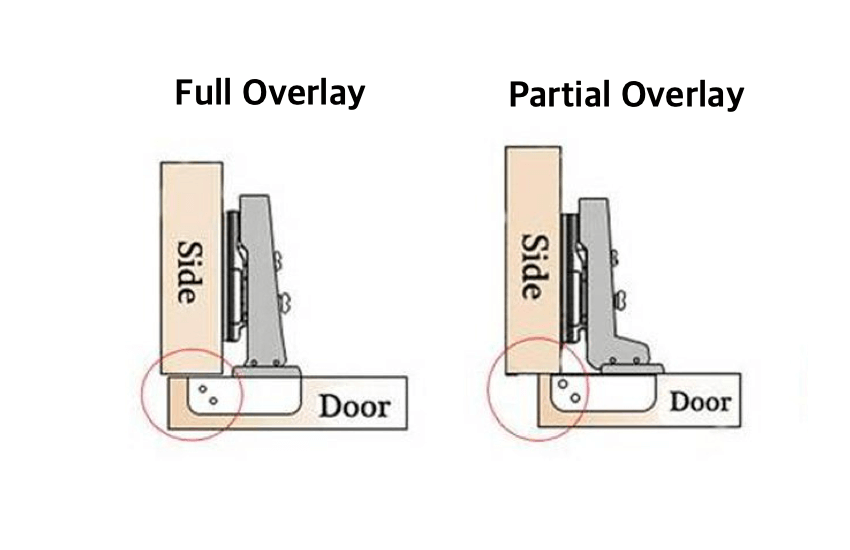
- 3 Full Overlay Hinges
- 9 Partial Overlay Hinges
Cut List & Parts
- 1 Parts , Custom
Directions
-
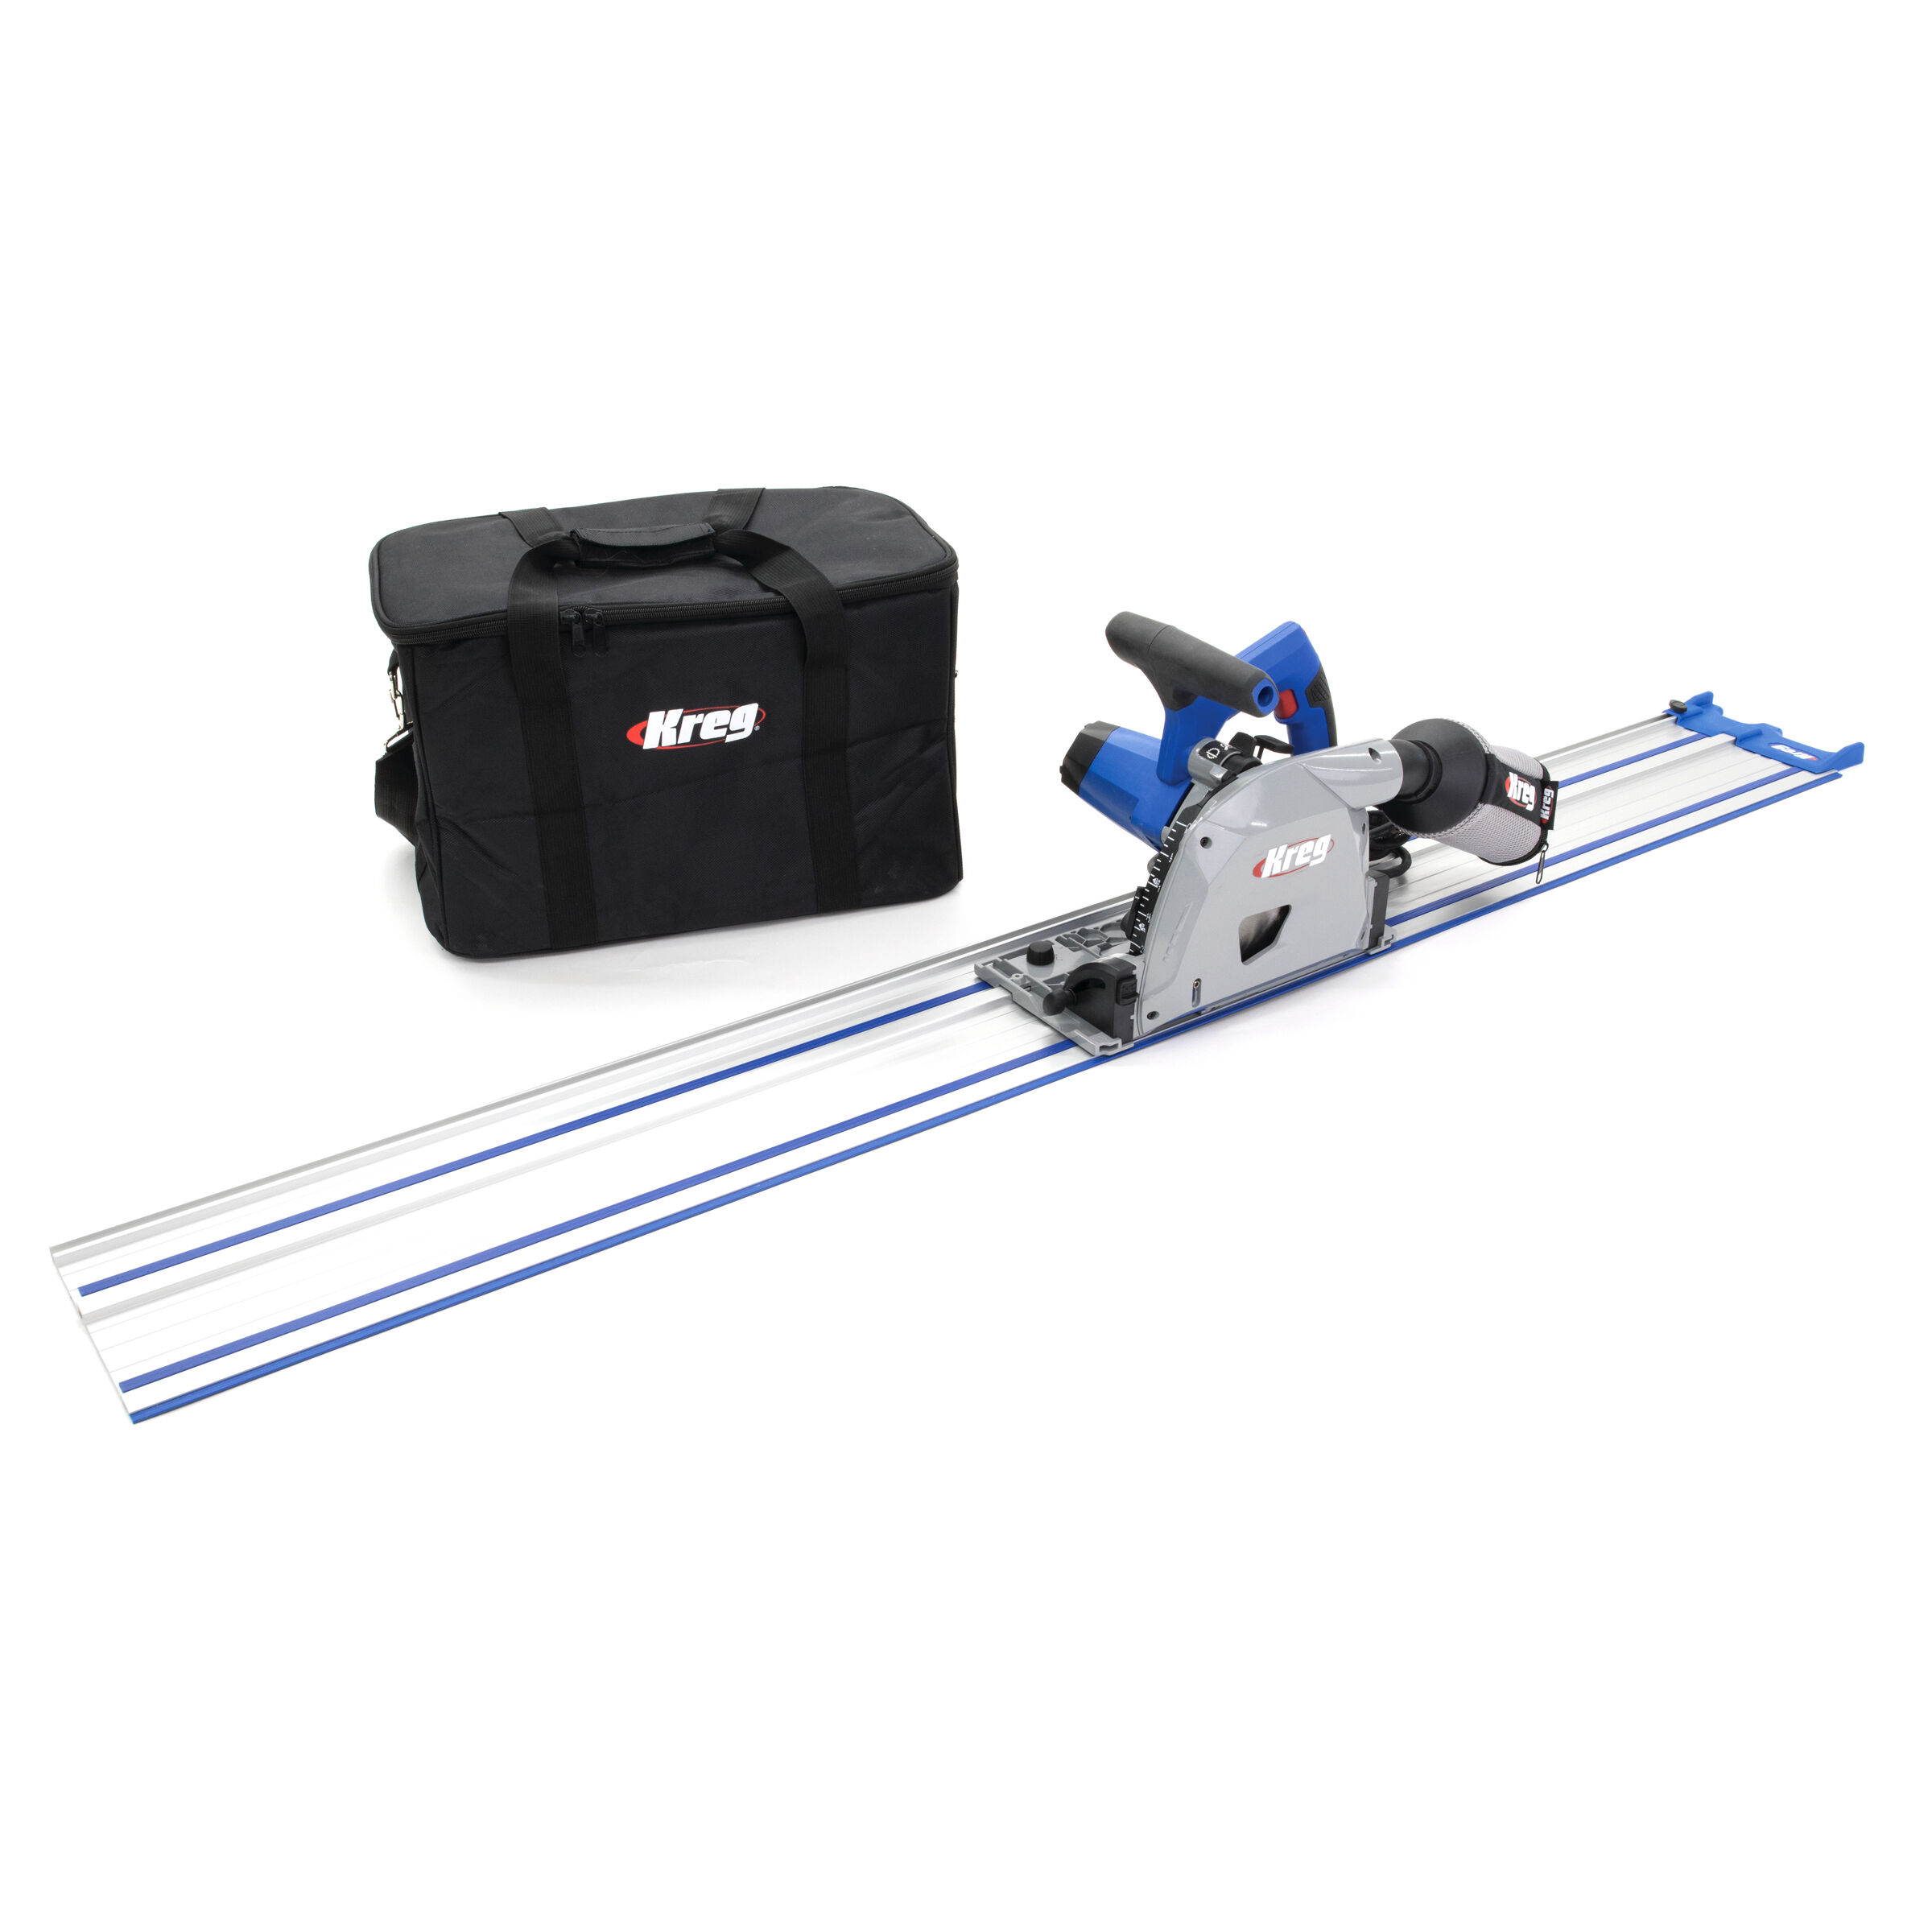
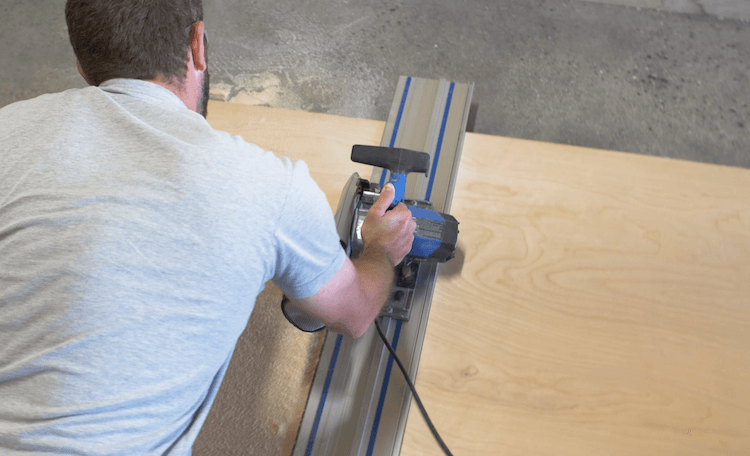
Breaking Down Plywood
When it comes to breaking down plywood for projects like this I have a new friend and his name is the Kreg Track Saw. This tool along with a sheet of rigid foam insulation make breaking down plywood faster and safer than using a tablesaw.
-
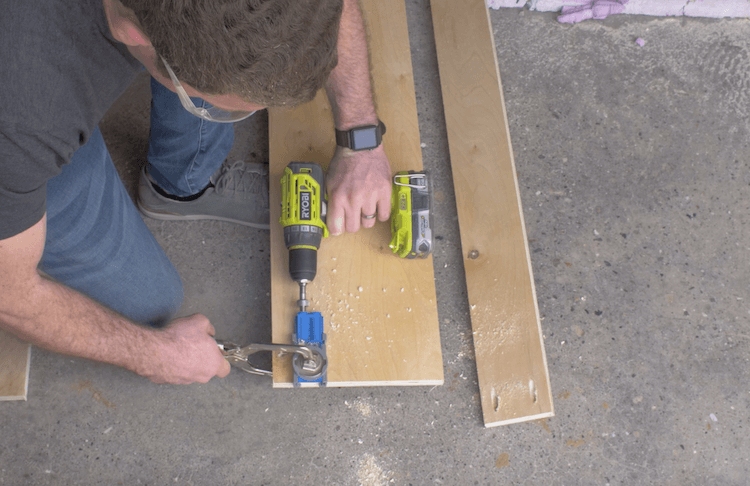
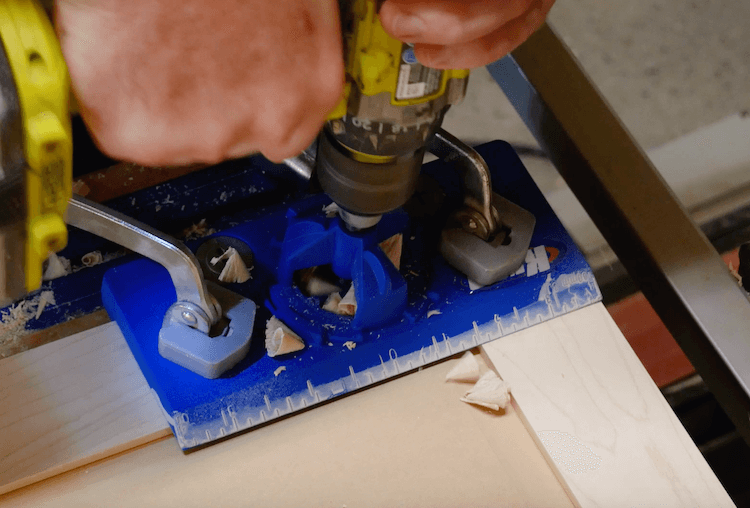
Pocket Hole Joinery
When it comes to joinery, we will be using mostly pocket hole joinery for this project. A pocket hole is an angled hole that allows a hidden screw to secure two pieces of wood together. The Kreg R3 is an inexpensive jig that will make this drilling process easier and quicker.
-
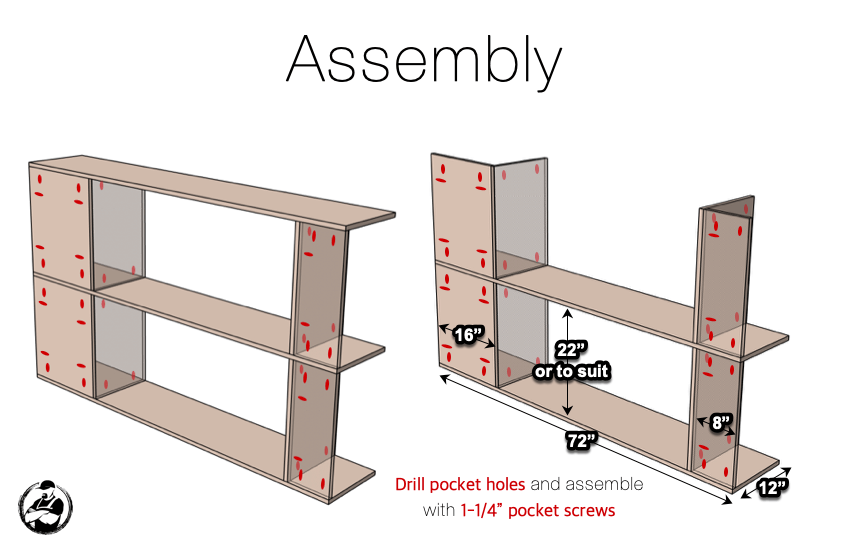
Assembly Process
With all the pieces cut and pocket holes drilled we move on to the assembly. Four lockers are about as big of a unit as I would suggest building as one. This thing was difficult to move around once it was assembled so take that into account.
-
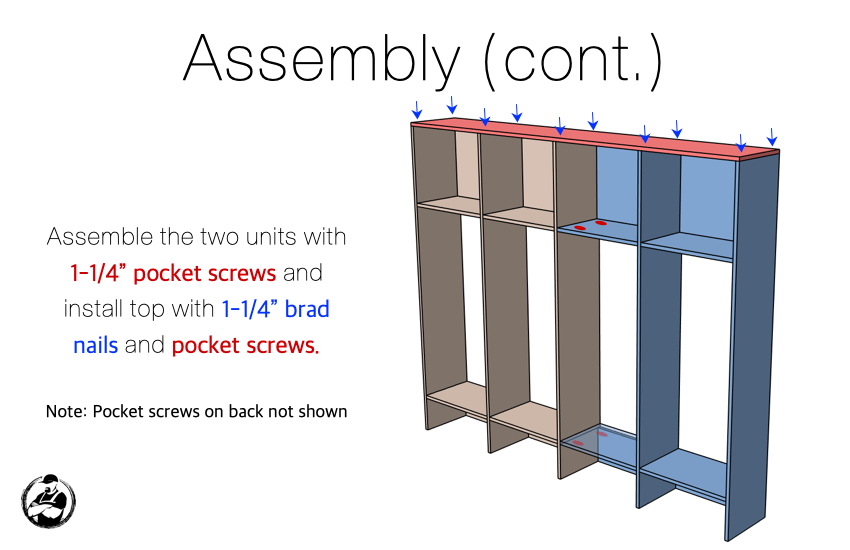
Assembly (cont.)
Assemble the two units with 1-1/4" pocket screws and install the top with 1-1/4" brand nails and pocket screws.
-
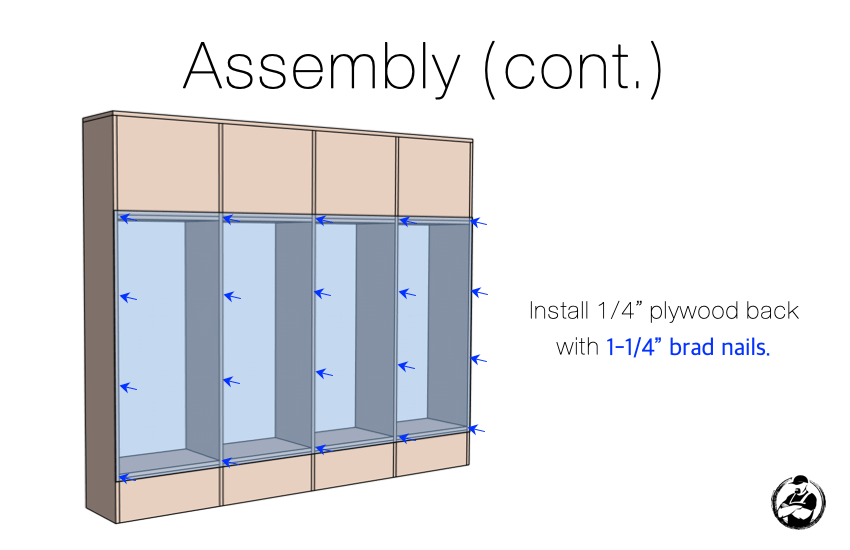
Assembly (cont.)
Install 1/4" plywood back with 1-1/4" brand nails.
-
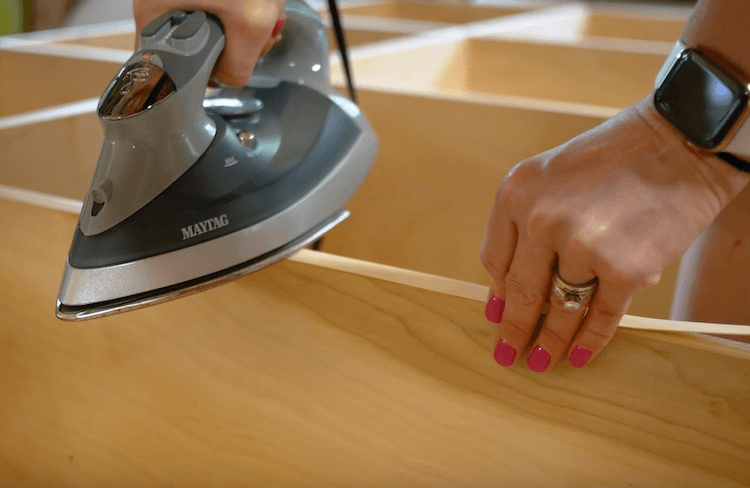
Edge Banding
With the unit assembled it was time for paint. Before that we needed to edge band the plywood edges. We did so with a birch iron-on edge banding. The edge then need to be sanded or trimmed with a trimmer. This process can also be down before assembly which may be easier for some.
-
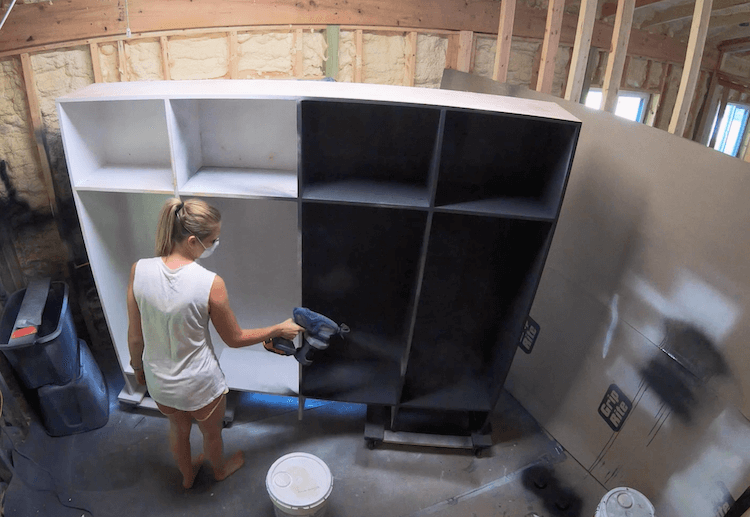
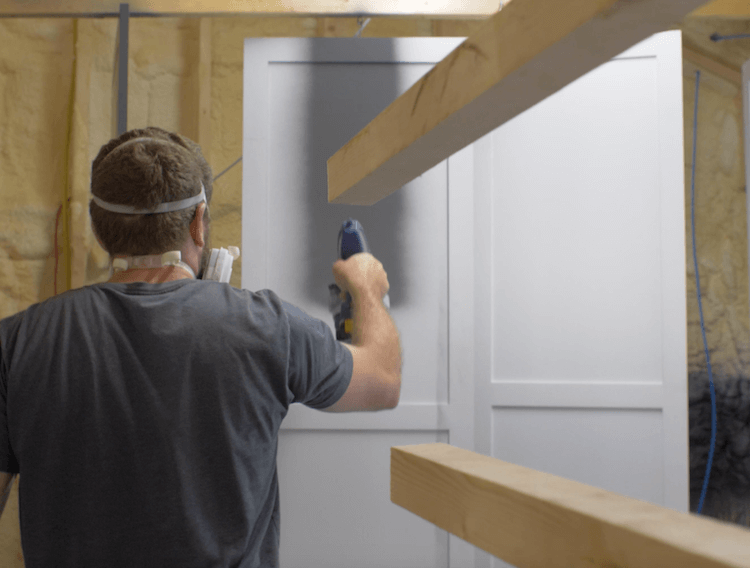
Prepping, Primer, Paint
We sanded all surfaces with 220 grit sandpaper and got the lockers ready for primer. Once the primer was dry, we sanded again and painted.
-
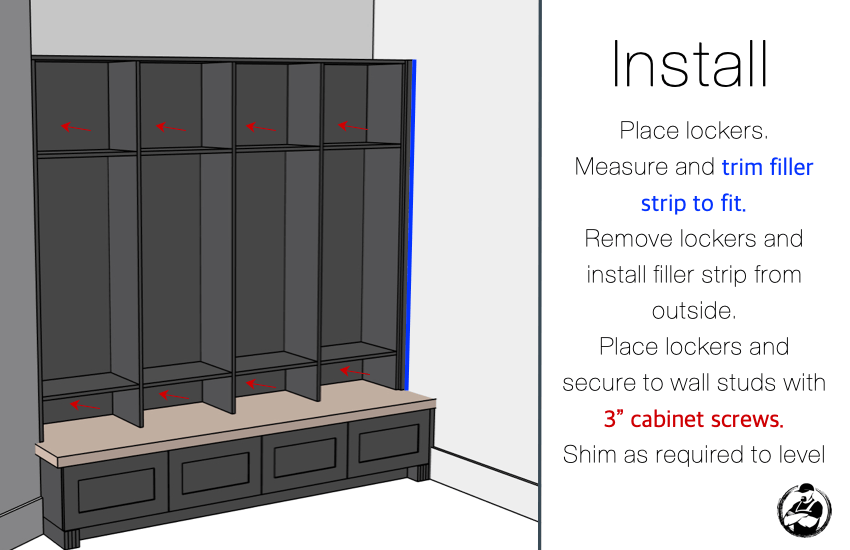
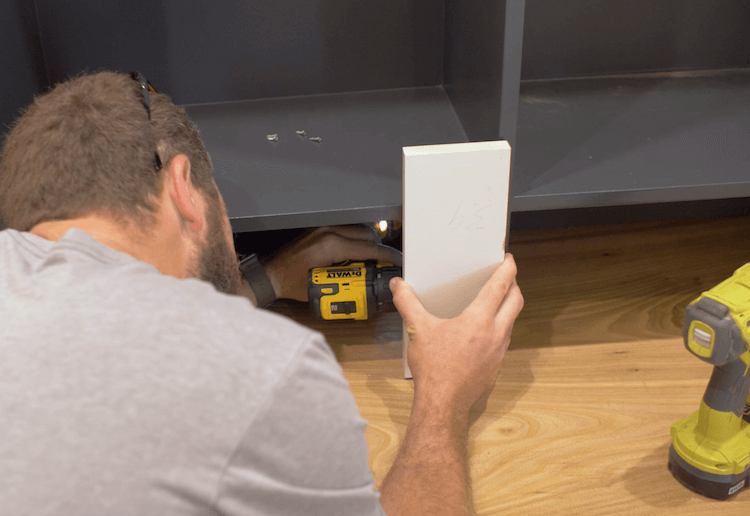
Install
Place lockers. Measure and trim filler strip to fit. Remove lockers and install filler strip from outside. Place lockers and secure to wall studs with 3" cabinet screws. Shim as required to level.
-
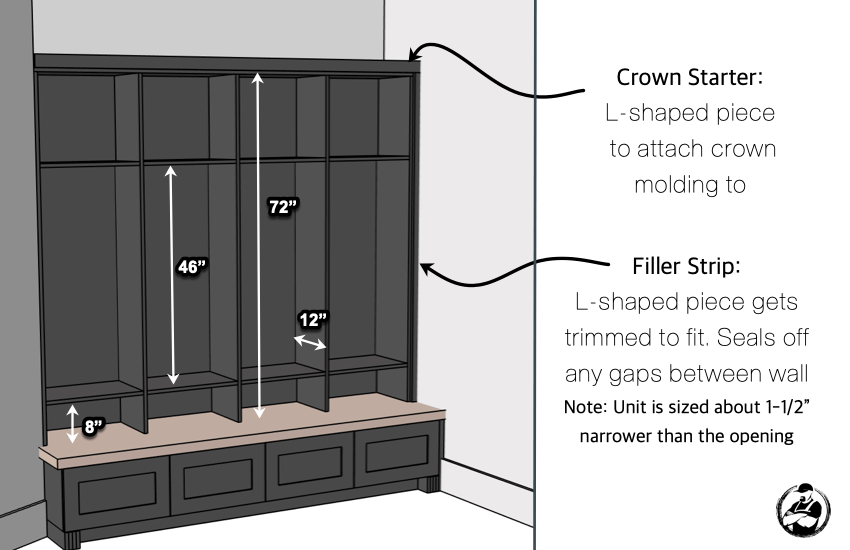
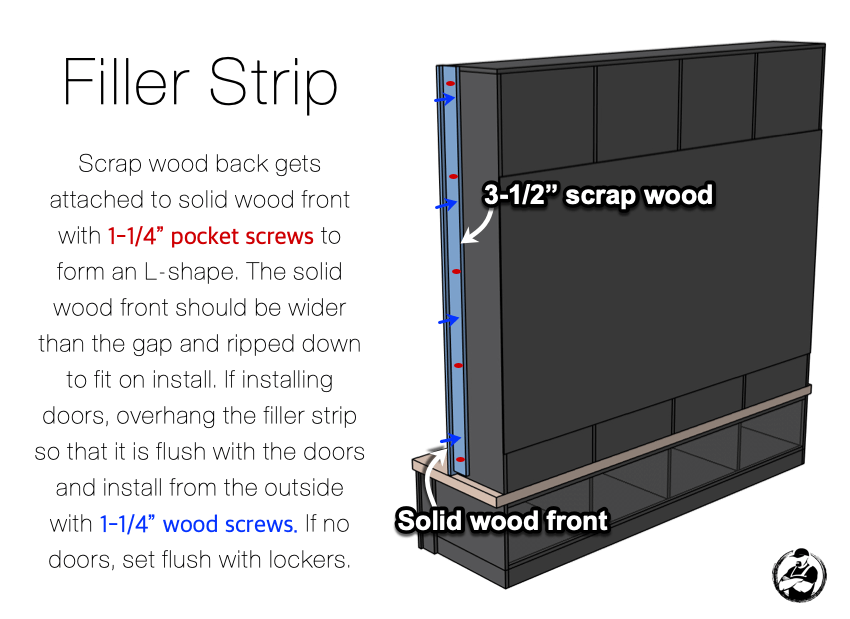
Filler Strip
Scrap wood back gets attached to solid wood front with 1/1/4" pocket screws to form an L-shape. The solid wood front should be wider than the gap and ripped down to fit on install. If installing doors, overhang the filler strip so that it is flush with the doors and install from the outside with 1-1/4" wood screws. If no doors, set flush with lockers.
-
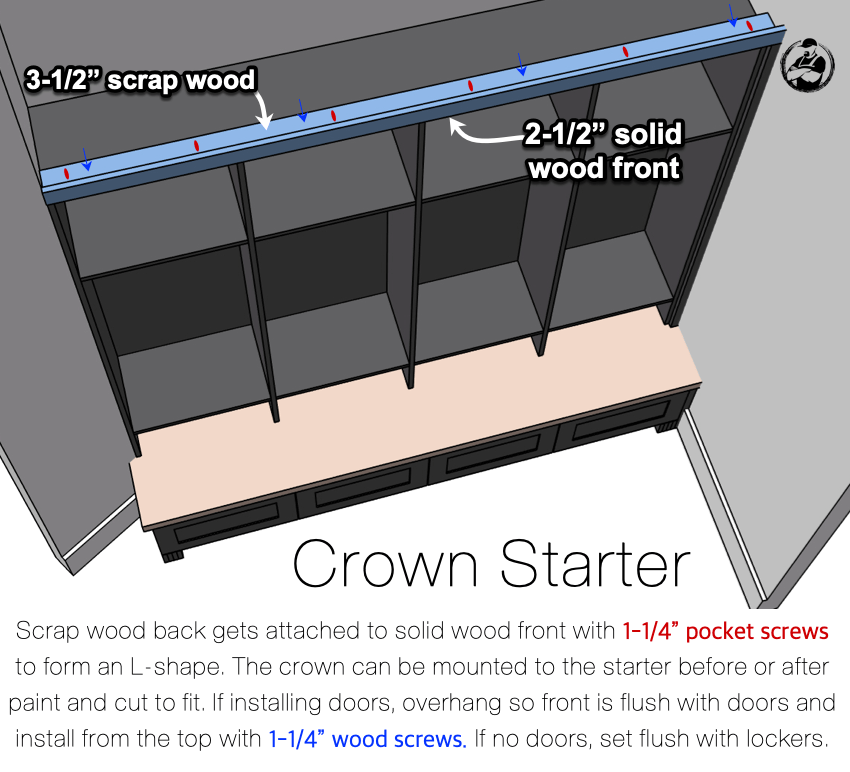
Crown Starter
Scrap wood back gets attached to solid wood front with 1-1/4" pocket screws to form and L-shape. The crown can be mounted to the starter before or after paint and cut to fit. If installing doors, overhang so front is flush with doors and install from the top with 1-1/4" wood screws. If no doors, set flush with lockers.
-
Doors
When it came time to put the doors on, we decided to have the pros make them because we wanted to make sure these massive doors would be completely flat and stay that way. If you want to make your own doors we have a tutorial on how to make those on a router table here, you can find the link below.
Click below to learn how to make your own cabinet doors
-
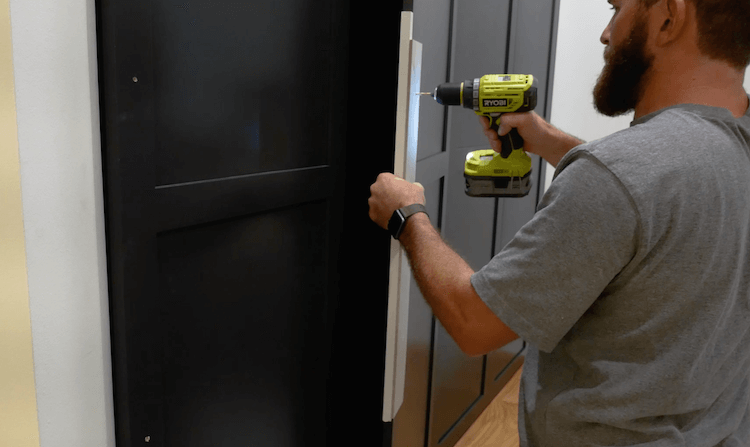
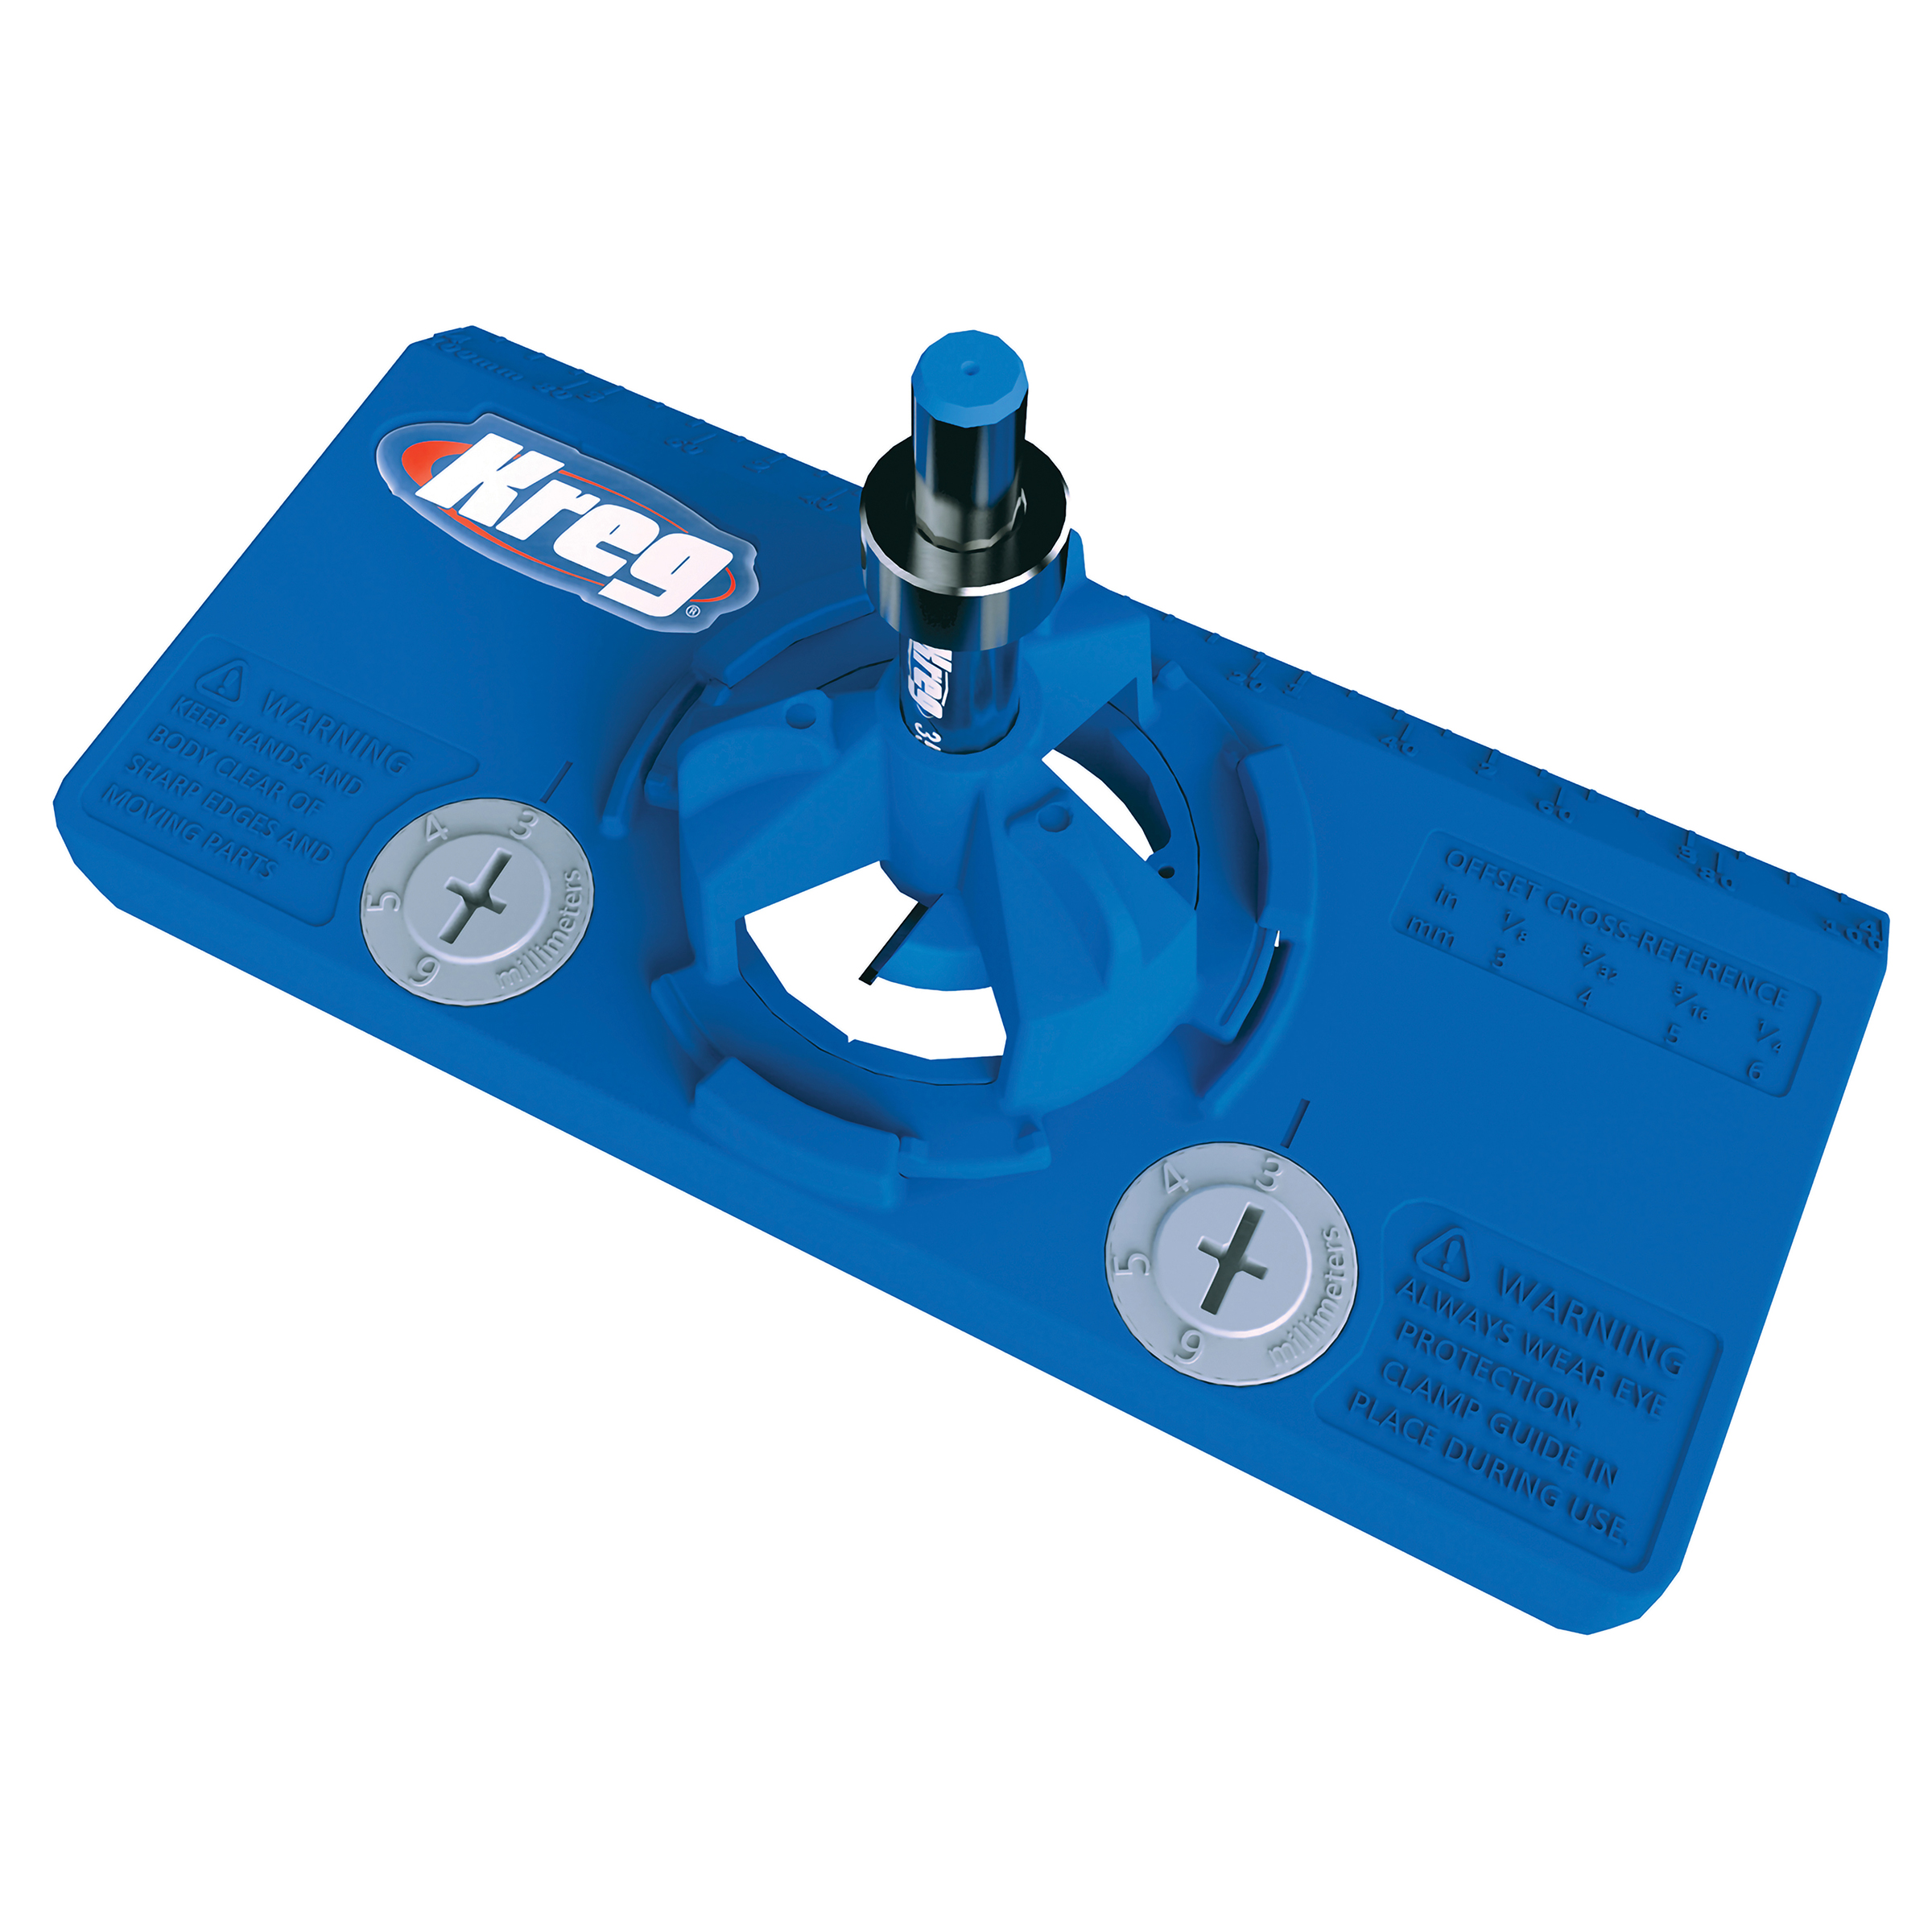
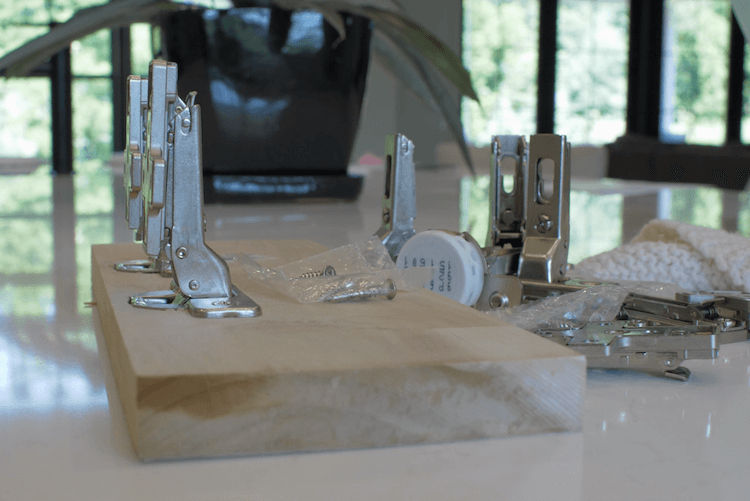
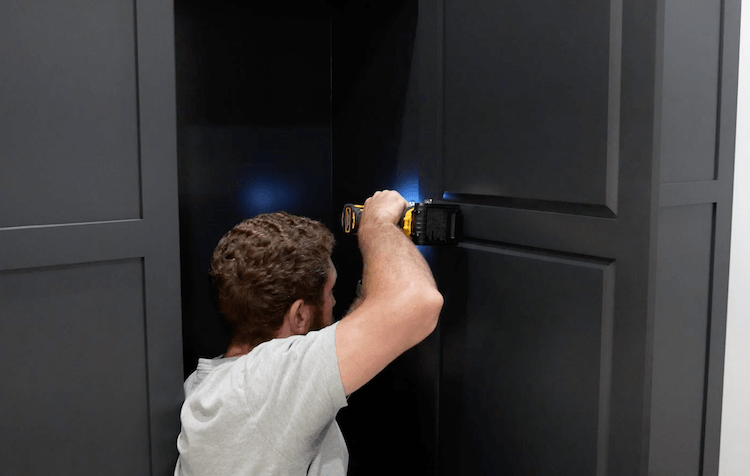
Hinge Intall
With the doors in, we needed to drill the holes for the concealed hinges. For this process we used the Kreg concealed hinge jig which allows you to consistently drill the holes in the same location and correct depth.
-
Hinge Intall (cont)
When it comes time to install the doors, you will need two different types of hinges.
Since all of our doors hinge from the right full overlay hinges are needed for the rightmost door since this door will need to cover the entire side of the locker.
For the other doors, partial overlay hinges will be used since the doors will share a side of the locker at their hinge side.
-
Hinge Template
To install these hinges, we made a template by drilling a hole in a small piece of scrap wood the same way that we did the doors. Then we mounted a hinge to the template and located it on the locker where the door will go.
-
Hinge Install (cont.)
Then we went back to the doors and installed the hinge on the doors.
-
Install Door
With the top and bottom hinges installed on the door we could then connect it to the base plates that are installed on the locker. These hinges have adjustability features that can be used to make sure the door lines up perfectly with the base plates.
-
Hardware
Finally, it was time to mount the hardware and normally I would use the Kreg Hardware Jig but we were installing really long pulls so I made a jig of my own with scrap plywood. I also, marked where the center rail on the door should go for easy locating.