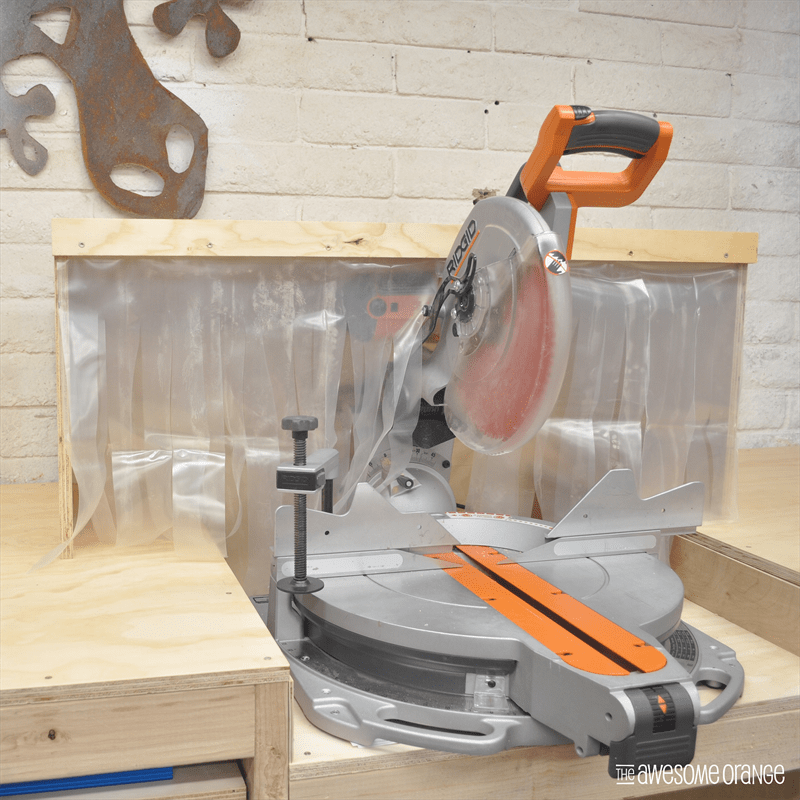


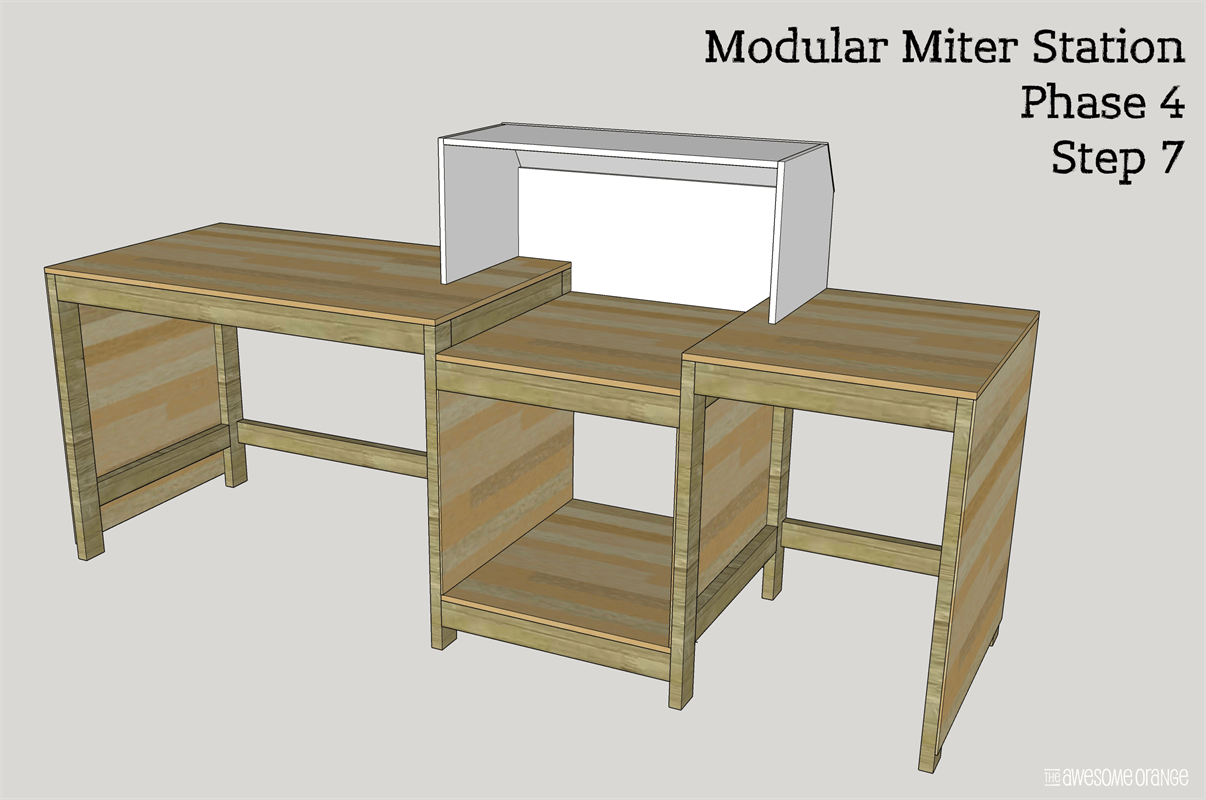
Every woodworkers nemesis is sawdust and this miter saw dust hood will help cut that down. Add a shop vac to your saw and it will be virtually dust free! This is phase 4 of my Modular Miter Station series…. this piece can be build with scraps from the other builds.
Tools
Kreg Tools


Other Tools
-
Table Saw

-
Tape Measure
-
Air Compressor
Materials
Wood Products
- 1 Plywood , 3/4" Thick , Full Sheet
- 1 Plywood , 1/4" Thick , Scrap Piece 43 1/2"L x 7.5"W
Hardware & Supplies
- 1 Box of 1 1/4" coarse pocket holes screws
- 1 18 ga brad nails
- 1 Dust Collector Bag or Heavy Plastic
- 1 Tube of painter's caulk
Directions
-
Review Dimensions
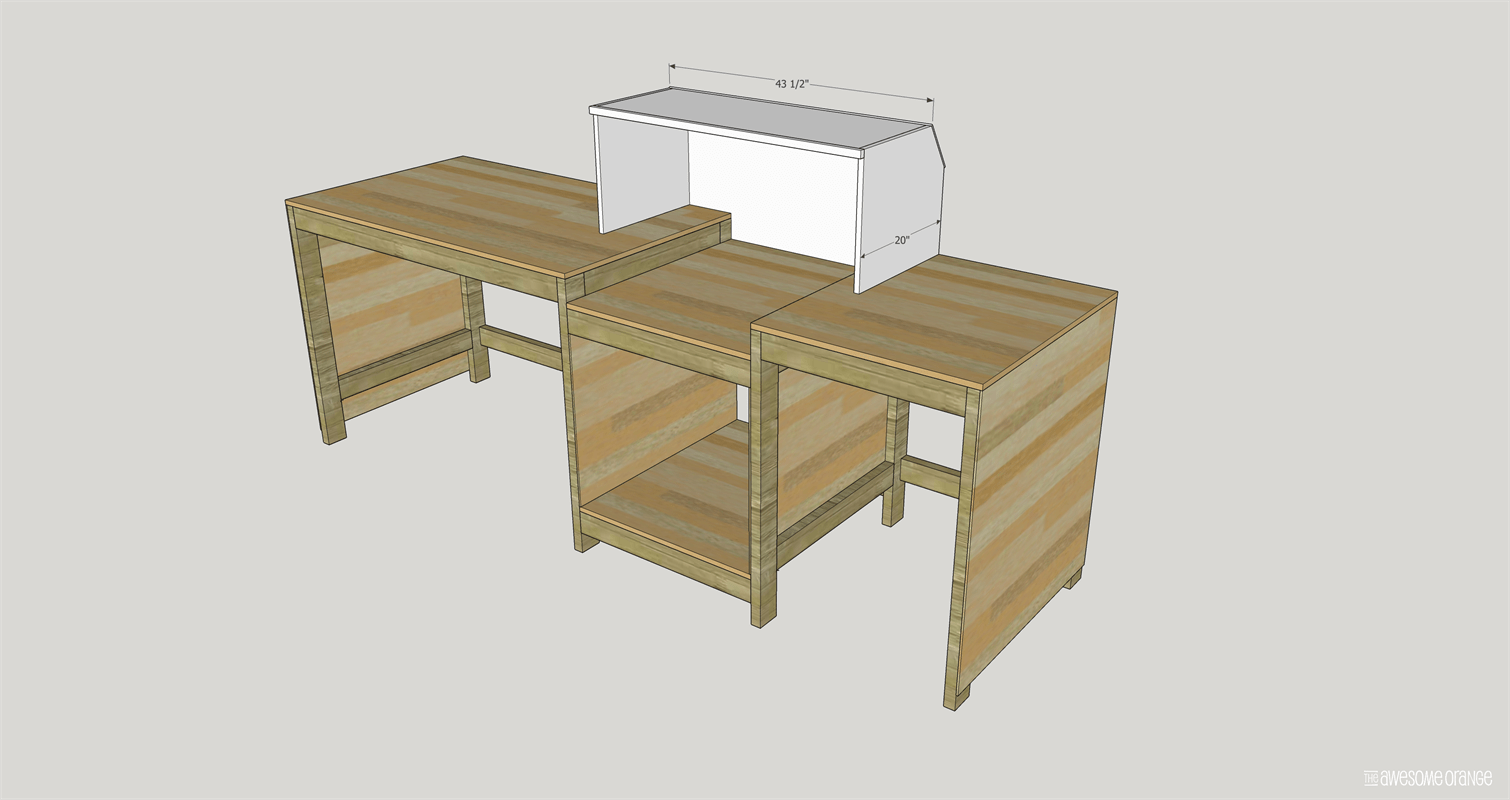
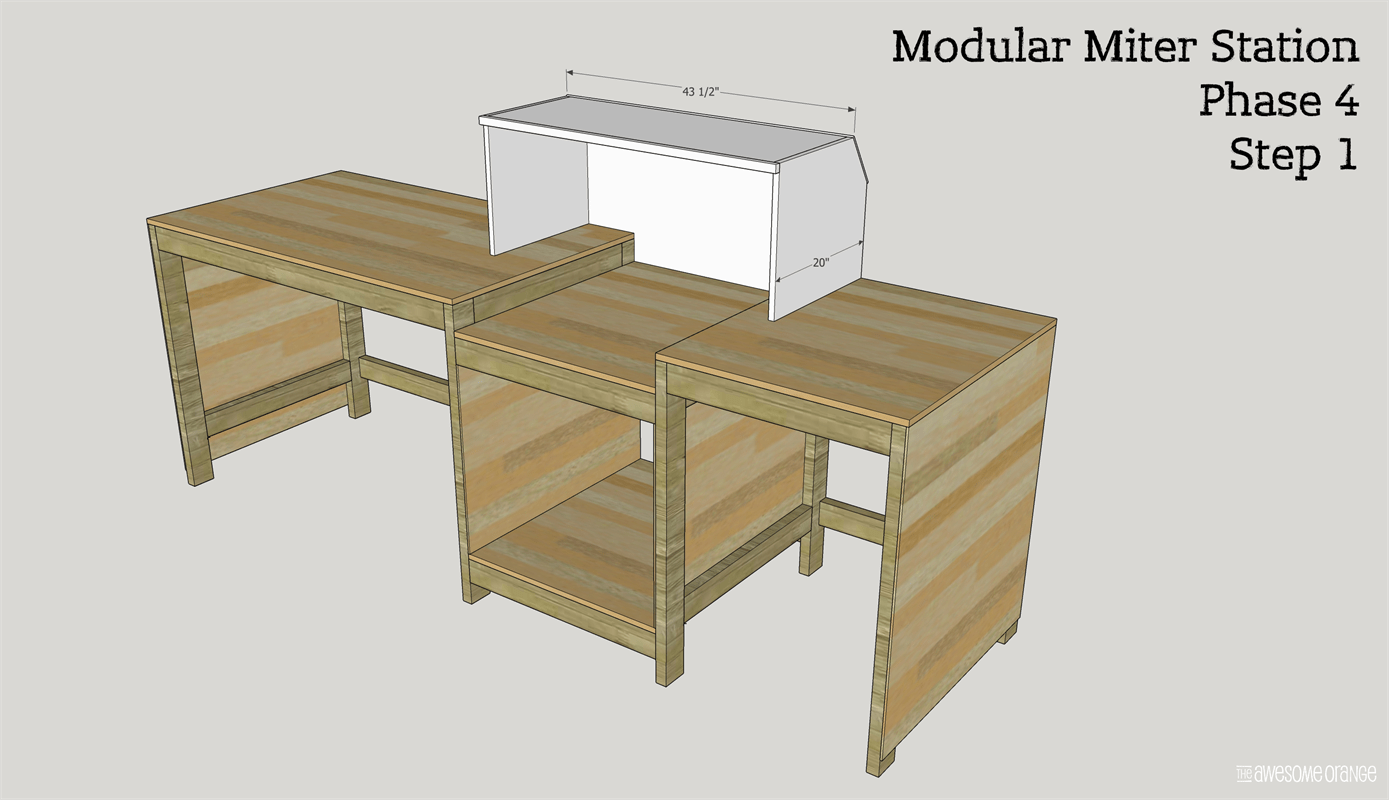
Review dimensions and adjust as necessary to work with your miter saw. Check you saw in multiple positions... miter, bevel, etc. You want to keep the hood as small as possible so that you can get good suction with shop vac. With that in mind, I installed the hood offset 4" to the left to accommodate my saw and the majority of the cuts I make. Again, adjust dimensions as necessary to fit your saw.
-
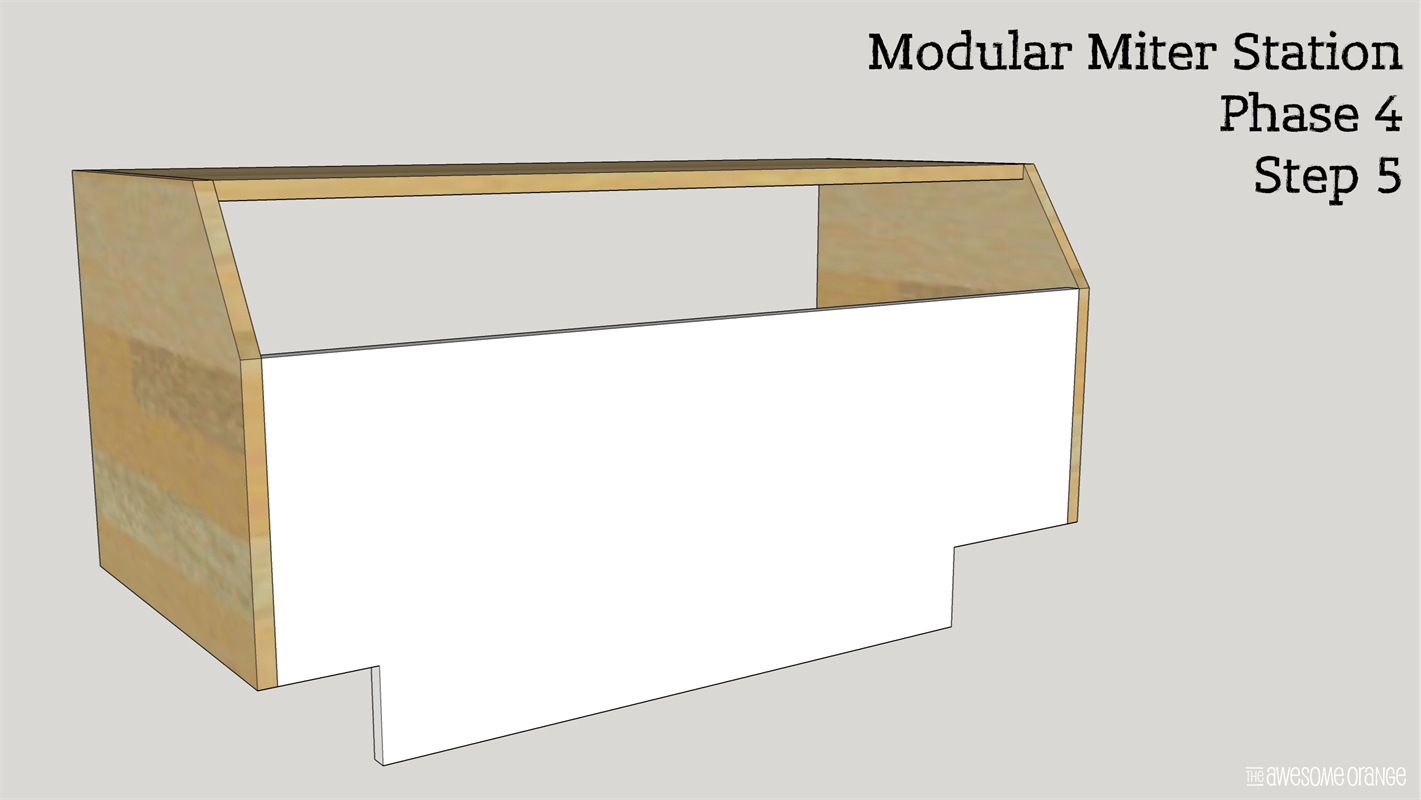
Cut Back Piece
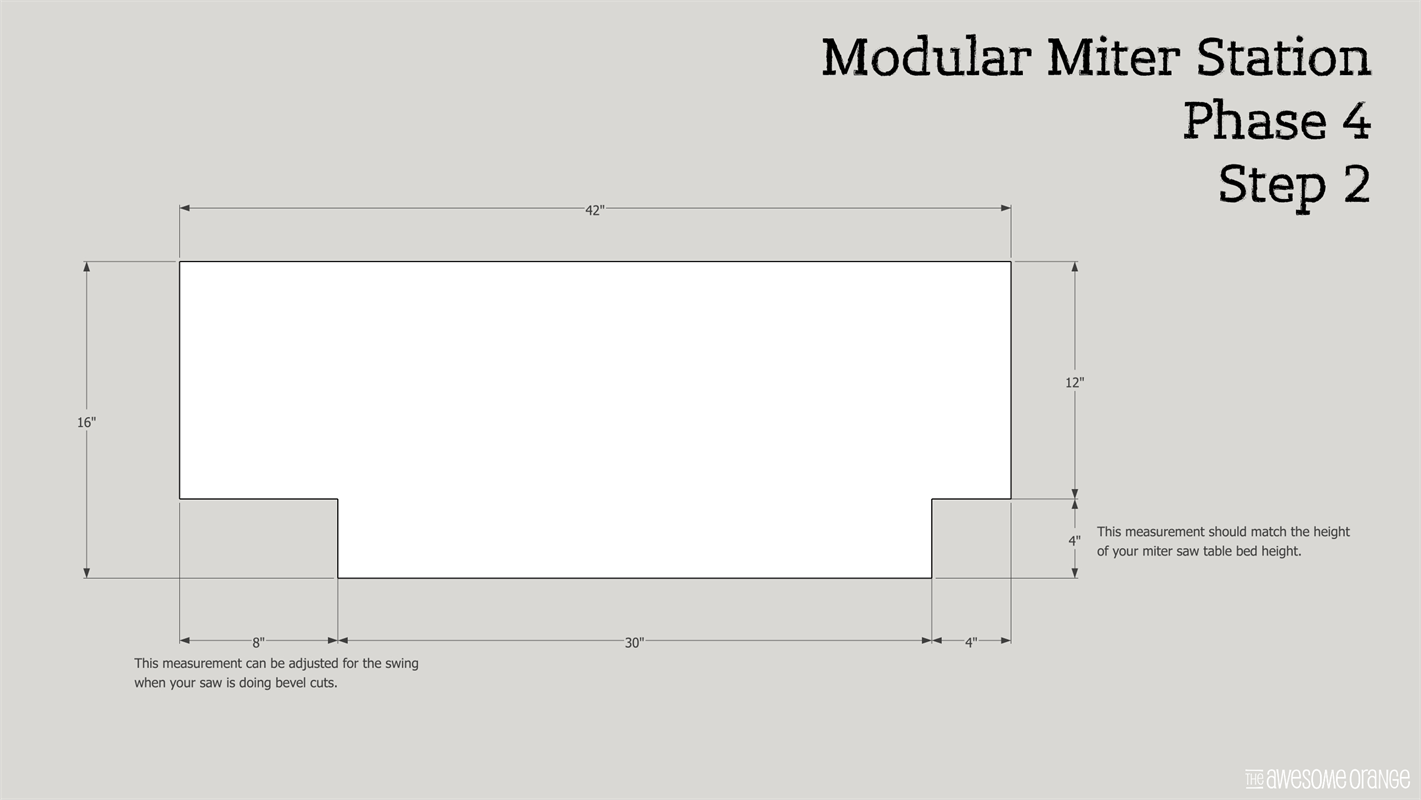
Using a jigsaw back piece to fit down in the middle section of the miter saw station. Depth will depend on the height of your miter saw table. In my case it was 4". Also, I allowed for more room on the left side (8") versus the right side (4"). You will be essentially cutting away two rectangles.
-
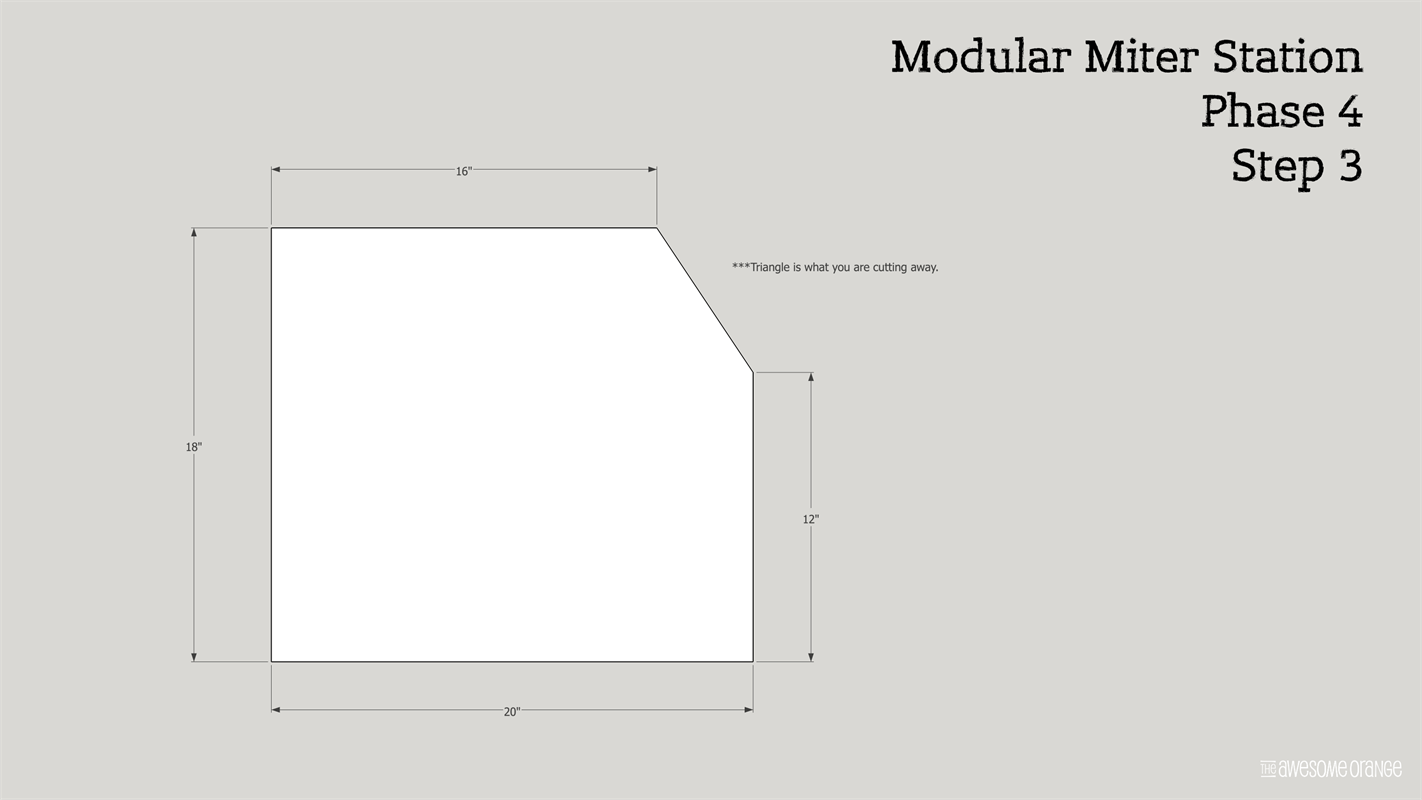
Cut Side Pieces
Mark the top of the side pieces 16" from the front and mark the back of the side piece 12" up from the bottom. Draw a line between those two marks and cut away triangle section using a jigsaw. ***Angles on the top/back of the hood is to help the dust fall down easier.
-
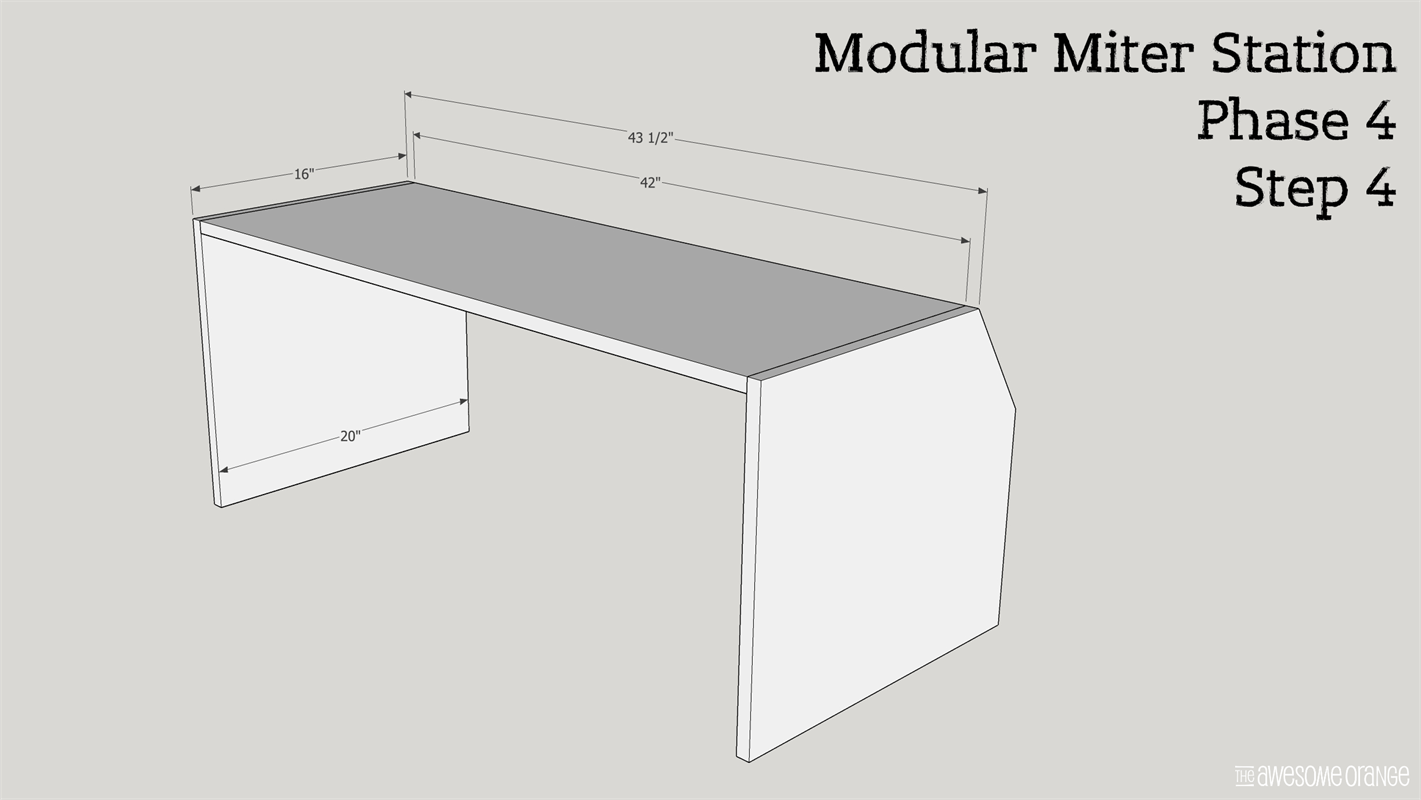
Attach Top to Sides
Attach top to side pieces using 3/4" pocket holes with 1 1/4" coarse pocket holes screws.
-
Attach Back to Sides
Attach back to sides using 3/4" pocket holes with 1 1/4" coarse pocket hole screws.
-
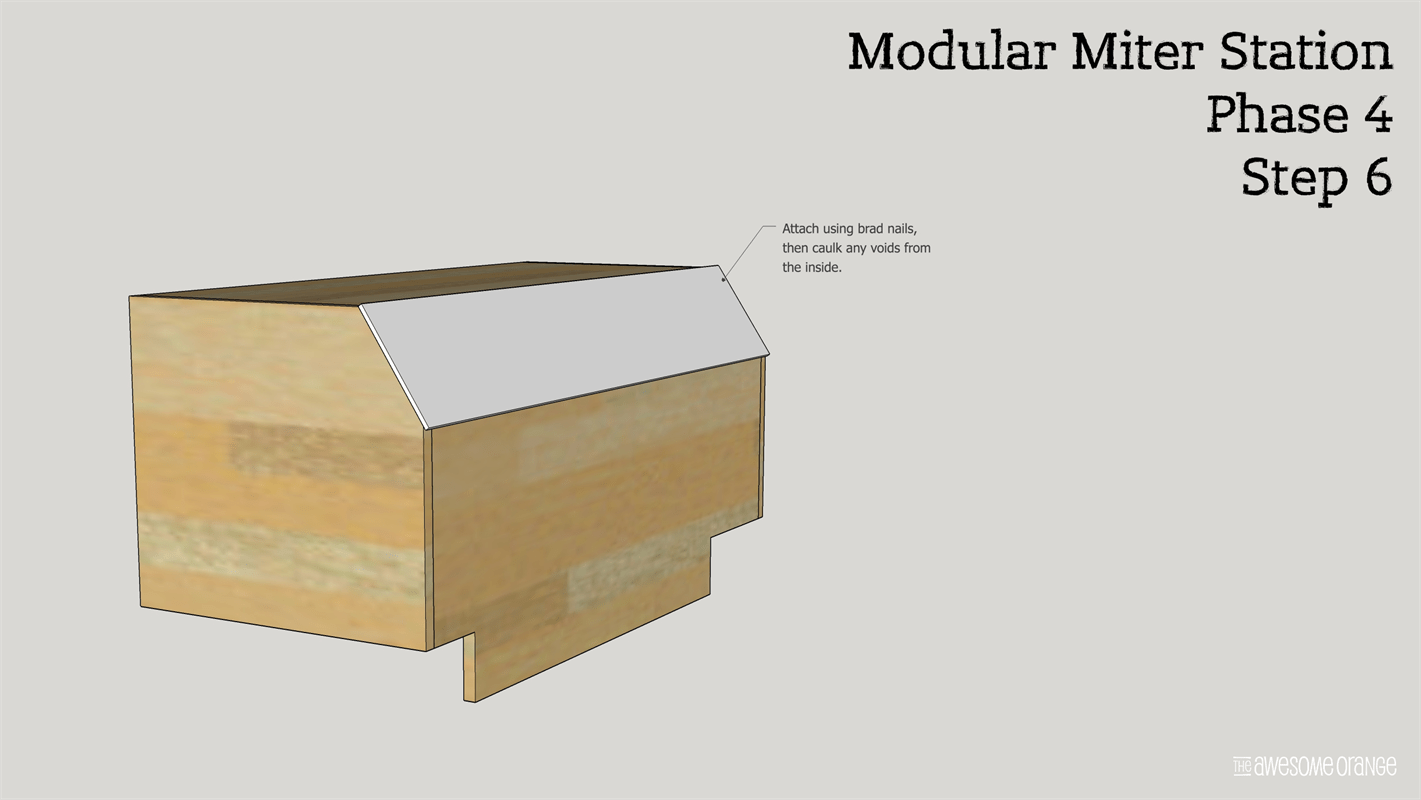
Attach Angled Back
Using 18 ga brad nails attach 1/4" plywood piece. Once attached caulk any void s from the inside so dust can't escape.
-
Attached to Workbench
Attach dust hood to workbench using 3/4" pocket holes with 1 1/4" coarse pocket hole screws.
-
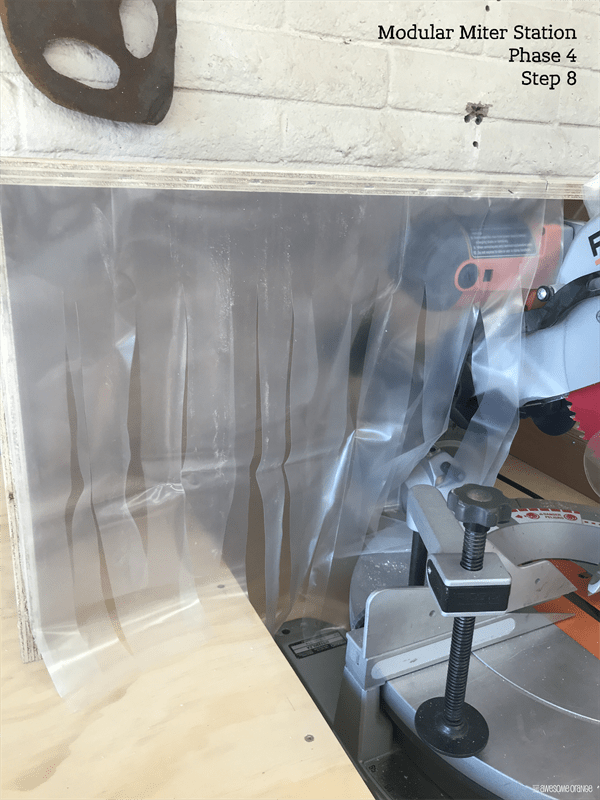
Attach Plastic & Trim
Attach heavy mil plastic (I used a dust collector bag) to the front of the hood using staples. I did a double layer of plastic and then cut strips in each layer offset from the other. Trim as necessary around saw. Then screw trim piece on to cover plastic edge. I used screws instead of brad nails so that it would be easier to replace the plastic, if needed, in the future.
-
Visit theAwesomeOrange.com
Visit www.theAwesomeOrange.com to see more pics of this build as well as all Phases of the Modular Miter Station build. Happy Building and have an AWESOME day!