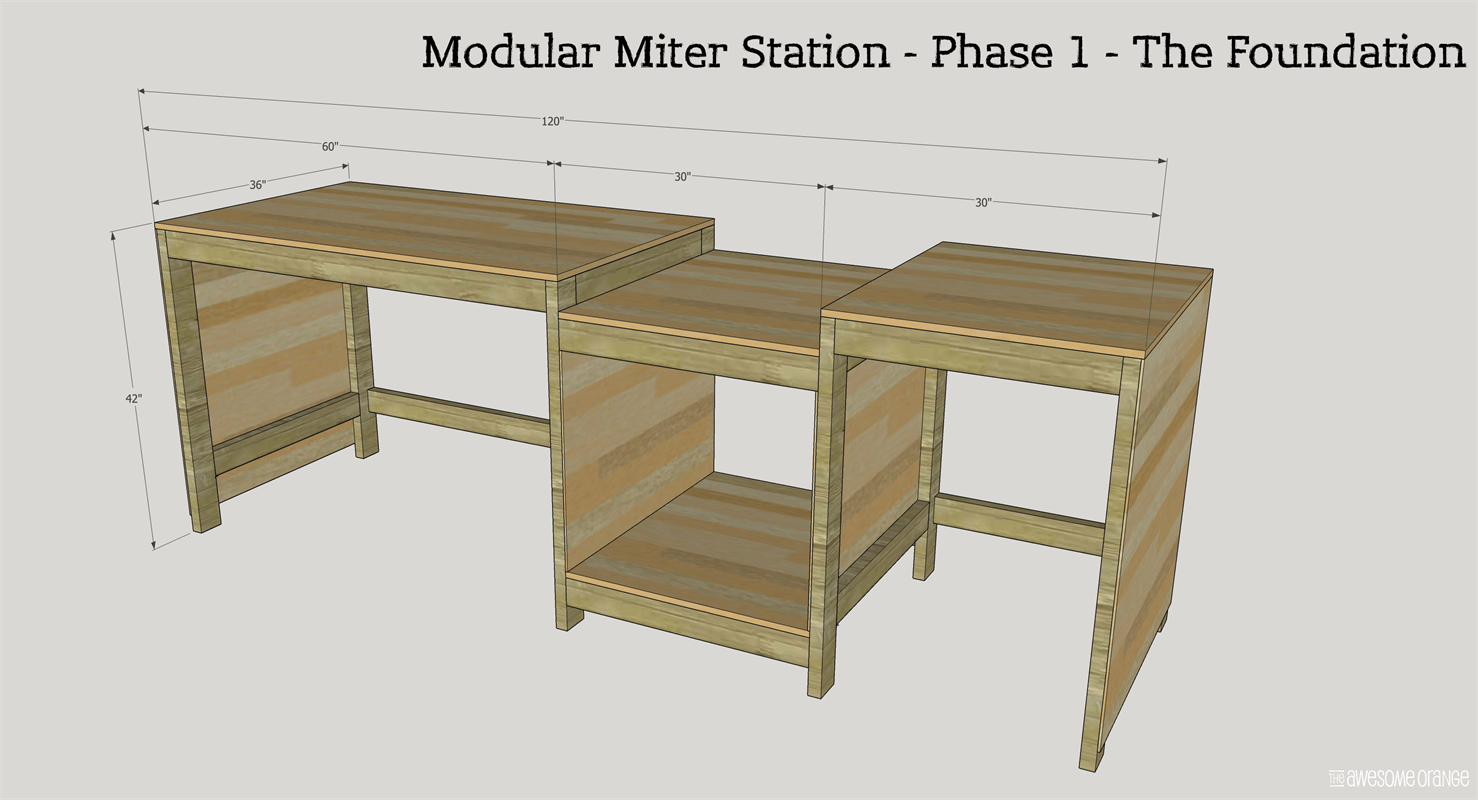
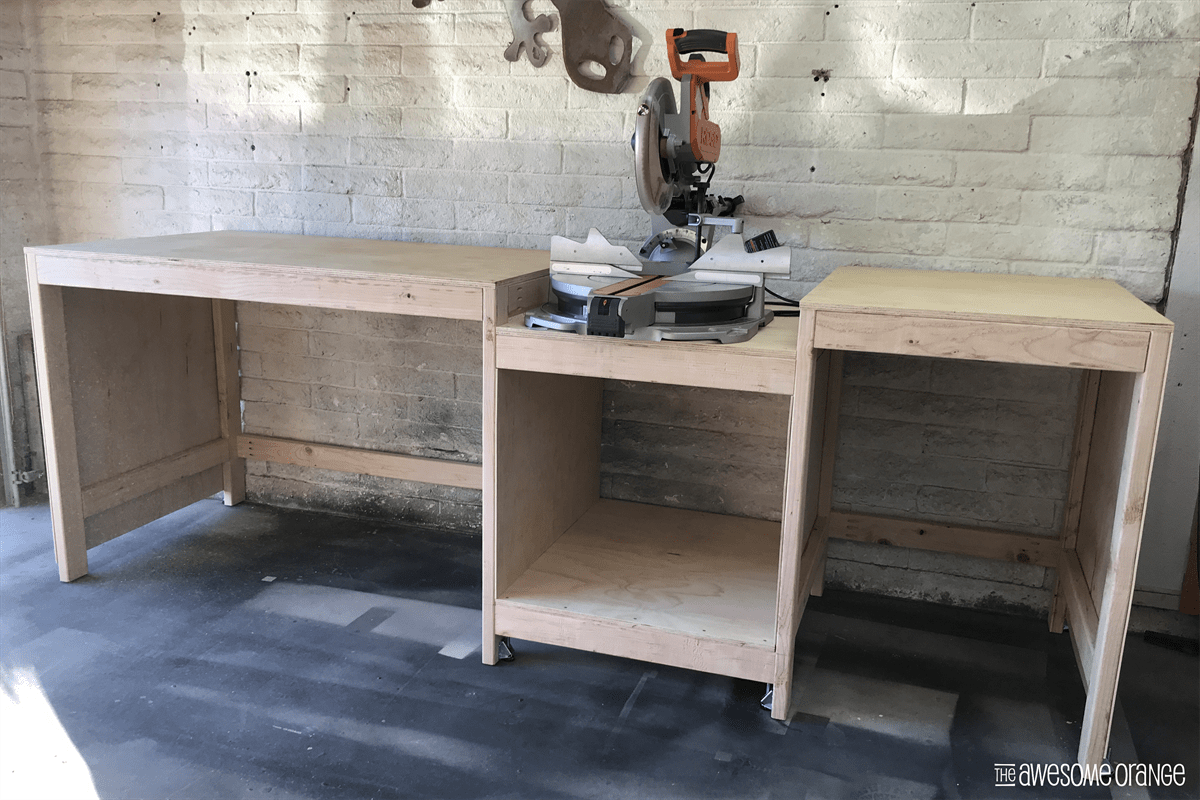
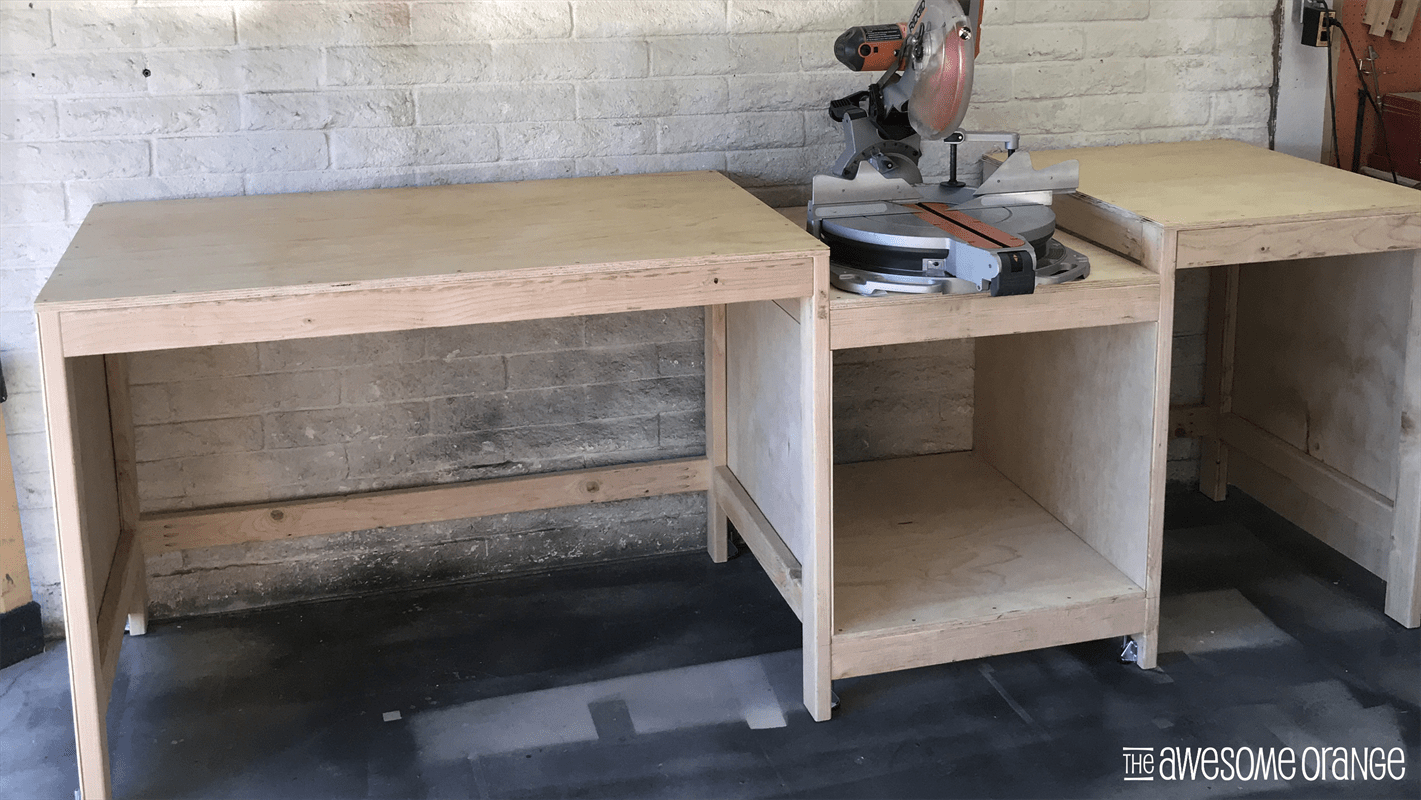
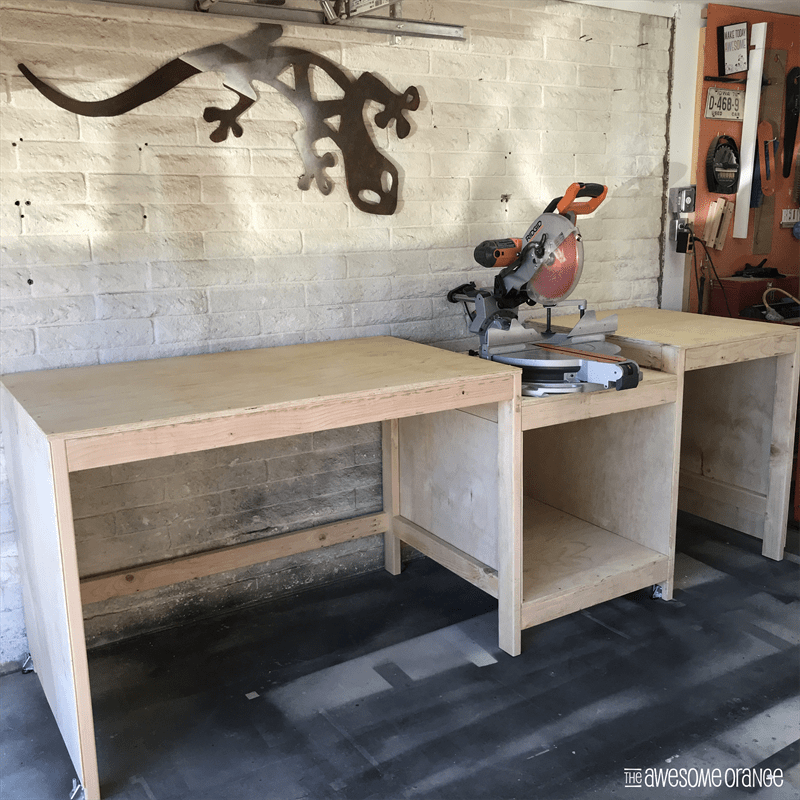
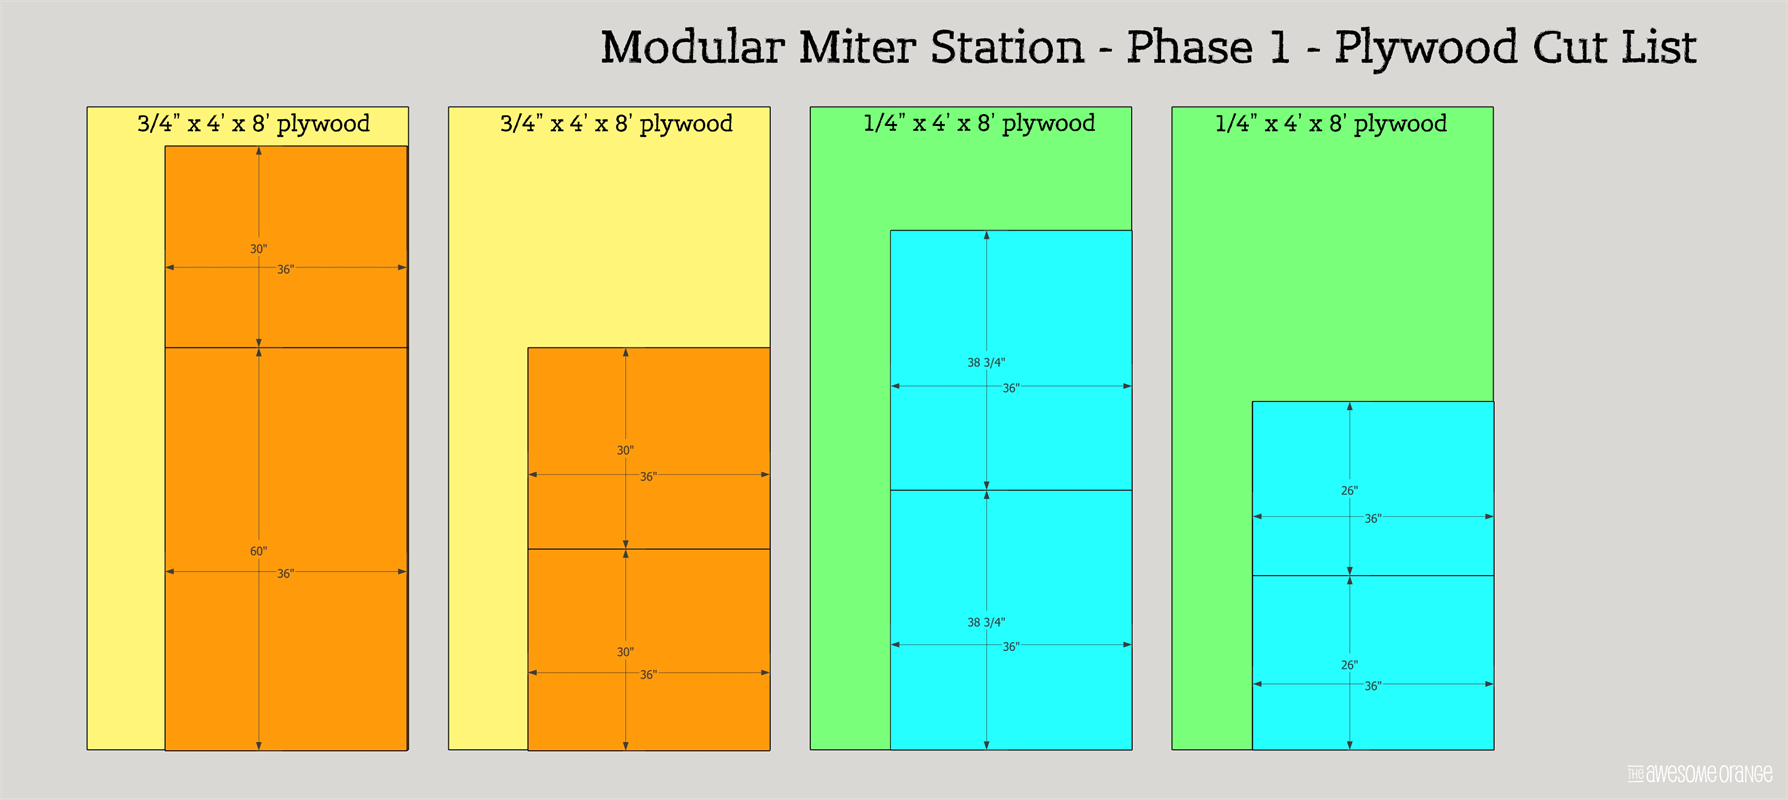
Modular Miter Station – Phase 1 – The Foundation
By The Awesome OrangeEasy to build workshop miter station to fit everyone's needs. Large work top surface with endless possibilities for storage and cabinet for customizable dust collection. Be sure to check out Phase 2, 3, & 4 that you can pair with this build!
Directions
-
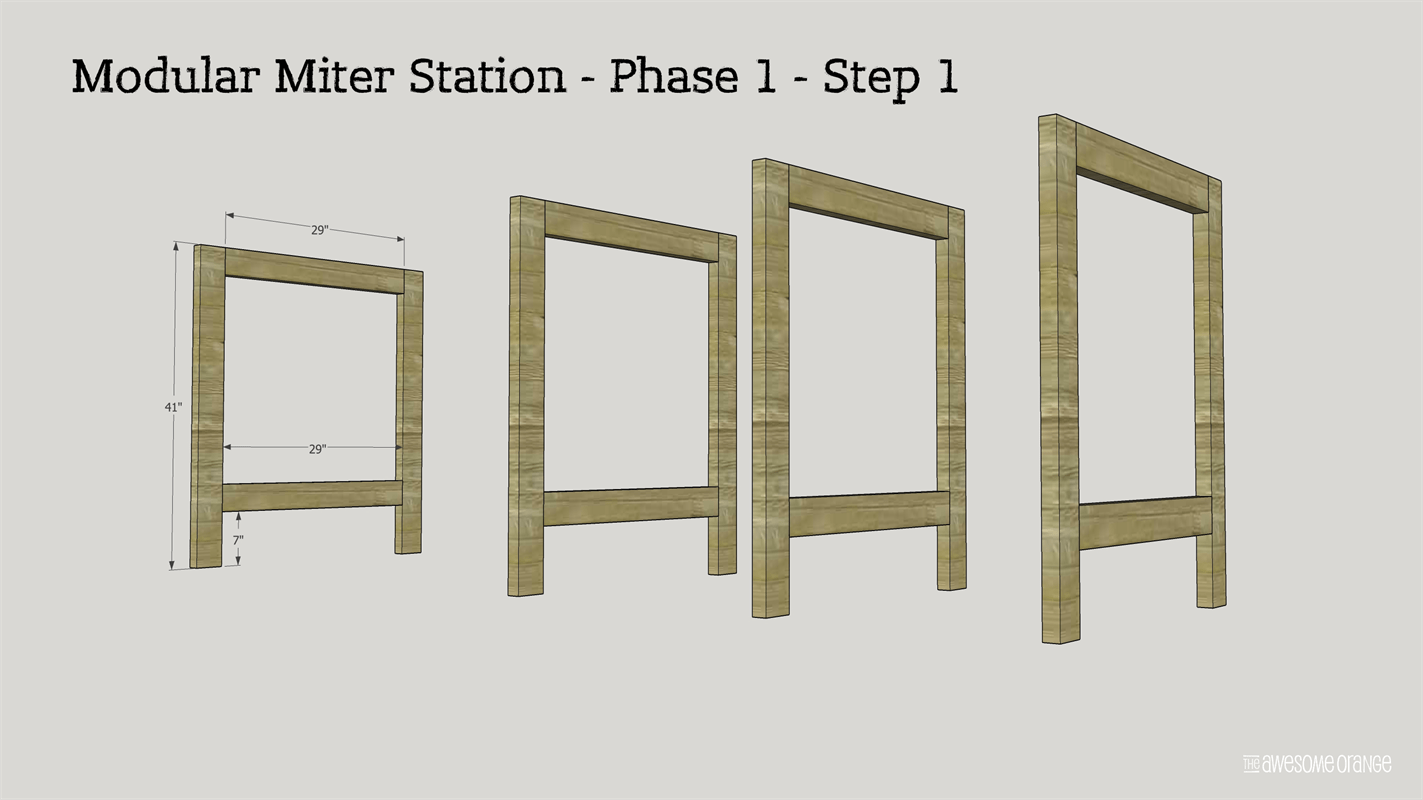
Assembly Four (4) Legs
Use 1 1/2" pocket holes and 2 1/2" coarse pocket holes screws to assembly four (4) legs. Legs will be 41"H x 36"W. Be sure that bottom cross support is up approximately 7" from the bottom. This will give clearance for casters on Phase 2 & 3.
-
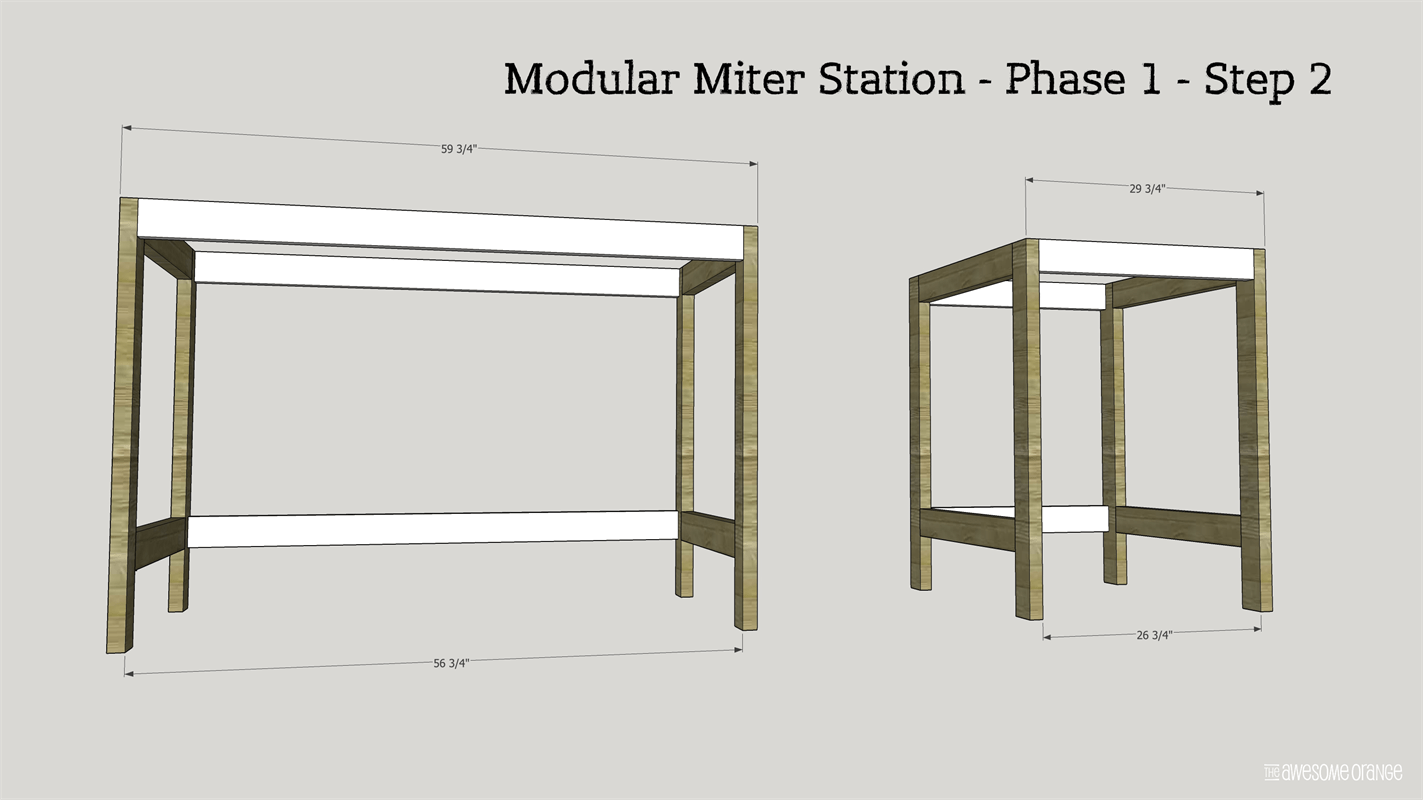
Add Stretchers
Attach two (2) legs and the three (3) 56 3/4" stretchers using 1 1/2" pocket holes and 2 1/2" coarse pocket hole screws. Two (2) on the top front & back and one (1) on the bottom back approximately 7" up from bottom. Then on the other two (2) legs add the three (3) 26 3/4" stretchers the same way.
-
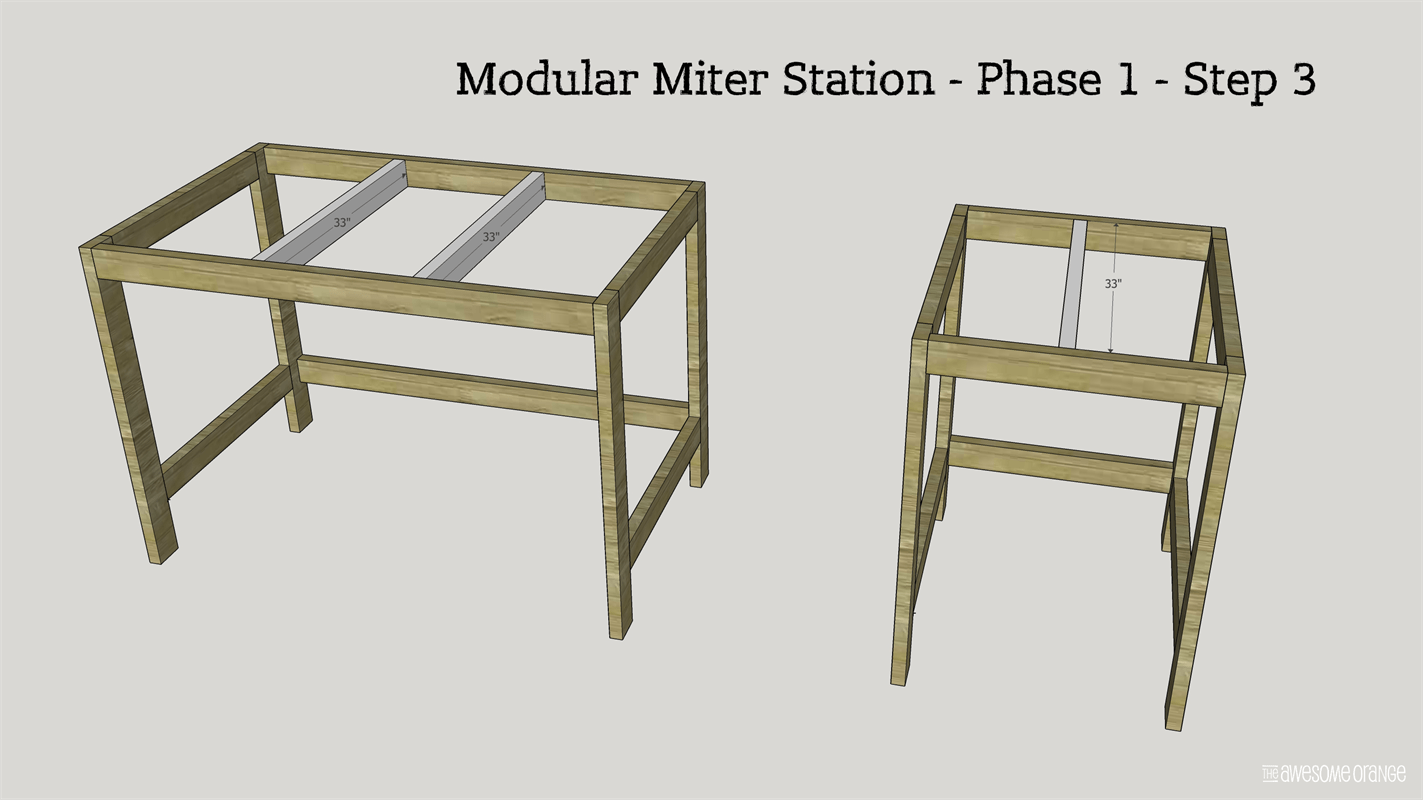
Add Cross Supports
Add cross supports on the top of the left and right sections using 1 1/2" pocket holes and 2 1/2" coarse pocket hole screws. ***I recommend waiting to cut these until you get to this step to ensure a tight fit.
-
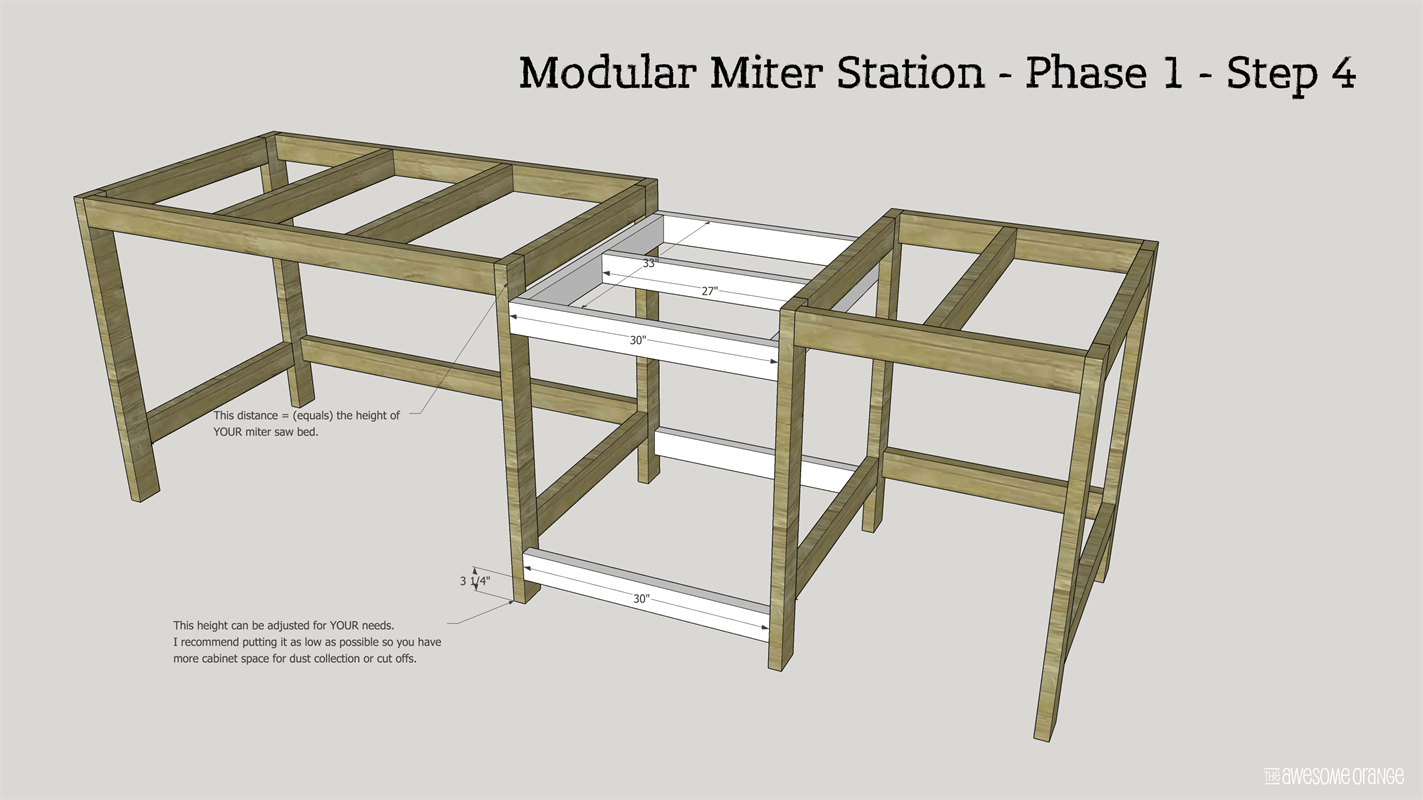
Assemble & Attach Middle Sections
Assemble top saw support section using 1 1/2" pocket holes with 2 1/2" coarse pocket hole screws. Then to install, measure YOUR miter saw to see how tall the bed is and attach it to the left and right side sections using 3" wood screws that exact distance down from the top. I recommend making spacers blocks to do this step to ensure accuracy! Then attach bottom two stretchers between the left and right sections using 1 1/2" pocket holes with 2 1/2" coarse pocket holes screws.
-
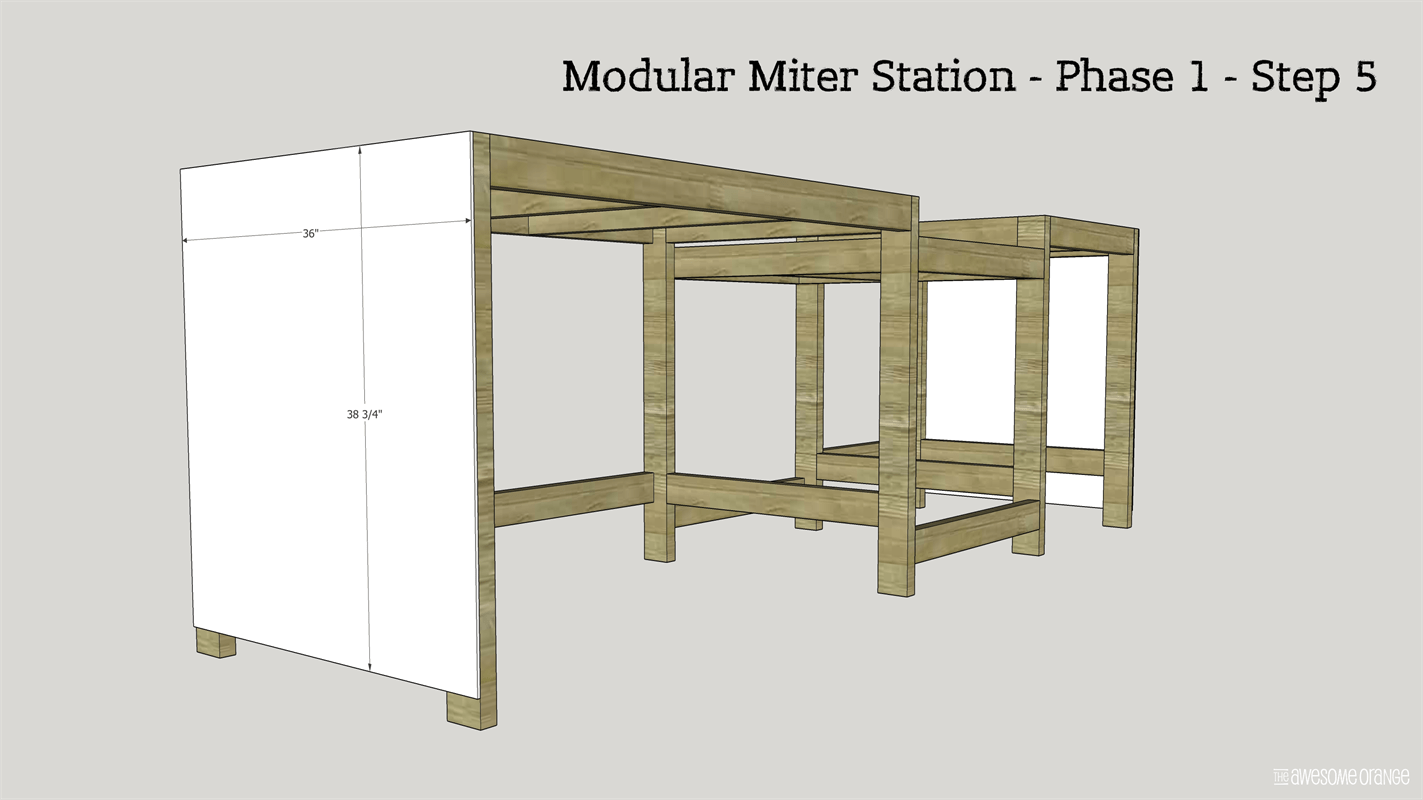
Attach Exterior Side Panels
Using 5/8"-3/4" 18 ga brad nails attach exterior side panels to the outside of the left and right sections.
-
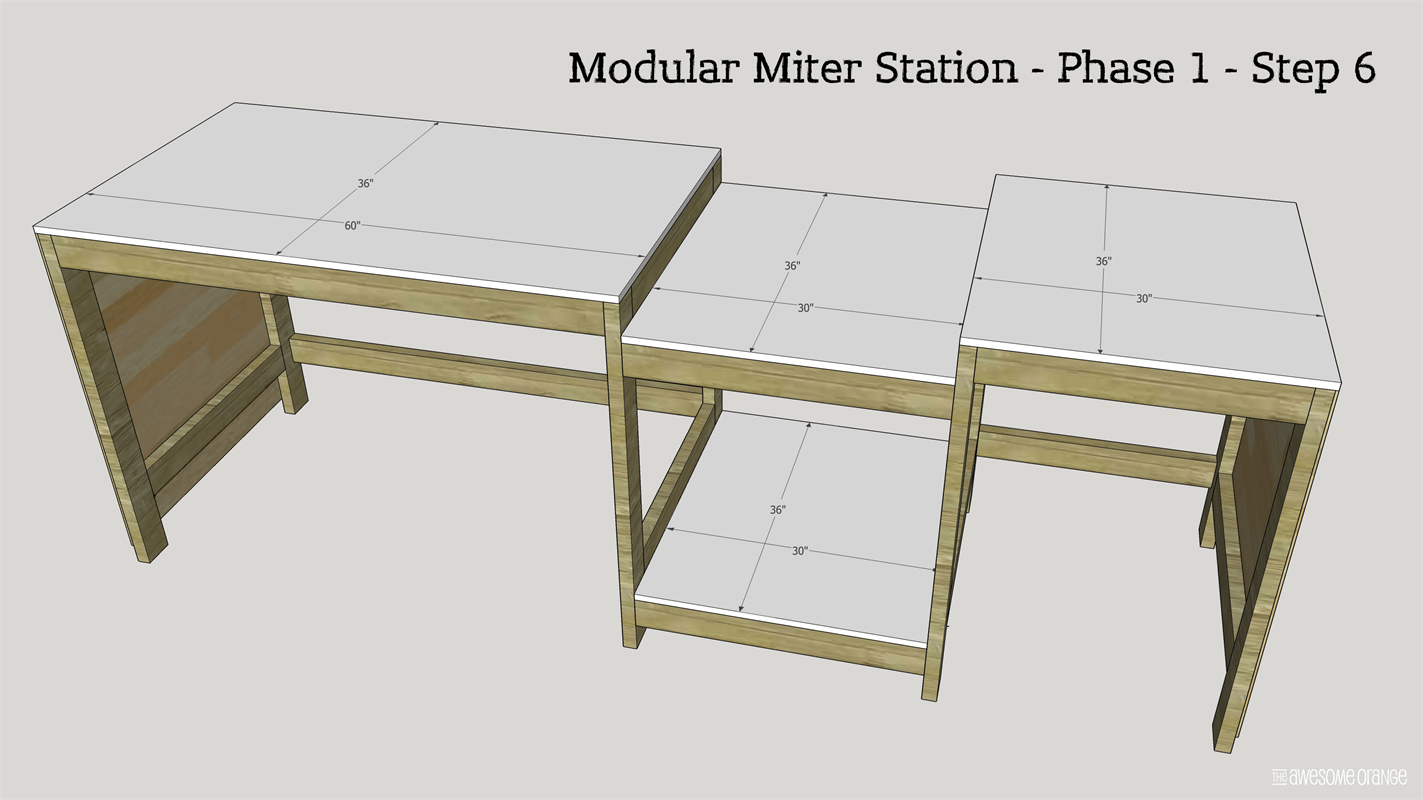
Attach Tops
Attach tops to each section using 1/4" wood screws.
-
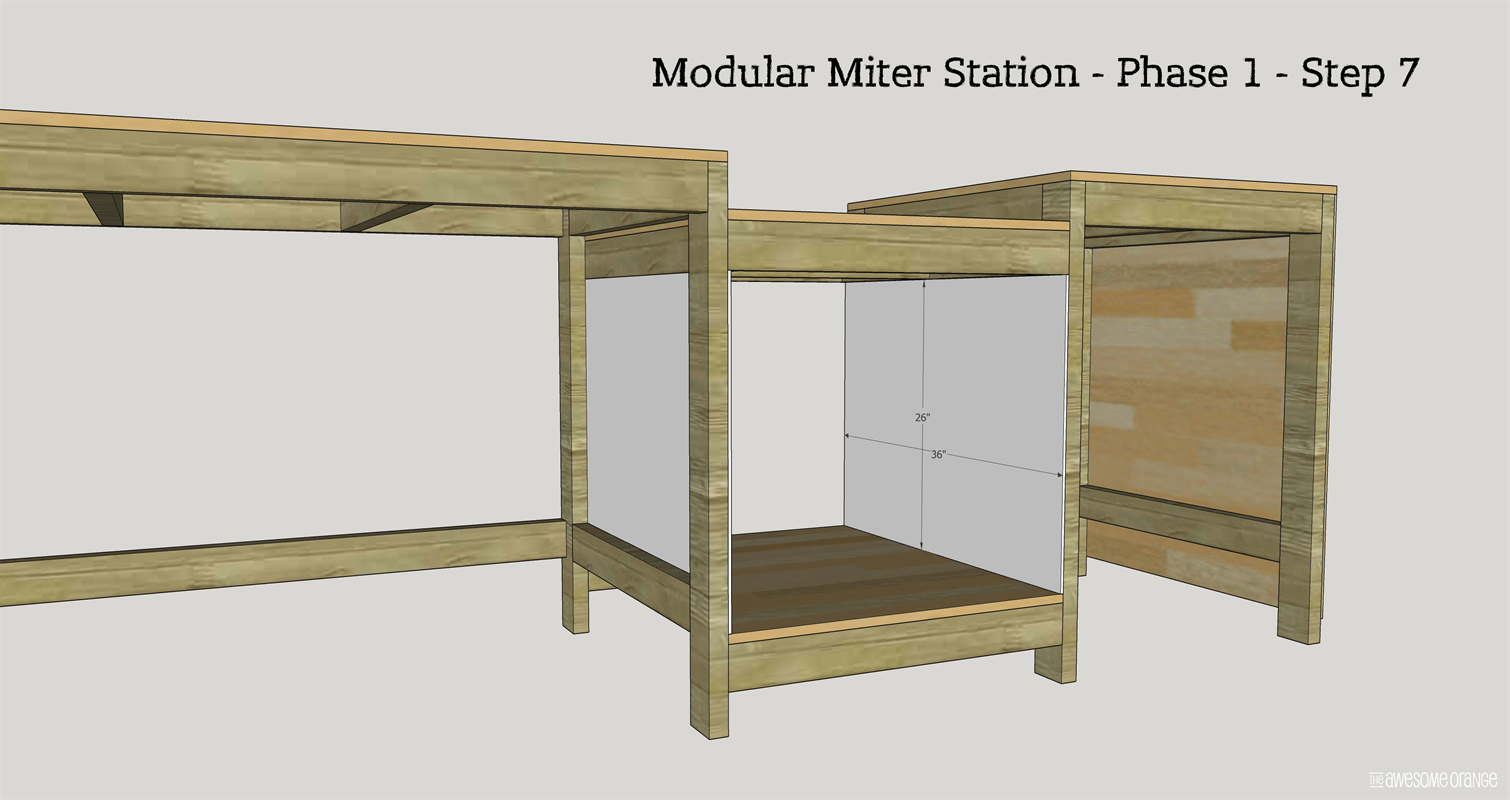
Attach Middle Side Panels
Using 5/8"-3/4" 18 ga brand nails attach middle section side panels.
-
Visit theAwesomeOrange.com
Visit www.theAwesomeOrange.com to see more pics of this build and all four (4) phases of the Modular Miter Station. Happy Building and have an AWESOME day!


