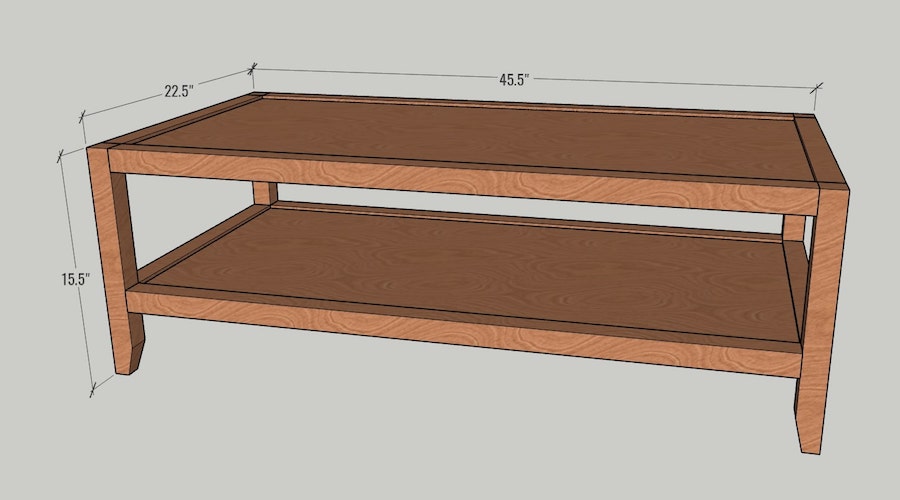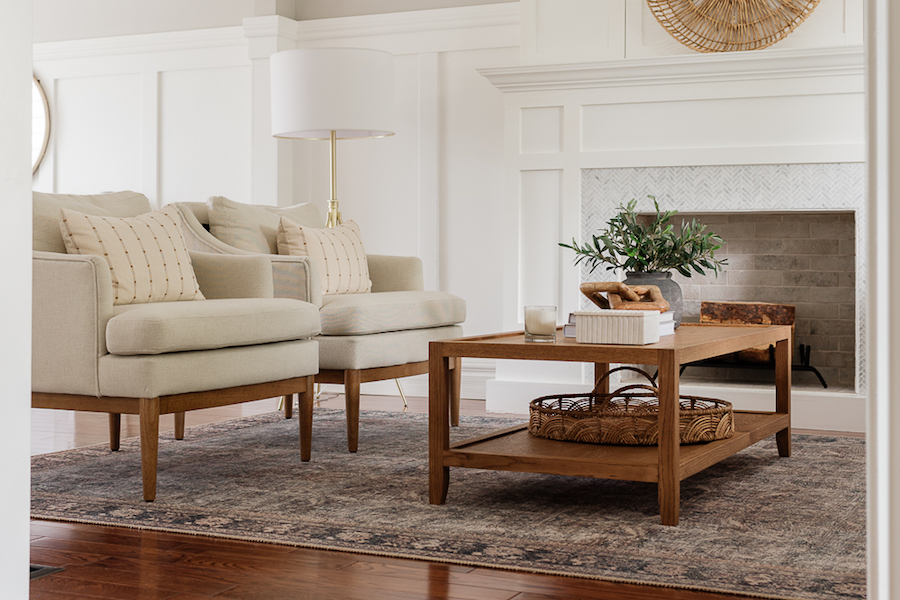
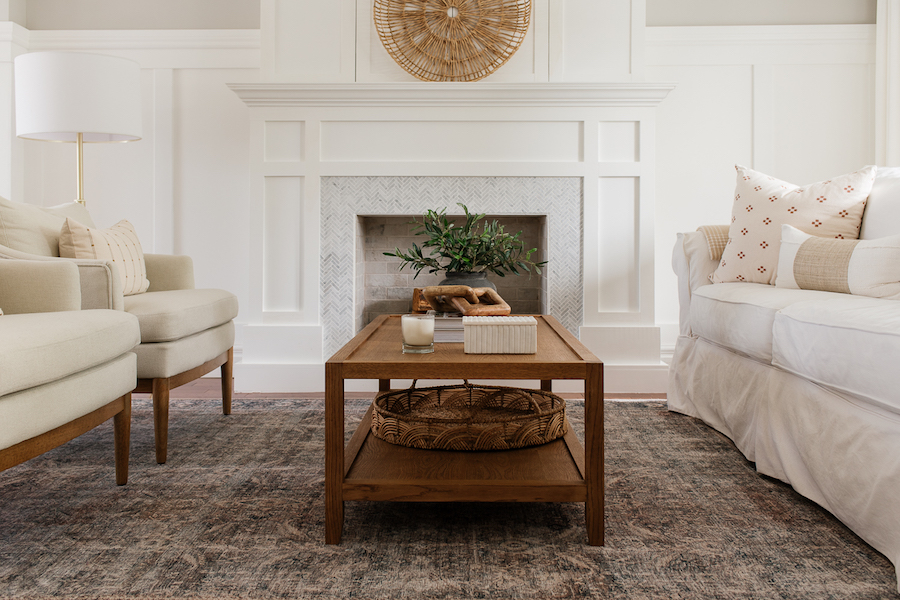
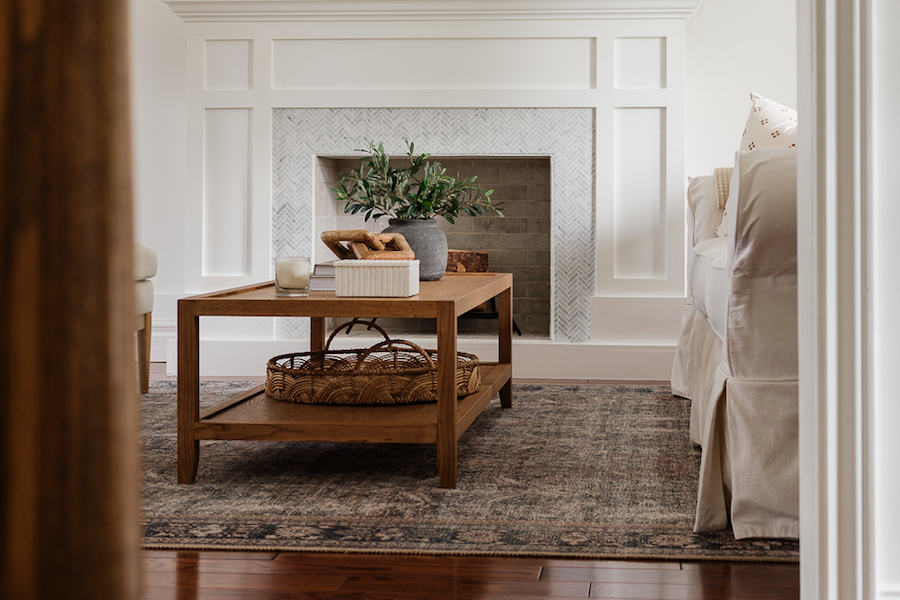
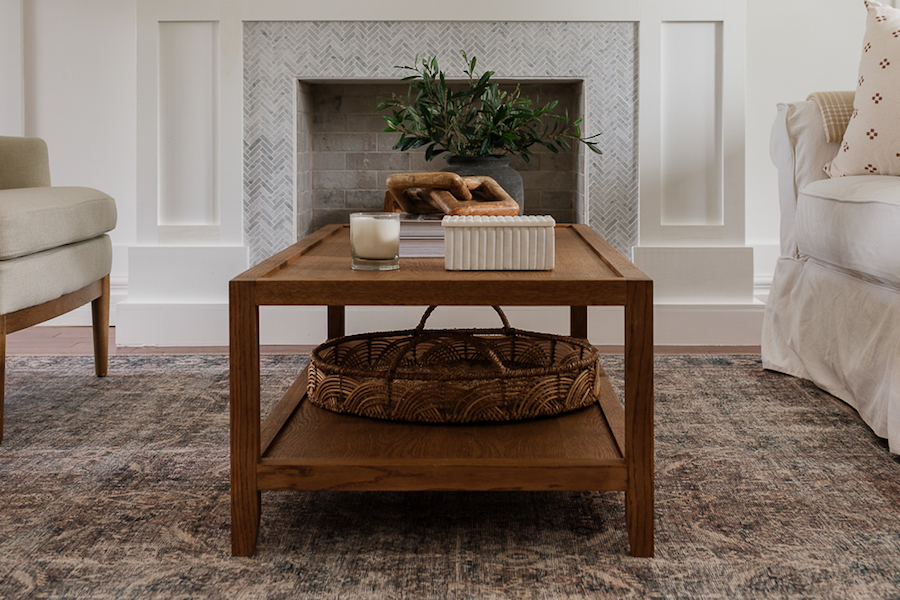
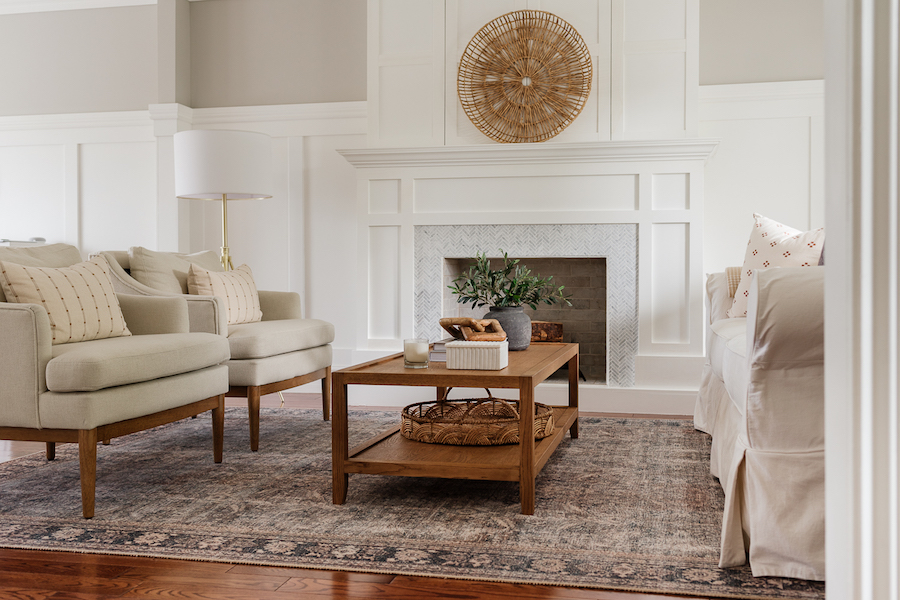


This simple coffee table is designed with subtle tapered bottom legs and recessed top and can be incorporated into any style of home. This is a simple weekend project for DIY’ers of any skill level. Overall size is 45.5 x 22.5x15.5”.
Tools
Kreg Tools


Other Tools
-
Table saw

-
Tape measure
-
Clamps
Materials
Wood Products
- 1 Plywood , ¾” x 4 x 8’
- 4 Boards , 2 x 2” x 8’
- 1 Scrap piece of wood, any size , ¼”
Hardware & Supplies
- 1 Box of 2 ½” Kreg Pocket Hole Hardwood Screws (see tools list)
- 1 Box of 1 ¼” Kreg Pocket Hole Hardwood Screws (see tools list)
- 1 Pencil
- 1 Wood glue
- 1 Various sandpaper grits
- 1 Wood stain of choice
- 1 Flat varnish
- 1 Bag of rags
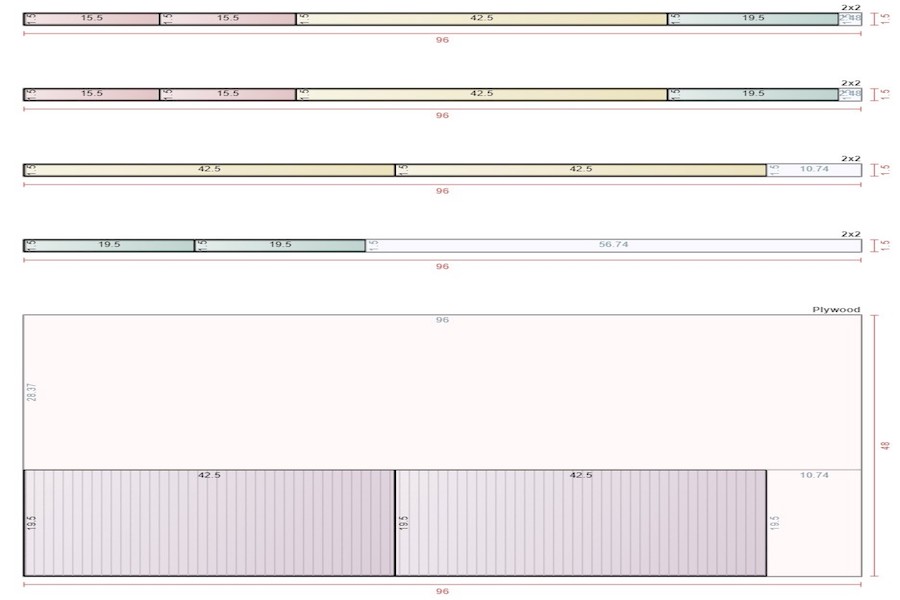
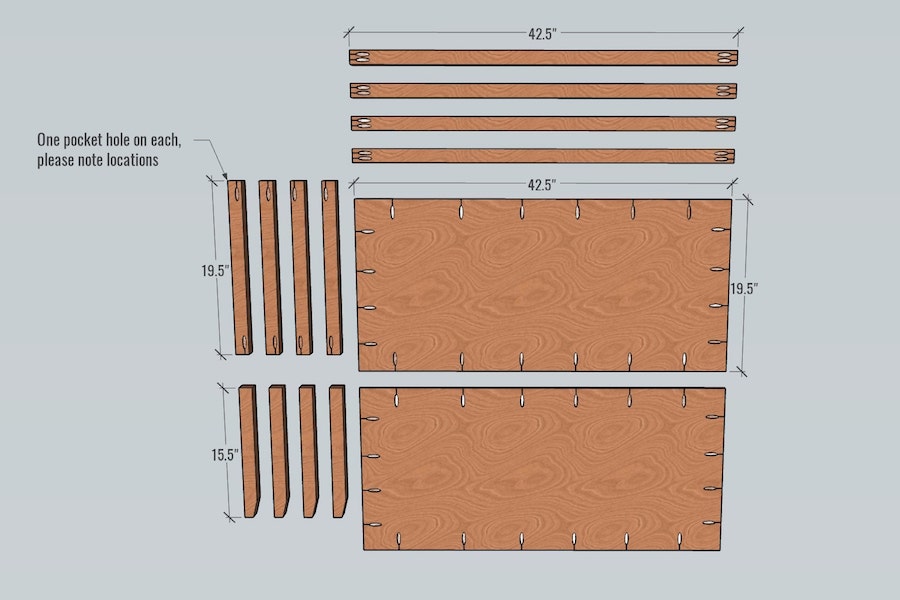
Cut List & Parts
- 4 Legs , 1 ½ x 1 ½” x 15 ½
- 4 Spans , 1 ½ x 1 ½” x 42 ½”
- 4 Side spans , 1 ½ x 1 ½” x 19 ½”
- 2 Top and shelf , 42 ½ x 19 ½” x ¾”
Directions
-
Step 1
Cut all parts to size as per the cut diagram (see steps two and three if you’d like to cut the angles on the legs). Drill pocket holes on the 2x2 boards in the locations shown to accommodate 2-1/4" pocket-hole screws, paying special attention to the 19.5” pieces which only have one pocket hole on each end. For the plywood top and shelf, drill holes to accommodate 3/4" pocket hole screws.
-
Step 2
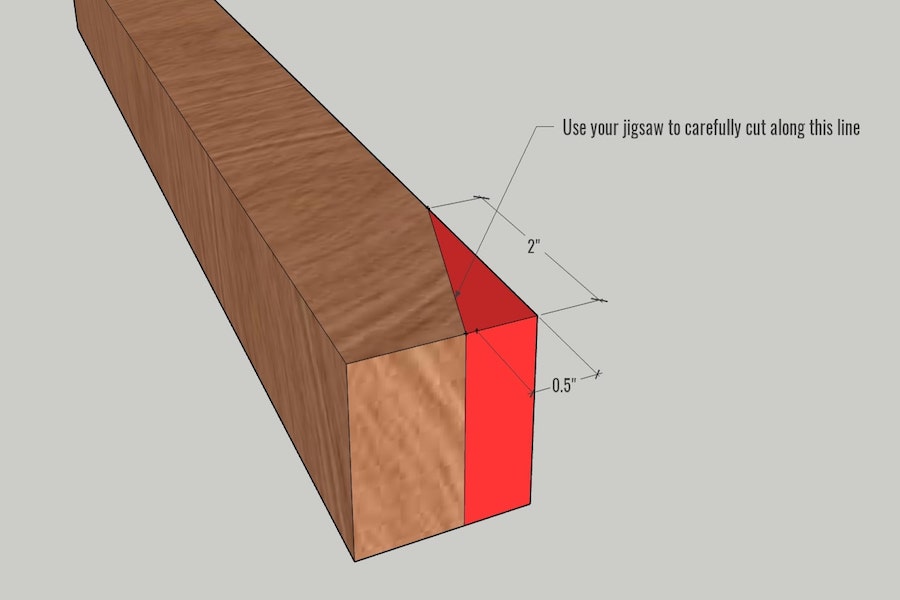
Steps two and three are optional. You can leave the legs straight if desired. To make the first cut, measure and mark at 0.5” along the bottom of the leg. Then measure and mark 2” from the bottom of the leg. Connect those two marks together. Clamp the board down with the part you are cutting hanging over the edge of your workbench. Carefully cut using your jigsaw along the line.
-
Step 3
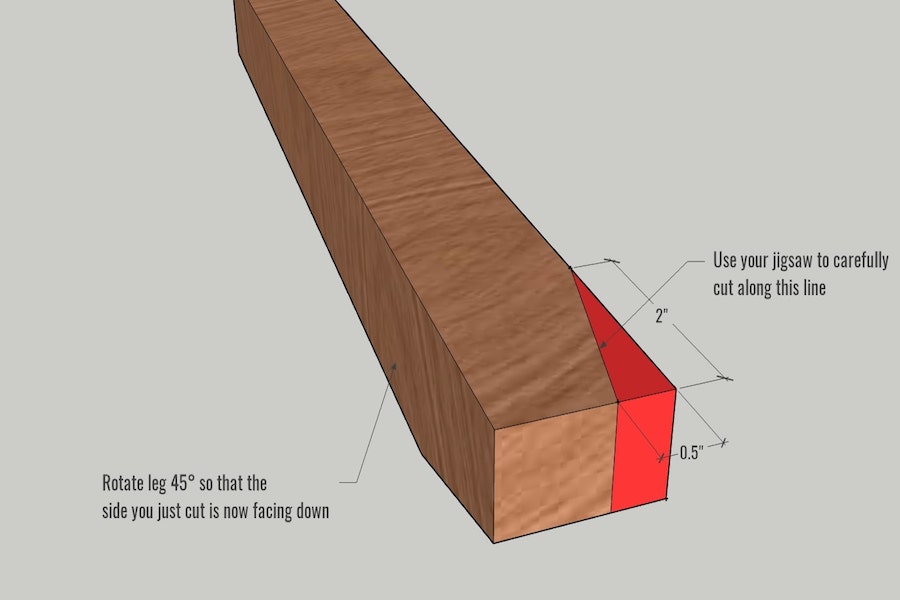
To make the second cut, rotate the leg 45° so that the cut you just made is now facing down on your workbench. Again, measure and mark at 0.5” along the bottom of the leg. Then measure and mark 2” from the bottom of the leg. Connect those two marks together. Again, clamp down the board with the part you are cutting hanging over the edge of your workbench. Carefully cut using your jigsaw along the line.
-
Step 4
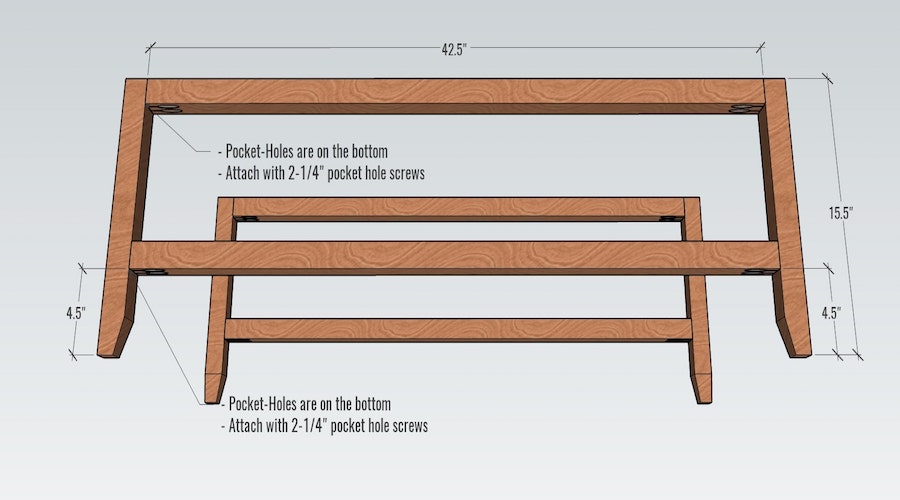
Attach legs to the 42.5” spans as shown in the diagram with wood glue and 2-1/2" pocket-hole screws. Note that the pocket-holes should be facing downward. The bottom span should be attached 4.5” from the bottom of the leg, but you can customize this if you want a lower or higher shelf.
-
Step 5
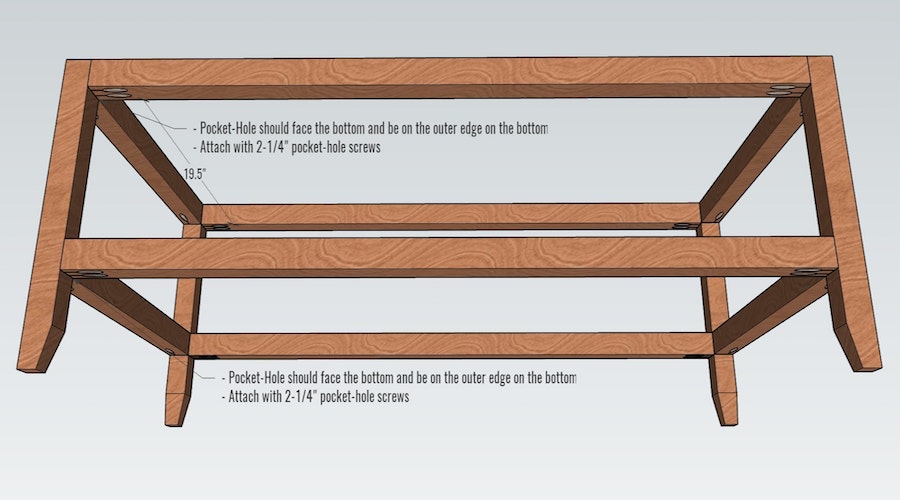
Attach the side spans as shown using wood glue and 2-1/2" pocket hole screws, taking note of the location of the single pocket hole. They should be on the outer edge. This avoids the screws colliding with the screws from the front span in the leg.
-
Step 6
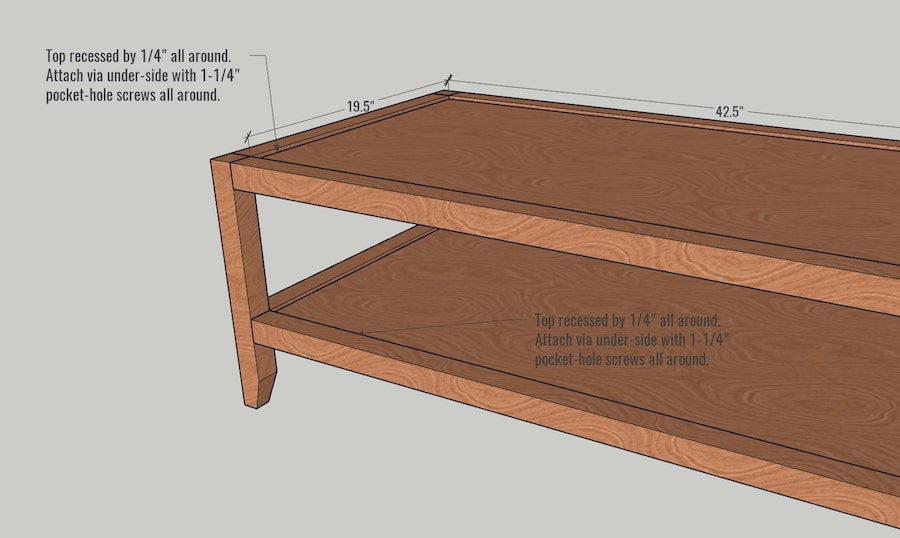
Attach the top and shelf 1/4" from the top of the spans to give the table a recessed look. You can use a scrap piece of 1/4" stock if you have it around, or simply measure and mark at various locations to help guide you. Attach with 1-1/4" pocket-hole screws around the perimeter.
-
Step 7
Sand, stain and finish with a matte or satin clear coat. For reference, the stain colour used here is Early American by Minwax on white oak.