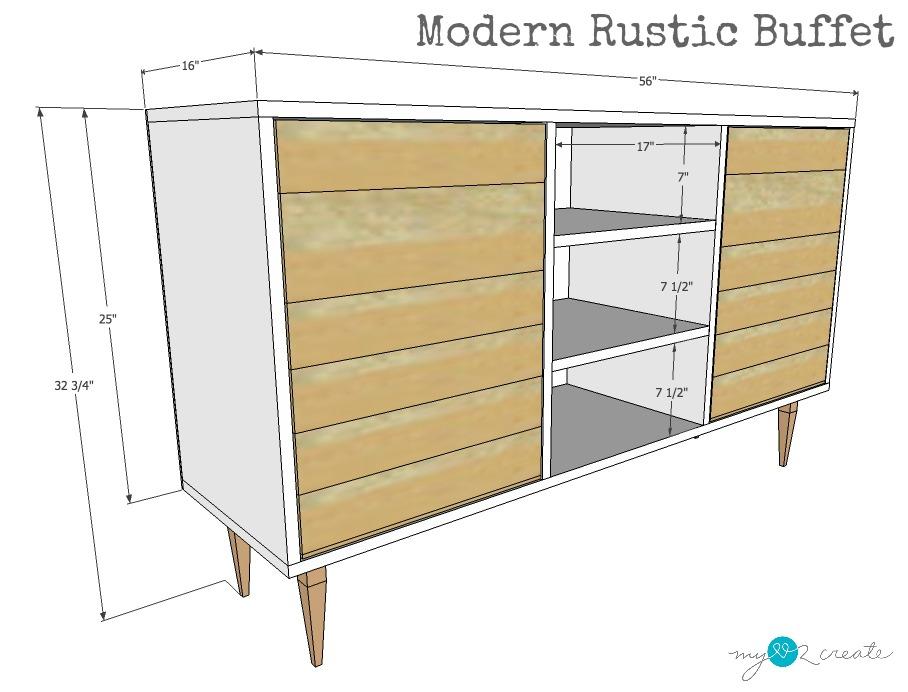
Modern Rustic Buffet
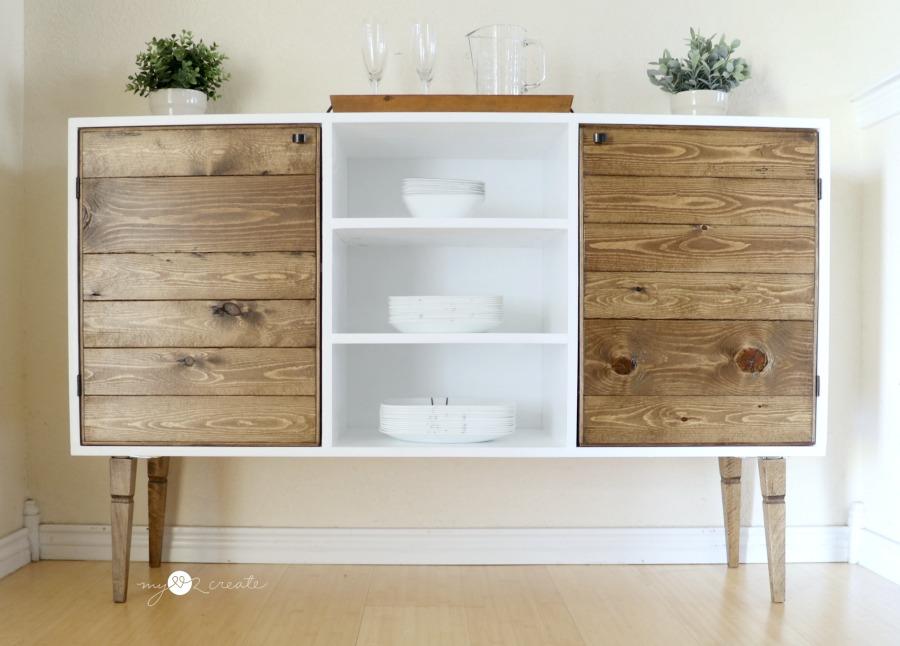
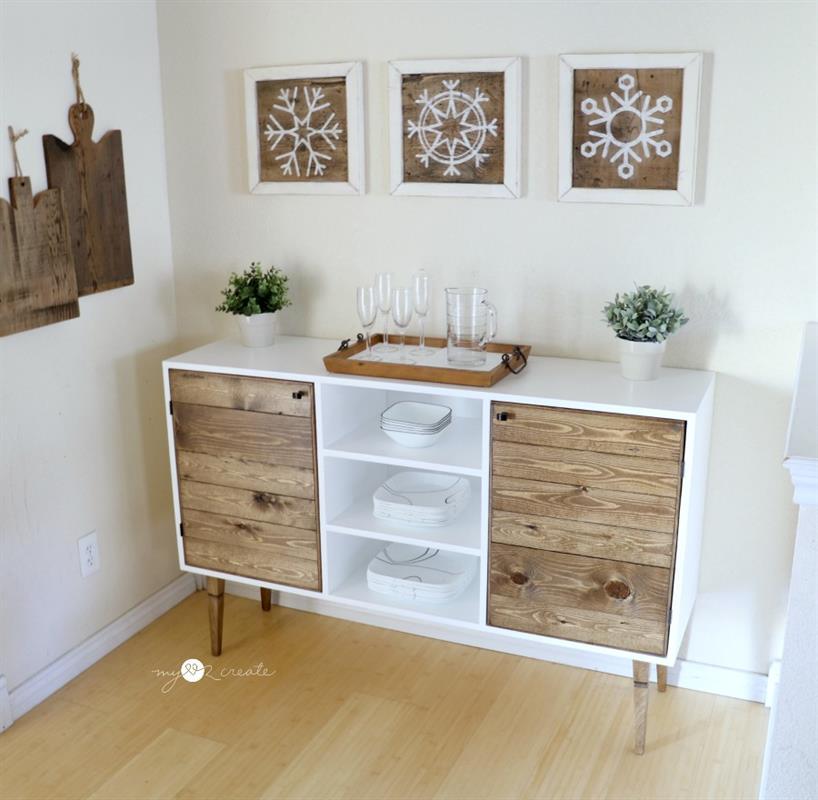
By My Love 2 CreateThis buffet combines a classic combo of modern and rustic, with clean lines, and beautifully stained cabinet doors. Ideal for helping serve up your best holiday celebrations, and don’t forget, it is perfect for your extra kitchen storage too! You can’t go wrong with this simple yet elegant build!
Directions
-
Build Frame
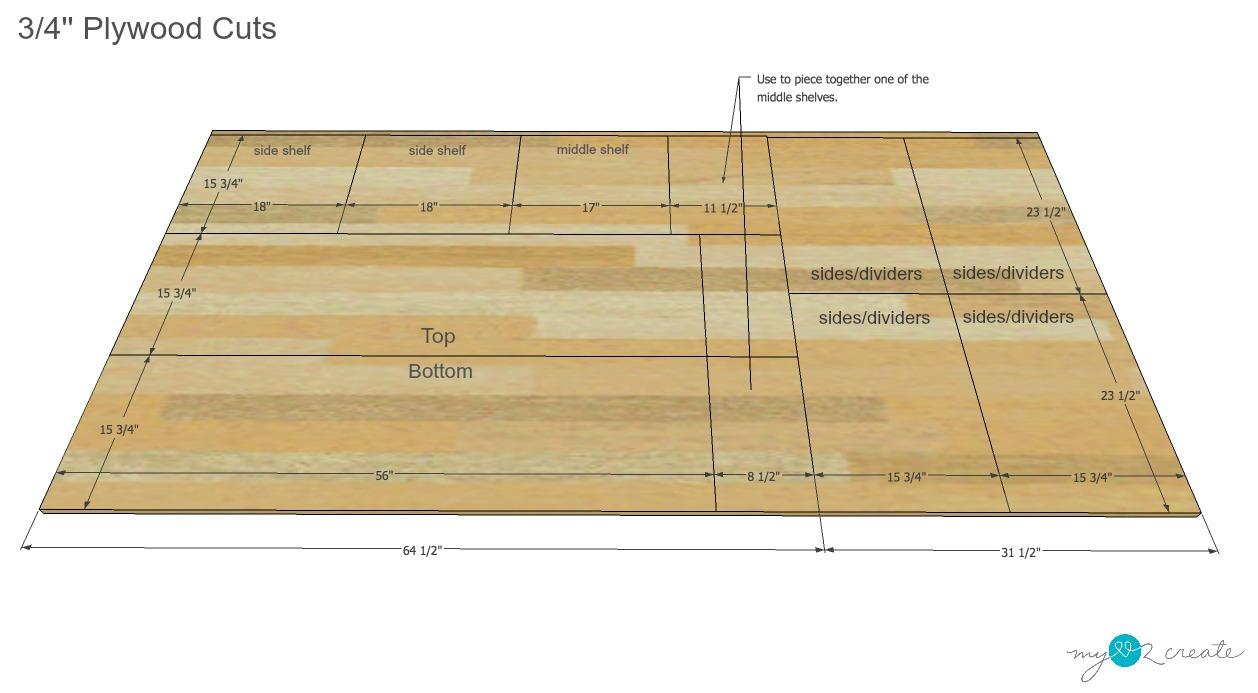
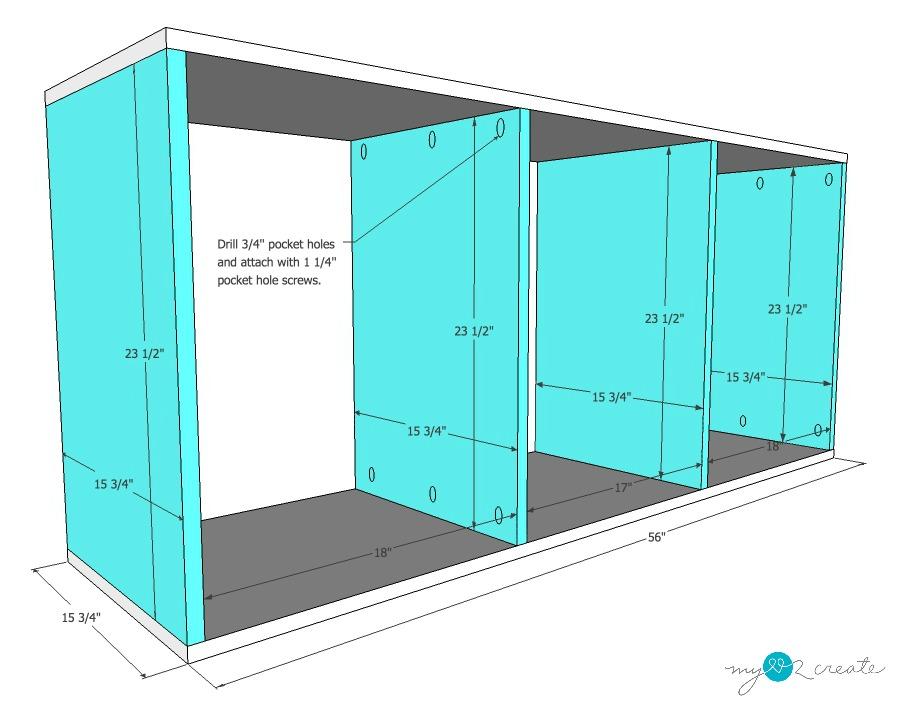
Attach the sides flush to each end of the bottom piece. Then attach the middle sections as directed. Next, attach the top piece. Use 3/4'' pocket holes and 1 1/4'' pocket hole screws for all joinery.
-
Add Shelves
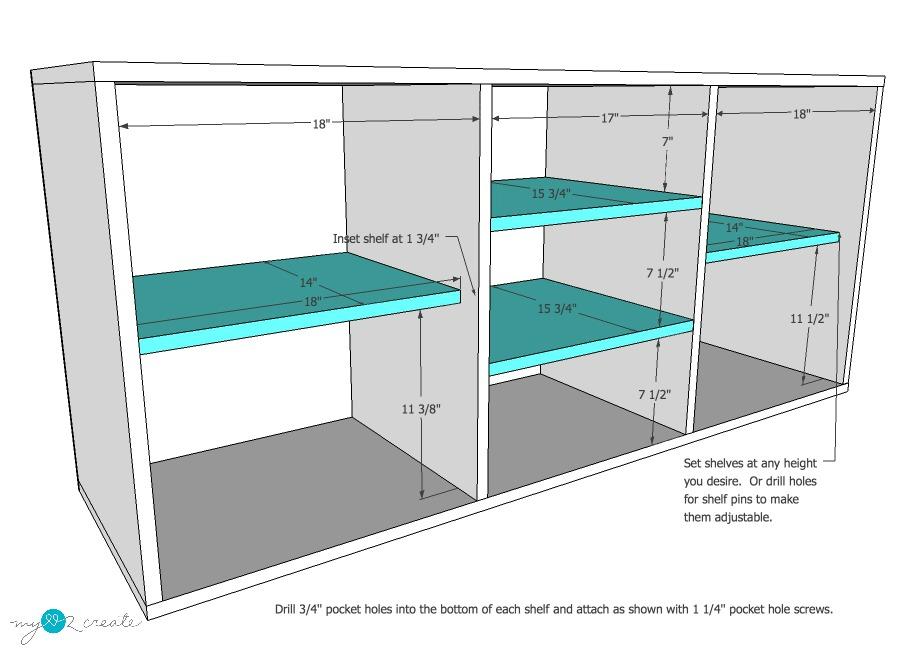
Measure and mark for middle shelf placement then attach with 3/4'' pocket holes and 1 1/4'' pocket hole screws from the underside. You can fix the side shelves to any height you desire by attaching with pocket holes, or you can use a Kreg shelf pin jig to drill holes for adjustable shelves inside the side cabinets.
-
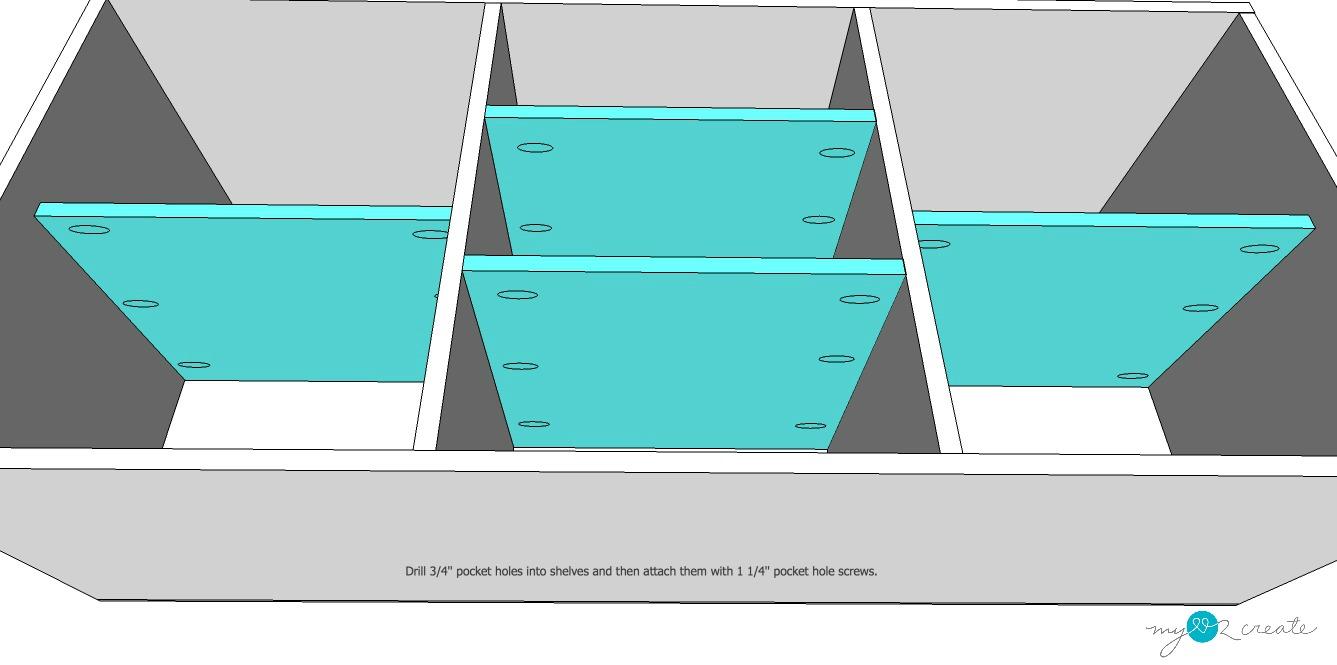
Pocket holes
Suggested placement for pocket holes on fixed shelves.
-
Attach backing
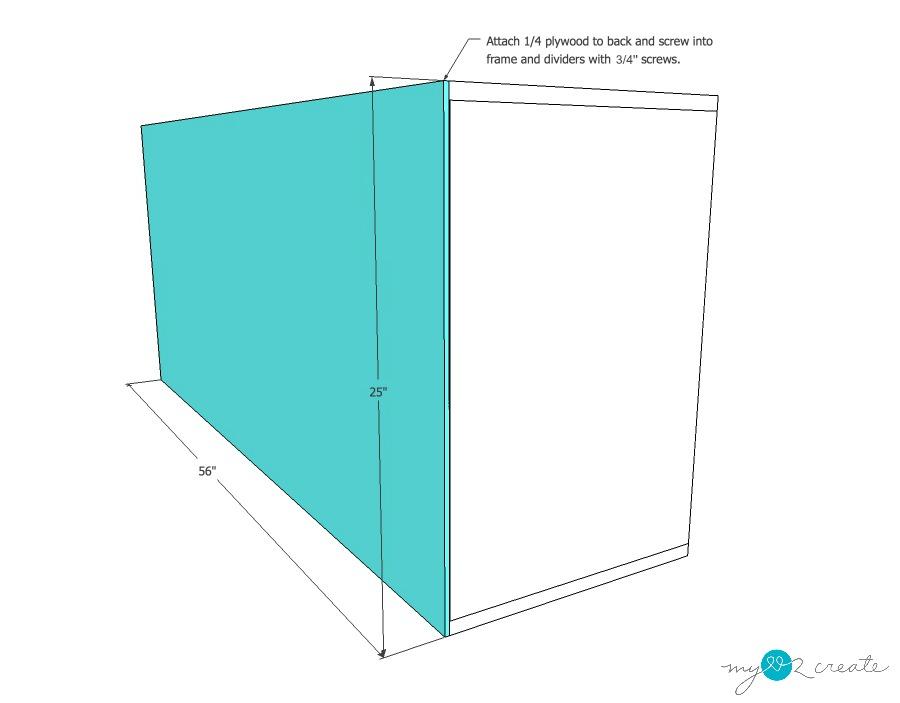
Attach the 1/4'' plywood back to the frame with 3/4'' screws, making sure to attach into each side, divider, shelf, and both top and bottom pieces. Always pre-drill holes first.
-
Build doors
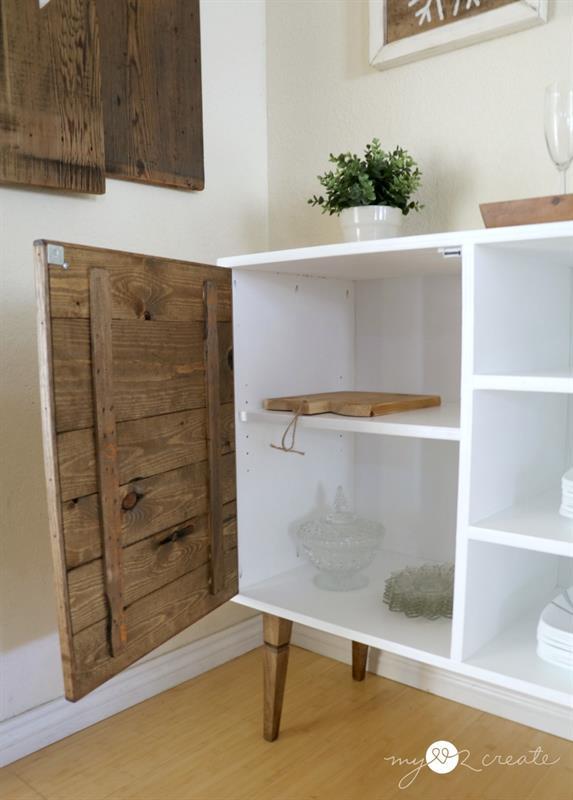
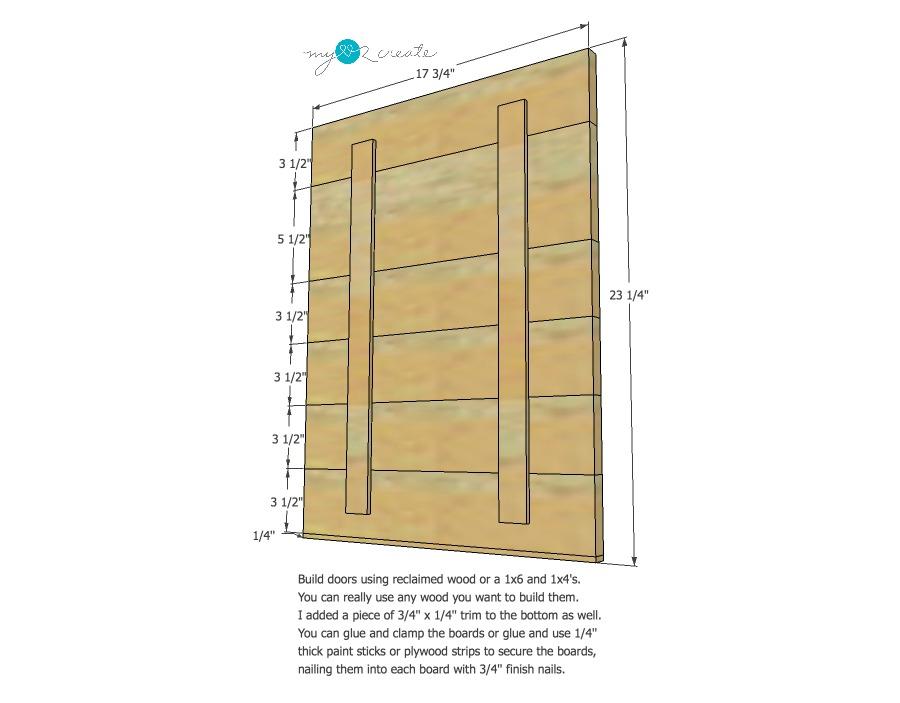
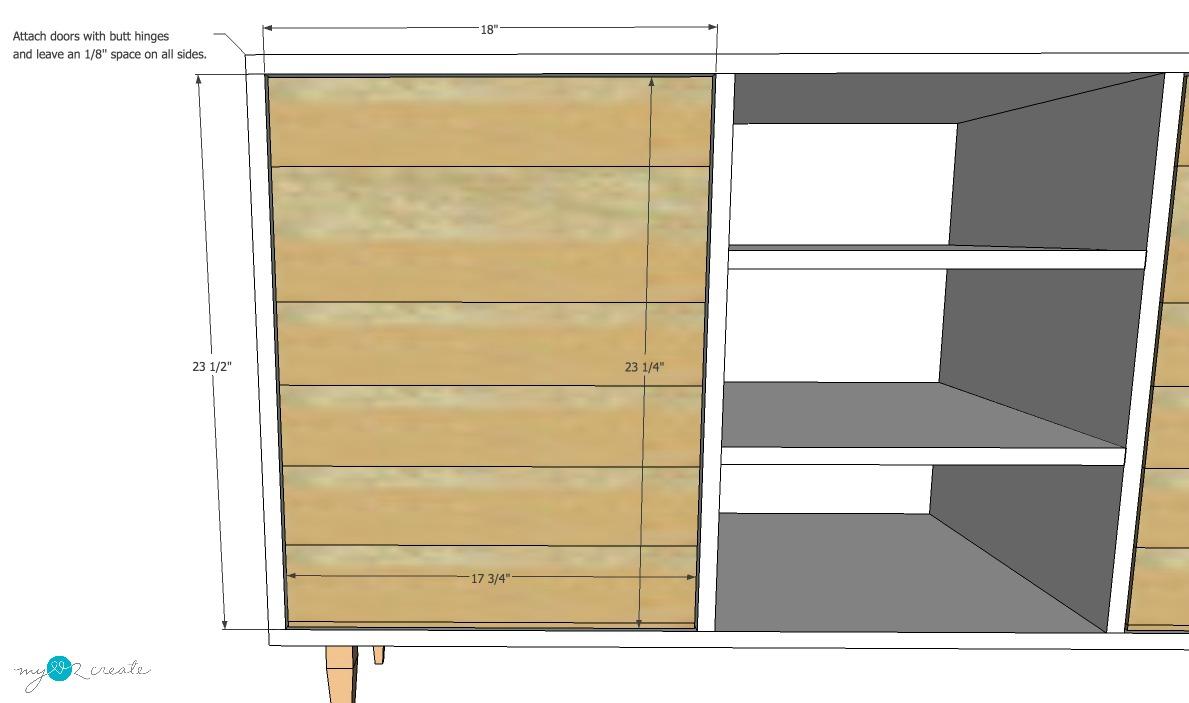
Using the 1x6, 1x4's, and trim piece, build two doors. Cut prices to length and glue together. You can clamp or secure them with a paint stick or scrap 1/4'' material with 3/4'' finish nails and glue. *Please note not all boards dimensions are accurate. After I built my doors I realized my 1x4 pieces were just short of the actual 3 1/2''. I ended up adding another piece of trim to the top and cut the sides down to fit trim on them to finish them out. You can build these doors anyway you like as long as the fit the opening. Doors should measure 1/8'' less then the opening on all sides, it is best to build the frame and then measure your opening before you build the doors.
-
Paint/Stain
Paint, stain, and finish as you desire.
-
Attach feet and doors
Attach the feet to the bottom of the buffet with leg mounting hardware. Attach the doors with butt hinges, apply the magnetic catch, and knob as well.
-
Visit www.MyLove2Create.com
For more photos of the build visit www.MyLove2Create.com


