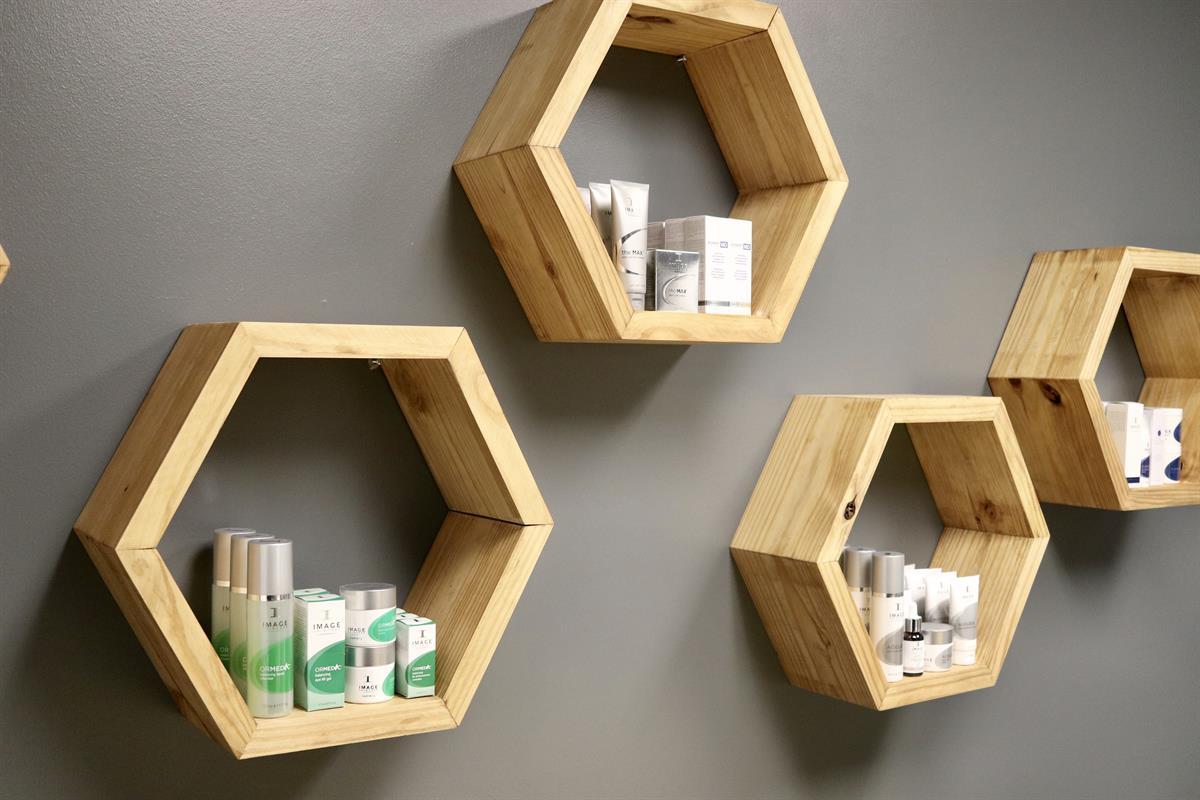
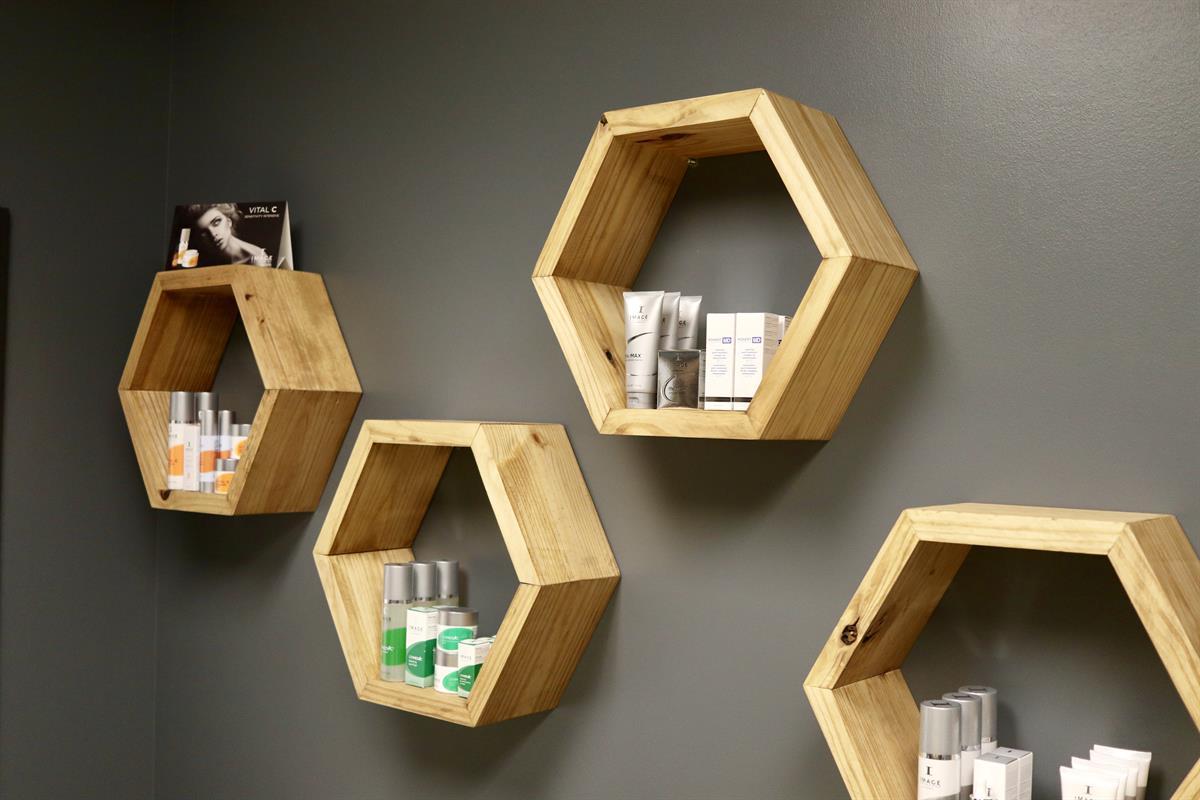
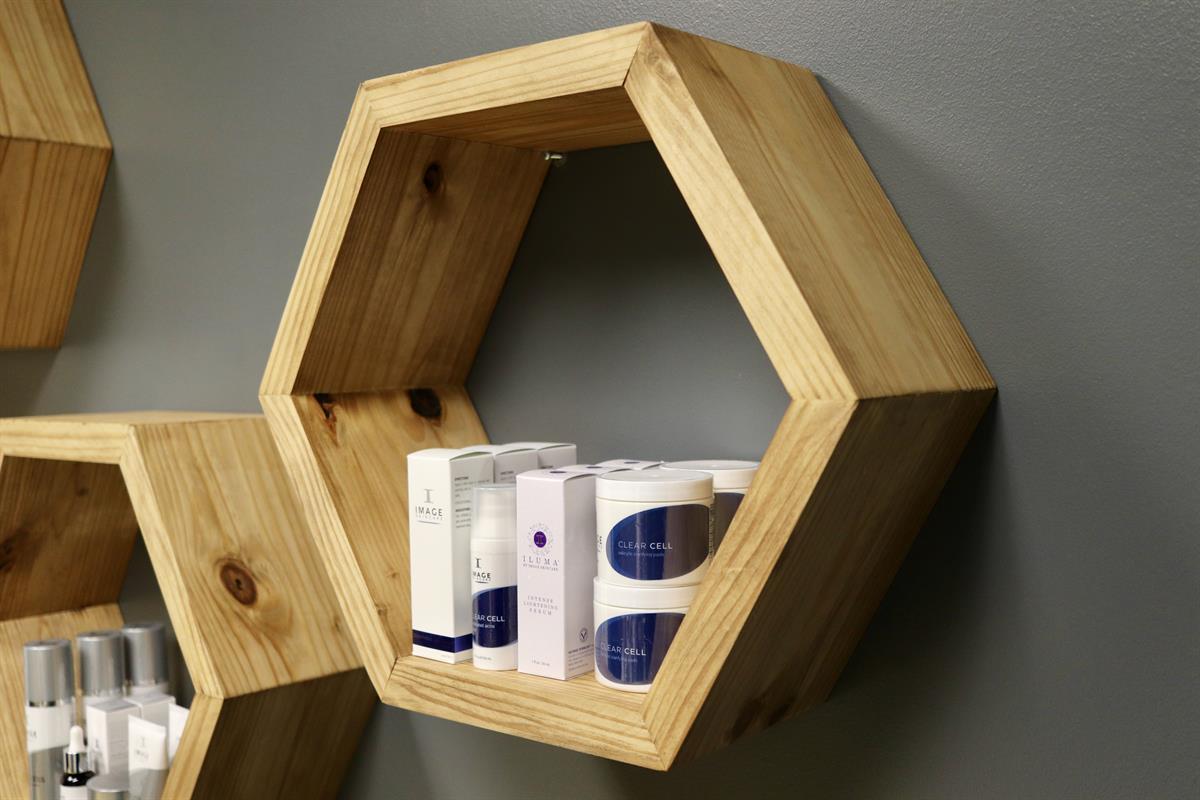


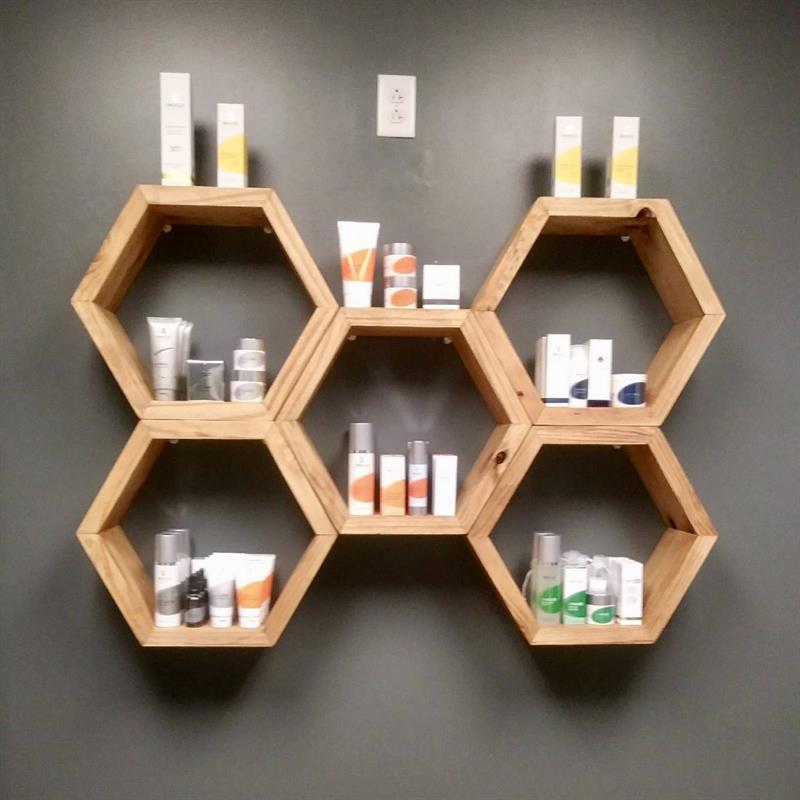
These hexagonal shelves give a great, modern look to any space buy giving your walls some depth and adding more storage to display your favorite items. Easy to make and cheap to build with limited tools make for a fun weekend project!
Tools
Kreg Tools


Other Tools
-
Table Saw

-
Tape Measure
-
Tape Measure
Materials
Wood Products
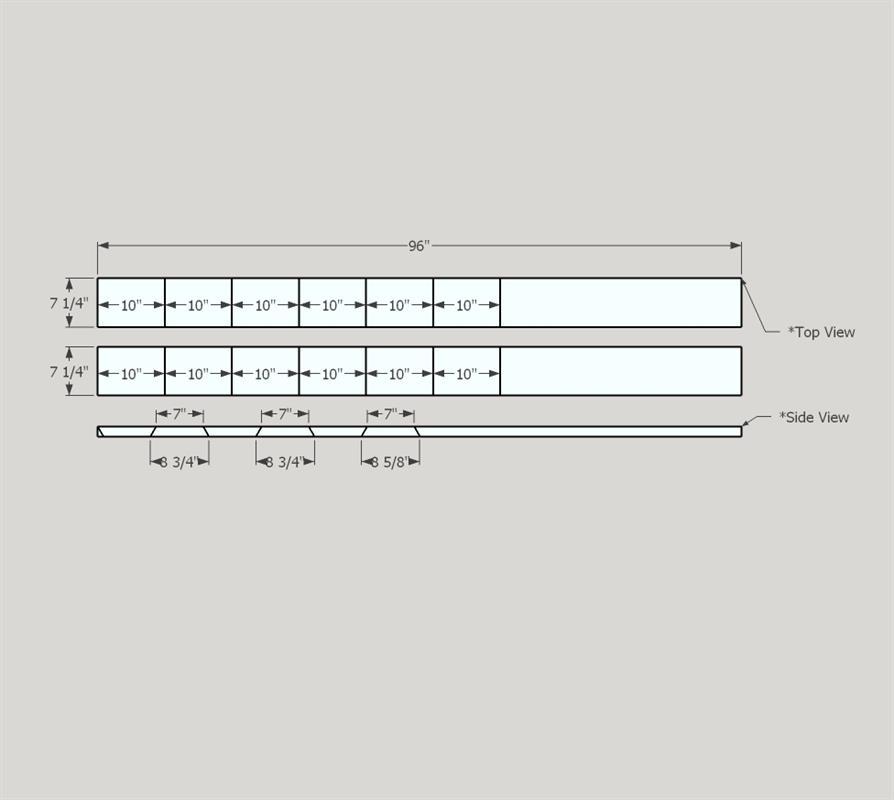
- 2 Board , 2x8 , 96"
Hardware & Supplies
- 1 Golden Oak Stain
- 1 Water-Based Polyurethane
- 1 Wood Glue
- 1 Painter's Tape
Cut List & Parts
- 12 Sides , 1.5"x7.25x10"
Directions
-
Cut Boards to Rough Length
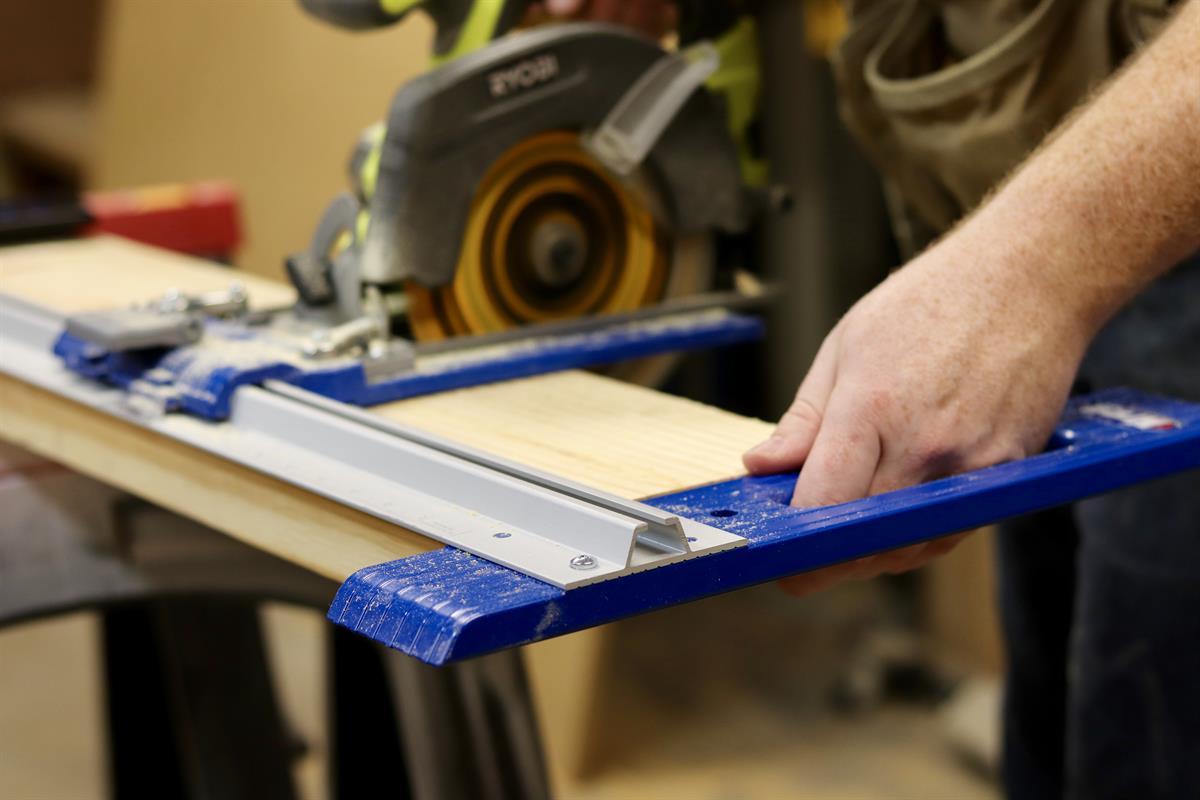
To start, you will need to cut your boards to rough length depending on what size shelves you would like. I used the Kreg Rip Cut to get accurate, repeatable cuts, quick and easy. You can also use a miter saw, table saw, or jigsaw if you prefer.
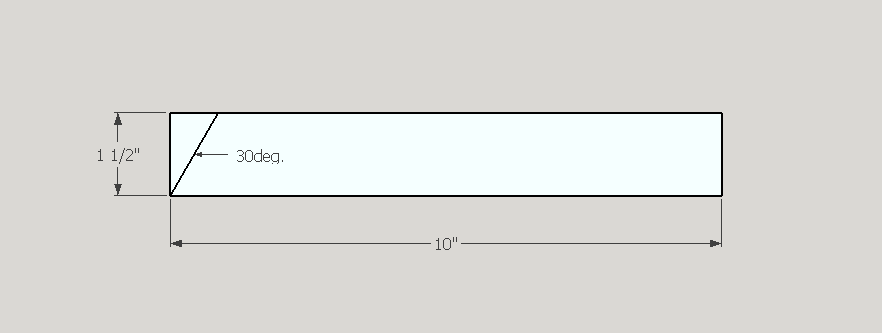
To compensate for the angle required to make the hexagon, add 3" to the size shelf you desire. For example, on my shelves, I wanted 7" for the interior, so I cut the boards into 10" sections.
-
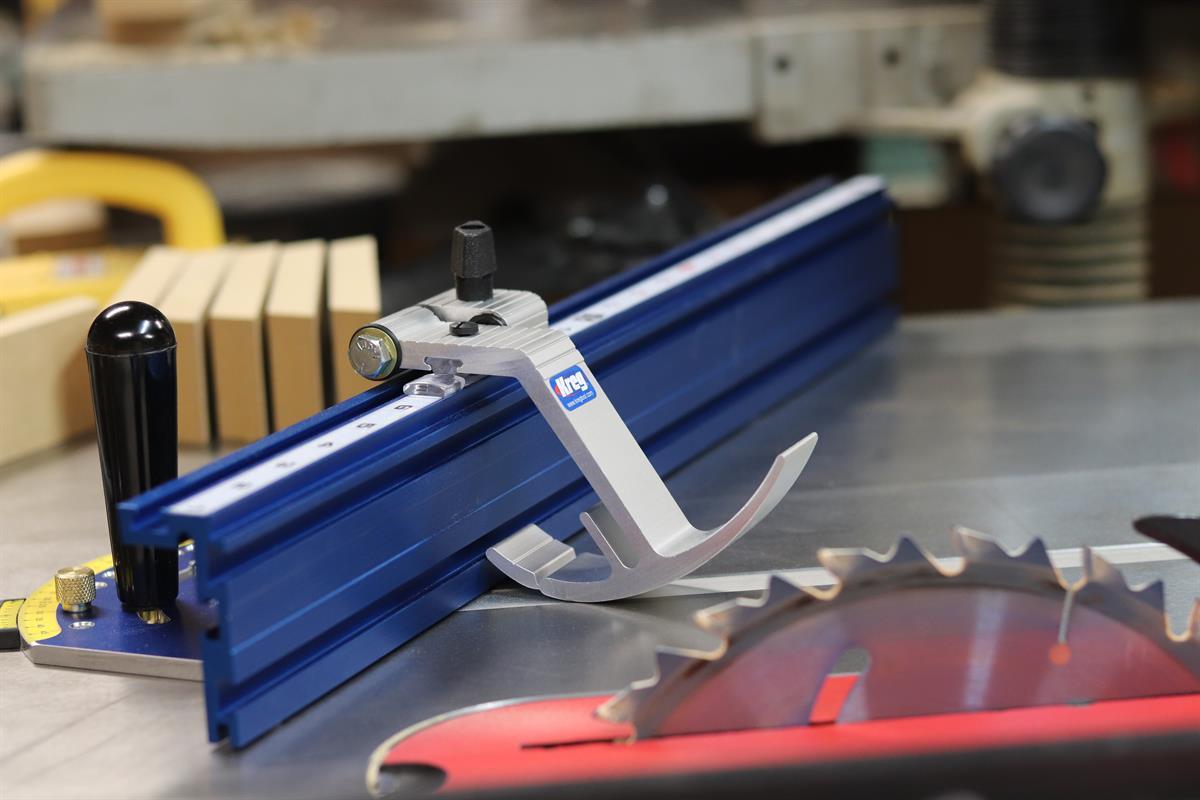
Set Your Saw Up
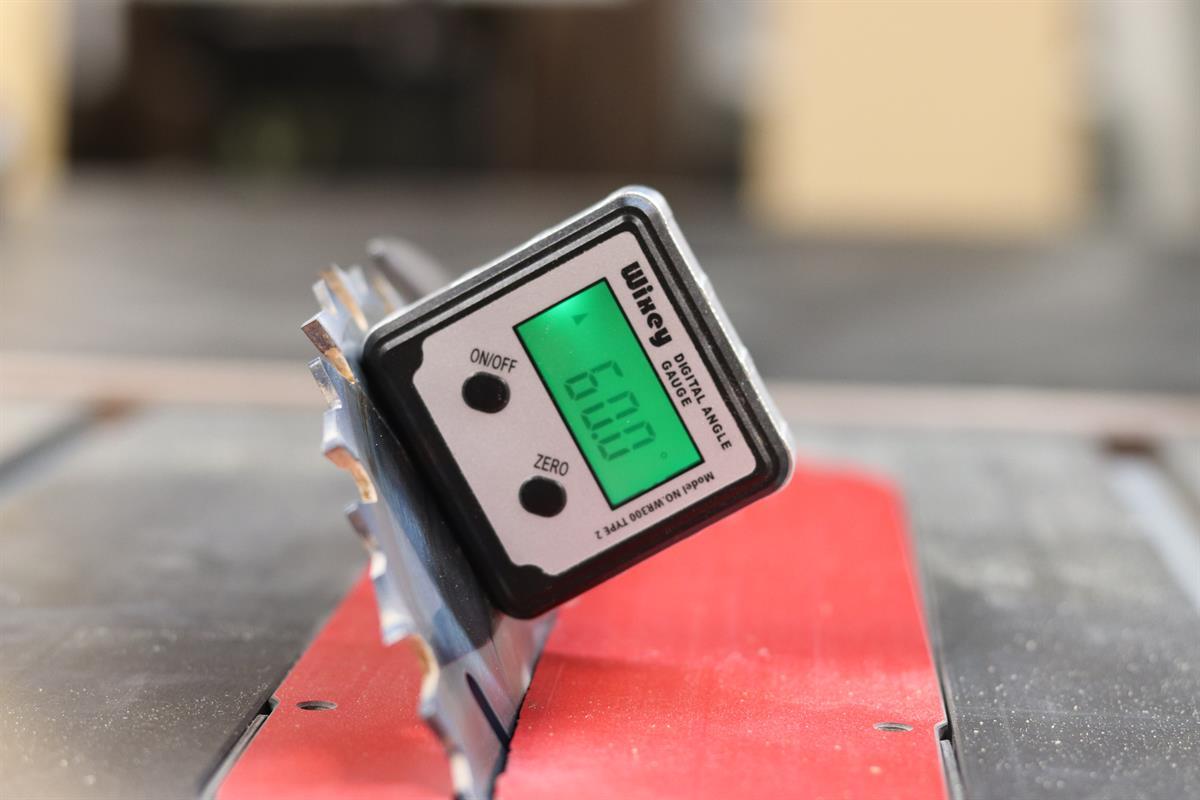
After cutting the boards to rough length, you will need to set your saw up to cut the angle required to form a hexagon when the pieces are joined together.
Since there are six sides to a hexagon, the angle between each board needs to be 30 degrees. Most table saws do not go past 45 degrees but 60 degrees will give you the complimentary 30 degree angle needed. A miter saw set to 30 degrees will also work as long as the material isn't taller than your tool's maximum capacity. Refer to the manual for your specific saw.
-
Cut Your First Angle
Now our saw is set up, cut your 30 degree angle on one side of all your pieces as close to one end as you can safely.
-
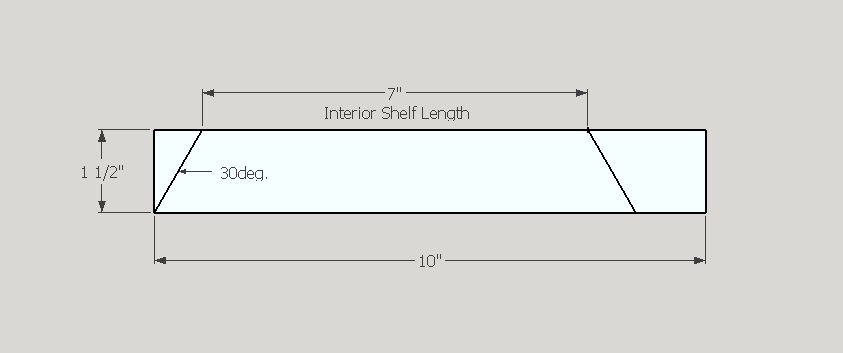
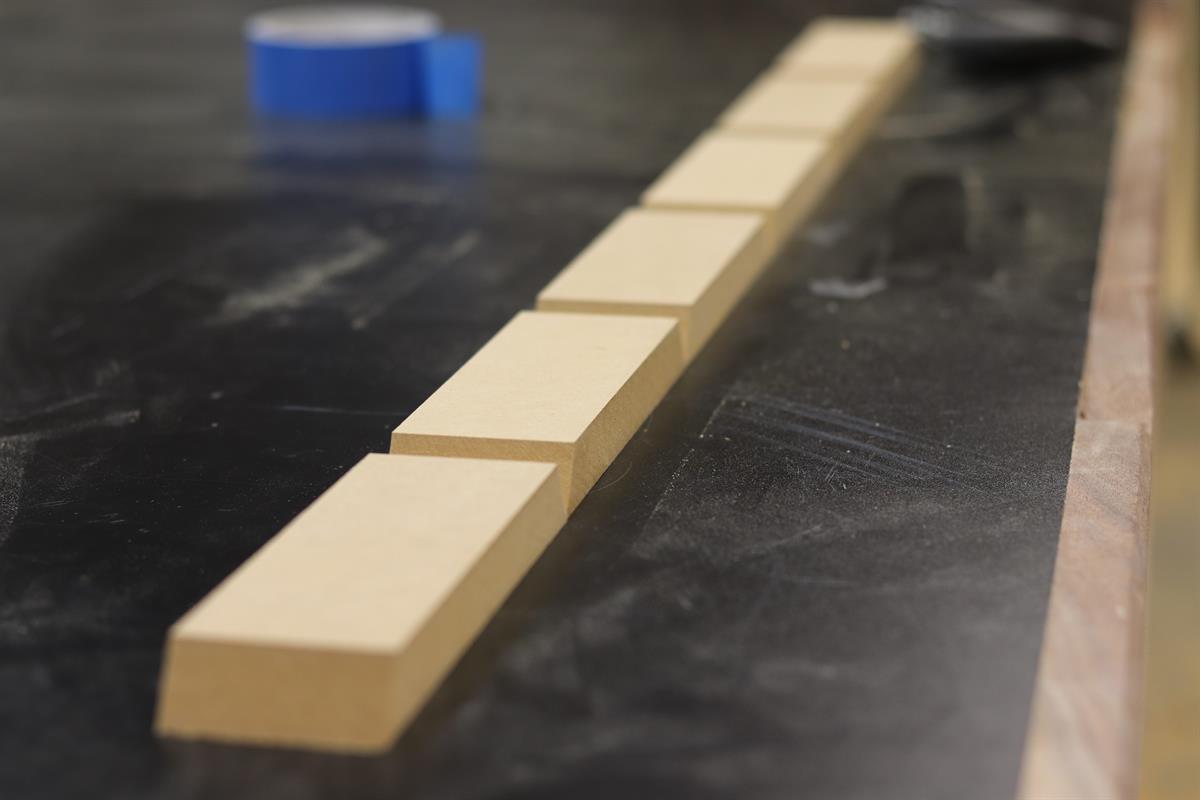
Measure Your Shelf Length
Once one side is cut, measure the length from the short end of the cut and mark the size desired for the interior length of your shelves.
You will need to rotate your board to cut in the opposite direction of the first cut when making the next cut.
-
Cut to Final Length
Now that you've measured the inside of the shelves, you can make the cut to it's final length before assembling the boards. Having the stop on the Precision Miter Gauge makes it easy to cut repeated lengths for consistent boards. This also ensures your hexagon will come out perfect, which makes for an easy glue up!
-
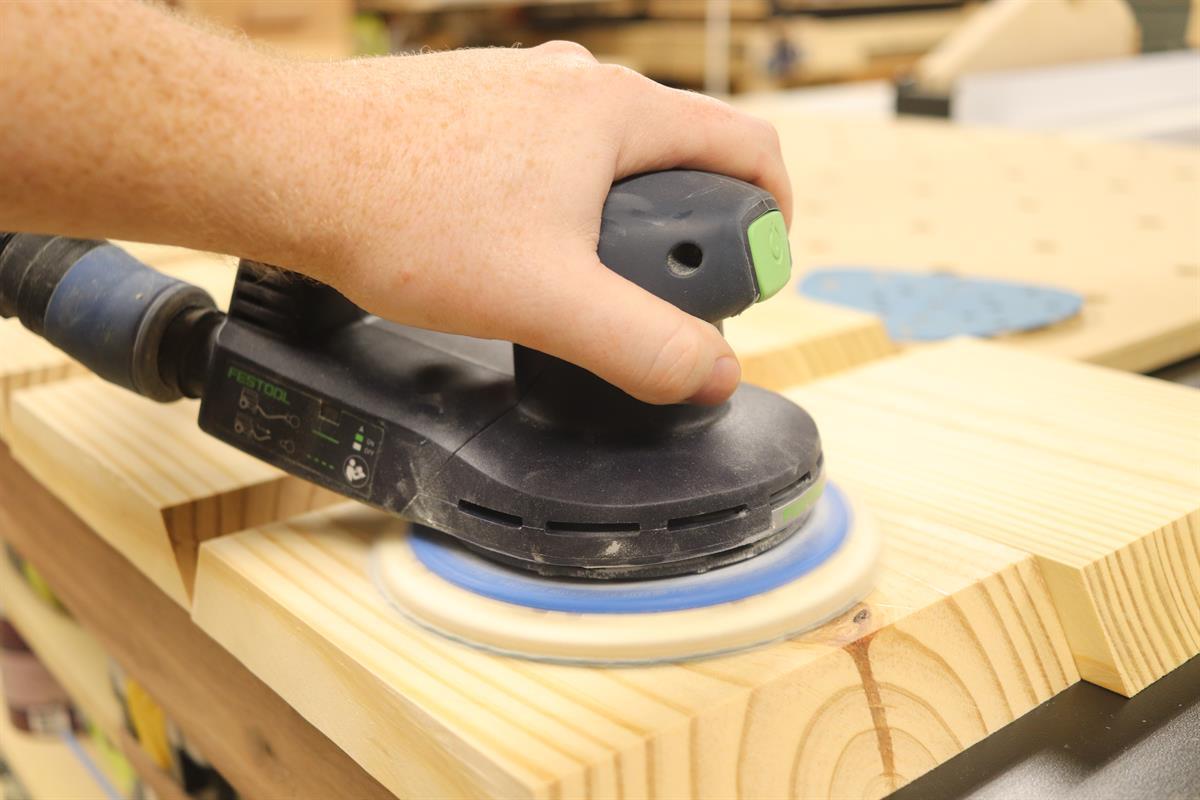
Sand, Sand, Sand
Before assembly, you will want to sand your pieces. Work from low to high grits to achieve a smooth surface.
-
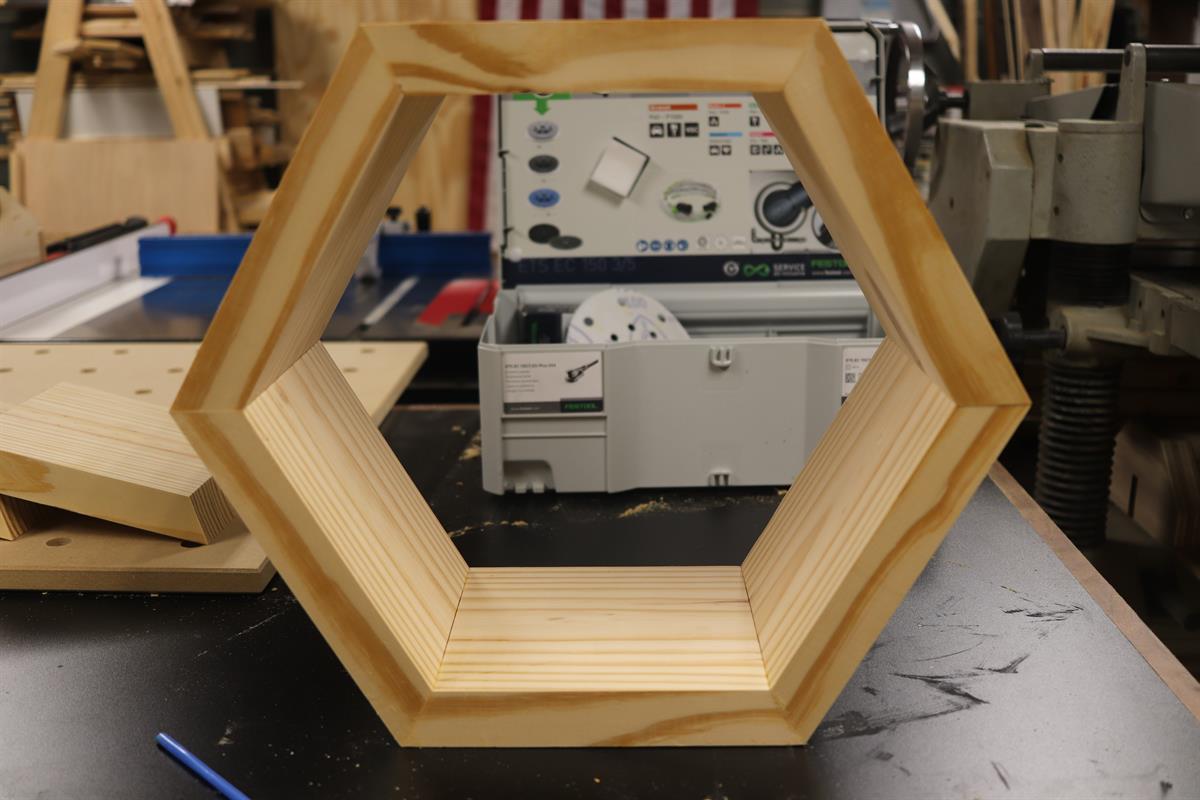
Assembly Time!
Now is the fun part...putting the boards together to make something! Since these shelves are not a shape that is easy to clamp, we're going to use some painter's tape to hold the shape together. Place the boards with the showing face down on your workbench as shown in the picture. Place some painter's tape in between each piece on the side faced down, as well as the end of the boards. Since this is an end grain to end grain joint, a good tip is to spread a small amount of glue on the joint and let dry before applying enough glue to hold it together. This will create a stronger connection between the boards.
-
Finishing
After the glue dries, clean up any glue squeeze out and we can get ready for finishing. Use a tack cloth, rag, or compressed air to get any remaining sawdust off the wood. Once your surface is clear of debris, stain the wood with the color of your choice. I went with an Golden Oak for mine. Follow the manufacturer's instructions for application. After the stain has dried, you can add a layer of protection by applying a coat of polyurethane.
-
Hanging Your Shelves
There are many ways to hang your shelves...brackets, anchors, even pocket-holes. Find which way works for you, attach them in your space and enjoy!
-
Follow Me!
Check out more of my builds!
YouTube, IG, FB @ tristartables
www.tristartables.com