

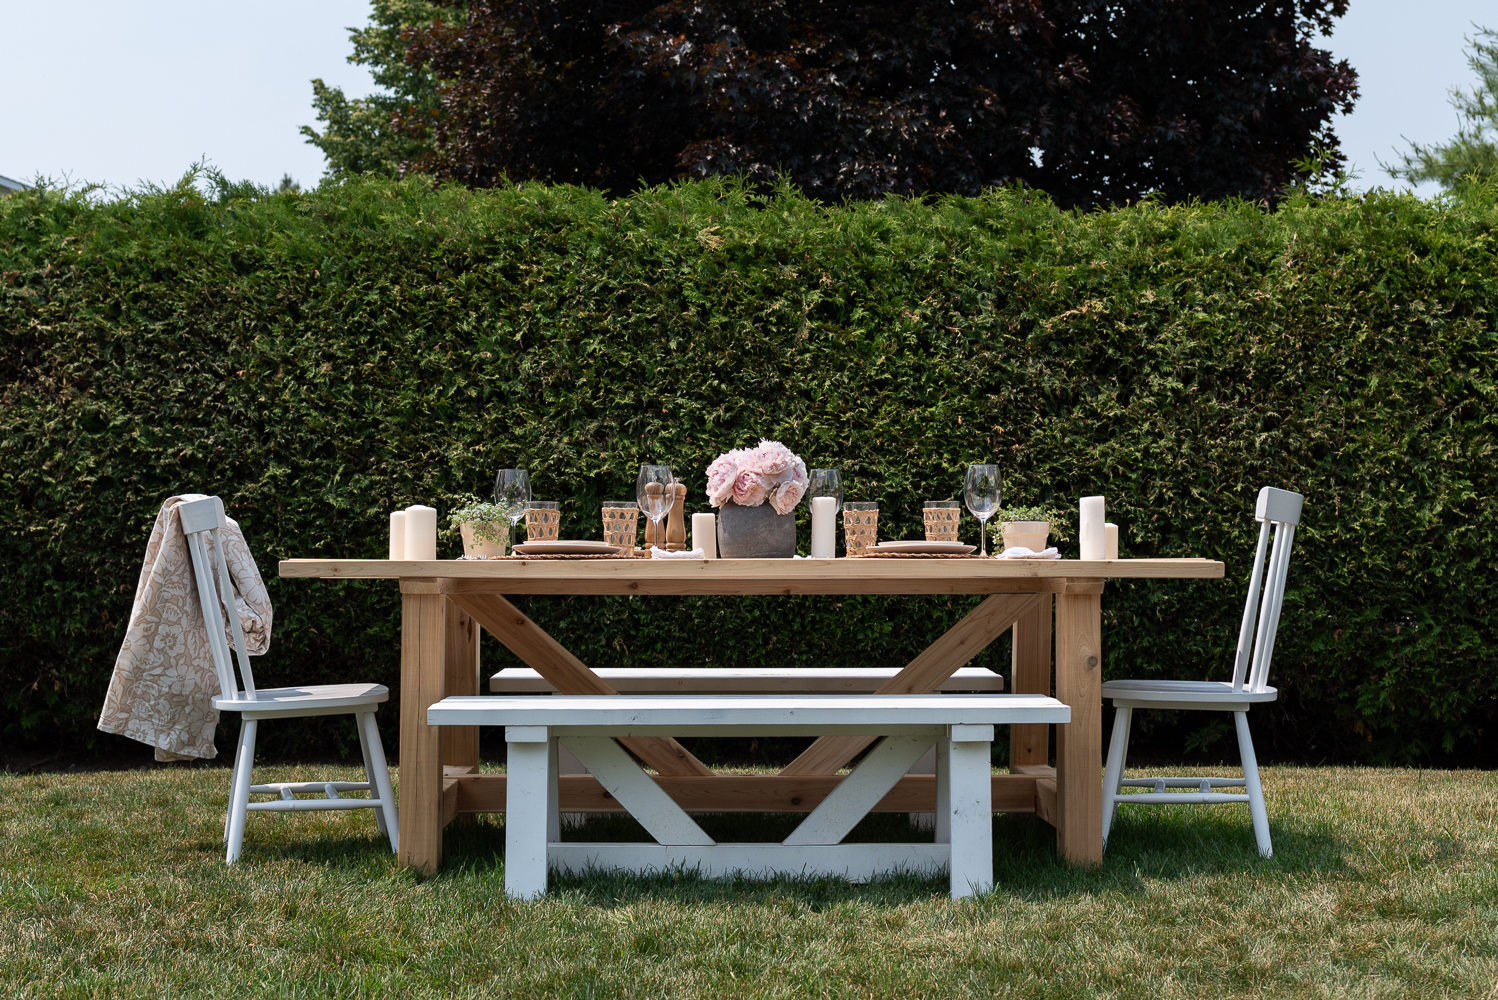
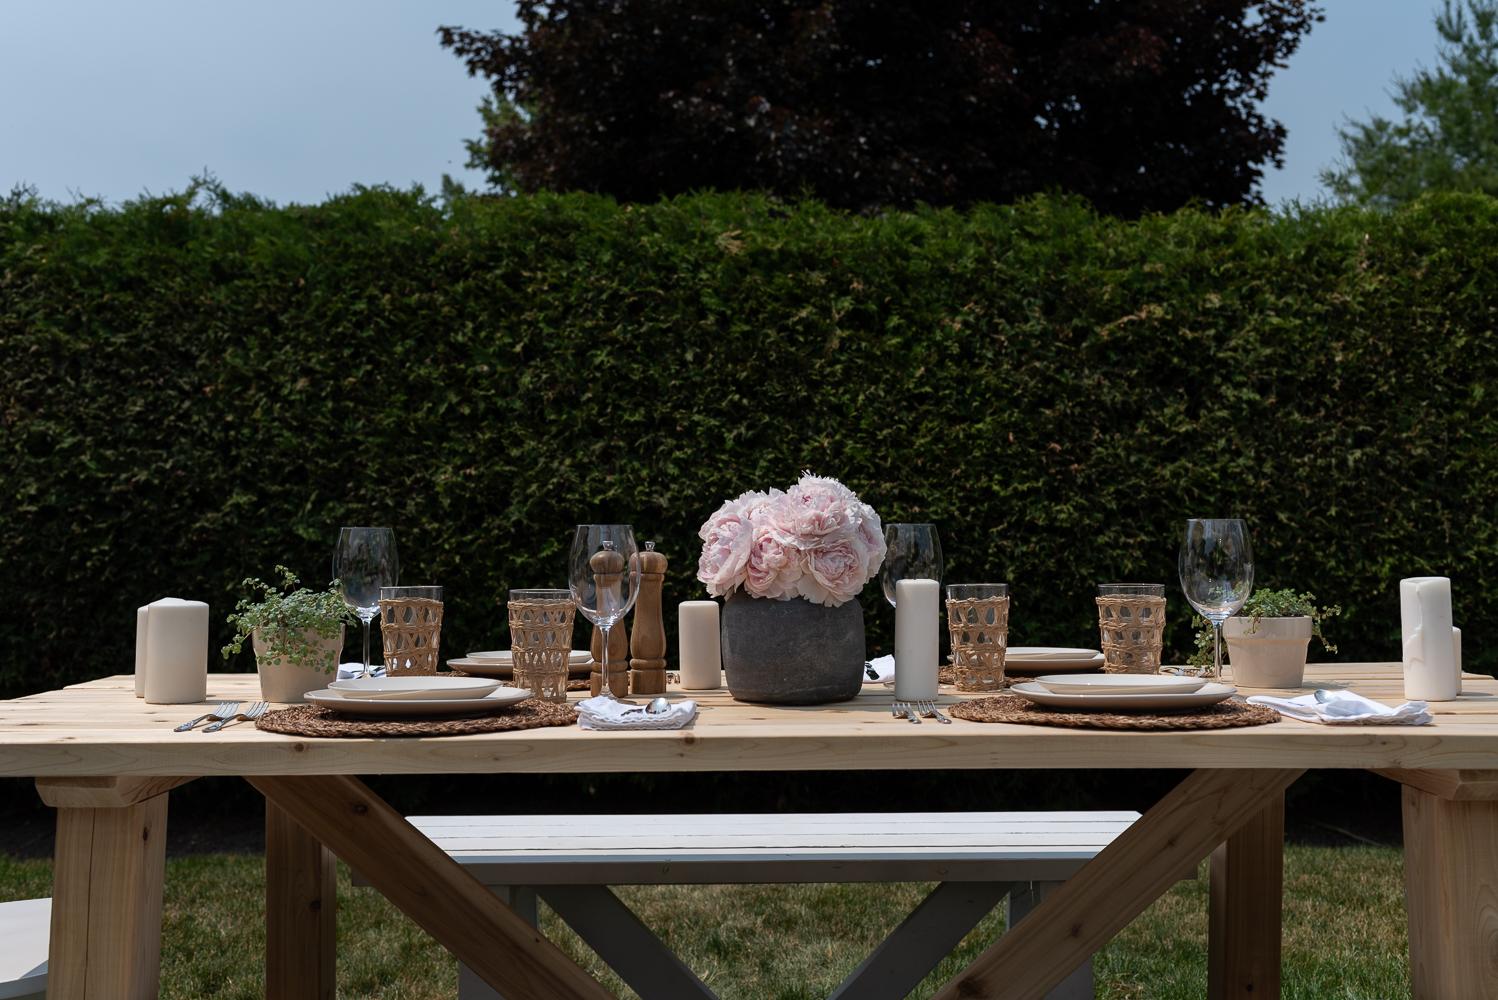

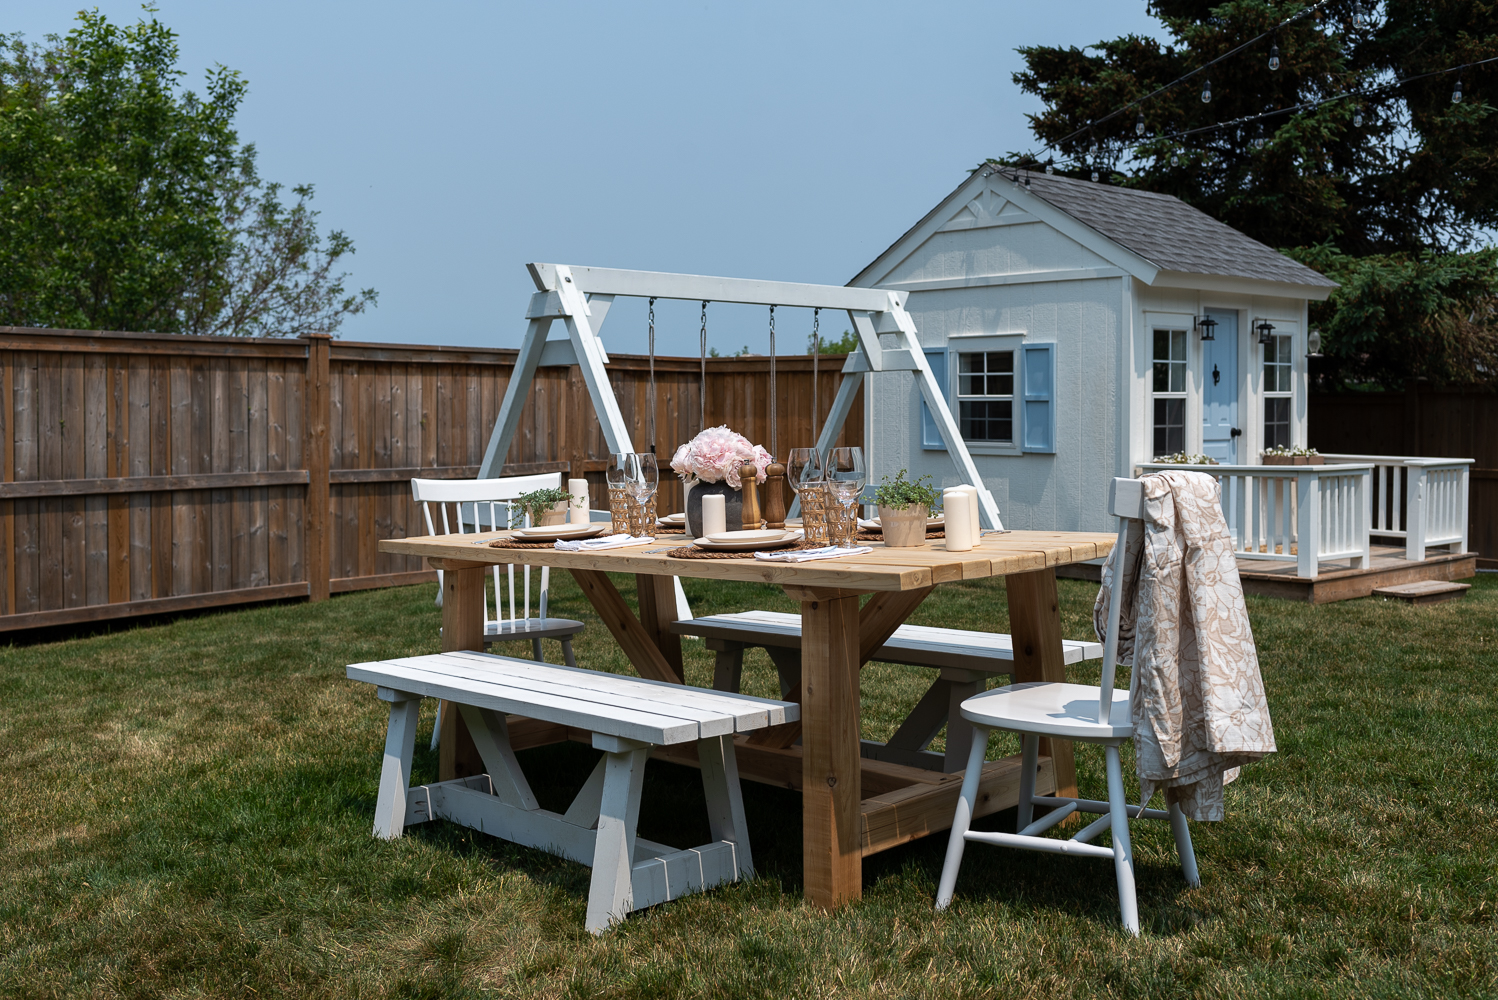
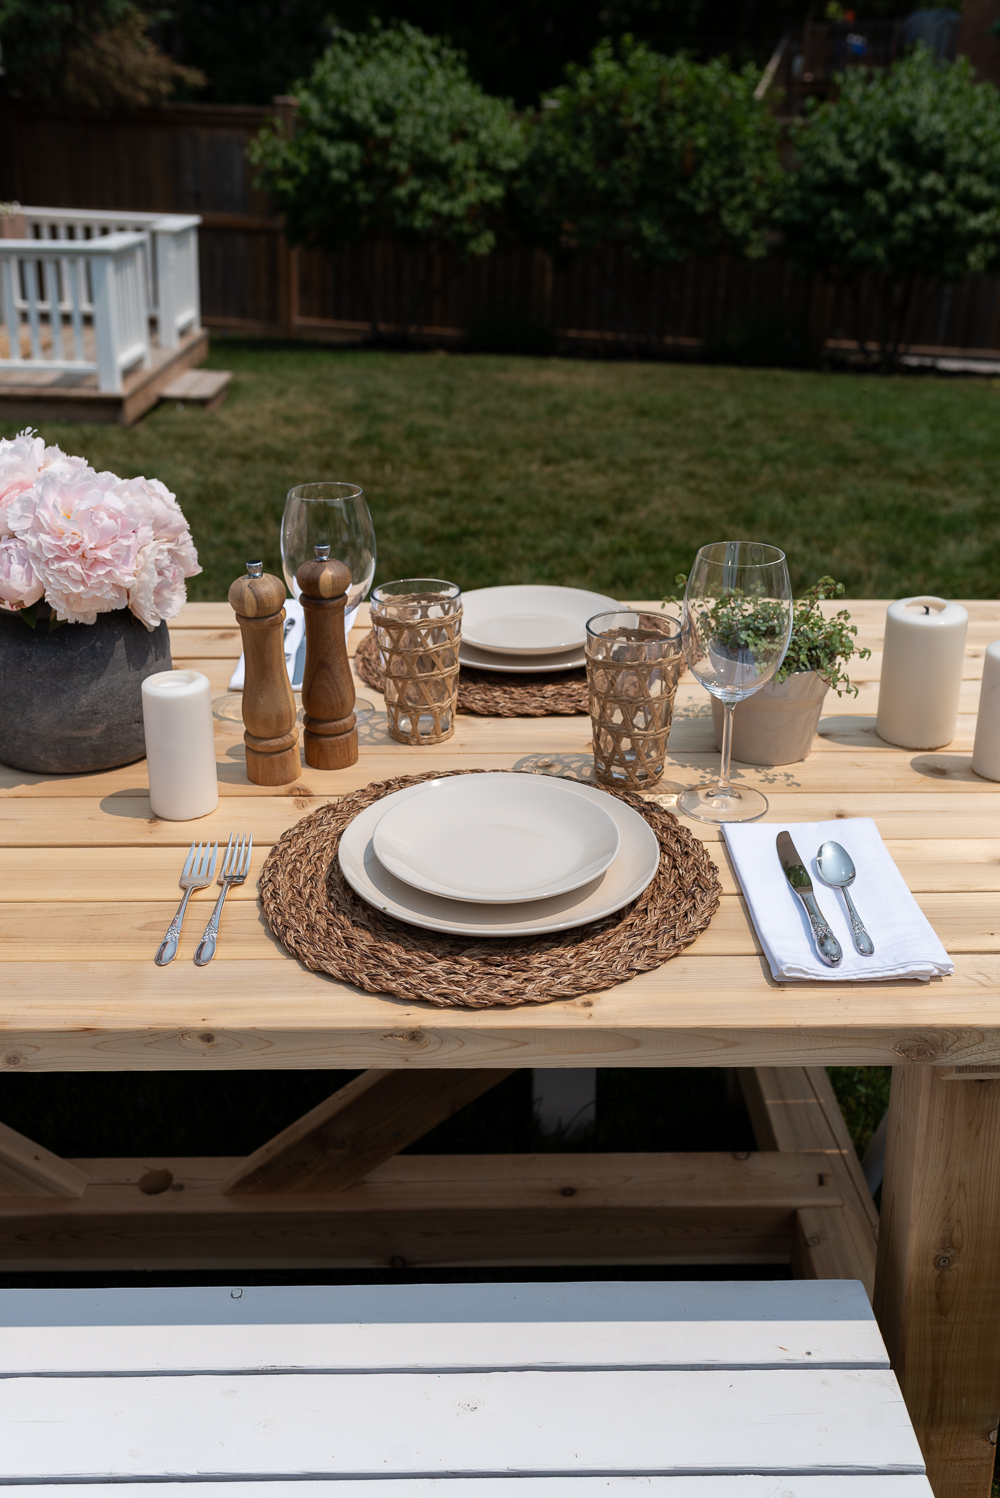
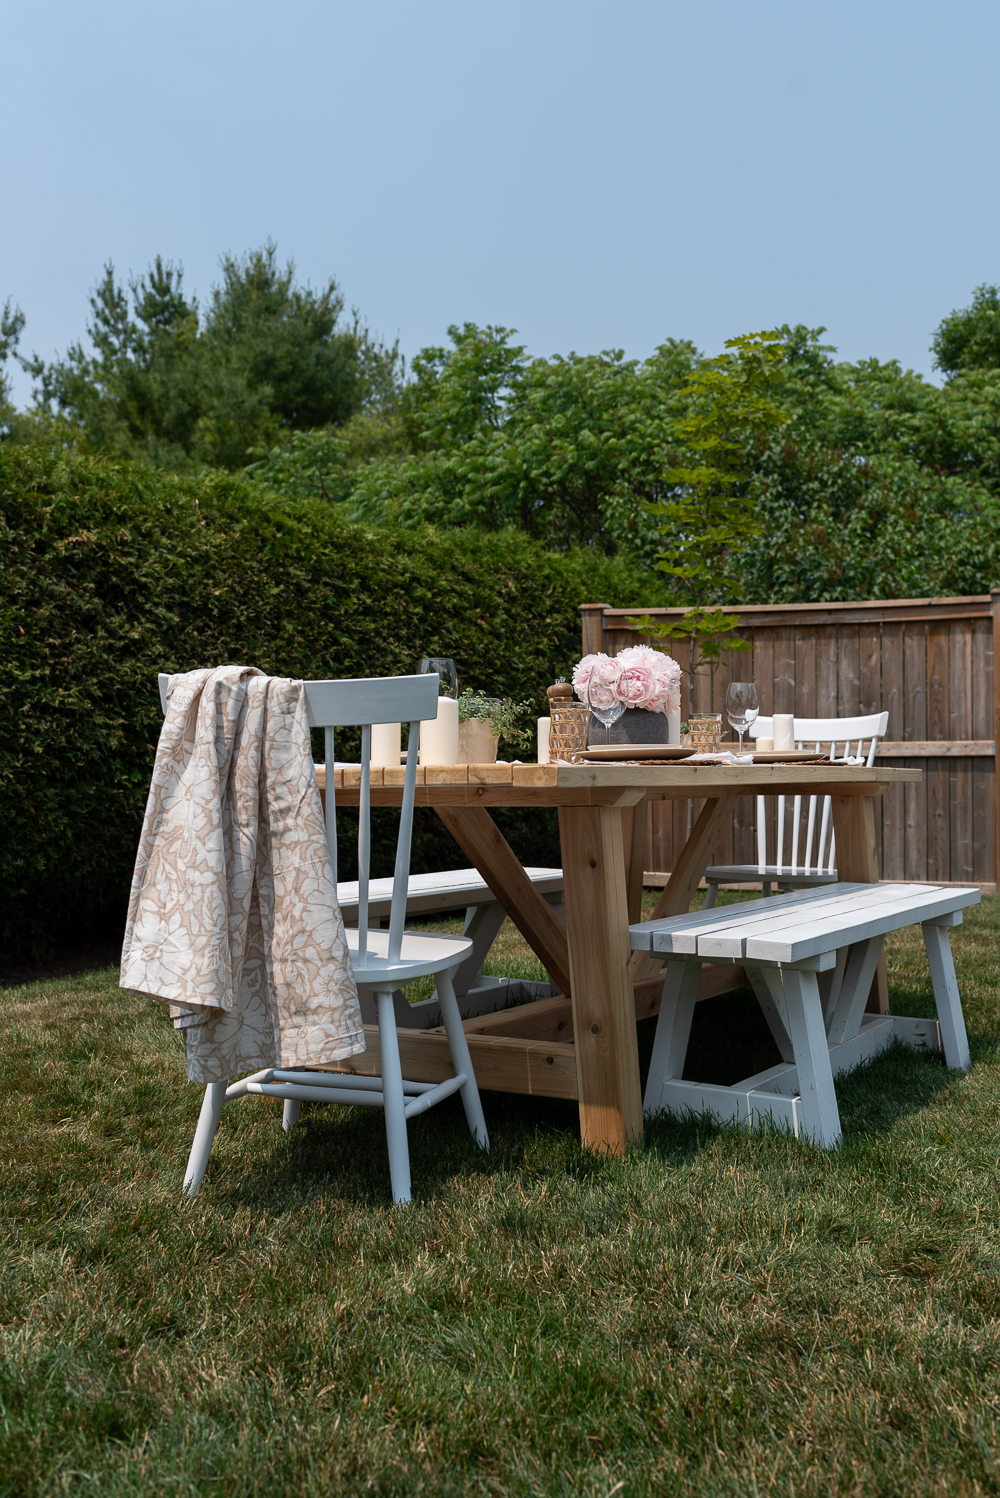


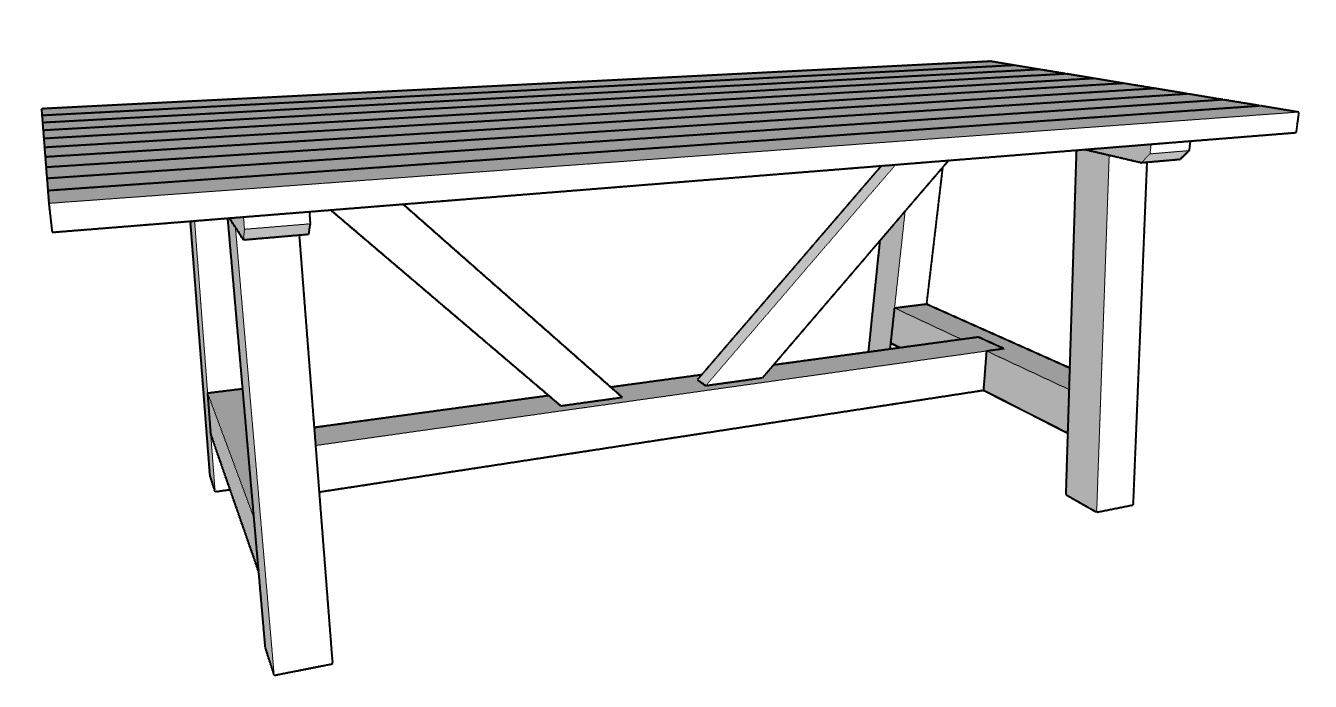
This rustic and charming indoor/outdoor dining table is a simple weekend build using just a few simple tools and minimum woodworking knowledge. Impress your family and friends when you build this beautiful solid piece of furniture. Choose your lumber to suit the indoor or outdoor space accordingly. The piece shown is made from Western Red Cedar and can seat 8-10 people with a finished size of 84" long x 36" wide x 30" tall.
Tools
Kreg Tools


Other Tools
-
Miter Saw

-
Chisel
-
Hammer
-
Measuring Tape
Materials
Wood Products
- 3 Boards , 4" x 4" x 8'
- 13 Boards , 2" x 4" x 8'
Hardware & Supplies
- 12 4" Kreg HD Screws
- 8 2-1/2" Kreg HD Screws
- 8 3" Deck/Wood Screws
- 24 2-1/2" Deck/Wood Screws
- 1 Waterproof Glue/Adhesive
- 1 Sandpaper (Various Grits)
Directions
-
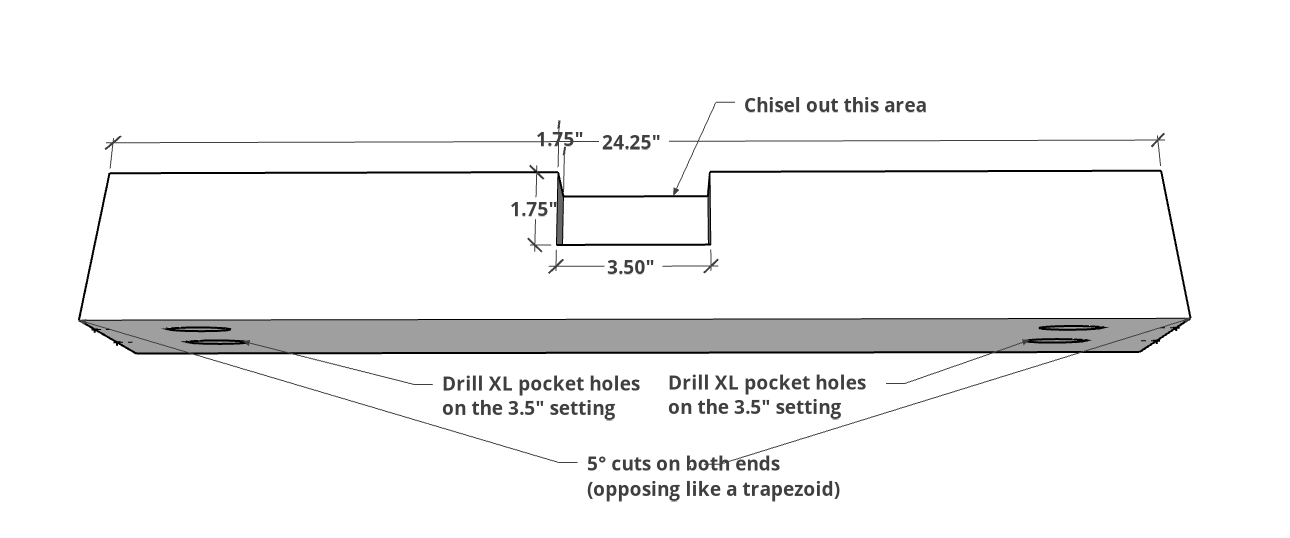
Leg Span
On the bottom of the LEG BOTTOM SPANS, drill pocket holes using the XL on the 3-1/2" setting as shown.
To cut out the area for the half lap joint, find the center of the top of the board and measure 1-3/4" on either side, to give you a total of 3-1/2". Then measure down 1-3/4" and 1-3/4" deep to identify the area to chisel out for the half lap (see next step for photo of chiseling).
-
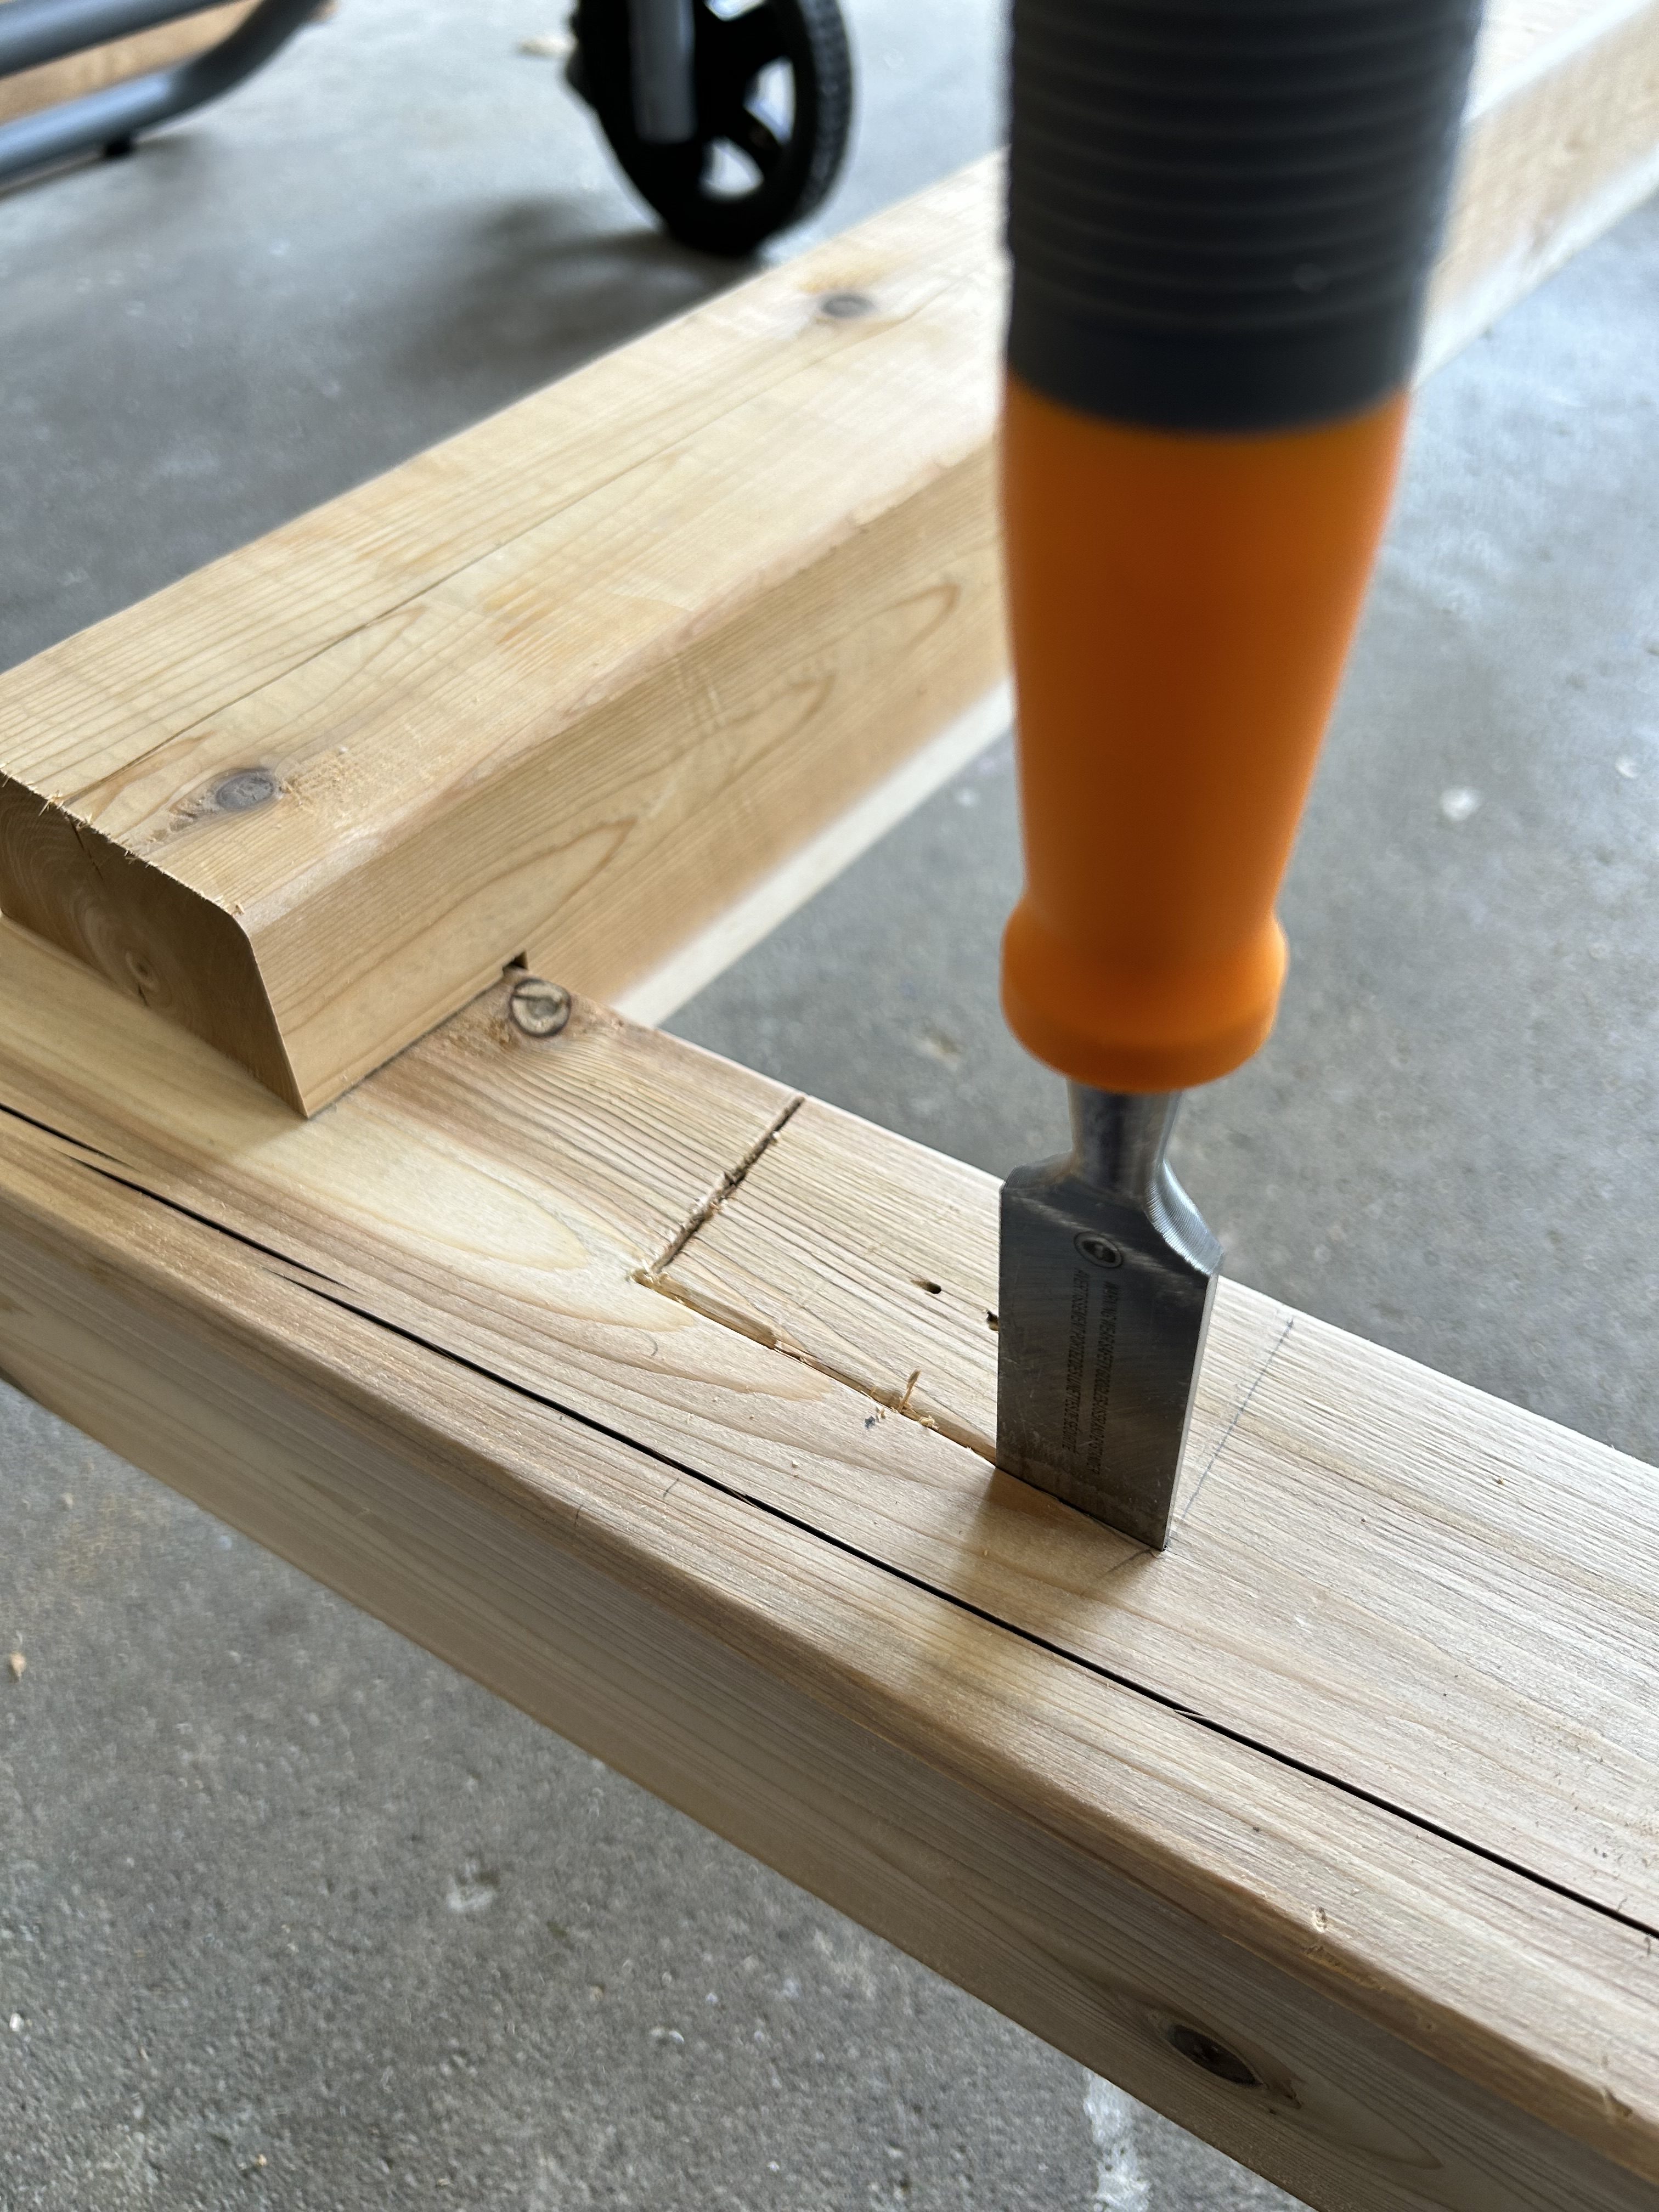
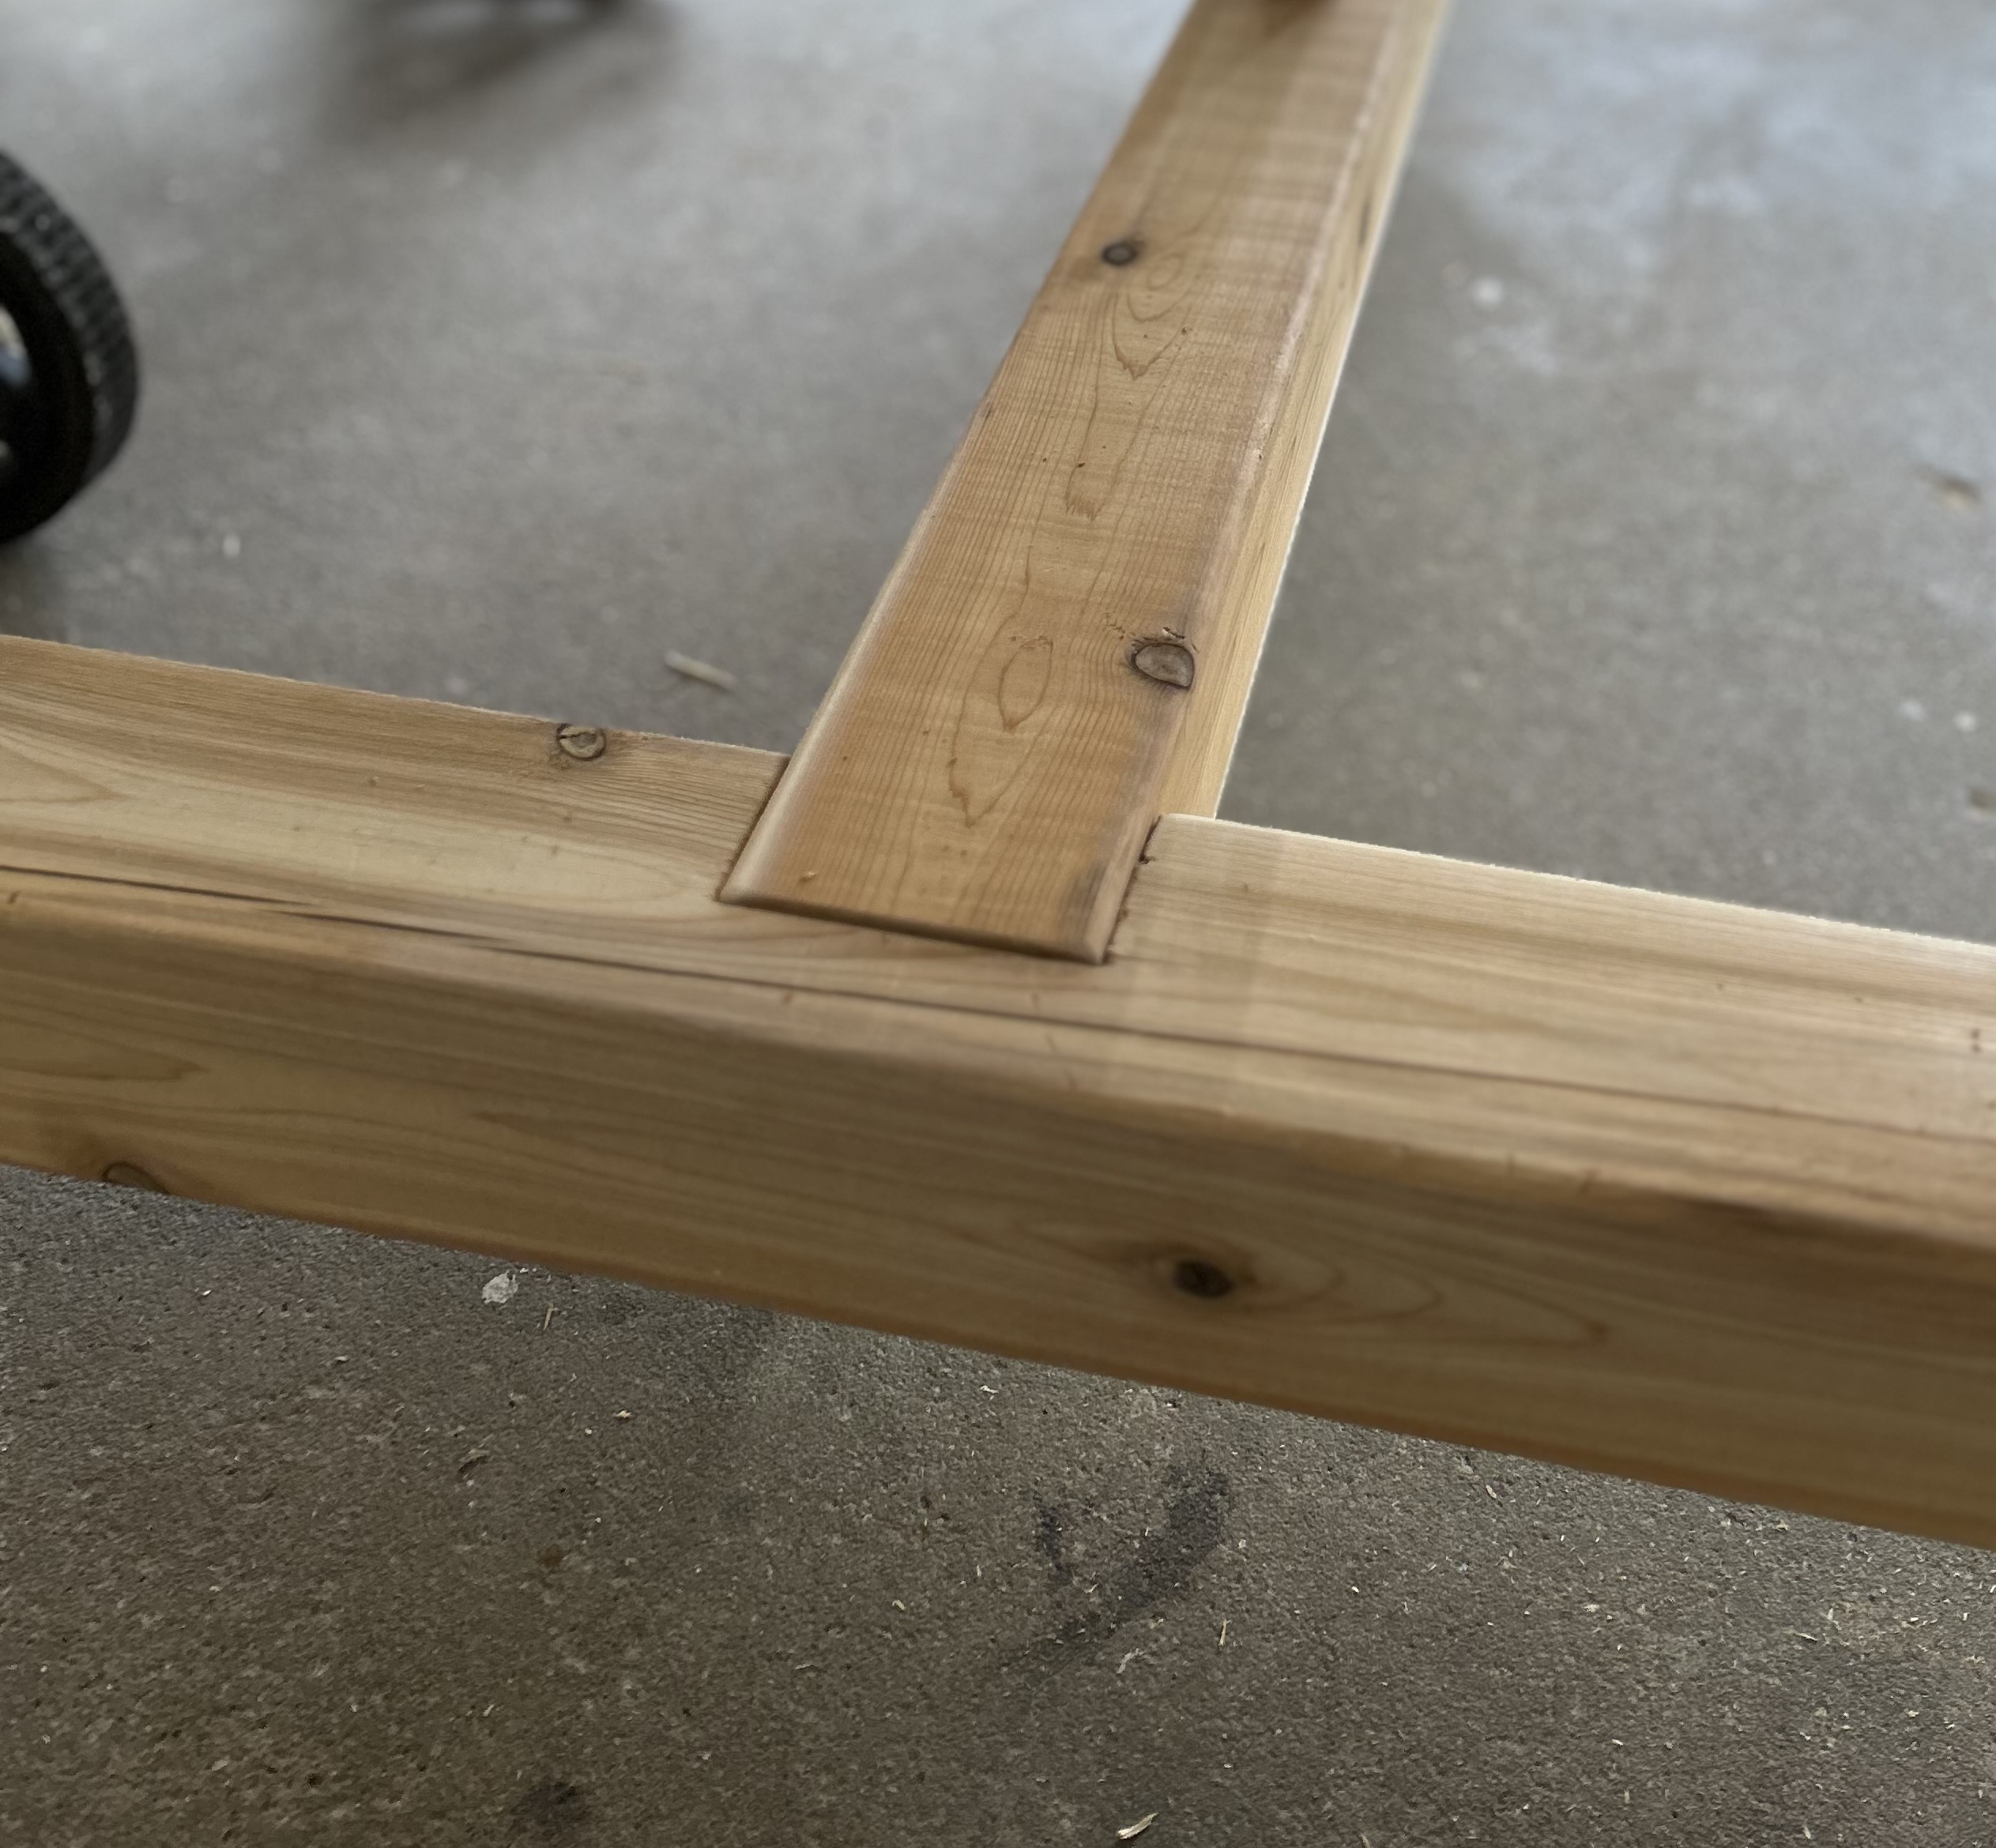
Chisel Half Lap
Here is a photo of the progressive chiseling being completed.
-
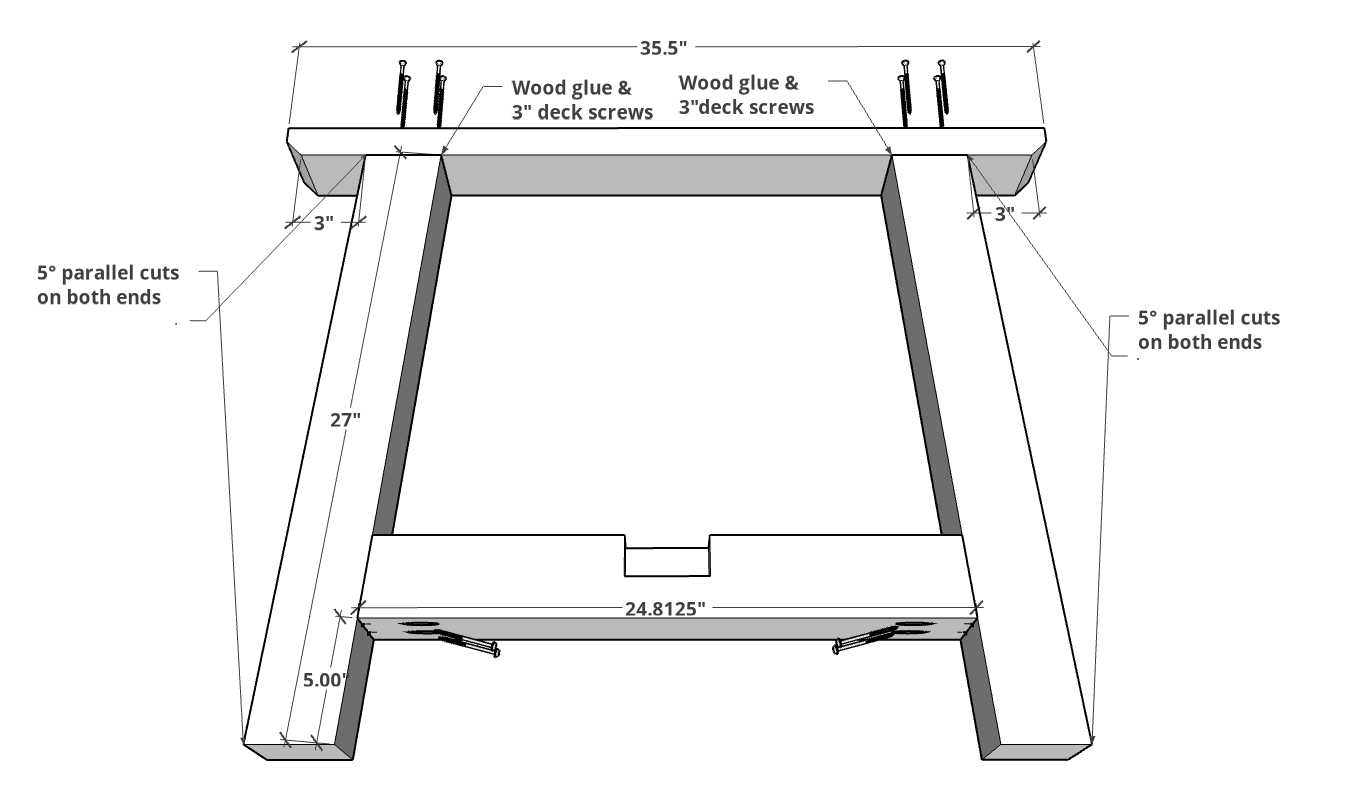
Build Legs
Attach the LEGS to the LEG SPANS 5" from the bottom using wood glue and 4" Kreg HD Screws. Be careful to orient the legs so that they are angling inward.
Cut a 45° on the LEG TOP SPANS starting about halfway down on the face. This is a decorative element and also to prevent anyone from scraping their leg on the piece.
Then attach it to the top of the LEGS as shown with wood glue and four 3" deck screws in each leg.
-
Half Lap in Base Bottom Span
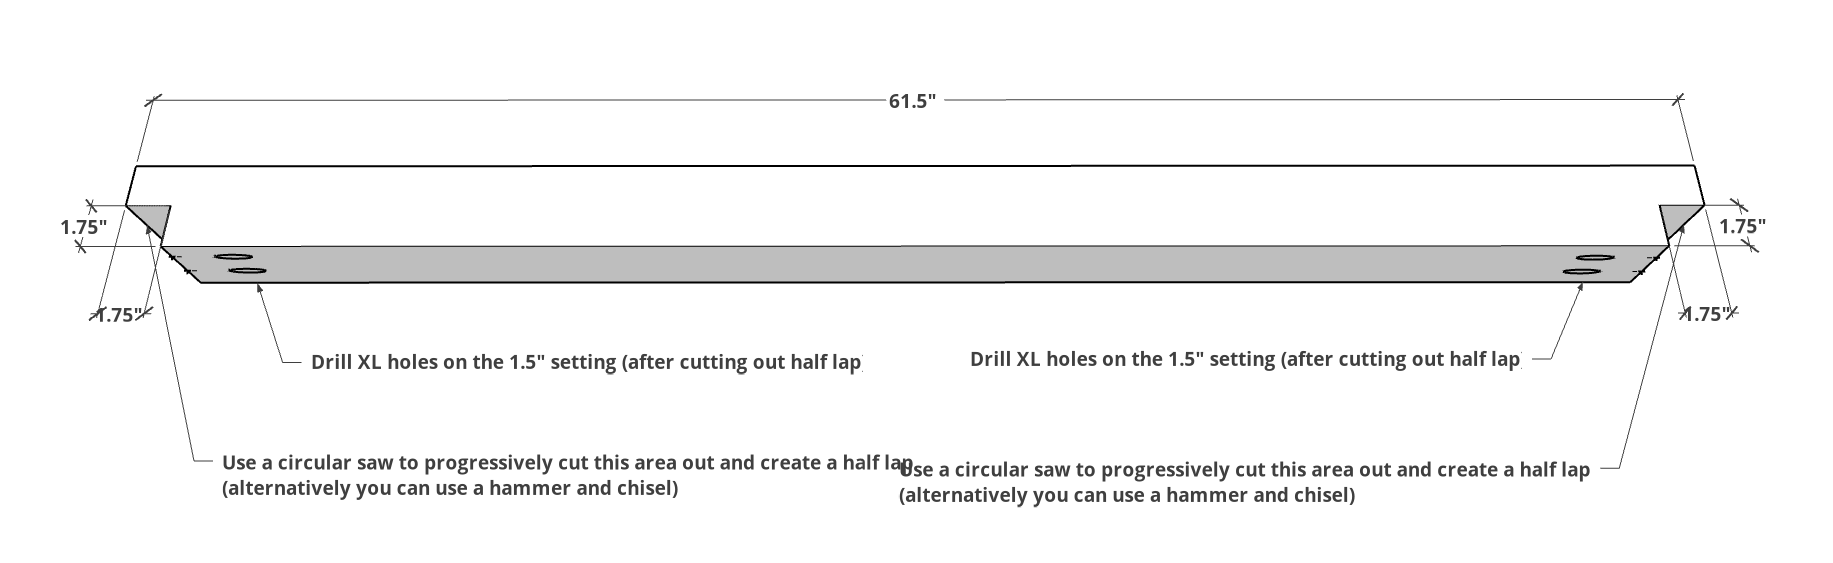
Using a circular saw, progressively cut the area on each end of the BASE BOTTOM SPAN to create a half lap. Alternatively you can use a hammer and chisel. The area should be the full 3-1/2" width of the board and 1-3/4" wide and 1-3/4" deep as shown.
Once complete, use the Kreg XL jig on the 1-1/2" setting and drill two holes on each end as shown.
-
Fit Half Lap Joint
Dry fit the half lap joints on each side and make any adjustments if necessary. Keep it tight, but not too tight or the wood might split over time.
-
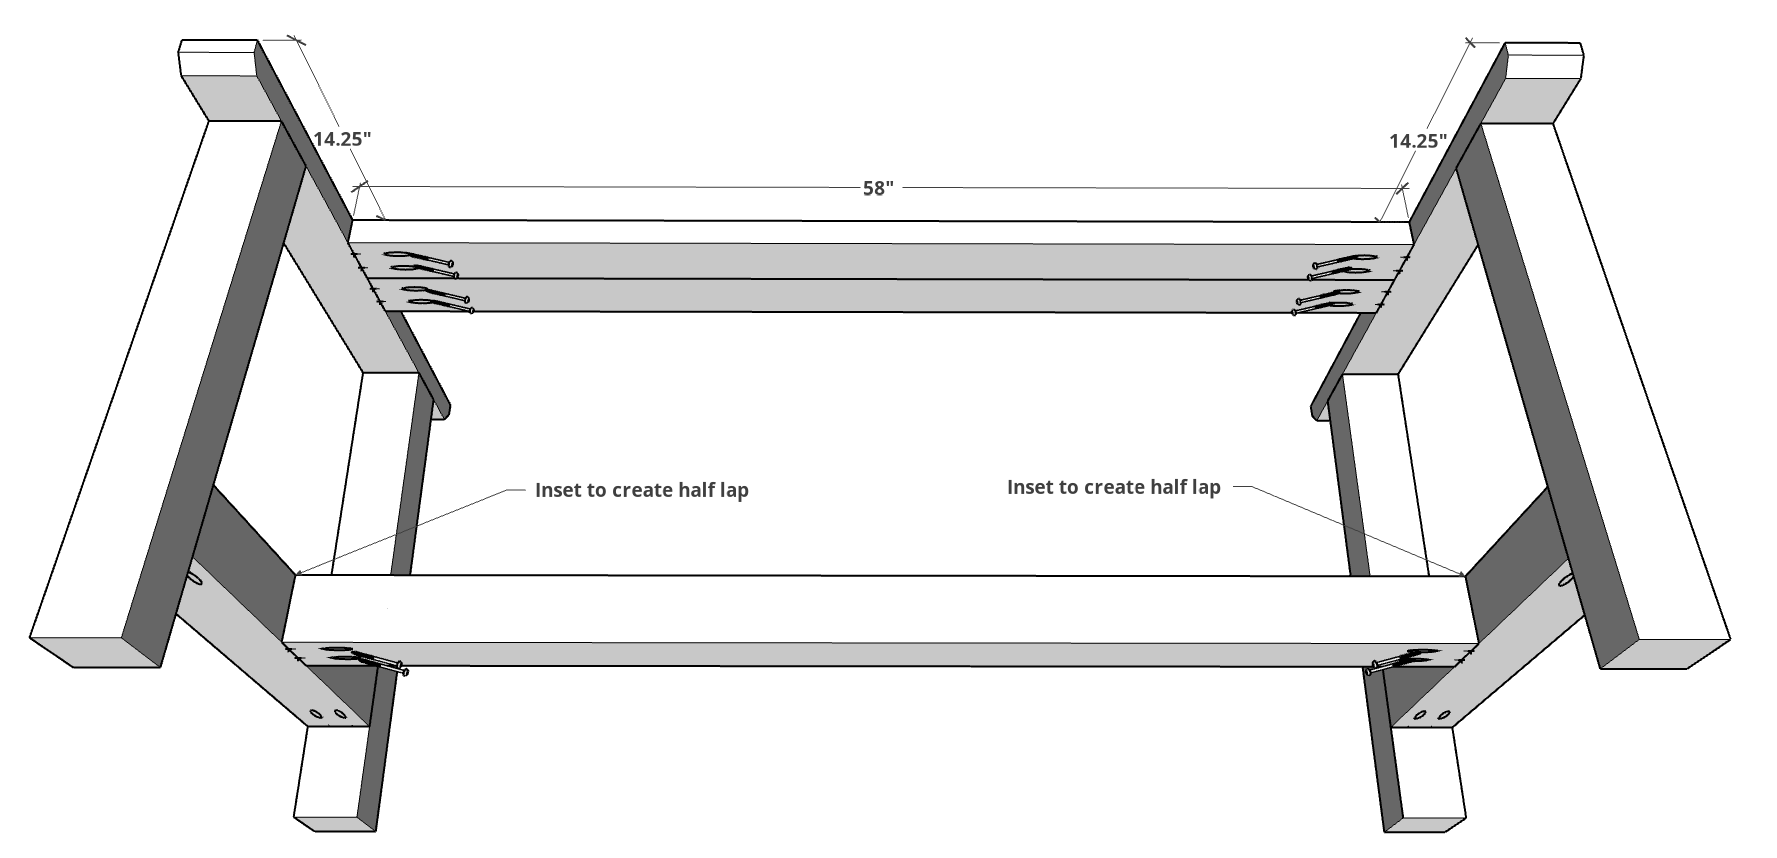
Attach Spans
Now that you have confirmed it will fit, attach the BASE BOTTOM SPAN using wood glue 2-1/2" Kreg HD screws.
Drill pocket holes using the Kreg XL on each end of the BASE TOP SPANS as shown. Attach the BASE TOP SPANS (2 boards) using wood glue and 2-1/2" Kreg HD screws. (Note these two boards meet in the exact center of the LEG TOP SPANS)
-
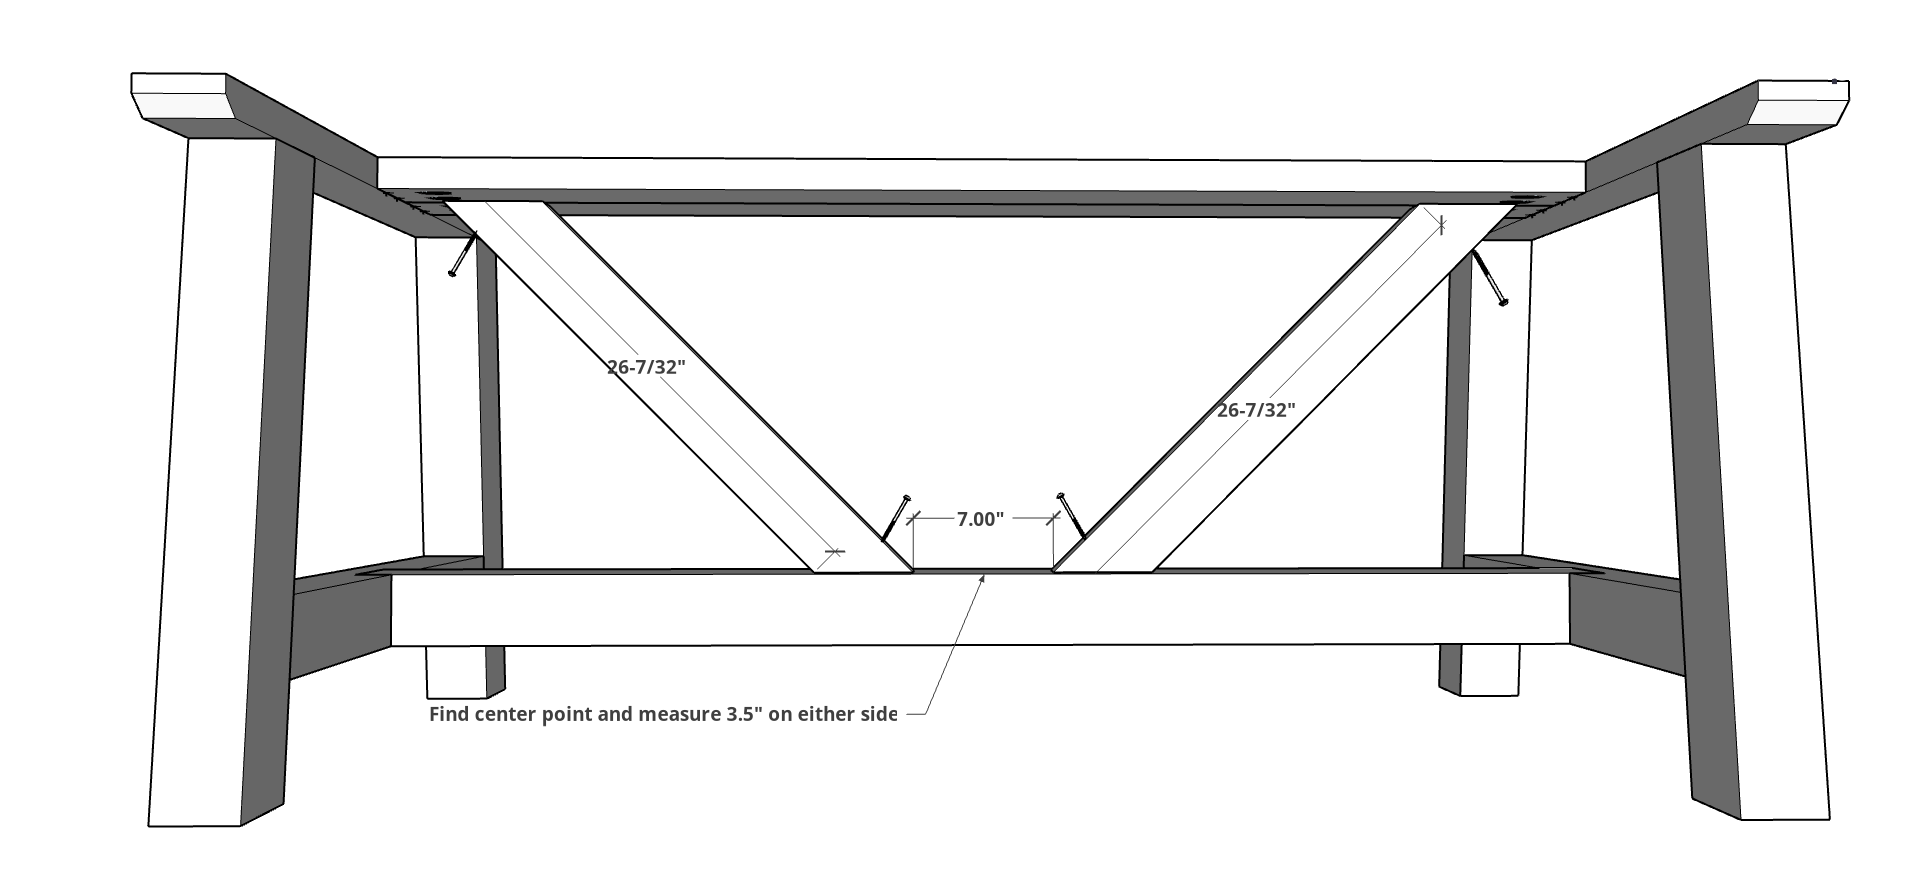
Attach Base Angle Spans
Measure the halfway mark on the length of the BASE BOTTOM SPAN. Then measure 3-1/2" on each side of that for a total of 7" Then measure half way across the board which should be 1-3/4". This is the location you will attach the BASE ANGLE SPANS (centering it in the board).
Using wood glue and a 2-1/2" deck screw to securely attach to the BASE BOTTOM SPAN as shown. Then attach in the position they land on the under side of the BASE TOP SPANS using wood glue and a 2-1/2" deck screw.
-
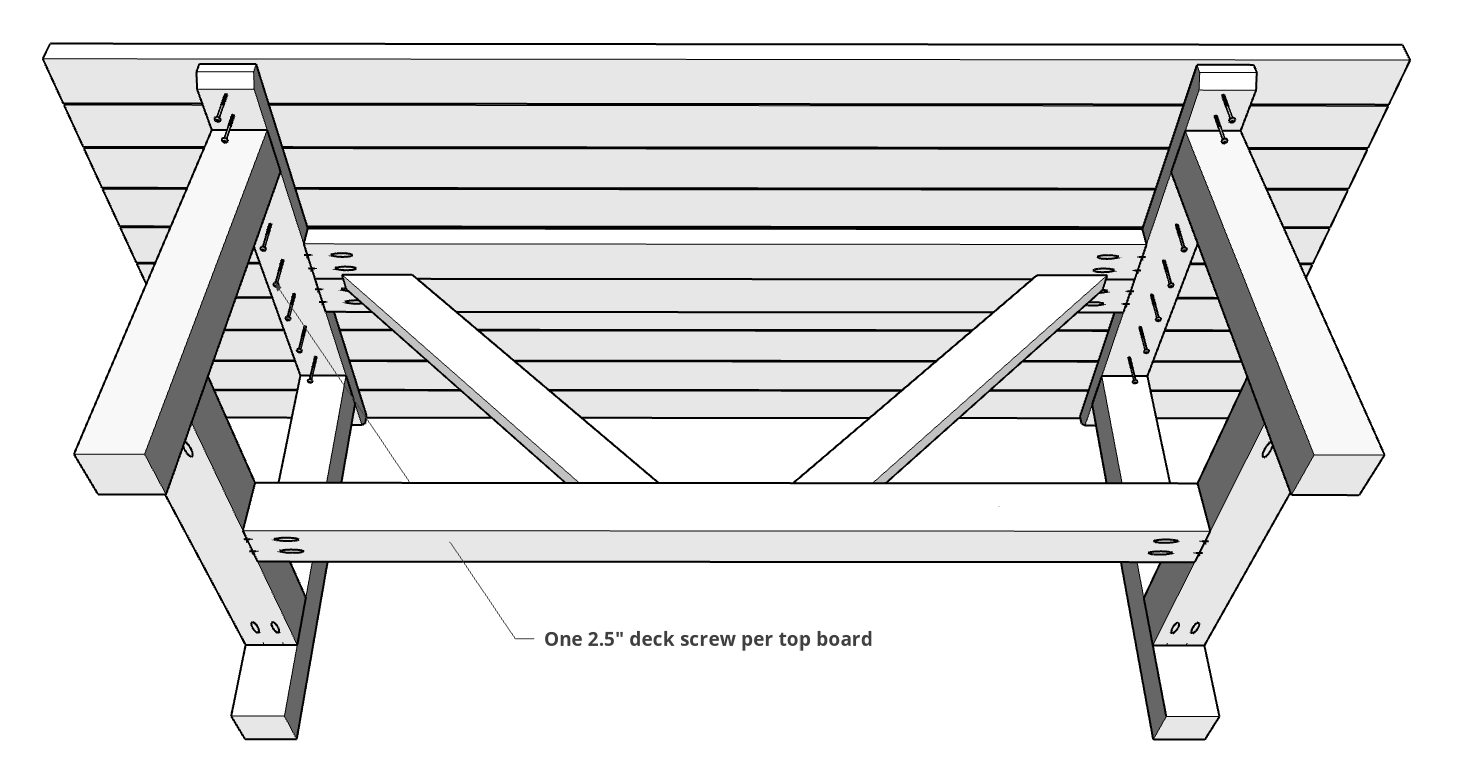
Attach Table Top Boards
Attach Table top boards from the underside using 2-1/2" deck screws or 2-1/2" outdoor standard Kreg screws. Do not use glue on this step as the boards will expand and contract a bit each time it gets wet and dries (some cracking will be normal).
-
Finishing
Sand and smooth out any sharp edges. You can choose to leave it natural, stain it, use a penetrating oil or paint it.
View other plans from Nick+Alicia!