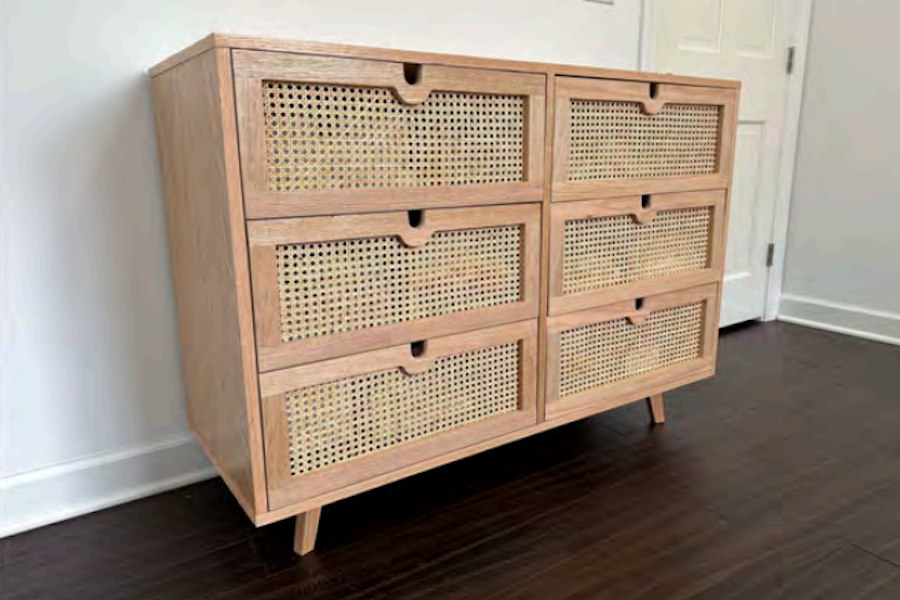
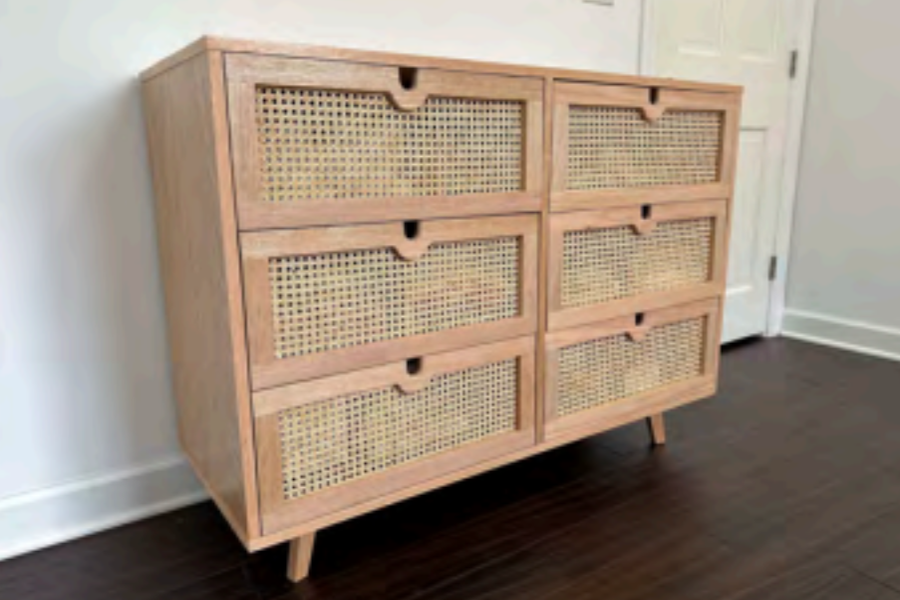


This modern dresser is an excellent way to liven up any room. The use of both cane webbing and oak wood makes it easy to see that combining textures is a great way to leave an impression.
Tools
Kreg Tools


Other Tools
-
Miter saw

-
Table saw
Materials
Wood Products
- 1 Oak sheet of plywood , 3/4" x 48" x 96"
- .5 Sheet of plywood (any species) , 1/2" x 48" x 96"
- .5 Sheet of plywood underlayment (any species) , 1/4" x 48" x 96"
- 3 Oak wood boards , 3/4" x 1.5" x 72"
- 2 Oak wood boards , 3/4" x 2.5" x 72"
- 2 Oak wood boards , 1" x 2" x 60"
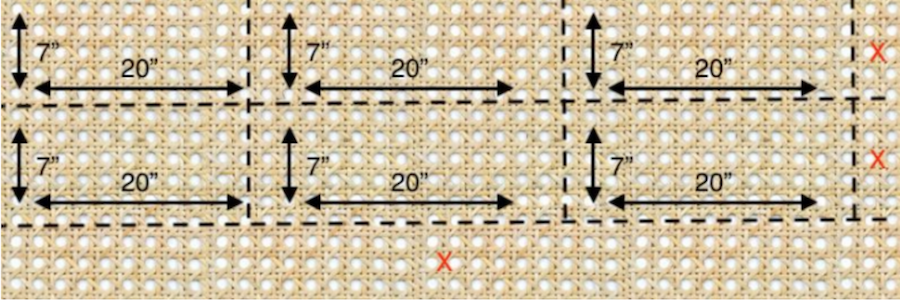
- 1 Woven cane roll , 18" x 60"
Hardware & Supplies
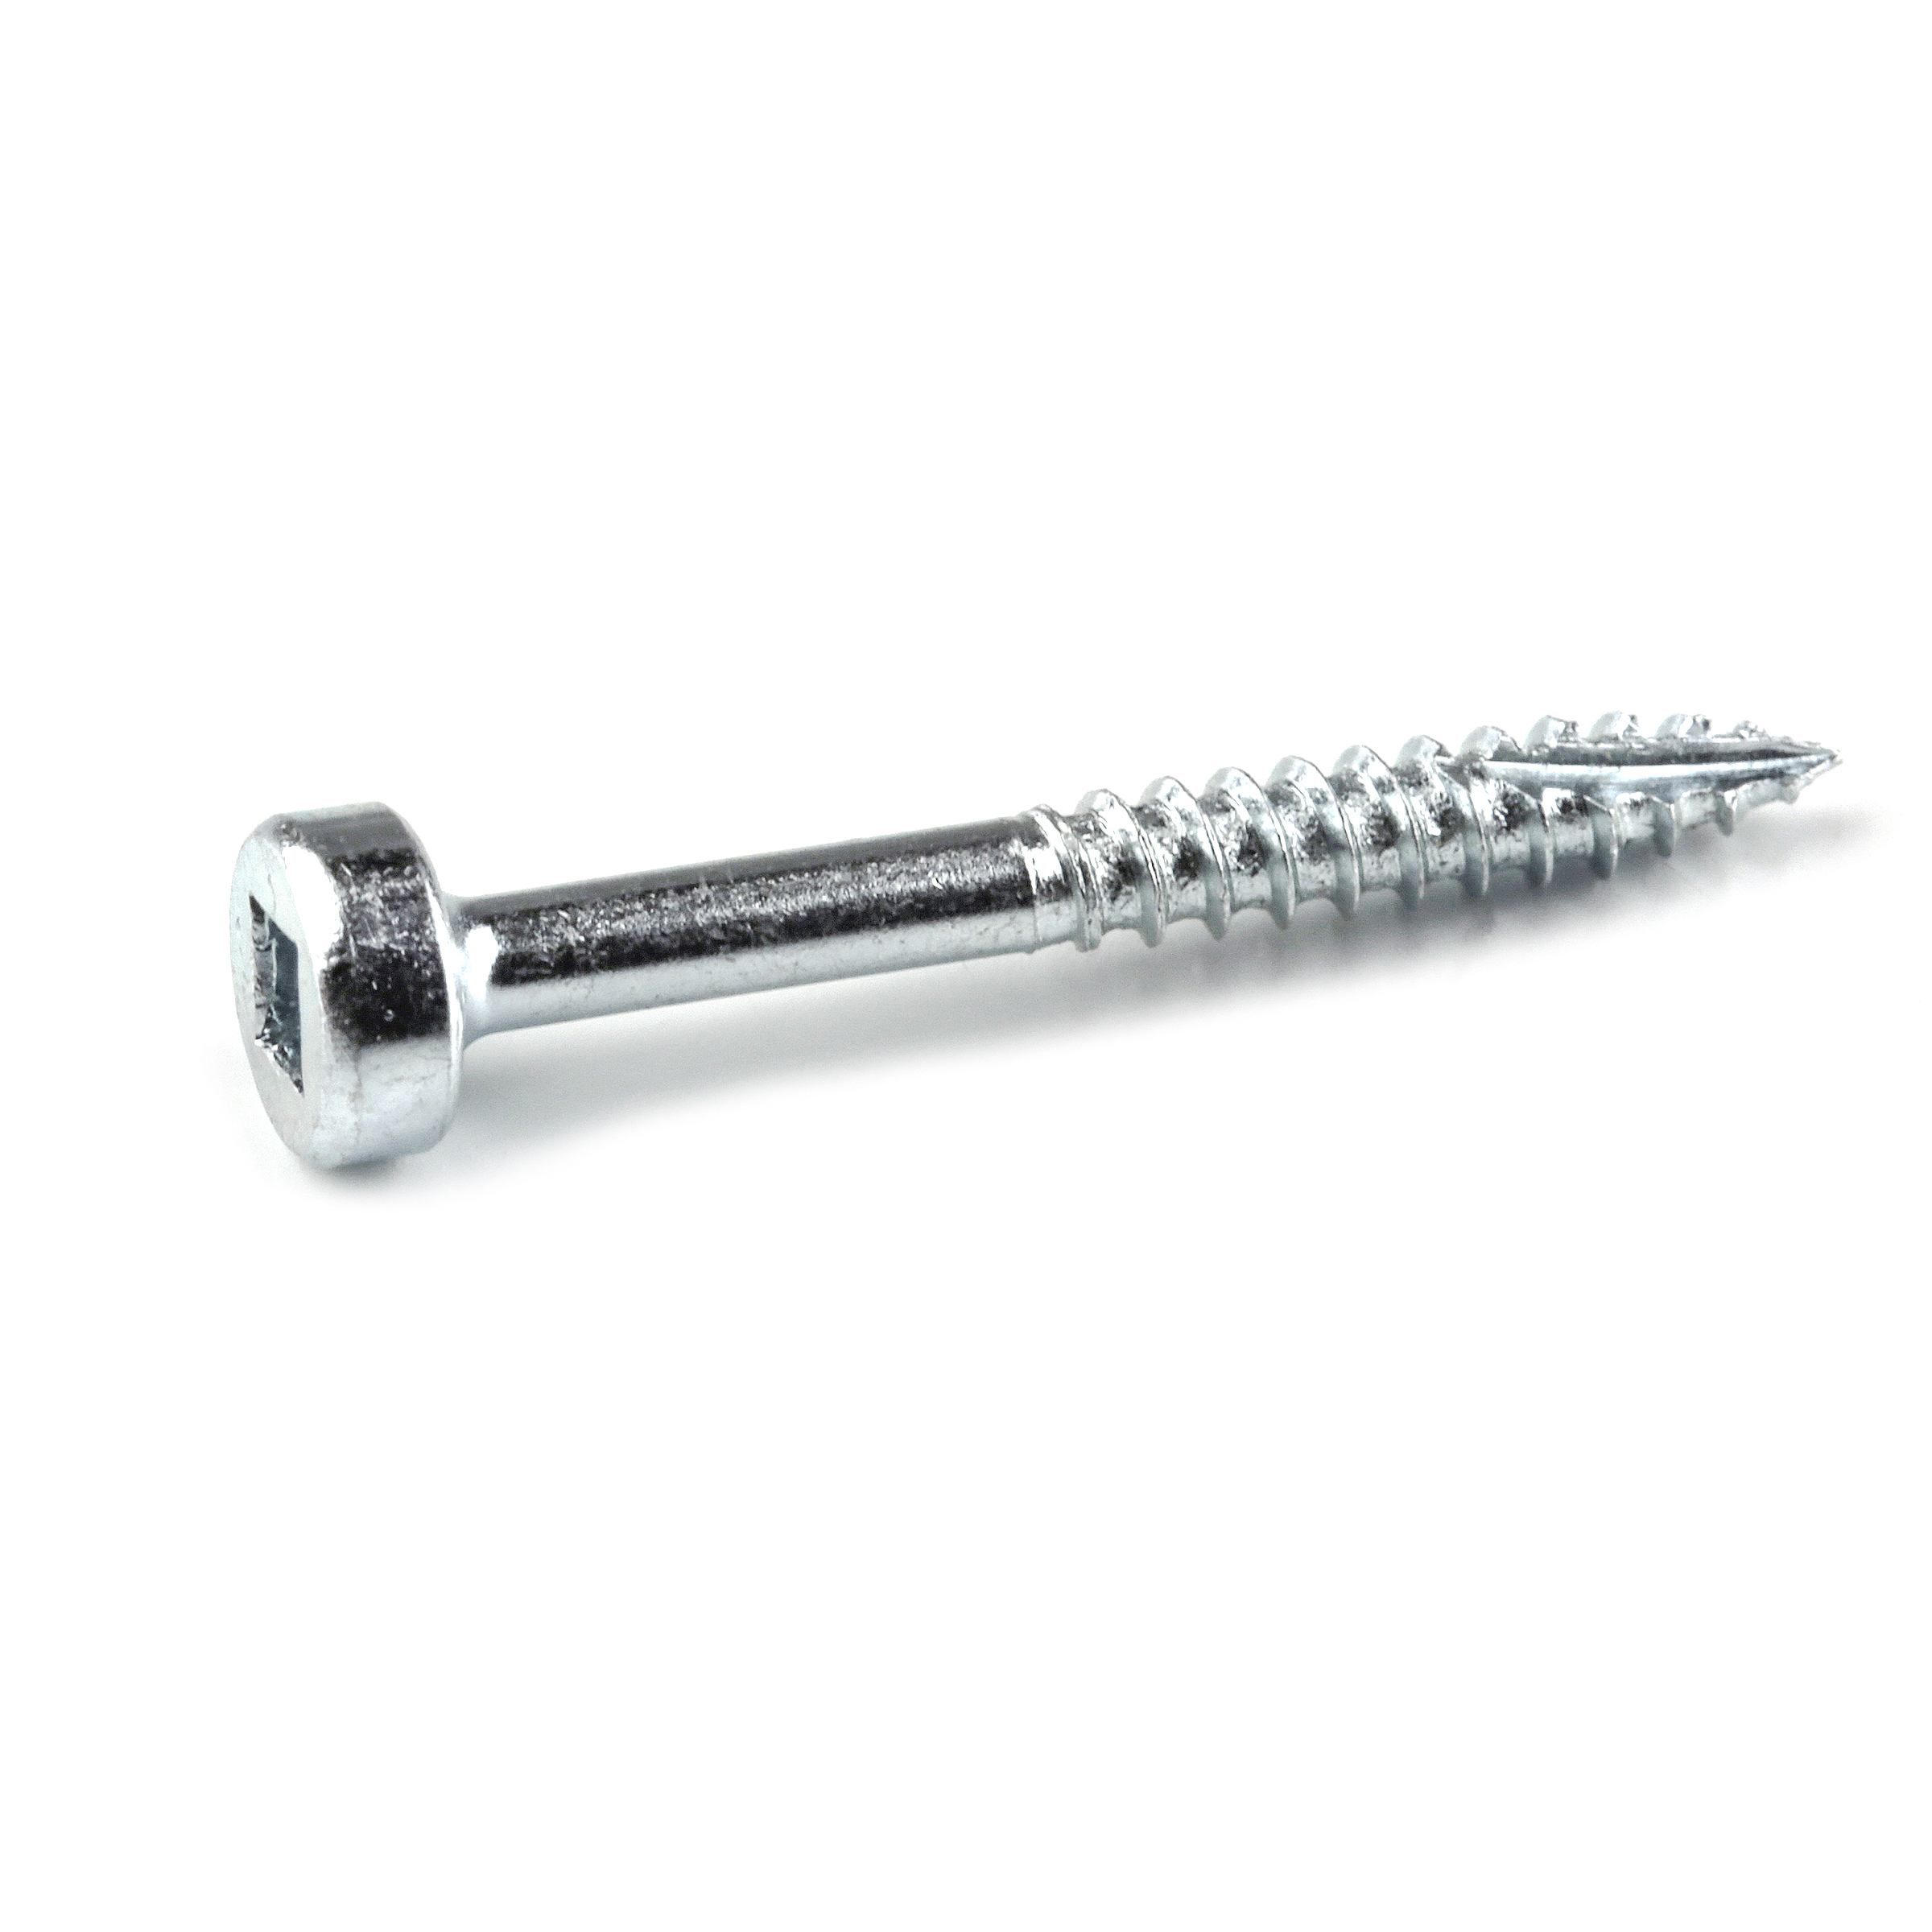
- 1 Box Of 1 1/4" Pocket Hole Screws (See Tools List)
- 6 Sets of drawer slides
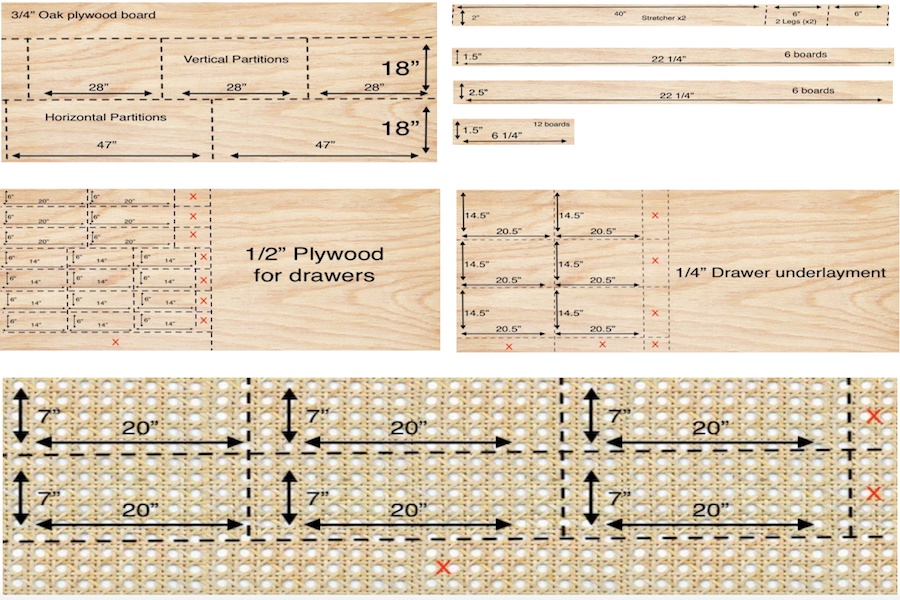
Cut List & Parts
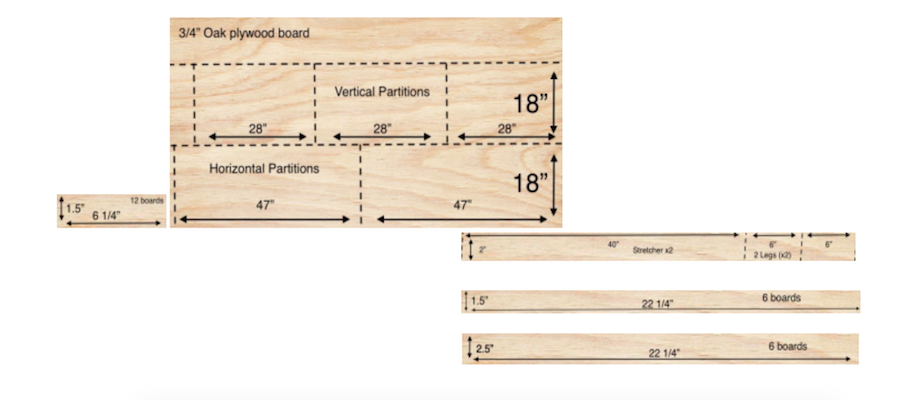
- 3 Vertical Oak plywood boards , 3/4" x 18" x 28"
- 2 Horizontal Oak plywood boards , 3/4" x 47" x 18"
- 4 Wooden Oak legs , 1" x 2" x 6"
- 2 Wooden Oak leg stretchers , 1" x 2" x 40"
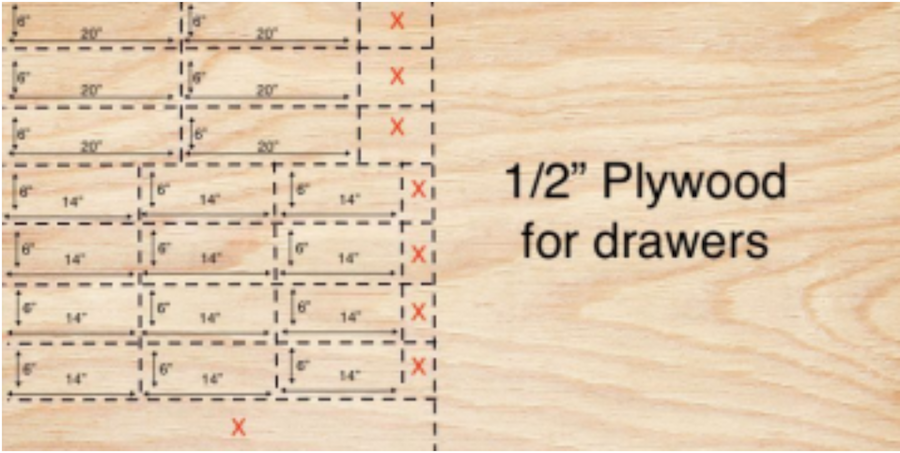
- 6 Drawer boards (rear) , 1/2" x 6 x 14"
- 12 Drawer boards (sides) , 1/2" x 6 x 14"
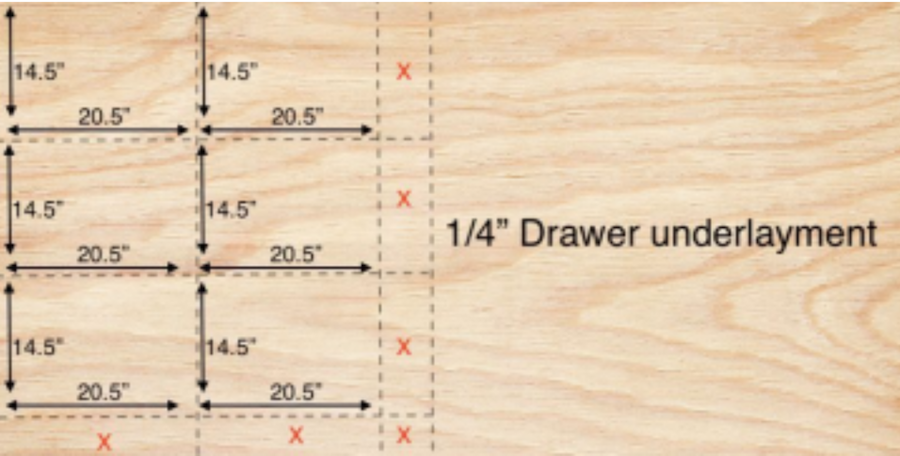
- 6 Drawer underlayment , 1/4" x 20 1/2"
- 6 Wooden boards , 3/4" x 2.5" x 22 1/4"
- 6 Wooden boards , 3/4" x 1.5" x 22 1/4"
- 12 Wooden boards , 3/4" x 1.5" x 6 1/4"
Directions
-
Watch The Video
If you're a visual-learner, watching the project video prior to following the instructions, as it will give more context regarding how all of the pieces come together. The video can be found on the Making Made Simple YouTube channel (link in Extras)
*if the video is not up yet, it will be soon
-
Map out materials
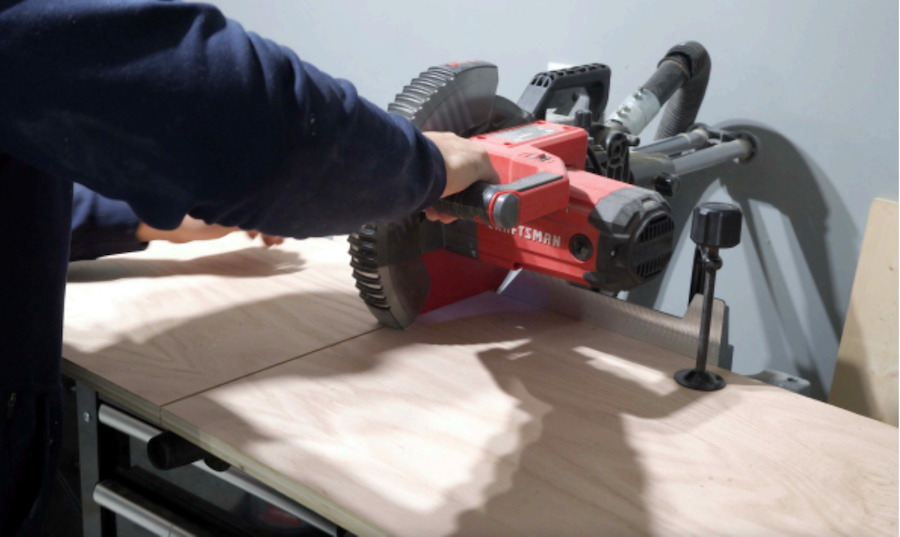
Start by cutting the materials to the dimensions mentioned on the cut list. Please keep in mind that larger pieces can generally be cut at local home shopping centers, when purchased
-
Cut body materials to corresponding lengths and assemble
For this step, you'll need to cut your horizontal and vertical partitions. There will be three vertical partitions, and two horizontal boards
-
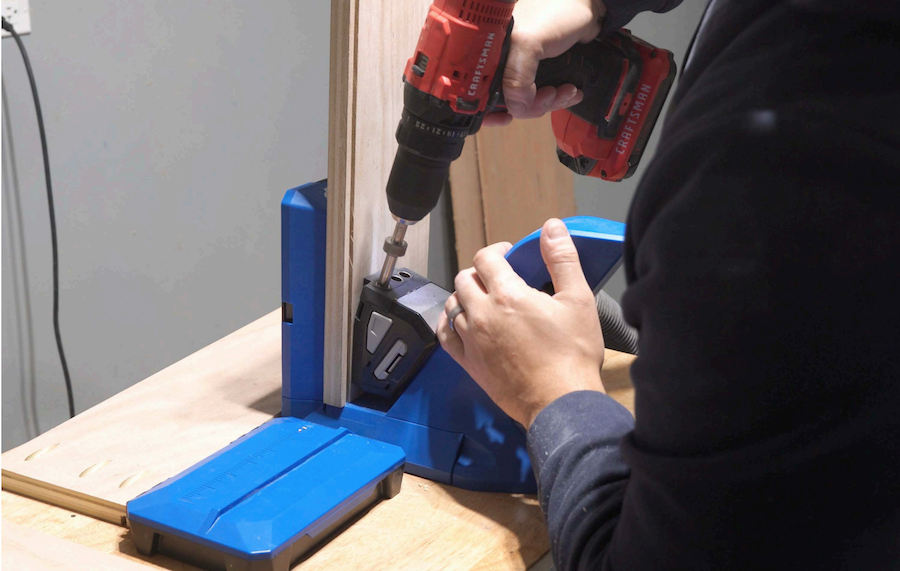
Drill pocket-holes into vertical partitions
The three vertical partitions (3/4" x 18" x 28") will need pocket-holes in order to hold them to the top/bottom panels (3/4" x 18" x 47"). Be sure to add the pocket-holes on the inside, so that they are not visible from the outside. As for the center vertical piece, it is safe to add pocket-holes on any side, as the screw-holes will not be visible. To position the center board, measure the distance from the center board to both outer boards and ensure the
distance is equal. It also helps to add wood glue to the board edges, to ensure longevity and strength.
-
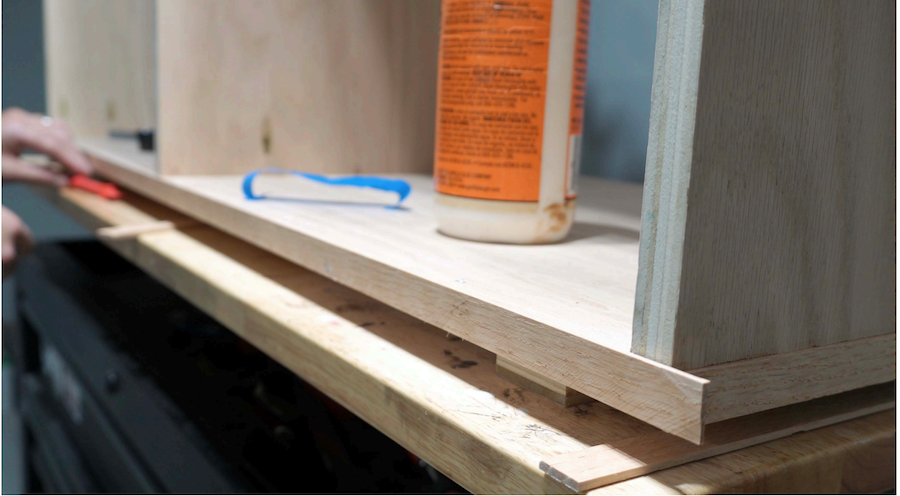
Cover plywood edges
You can glue thin pieces of oak wood to the plywood edges to ensure they're covered up; this will establish a more uniform look. Some people prefer to use iron-on veneer rolls, which are also a great alternative! These pieces can be held together using painting tape while the glue dries. Once the pieces have been attached, you'll need to saw off the excess.
-
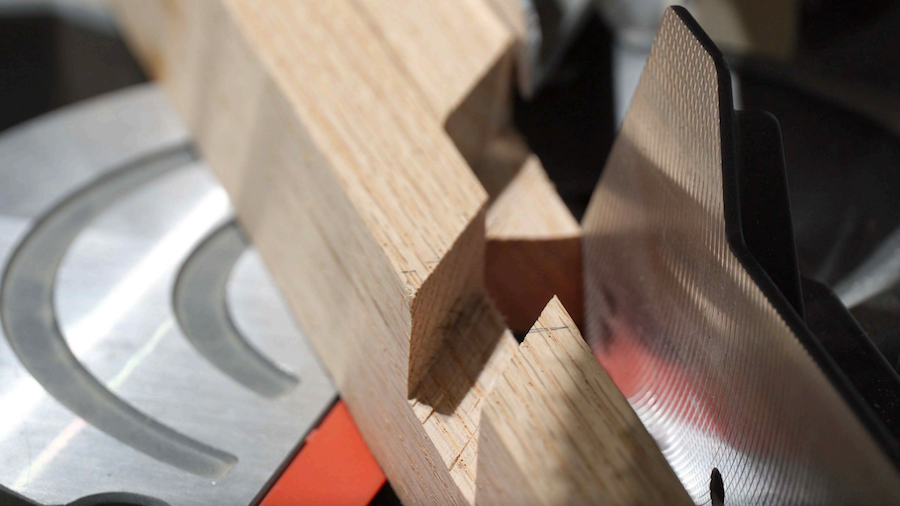
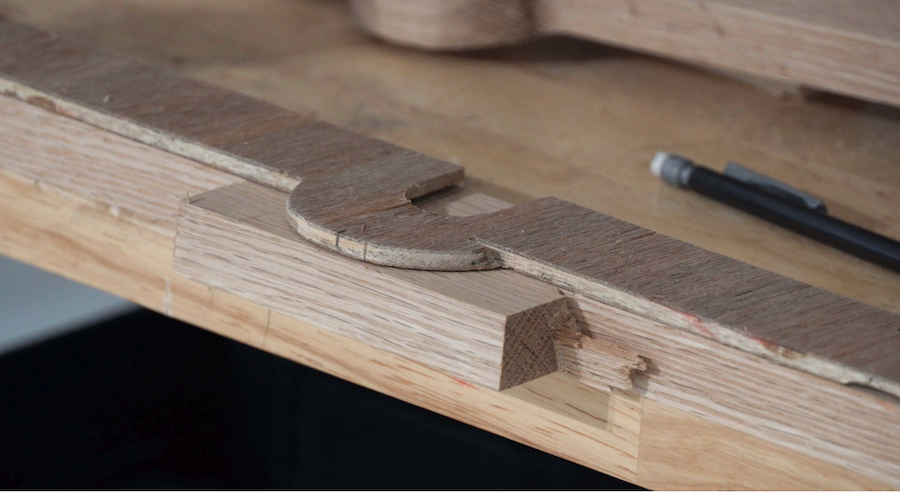
Cut leg stretchers to size, and measure fitment
Your two 40" boards are going to serve as the leg stretchers. You'll need to indicate the center of each board, and you're going to create a dado into each board to ensure that they'll fit into each other. This dado will need to be cut with a 60 degree angle. I set the depth on the miter saw to 1", so that it only removes half the depth of the material (2").
-
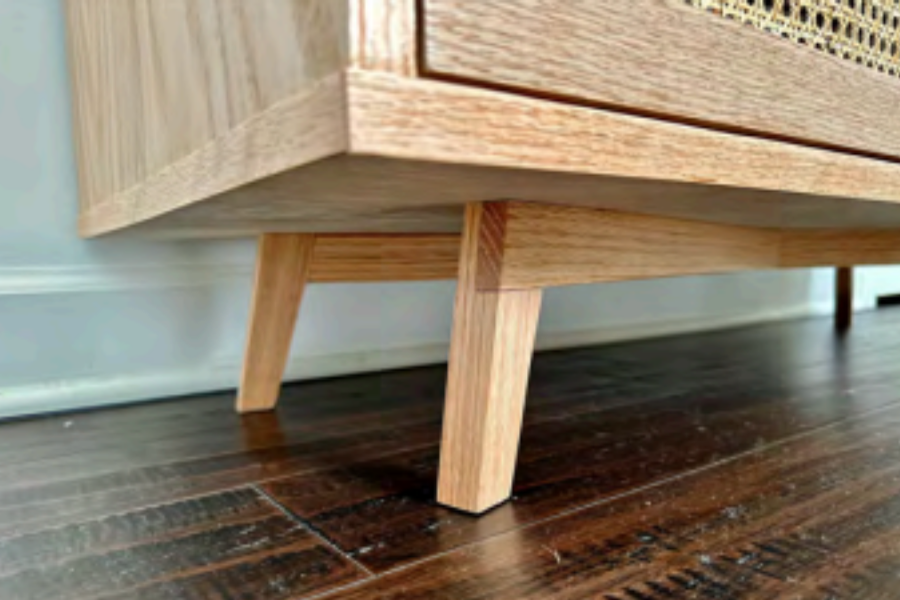
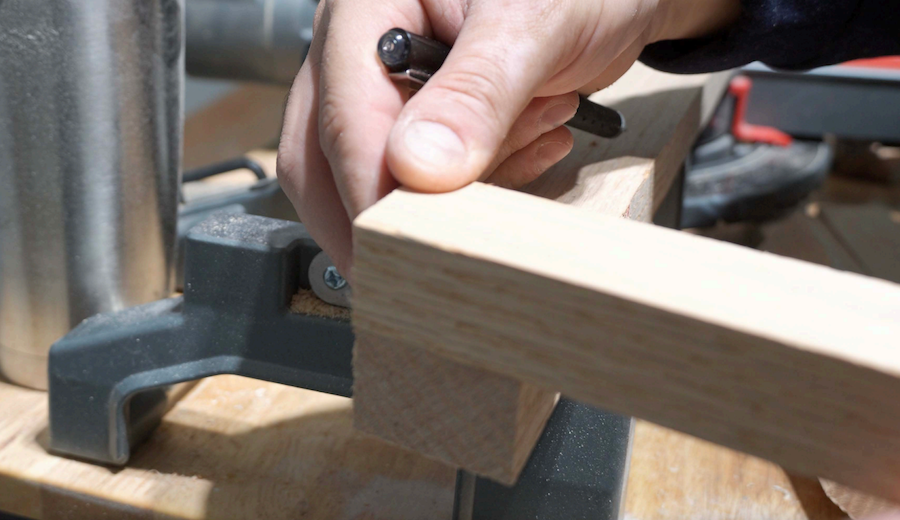
Make dresser legs
Leave a 10 degree cut at the end of each of the two stretchers. You will need to cut the top (and bottom) of the 6" wooden legs with the same angle, in order to match the stretchers. Once you've ensured the pieces' angles correspond, draw a line indicating where the boards align, and remove half of the material once again using the dado. Set a positive spot on the miter saw to ensure only half the material is removed from both the stretcher and leg.
-
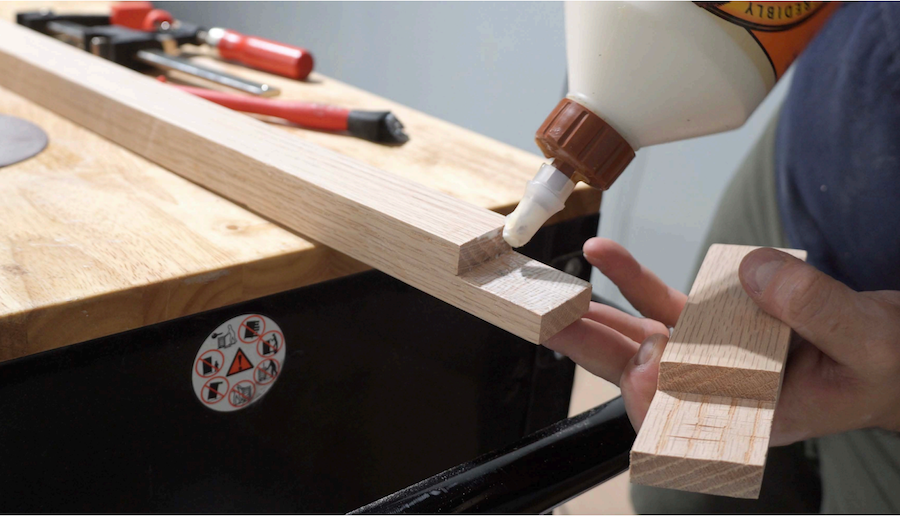
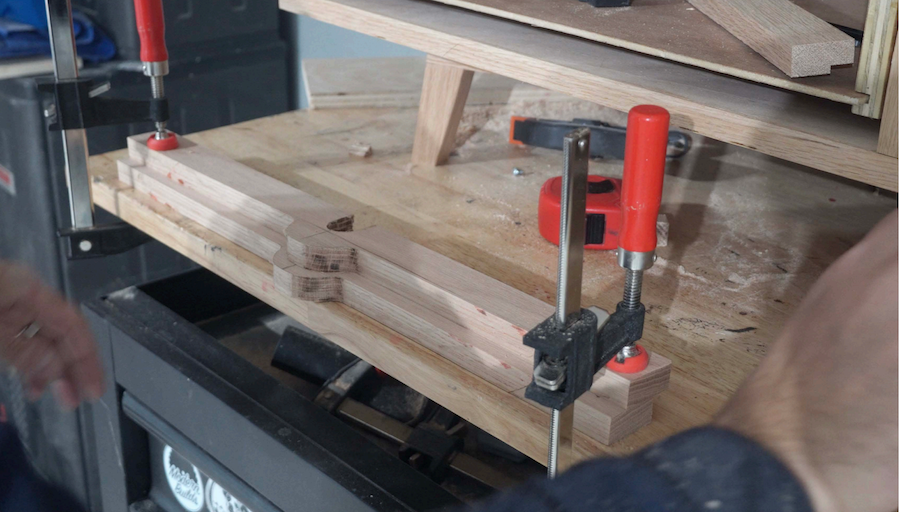
Glue stretchers and legs together
Once the material is removed, add wood glue between the gap corresponding to both pieces and clamp the pieces together. Allow at least one full day for curing, to ensure glue reaches its full strength.
-
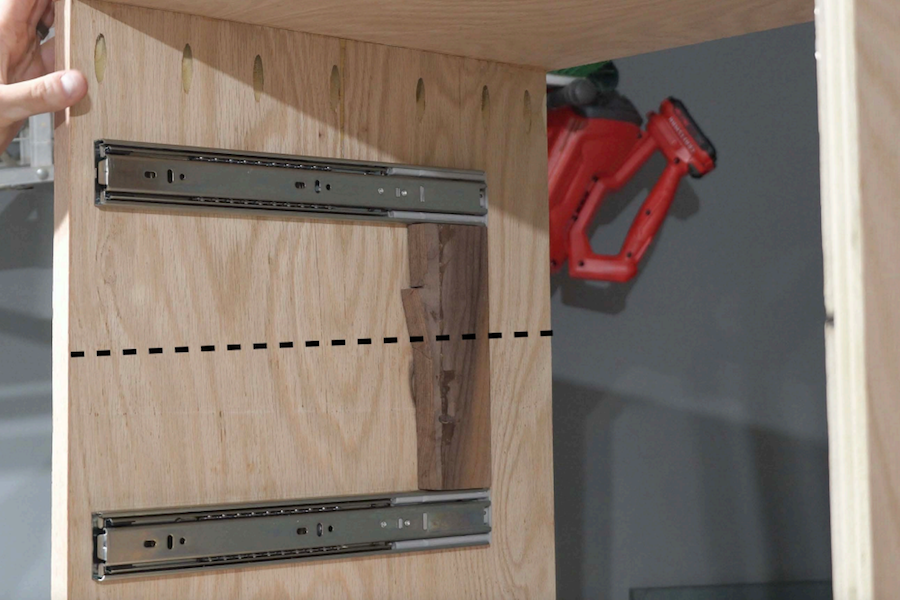
Install Drawer Slides
Next, you can start setting up for the drawers. Split the vertical length into three parts (approximately 9 1/4"), then measure the center of that distance and add the slide there (to ensure it's centered). You'll notice in the first picture, I'm using a scrap piece of wood to space out an equal distance between two of the drawer slides.
-
Cut drawer boards to size
Rip the 1/2" boards to 6 inches (feel free to make these wider, if you have enough material to accommodate it, feel free to make the drawer boards taller. After that, cut them to size (six 20" boards and twelve 14" boards). Each board will need to be run through the table saw approximately 3/4" of an inch from the bottom of the inside of the board. This will create a dado for the drawer bottoms to sit in.

-
Set up drawer boards with pocket-holes
Drill three pocket-holes onto the 14" board, towards what will be the drawer-face. The back portion of the drawer will have three pocket-holes facing each of the drawer sides (on the back-side, to ensure the pocket-holes are hidden).
-
Assemble drawers
Add corresponding pocket-hole screws and begin to assemble the drawers. Ensure all of the drawer-bottom dados align. Then, install the corresponding drawer slide piece. My particular drawer slides are closer to the top, since my drawer boxes are only six inches tall. If your drawer boxes are taller, feel free to add the drawer slide more towards the center.
-
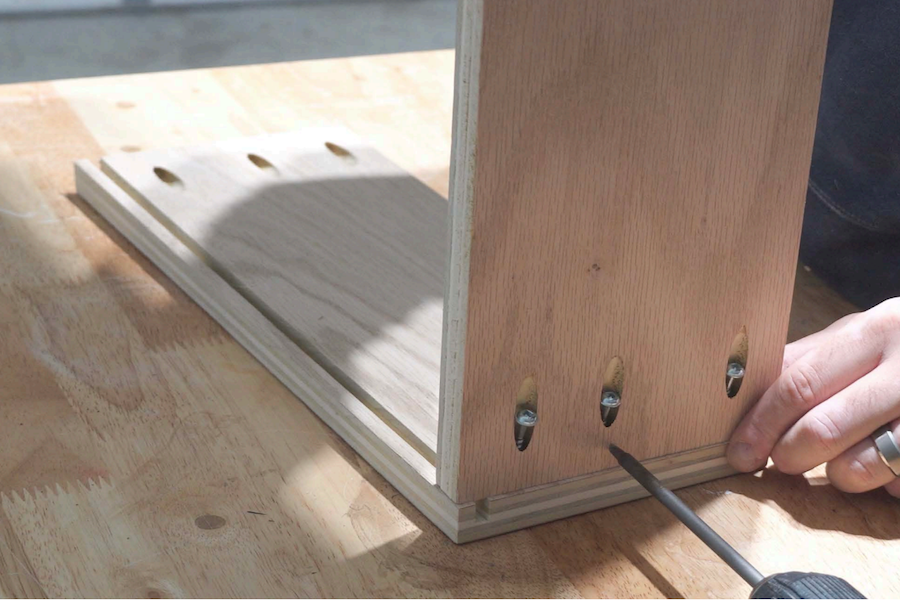
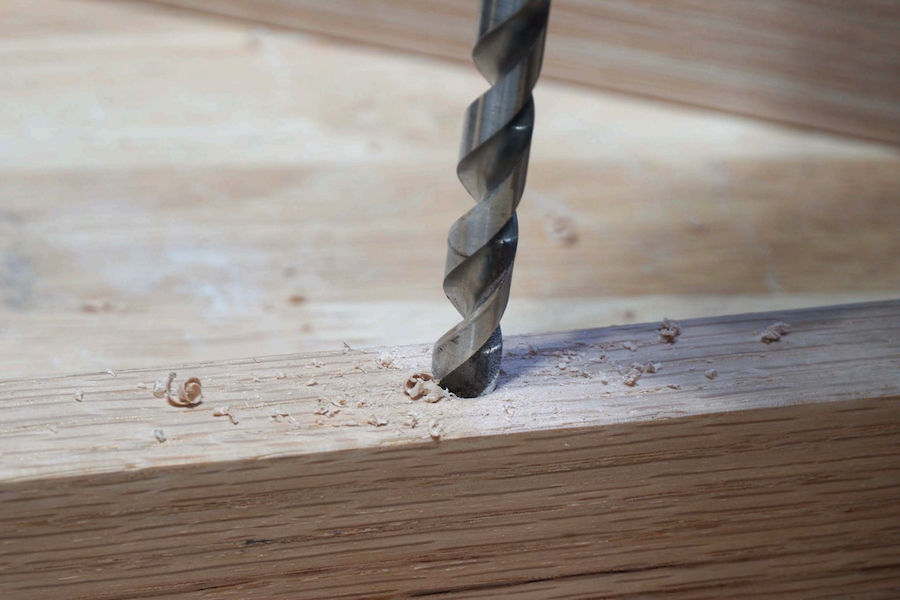
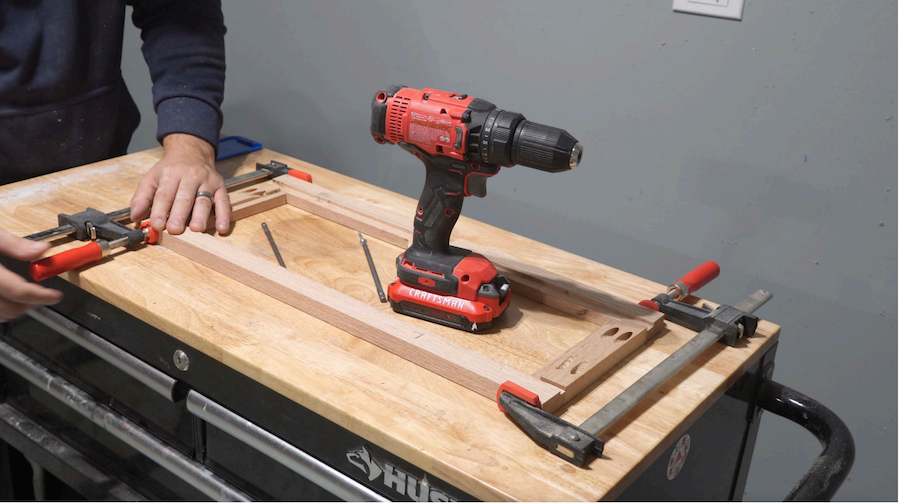
Attach the stretcher/leg base to the dresser
Drill a hole under the leg stretchers. This stretcher is 2" thick, so be sure to make the hole 1 1/4" deep, to ensure the 1 1/4" screws reach the stretcher. Once the eight holes are made, center the base, then attach it using the pocket-hole screws. Prior to attaching the base, you should consider sanding it, as the base will be less accessible later. Steps for sanding will be covered in step 18.
-
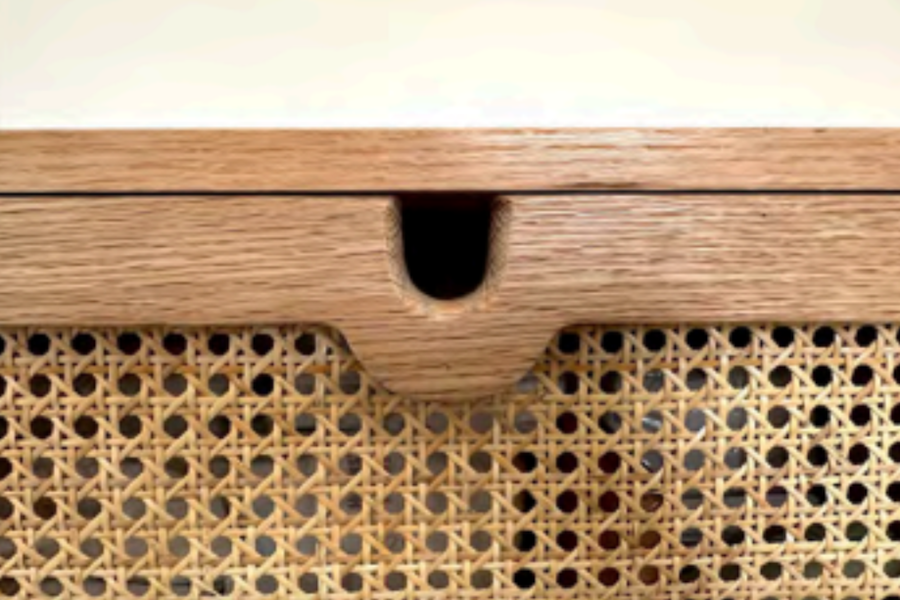
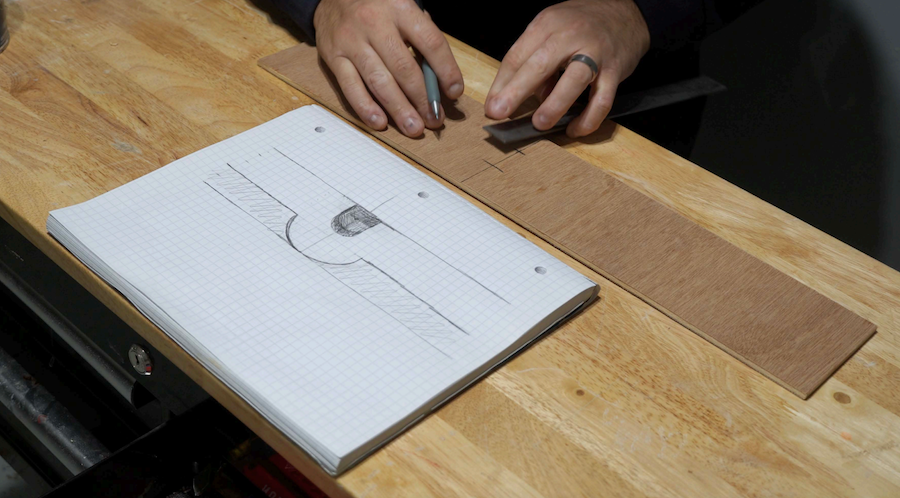
Create drawer face template
Using a sheet of graph paper (to ensure symmetry), I began mapping out the design for what the drawer handle should be. This part is entirely up to subjective, but feel free to use this layout as an example. Once the template was made on the graph paper, I transferred that drawing over to the think piece of scrap-wood my measuring the distance between all my points. I cut off excess material with a circular saw and wood chisel.
-
Create drawer handles using template
Utilize the 3/4" x 2.5" x 20X boards for this step. Draw an outline of the template using the board mentioned, and then cut off majority of the excess material using a circular-saw (as this will strain the router less). Once this is complete, use a wood router with a flush-trim bit to copy the template onto your actual piece, while the template is clamped down. The flush-trim router bit has a bearing on it that follows the template's outline, while
simultaneously removing the excess material below it.* This step can be easily skipped, if you'd rather attach your own drawer-handles.
-
Create a dado for the Cane Material
You'll need to create a rabbet on the back of every drawer face , in order to allow space for the cane material. Allow approximately 1/2" for this on every side. You can continue to use the flush-trim bit to ensure a standard rabbet through out the piece, especially the round drawer-handle. In my case, I clamped two corresponding pieces together, approximately 1/2" apart so that the flush-trim router can make the rabbet.
-
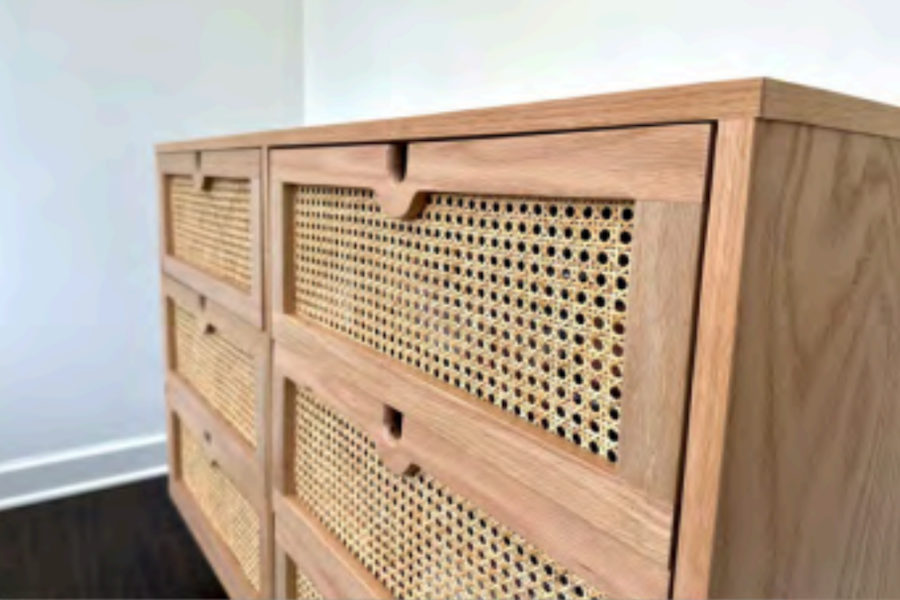
Make drawer-faces
The vertical portion of a drawer face is referred to as a 'stile', and the horizontal piece is the 'rail'. Drill pocket-holes into the stile on both sides, and begin attaching these pieces to their respective rails. Prior to adding the pocket-hole screws, it is also a good idea to clamp together the drawer-faces to ensure proper alignment (the back of the drawer-face is shown in the second image - the rabbet that will house the cane-webbing is more visible here).
-
Sand the project and use your stain/clear coat
Since the drawer-faces are accessible here, it is a good idea to begin the sanding process (prior to them being attached to the cane webbing). The same logic applies to the dresser itself, as well as the stand/legs (mentioned earlier). I typically use an orbital sander, progressing from 120-grit to 180-grit sandpaper, and finish on 240-grit sandpaper. Sanding the dresser is essential, as it'll smoothen all surfaces, as well as allowing any stain or clear-coat to adequately adhere to the surface. Everyone's process is different, however, finishing 200-grit sandpaper mark is fairly typical. I did not stain the project in this case, as I wanted to keep the natural color of the oak wood intact. To do this, I clear-coated the entire project using Varathane's water-based
polyurethane using a sponge brush. The clear-coat will also provide a protective surface, increasing the lifespan of your project.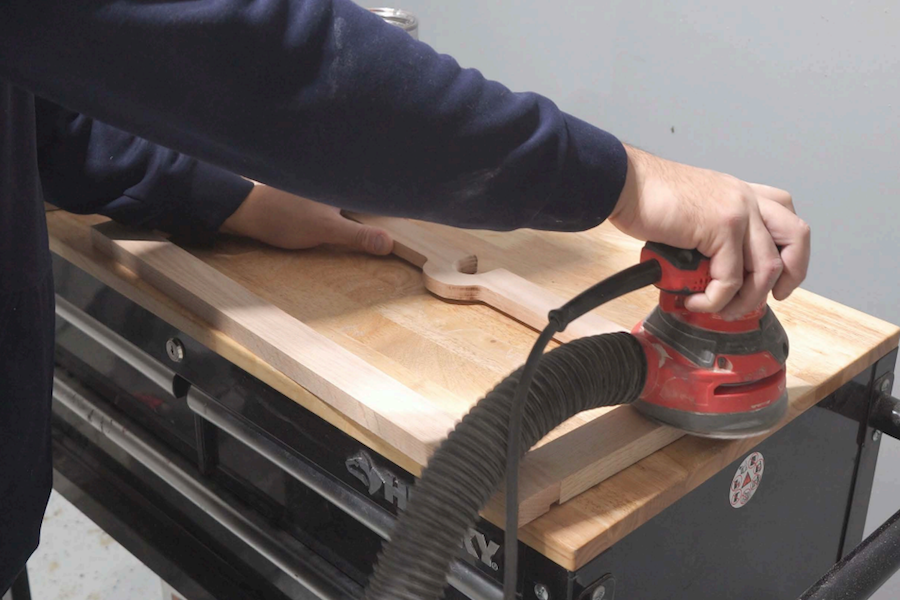
-
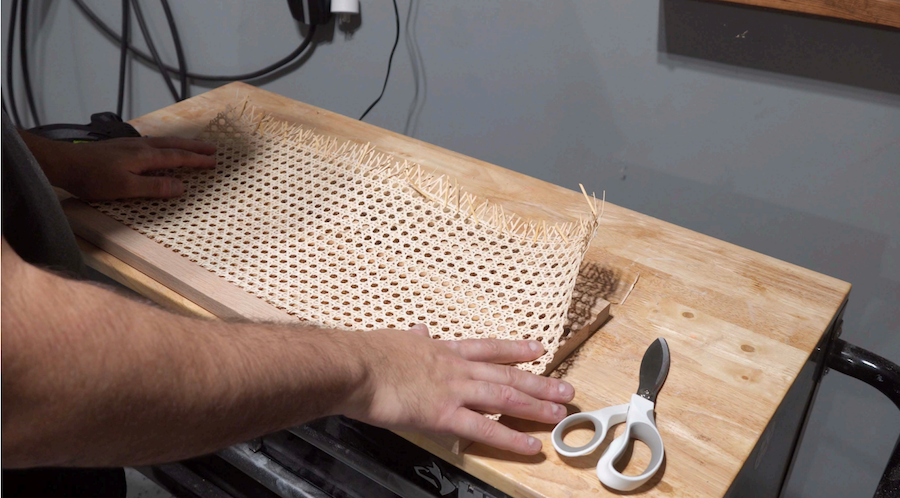
Adhere the cane to the drawer-faces
Once the clear-coat has dried on all surfaces, I cut it to approximate length and began bonding it to the rabbets mentioned earlier using hot glue (this tends to work well on materials like cane and wood). I also made sure to remove any excess material using scissors. The goal is to only have enough material to fill the rabbets; nothing more.
-
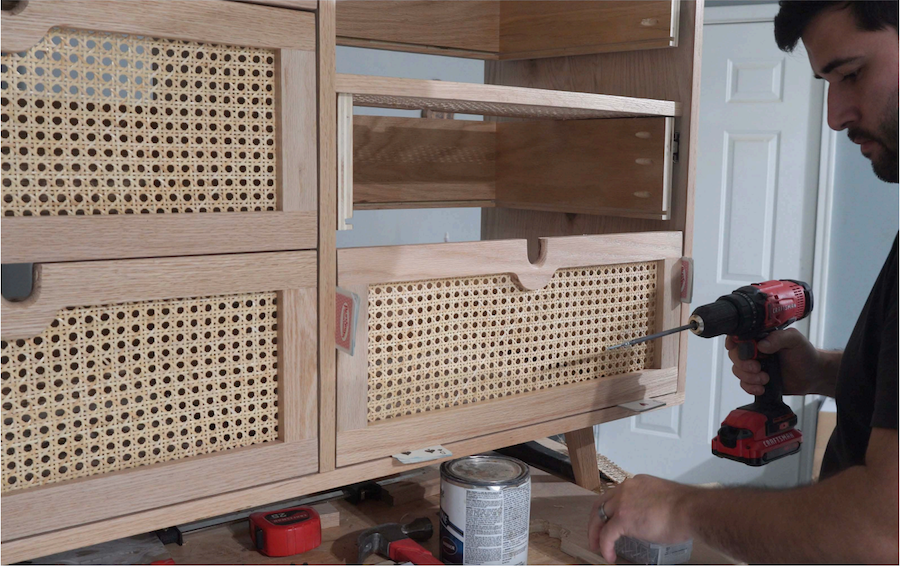
Add the drawer-bottoms and attach drawer faces
Using the dimensions provided, cut the 1/4" thick underlayment to 20 1/2" x 14 1/2" - this should slide right into the dado on the existing drawers. Once the drawer-bottoms are in, you can begin attaching the drawer-faces. To get an even gap on all sides, I began putting an equal amount of playing cards into each gap until the drawer-face was centered. Once it was centered. I secured the drawer to the drawer-face using the pocket-holes we drilled into the inside of the drawer, facing outward. As shown in the second image, this step is very easy if you haven't attached the back panel.
-
Enjoy
Attach the back panel using small nails (1/4" thick - cut this to size, depending on the dimensions you go with), and enjoy your new fun project! This project is a lot of work, but also very rewarding to see, and unique overall. As mentioned, feel free to refer to the instructional video as a visual to this guide
- if it hasn't been uploaded yet, it will be soon