

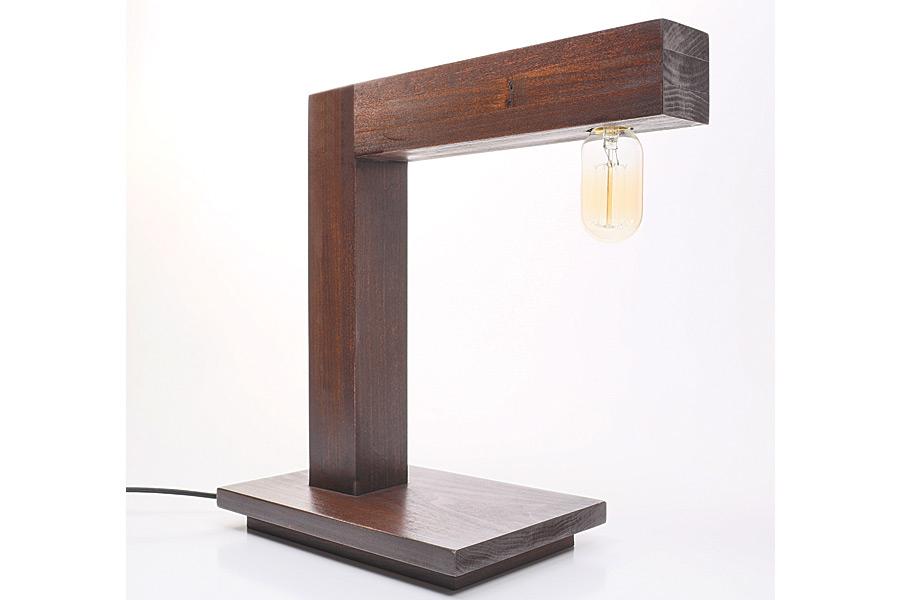
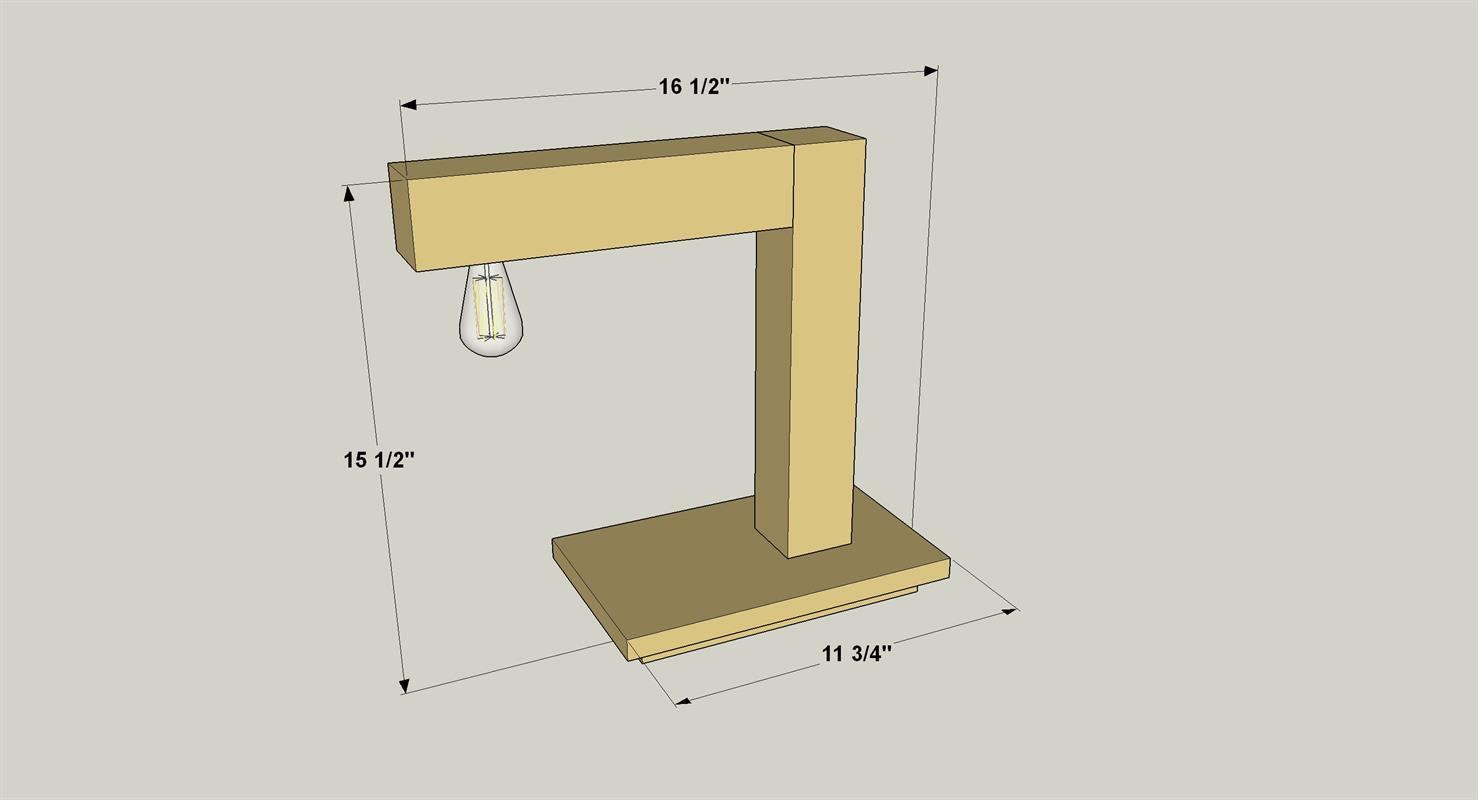


With its modern styling and antique-style bulb, this desk lamp offers a unique look that’s sure to please. It’s made from just three short boards, plus simple lamp hardware. The biggest challenge with this project is drilling a couple of long, straight holes, which will help you work on your skills.
Tools
Kreg Tools


Other Tools
-
Miter Saw

-
Tape Measure
Materials
Wood Products
- 1 Board , 3x3 , 36"
- 1 Board , 1x8 , 24"
- 1 Board , 1x2 , 36"
Hardware & Supplies
- 4 #8 x 3" wood screws
- 4 #8 x 2" wood screws
- 1 75-watt light socket
- 1 8' lamp cord (with plug)
- 1 In-line switch
- 1 40-watt Edison-style bulb
- 1 3/8" x 12" drill bit
- 1 Wood glue
- 1 1 1/4" Forstner-style drill bit
Cut List & Parts
- 1 Arm , 2 1/2" x 2 1/2" x 11 1/2"
- 1 Post , 2 1/2" x 2 1/2" x 14"
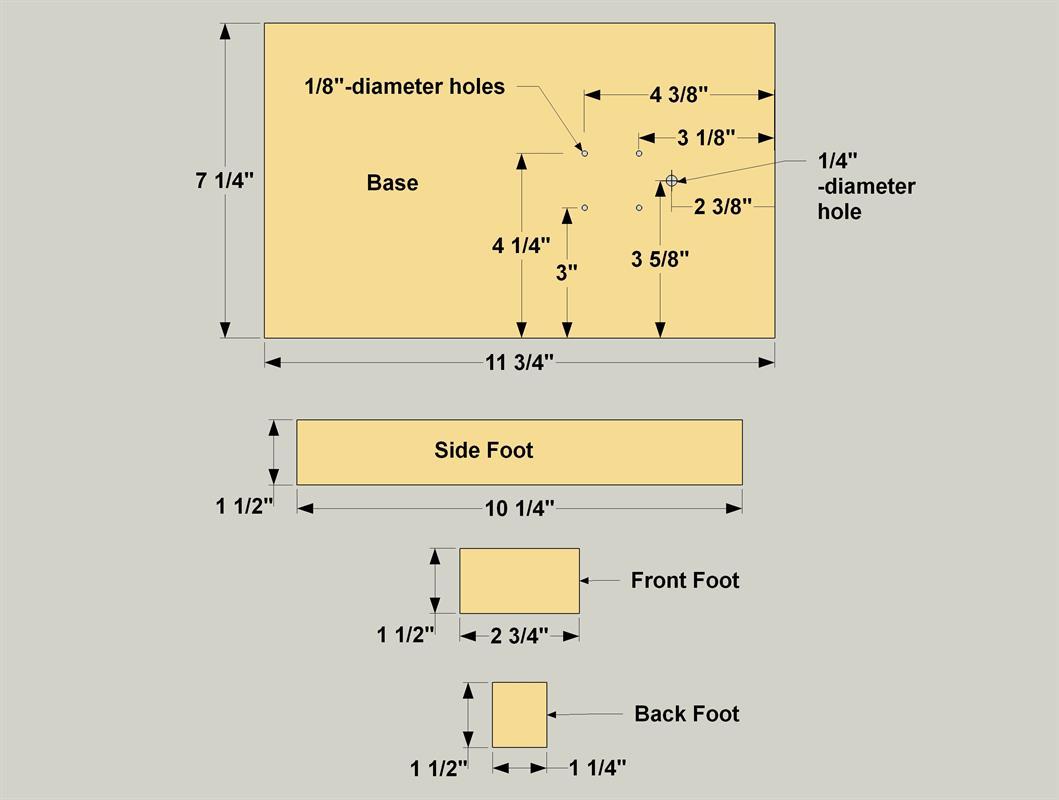
- 1 Base , 3/4" x 7 1/4" 11 3/4"
- 2 Side Foot , 3/4" x 1 1/2" x 10 1/4"
- 1 Front Foot , 3/4" x 1 1/2" x 2 3/4"
- 2 Back Foot , 3/4" x 1 1/2" x 1 1/4"
Directions
-
Create the Arm and Post
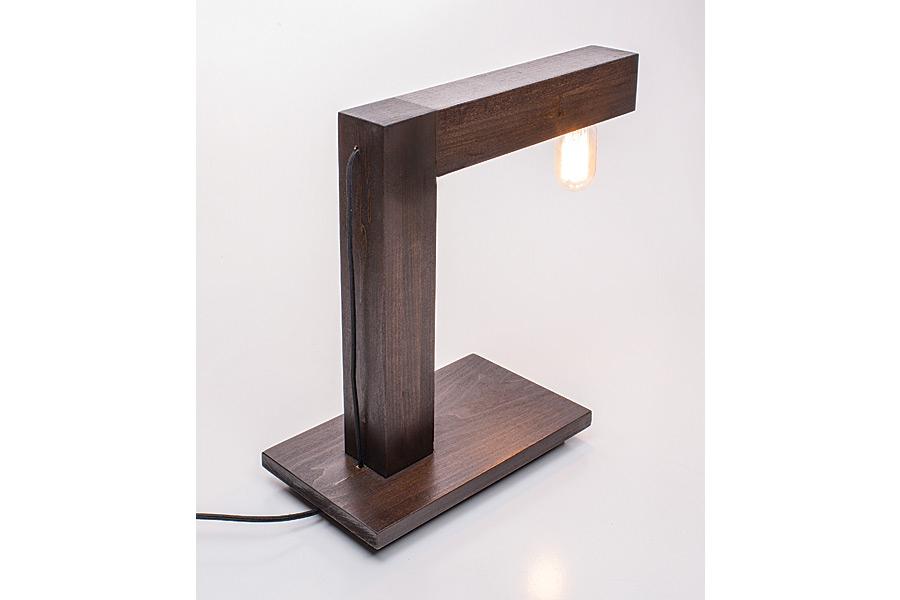
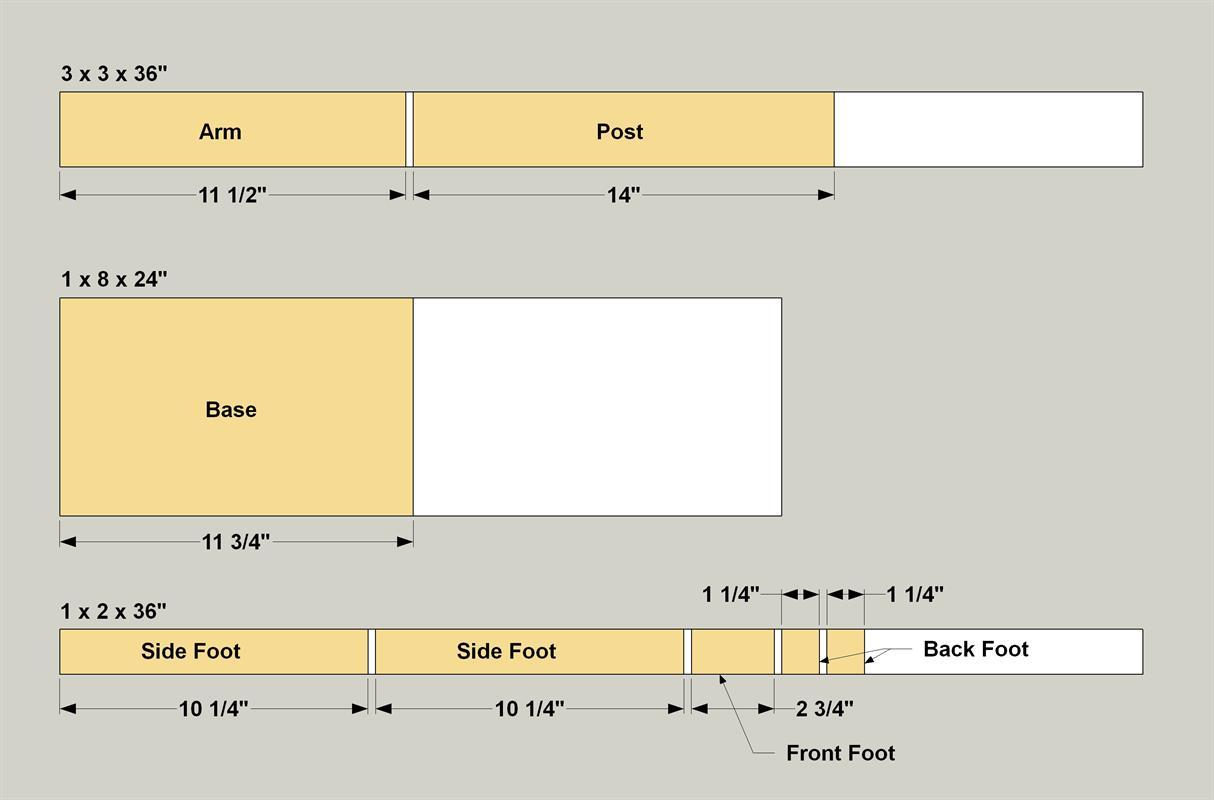
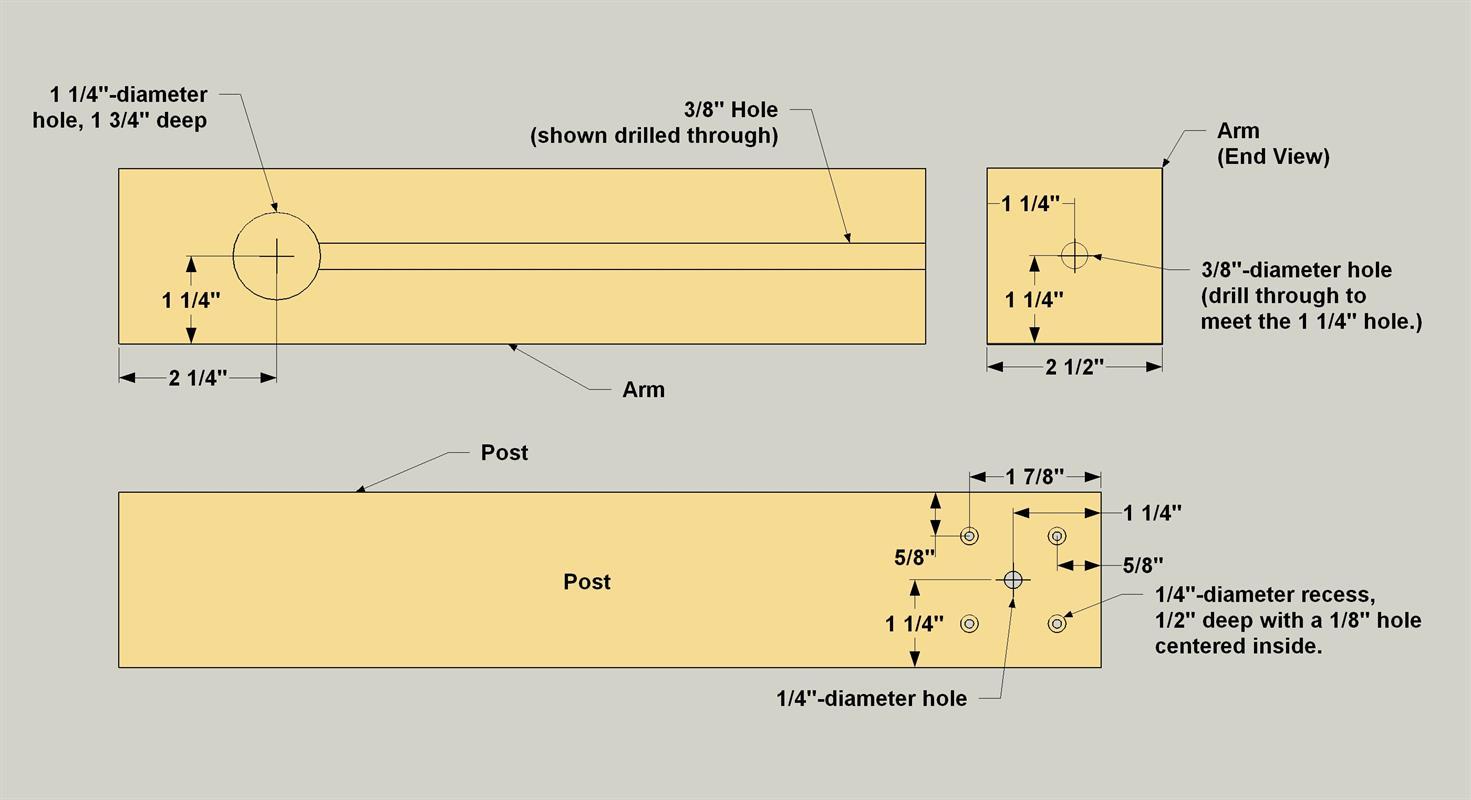
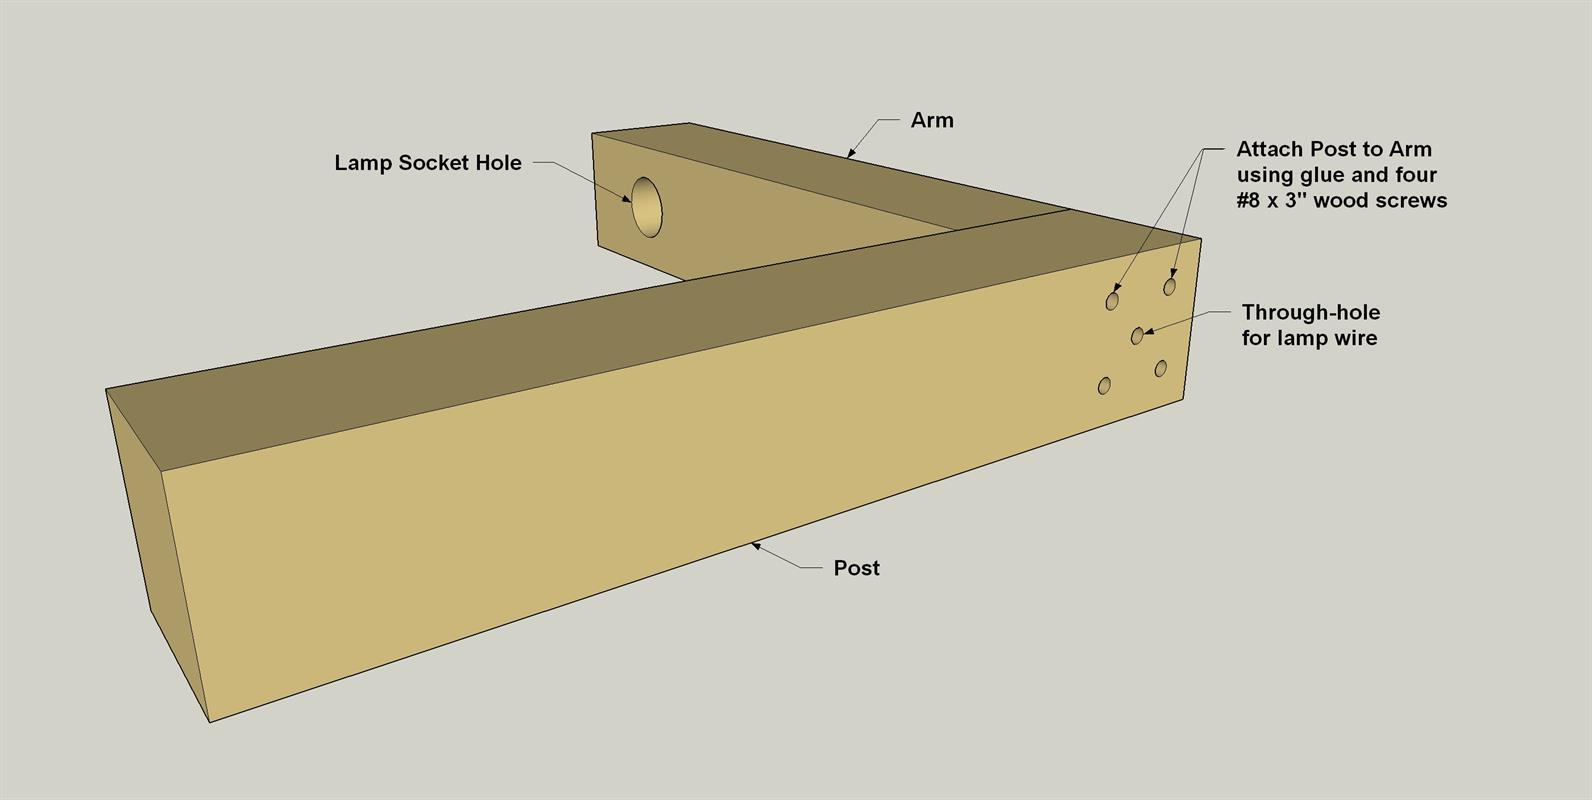
Cut the Arm and Post to length form a 3 x 3 x 36" board, as shown in the cutting diagram. In the Post, first drill a 1/4" hole, where shown. This will be for the lamp cord. Be sure to hold the drill perpendicular to the surface so you drill straight through the Post. Then drill four 1/8" holes through the Post where shown, again making sure to drill straight. Then come back with a 1/4"-diameter bit and drill recesses 1/2" deep at the same locations. For the Arm, you’ll need to drill a 1 1/4" recess 1 3/4" deep for the lamp socket where shown. Then use a long 3/8"diameter drill bit to drill a long hole, as shown. This hole is for the lamp cord. It starts at the end of the Arm and extends through until it meets the lamp-socket hole.
-
Assemble the Arm and Post
Sand the Arm and Post as needed, and then assemble them. Spread some glue on the end of the Arm and clamp it against the Post. Then drive in four #8 x 3" screws.
-
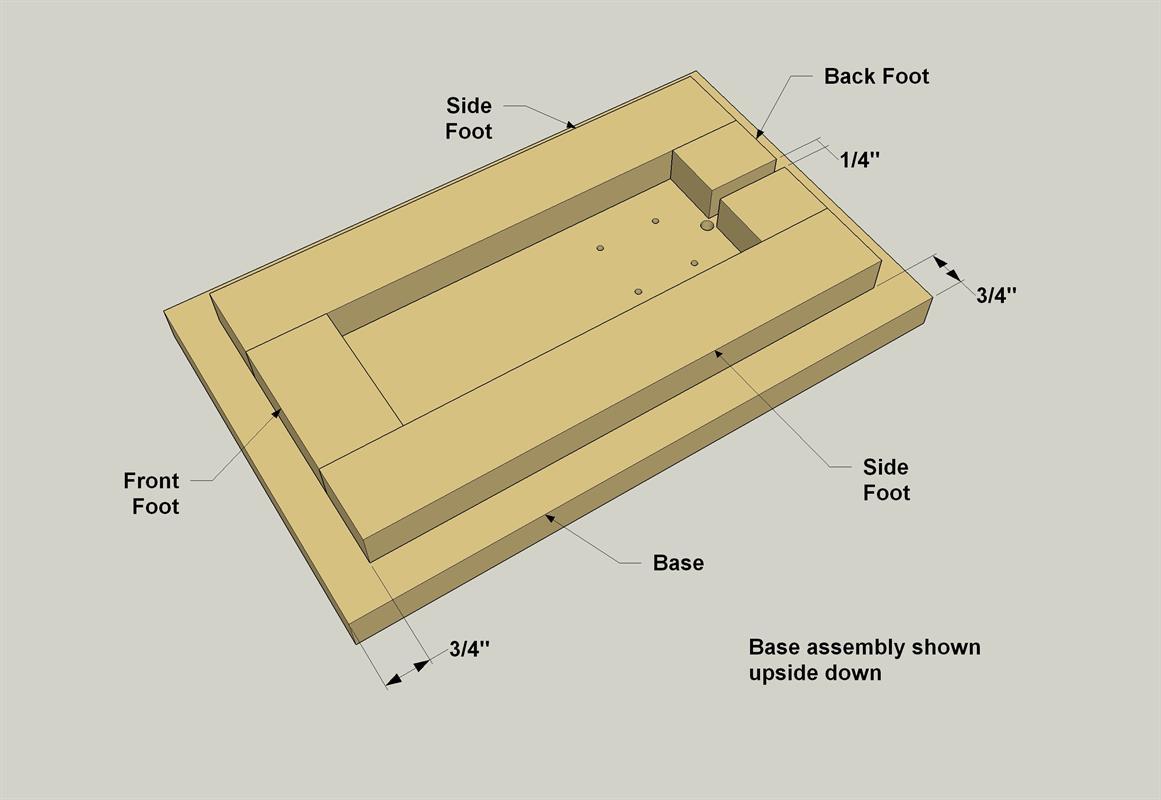
Create the Base Parts
Cut a Base, two Base Side Feet, two Base Back Feet, and one Base Front Foot to size, as shown in the cutting diagram. Then drill holes in the Base for the lamp cord, and for post-mounting screws, as shown.
-
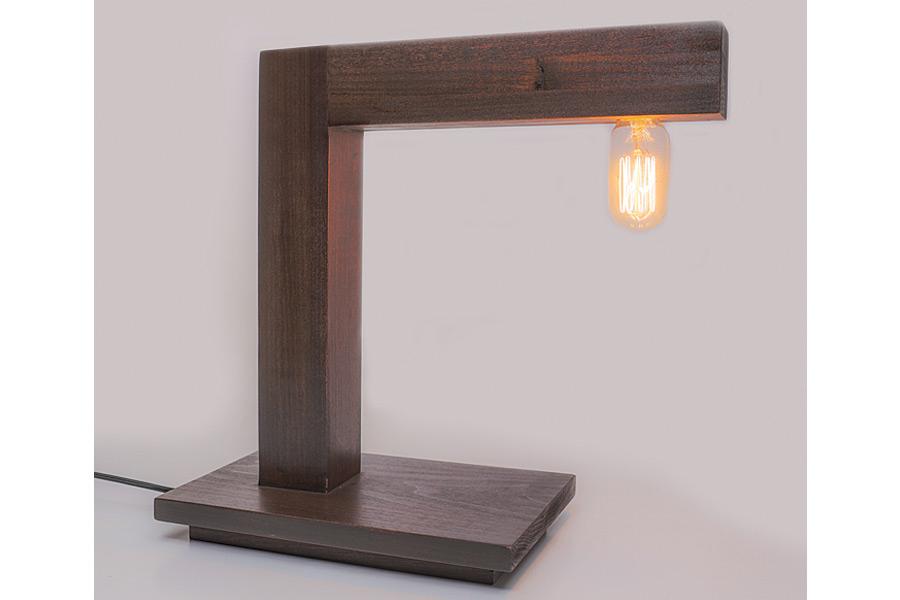
Assemble the Base
Sand the base parts as needed, then attach the Base Feet to the Base with glue, as shown.
-
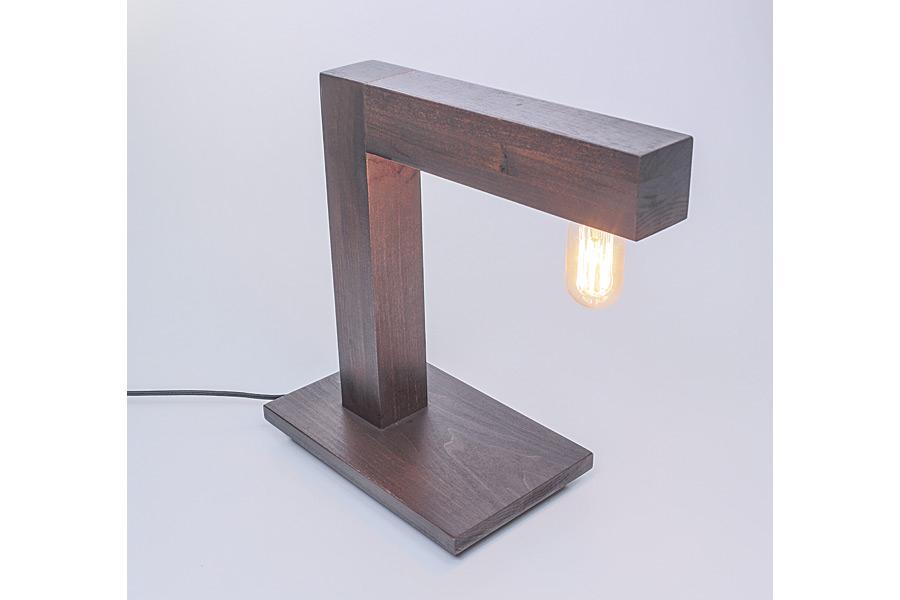
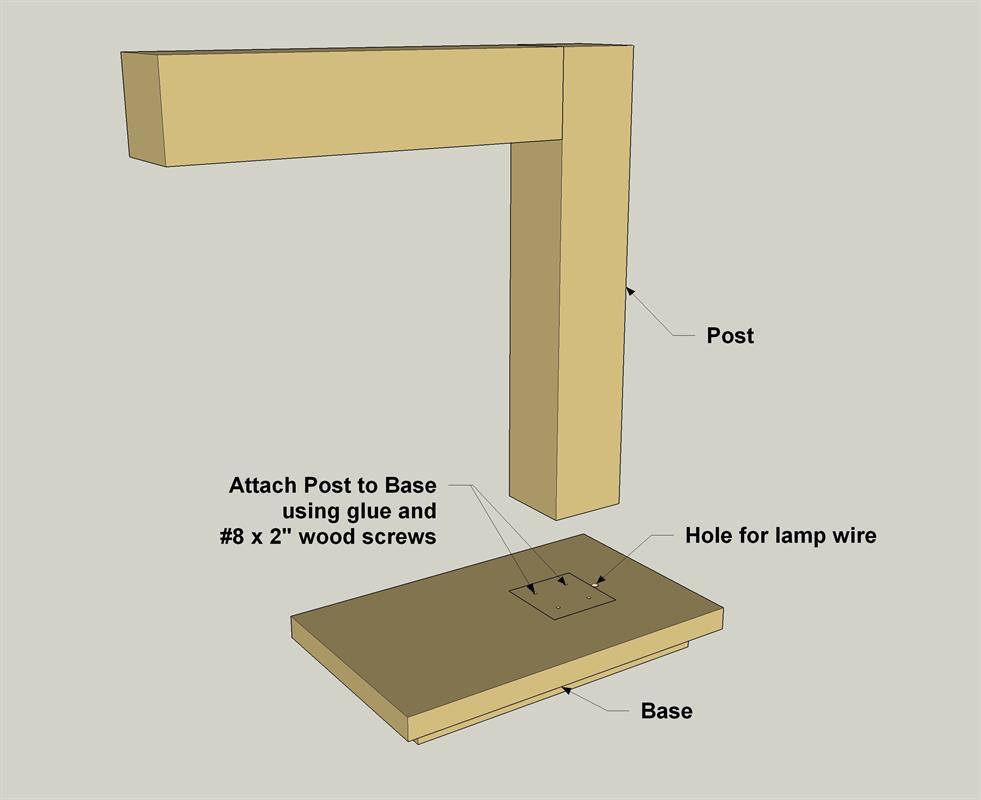
Attach the Post to the Base
Attach the base assembly to the Post with #8 x 2" wood screws, as shown.
-
Stain and Wire It Up
Now you can do any final sanding needed, and apply the stain of your choice. When the stain dries, feed the lamp cord up through base, along the post, and through the arm. Secure the wires to the lamp socket, and then press the socket into place. You may need to add a bit of glue to prevent the socket from turning inside the hole. Pull excess lamp cor taut, and then attach an in-line switch to the cord at a convenient location.