Modern Bathroom Vanity with Drawers on the Bottom
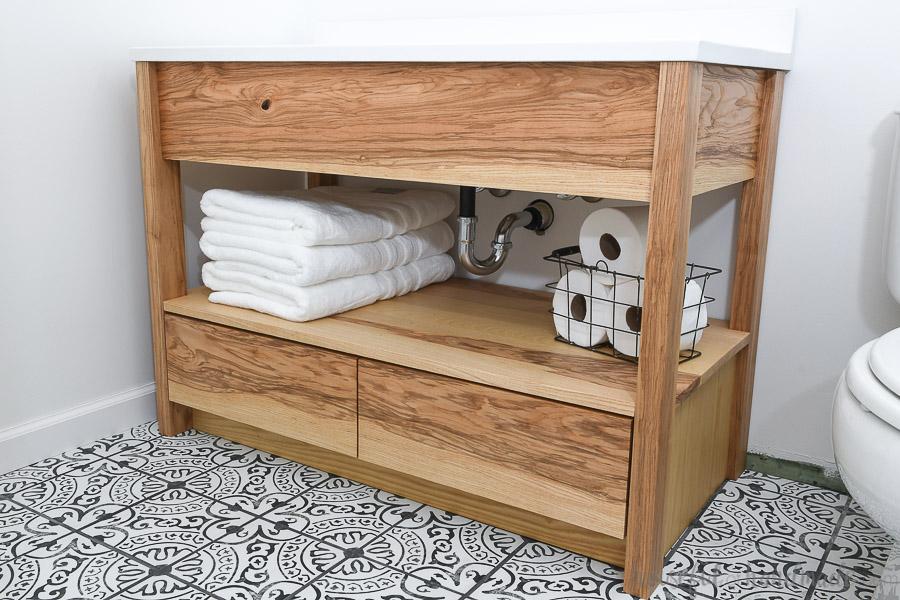
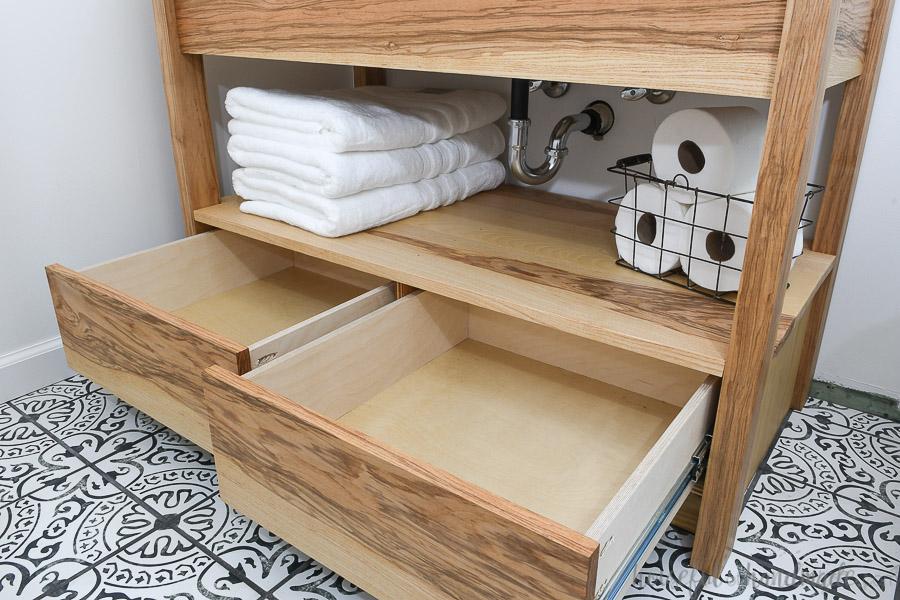
By Houseful of HandmadeCreate a beautiful modern bathroom with this open bathroom vanity. The large drawers on the bottom give lots of storage. While the open shelf allows you to store towels and other necessities in plain sight. Perfect for a guest bathroom.
Directions
-
Build the sides
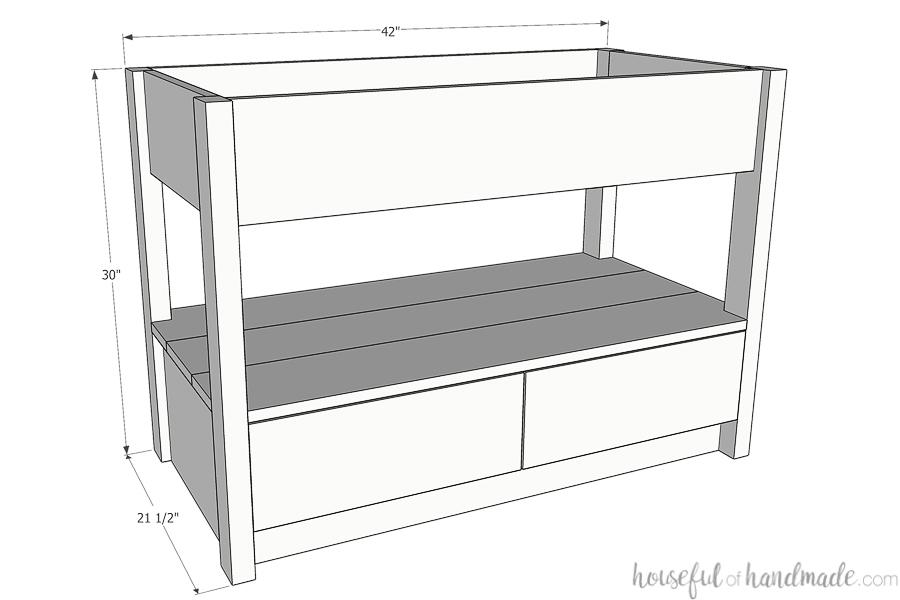
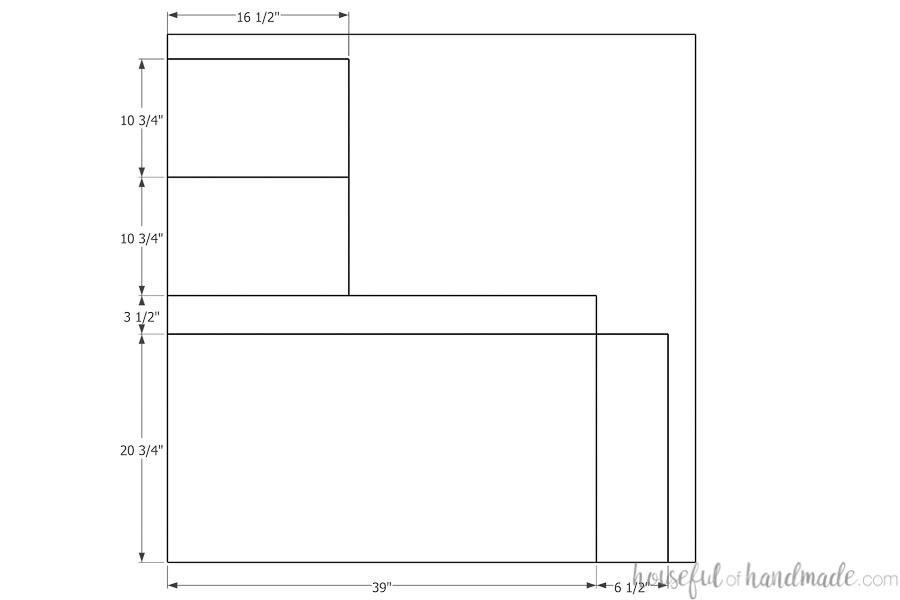
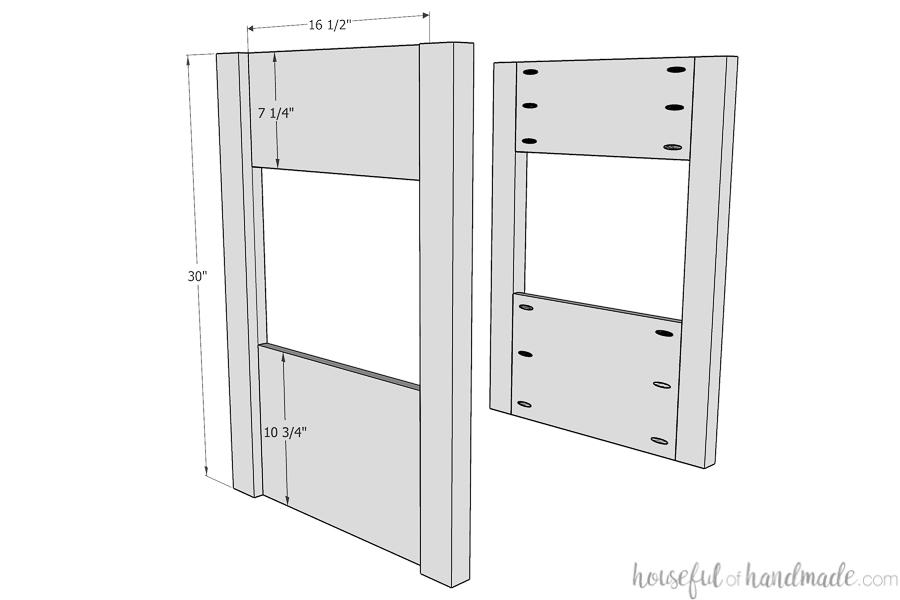
Cut the legs, side top skirt and side panel pieces. Assemble the sides of the vanity by drilling pocket holes set for 3/4" material in the side of the skirt and panel pieces. Attach them to the legs with 1 1/4" pocket holes so the skirt is flush with the top and inside of the legs and the panel is flush with the bottom and inside of the legs.
-
Attach the toe kick
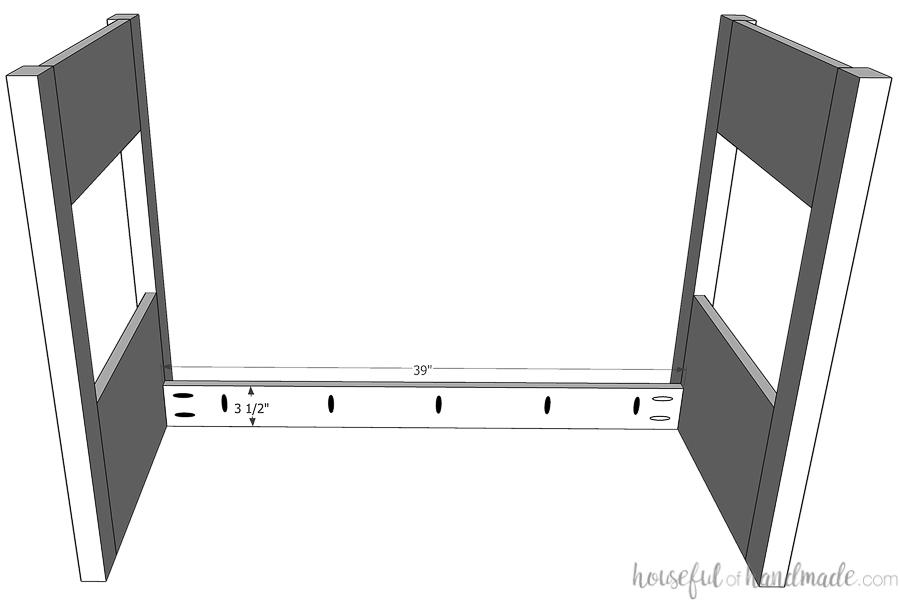
Drill pocket holes in the sides and top of the toe kick. Attach the toe kick between the assembled sides so it is set back from the front 2 1/2" (flush with the edge of the side panel) using 1 1/4" pocket hole screws.
-
Attach the base
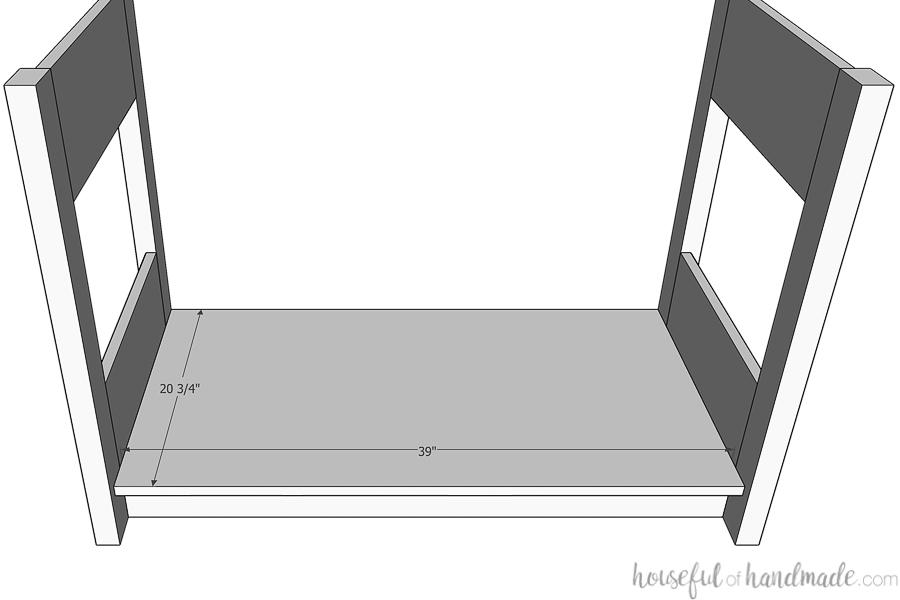
Drill pocket holes set for 3/4" material in the sides of the base piece. Be aware of where the toe kick will be so you make sure your pocket holes are not in the same spot. Attach the base piece to the sides so that the back is flush with the back (it'll be set back from the front 3/4") using 1 1/4" pocket hole screws. Also, attach the base to the pocket holes drilled in the toe kick with 1 1/4" pocket hole screws.
-
Build the shelf
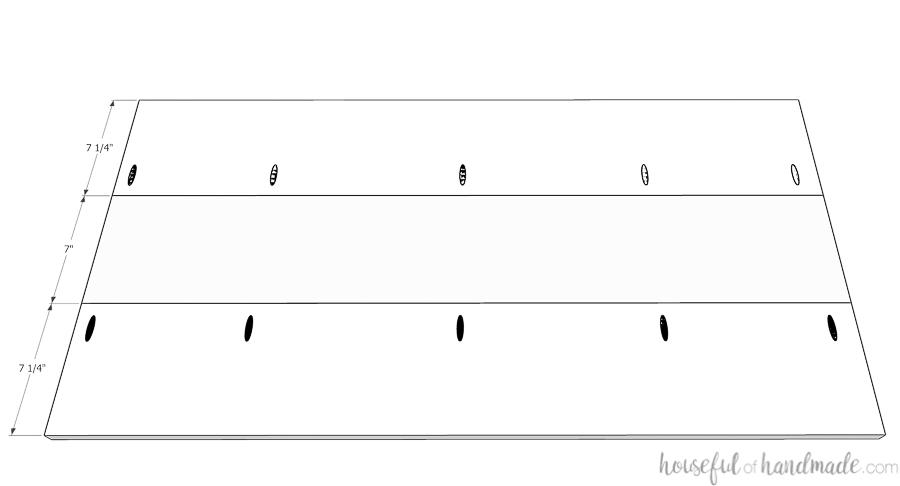
One of the shelf slats will have to be ripped down to 7" to fit the vanity. Use a table saw or circular saw with a guide track to cut it down. Drill pocket holes set for 3/4" material in the edge of the outer shelf slats. Using wood glue and 1 1/4" pocket hole screws, attach the 3 shelf slats so they make one large shelf.
-
Notch out the shelf
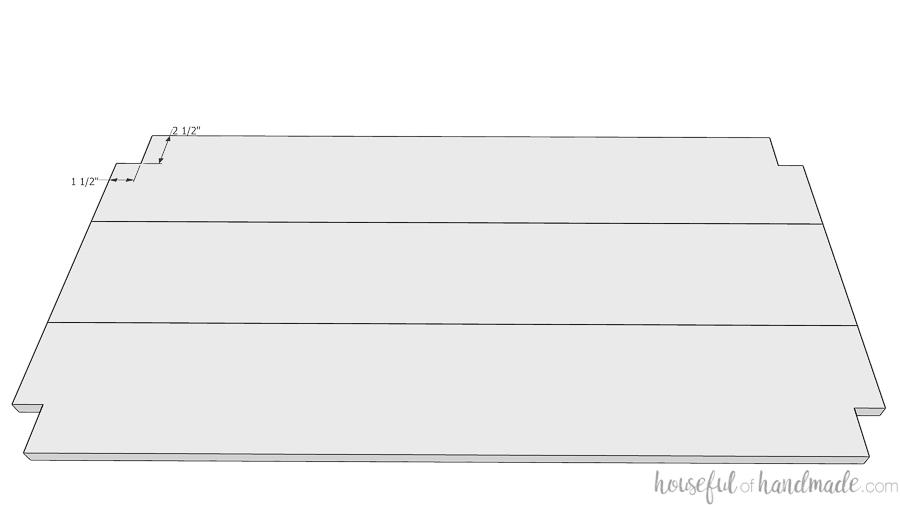
To fit the shelf in the vanity, notch out room for the 2x3 legs to fit into the corners with a jigsaw.
-
Attach the drawer divider
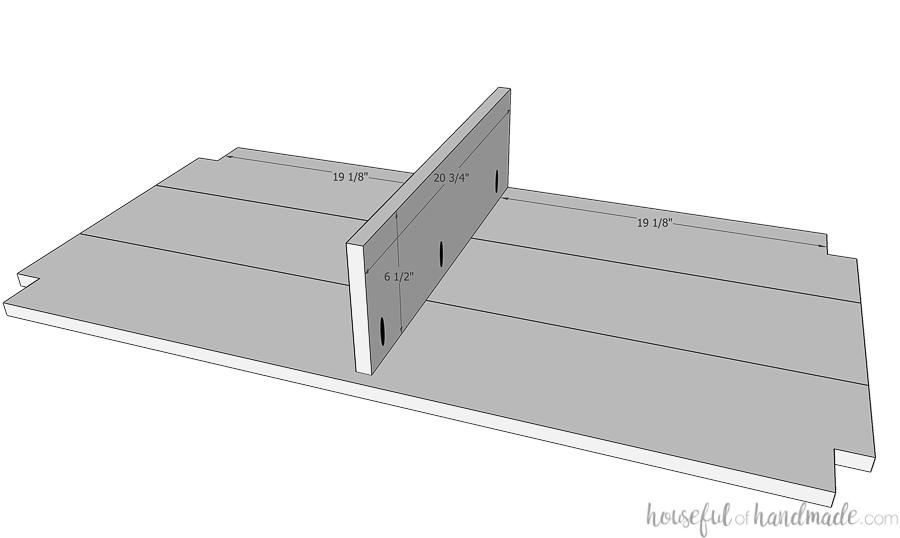
Drill pocket holes set for 3/4" material in the top of the drawer divider. I put 3 pocket holes on one side and two in between them on the other to keep the drawer divider vertical. Attach it to the center bottom of the assembled shelf with 1 1/4" pocket hole screws.
-
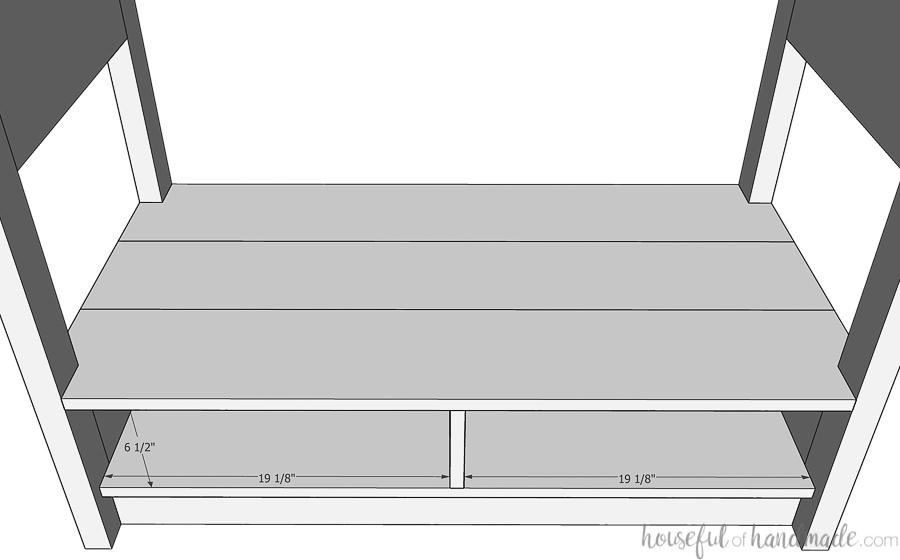
Attach the shelf
Drill pocket holes set for 3/4" material in the notched out sides of the shelf (so the screws will go into the legs pieces). Carefully fit the shelf into the vanity between the sides. Ensure the notches fit snuggly around the legs. Clamp tight to the side panels and so the drawer divider is snug to the base. Secure with 1 1/4" pocket hole screws into the legs. Then secure the drawer divider to the base with screws from the underside. You can use 1 1/4" pocket hole screws for this if you don't want to buy other screws. Make sure the drawer divider is centered on the base.
-
Attach the top skirt
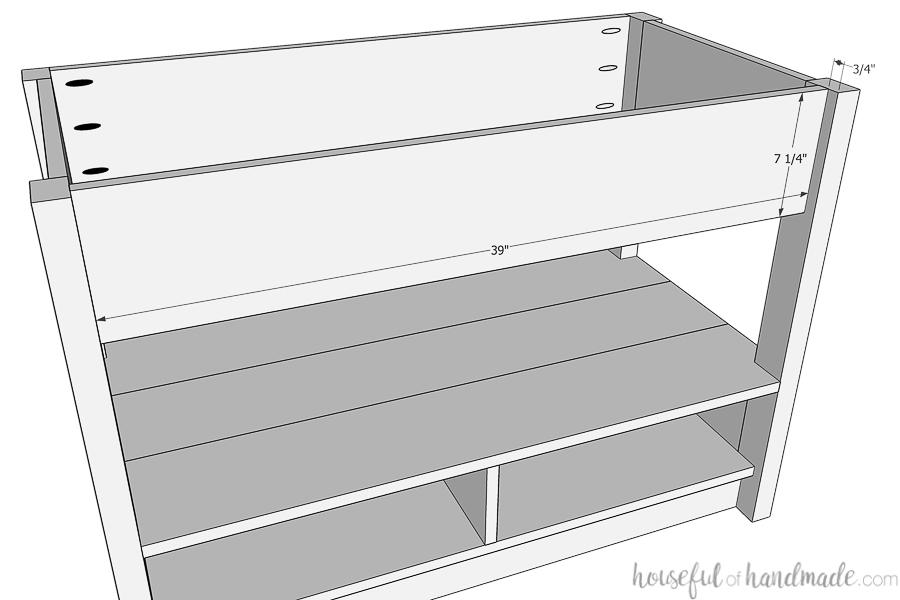
Drill pocket holes for 3/4" material in the sides of the front & back top skirt pieces. Attach the back piece so it is flush with the back of the legs (also, you can put the pocket holes facing the back since they will be up against the wall). Attach the front piece so it is set back from the front of the leg by 3/4". Secure with 1 1/4" pocket hole screws.
-
Prep the drawer box pieces
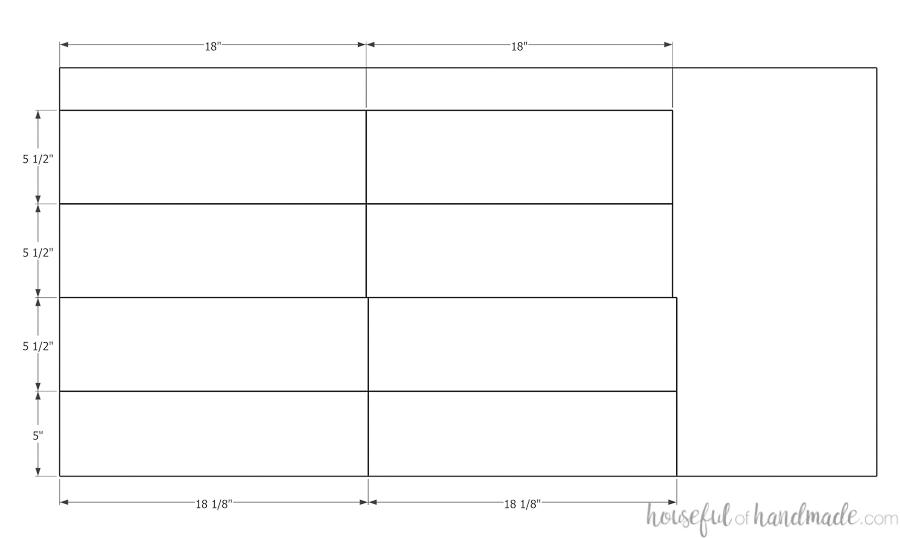
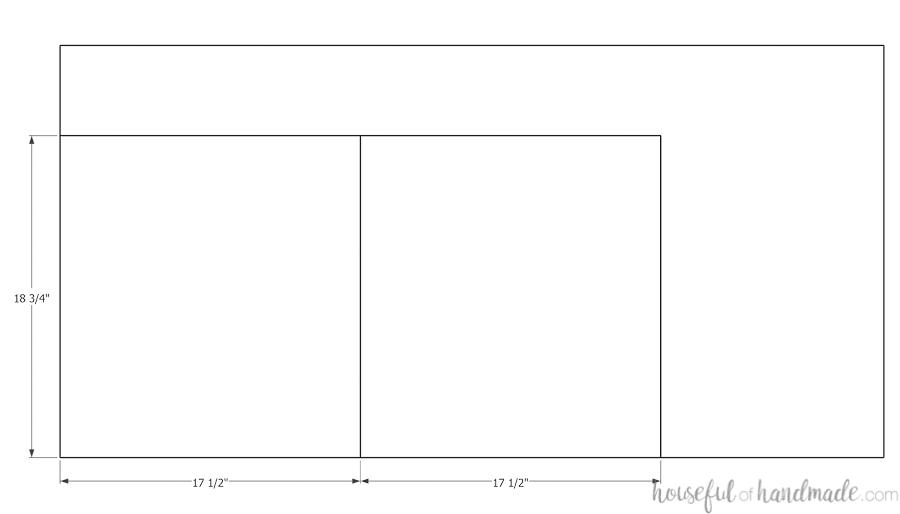
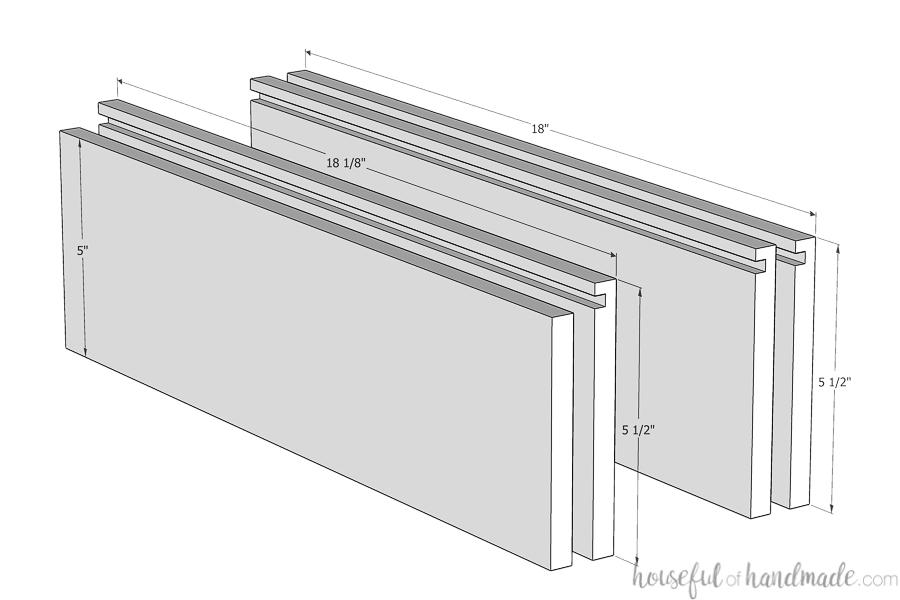
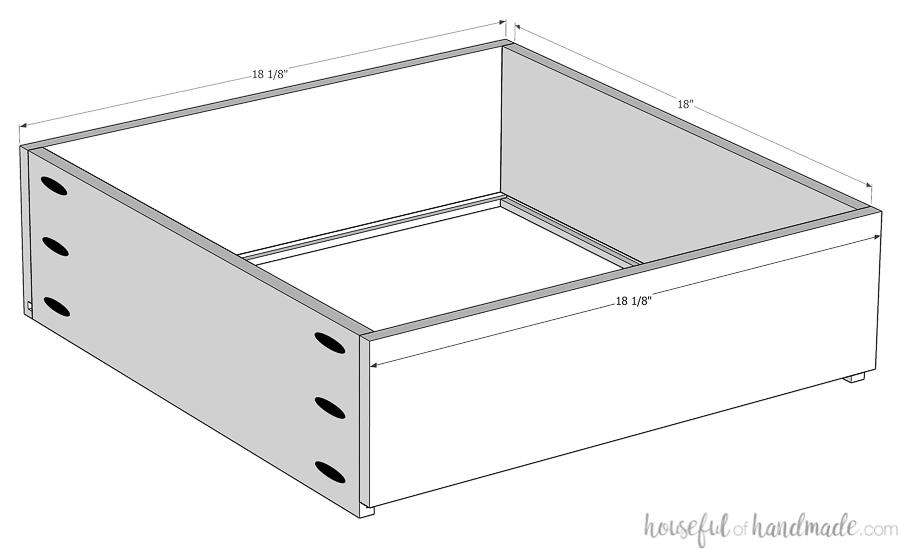
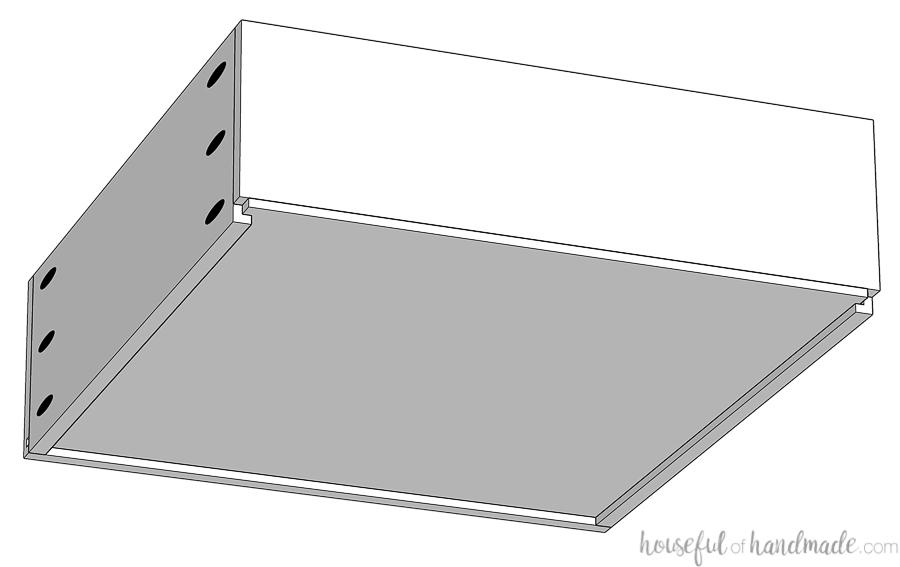
Cut the drawer box pieces out of the 1/2" plywood. Cut a 1/4" wide by 1/4" deep groove in the inside of the front and side drawer box pieces 1/4" up from the bottom.
-
Build the drawer box
Drill pocket holes set for 1/2" material in the outside sides of the drawer box side pieces (not the same side as the groove). Build the drawer box by securing the side pieces to the front and back pieces with wood glue and 1" pocket hole screws. Make sure the top of all the drawer box pieces is flush. The bottom of the drawer box back piece should be flush with the top of the groove.
-
Attach the drawer box bottom
Slide the drawer box bottom piece under the back piece and into the groove on the sides and front. Ensure the box is square and then secure the drawer box bottom to the back piece with 5/8" brad nails.
-
Install the drawers
Install the drawer slides so the front of the drawer box is flush with the front of the drawer divider. Clamp the drawer fronts to the drawer box so there is an 1/8" gap on the sides and tops of the drawer fronts. Secure with 1 1/4" screws through the inside of the drawer.
-
Enjoy!
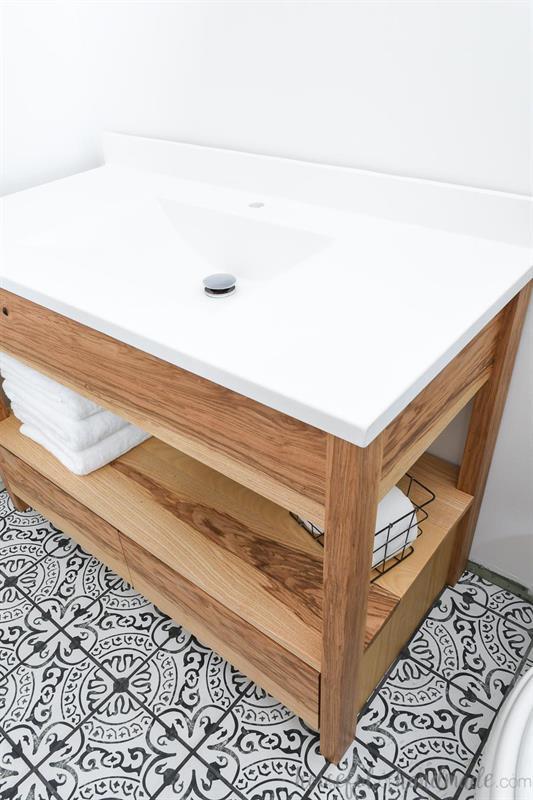
This vanity is made to fit an off-the-shelf 43" x 22" vanity. So you can finish and install your vanity with a sink in a weekend! And for more building plans and ideas for remodeling a bathroom on a budget, make sure to visit me at Housefulofhandmade.com!


