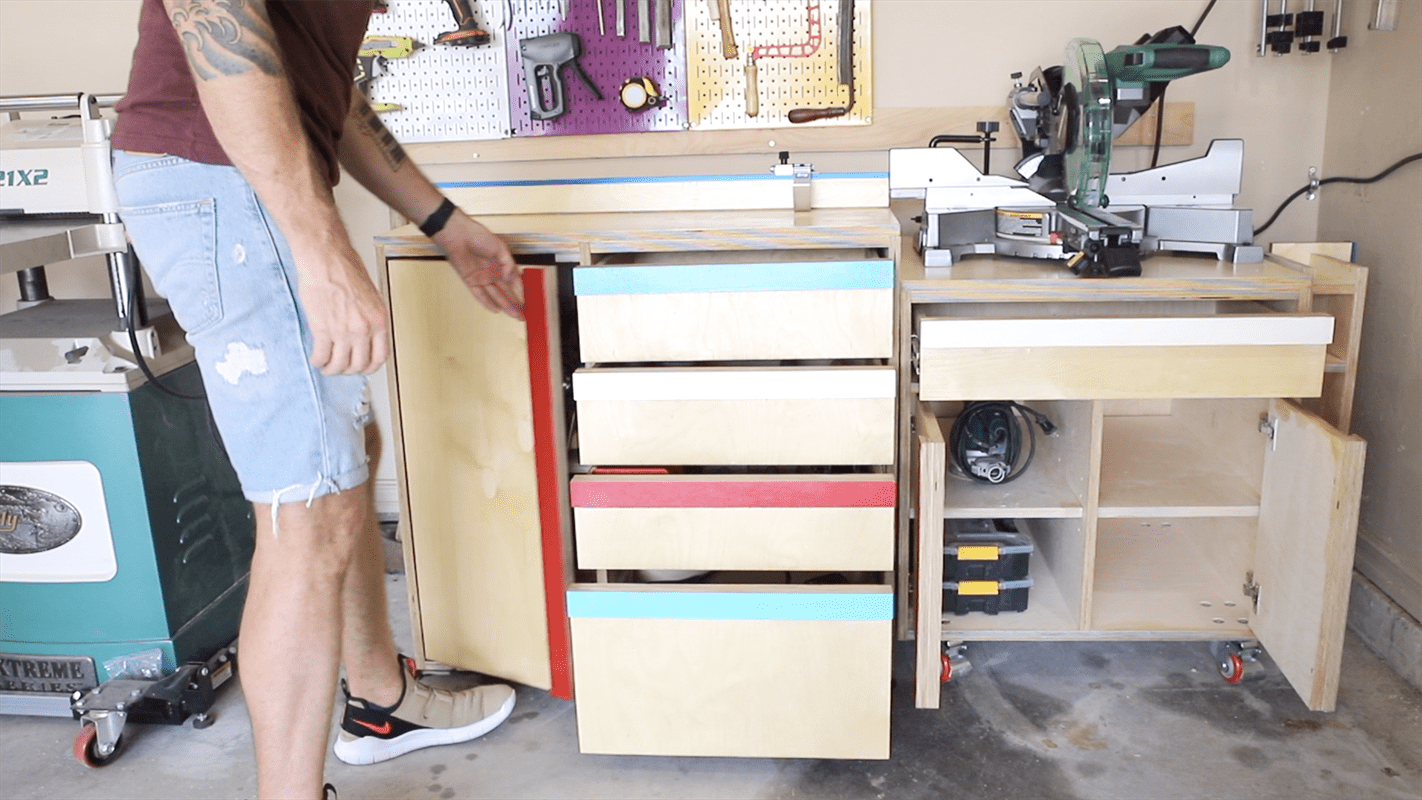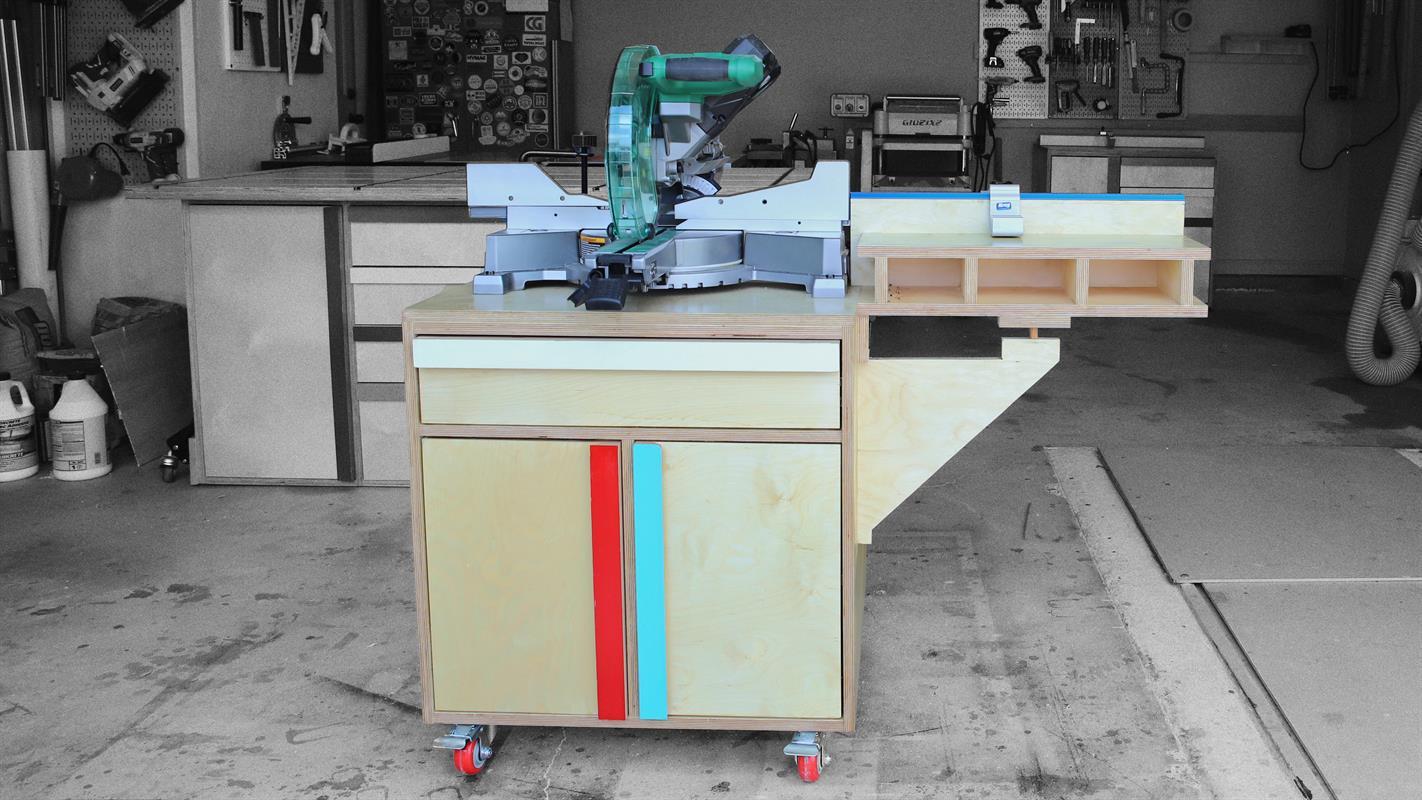


This miter station is both mobile & modular. It features a fold up wing for supporting work pieces, the Kreg Trak system, and the ability to roll around the shop. It also has 5 drawers, and 3 cabinets. Watch the YouTube video for further details and a link to the sketchup file: https://youtu.be/pXTB
Tools
Kreg Tools


Other Tools
-
Miter Saw

-
Table Saw
-
Tape Measure
Materials
Wood Products
- 3 Plywood , 3/4" Thick , Full Sheet
- 1 Plywood , 1/2" Thick , Full Sheet
- 1 Plywood , 1/4" Thick , Full Sheet
Hardware & Supplies
- 100 Pocket screws 1 1/4"
- 5 18" drawer slide sets
- 3 Euro style inset hinges
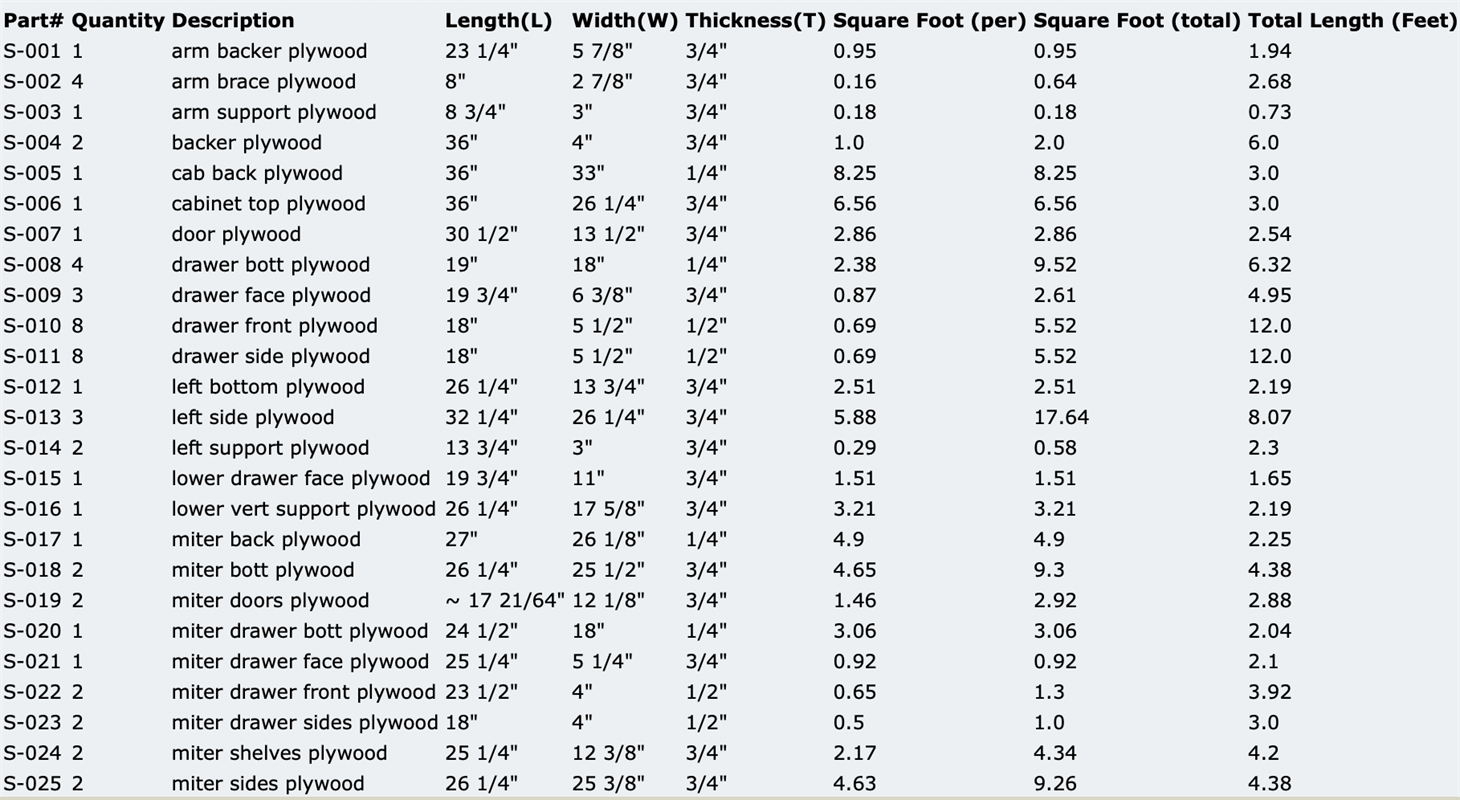
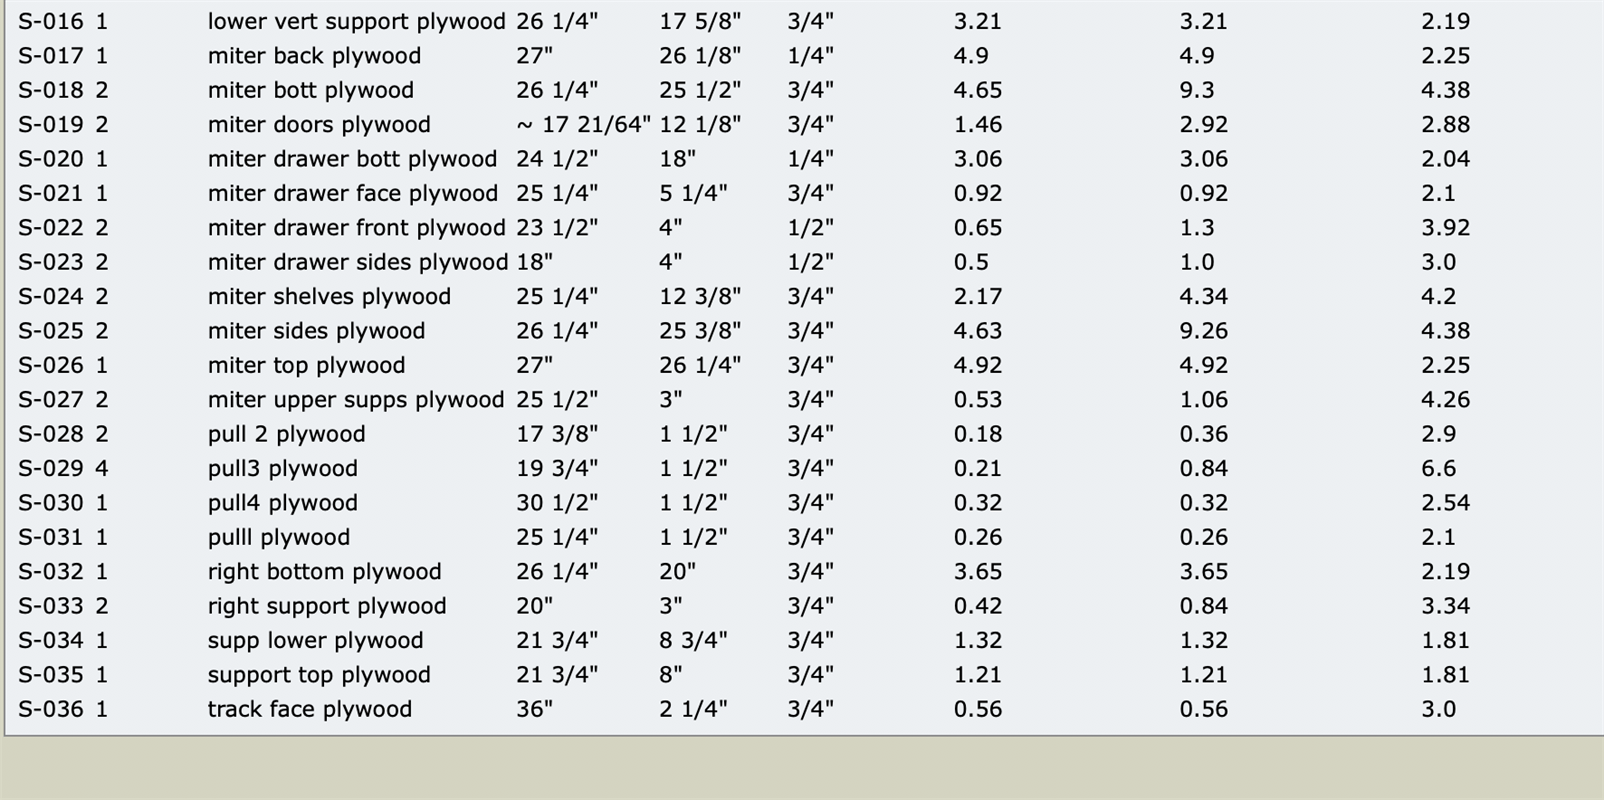
Cut List & Parts
- 3 3/4" Baltic Birch Plywood , 4x8
- 1 1/2" Baltic Birch Plywood , 4x8
- 1 1/4" Baltic Birch Plywood , 4x8

Directions
-
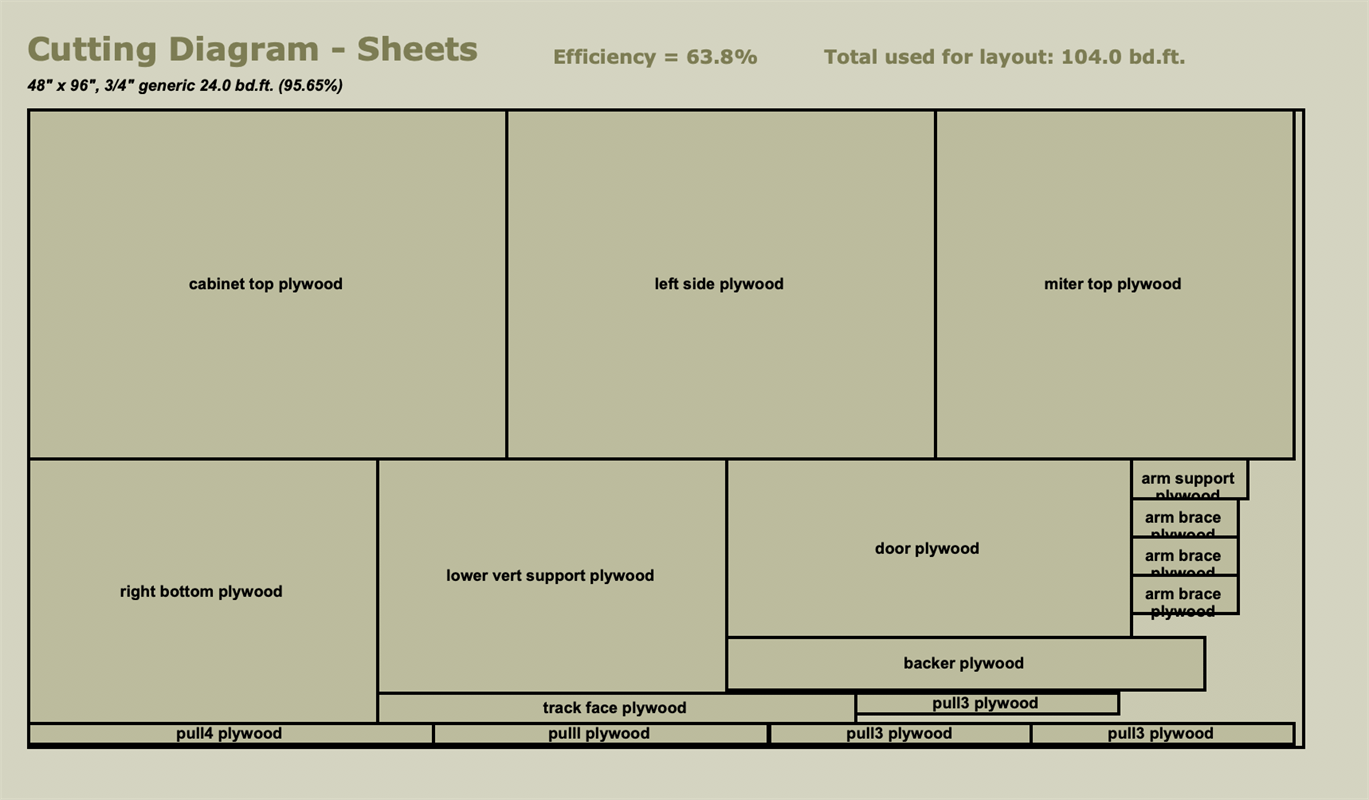
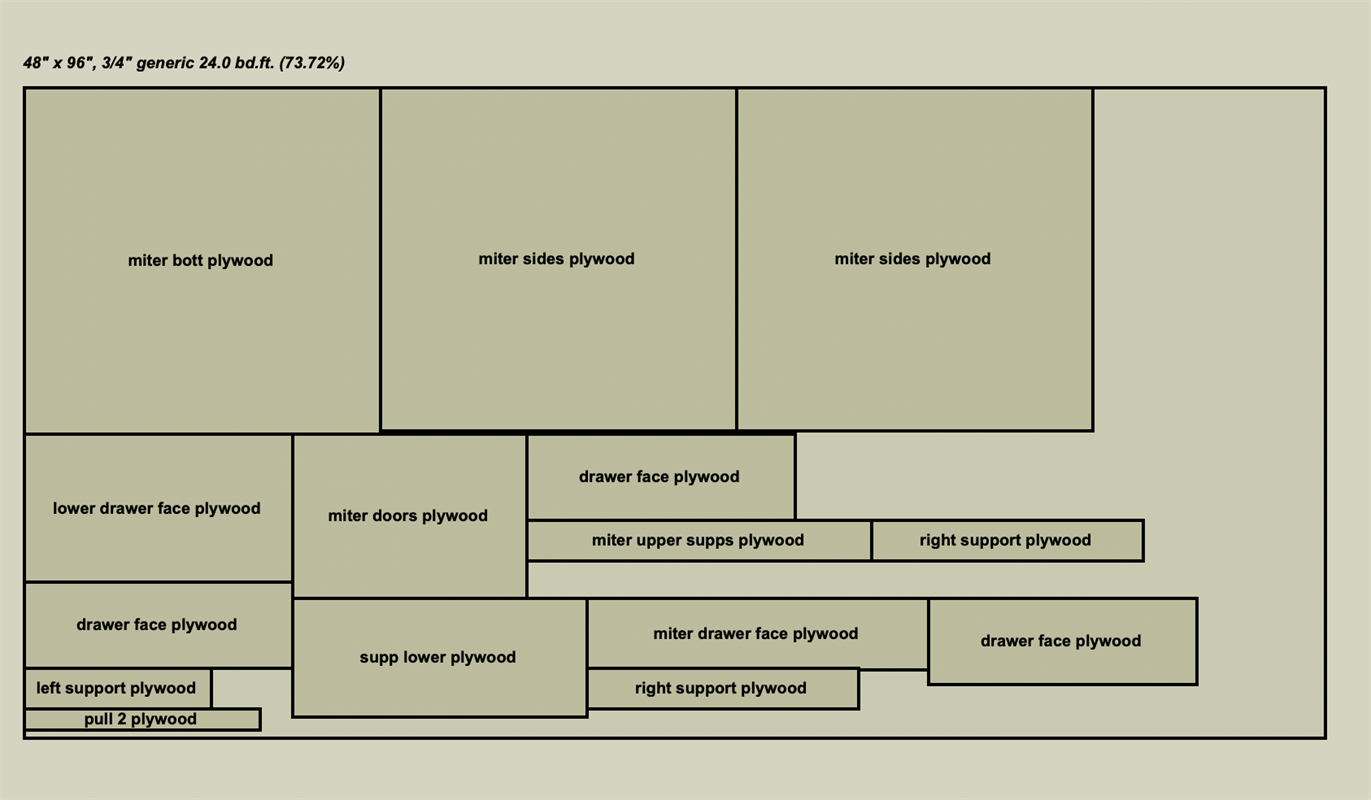
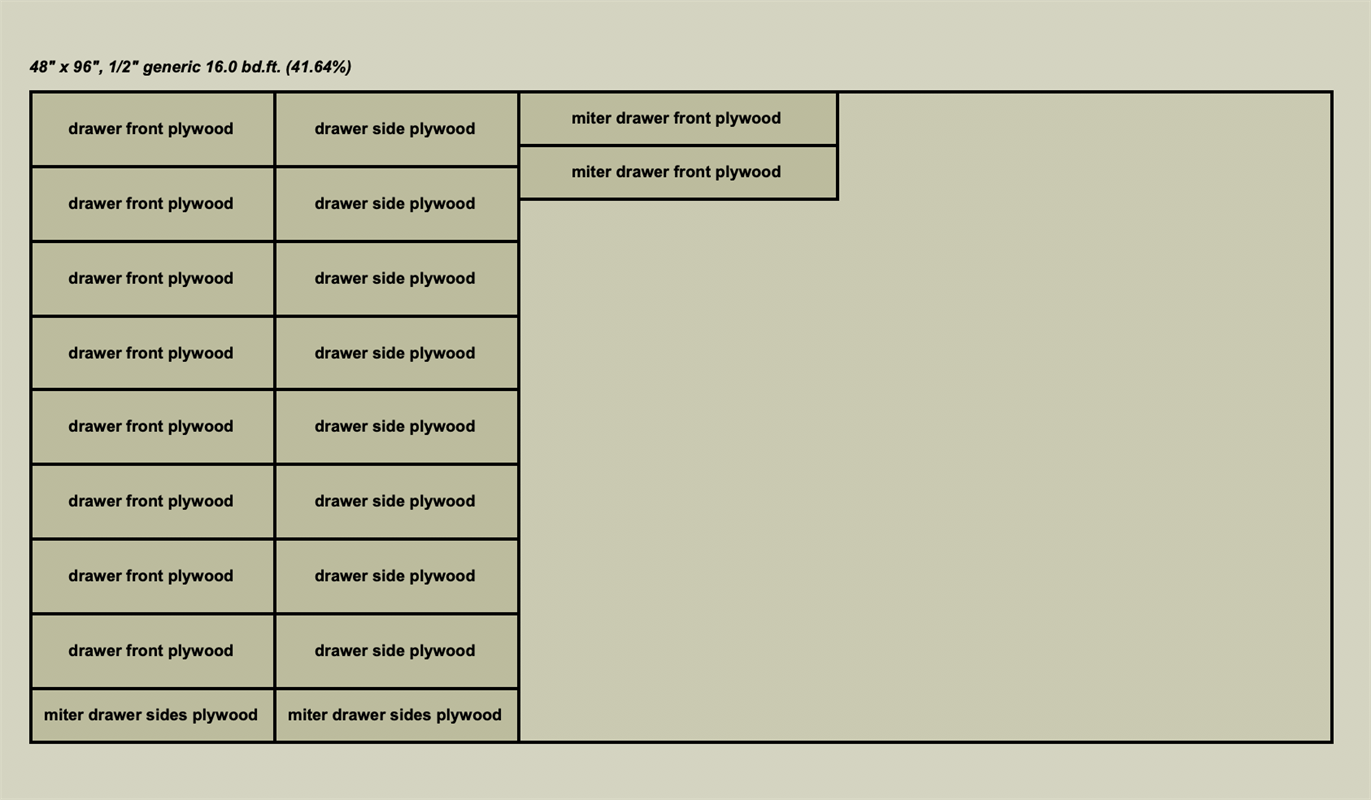
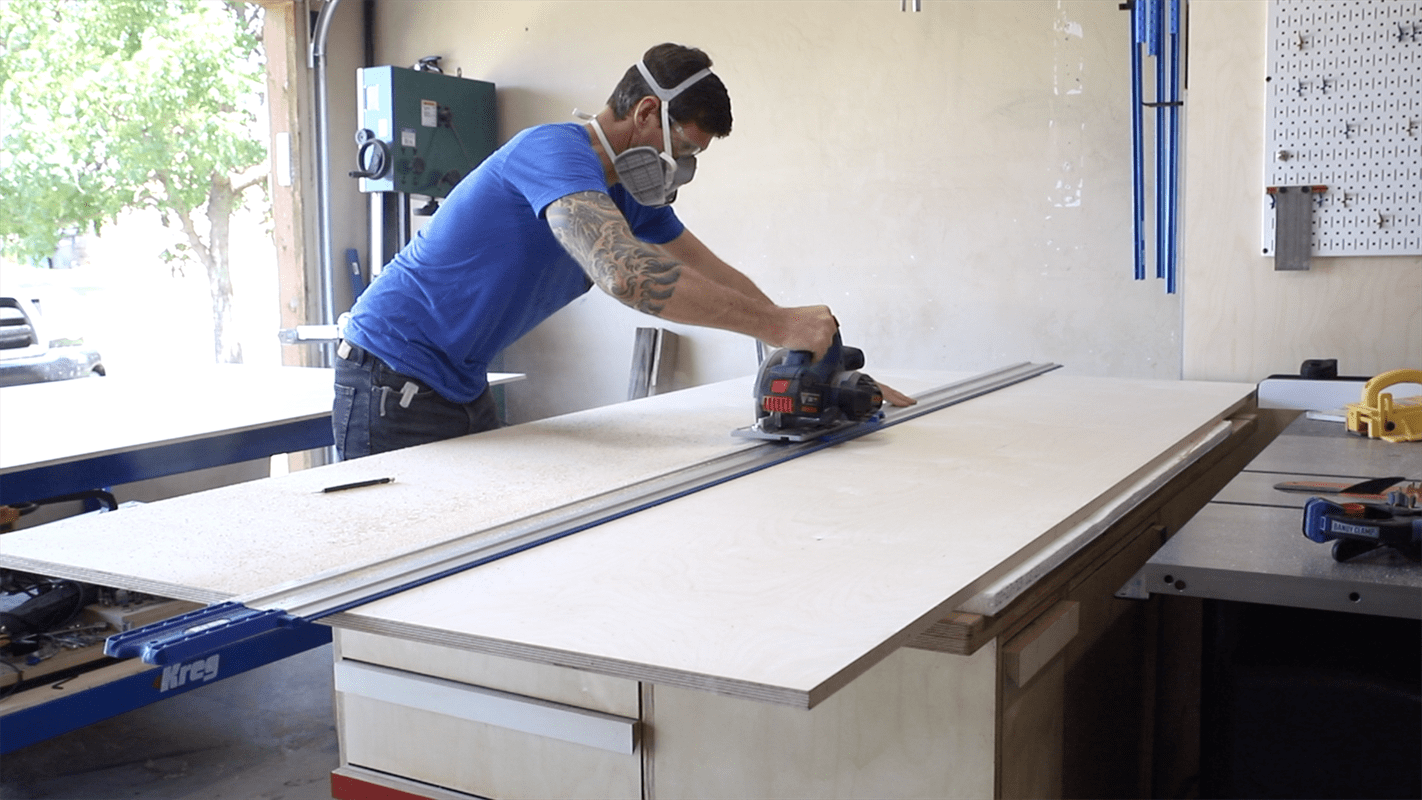
Cut Down Plywood for Panels
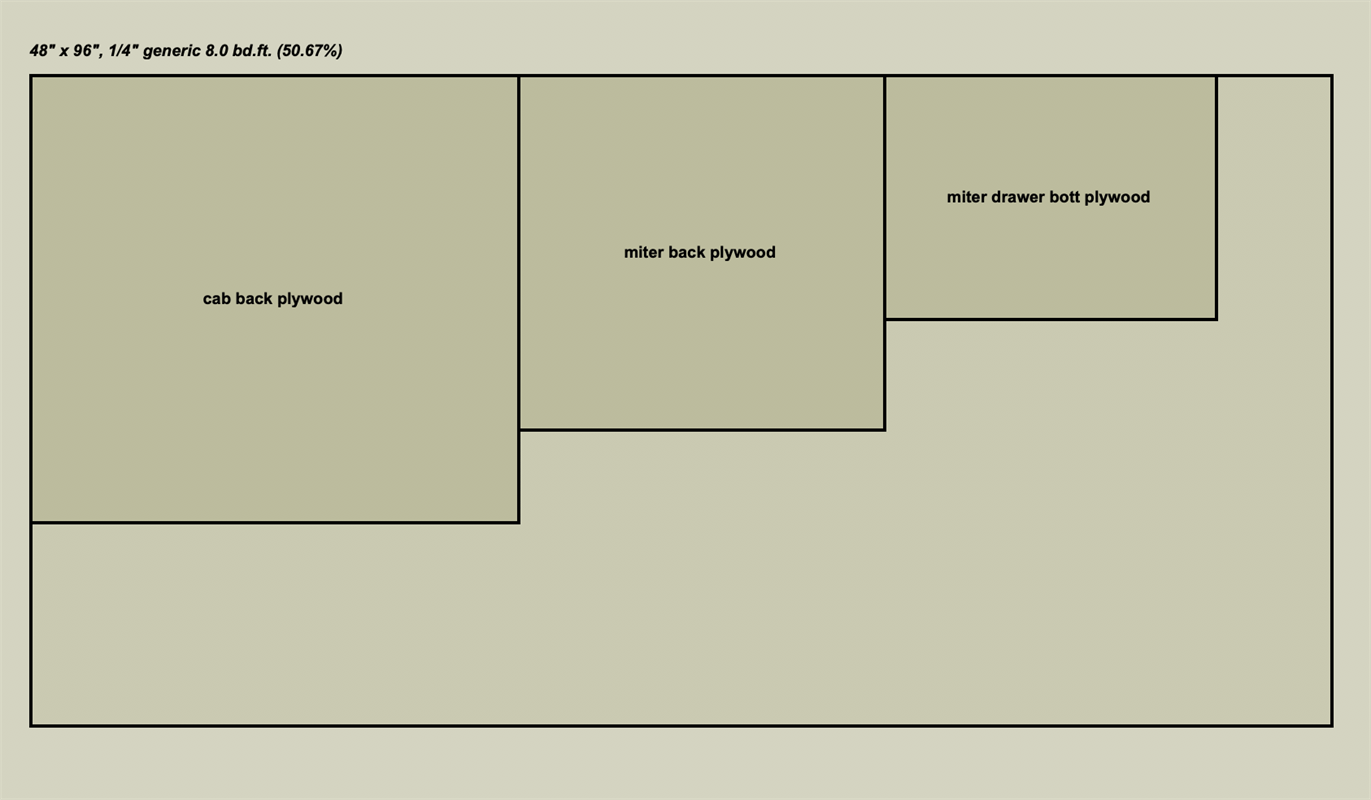
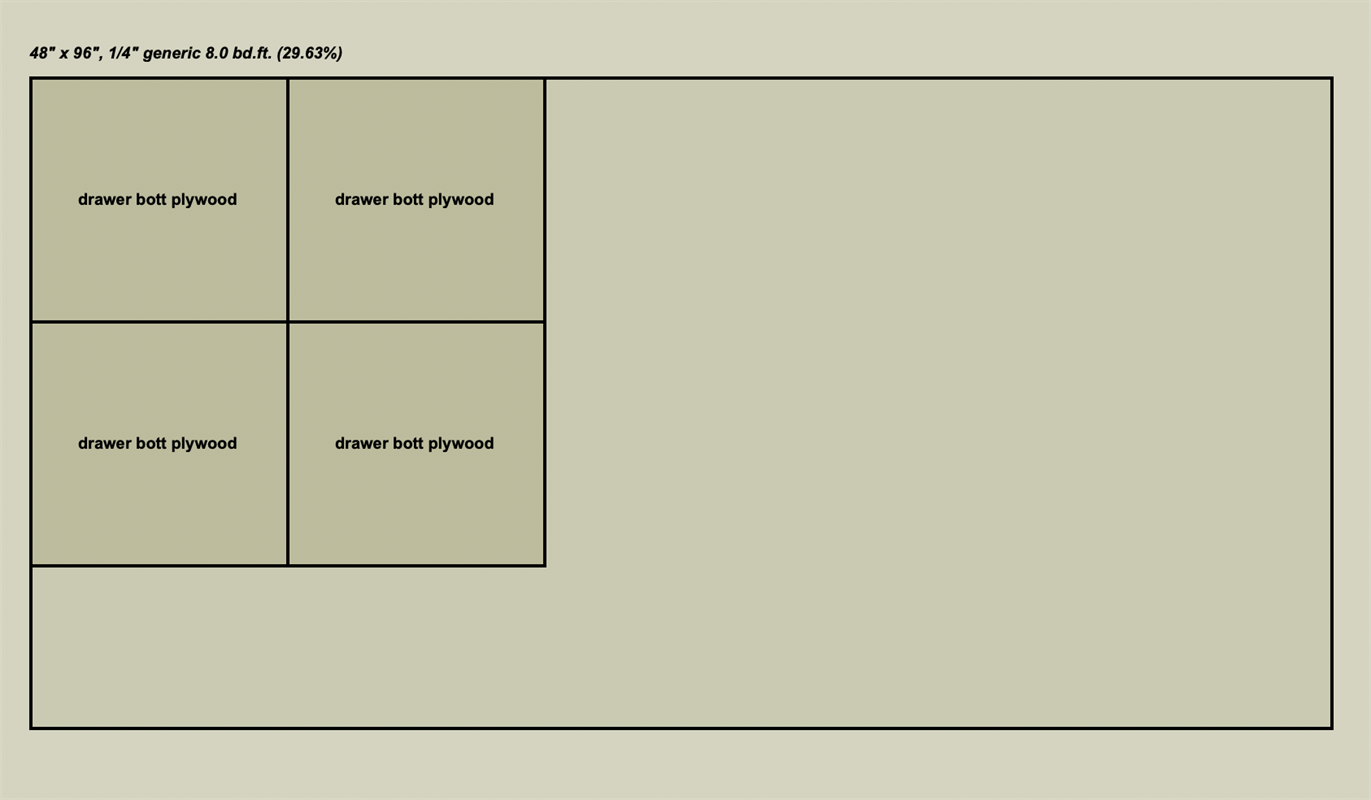
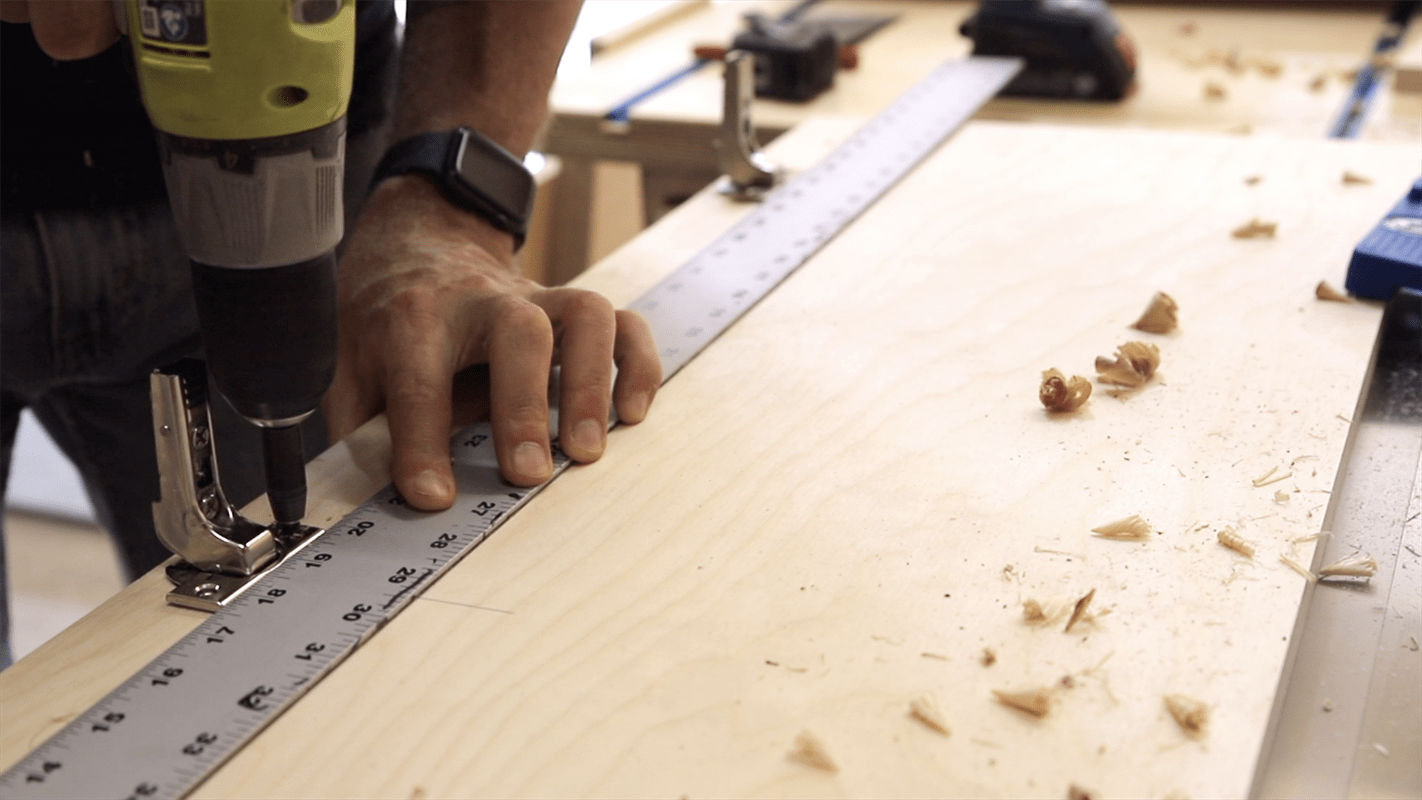
Using the cut list and diagrams attached cut the plywood down into all the panels needed to assemble the miter saw cabinet and the stationary cabinet. I suggest cutting the remaining pieces to fit after the cabinets are assembled.
-
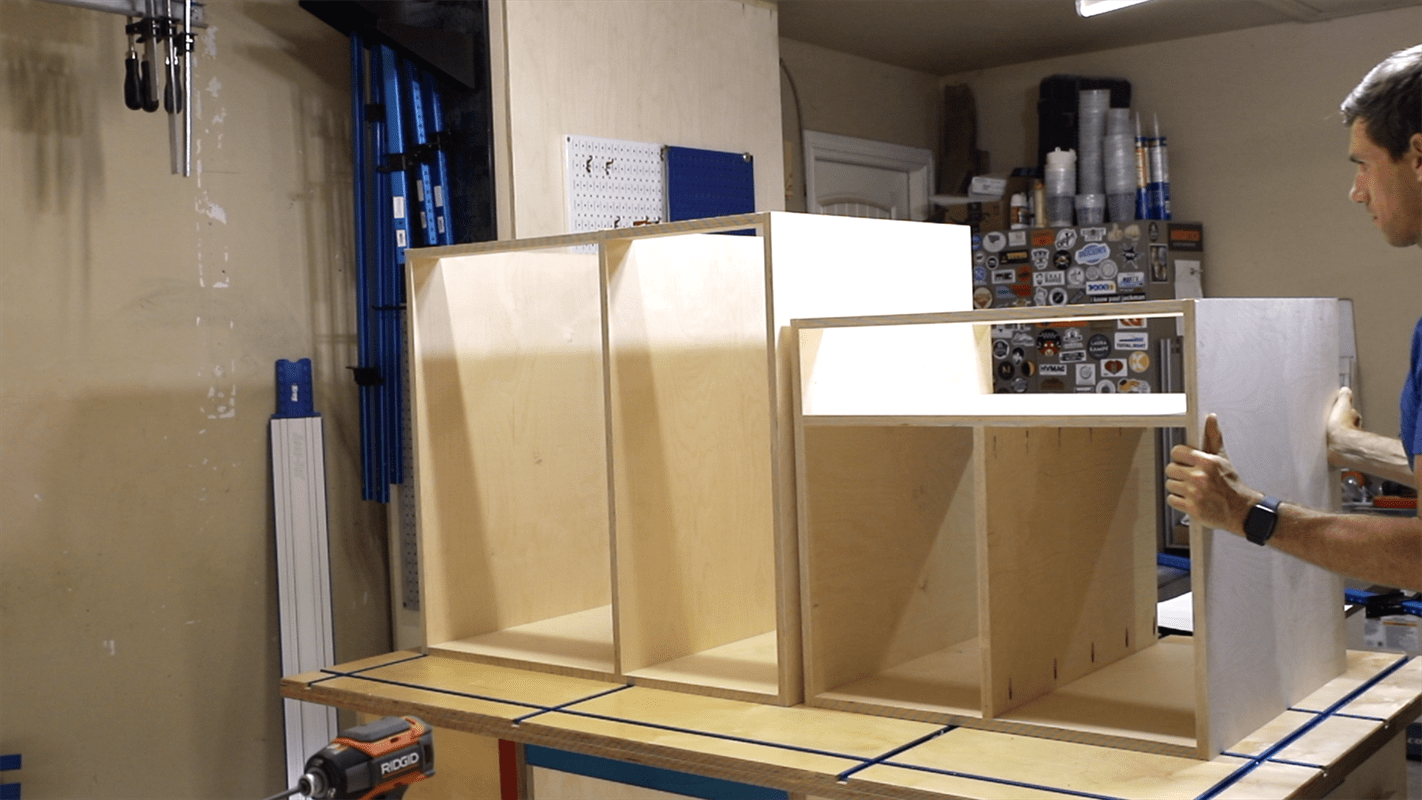
Assemble Cabinet Carcasses
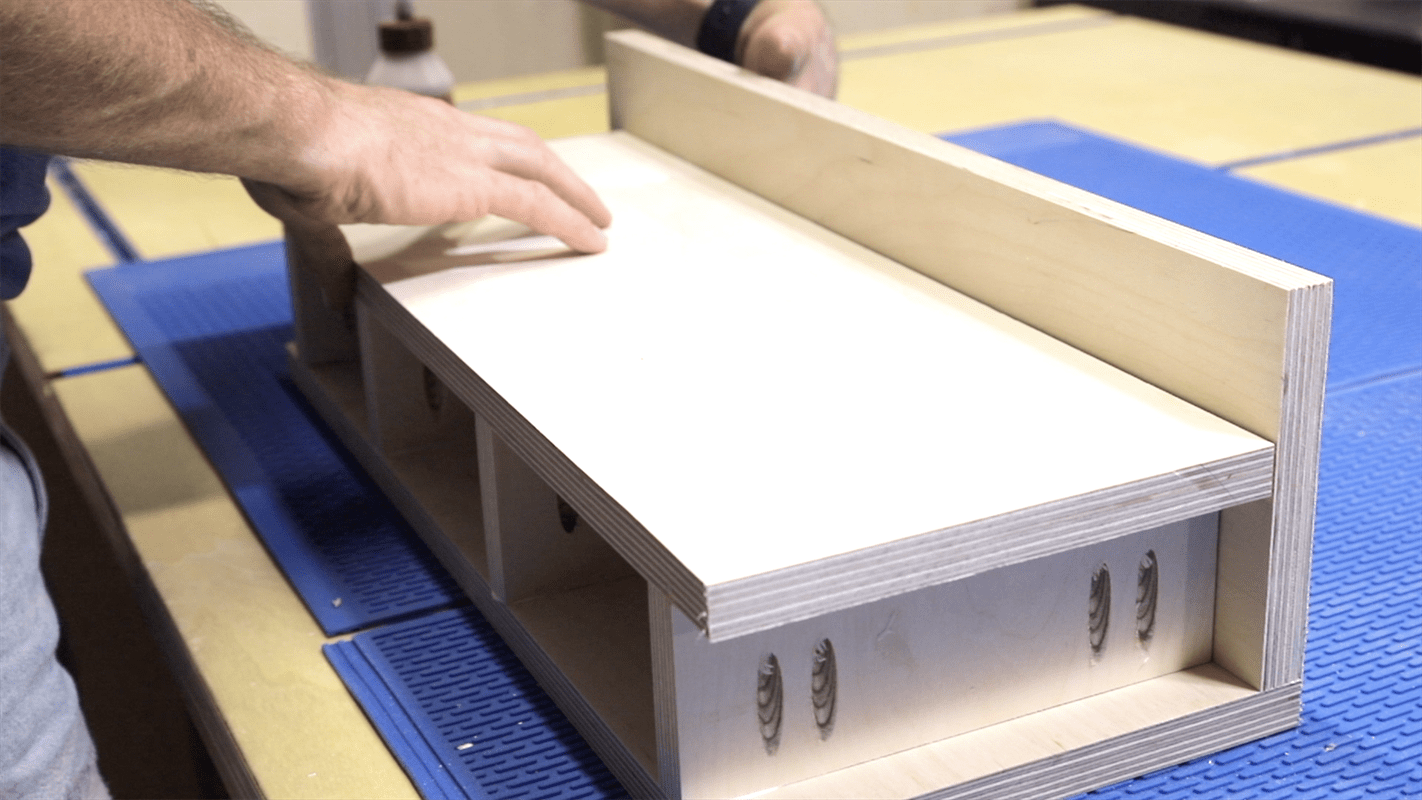
The bottom panels, and the upper supports get pocket holes, and then join these panels to the vertical side panels of the cabinet. The stationary cabinet has a center partition that separates the cabinet from the drawer box. The miter cabinet has a center divider that gets joined to the bottom panel of the drawer box to form a "T". These get joined with pocket screws.
-
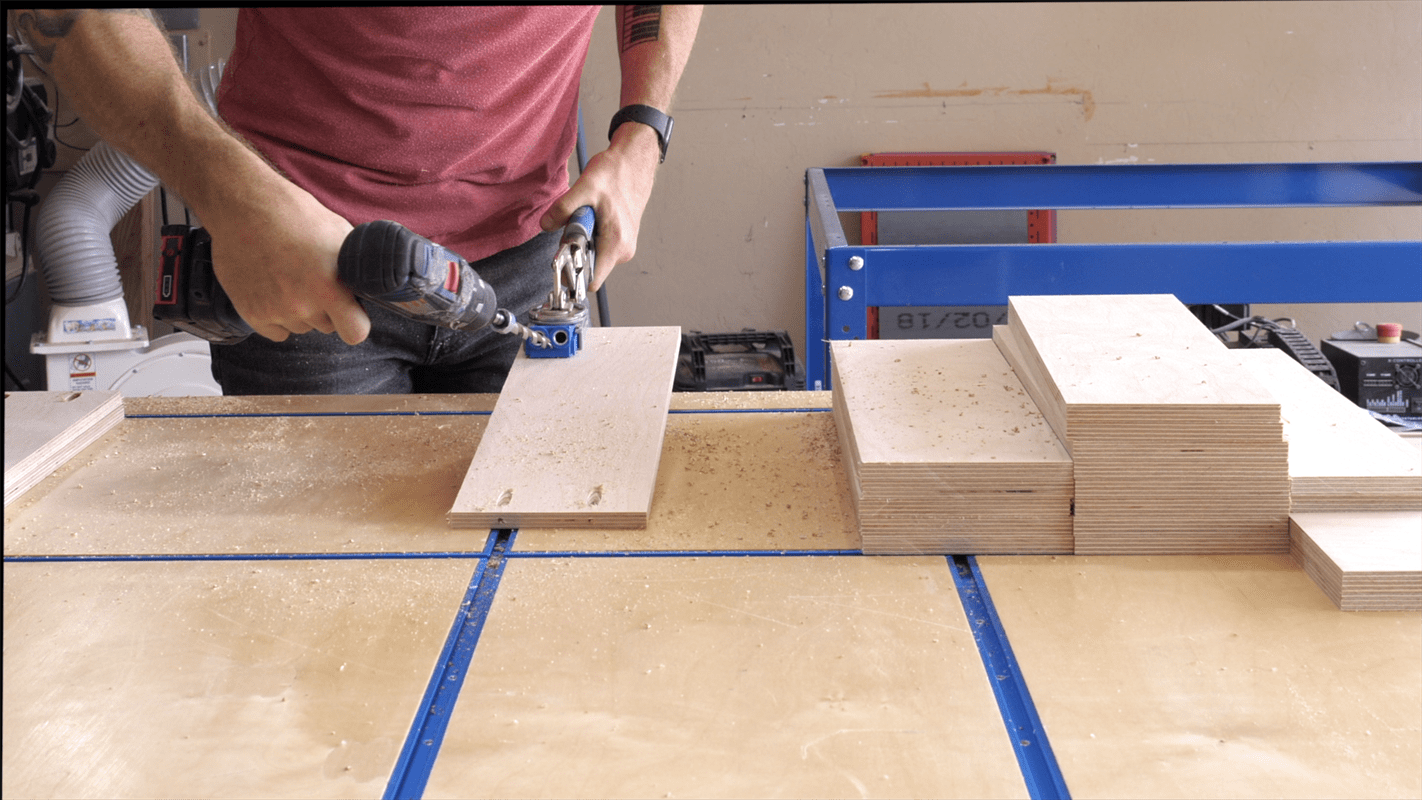
Build 5 Drawers
I used 18 inch full extension drawers slides for this cabinet. Each drawer is made from 1/2" plywood. The stationary cabinet drawers are 5 1/2" tall including the 1/4" plywood drawer bottom, and the miter cabinet drawer with 4 1/4" tall including the 1/4" plywood bottom. Rip the 1/2" plywood to width, and then cut them to their final length on a miter saw. See cut list for dimensions. The drawers get assembled with 1" pocket screws, and the plywood bottoms are cut to fit before attaching with screws.
-
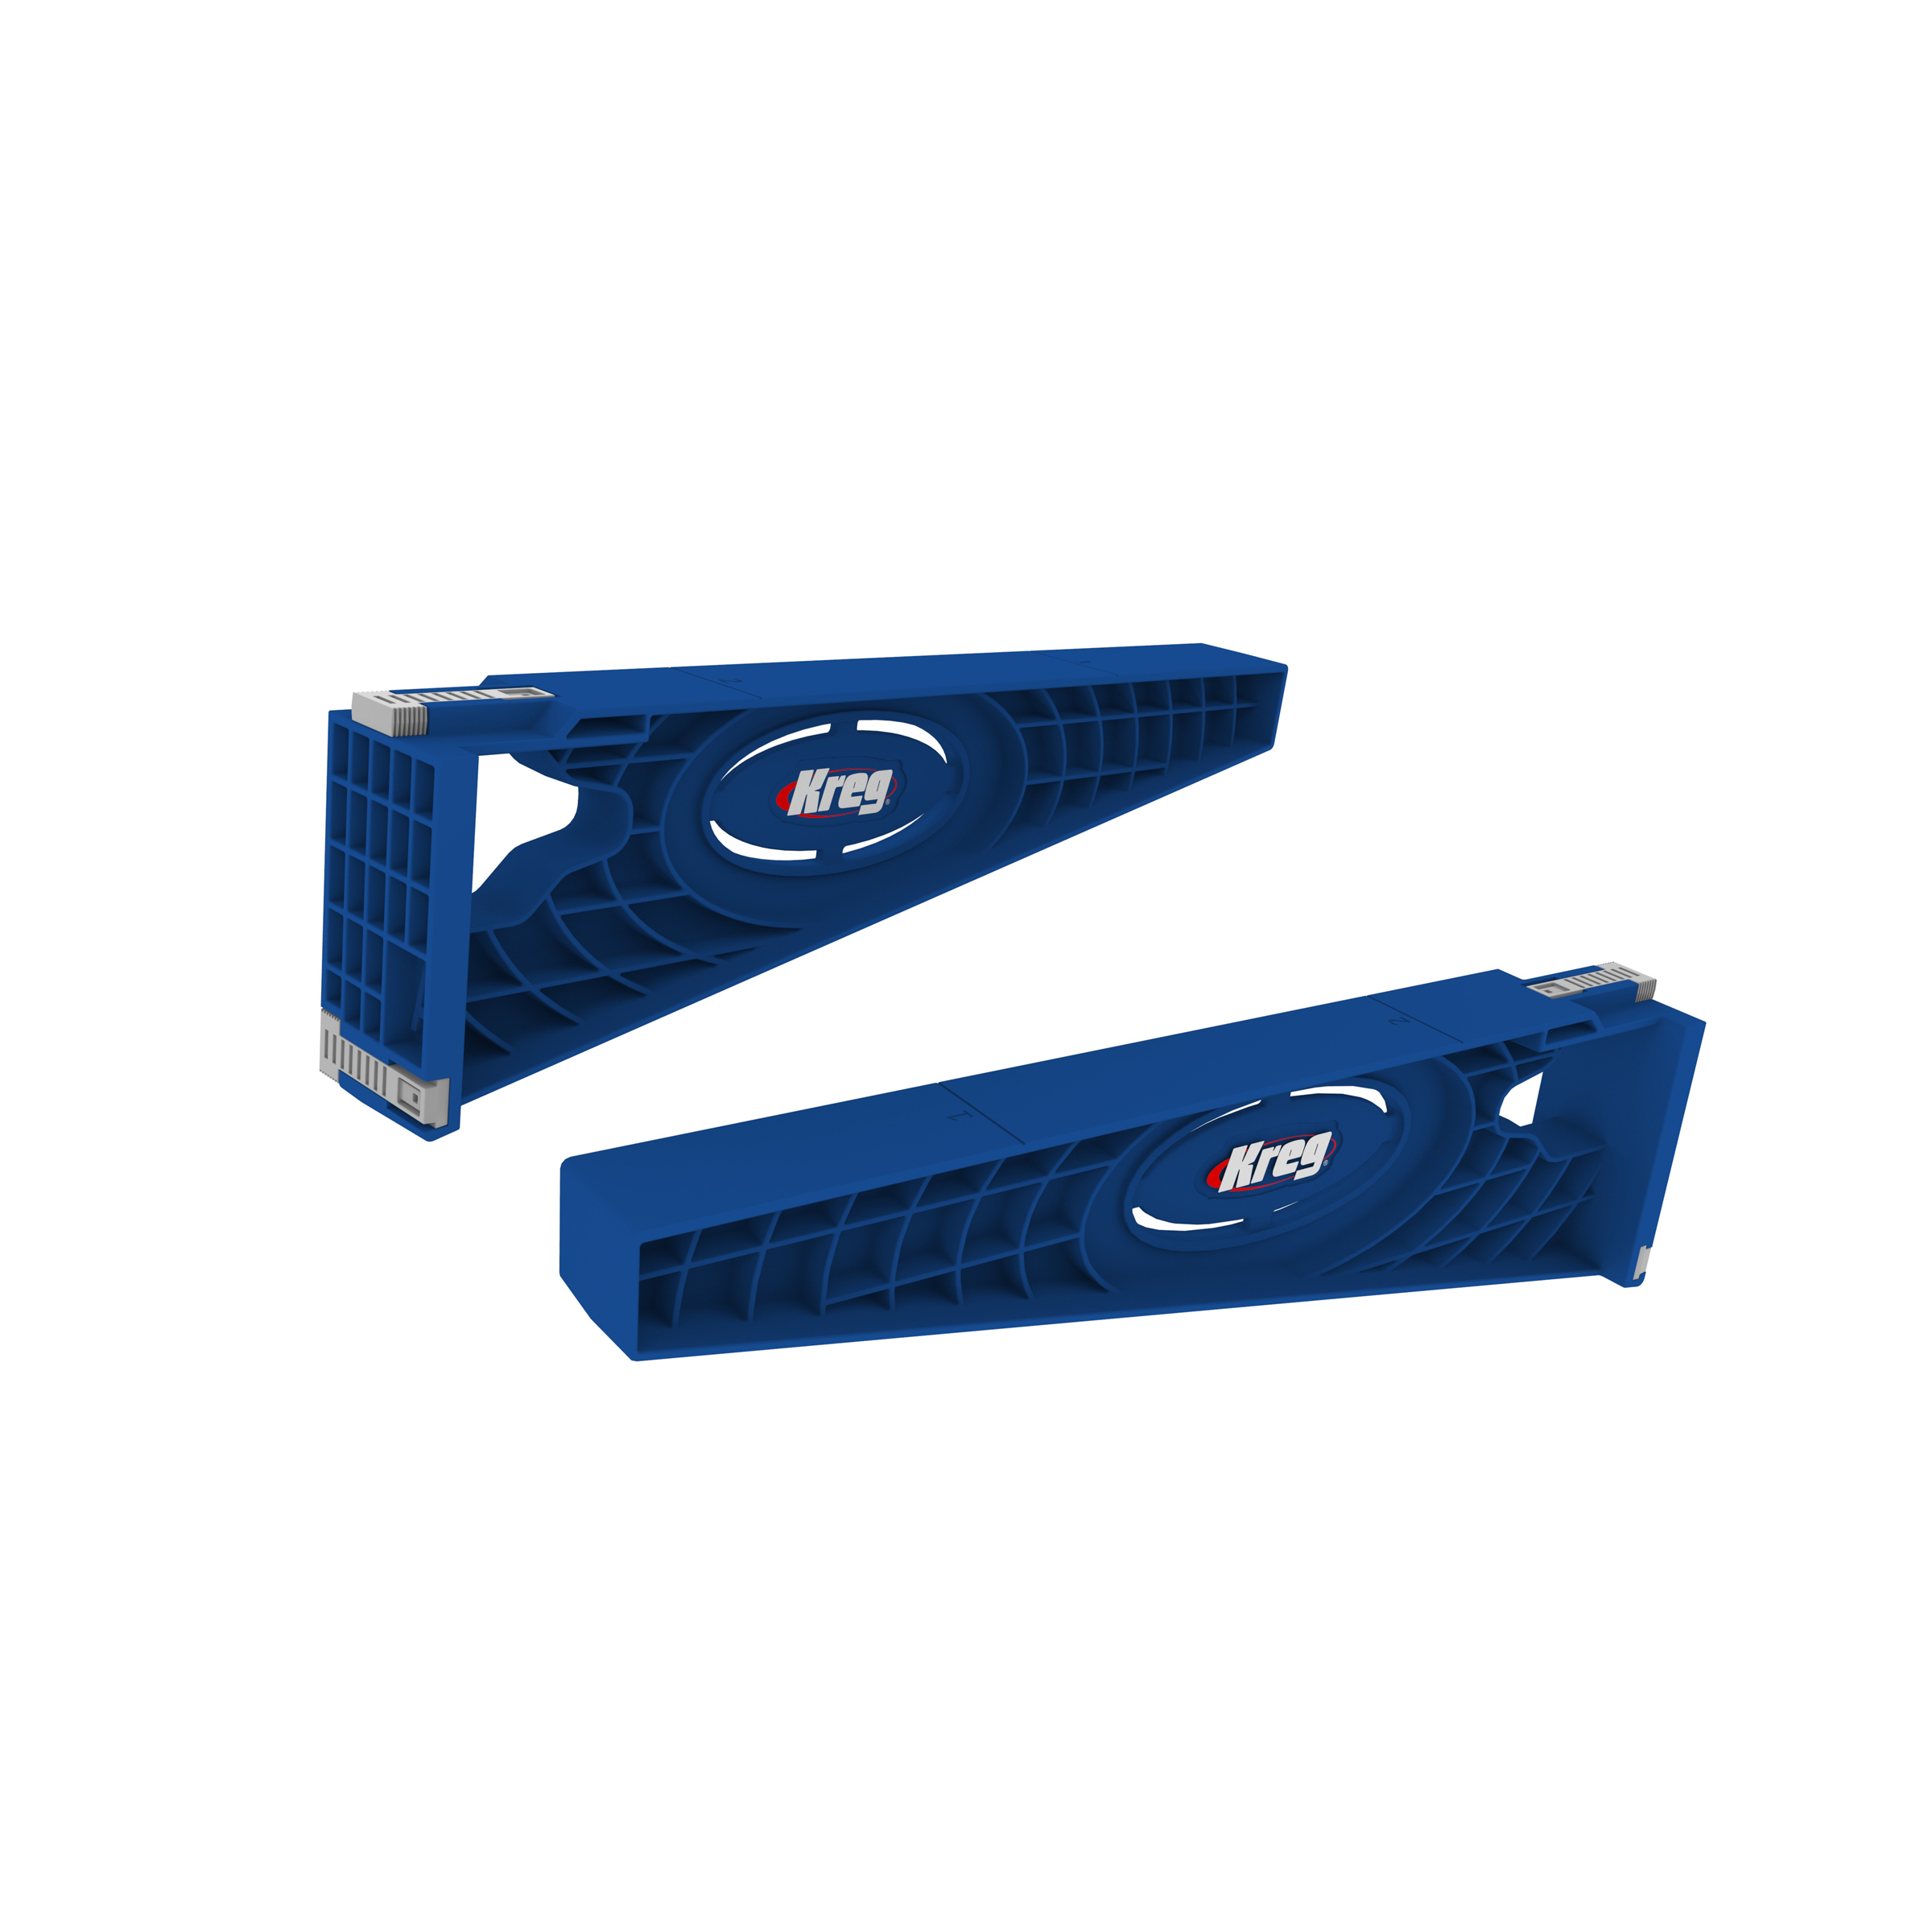
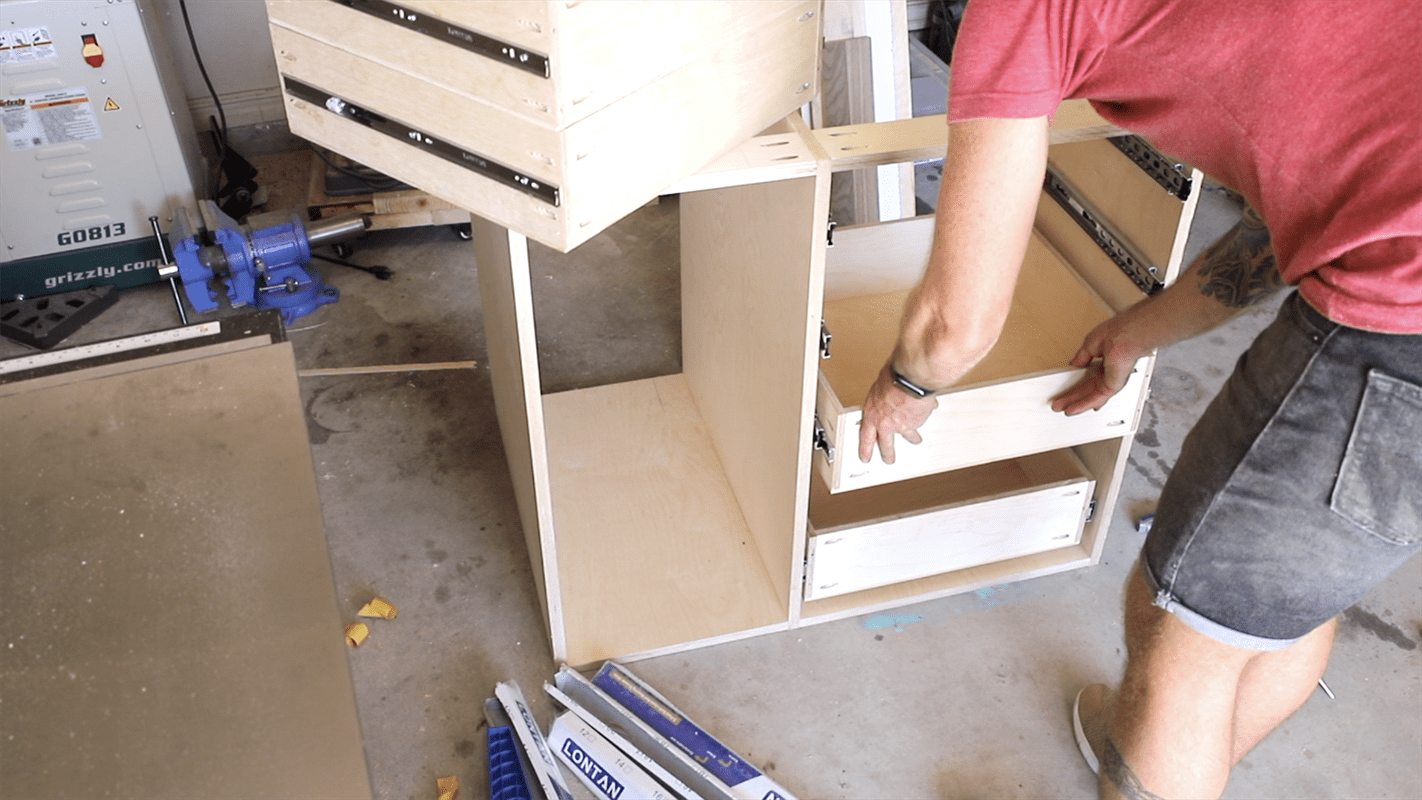
Install Drawer Slides & Fronts
The drawer box on the stationary cabinet has 4 drawers. The top 3 drawers are spaced 3/4" apart, & the bottom drawer is spaced 3/4" from the bottom of the cabinet. This gives extra capacity to the bottom drawer. Starting at the top measure 3 1/2" and use the Kreg drawer slide jig to mount slides to the cabinet. This gives the 3/4" spacing plus 1/2 the width of the drawer. For the next two drawers measure 6 1/4" down and mount the slides. The bottom slides are installed at 3 1/2" from the bottom. Mount the other side of the slides to the middle of the drawer sides. The drawer slides are mounted 2 7/8" from the bottom of the miter saw cabinet drawer box. Slide in drawers and cut drawer fronts with 1/8" spacing and attach with 2 screws.
-
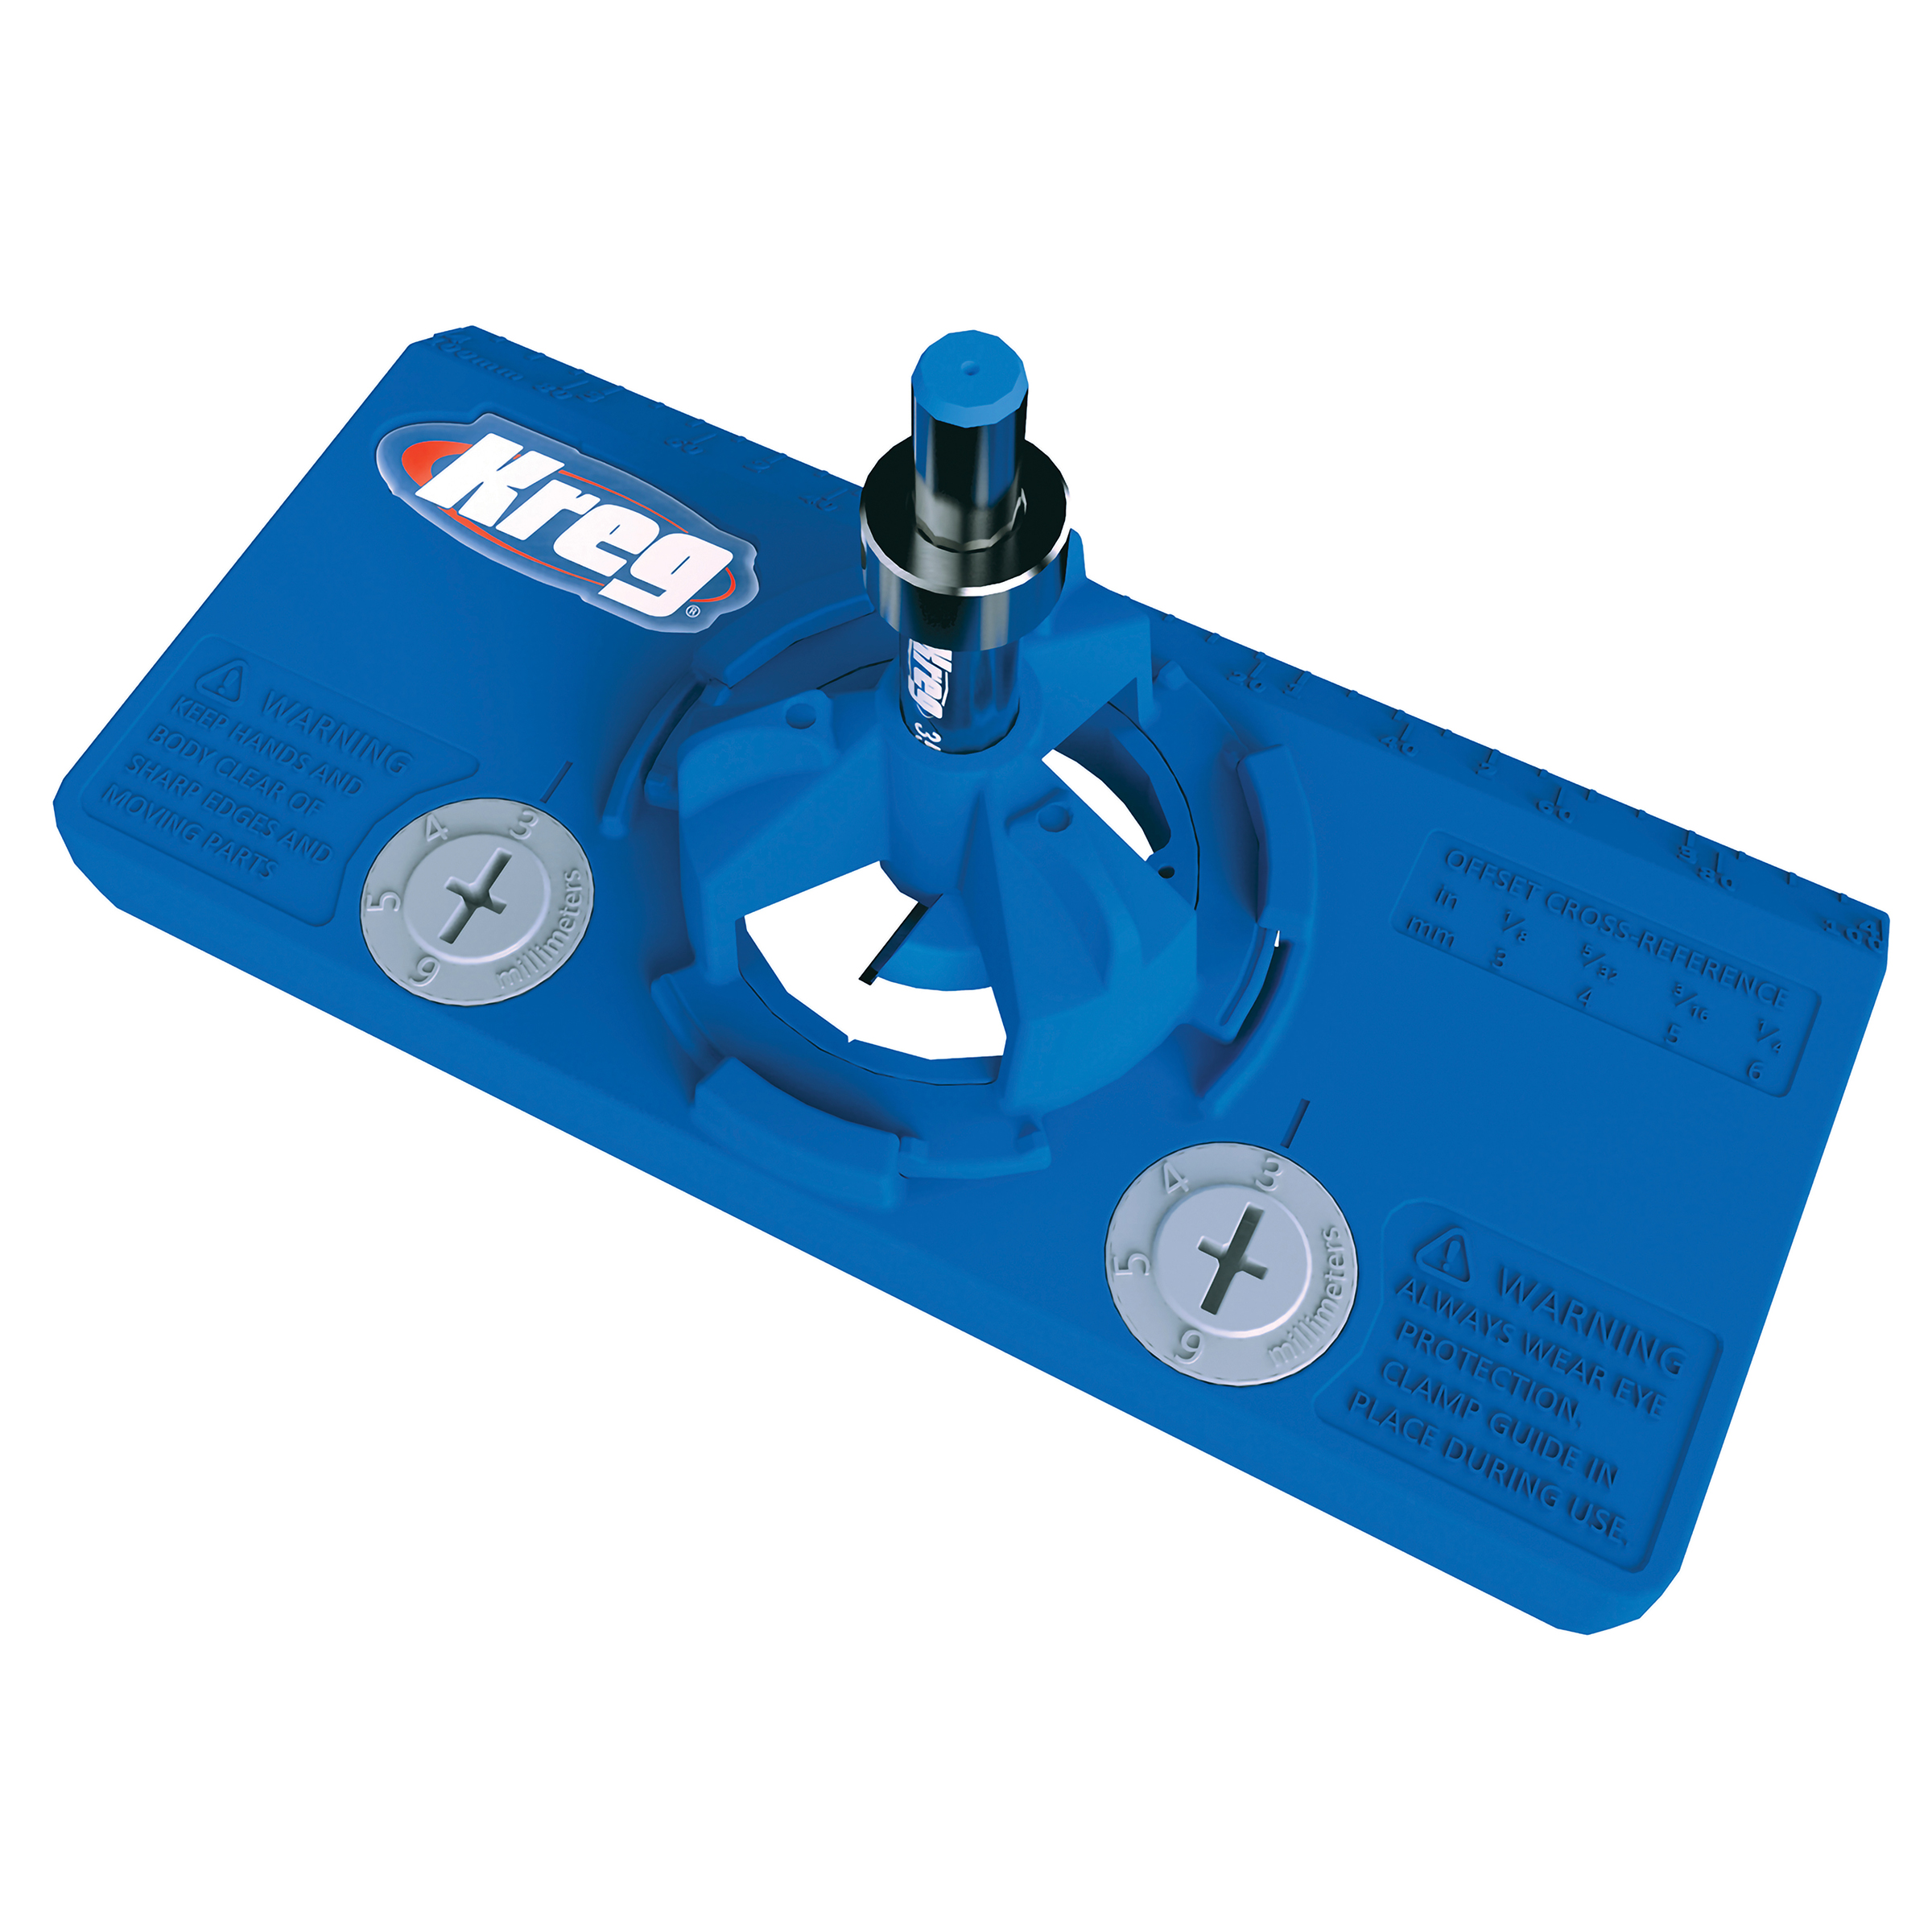
Cut Doors & Install Hinges
Cut three doors to fit in the two cabinets with an 1/8 reveal all the way around. I used euro style inset concealed hinges. The stationary cabinet hinges are spaced 18 inches apart, and the miter cabinet doors are spaced 12 inches apart. Measure out from the center of the doors half that distance, and mark your line. Using the Kreg concealed hinge jig drill out for the hinges. Attach the hinges with screws. Mark out the location on the cabinets for the cabinet side of the hinge, and install with screws.
-
Leveling Feet & Casters
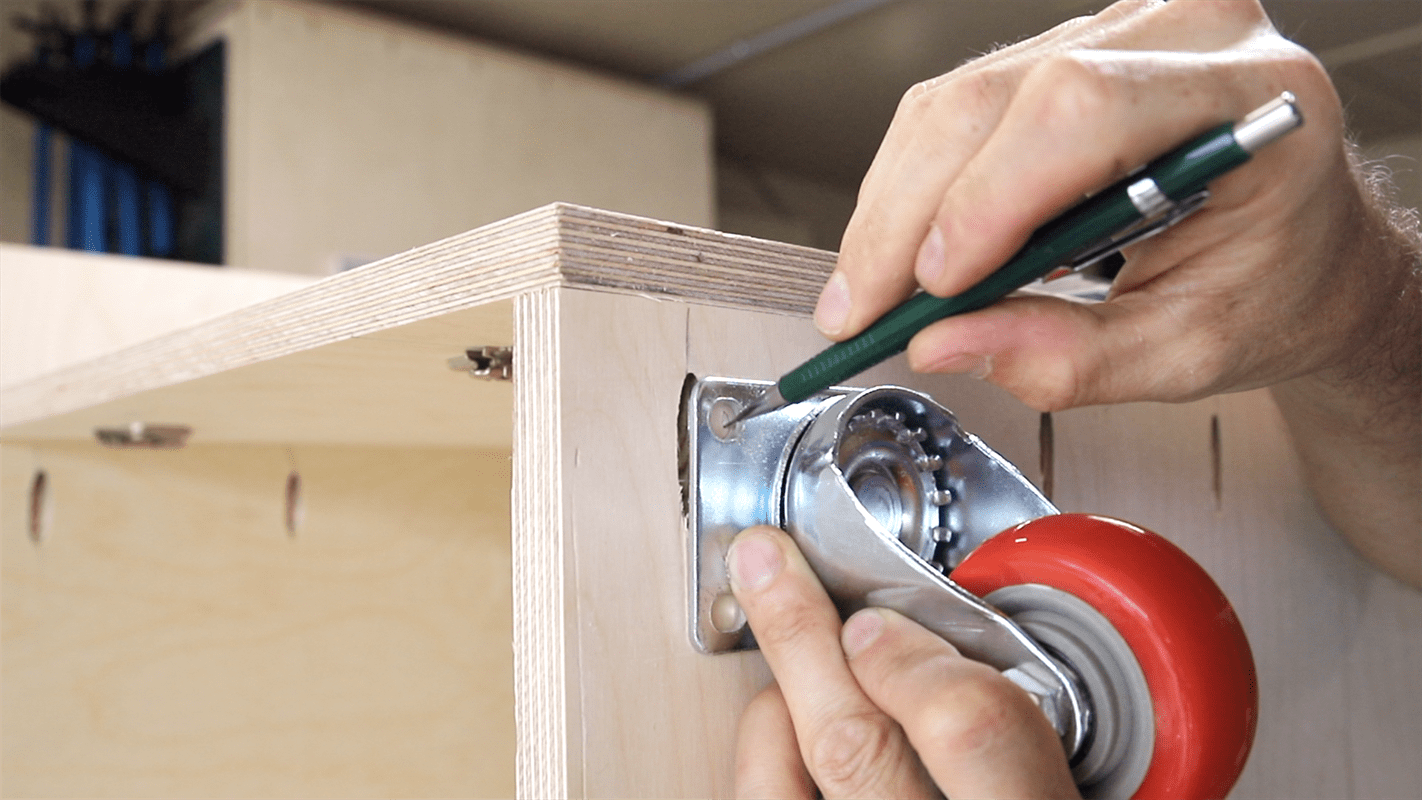
I used (4) 3" locking casters for the miter cabinet. These are actually 4" tall. Mount to the miter cabinet by marking the hole locations (inset 1 1/4" from side and front), drill a pilot hole, mortise out pace for the bolt head on the inside of the cabinet, and drill out the hole with a 1/4" bit. Attach casters with 1/4-20 bolts and nuts. The stationary cabinet gets 4 leveling feet. The set I used requires a 1/2" hole drilled out for the t-nut that gets hammered in place. Screw in the leveling feet into the t-nuts.
-
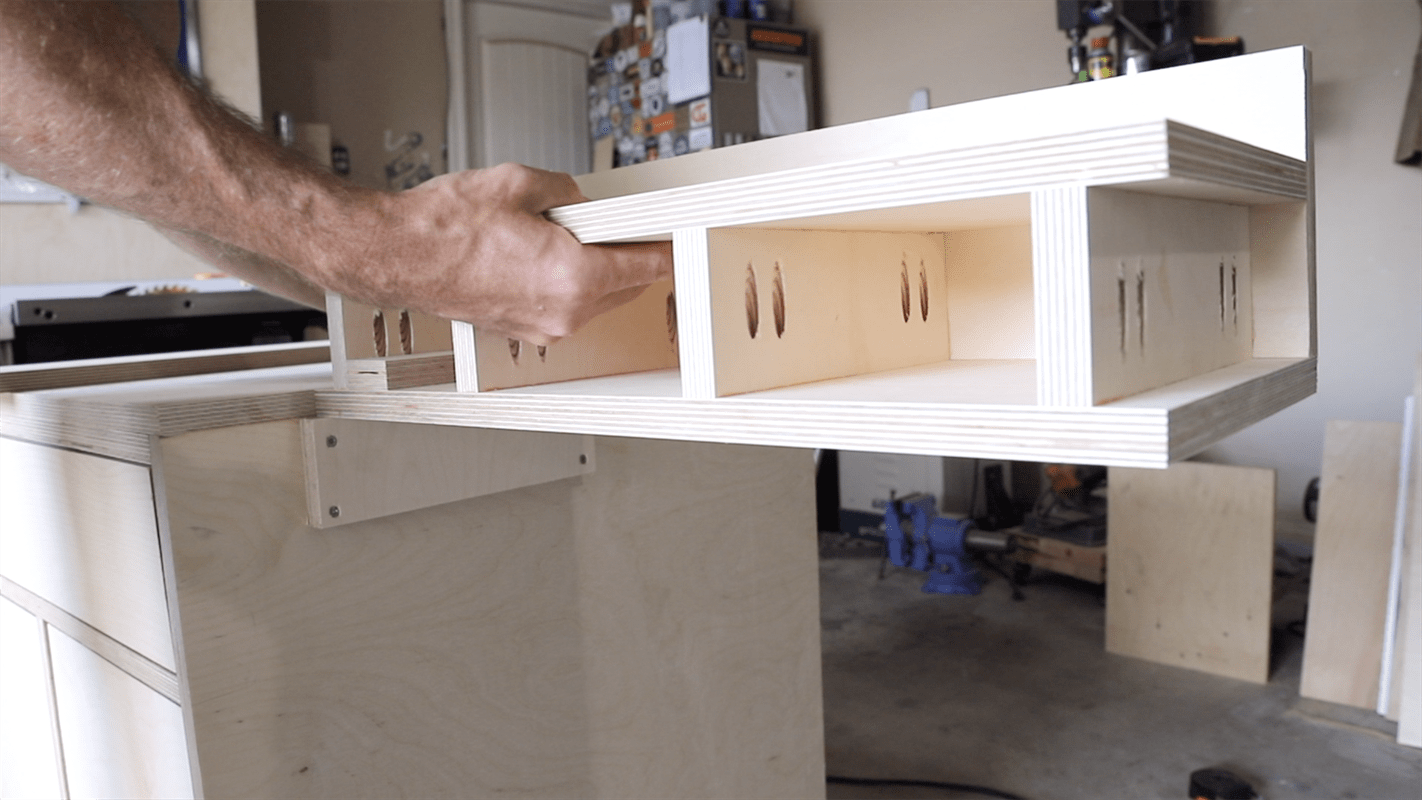
Fold Out Support Wing Assembly
The video is going to be helpful to see how this comes together. The wing is made from a bottom panel and a top panel that have 4 spacer supports between them. Attach the spacers with pocket screws to the underside of the top panel. The bottom panel is 3/4" wider than the top to support the fence board. Attach the bottom panel by predrilling and driving in screws through the panel into the spacers. Attach the back panel so it rests on the 3/4" protrusion on the lower panel.
-
Stationary Cabinet Fence
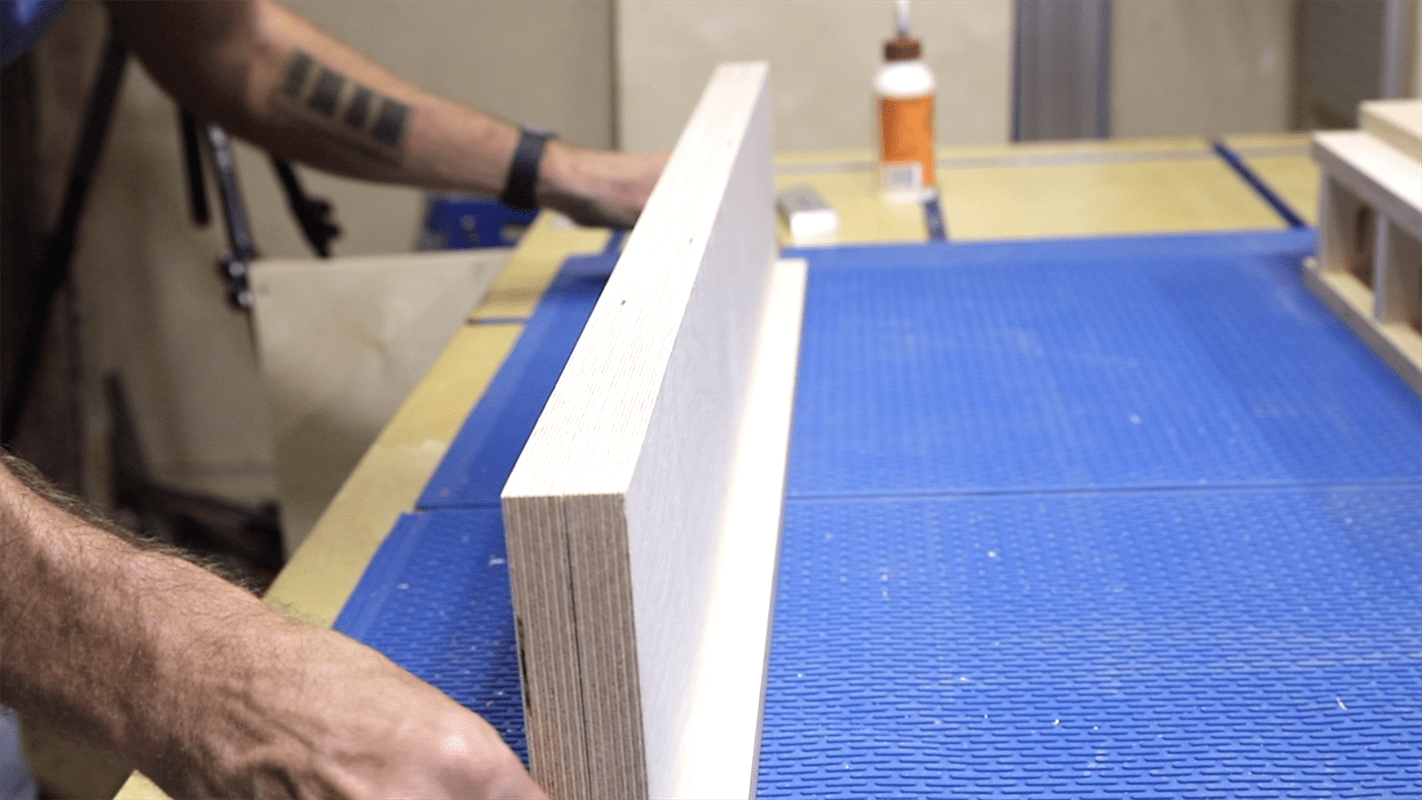
The fence of the stationary cabinet is made from two 6 inch wide panels that run the length of the cabinet and get laminated together. First drill pocket holes to one of the 6" wide panels before laminating. This is how you'll attach the front fence. Cut the front fence to 2 1/4" tall, and cut in a 45 chamfer on the bottom outward facing edge. This gives sawdust a place to go during cuts when the piece is against the fence. Attach the fence to the laminated panels with pocket screws.
-
Mounting the Wing
Attach the wing support block to the outside of the miter cabinet 3/4" from the top and spaced so the fence on top of the wing can sit flush with the back fence of your miter saw. Using two 4" door hinges attach the wing on top of the support block so it sits flush with the miter cabinet table top. The lip of the back fence should sit over the able top and provide extra support and alignment.
-
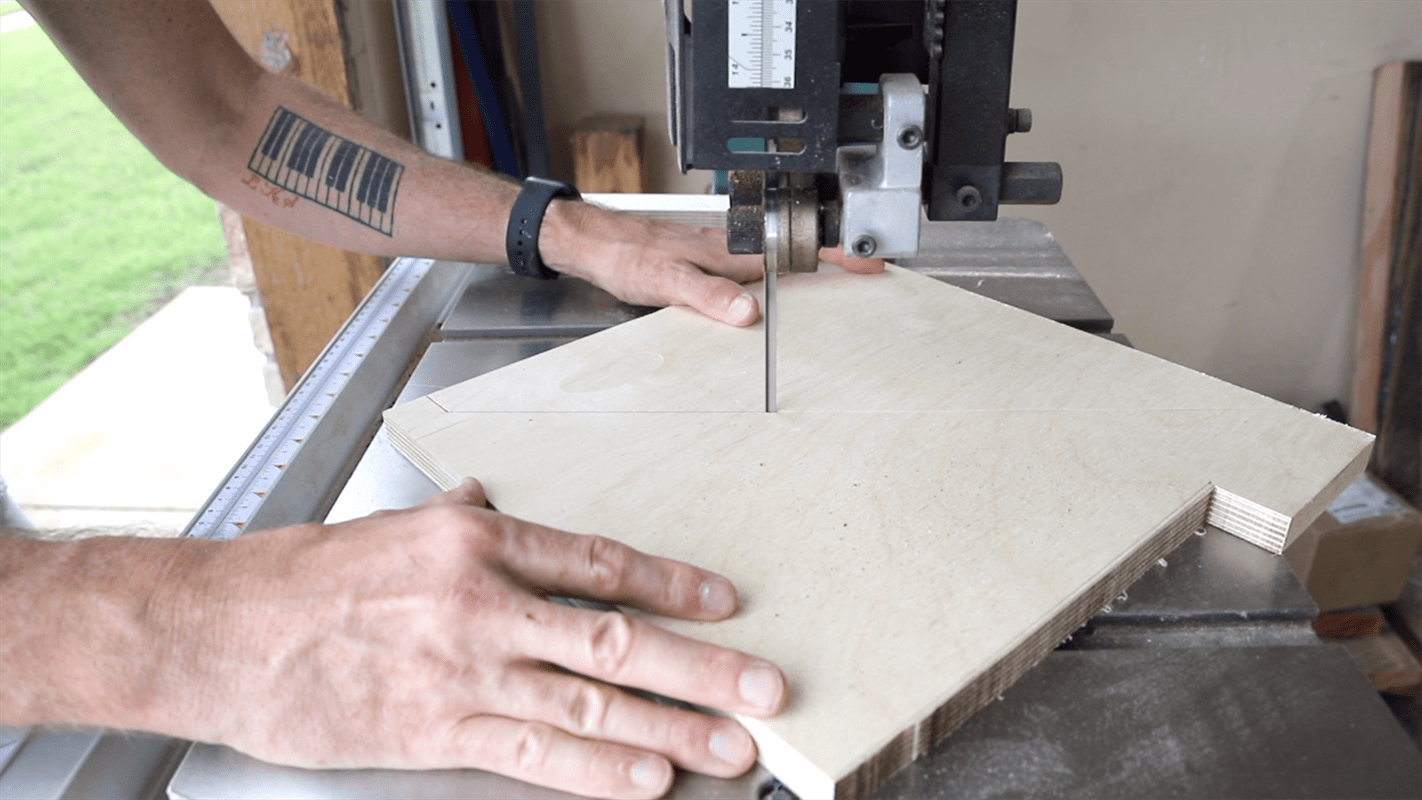
Wing Support
The wing is held up with a fold out support and a 1/2" dowel. I cut a 12"x12" panel, and then marked a line diagonally from one corner to the other. Measure in 3", and then down 1" and mark these lines. Cut out the shape on a bandsaw or with a jigsaw. Drill a 1/2" hole for the dowel in the middle of the support end. Attach a 12" piano hinge to the inside of the support, and then attach the miter cabinet just below the wing. Space the support so it can fold behind the support and sit flush against the cabinet. Cut a dowel to fit while holding the wing up flush. Drill a 1 1/2" hole with a forstner bit into a small block, and then cut this block in half. Install this stop block so it catches the dowel on the bottom of the wing.
-
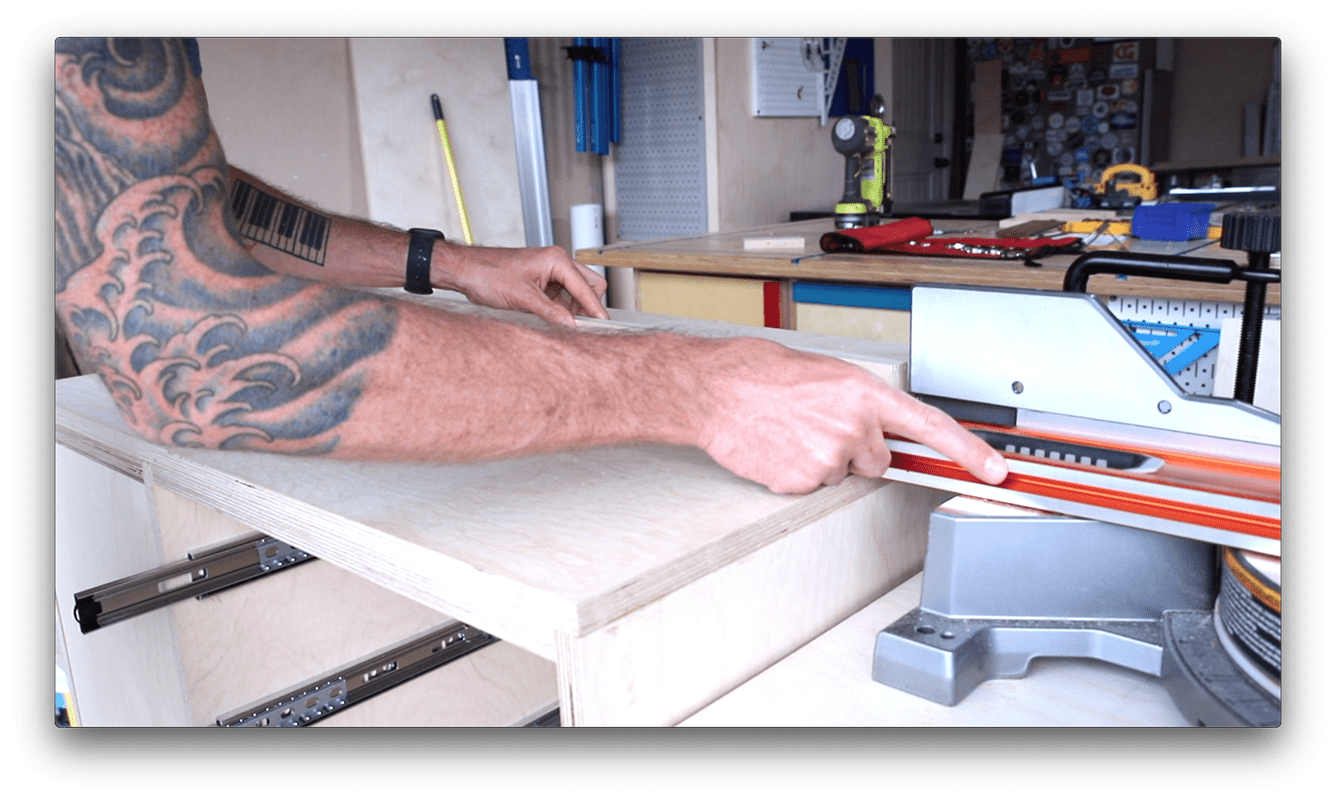
Attach Stationary Fence
Place your miter saw on the miter cabinet so its flush with the wing fence. Secure the miter saw to the table top with bolts. Place the stationary fence on top of the stationary cabinet and use a straight edge to align. Attach the stationary fence from inderneath the cabinet with screws.
-
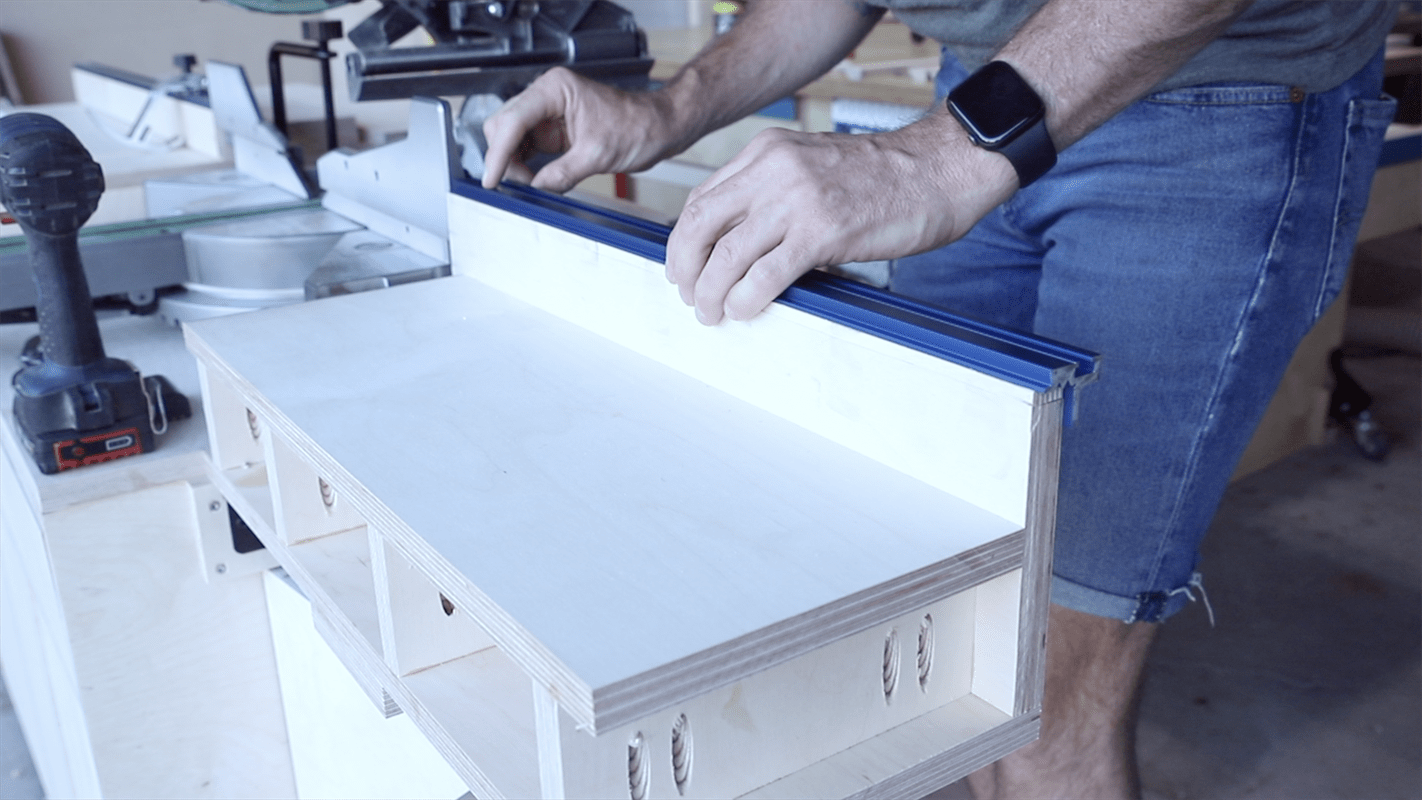
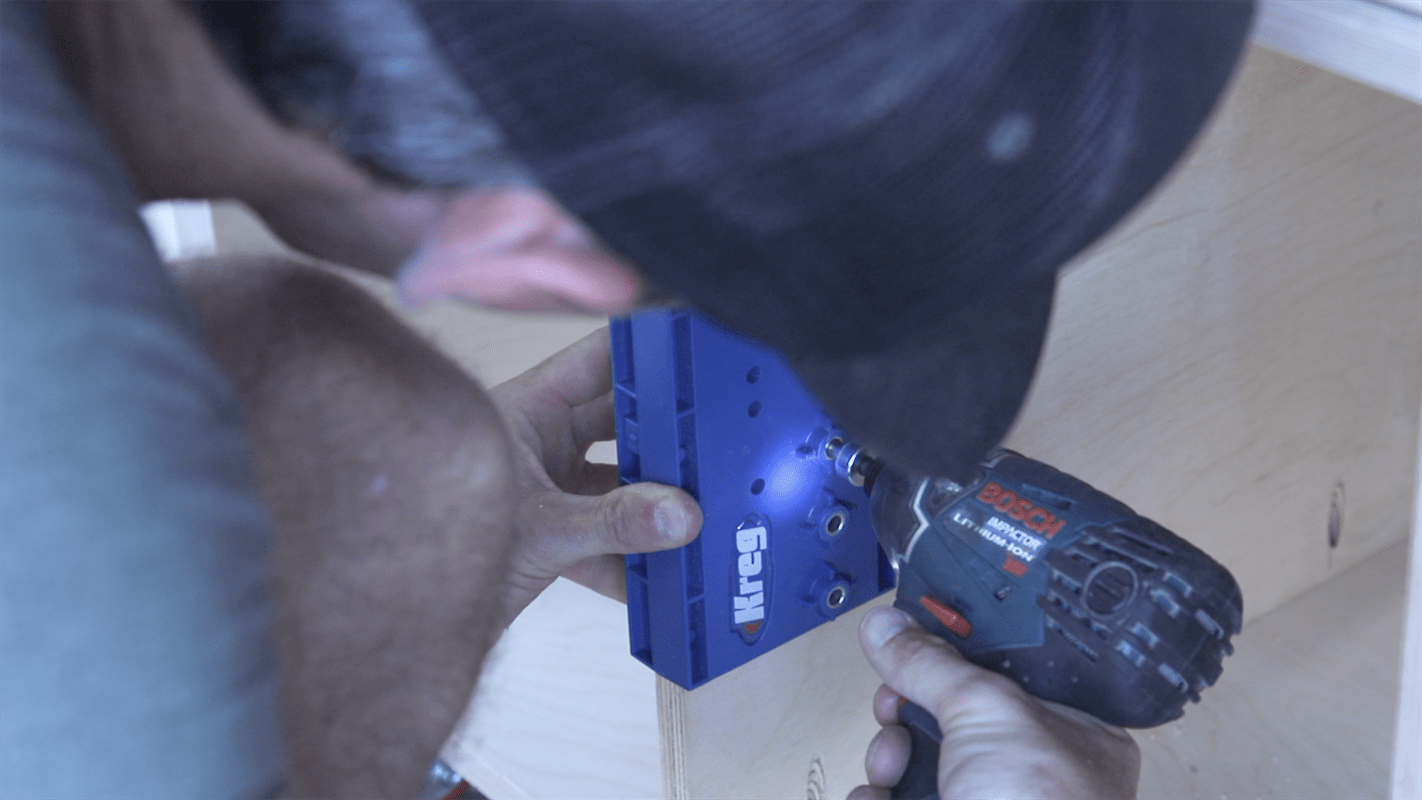
Kreg Precision Trak & Stop System
I used the Kreg Trak and Stop system to set up repeatable cuts. Cut the aluminum tracks to fit on the stationary cabinet fence and wing fence. Drill holes in the tracks and attach with 3/4 inch screws.
-
Shelves
I added shelves to the three cabinets. Drill out holes in the front and back of each cabinet using the Kreg shelf pin jig. Insert 1/4" shelf pins, and cut shelves to fit.
-
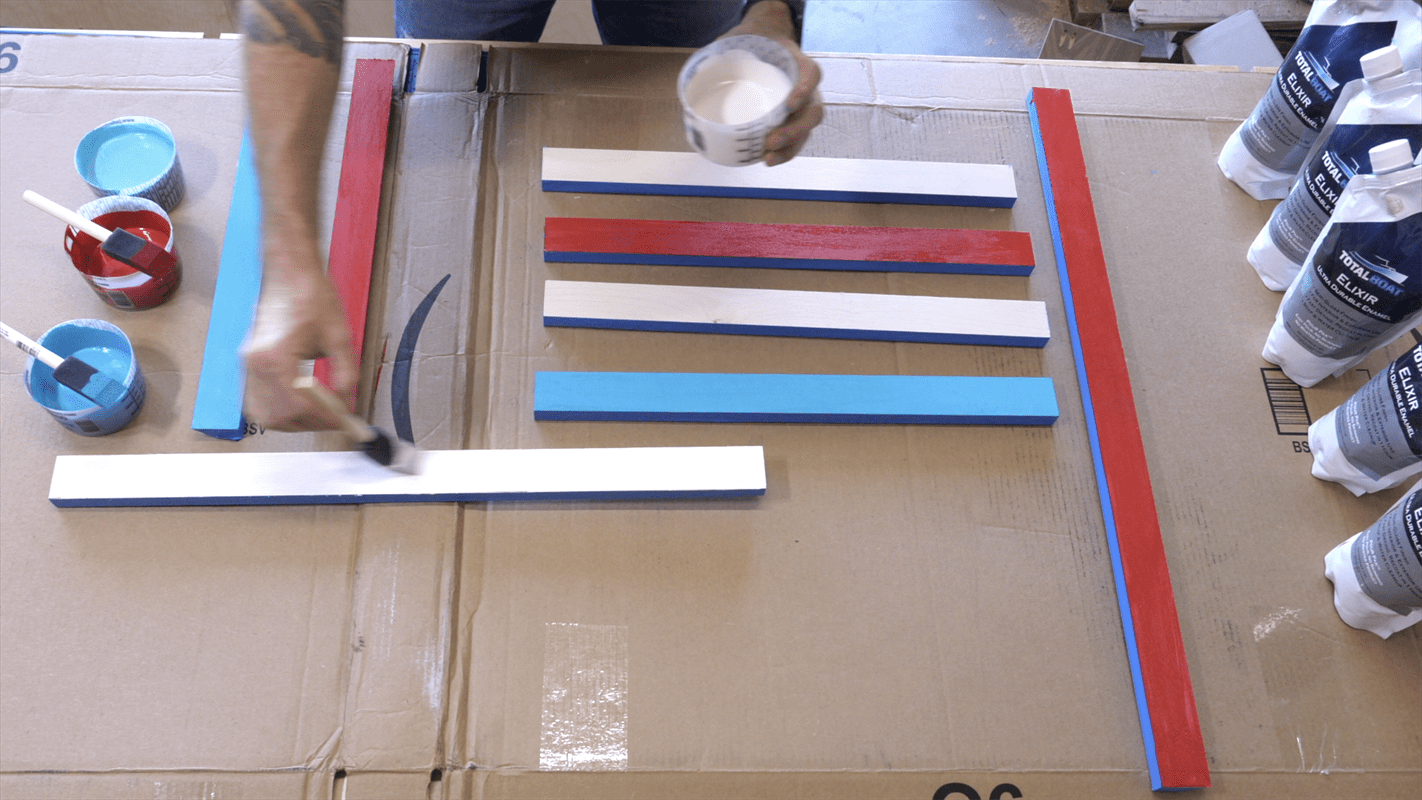
Drawer Pulls/Door Handles
I make my drawer pulls and door handles by cutting 2 inch wide strips, and then adding a 45 degree bevel while cutting these strips to their final width of 1 1/2". I measure each handle/pull to span the entire width of the drawer or height of the door. Add paint if desired, and then attach to the drawers & doors with screws from the back side.
-
Finish
I applied 4 coats of a marine grade spar varnish to create an extra durable finish. Whichever finish you go with first remove the tracks and the miter saw. After that you're all done. Again, for further details I recommend you watch the YouTube build video n my Jonny Builds channel. A link to the sketchup file is in the description of that video. Make sure to post pics if you build this project, and email me if you have questions.