

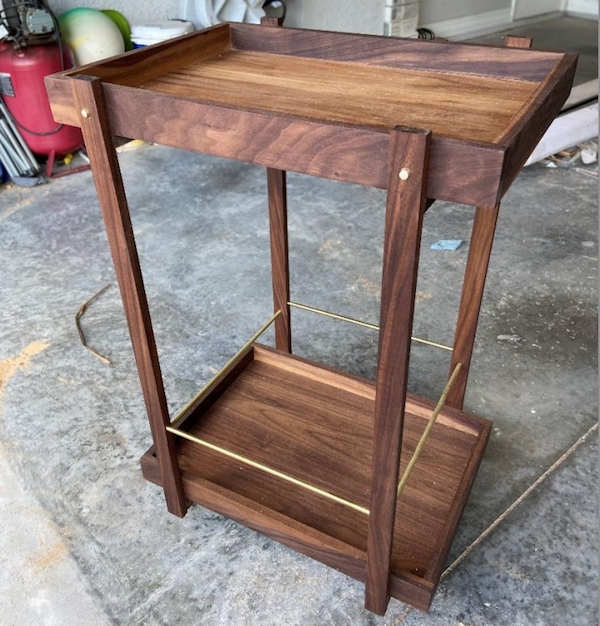


Make this rolling beverage cart in time for hosting holiday parties. Use a hardwood like walnut or use select pine and a walnut stain to get that expensive look without breaking the bank.
Tools
Kreg Tools


Other Tools
-
Miter saw

-
Clamps
-
Mallet
-
Brad nailer (optional)
Materials
Wood Products
- 3 Boards , 1x2x8
- 2 Boards , 1x3x8
- 2 Boards , 1x6x8
Hardware & Supplies
- 1 Box of 1 ¼” Kreg pocket hole screws (See tools list)
- 1 Safety glasses / personal protective equipment
- 1 Oil or finish of choice
- 1 Measuring tape
- 1 Combination square
- 1 Brass tube rail
- 1 Solid brass rod
Directions
-
Step one
Cut all your components to size, not including your bottom panel
1x6’s. Cut those about an inch longer so that any movement that
occurs during the glue up can be trimmed off and squared up.
More on that in Step 2.Tip:
**Please note, I do not recommend cutting these to final length of 22.5
prior to glue up. When clamping pressure is applied to boards being
glued into a panel, there tends to be some movement and it’s difficult to keep them perfectly aligned for your overall dimension of a 16.5”x22.5” bottom panel for your tray. See Step 2 for further info. -
Step two
Glue Up your 1x6 components in two panels of 3 boards each.
Try to align them but remember, you cut these boards longer so
that any shifting during this glue/clamp up could be accounted
for. Spread glue evenly between boards and clamp snugly, but do not over tighten the clamps. Make sure to push down before tightening fully in order to keep the boards flat. In a few hours when they can be removed from the clamps, you can use the Kreg ACS or any other circular saw system with a straight edge to trim one edge of your panel, measure 22.5” from the freshly squared off edge, and trim the other edge to make it the final dimension of 16.5”x22.5”.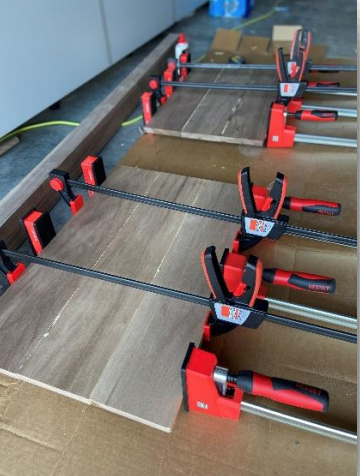
-
Step three
Drill pocket holes using the Kreg 720PRO into (4) of the (6)
1x2x18 cross support pieces. This is how we will create our framework supporting the entire
bar cart. You should drill 2 close
pocket holes on both ends of 4
cross supports giving you a total
of 16 pocket holes. The two extra
cross supports do not need
pocket holes and are meant to be
used as blocking underneath the
lower cross support for the attaching of wheels.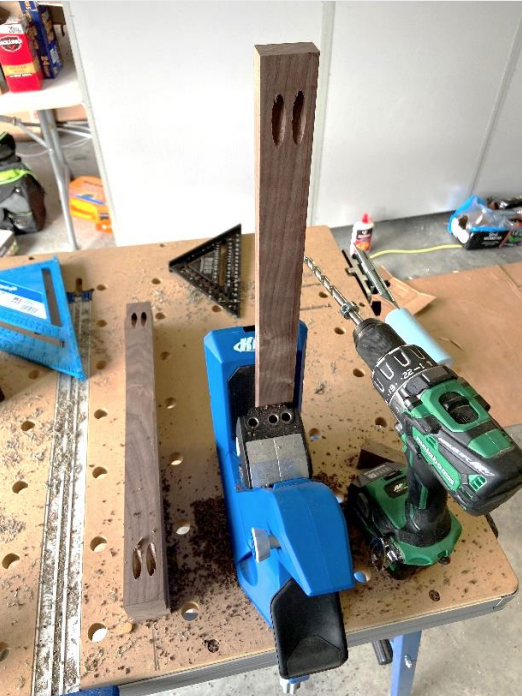
-
Step four
Combine a blank 1x2x18 cross support with one that has pocket
holes. Do this twice. I glued mine back-to-back and clamped
them together. This gave me the thickness I needed to drill holes
for wheels to be attached later. After more research, there are other wheel options that could be screwed directly into the 1x2 rather than having to drill a hole and insert a stem. Regardless of the wheel you choose, the extra 1x2 for support isn’t a bad idea.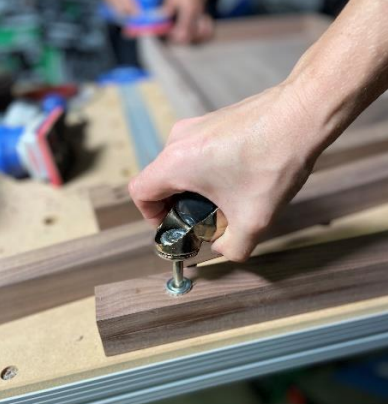
-
Step five
Install wheels of your choice
according to the instructions provided by wheel manufacturer to the bottom of the two lower cross supports after they come out of clamps. Try to keep the wheels as far out as possible to aid in proper balance. -
Step six
Attach the 1x2x18 cross supports to the 1x2x36 pieces with glue
and 1 ¼" pocket hole screws. The tray is 2.5” tall and I wanted the upright legs to have a ¼” reveal above the tray so my upper cross support was about 2.75” from the top. On the bottom
portion, I installed my cross supports with wheels so that the
antiqued brass wheel was visible but the attached portion was hidden behind the 1x2 upright. This is also the time when, if you are choosing to add the brass tube accent rail, you would need to mark and drill 3/8” holes into your upright legs so those can be inserted prior to attaching your cross supports as it will be much easier to insert them at this time.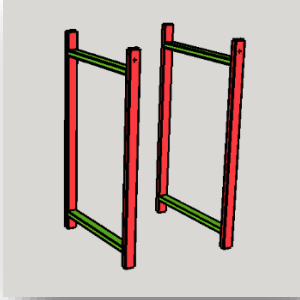
-
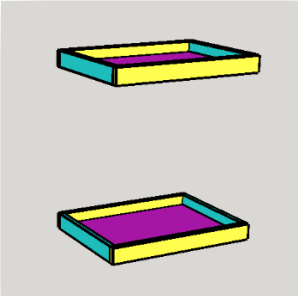
Step seven
Assemble your two trays. The 1x3x24 long sides go on first. You can use glue and clamps or brad nail it to keep working. These will overhang the tray by ¾” on each side to allow for the 1x3x16.5 short sides to be attached in between.
-
Step eight
Put it all together! Grab a friend for this part - you’ll need the extra set of hands. After the glue is fully cured, it’s time to place the trays atop the cross supports and join them together. These will fit snug and will need to be tapped into place with a scrap piece of wood and a mallet. I fastened mine to the cross supports from below with 1 ¼” pocket hole screws.
-
Step nine
Secure the top tray to the upright legs with a through-dowel. This is
necessary to avoid a left-to-right pivot point being formed. There are multiple ways to do this. I drilled a 3/8” hole through both and super glued solid brass rod inside. Another option would be to simply pre-drill a hole and countersink a screw, being sure to not pass through the side of the tray, and then plug the hole.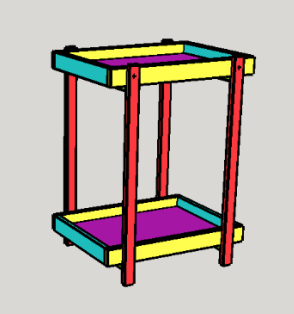
-
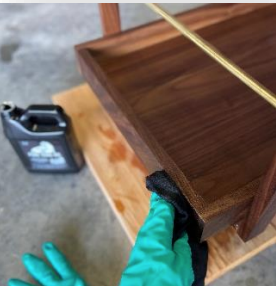
Step ten
Finish the bar cart with the sealant of your choice. I used a wipe on tung oil but a number of options would work! Make sure to take a picture in front of your build and tag @oakhillmillworks and @kregjig on Instagram so we can see!
Thanks for checking out these plans! If you want to connect with
me on other platforms, check me out on:
Instagram: Oak Hill Millworks Instagram
YouTube: Oak Hill Millworks
Facebook: Oak Hill Millworks
Web: Oak Hill Millworks Website