Leonard Media Console
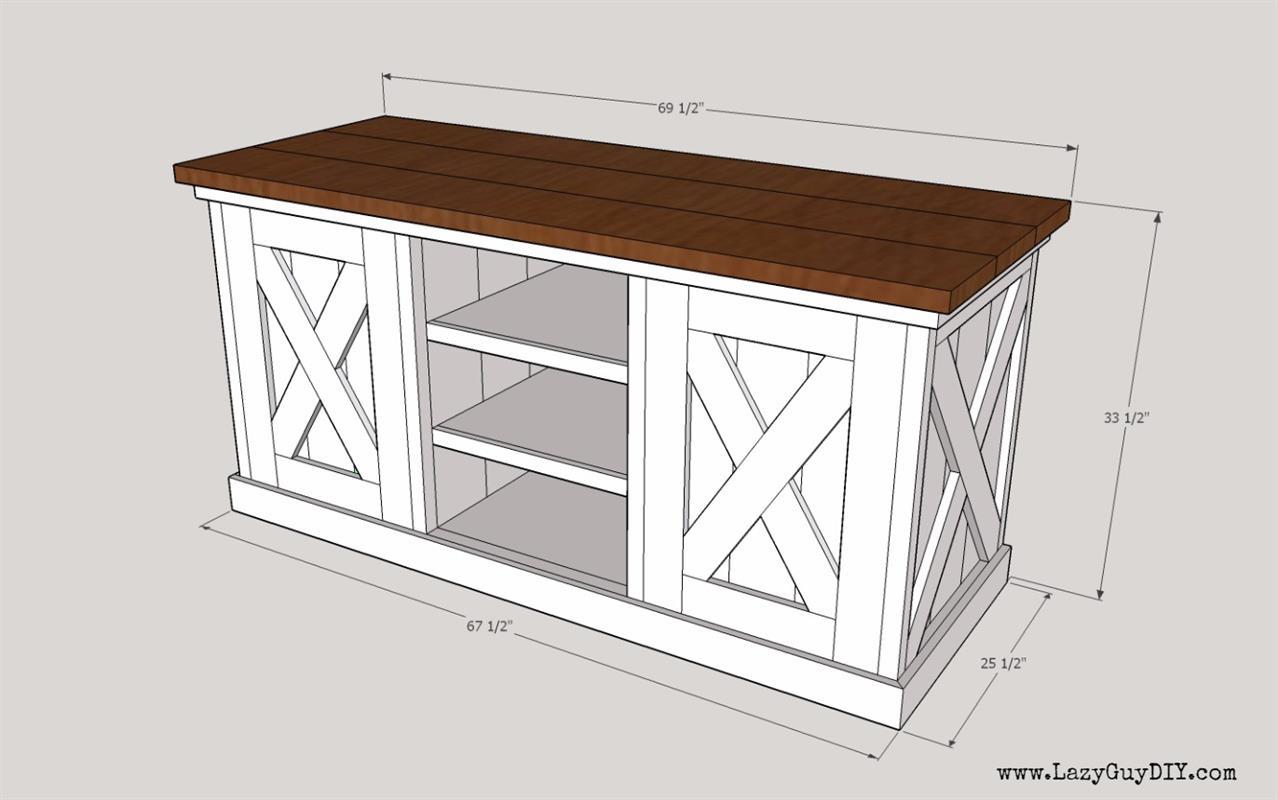
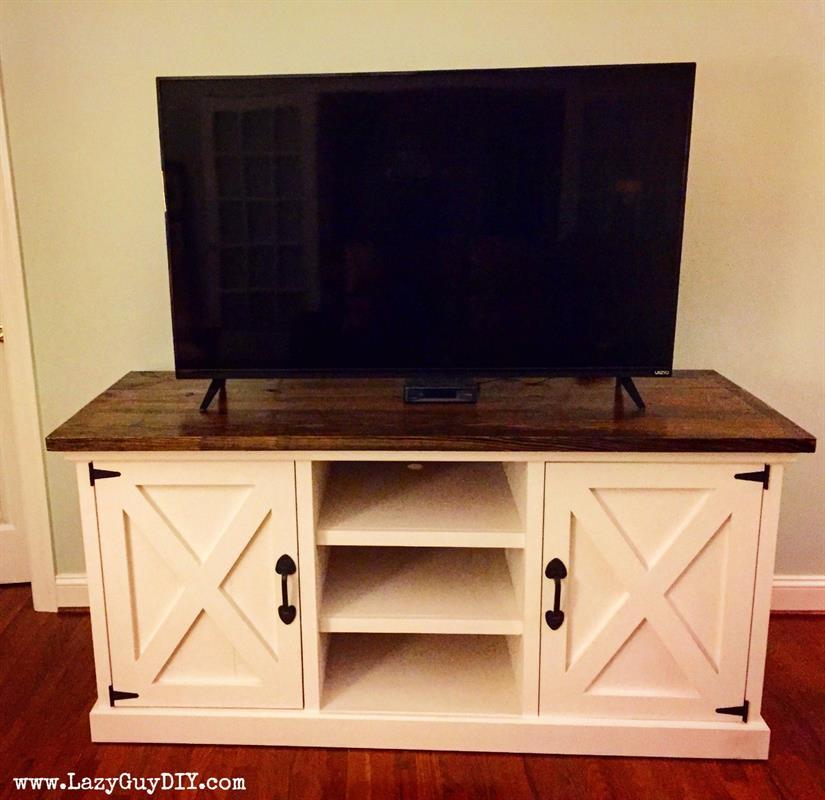
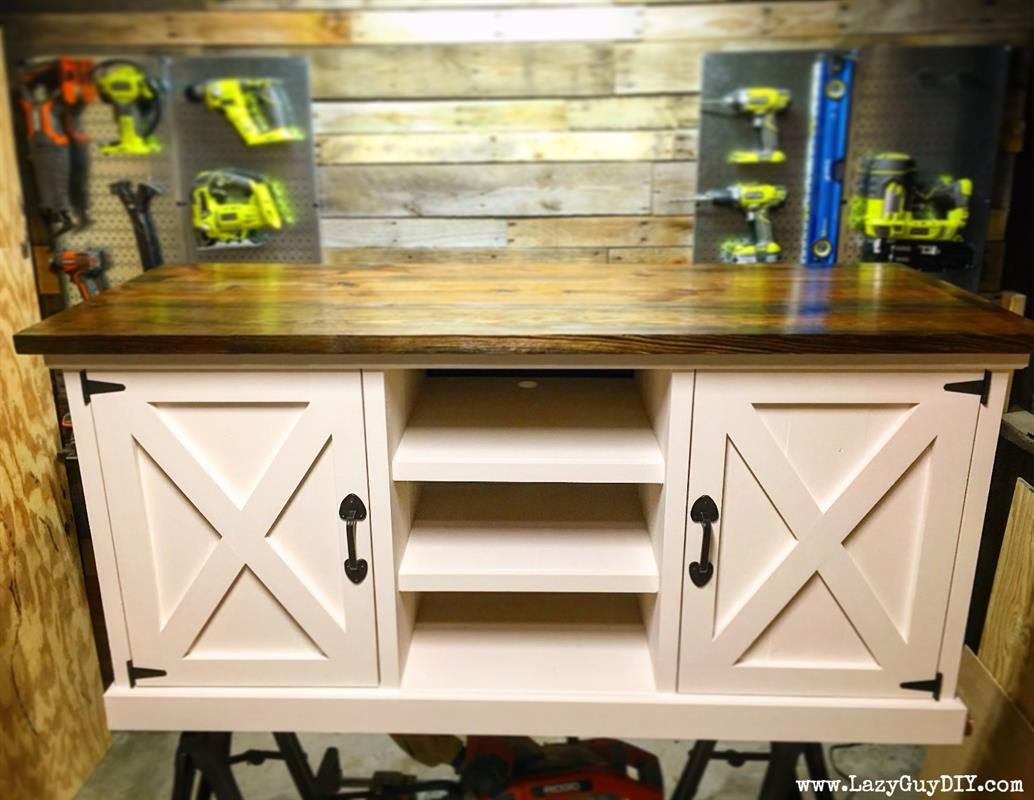
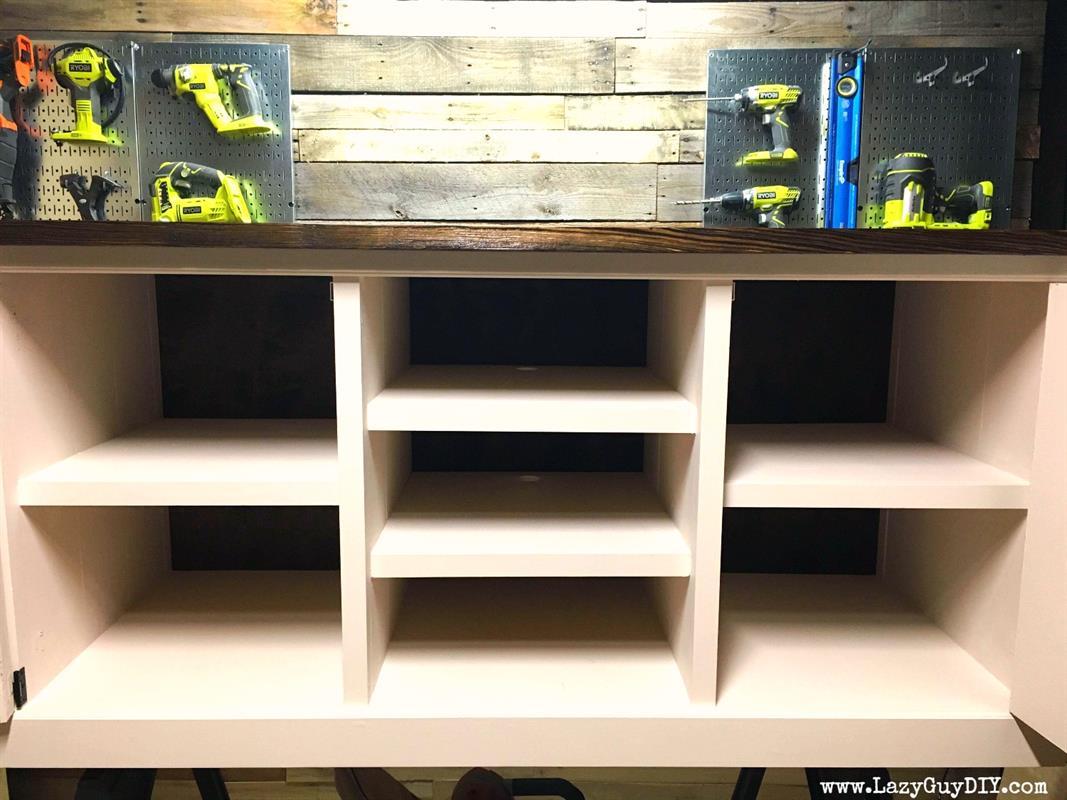
By Lazy Guy DIYThis large farmhouse style media console has a thick farmhouse top, rustic X accents and plenty of storage for uh... media console-y stuff or a ginormous tv! For the long winded tutorial with more pictures and video, checkout www.LazyGuyDIY.com.
Directions
-
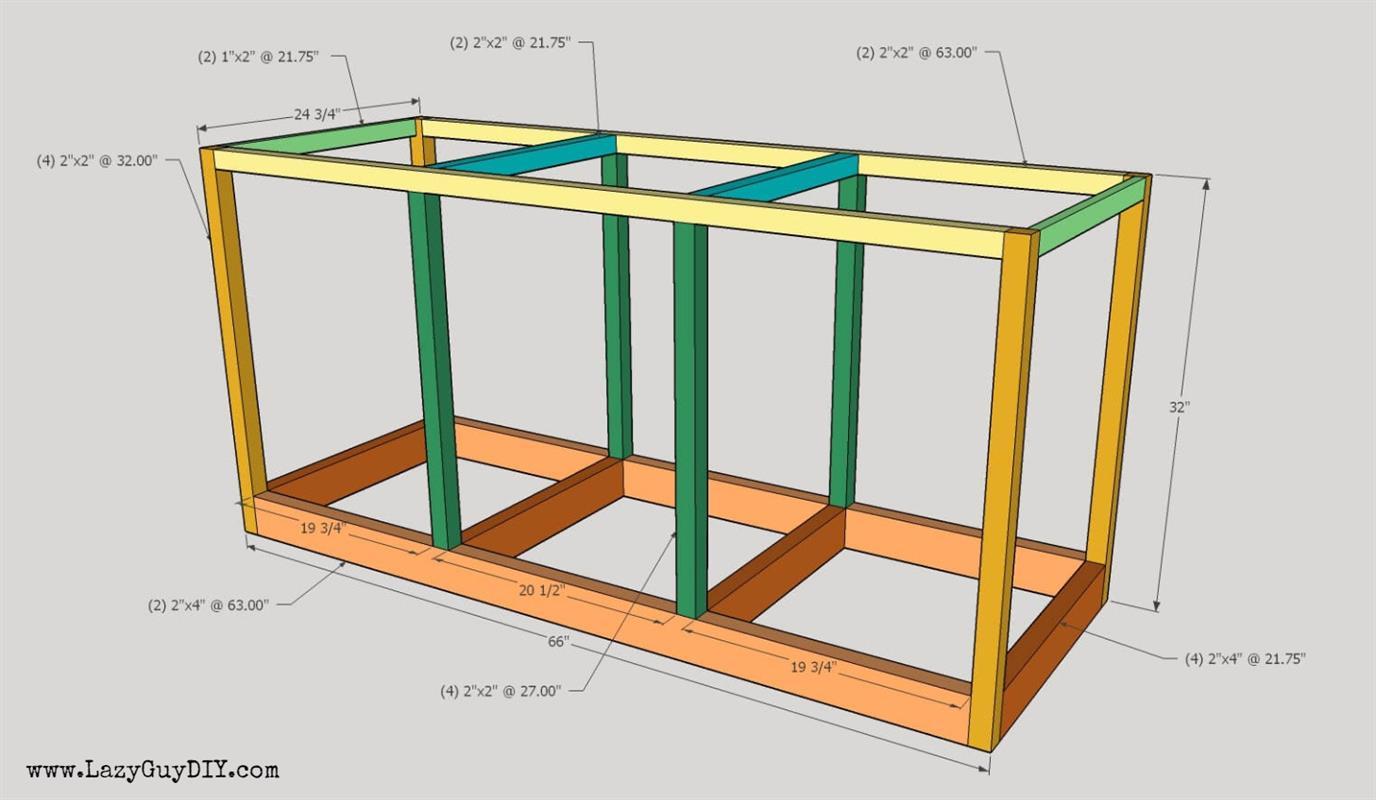
Assemble The Frame
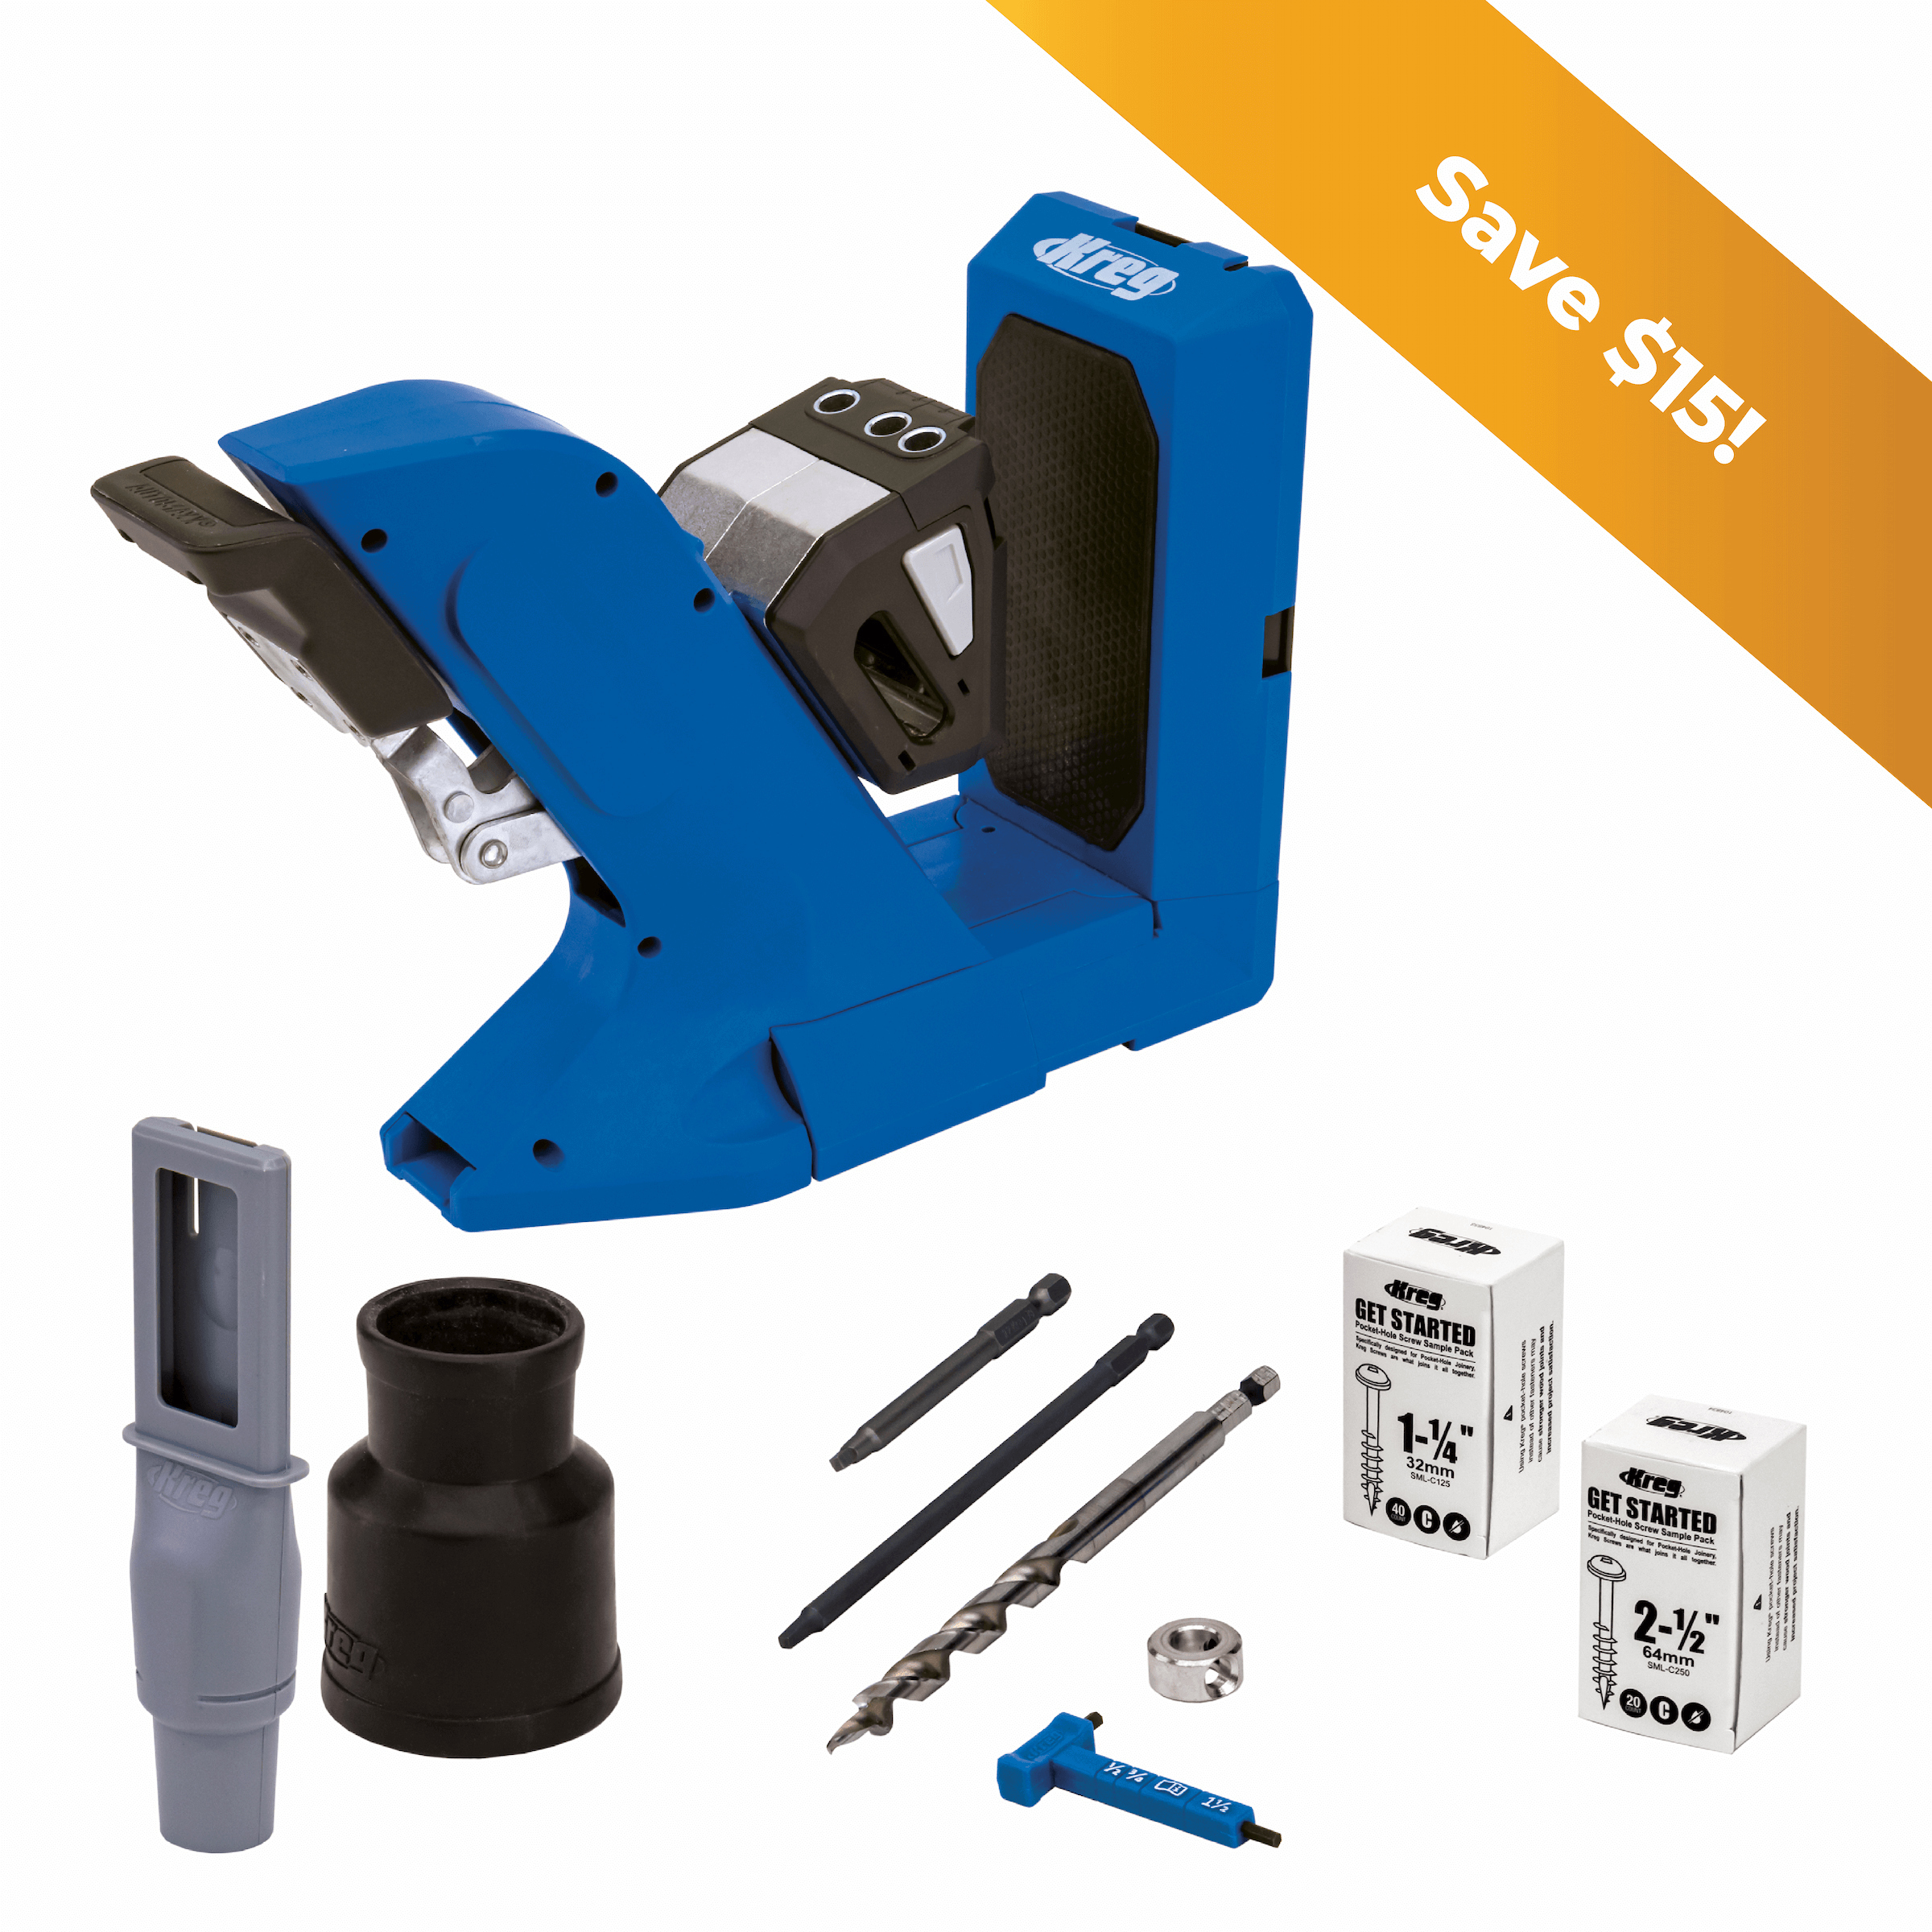
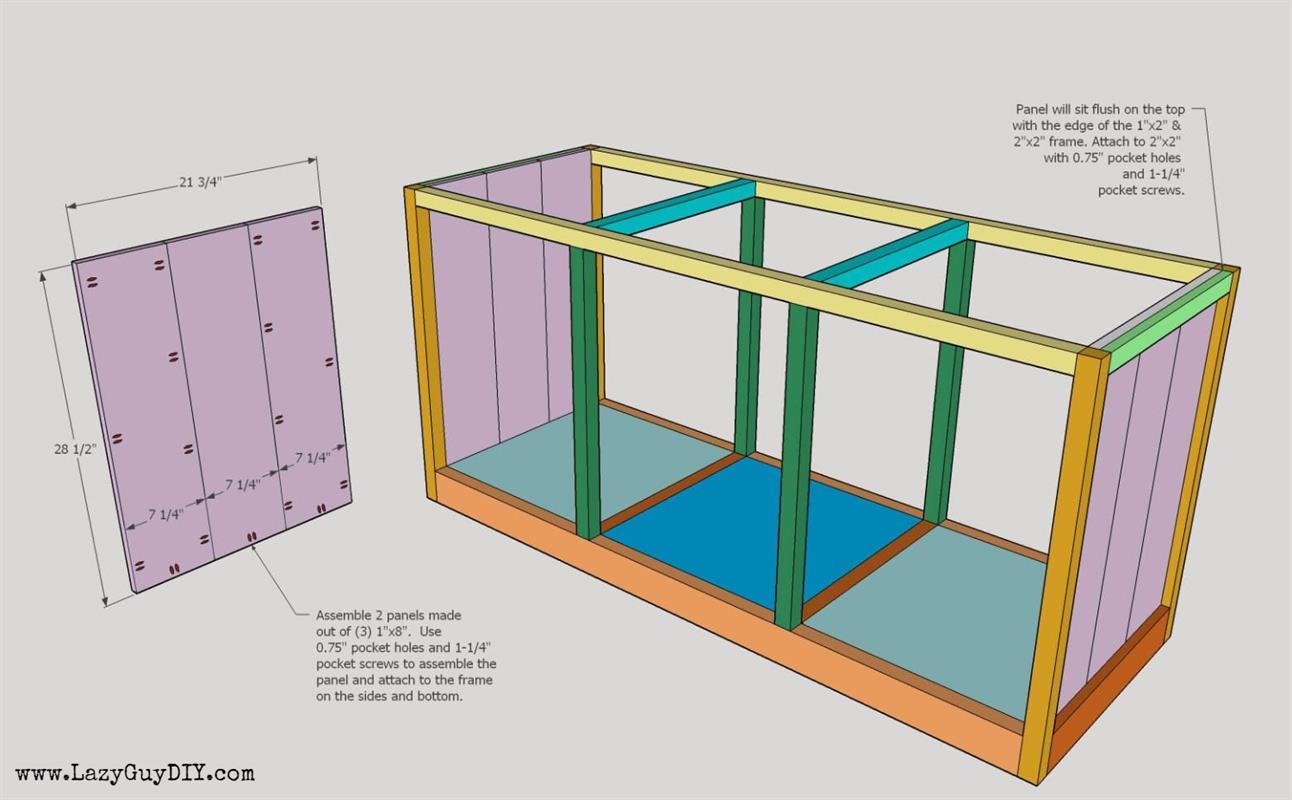
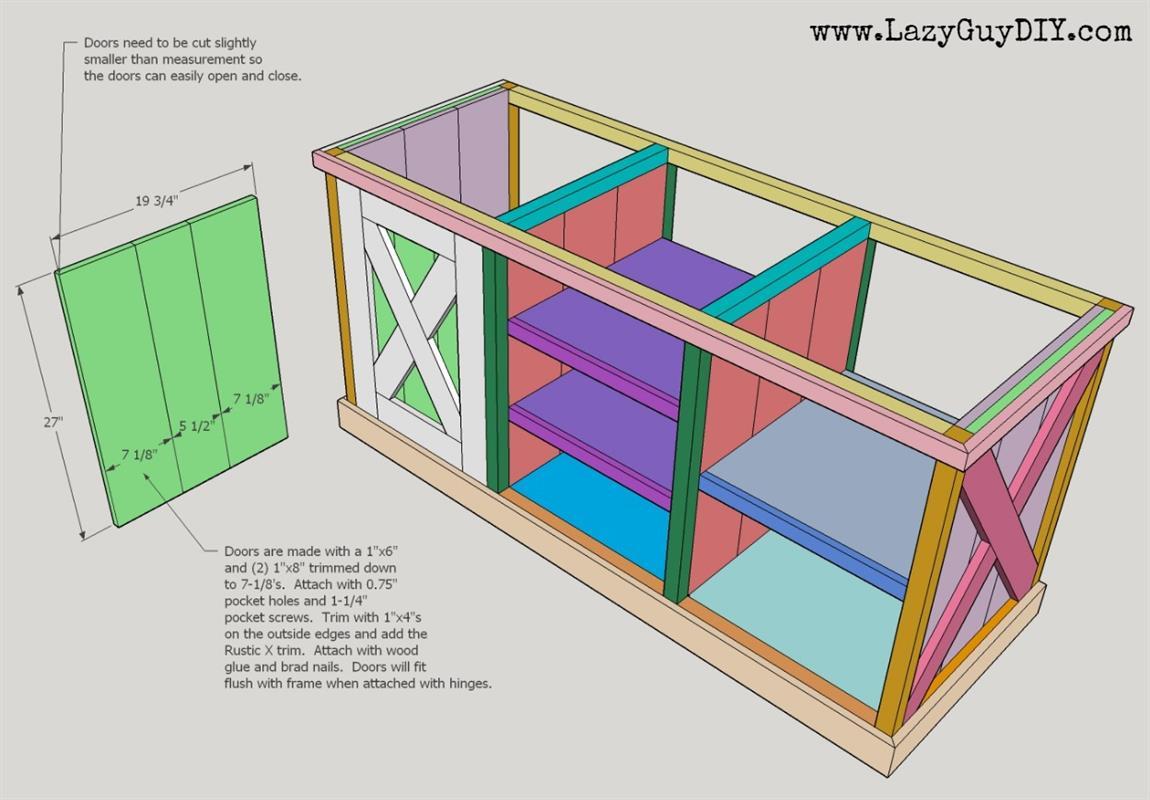
Start from the bottom with the 2x4 frame work. If available, square off all sides of 2x4 material with a thickness planer for flush fit of panels (in later step). Attach 2x material to 2x material with 1.50" pocket holes and 2-1/2" pocket screws. All material attaching to 1x material should use 0.75" pocket holes and 1-1/4" pocket screws. The top outside 1x2's are intentionally used for installing the outside panels in a later step.
-
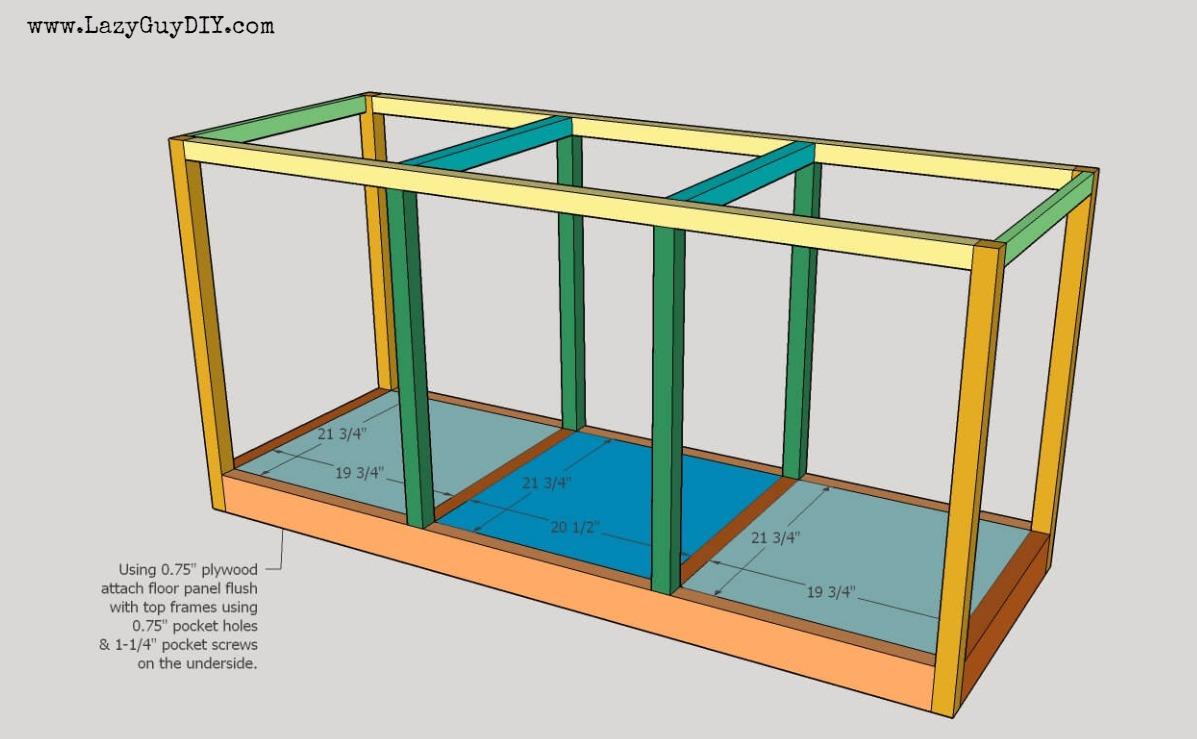
Attach The Floor Panels
If you ran your 2x4's on the frame through the thickness planer, your measurements will be slightly different than those in the diagram. Your fit will be flush though. If you didn't plane the 2x4's, you will have a slight gap from the rounded edges of the 2x material. You can fill this before painting or cover it with a thin piece of underlayment. Attach your plywood panels from underneath with 0.75" pocket holes and 1-1/4" pocket screws.
-
Outer Panel Assembly & Attachment
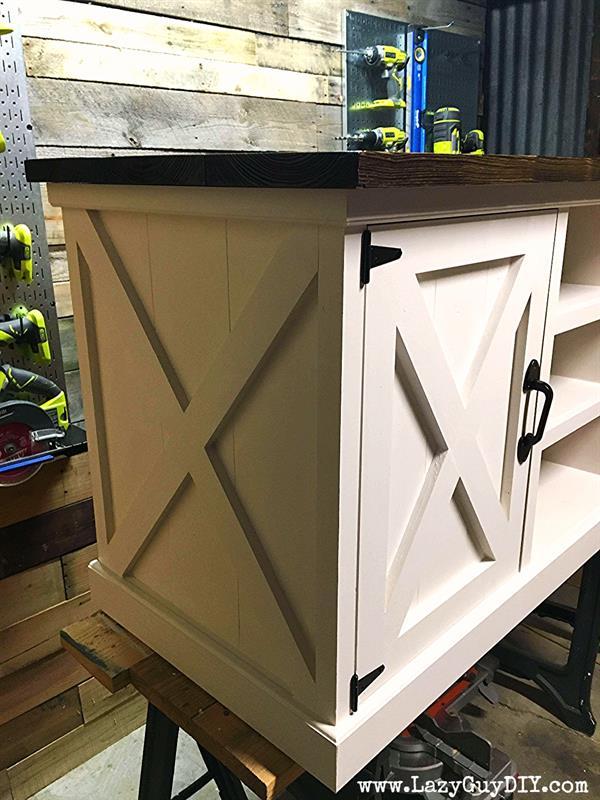
Assemble your two outer panels with three 28.50" 1x8's each. Use 0.75" pocket holes with 1-1/4" pocket screws. To show an exaggerated seam, round over the edges with a palm sander before jointing the 1x8's. Pre-drill 0.75" pocket holes around the sides and bottom of the panel (not the top). Slide the panel behind the 1x2" top/out frame and attach the bottoms and sides with 1-1/4" pocket screws and the top with a brad gun. Make sure the outside panel leaves an even 0.75" exposure on the frame. Patch the interior pocket holes.
-
Inside Panel Assembly & Attachment
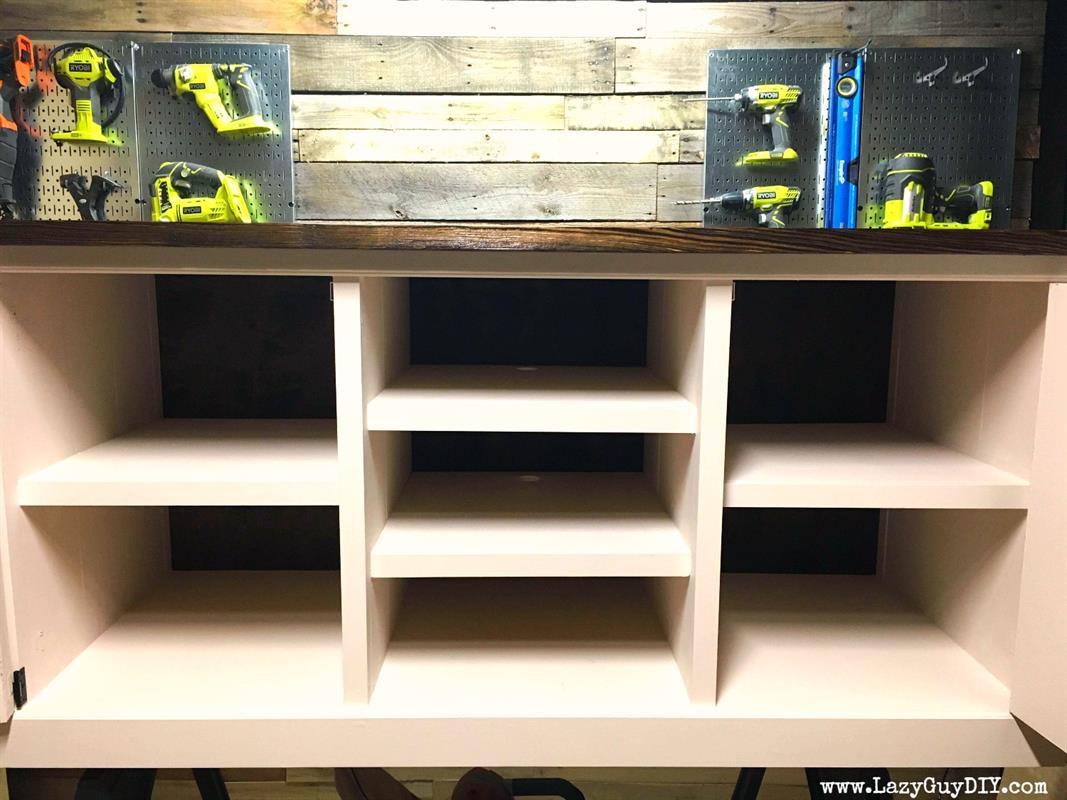
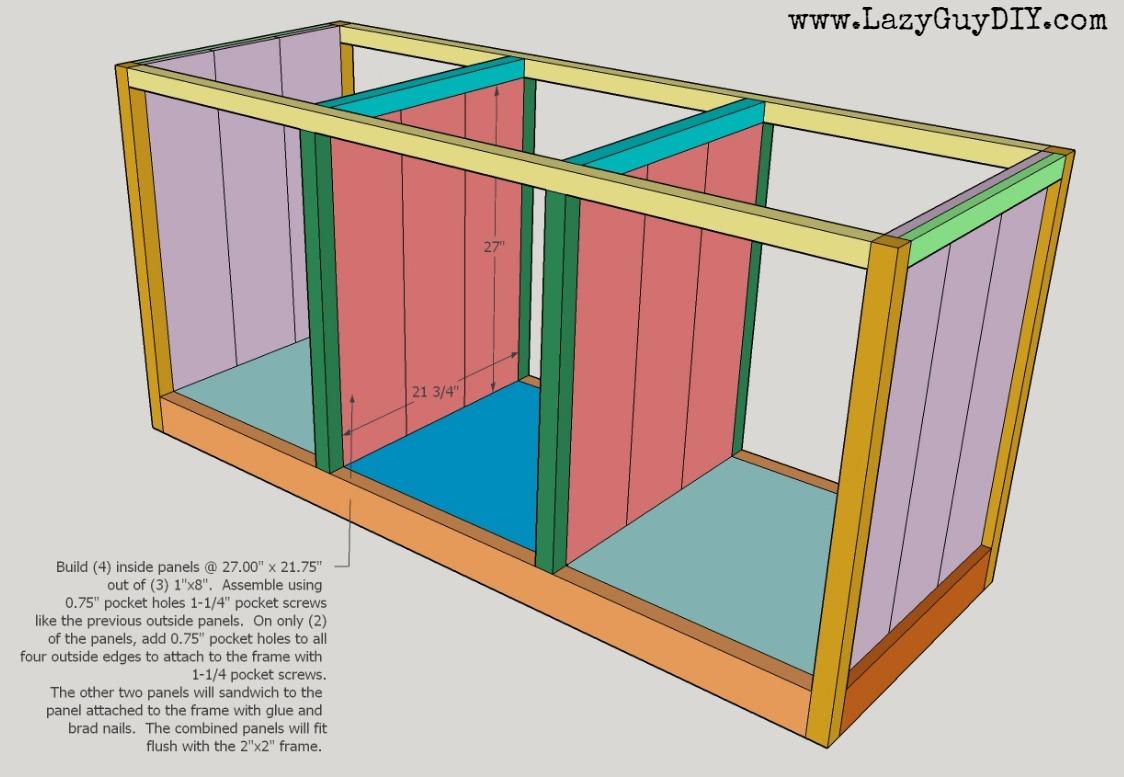
Similar to the outer panels, assemble four panels (three 1x8's wide @ 27") for the inner panels using 0.75" pocket holes and 1-1/4" pocket screws. On only two of the panels add 0.75" pocket holes to the outside edges to attach to the frame. Attach those pre-drilled panels to the inside frames using 1-1/4" pocket screws, making sure the panels are flush with the frame. Once on, sandwich the remaining two panels on the opposite side of the frame and attach with wood glue and a brad gun. When together, the panels should sit flush between the 2x2 framework.
-
Assemble & Attach Shelving
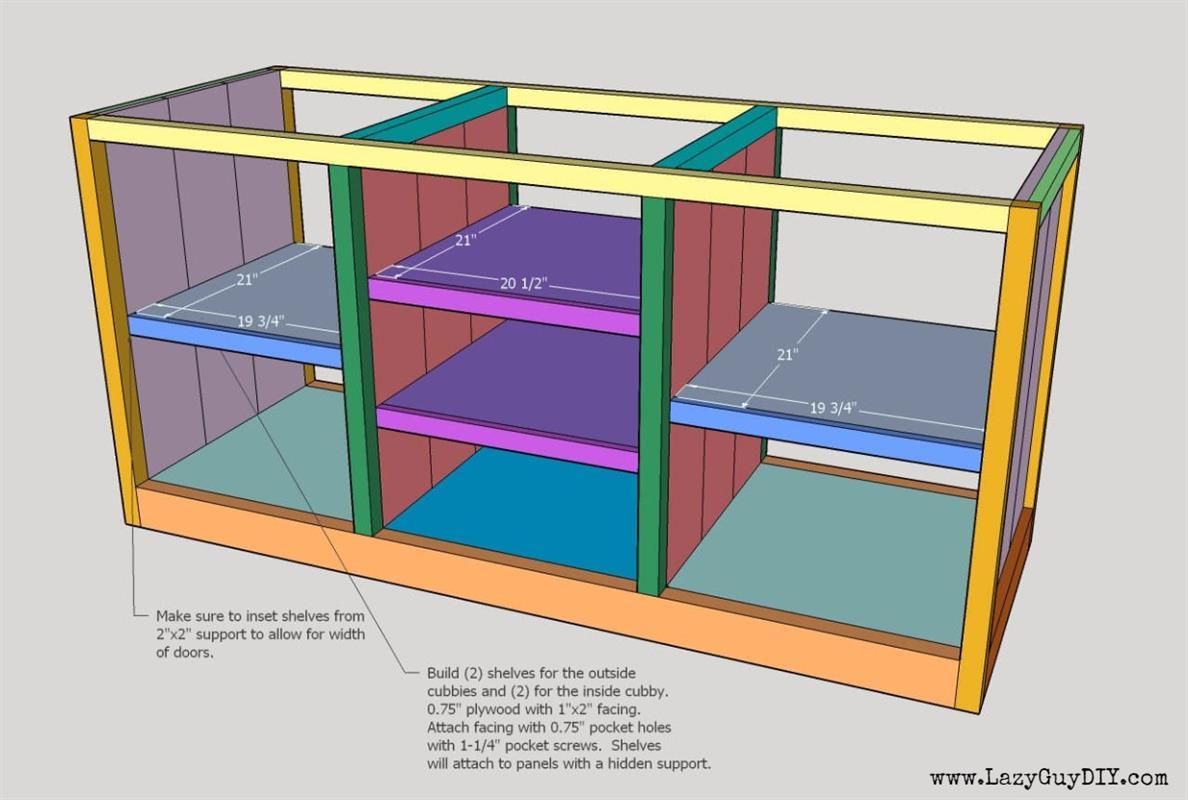
Cut plywood to length for the outer and inside shelves. Attach 1x2 facing from underneath with 0.75" pocket holes and 1-1/4 pocket screws. Attach shelves by using halved, scrap pieces of 1x2 and attaching to the panel walls at the desired height for the shelf support. Then slide shelf panel on top and attach with brad gun. Make sure the shelf and facing are inset enough from the framework that the cabinet doors will close flush. This is also a good time to fill any gaps and prime the unit before continuing.
-
Install Trim Work
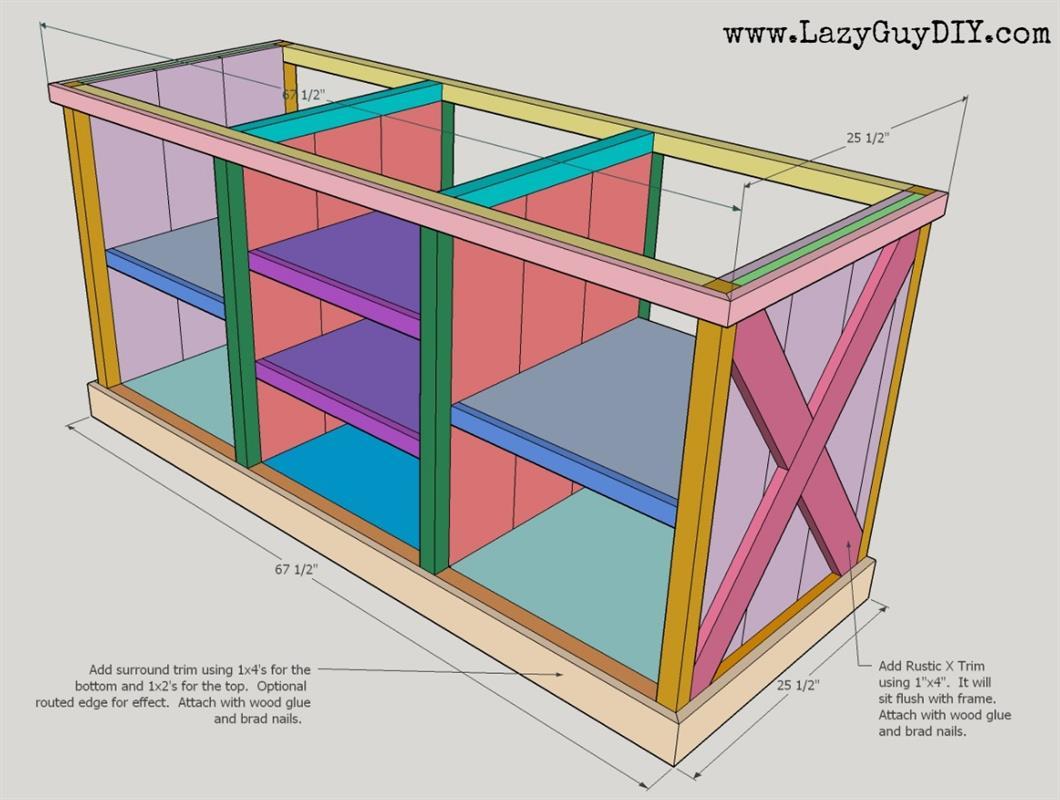
Cut and attach 1x2" trim with mitered edges to the top and 1x4" trim to the bottom. I routed a round-over edge for decoration. The trim will only cover the front and side panel. Leave a 1/4" overhang off the back of the trim so the underlayment used for the back panels will sit flush. Add rustic X trim to the side panels using 1x4's. The X's will sit flush with your framework. Attach with brad gun and wood glue.
-
Assemble Cabinet Doors
For the door panel, cut down two 1x8's to 7-1/8" by 27.00" for the outer pieces and a 1x6" for the inner piece. Dry fit, but do not attach yet with pocket screws. Cut 1x4" outside trim to fit and dry fit rustic X. Mark your panel for all areas to be covered by the trim and then add 0.75" pocket holes with 1-1/4" pocket screws on to the panel. When you add your trim work over top (with wood glue and brad nails) your pocket holes will be hidden. These measurements are also for a flush fit door, you want to make the door with an 1/8" exposure to your frame for easy opening and closing. You can always go back and make adjustments to the door with a table saw for a better fit. Attach hardware and hang doors.
-
Assemble & Attach Top
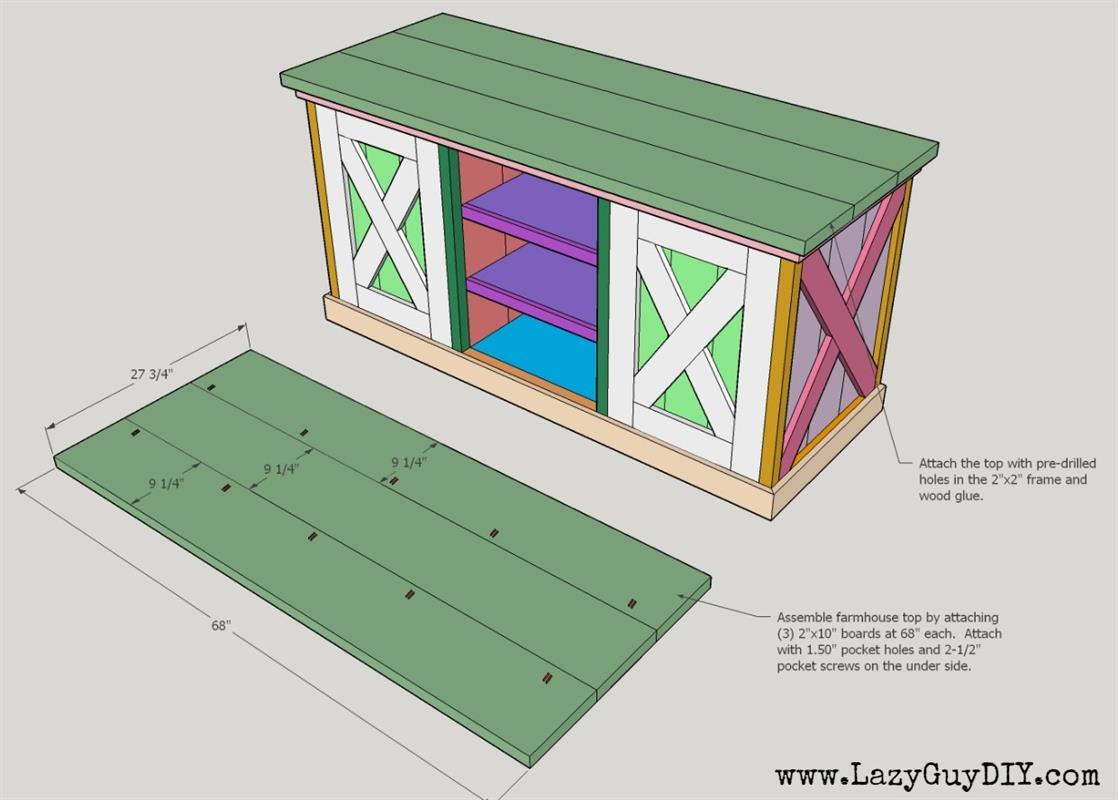
Cut the 2x10's to 69.50" and run through the thickness planer (if desired). Attach together with 1.50" pocket holes and 2-1/2" pocket screws. Pre-drill the frame of the console to attach the top with 2-3/4" wood screws. Be sure to clamp the edges down before attaching for a flush fit.
-
Install Back Panels
Using 1/4 sheet underlayment, attach to the back of the unit with wood glue and brad nails. I stained the inside of the panels to match the top and painted the back to match the rest of the unit. The extra 1/4 of trim installed in step 6 should sit flush with the panels. I also cut a hole for media wires in the center panel.


