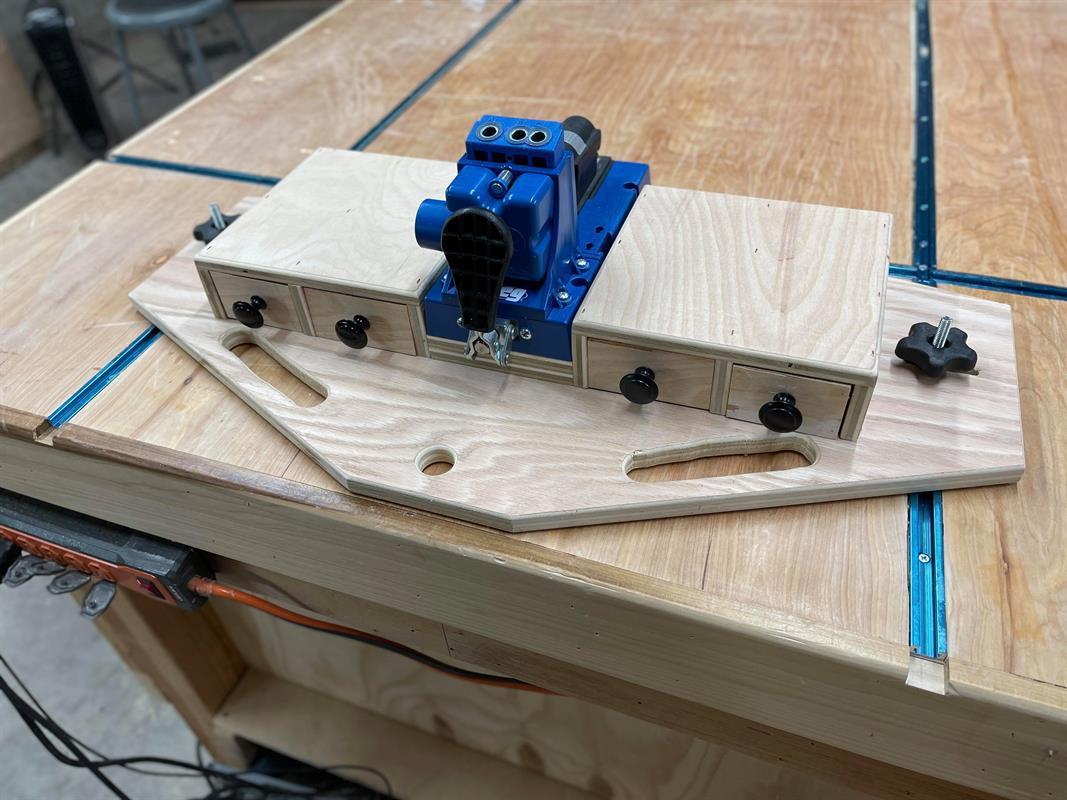
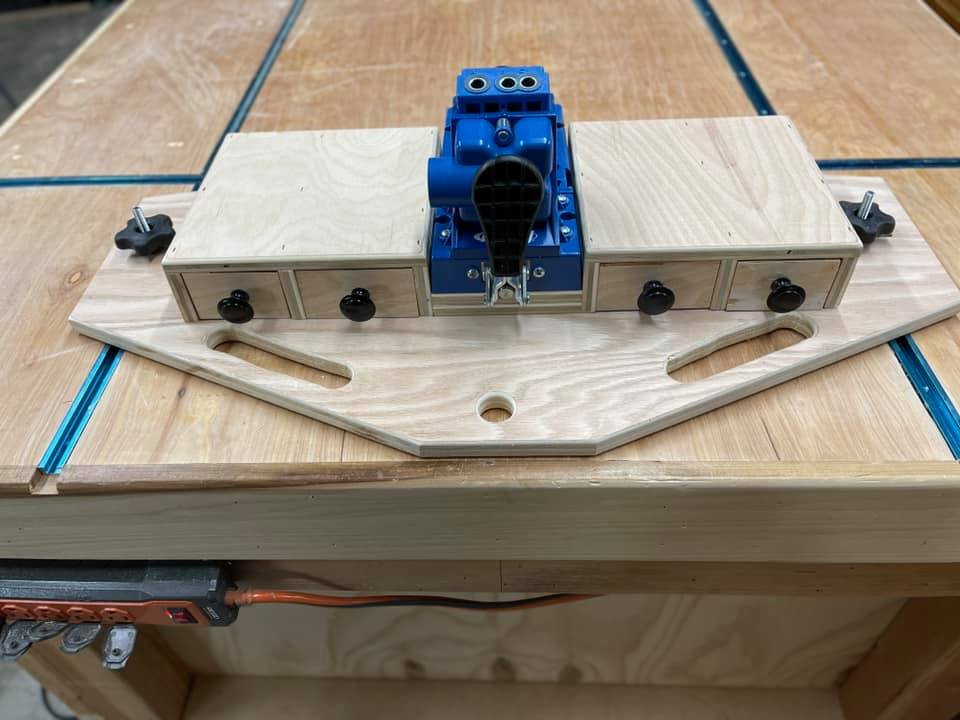
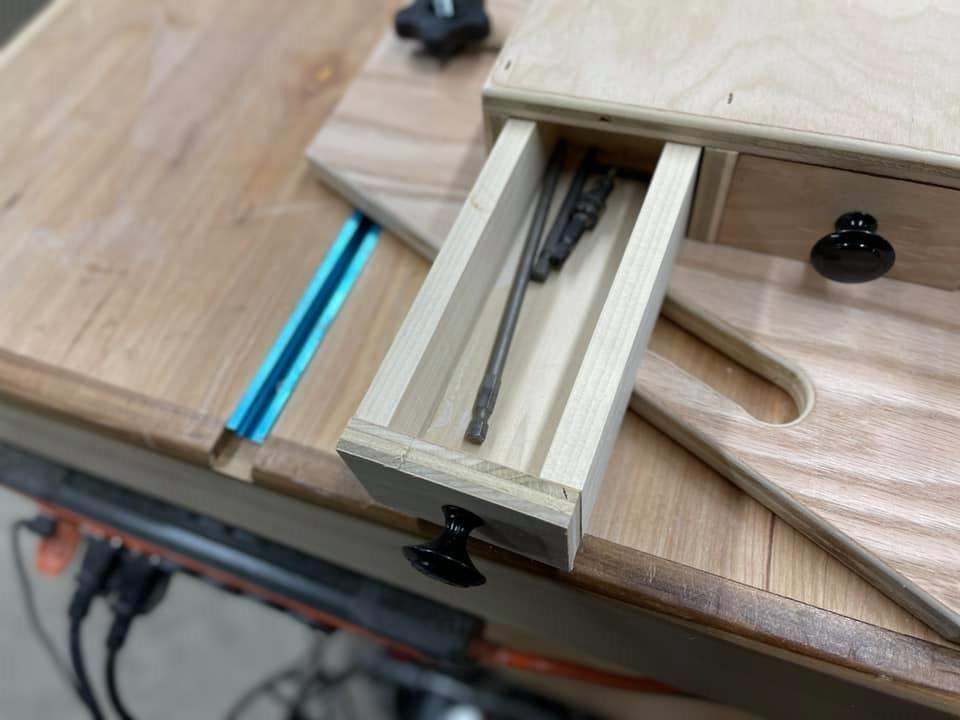


I will show you how to build a cabinet for your Kreg K5 Jig. This cabinet features t-track slots to clamp down to a work bench. It has 4 drawers for accessory storage and a hole to store the cabinet vertically on a wall or, in my case, the side of my workbench. See extras tab for full video!
Tools
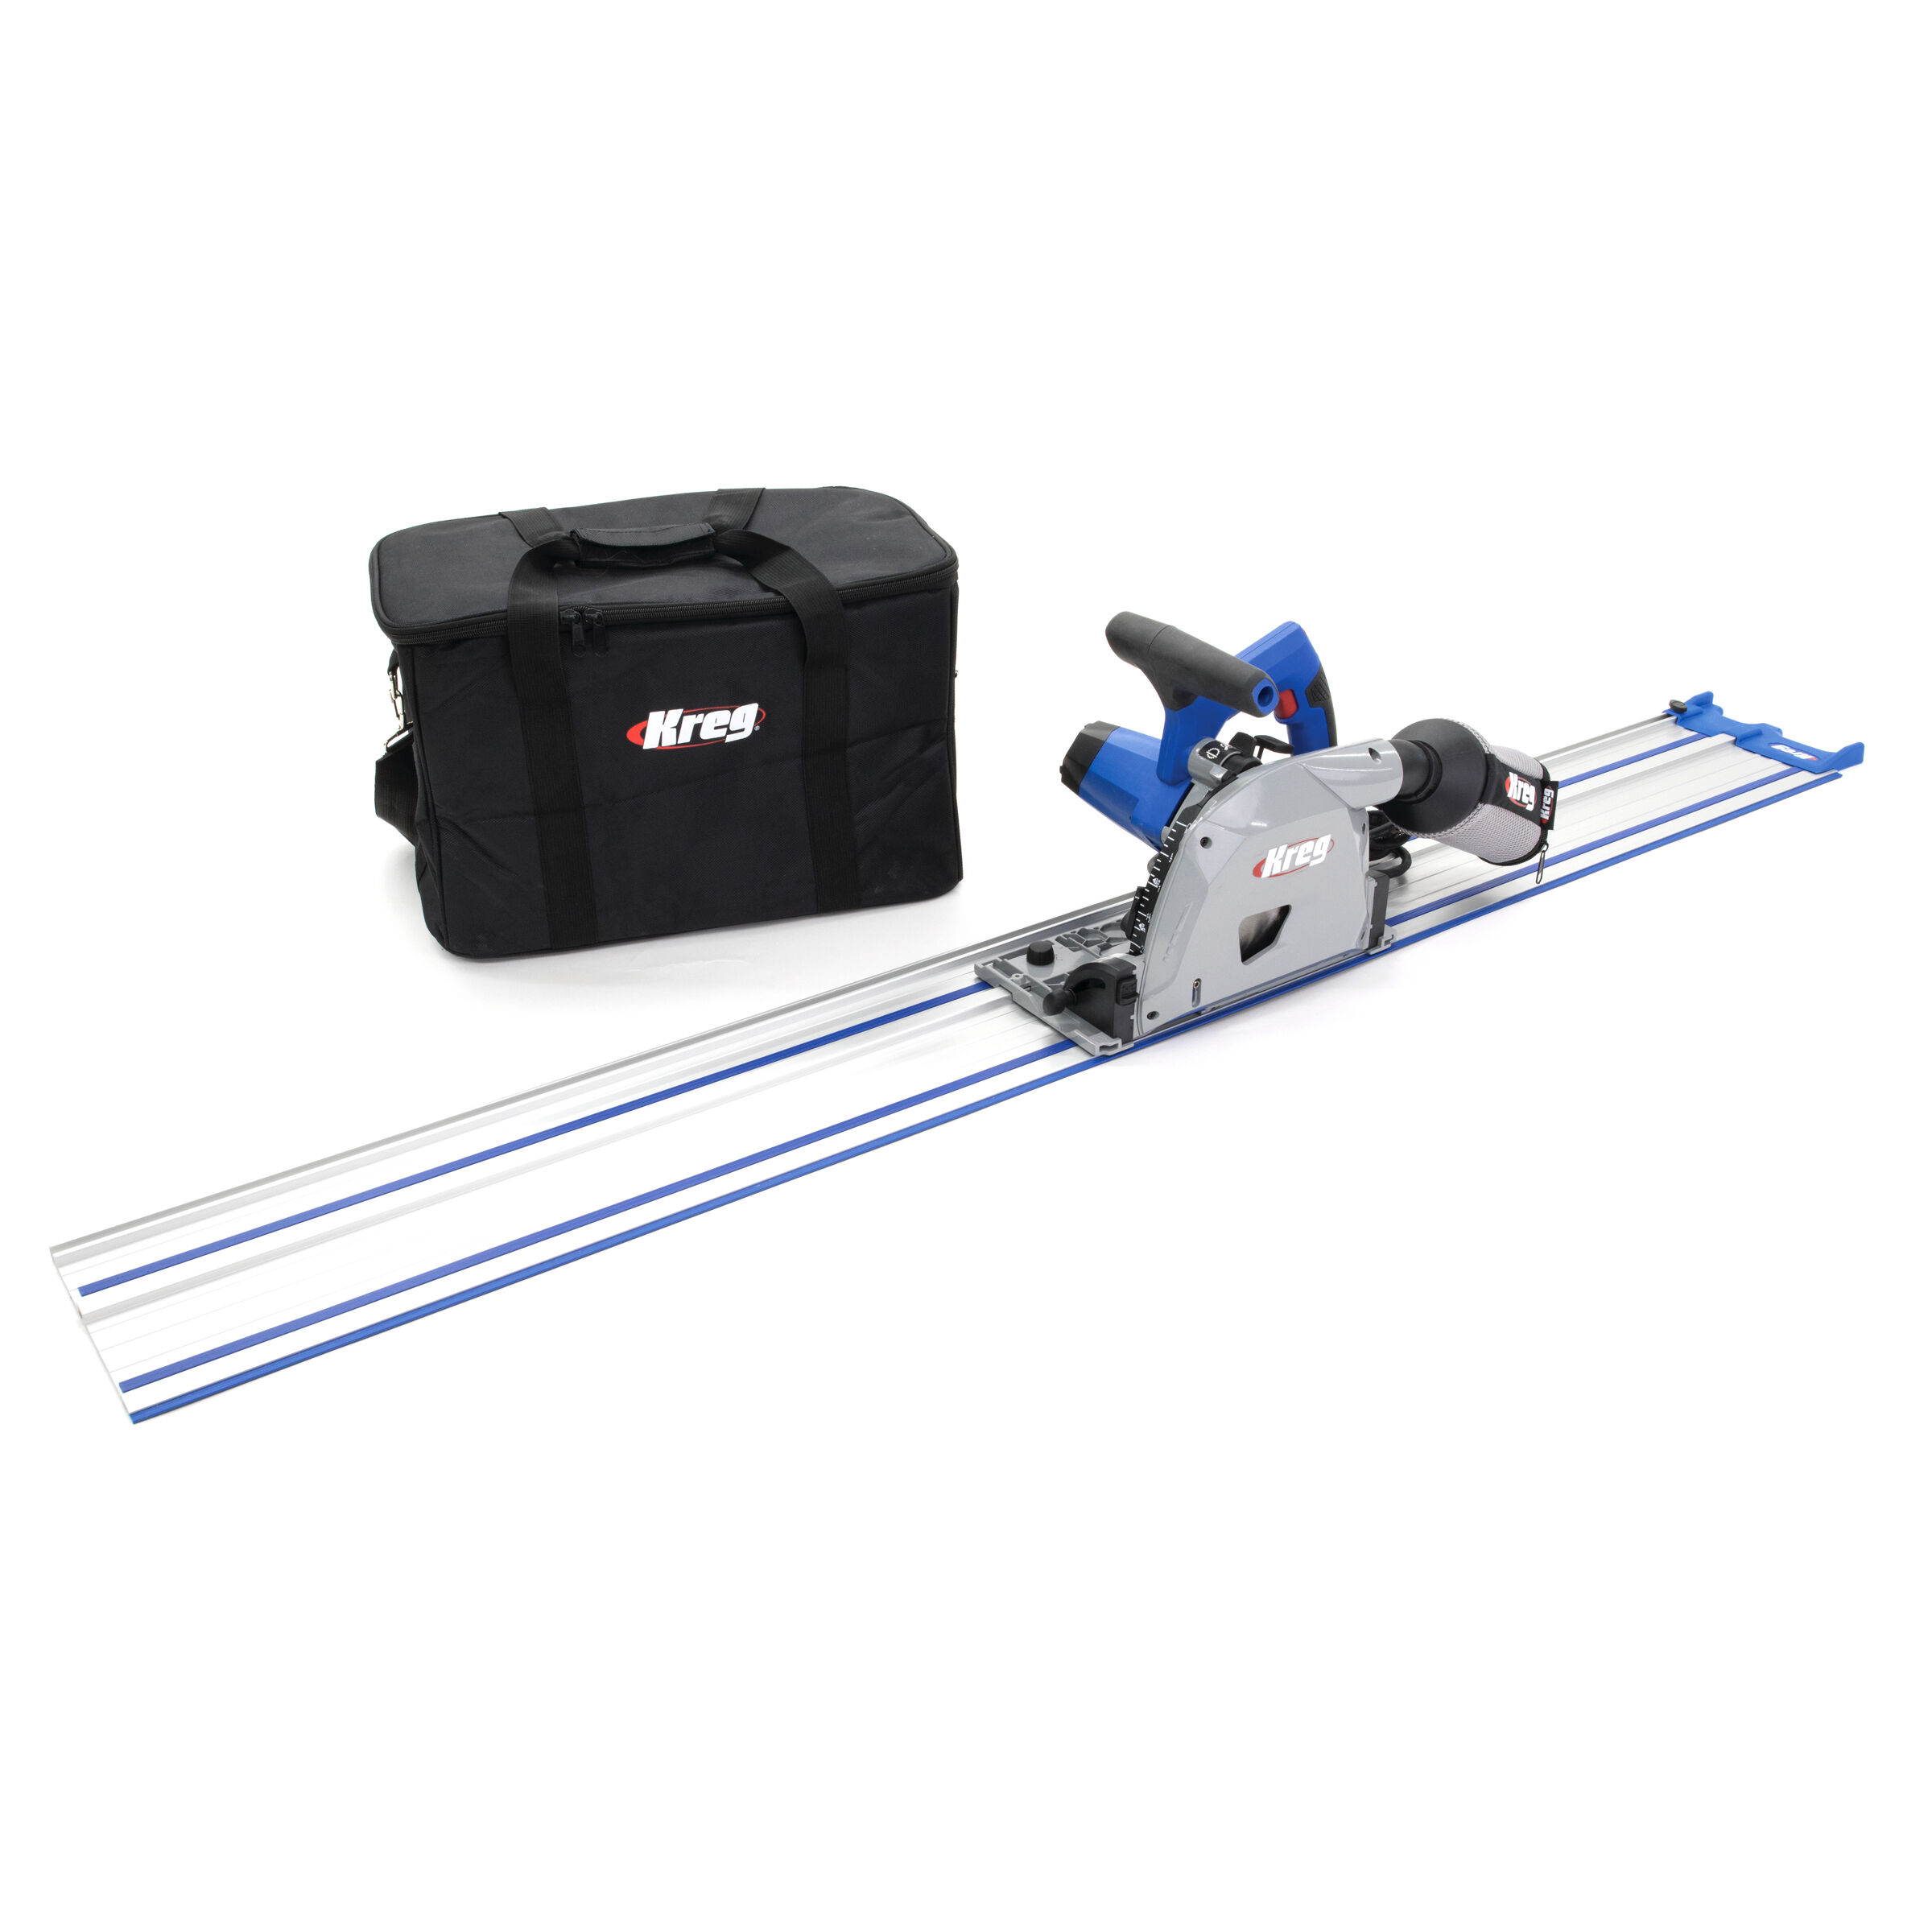
Kreg Tools


Other Tools
-
Miter Saw

-
Table Saw
-
Tape Measure
-
Nail Gun
-
Drawer Pulls
-
Air Compressor
Materials
Wood Products
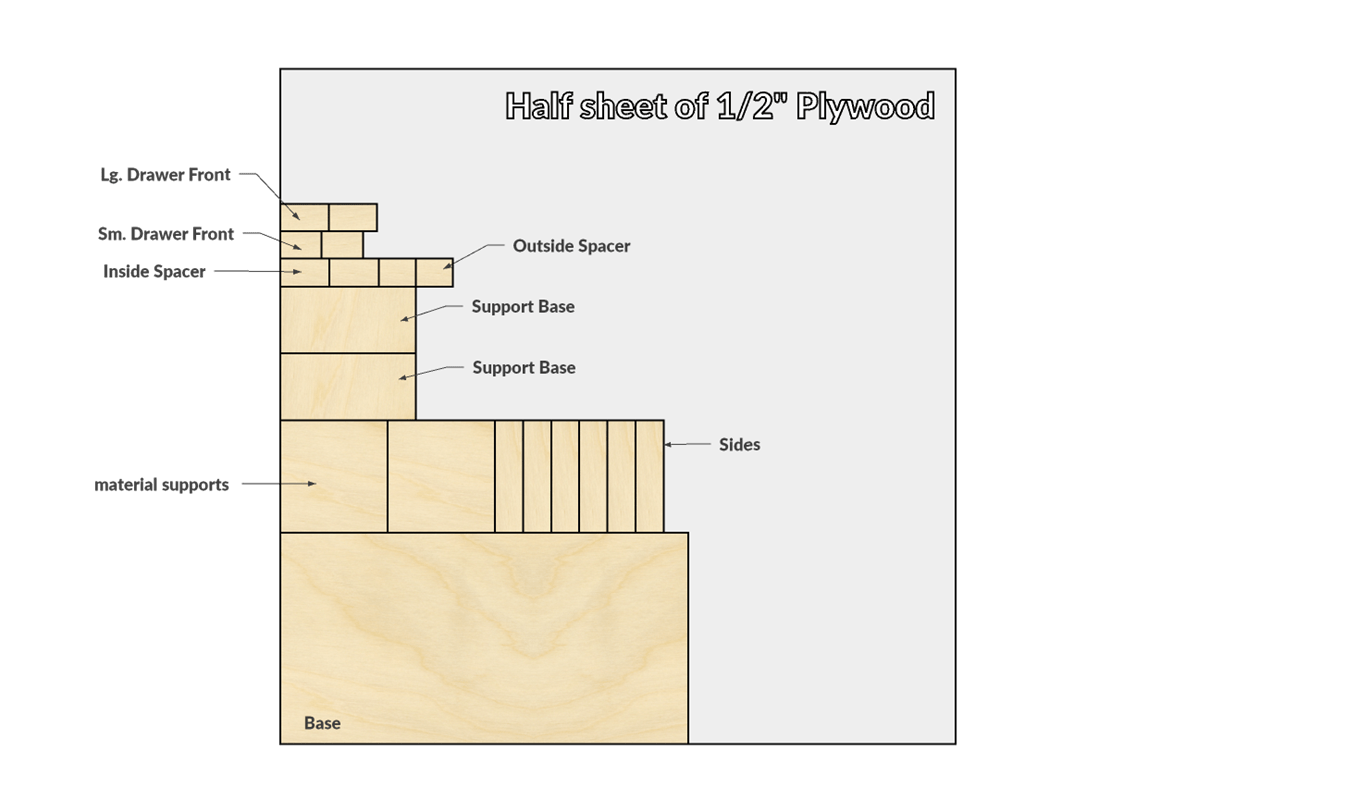
- 1 Plywood , 1/2" Thick , 96"
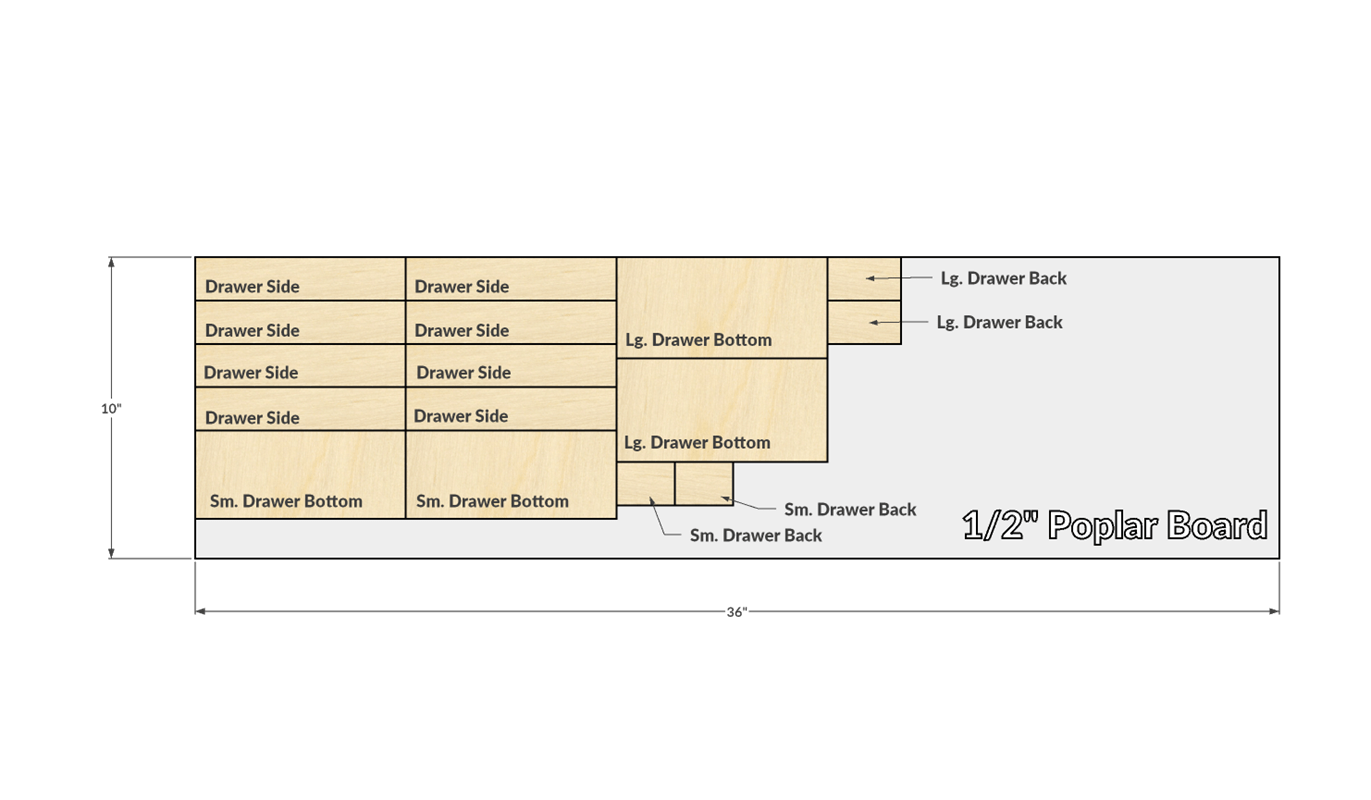
- 3 Poplar , 1/2" Thick , 36"
Hardware & Supplies
- 1 Box of 1" Pin Nails
- 1 Box of 1" Crown Staples
- 4 Drawer Pulls
- 1 Wood Glue
- 2 5/16" T-Bolts
- 2 Star Knobs
- 1 Kreg K5 Pocket Hole Jig
Cut List & Parts
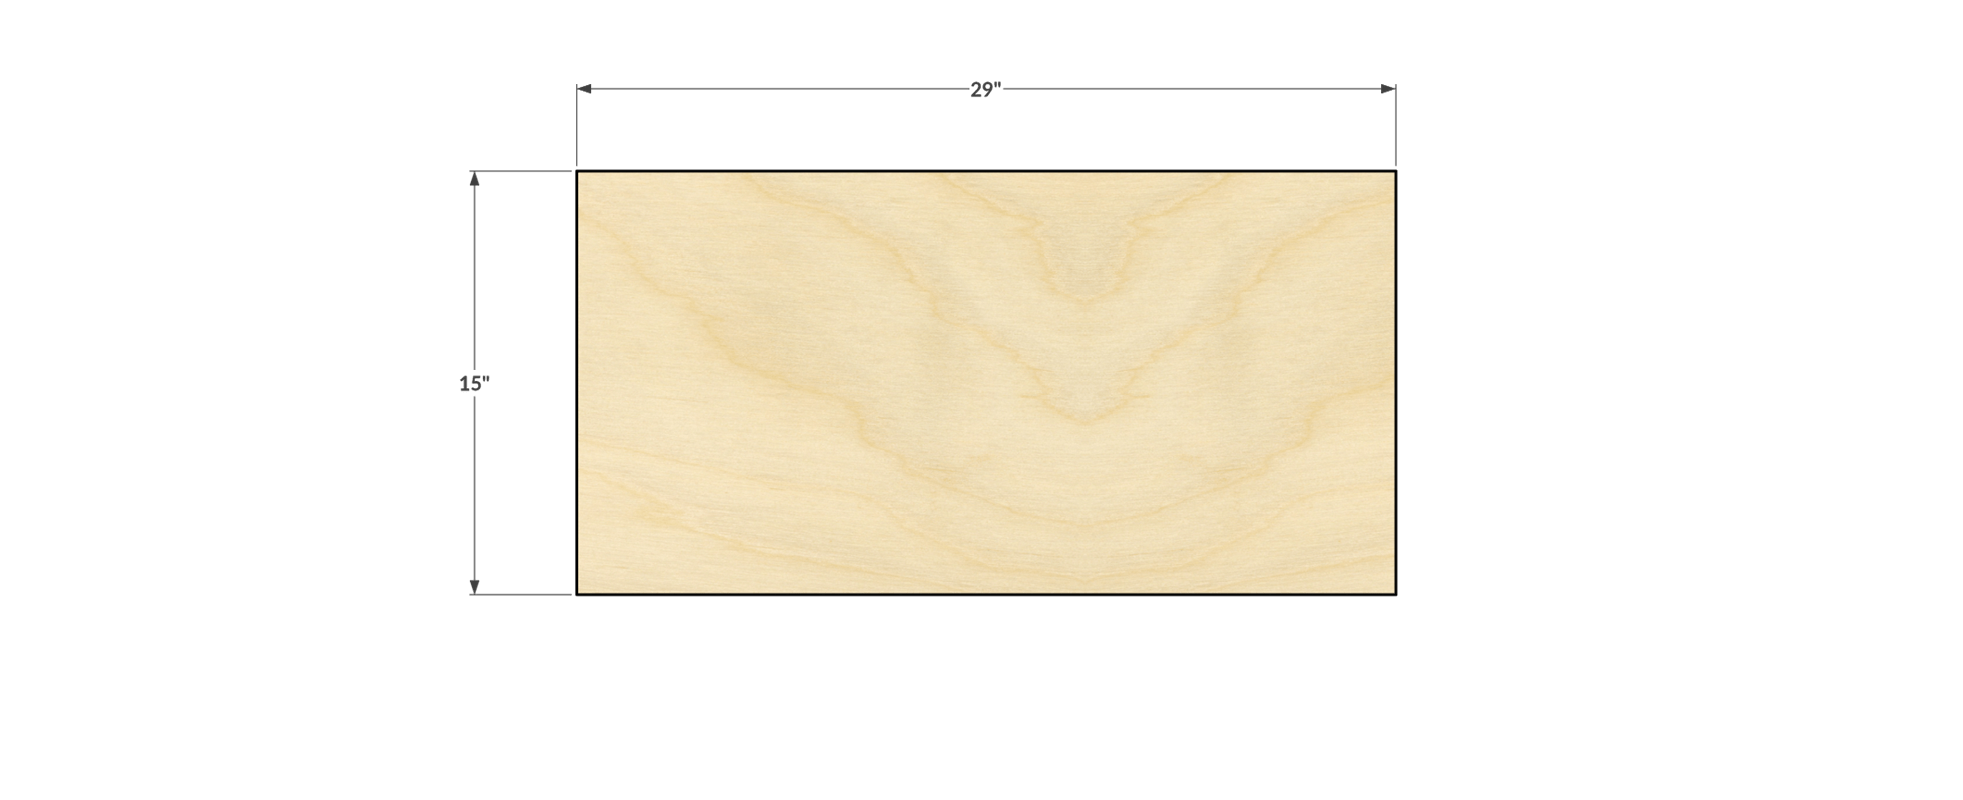
- 1 Base , 29" x 15" x 1/2"
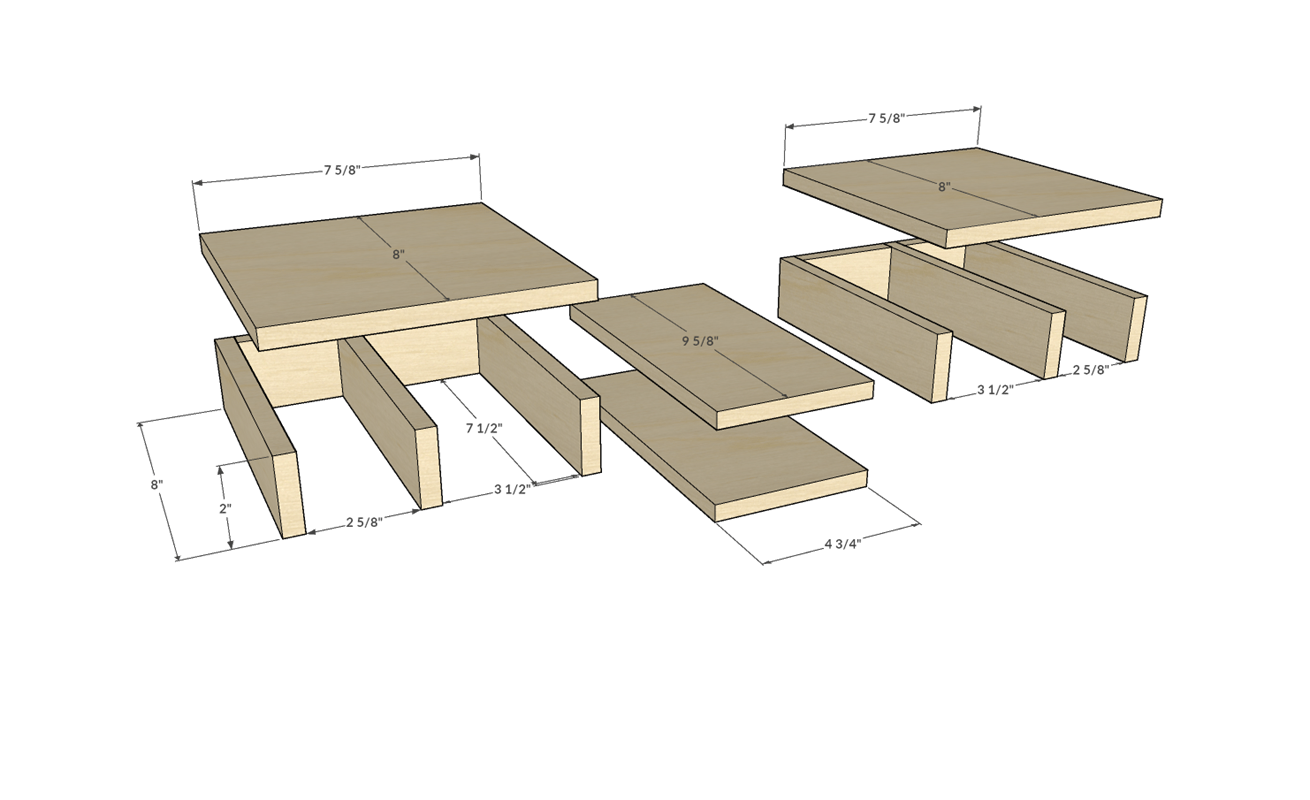
- 2 Base Supports , 9 5/8" x 4 3/4" x 1/2"
- 2 Material Supports , 8" x 7 5/8" x 1/2"
- 6 Sides - Dividers , 8" x 2" x 1/2"
- 2 Inside Spacers , 3 1/2" x 2" x 1/2"
- 2 Lg. Drawer Fronts , 3 7/16" x 1 15/16" x 1/2"
- 8 Drawer Sides (Poplar) , 7" x 1 7/16" x 1/2"
- 2 Sm. Drawer Fronts , 2 15/16" x 1 15/16" x 1/2"
- 2 Outside Spacers , 2 5/8" x 2" x 1/2"
- 2 Lg. Drawer Backs (Poplar) , 2 7/16" x 1 7/16" x 1/2"
- 2 Lg. Drawer Bottoms (Poplar) , 7" x 3 7/16" x 1/2"
- 2 Sm. Drawer Backs (Poplar) , 1 15/16" x 1 7/16" x 1/2"
- 2 Sm. Drawer Bottoms (Poplar) , 7" x 2 15/16" x 1/2"
Directions
-
Step 1: The Base
cut the base to to final with a tracksaw (or jigsaw) and a table saw.
-
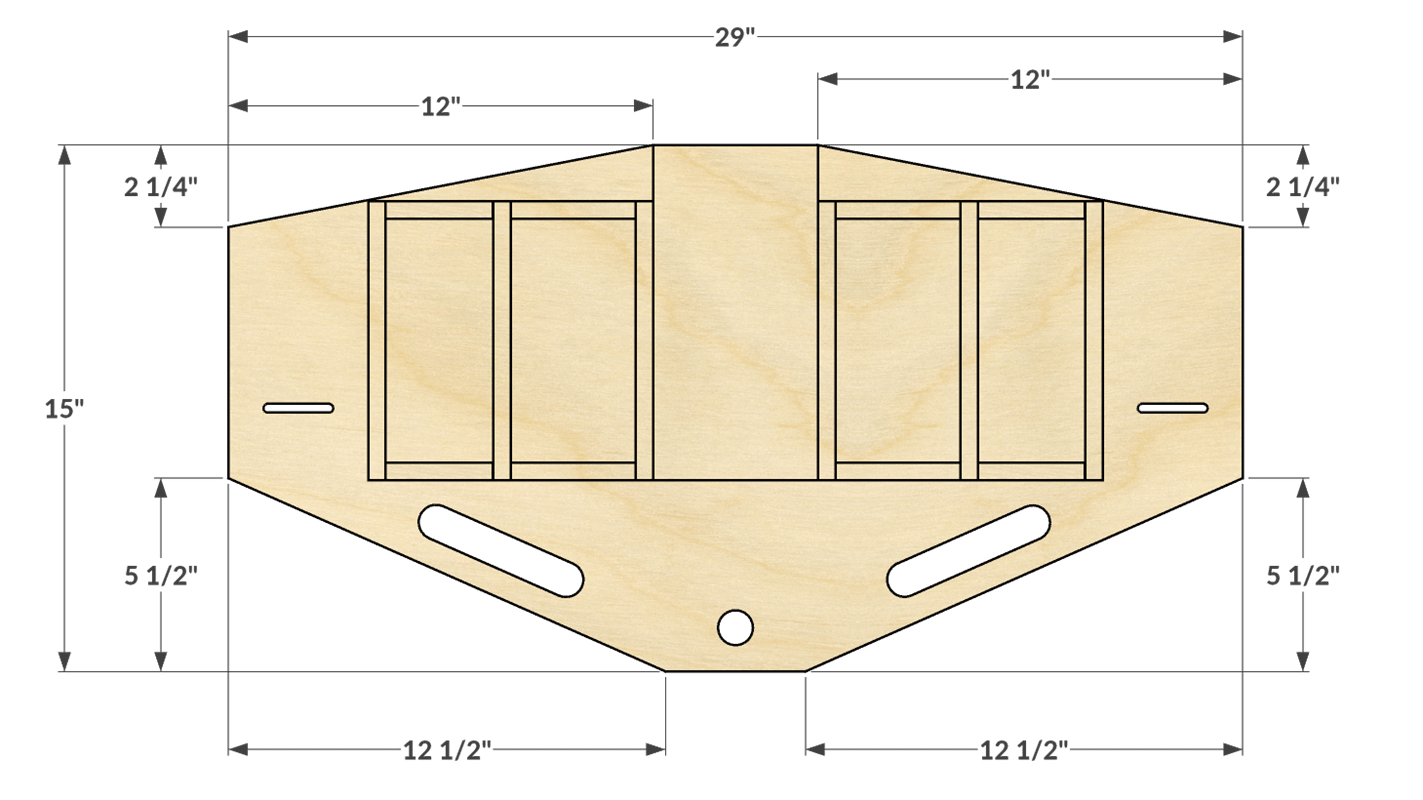
Step 2: Diagonal Lines
Mark the diagonal lines according to the image. Then cut out the lines with a track saw or jigsaw.
-
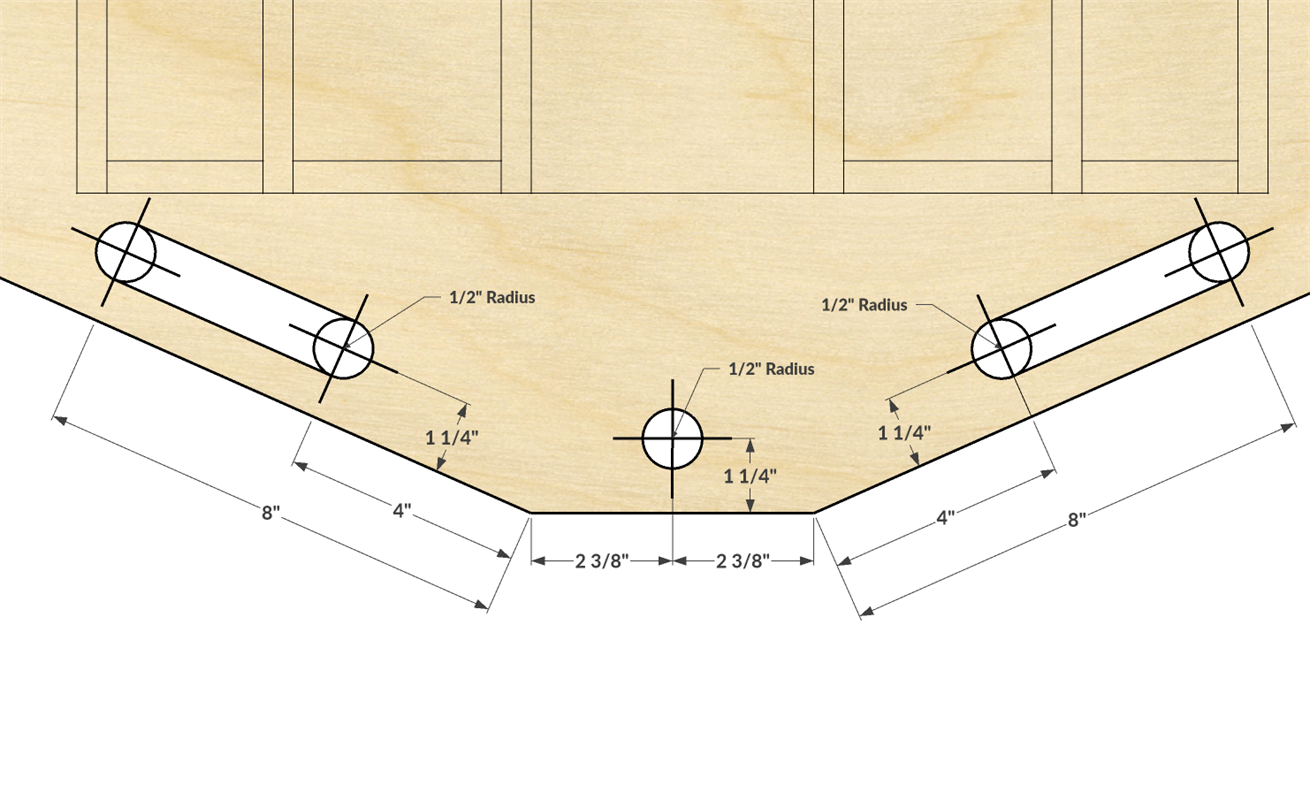
Step 3: Handles and Through Hole
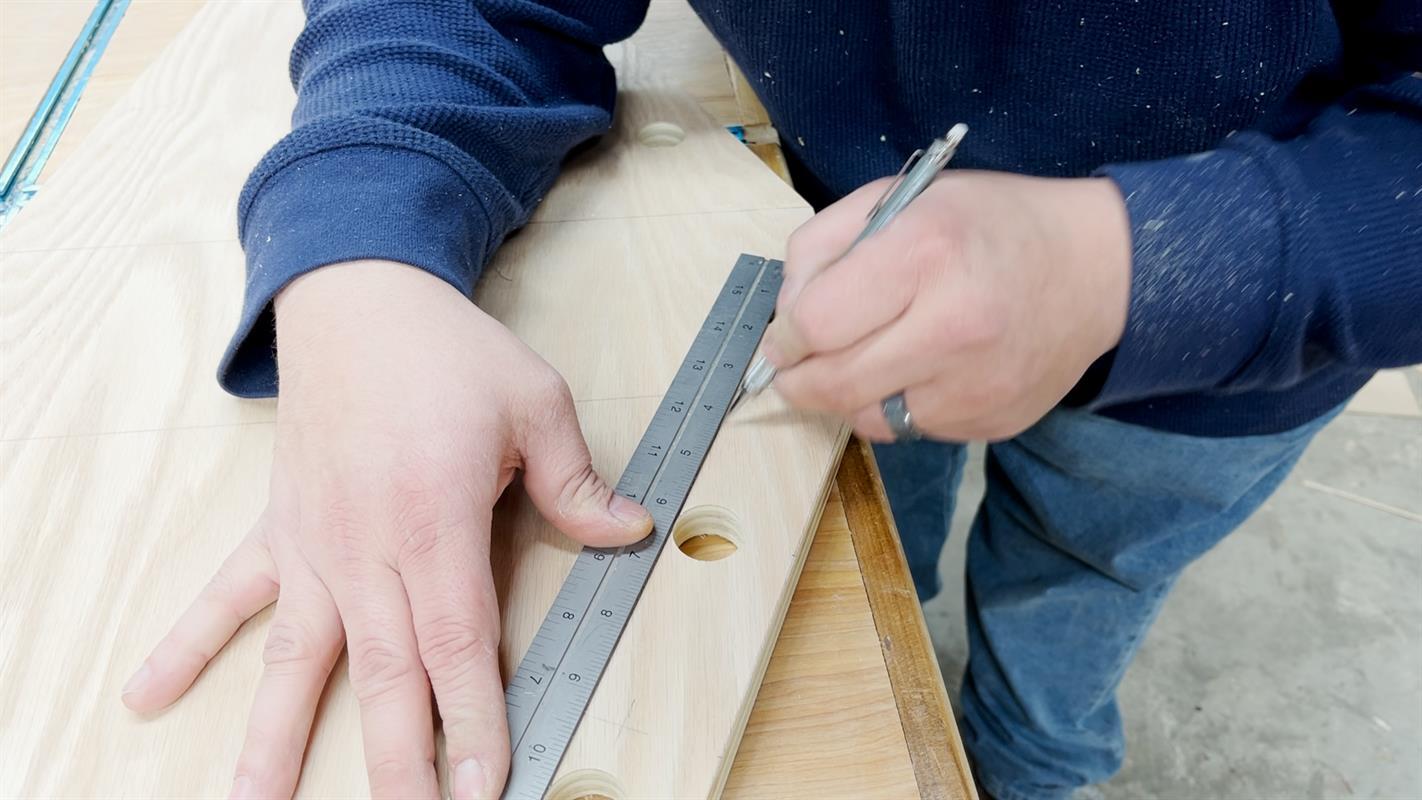
Using a combo square and a standard square, mark each cross hair for the handles, through hole. The slots will receive a 5/16” hole and a 1” forstner bit is used for the handles and through hole. Drill out the holes accordingly with a drill press or regular drill.
-
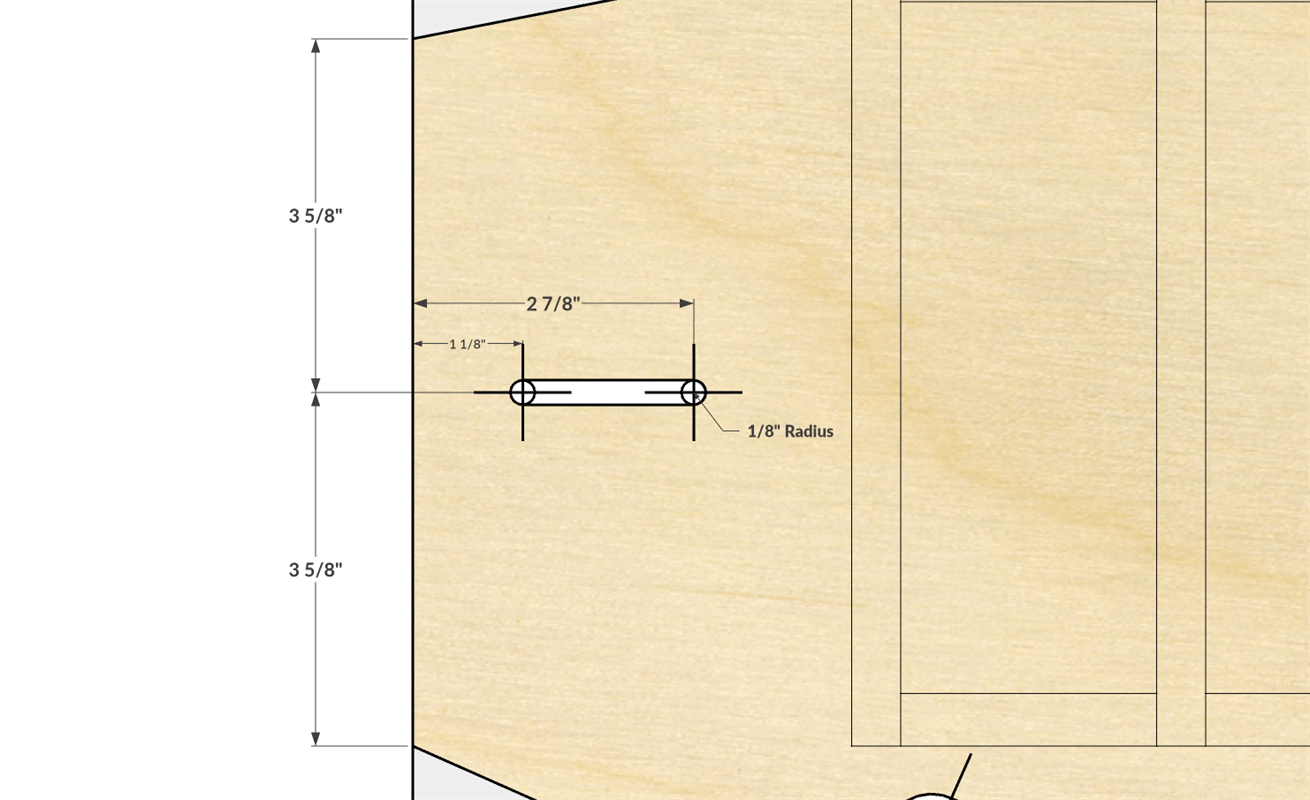
Step 4: Slots (Optional)
Mark out the slots for the t-track bolts. The will receive a 5/16" hole. The slots are spaced 25" on center to fit my tracks on my workbench. Adjust the spacings accordingly to your sit up. If you do not wish to use the slots, there is plenty of space to use clamps on the base. Drill out the holes with a Drill Press or regular drill.
-
Step 5: Marking The Lines
Use a straight edge ruler and connect the top and bottom of each hole. Then use a jigsaw to cut the lines. Then add a 1/8” roundover to the base, handles, and through hole.
-
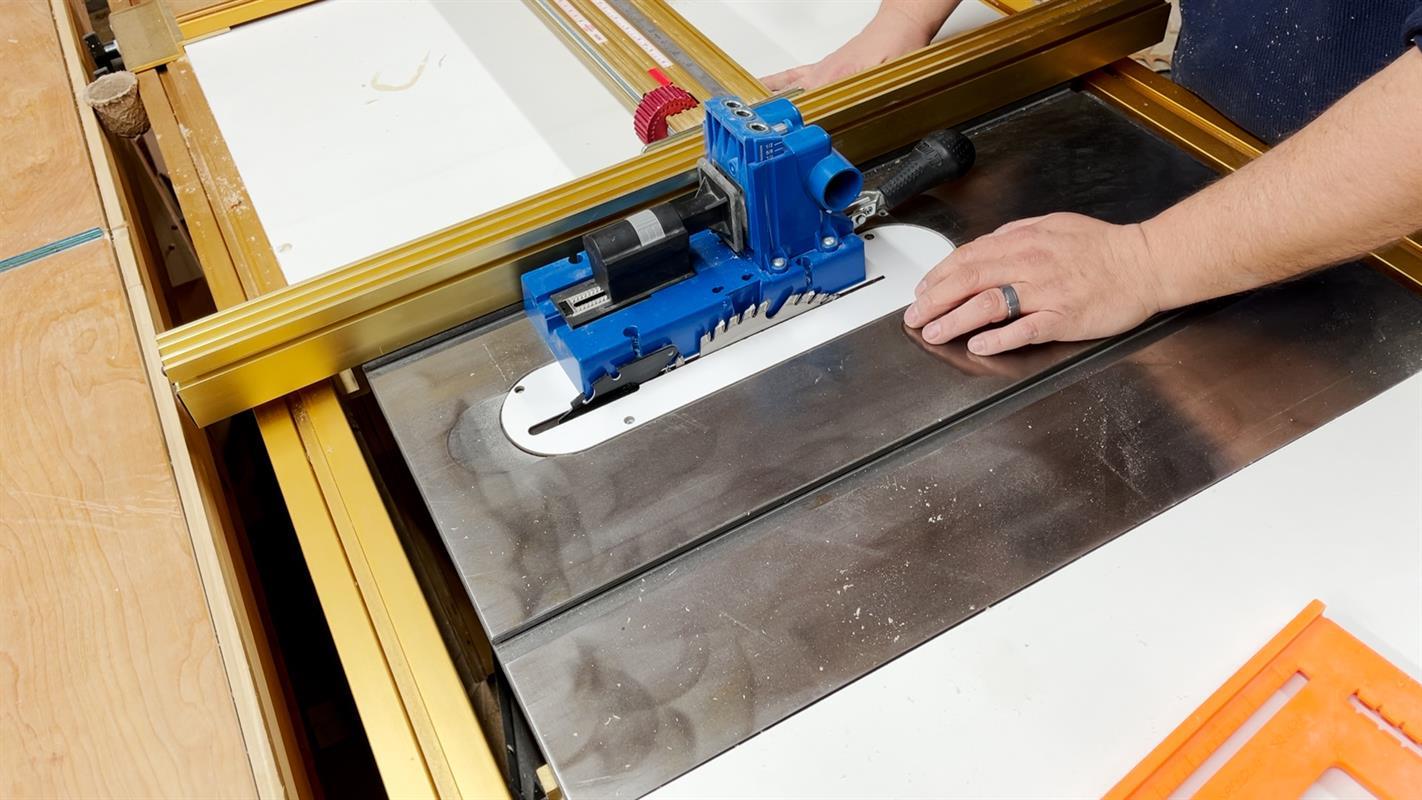
Step 6: Size the Base Supports
To size the support bases, use a flat surface with a straight edge. I used my table fence. First place, the K5 between the fence and the blade, move the fence until the blade barely touches the side. Then rip the stock. Next, butt up a piece of stock to the fence, then place the K5 on top. Mark a line at the front of the K5 and the cross cut the stock. This will give you exact reference measurements.
-
Step 7: Install K5
Attach the jig supports by centering them flush with the back of the base. Use glue and staples to secure them. Then attach the K5 Jig.
-
Step 8: Cabinet Assembly
Assemble the cabinets with glue and staples. You can also use pocket holes if you choose.
-
Step 9: Install The Cabinet
Next, install each cabinet structure to the base. Use glue and flush up the front of the cabinet structure with the front of the jig base support. Toe nail a crown staple into the inside front of the cabinet side. Then staple the rest of the structure from the bottom. Be careful not misfire a staple into the drawer cavity, as it will be really difficult to remove. Add a 1/8” Roundover to the top of the material supports.
-
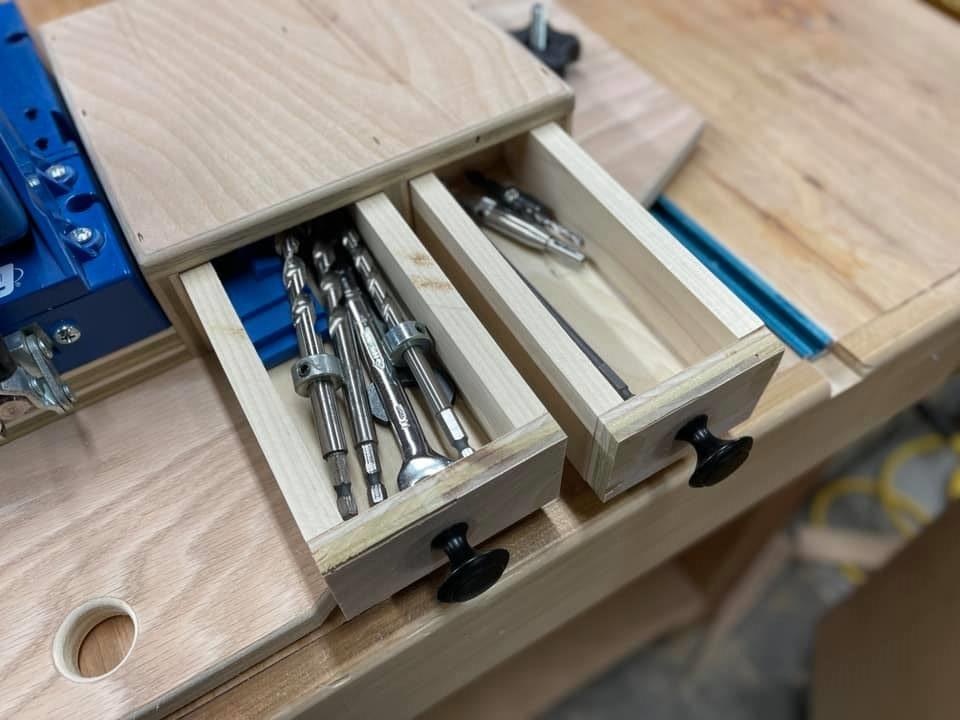
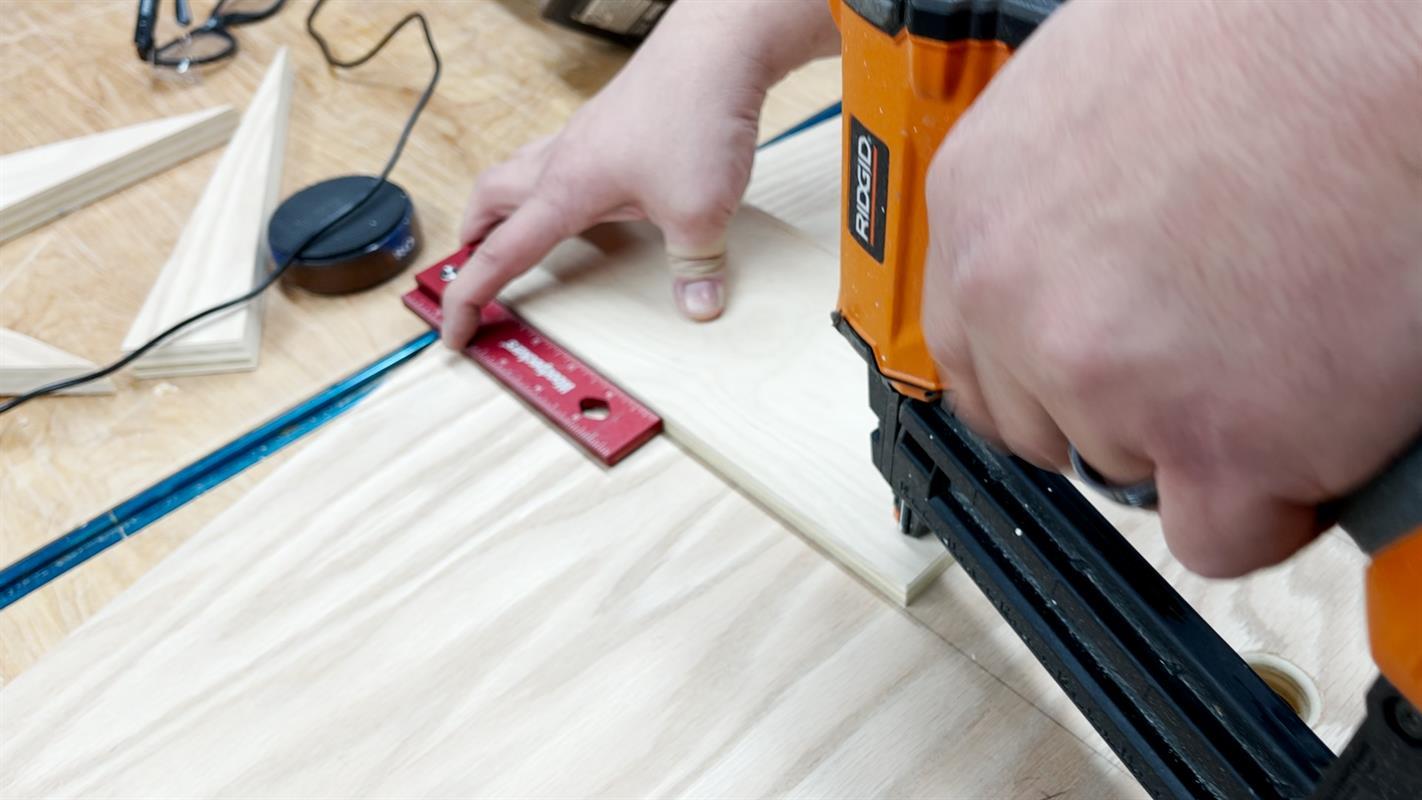
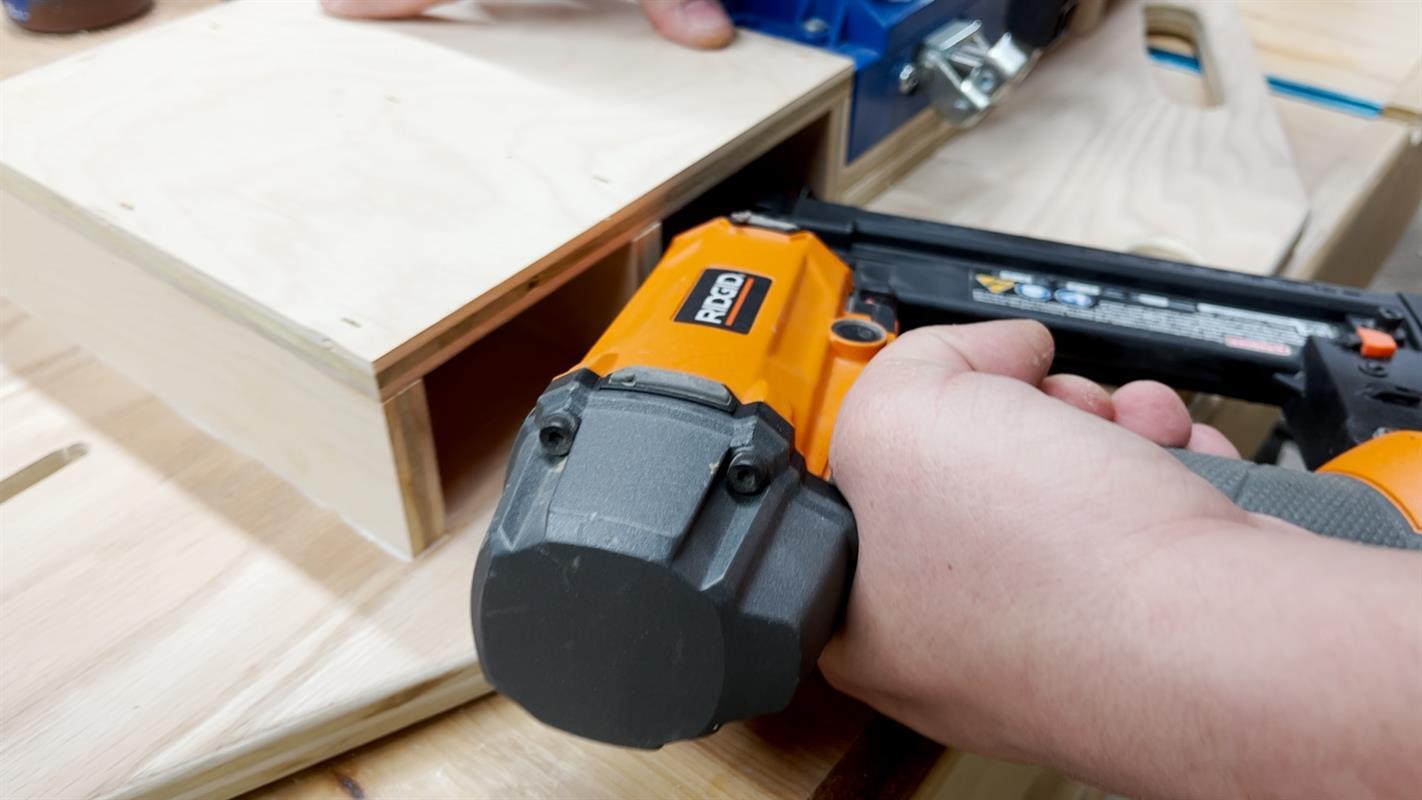
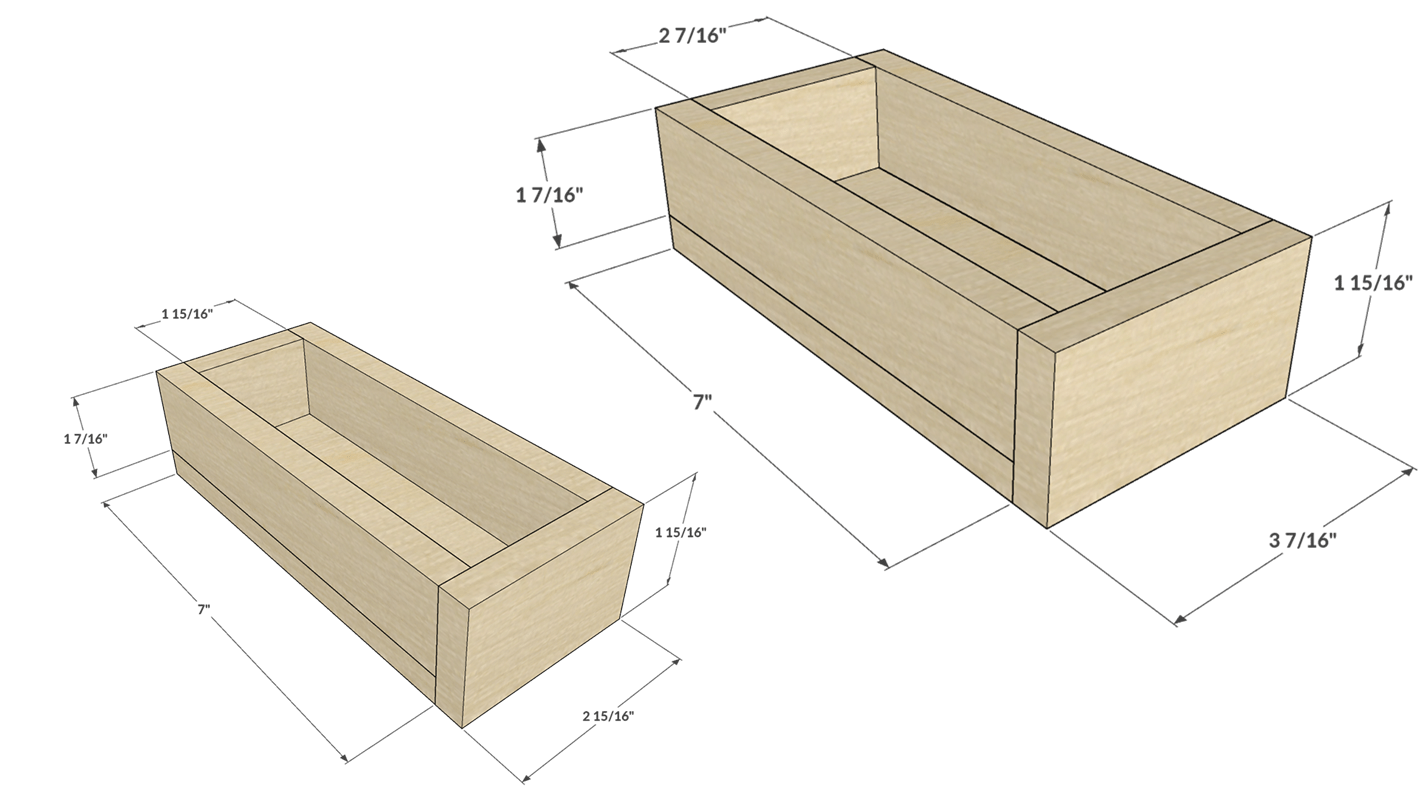
Step 10: Build the Drawers
The parts for the drawer boxes are listed in the cut list. However, measure each opening before cutting. I made the boxes out of poplar but you can use plywood if you choose. Each part is sized 1/16” shorter than the drawer opening so the drawer can slide easier. The drawer bottom is 1/2” shorter than the front to back measurement to allow space for the drawer front. All the parts are attached to the drawer bottom with glue and pin nails.
-
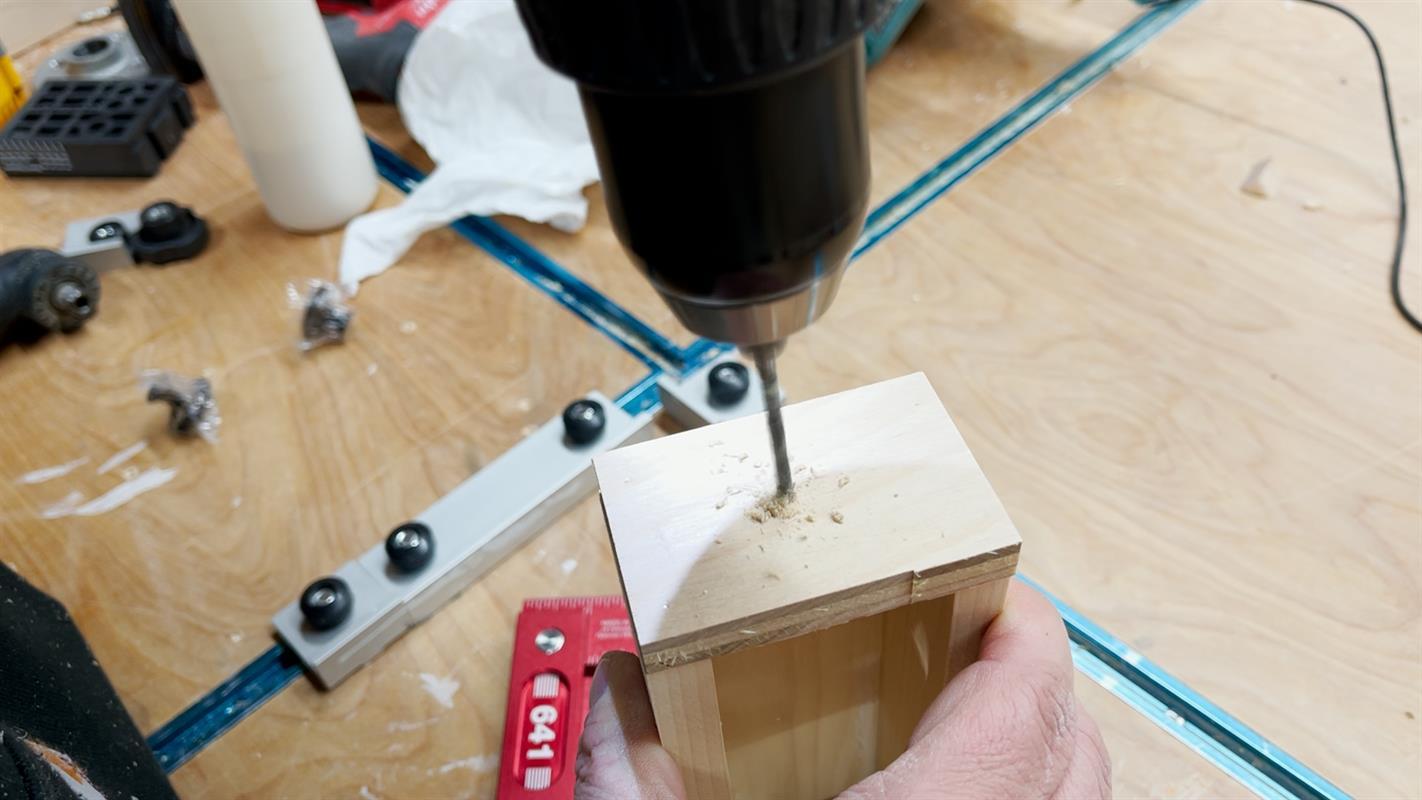
Step 11: Install Drawer Pulls
Find the center of each drawer front by marking diagonal line from each corner. Drill a hole in the center point. Then poke the pull bolt through the hole and screw on the handles. Use a screw driver to tighten the bolts. Install the drawers and fill them up with your Kreg accessories!