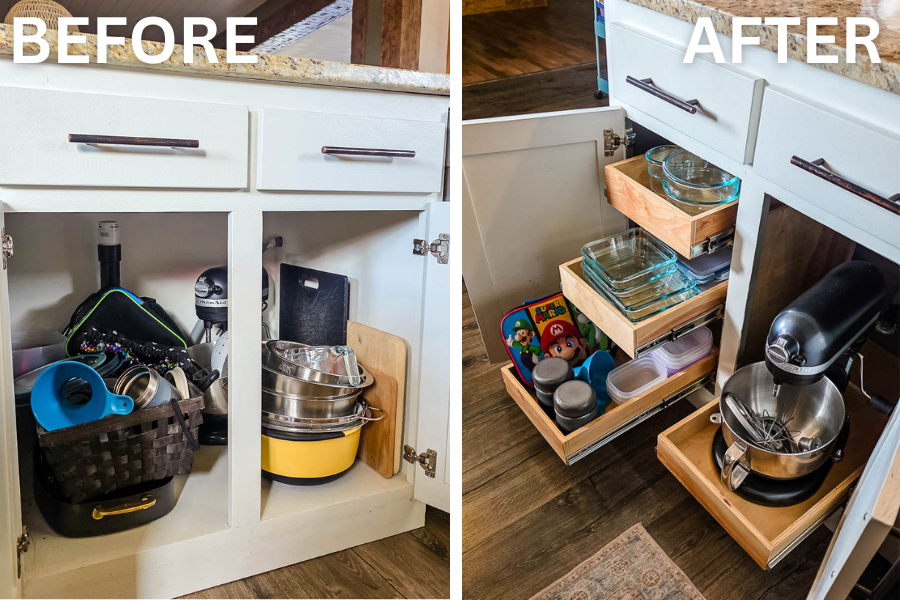
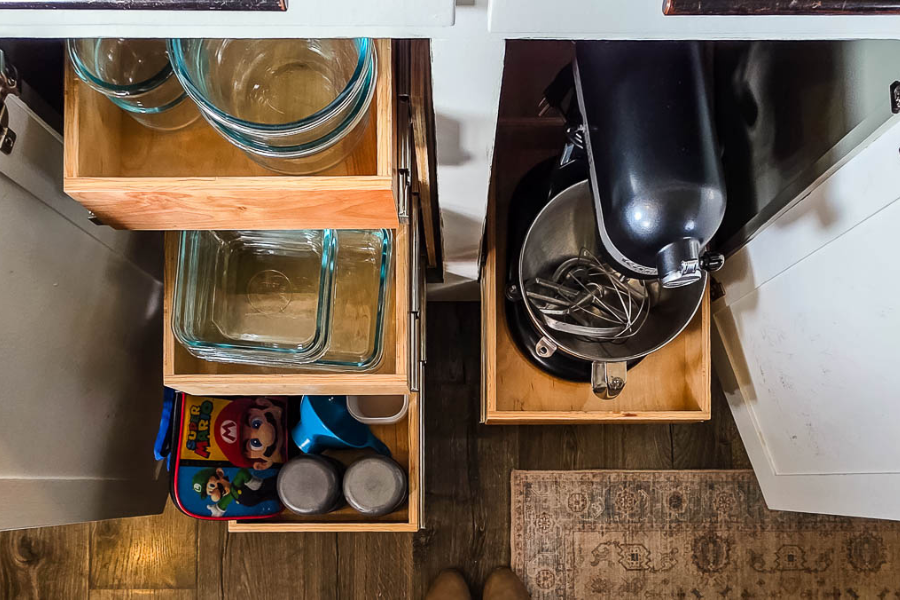


Get your kitchen cabinets organized with these easy DIY kitchen cabinet pull out shelves made with plywood and pocket holes.
Tools
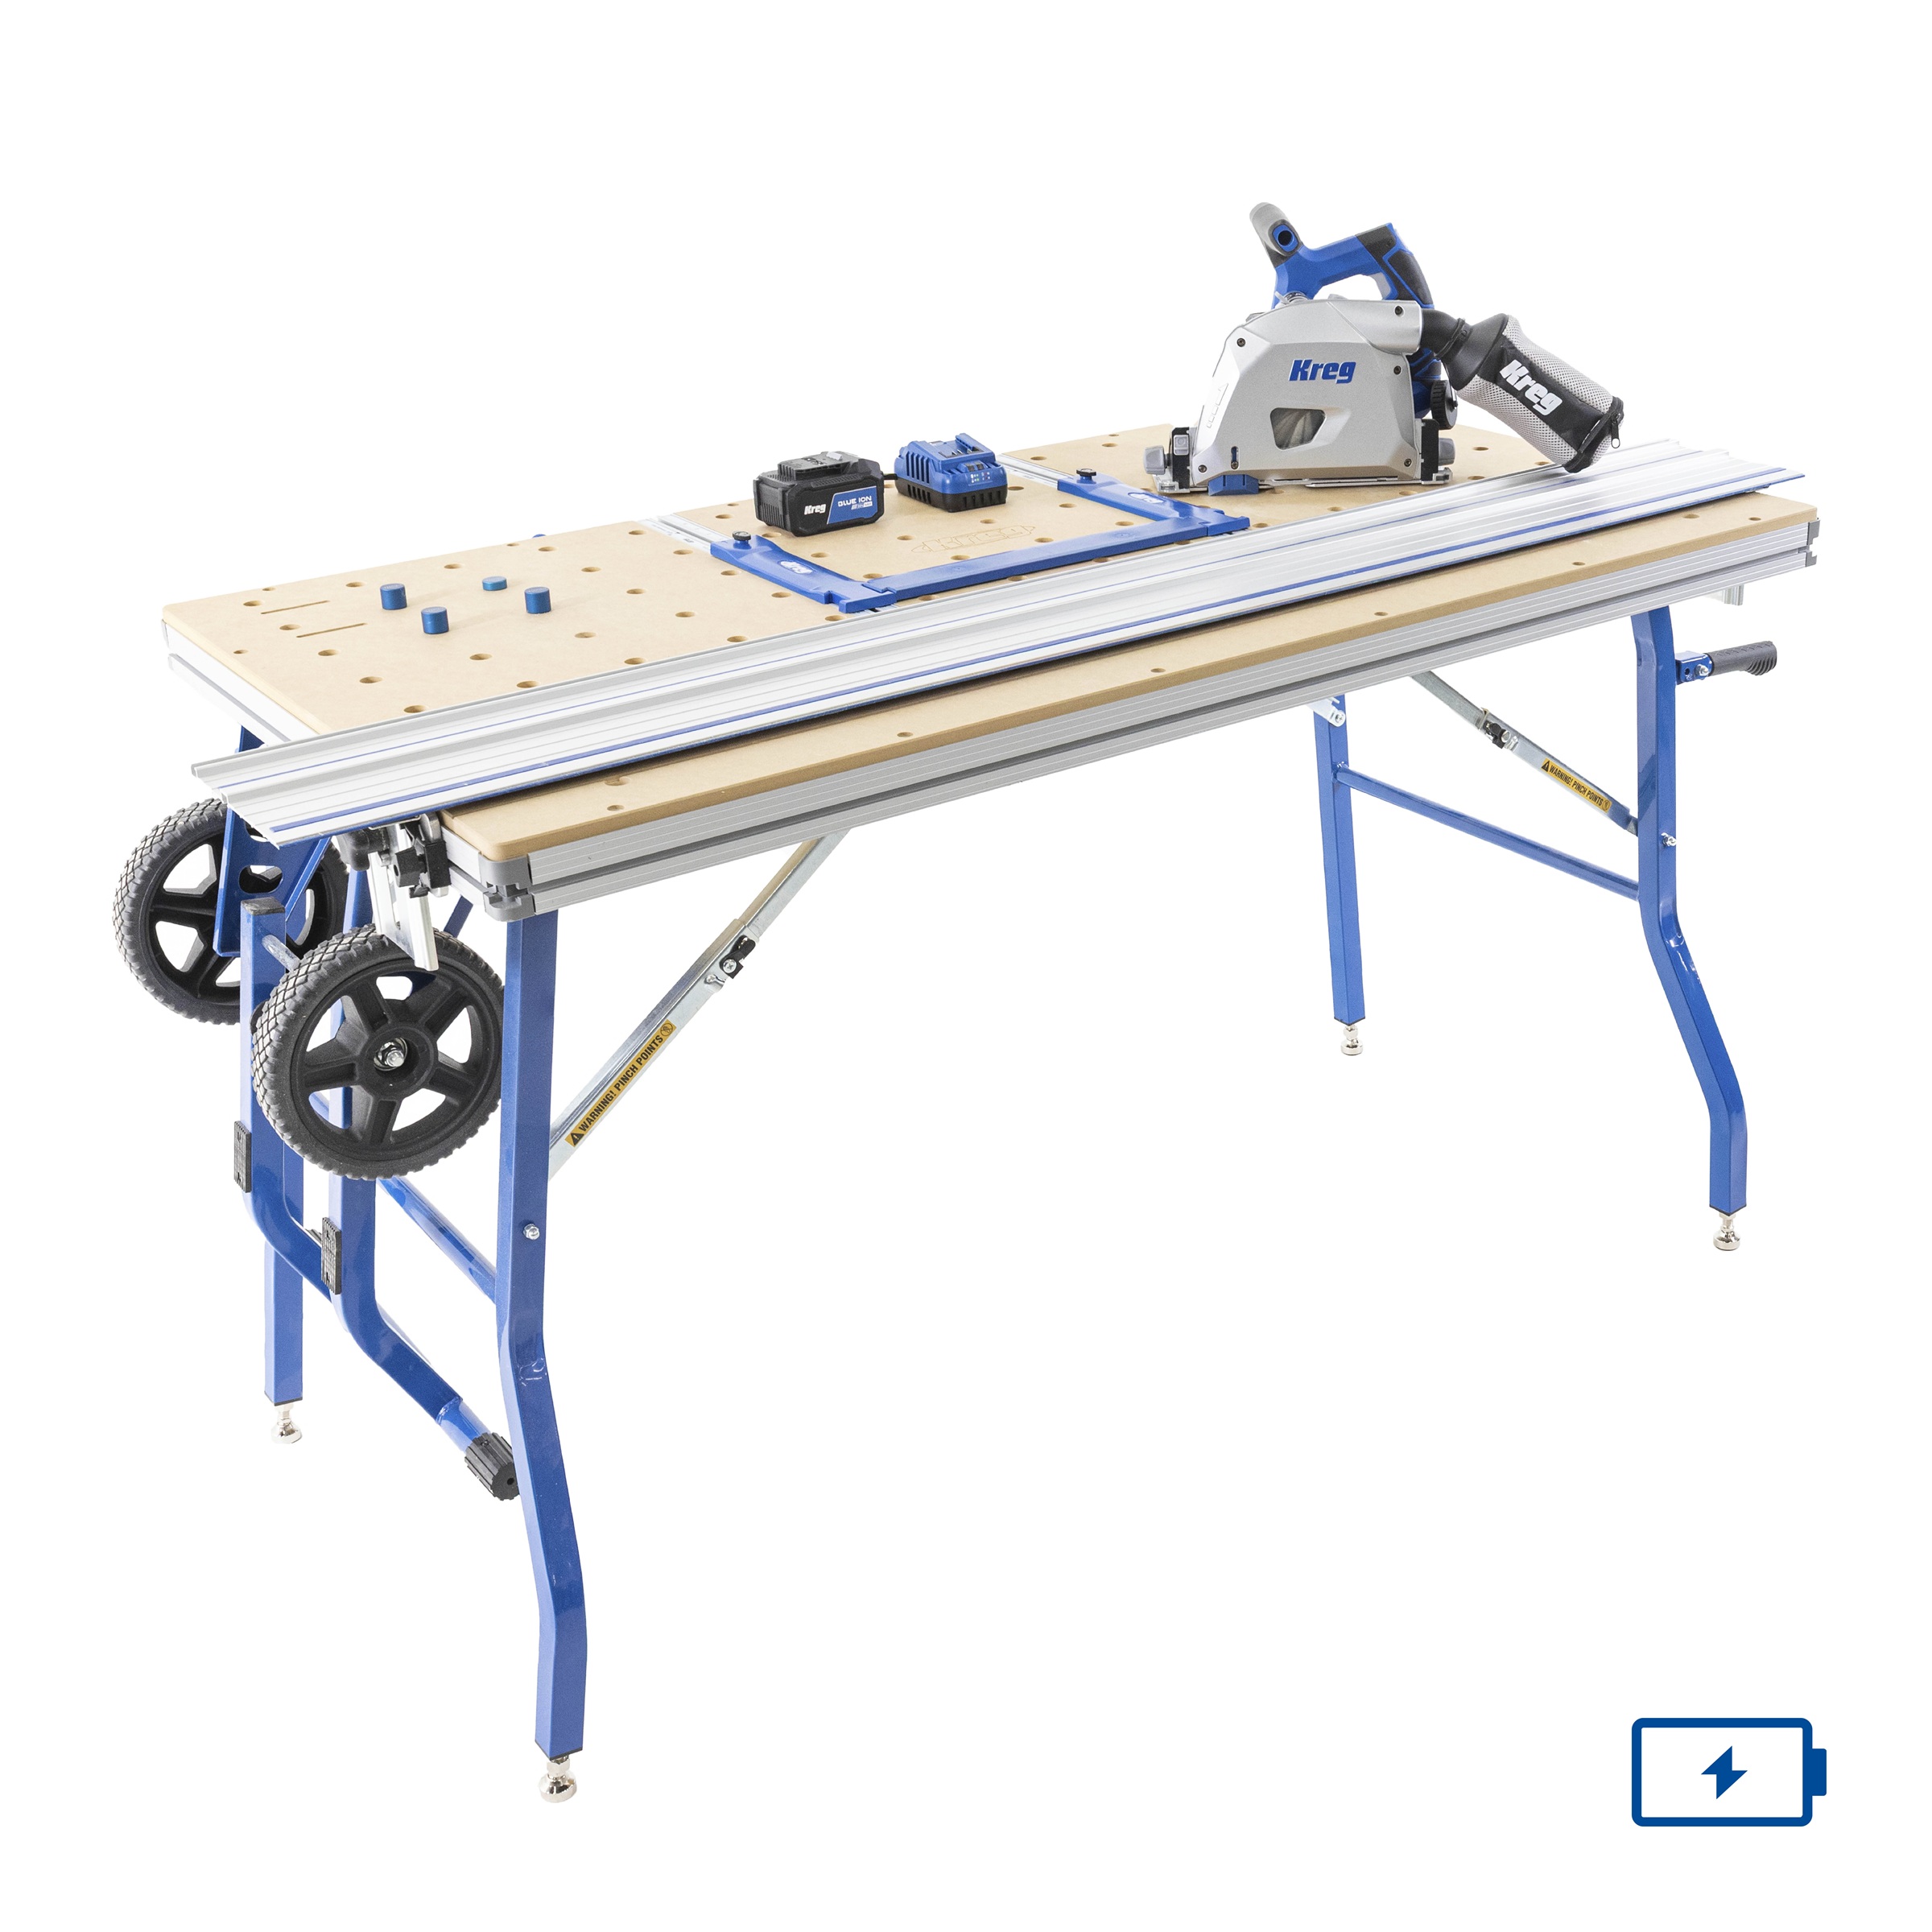
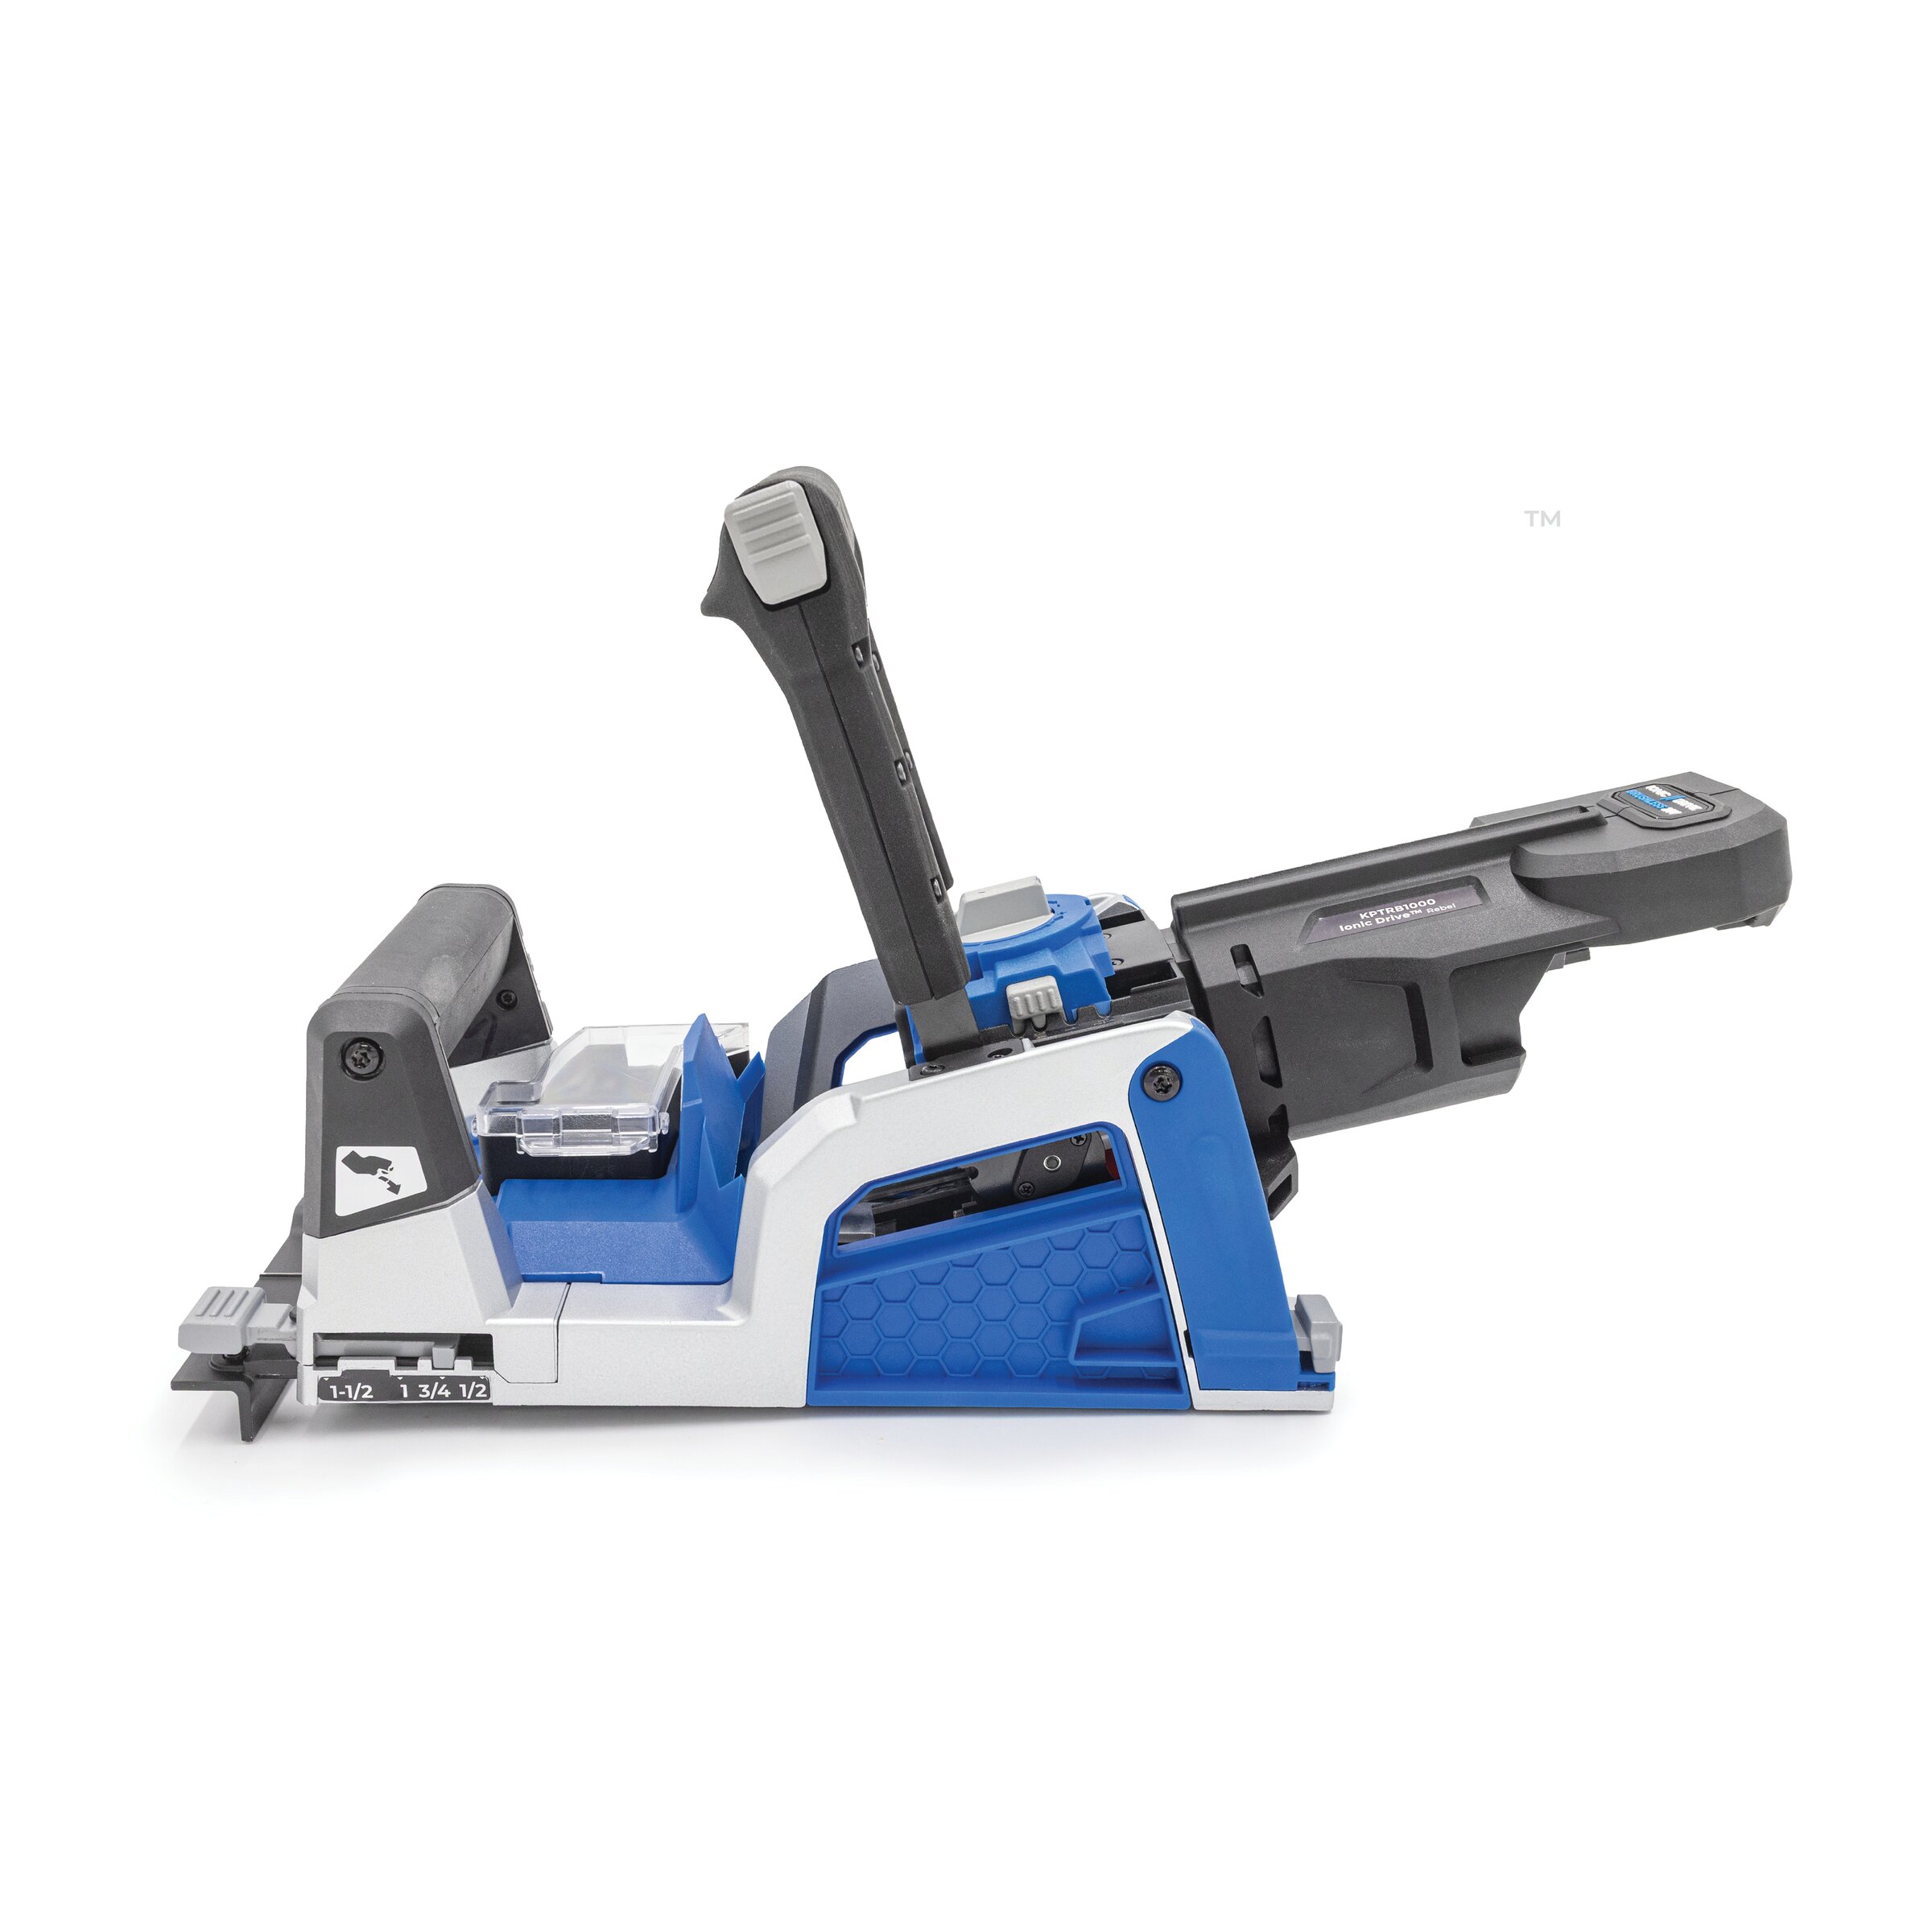
Kreg Tools

Other Tools
-
Pin nailer

-
Tape measure
-
Screwdriver
Materials
Wood Products
- 1 Birch plywood , ½” x 4’ x 8’
Hardware & Supplies
- -- Pocket hole screws (1" zinc coarse) - see tools list
- -- 1 1/2" pin nails
- -- 1 1/2" trim screws
- -- Sandpaper (120- & 220-grit)
- -- Wood filler
- -- Wood glue
- -- Spray lacquer
- -- Drawer slides (18” full extension side mount, 50-lb capacity)
- -- Heavy-duty drawer slides (100-lb capacity) for mixer shelf
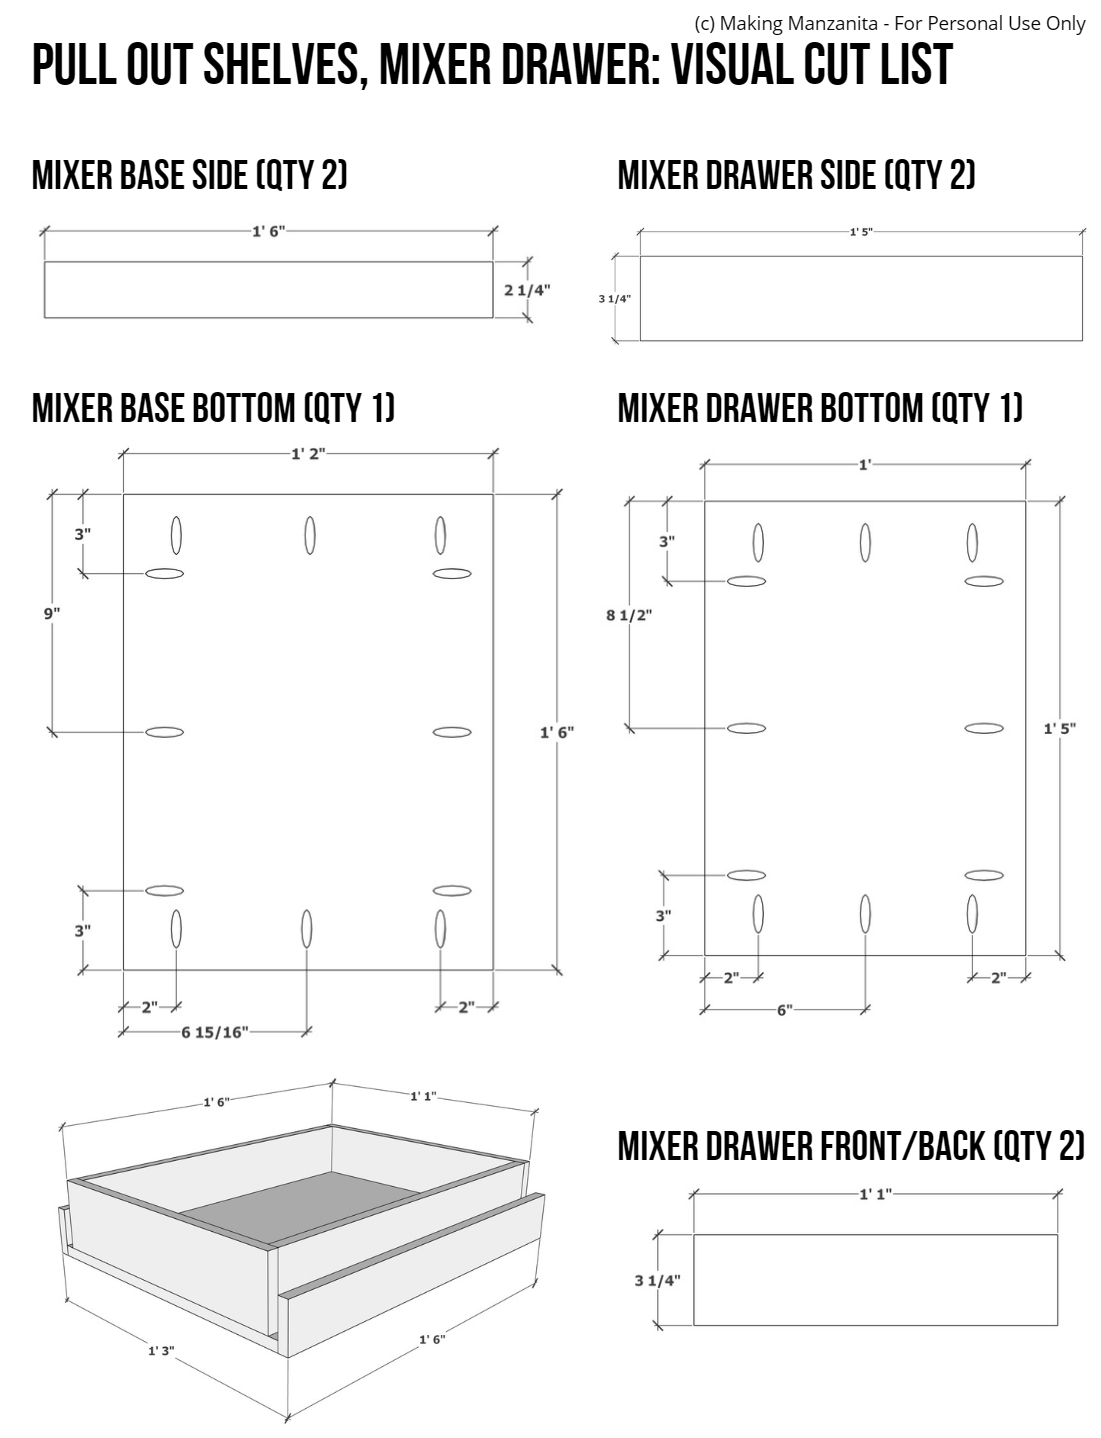
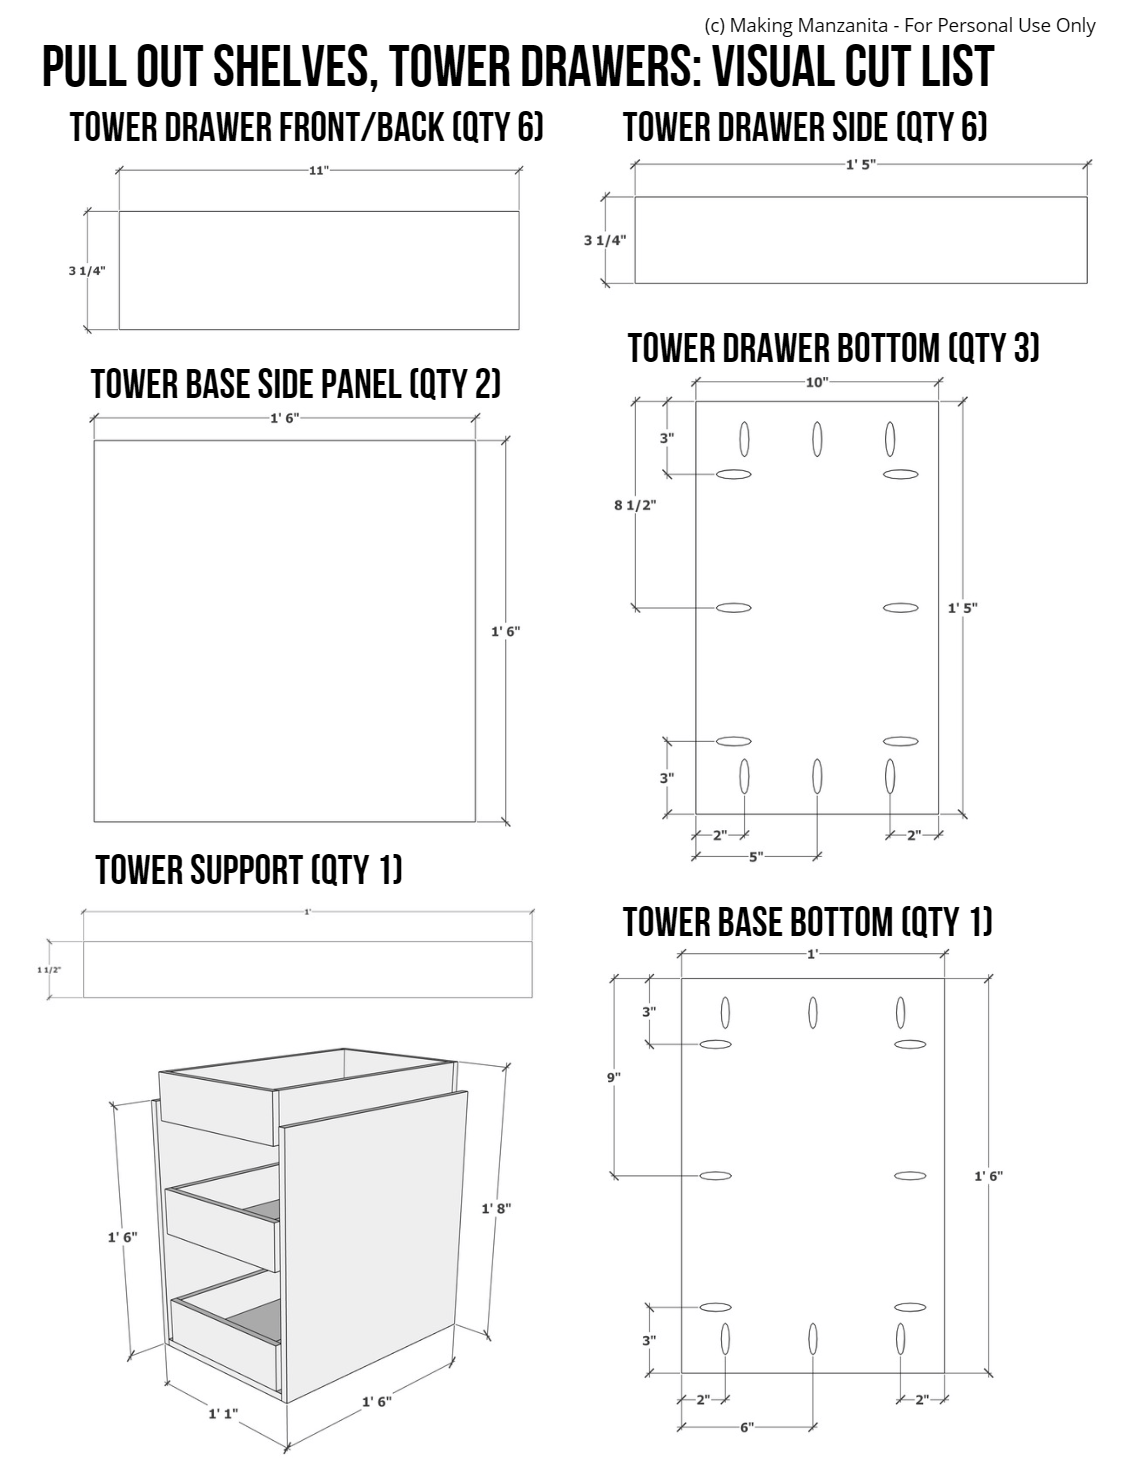
Cut List & Parts
- 2 Mixer Base Side, 1/2" x 1' 6" x 2 1/4"
- 1 Mixer Base Bottom, 1/2" x 1' 6" x 1' 2"
- 2 Mixer Drawer Side, 1/2" x 1' 5" x 3 1/4"
- 1 Mixer Drawer Bottom, 1/2" x 1' 5" x 1'
- 2 Mixer Drawer Front/Back, 1/2" x 1' 1" x 3 1/4"
- 6 Tower Drawer Front/Back, 1/2" x 11" x 3 1/4"
- 6 Tower Drawer Side, 1/2" x 1' 5" x 3 1/4"
- 3 Tower Drawer Bottom, 1/2" x 1' 5" x 10"
- 1 Tower Base Side Panel, 1/2" x 1' 6" x 1' 6"
- 1 Tower Support, 1/2" x 1' x 1 1/2"
- 1 Tower Base Bottom, 1/2" x 1' 6" x 1'
Directions
-
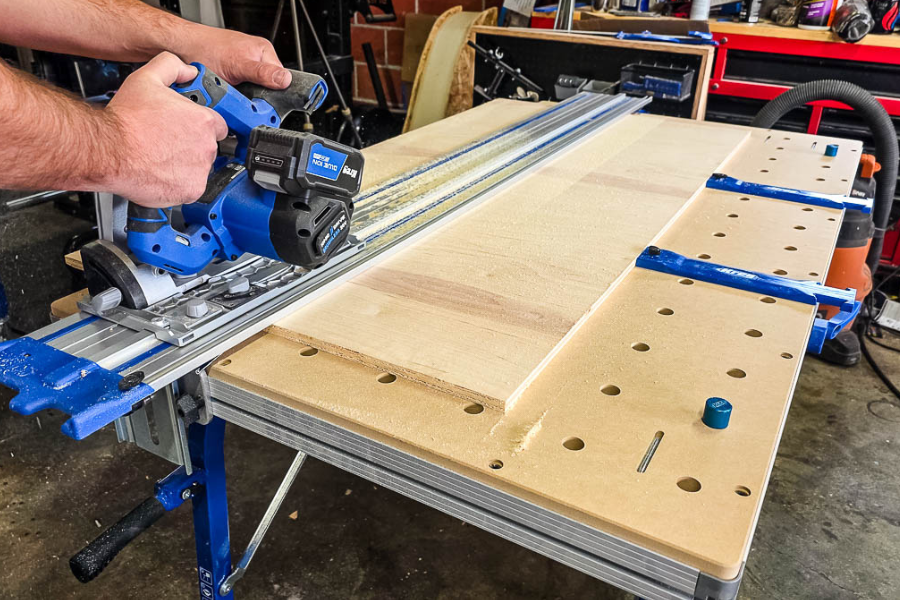
Cut wood
Cut the plywood panel down to size according to the visual cut list in the woodworking plans. We used the Kreg Adapative Cutting System to cut everything down to size. You could also use a table saw or Rip-Cut for this.
-
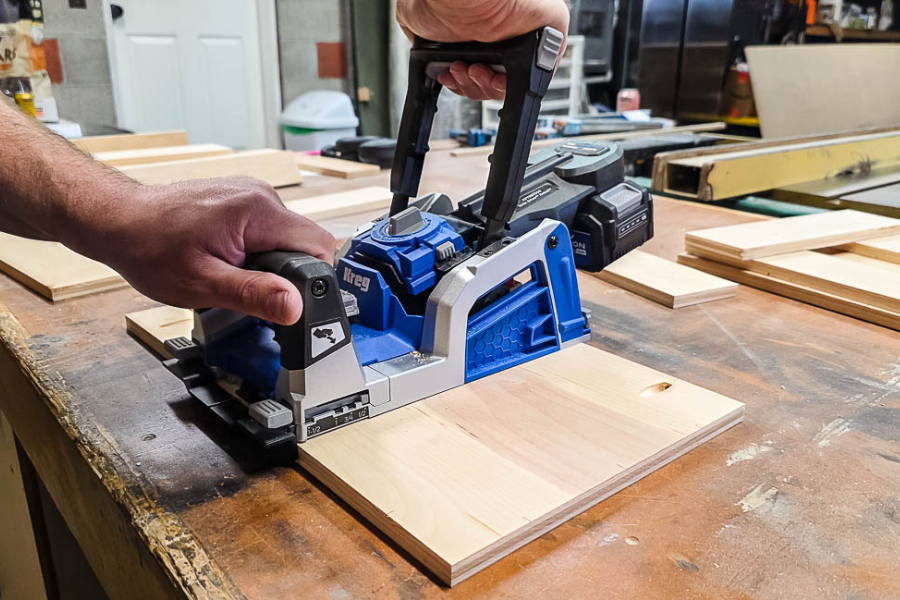
Drill pocket holes
Drill pocket holes on the wood where shown in the woodworking plans. We used the Kreg Rebel.
-
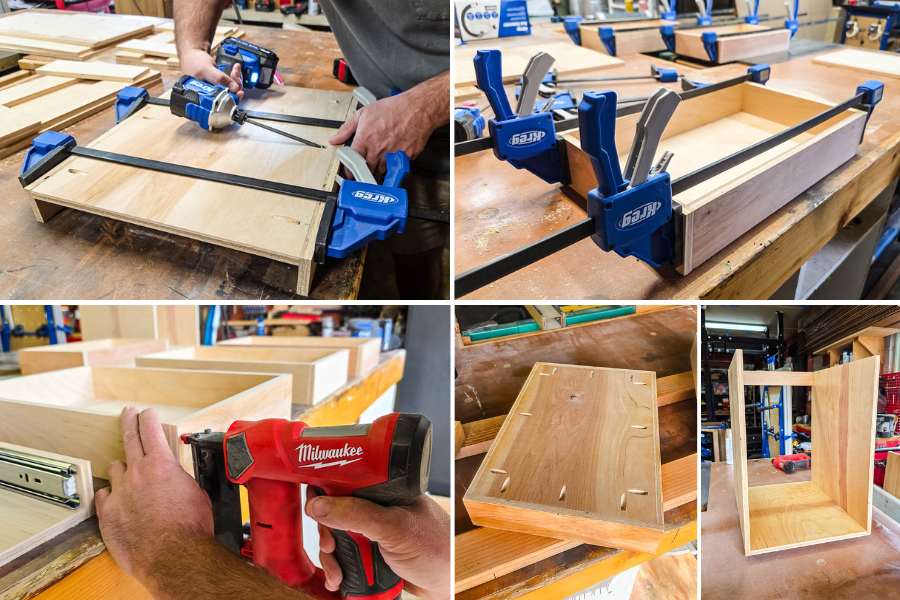
Assemble
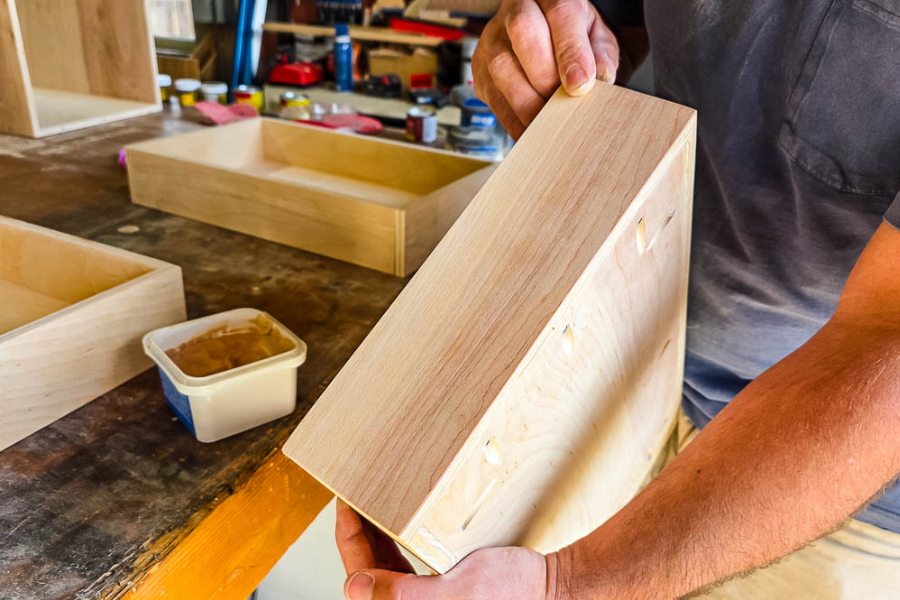
Attach the bottoms to the side pieces for the drawers and bases using the pre-drilled pocket holes and 1” pocket hole screws. Since we’re only working with ½” plywood, it is important not to overtighten the pocket hole screws because you’ll go right through the soft plywood. Attach the front and back pieces on the drawers with wood glue and clamp until dry. Once dry, add pin nails to the joints on the front and back pieces. Attach the tower support piece with pin nails.
-
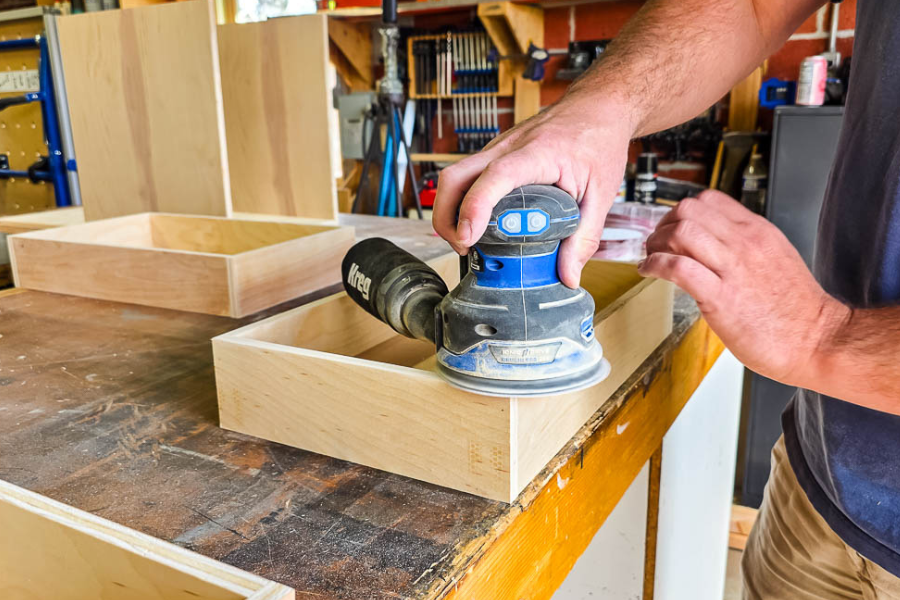
Sand
Sand everything smooth with 120-grit and 220-grit sandpaper and an orbital sander.
-
Fill
Fill the pin nail holes, joints, and imperfections with wood filler and let dry. Then sand smooth.
-
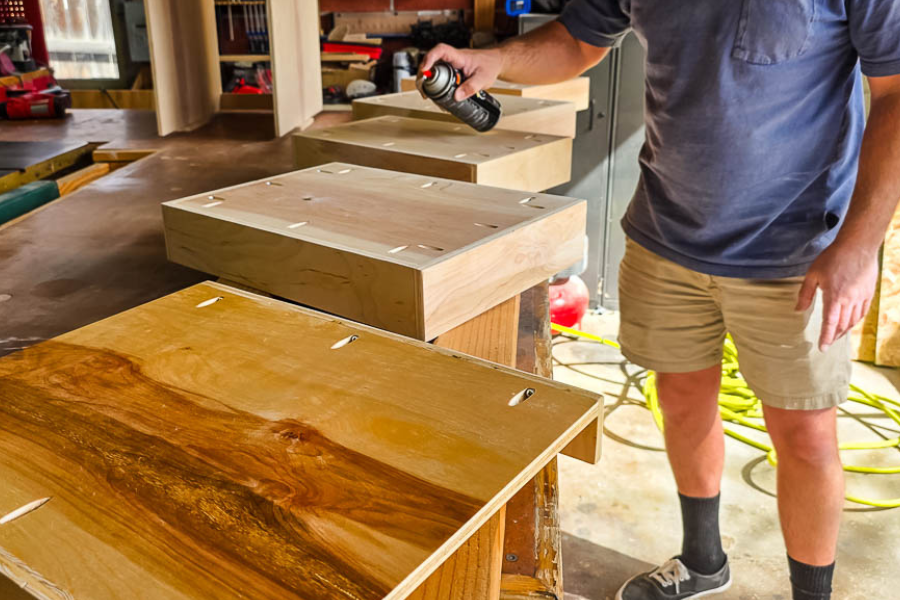
Seal
Spray with lacquer and let dry. If you wanted to stain or paint the pull out shelves, you could do that as well, but we opted to keep ours natural.
-
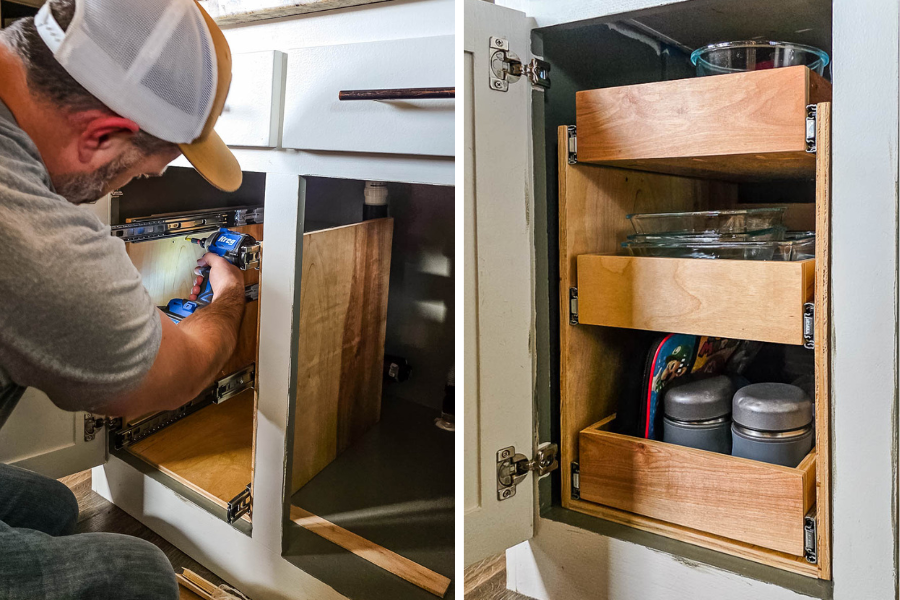
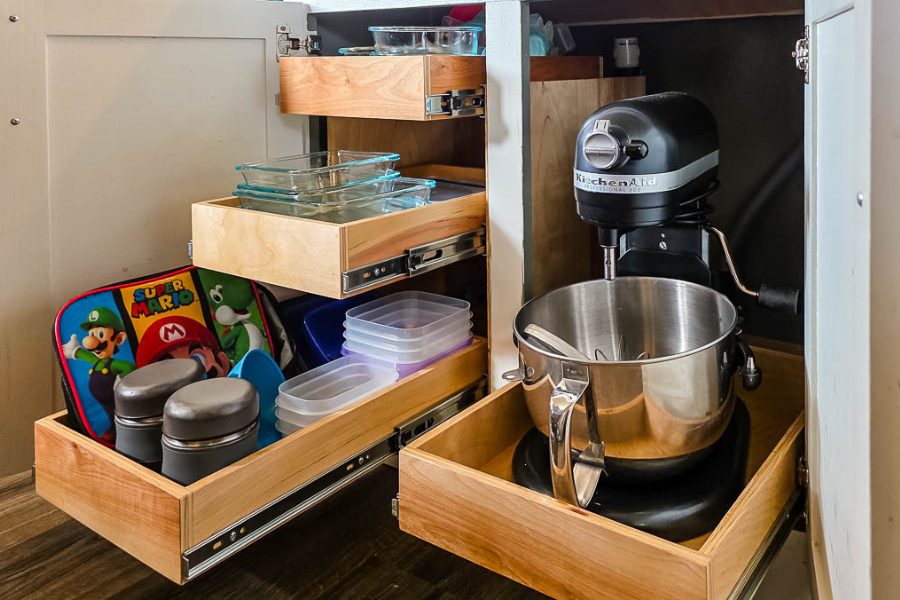
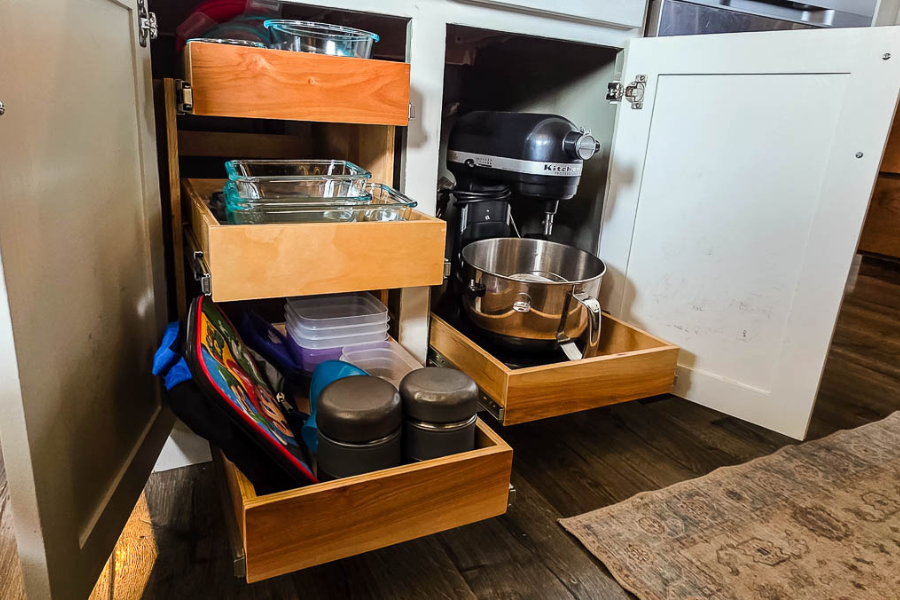
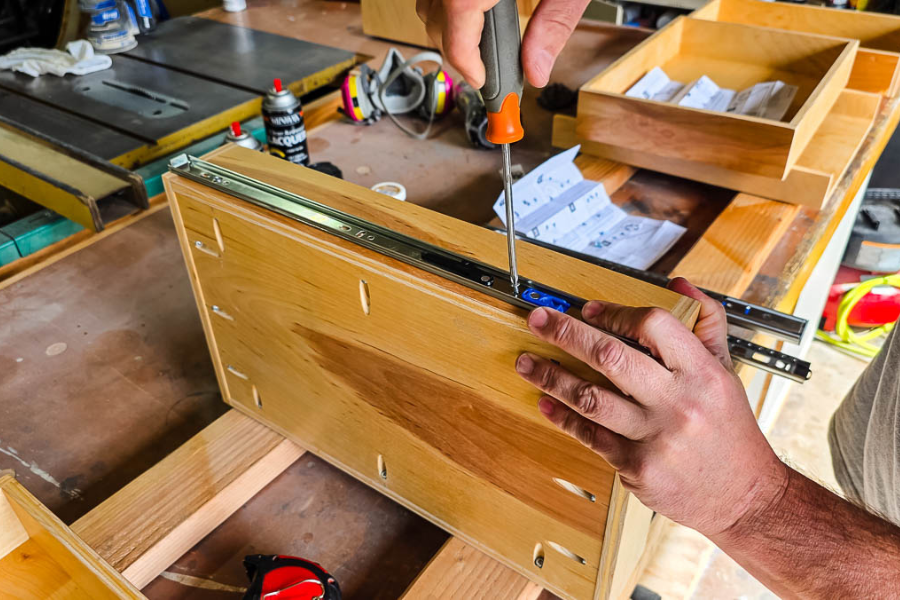
Attach drawer slides
Attach the drawer slides to the side pieces on each drawer & the bases according to the manufacturer's instructions. We used heavy-duty drawer slides on the mixer drawer that can withstand up to 100 pounds because the stand mixer is fairly heavy.
-
Install in kitchen cabinets
Install inside your kitchen cabinet using wood shims or blocks if necessary. Secure with 1 ½” trim screws on the base and one side of the tower.