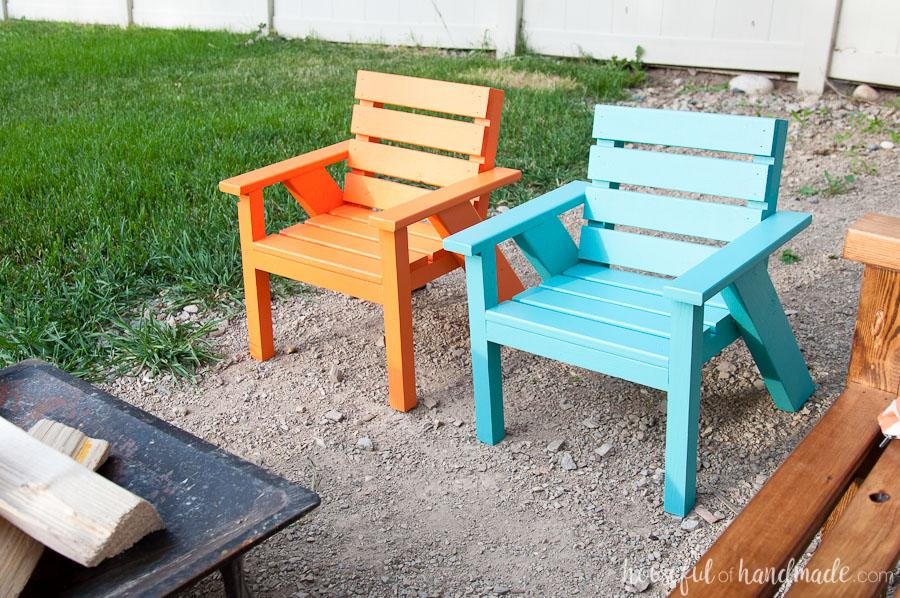
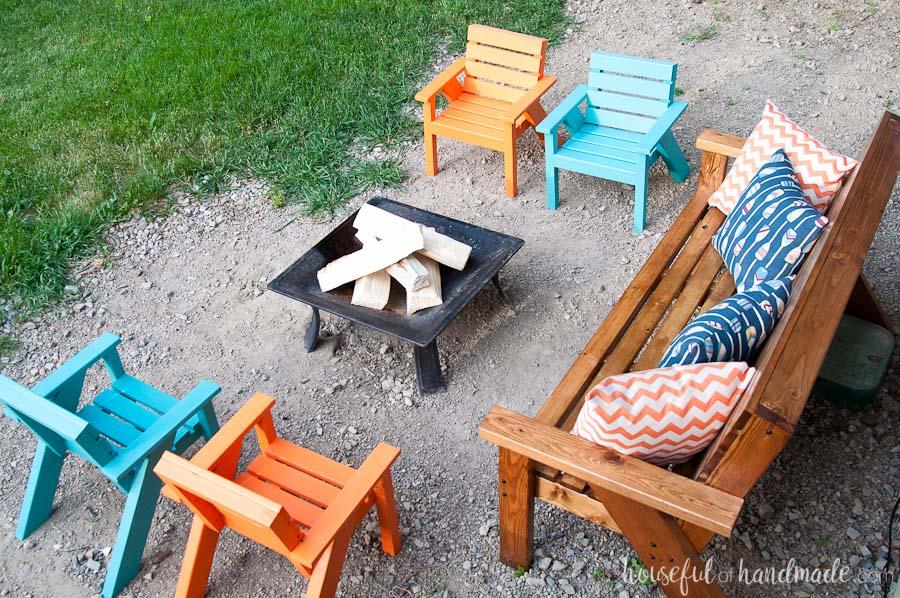
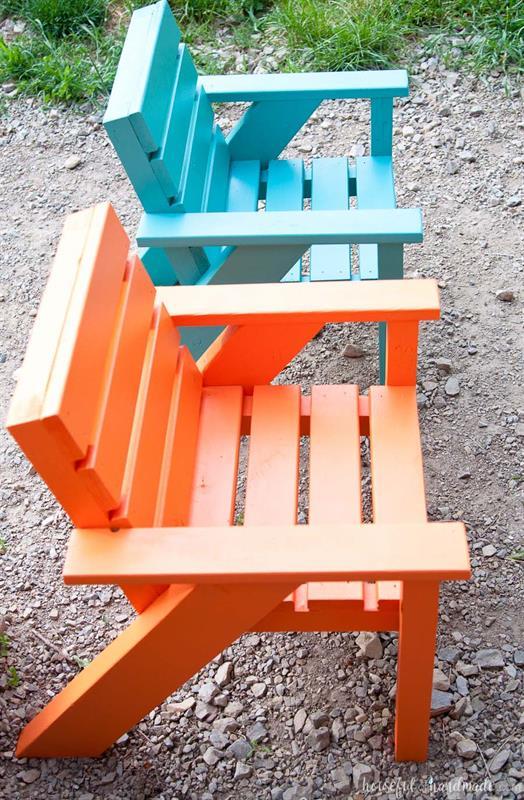
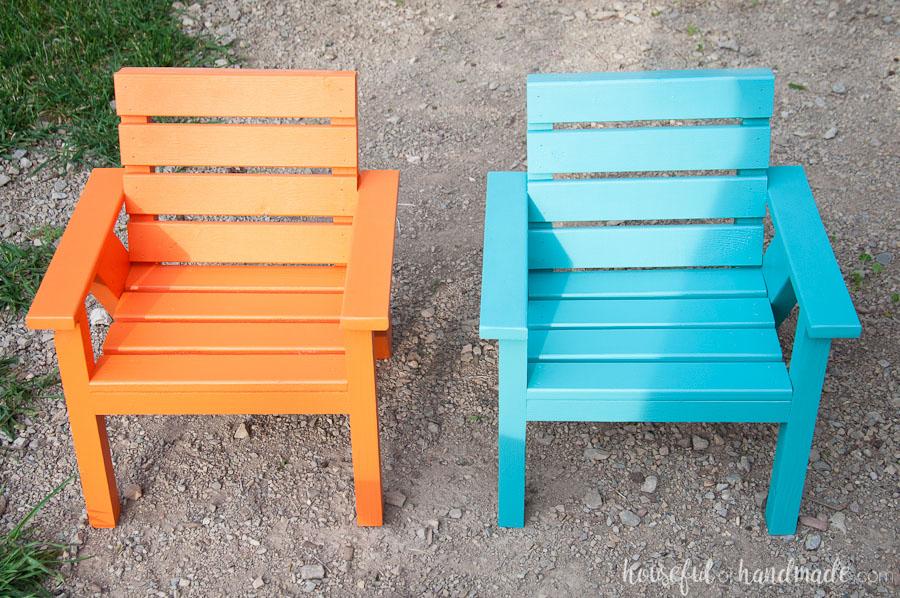
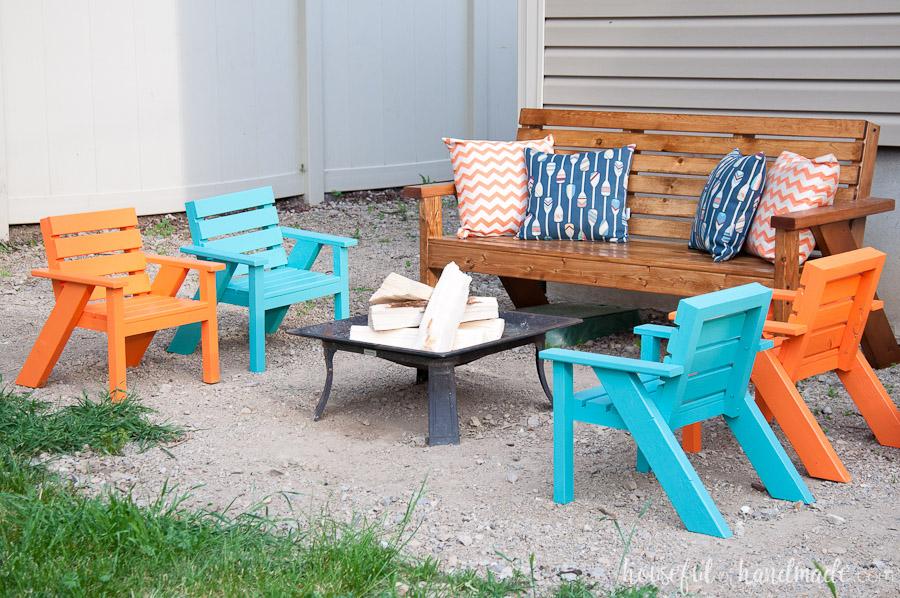


Easy to build kids chairs are perfect for creating outdoor spaces for the whole family! Chairs are light enough for kids to move but the wide, angled back leg keeps them from tipping over. Paint them in a rainbow of colors for lots of backyard fun. Pair them with the matching Slatted Outdoor Sofa.
Tools
Kreg Tools


Other Tools
-
Miter Saw

-
Square
-
Nail Gun
Materials
Wood Products
- 2 Board , 2x2 , 96"
- 1 Board , 2x4 , 48"
- 2 Board , 1x3 , 96"
Hardware & Supplies
- 8 1 1/2" pocket hole screws
- 24 2 1/2" pocket hole screws
- 16 1 1/2" finish nails
- 1 Outdoor paint
- 1 Waterproof wood glue
Directions
-
Overall Dimensions
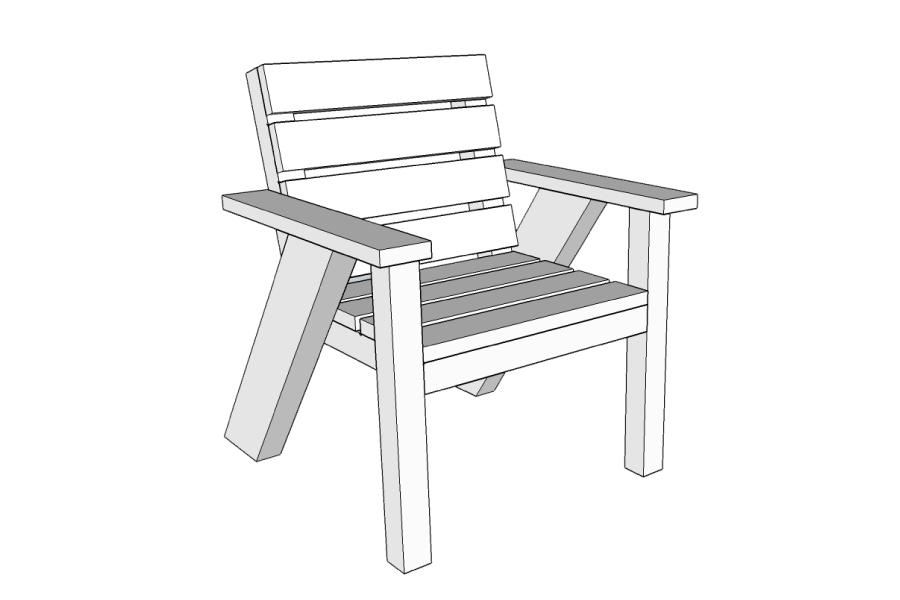
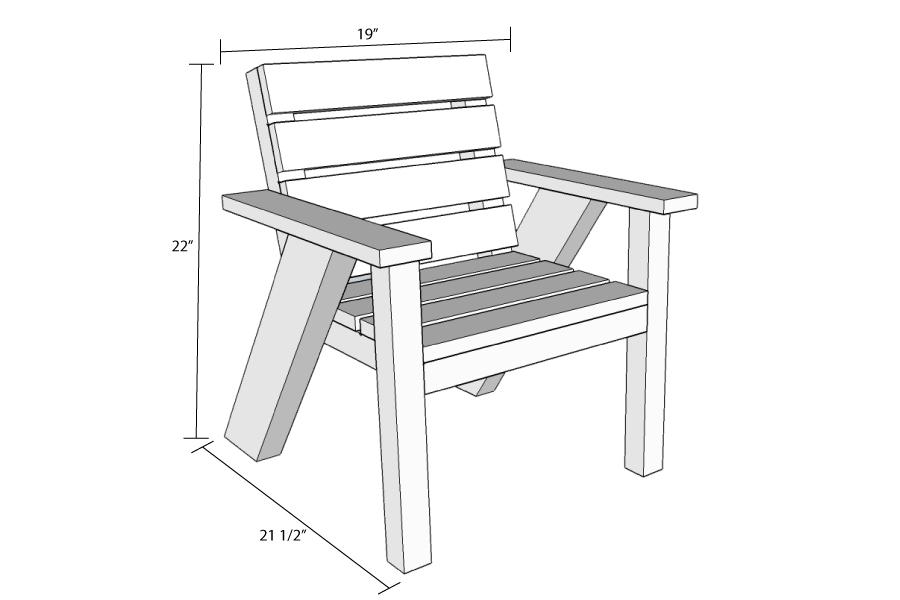
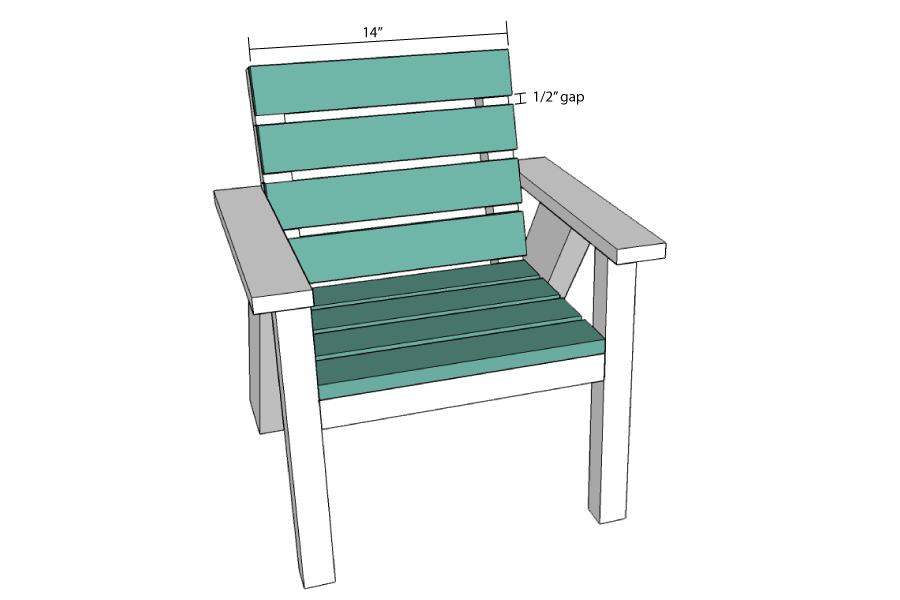
The final chair will be 19" wide by 21 1/2" deep and 22" tall. The seat is 14" wide by 11" deep and sits 10 3/4" off the ground. It's perfect for toddlers and kids.
-
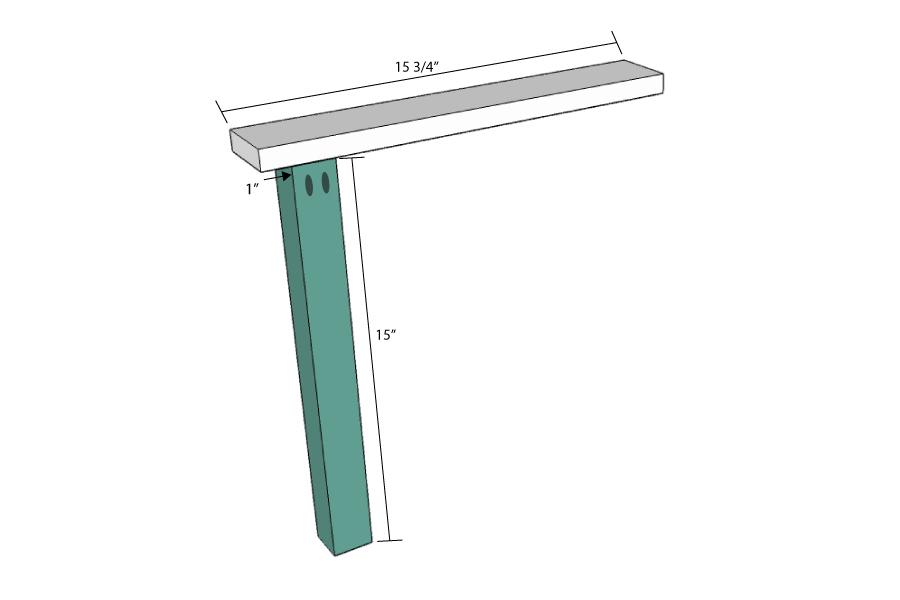
Cut Back Leg Boards
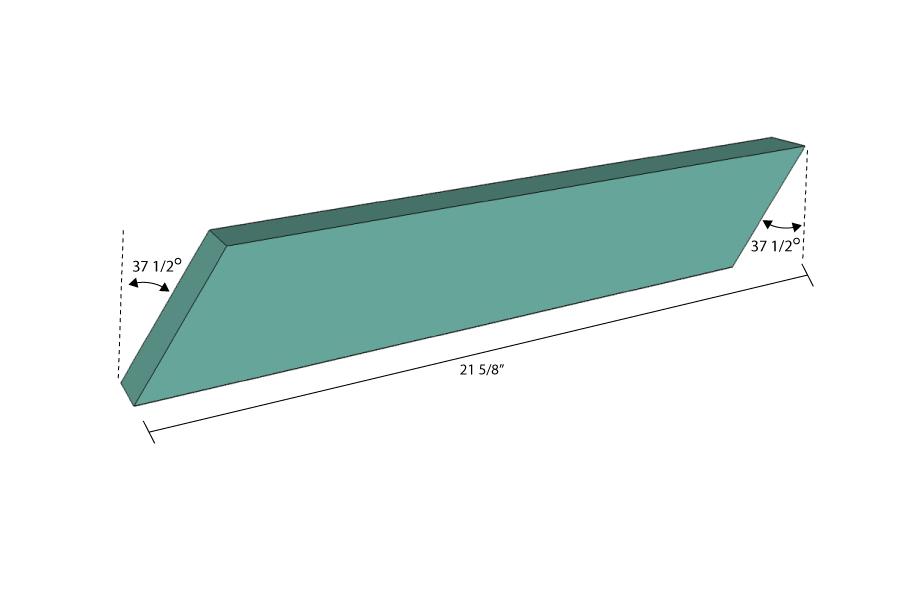
Cut 2 pieces of 2x4 board to 21 5/8" long. Cut both ends off at a 37 1/2 degree angle in the same direction. Drill 2 pocket holes with the wood depth set for 1 1/2" wood on the inside top of each back leg board. Be aware that the boards need to mirror each other when drilling pocket holes.
-
Attach Front Legs
Drill 2 pocket holes set to 1 1/2" board thickness in the top inside of each of the front legs. Attach them to the arm boards so they are 1" in from the front and flush with the inside of the arm board. Use wood glue and 1 1/2" pocket hole screws to secure into the 3/4" deep arm boards.
-
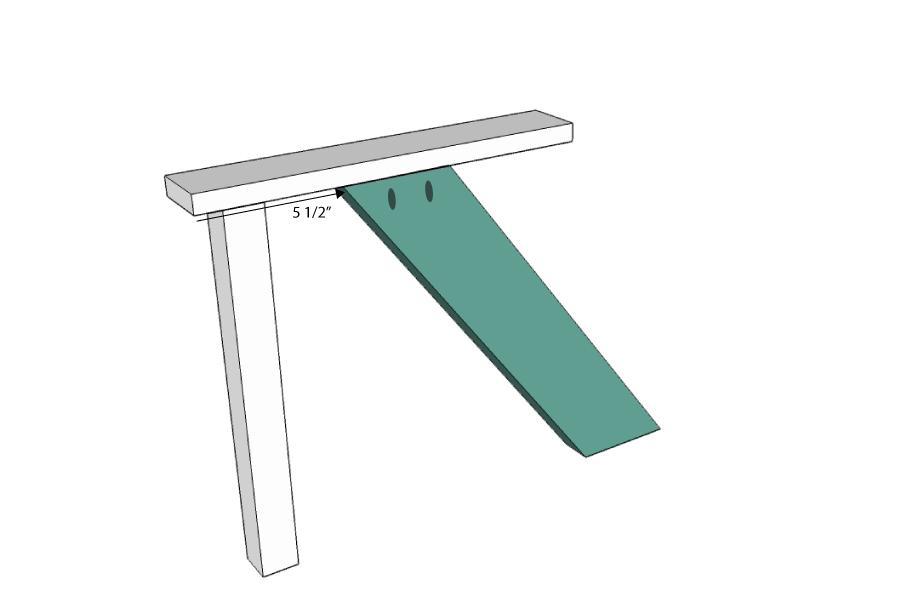
Attach Back Legs
Use wood glue and 1 1/2" pocket holes to attach the back legs to the arm boards. Attach them so they are 5 1/2" back from the front and flush with the inside of the board. Make sure the 2 legs are mirrored.
-
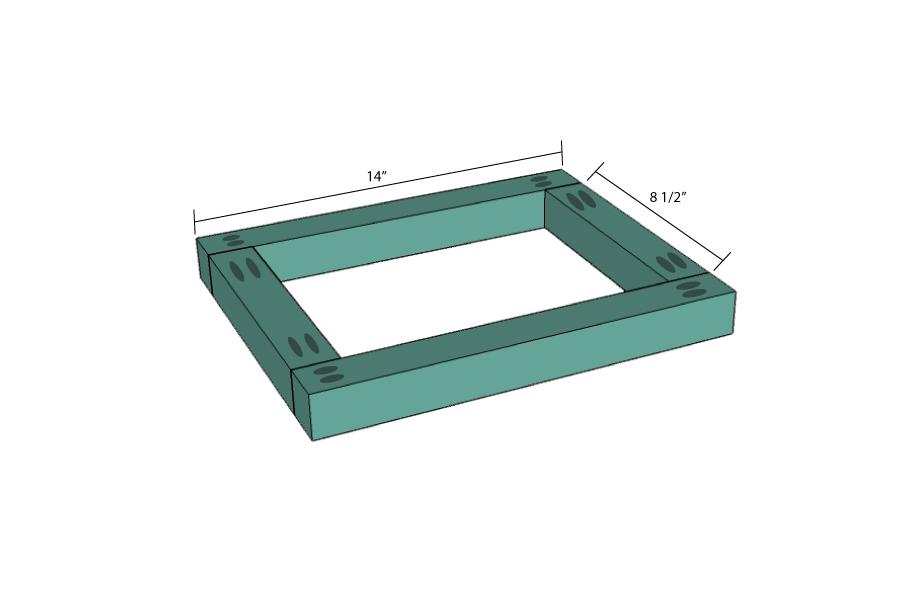
Build the Seat Frame
Drill pocket holes with the wood depth set for 1 1/2" wood in both ends of the 8 1/2" and 14" seat frame boards. Build the seat frame as shown in the diagram using wood glue and 2 1/2" pocket hole screws in the pocket holes on the 8 1/2" seat frame boards.
-
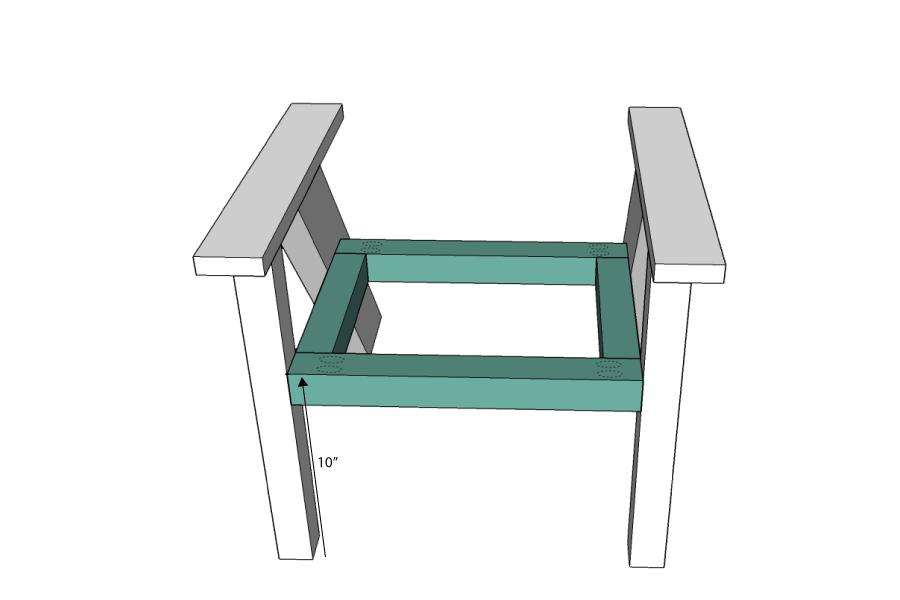
Attach the Seat Frame to the Sides
Attach the seat frame to the sides boards so the top is 10" off the ground and it is flush with the front of the front legs. Use wood glue and 2 1/2" pocket holes screws in the pocket holes drilled in the 14" seat frame boards.
-
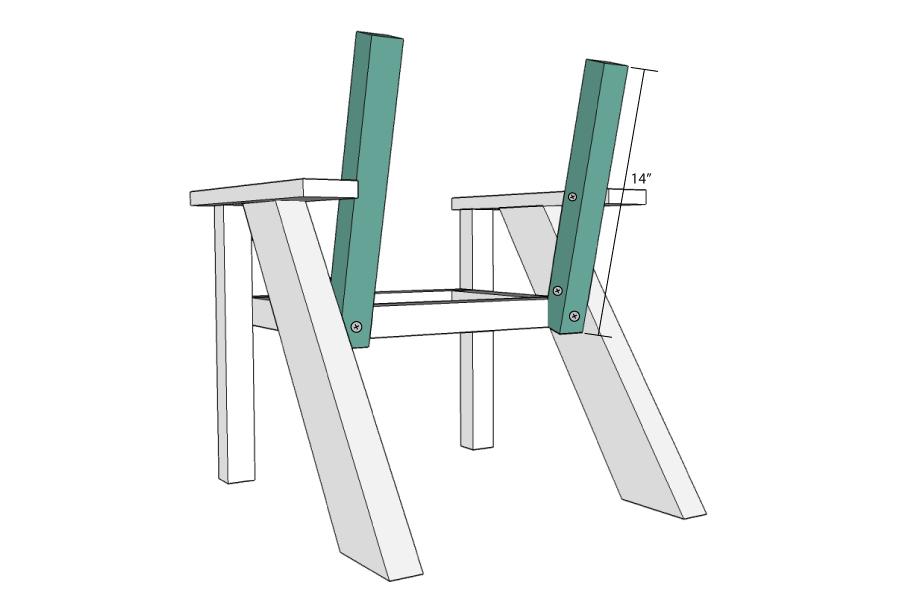
Attach the Back Frame Boards
Print the back frame board template (in the extras). Cut it out and mark the cut line on the 14" back frame boards. Cut them out. Attach the back frame boards so they are flush with the outside of the seat frame and level on the bottom. Use wood glue and (3) 2 1/2" pocket hole screws, however you will just be drilling them straight into the wood instead of using pocket holes. Start by drilling 1 through the back of the back frame into the seat frame. Then secure 1 through the side of the back frame into the back leg. Then 1 through the side of the back frame into the arm. Repeat on the other side.
-
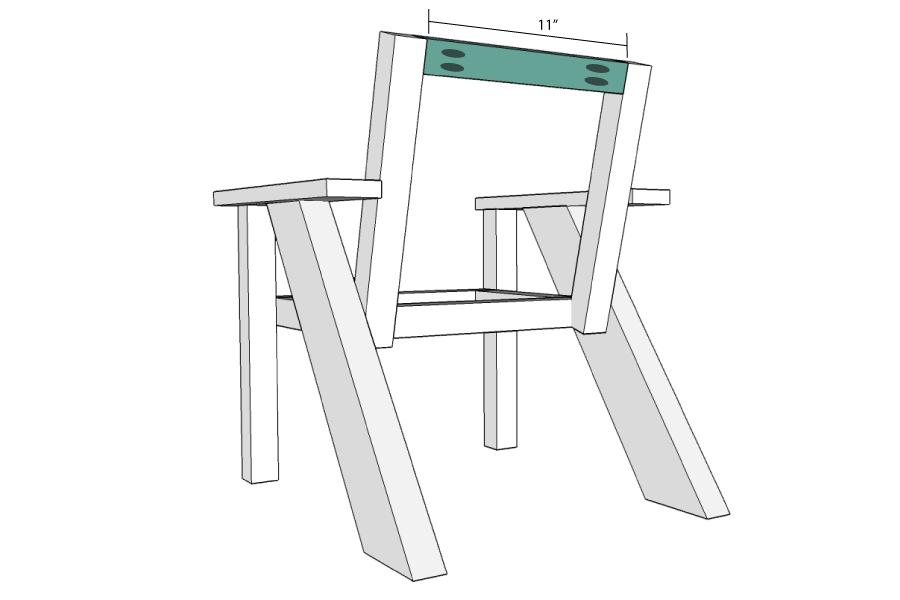
Attach the Top Back Frame Board
Drill 2 pocket holes in each end of the 11" back frame boards with the depth set for 1 1/2" wood. Using wood glue and 2 1/2" pocket hole screws, attach it between the other back frame boards so it is flush with the top.
-
Add the Slats
Attach the 14" slats to the frame with wood glue and 1 1/2" finishing nails. Start with the front seat slat. It should be flush with the front of the seat frame. Then add the remaining seat slats with a 1/2" gab between. Finish with the back slats starting at the top, where it should be flush against the top of the back frame. Then add the remaining back slats with 1/2" gap between.
-
Finishing
Sand and finish the chair. You will want to use paint, stain and/or sealer that is made for outdoor use.