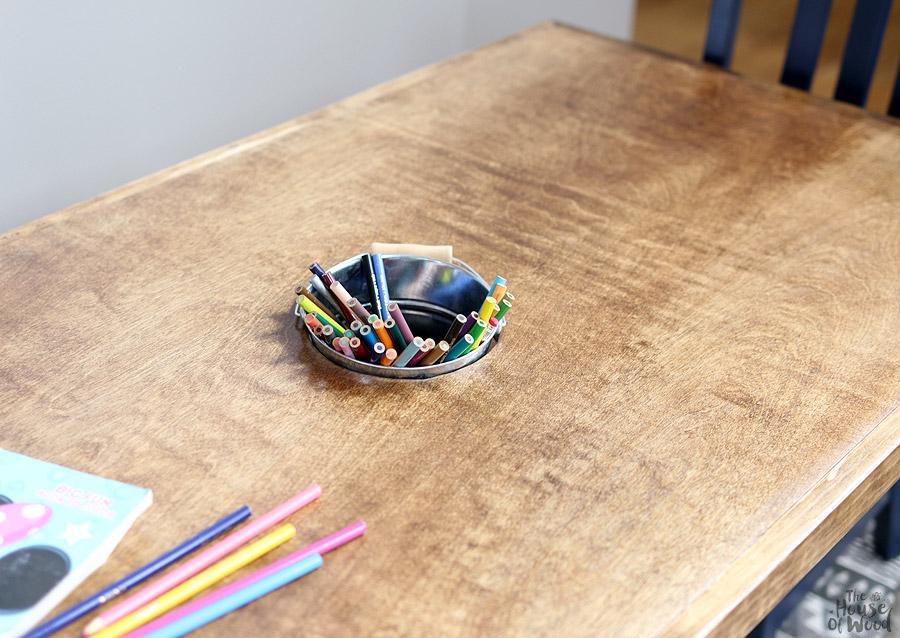
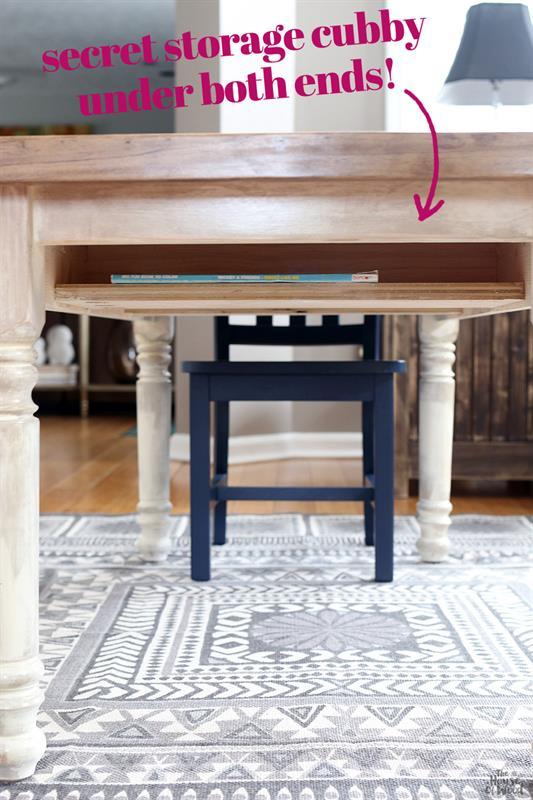
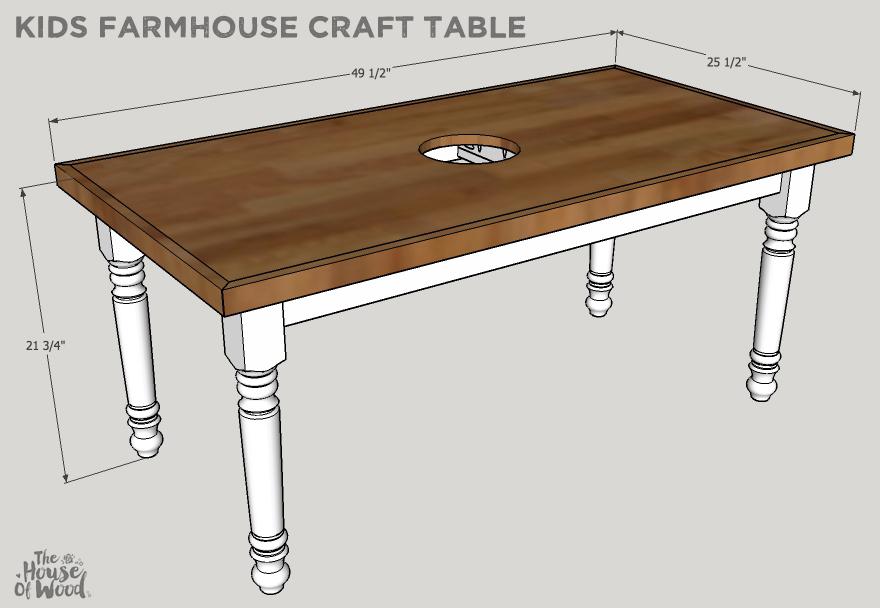


This kids' craft table has a bucket in the center to store art supplies and two secret cubbies underneath for books or small toys. Using store-bought turned legs, this farmhouse-style table is the perfect little workspace for your wee ones to create their masterpieces or ace that pop quiz!
Tools
Kreg Tools


Other Tools
-
Circular Saw (cordless)

-
Jigsaw
-
Square
-
Tape Measure
-
Drill (cordless)
-
Nail Gun
-
Sander
Materials
Wood Products
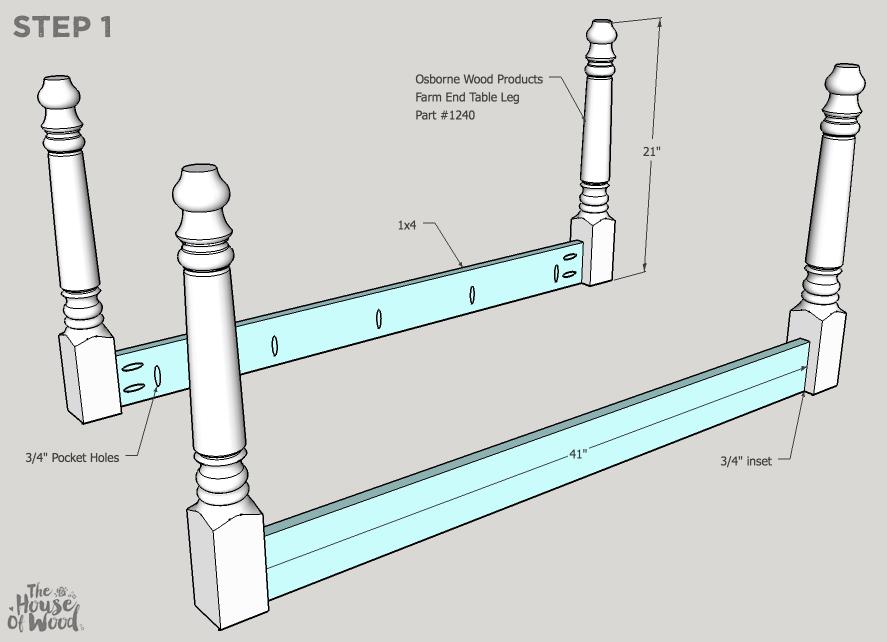
- 4 Part #1240 , Osborne Wood Farm End Table Legs , 21" x 2-1/2"
- 1 Board , 1x4 , 96"
- 1 Board , 1x3 , 96"
- 1 Plywood , 3/4" Thick , Half Sheet
- 2 Board , 1x2 , 96"
Hardware & Supplies
- 1 1-1/4" Pocket Hole Screws
- 1 1-1/4" Brad Nails
- 1 Wood Glue
Directions
-
Attach the Long Aprons
Drill 3/4" pocket holes facing up and out into the long aprons. Space pocket holes approximately 6"-8" apart. Attach the long aprons to the turned legs with 1-1/4" pocket hole screws and wood glue. The aprons should be 3/4" inset from the outside of the legs. The upward-facing pocket holes in long aprons will be to attach the table top in later steps.
-
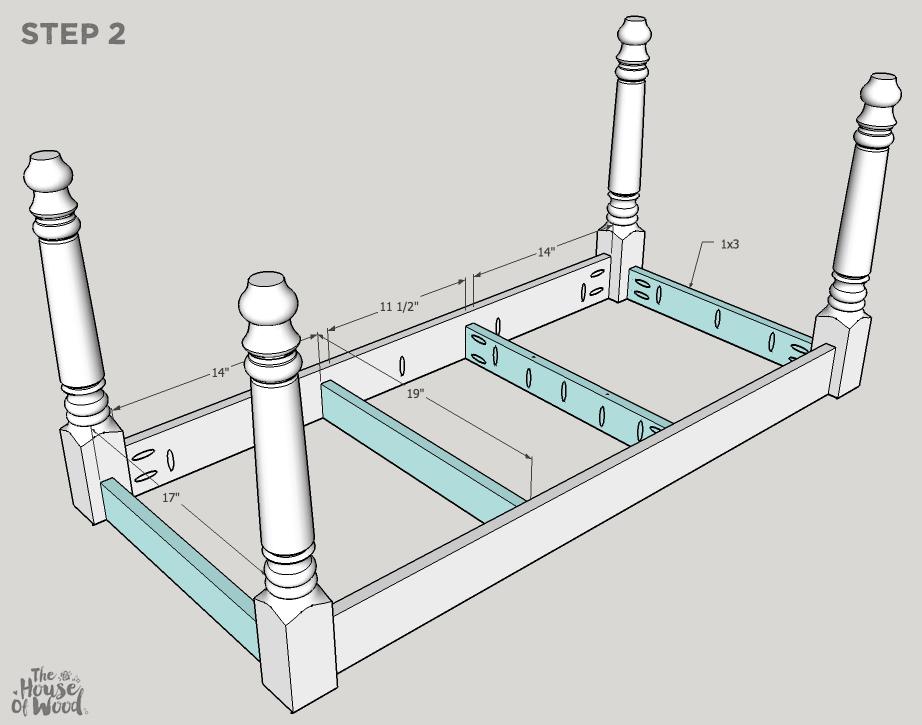
Assemble the Carcass
Drill 3/4" pocket holes into the 1x3 boards as shown. Notice that the two middle 1x3 boards have pocket holes drilled facing both up and down. The downward-facing pocket holes will be to attach the secret cubby shelf in the next step. Use 1-1/4" pocket hole screws and wood glue.
-
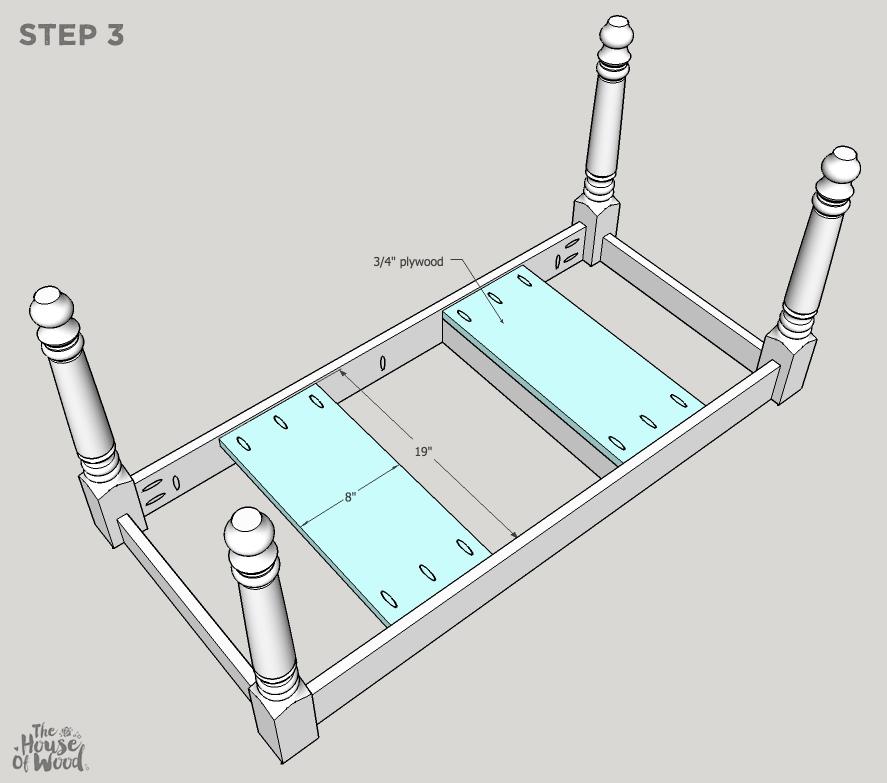
Attach the Secret Shelves
Drill 3/4" pocket holes into the 3/4" plywood shelves as shown and attach it to the long aprons with 1-1/4" pocket hole screws and wood glue. Attach the 1x3 boards to the shelf with 1-1/4" pocket hole screws as well.
*Tip: use a scrap 1x3 piece to keep the shelf level while you're attaching it.
-
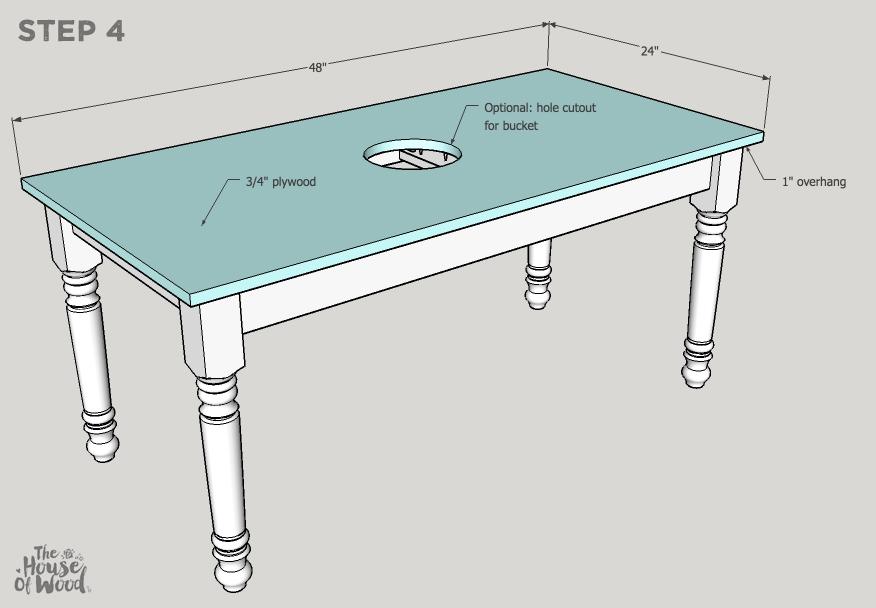
Attach the Top
Center the top over the base and attach it by screwing 1-1/4" pocket hole screws from the aprons to the table top. Allow for a 1" overhang on all four corners. Measure your bucket and use a jigsaw to cut the hole accordingly so that you can drop the bucket in place to store art supplies.
-
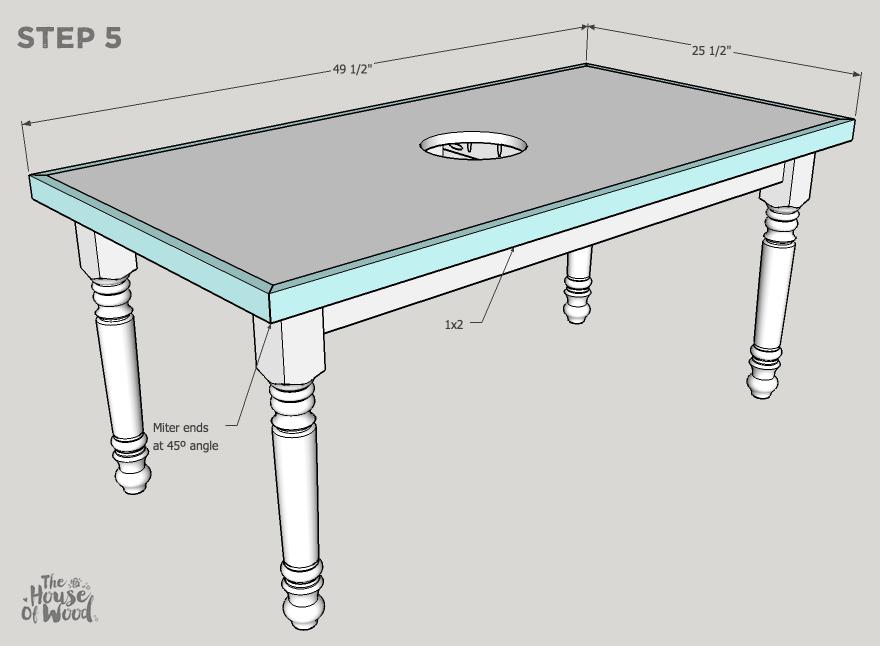
Add Trim
Measure and miter cut the ends of the 1x2 trim at 45º angle. Use wood glue and 1-1/4" brad nails to attach it to the perimeter of the table top.
-
Visit www.JenWoodhouse.com
Visit www.JenWoodhouse.com for more free building plans and project tutorials.