Kids Art Table
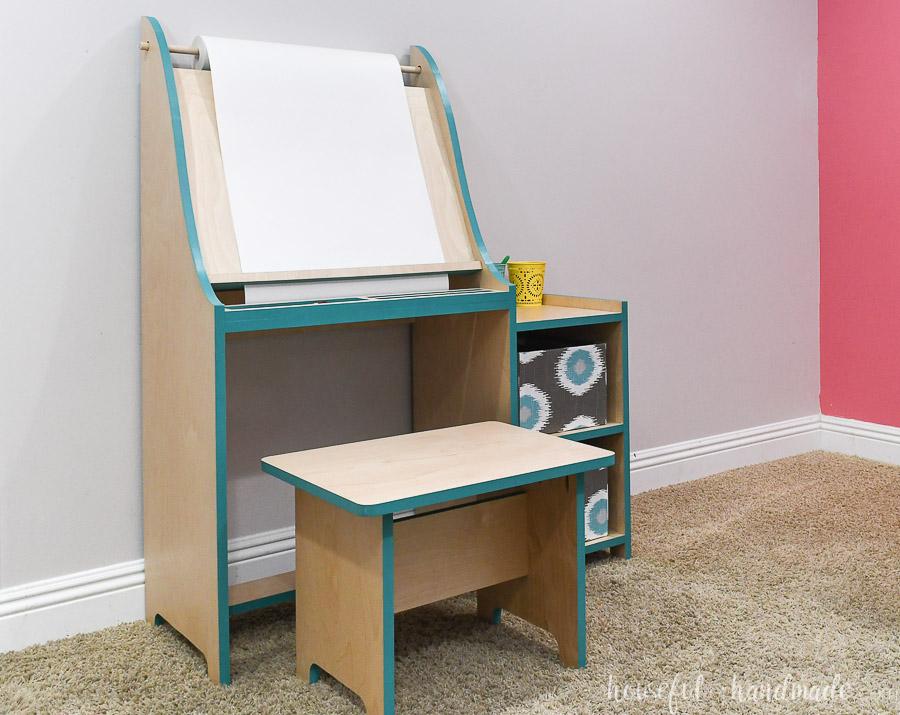
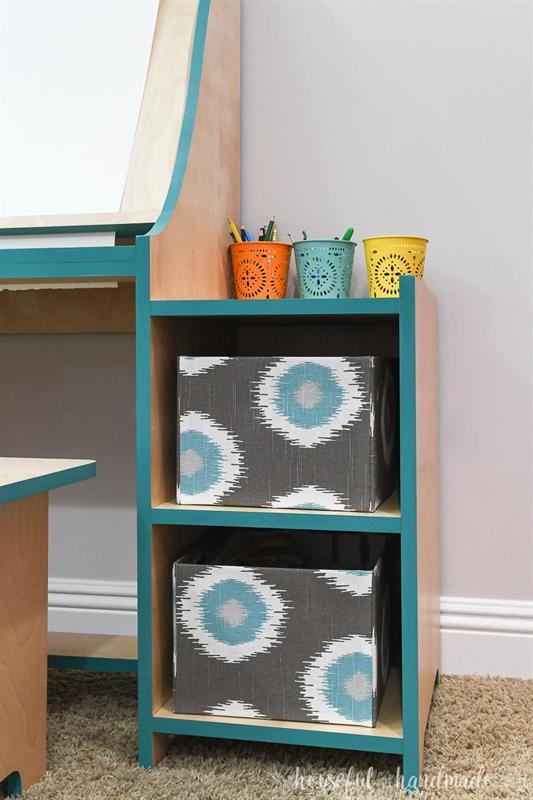
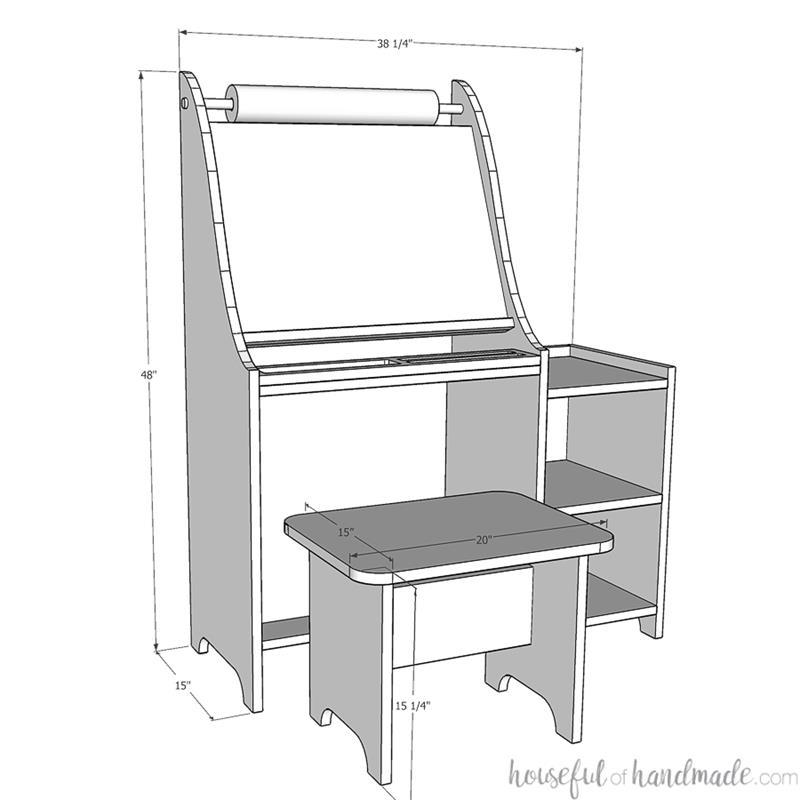
By Houseful of HandmadeBuild this beautiful kids art table, complete with easel, from just 1 sheet of 3/4" plywood. This art table is perfectly sized for kids, but big enough it can grow with your budding artist. And the shelf cubbies allow for lots of storage to keep the art area clean and organized.
Directions
-
Cut easel tray
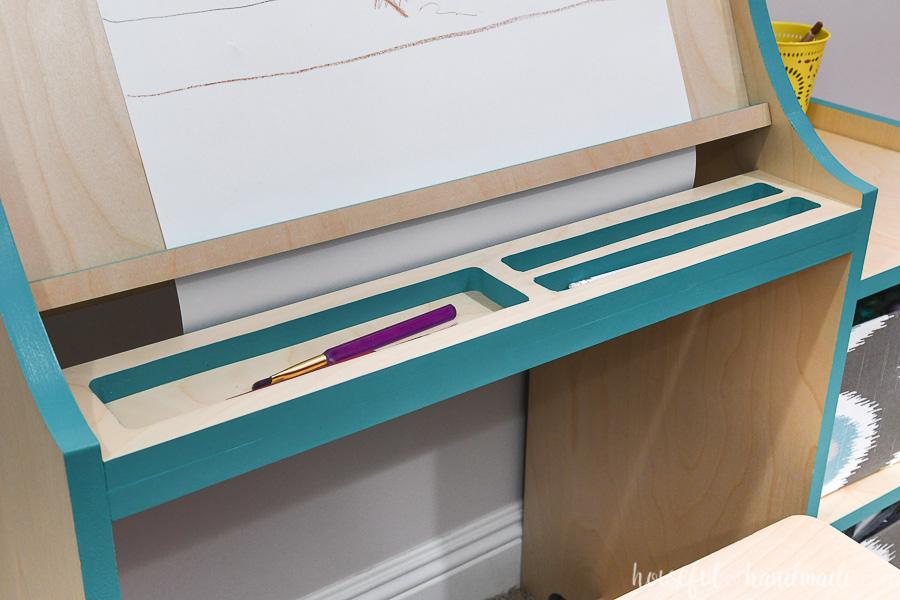
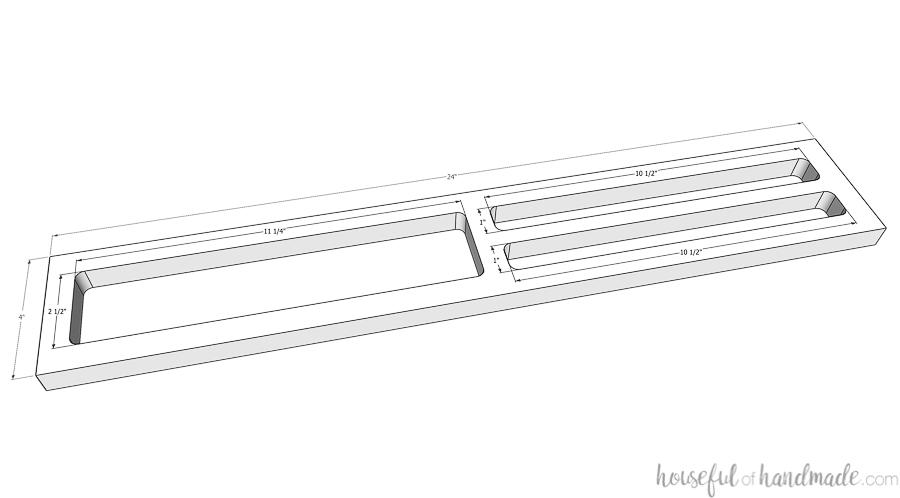
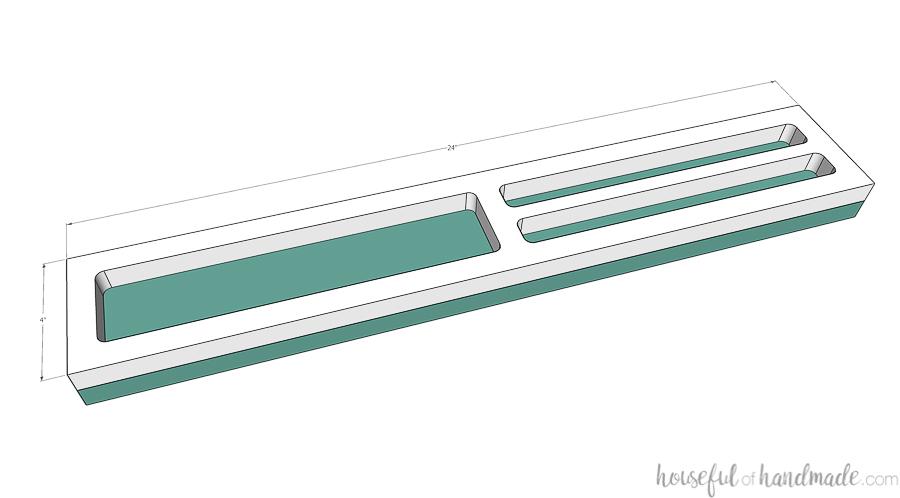
On one of the easel tray pieces, mark out the dimensions for the pencil tray on the easel according to the picture. Drill 1/2" holes in the corners of each of the tray compartments. Then use a jigsaw to cut between the holes to remove them.
-
Laminate easel tray
Add wood glue to the back of the cut out easel tray piece. Glue it to the top of the second easel tray piece. Clamp and let the glue dry.
-
Cut the side pieces
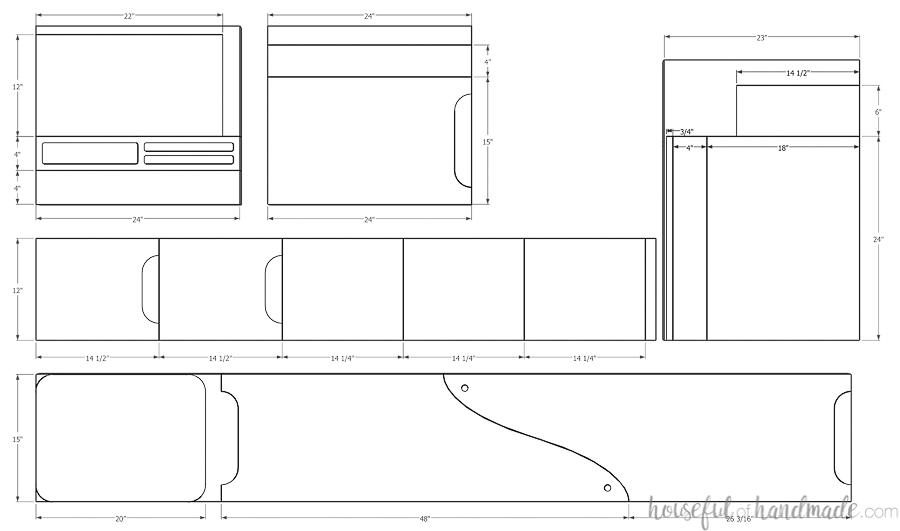
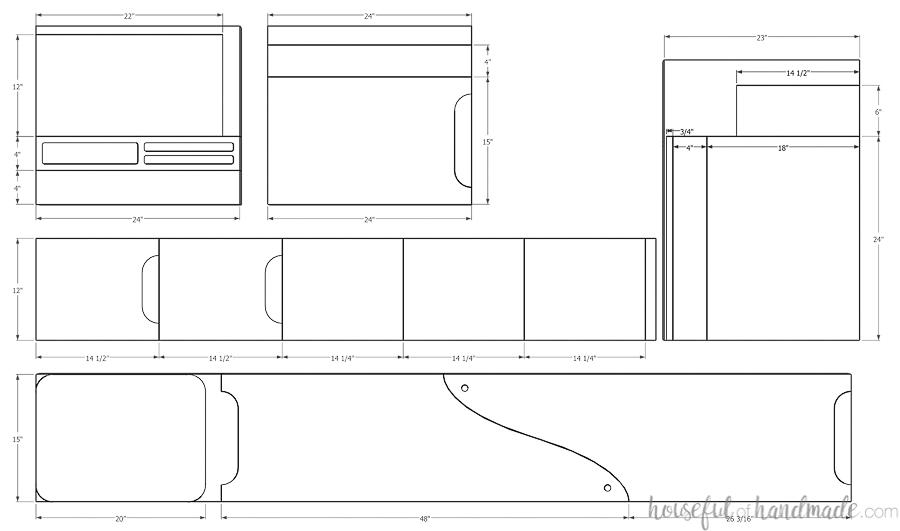
Use the template in the extras or draw your own arc to the side pieces. The top of the side piece should be 48" and the front 26 3/8". The arc is mirrored so that you can cut out both pieces from one long piece (see plywood cut diagram). On the template, make sure your printer is not scaling the template when printing. Then line up the triangles (to make diamonds), and tape together. Also, mark and drill a 3/4" hole on the top of each side piece.
-
Attach easel pieces
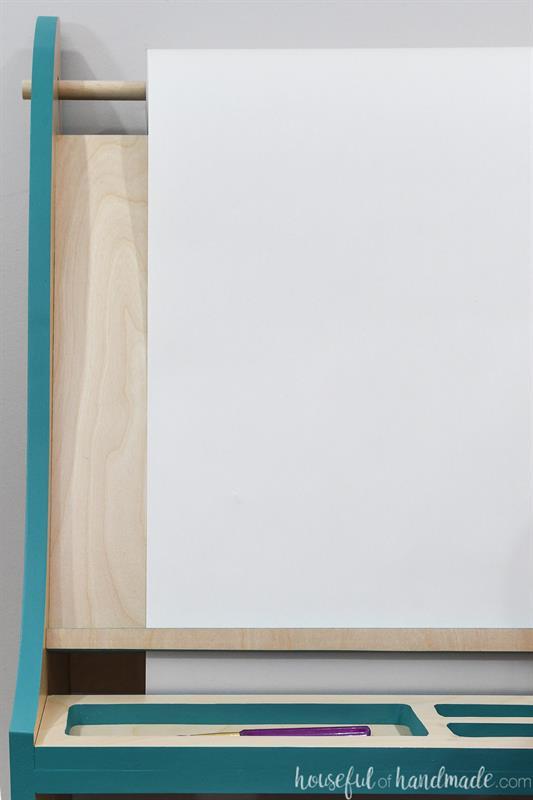
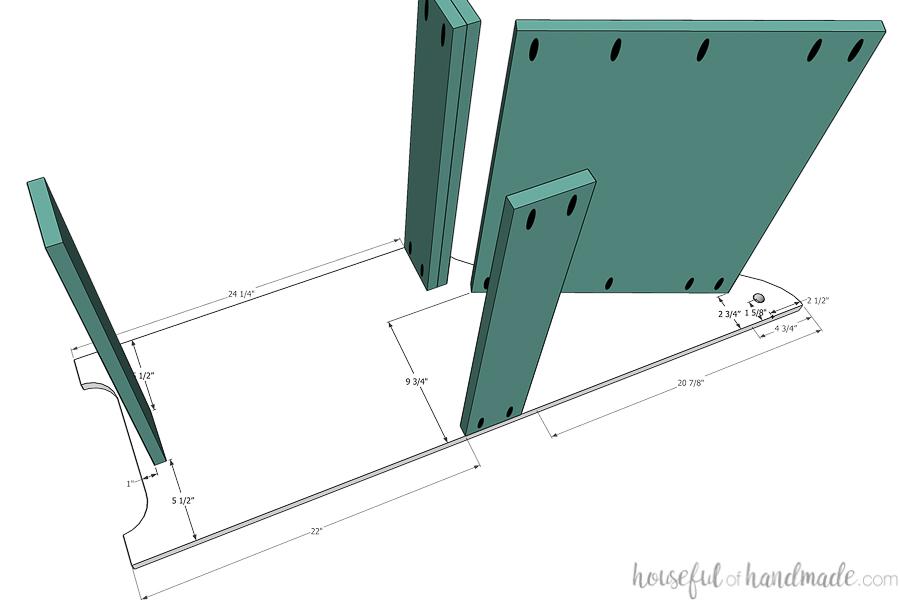
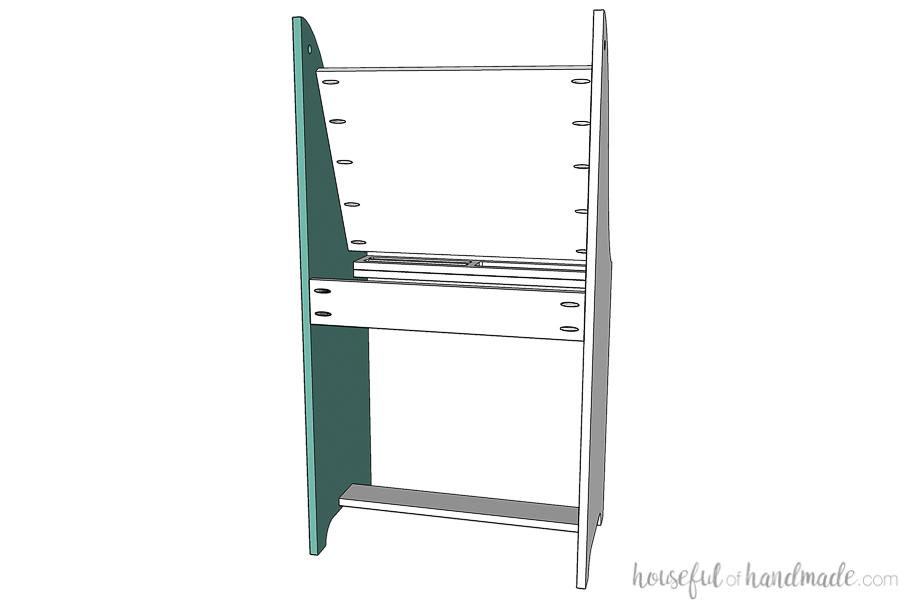
Measure out the placement of the easel, easel tray, and easel supports on the easel side pieces according the picture. Make sure to measure from the back of the pieces for accurate measurements. Drill pocket holes set for 3/4" material in both sides of these pieces and attach with wood glue and 1 1/4" pocket hole screws.
-
Cut plywood
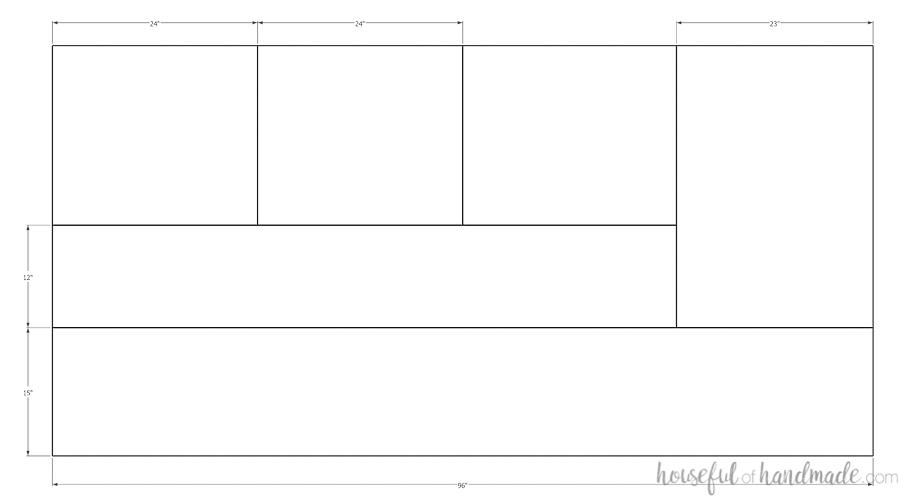
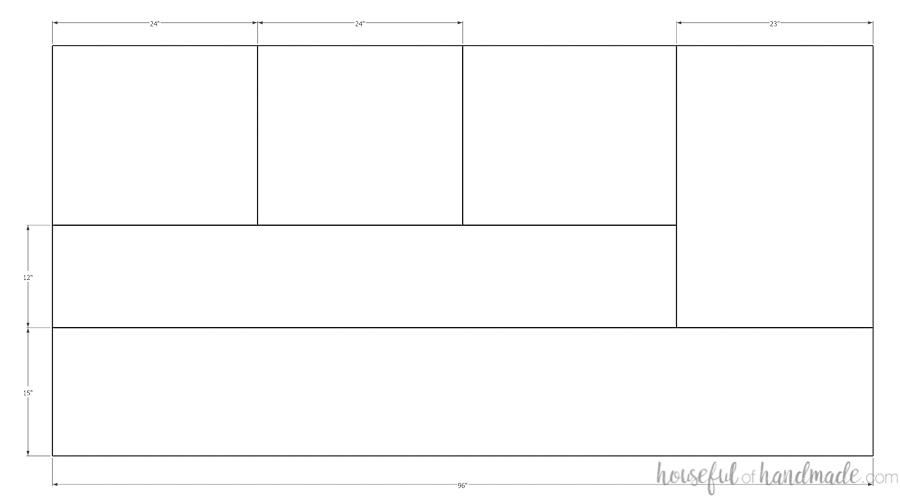
All the pieces are cut from 1 full sheet of plywood. Start by cutting a 15" strip off the long side of the sheet. I used the Kreg Rip-Cut to easily do this. From the remaining piece, cut a 23" piece off the bottom (it will be approximately 33" long) using the Kreg Accucut. Then rip a 12" piece from the remaining piece. Finish by cutting 2 24" wide pieces from the final piece.
-
Finish cutting plywood
Using the diagram, finish cutting out all the plywood pieces. On the side pieces, shelf cubby side, and bench sides cut an arc out of the bottom of the board with a jigsaw. Measure in 2" from the sides and 2" up from the bottom. Draw a curve to make the cut easier and cut out with the jigsaw. Also, cut a curve on the 4 corners of the bench seat board.
-
Attach second side
Attach the easel pieces to the second side board using your markings and the predrilled pocket holes. Make sure to use 1 1/4" pocket hole screws and wood glue to secure.
-
Build shelf cubby
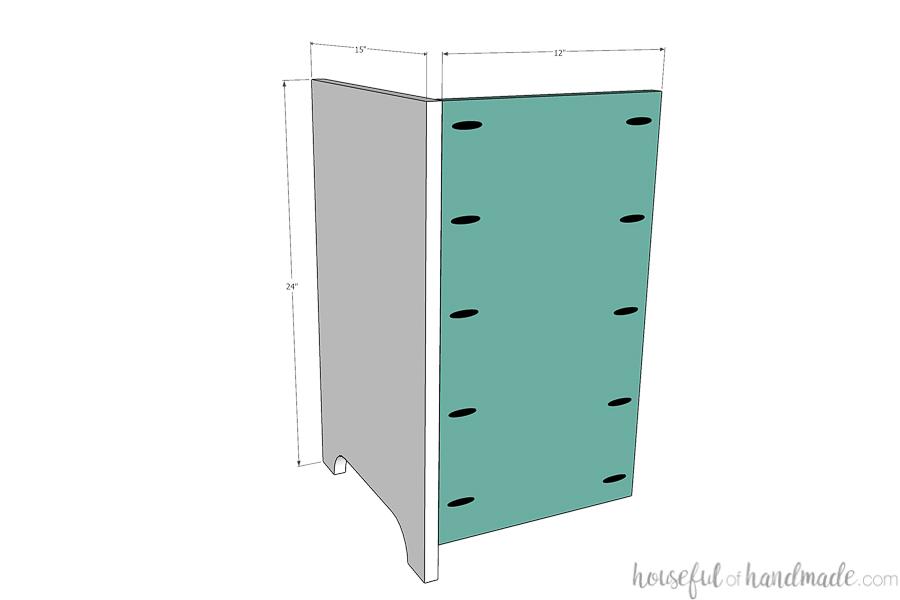
Drill pocket holes set for 3/4" material in both sides of the shelf cubby back piece. Attach it to the shelf cubby side piece with wood glue and 1 1/4" pocket hole screws so that the top is flush. It will be 2" short on the bottom.
-
Attach the shelves
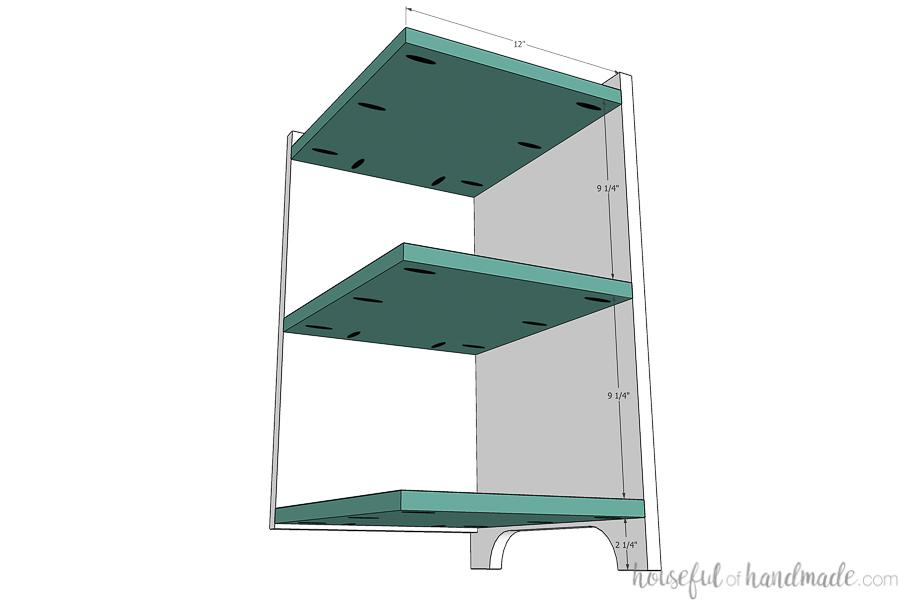
Drill pocket holes set for 3/4" material in the sides and back of the shelf boards. Attach them to the shelf cubby side and back with wood glue and 1 1/4" pocket hole screws. The lower shelf should be 2 1/4" up from the ground, and there should be 9 1/4" in between the remaining shelves.
-
Attach the shelf cubby
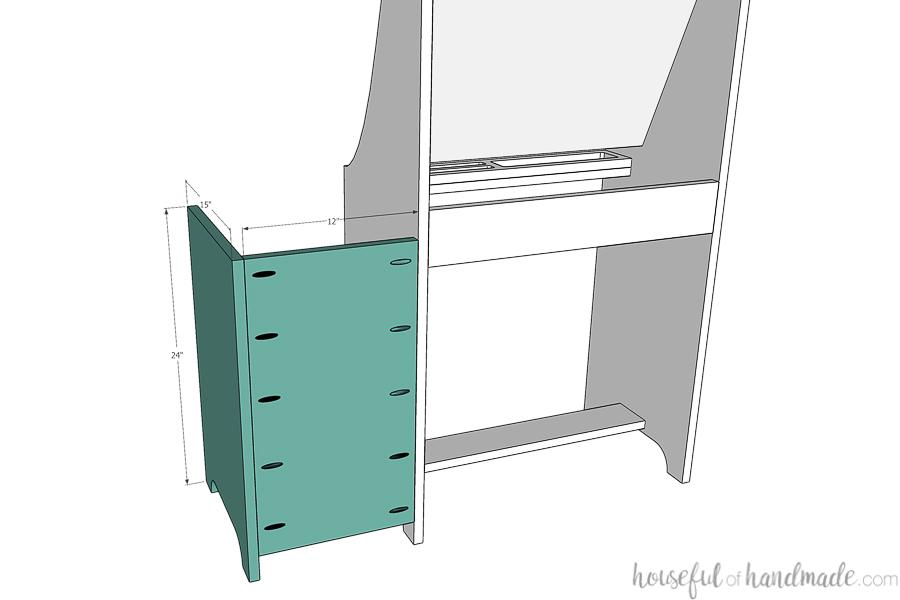
Attach the shelf cubby to the easel with the pocket holes on the back of the shelf cubby back so the top is 24" up from the bottom. Also, attach the shelves to the side of the easel. Use wood glue and 1 1/4" pocket hole screws to secure.
-
Add easel lip
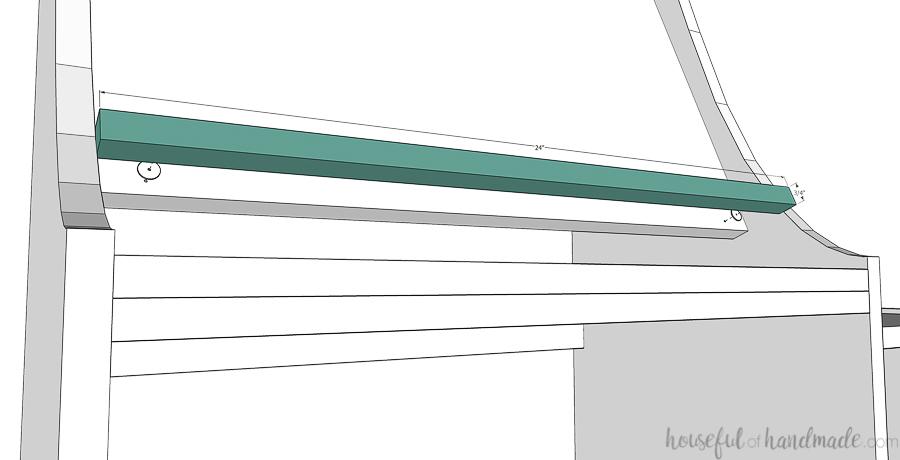
Create a lip on the bottom of the easel with the easel lip piece to hold down the roll of paper. Make a mark 1 1/2" in from the side of the easel and 3/8" up from the bottom on both sides. Predrill through this mark to make a hold for a screw, but make sure to go all the way through the easel. From the back of the easel, drive in a 1 1/4" pocket hole screw just until it is poking through the easel. Place a 1/2" wide washer on it, then clamp the easel lip to it. Finish driving in the screw to secure it. Now the lip is slightly proud of the easel and you can slide the paper between it and the easel to hold it. Also you can use it to tear off the paper from the roll.
-
Start building the bench
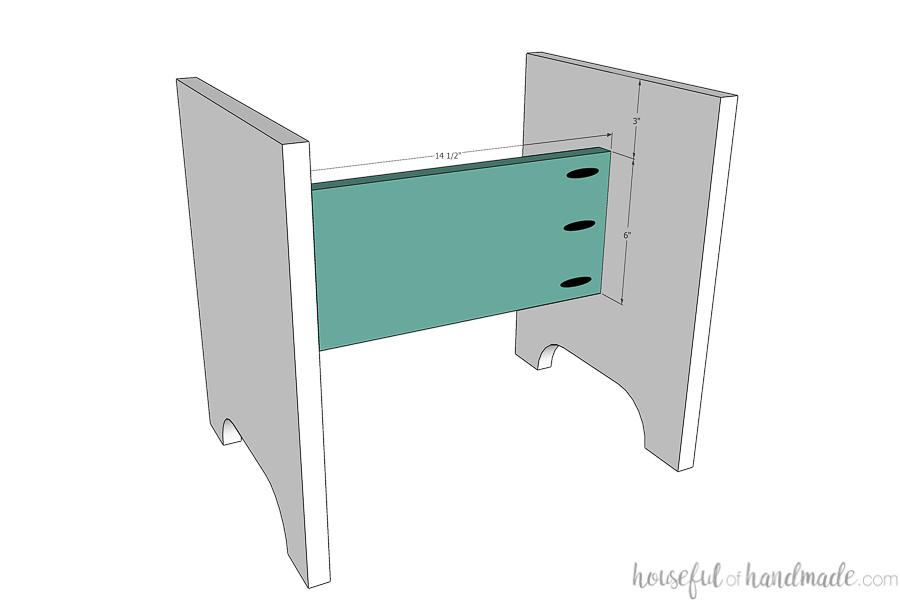
Drill pocket holes set for 3/4" material in both sides of the bench support board and in the top of the bench side boards. Attach it between the bench side boards with wood glue and 1 1/4" pocket hole screws so it is 3" below the top and centered on the sides.
-
Finish building the bench
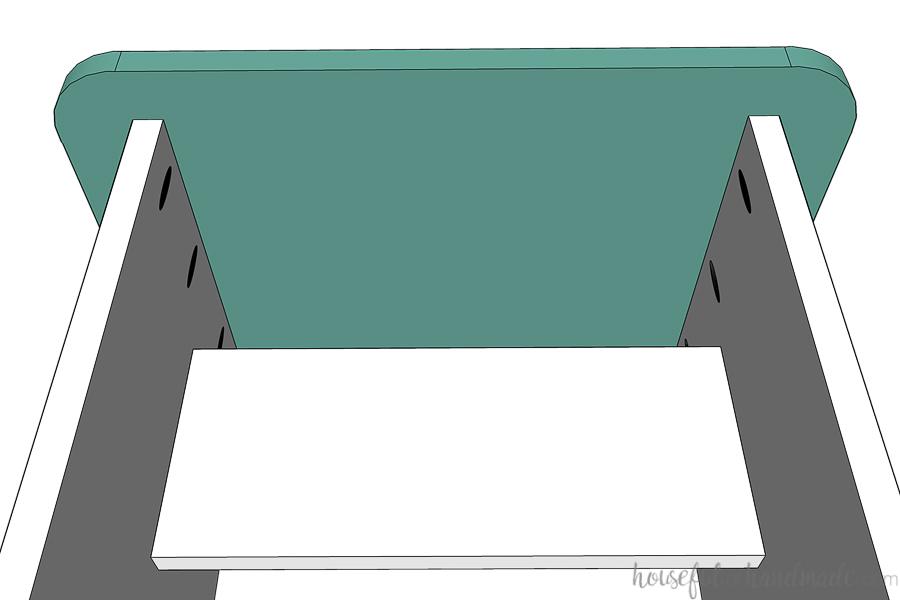
Attach the bench top to the bench sides with the predrilled pocket holes and 1 1/4" pocket hole screws and wood glue. Make sure the top is centered on the base.
-
Sand & Finish
Sand and finish your new art easel then place a roll of paper on the dowel and get creative! To see how I easily painted the edges of the plywood to hide them and create a stunning look on our kids art table, make sure to check out my post on Housefulofhandmade.com (link in extras). And follow along for lots of fun DIYs for the home!


