Hide Away Craft Center
By Lazy Guy DIYMy wife does quite a bit of crafting from sewing quilts to printing out designs for t-shirts. Right now the go to place for her to work is the dining room table. With this plan, we wanted a storage option that could hold her sewing equipment and craft gear and yet still be able to “hide away”.
Directions
-
Build Frame
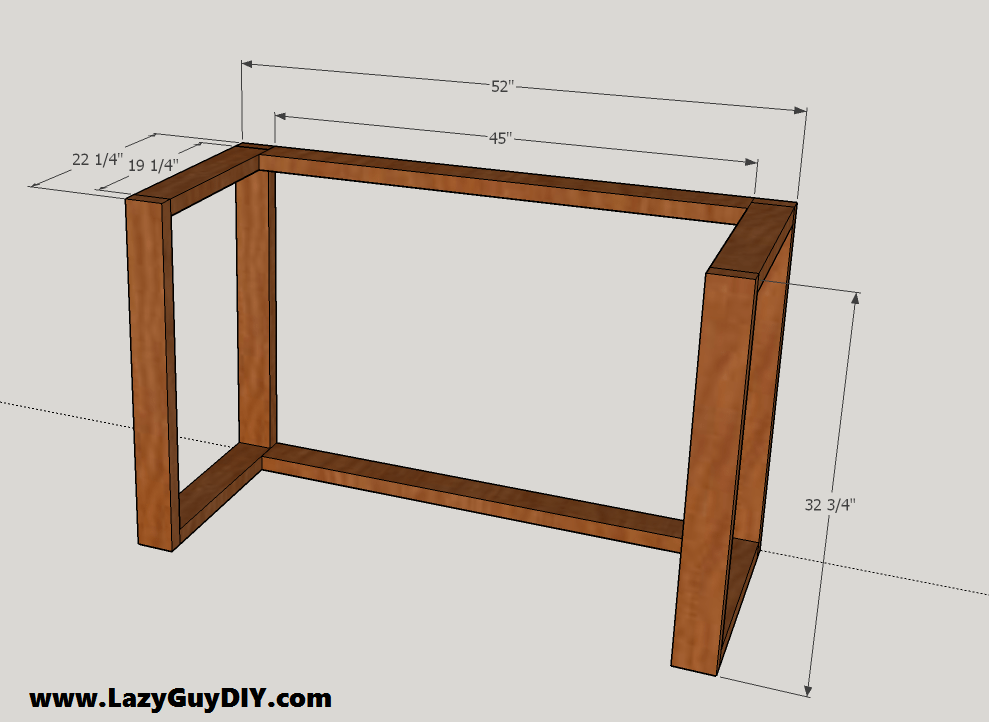
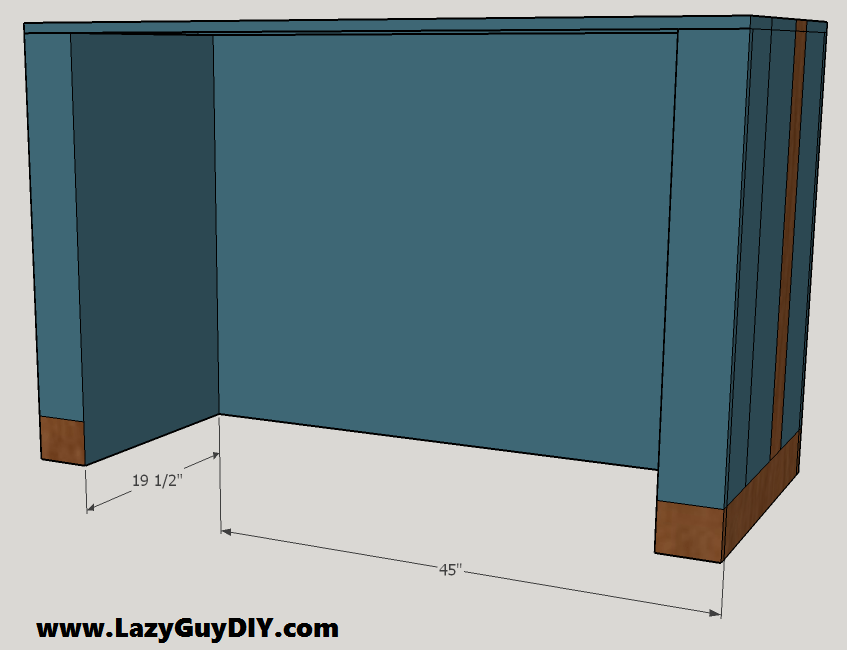
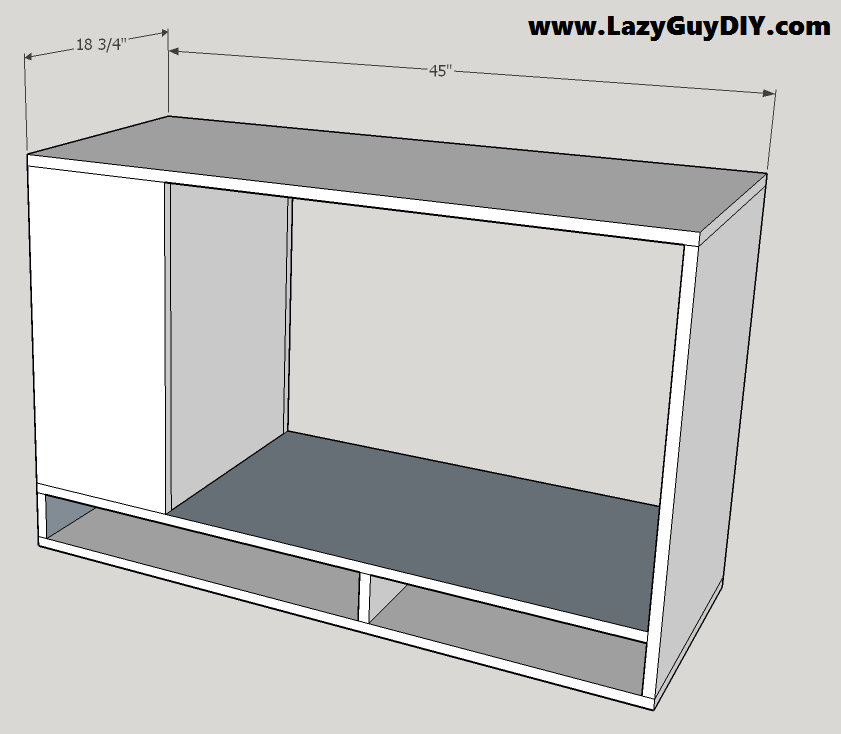
Cut your 2x4's to the following lengths:
45.00" 2x
19.25" 4x
32.75" 4xUsing your Kreg Jig for pocket holes, attach the 2x4's using 2" self tapping screws with a setting of 1 1/2" for the drill bit and pocket hole jig.
-
Assemble Back Panel
Back Panel Cuts
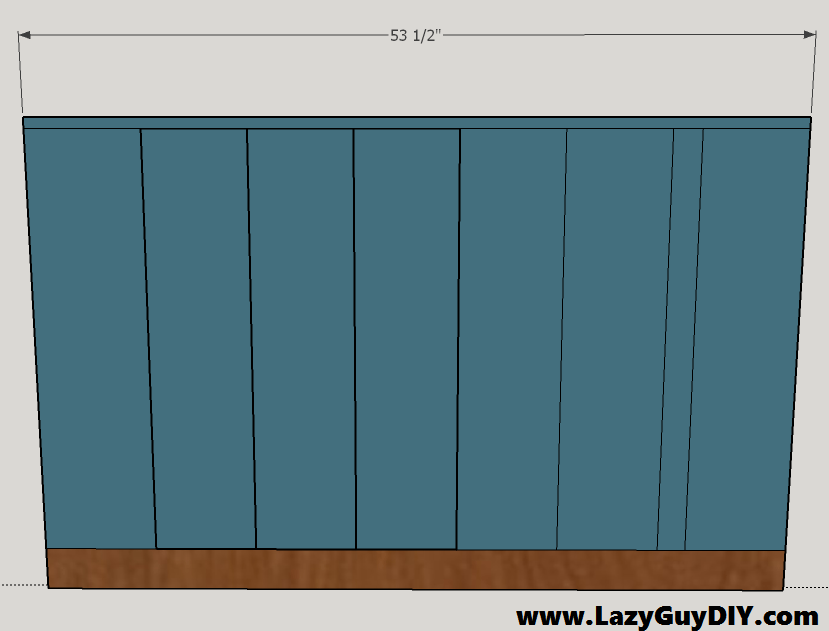
-1x8 - 29.75" (7x) - 1 additional scrap piece will be needed as filler at 2.00" x 29.75"
-1x4 - 53.50" (1x)Using your Kreg Jig, attach each 29.75" piece of 1x8 lengthwise (mixing in the 2" filler) using a but joint with 1 1/4 self tapping screws and a depth setting of 0.75".
Attach the 1x4 trim board to the bottom of the panel with pocket holes as well.
Attach to frame.
-
Assemble Side and Panels
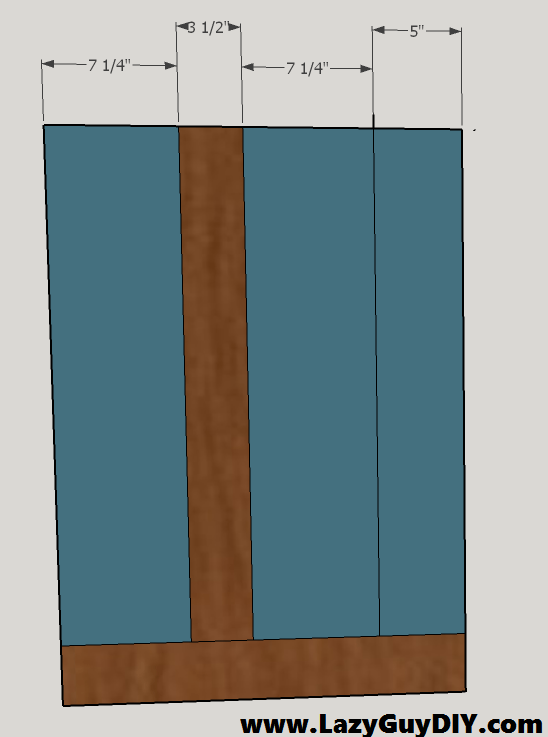
Our version of this build included a decorative 1x4 insert that tied into the the 1x4 trim piece. You can exclude the decorative detail and just measure the length of the side of the frame to get your new width.
Side Panel (2x)
1x8 - 29.75" (3x)
1x4 - 29.75" (1x)The 3rd 1x8 will need to be trimmed down with a table saw to make the edges flush.
Trim Board (2x)
1x4 - 22.25" - (1x)Assemble your panels by creating butt joints with your Kreg Jig to attach the boards lengthwise and then attach the bottoms to the trim board. You will continue to use the 1 1/4 self tapping screw and 0.75" depth setting.
** Make sure your two panels are mirror images so the top insert will line up exactly with your decorative 1x4's.
Attach to side of frame
-
Assemble Front Facing
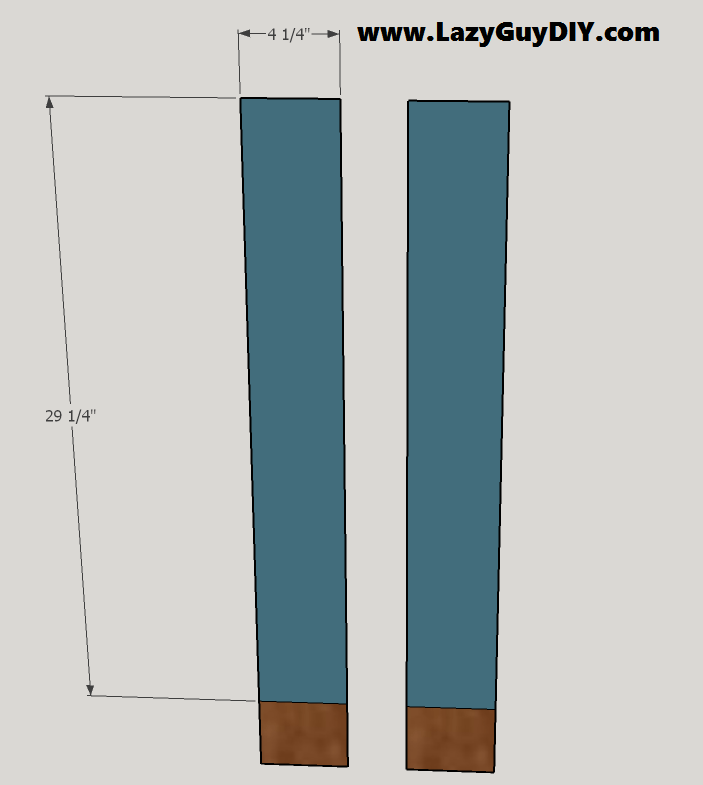
Only 2 pieces per side. Hooray!
Your 1x8 will need to be cut down to cover the face plate of the frame. Mine ended up being 4.25".Cut your trim board as well to 4.25". Attach with pocket holes.
Attach to front of frame.
-
Cover Inside Panels
Instead of using more 1x8's and also cutting down on the weight of this build, I opted for using 5.0mm plywood underlayment. It's thin and light and won't take up important real estate on the inside of the desk.
Measure and cut to fit.
I ended up with a 45.00" x 32.75" for the back panel and 19.50" x 32.75" for each side panel.
-
Assemble Top Panel
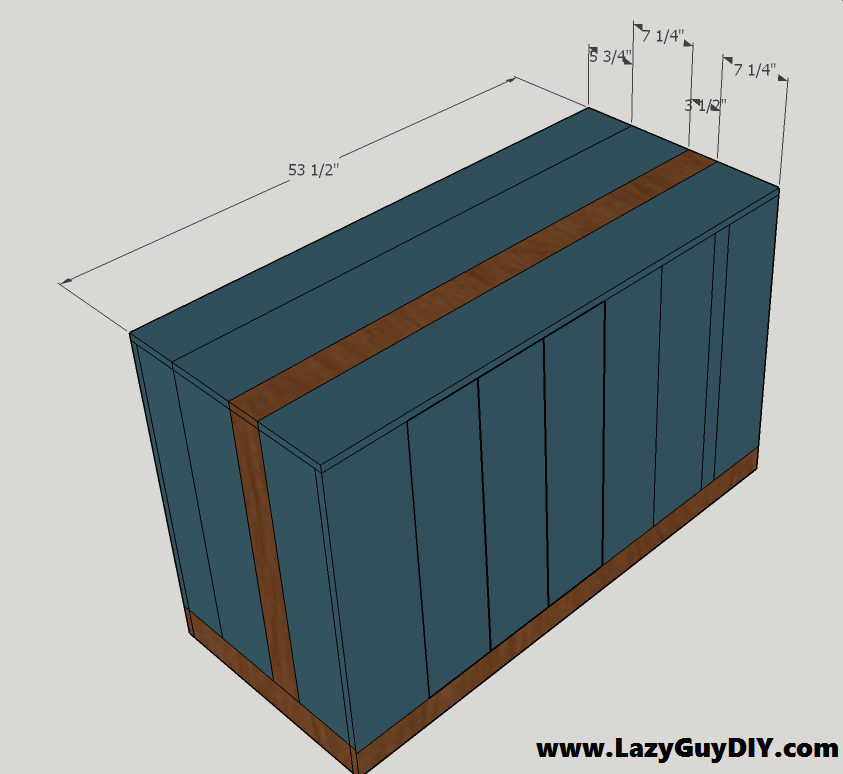
Cut your 1x4 insert first to length to cover desktop, it should be 53.50".
Cut the 1x8's to the same 53.50". The 3rd will need to be cut down to size to be flush with the front and back panels. Mine came out to be 5.57".
Line up your 1x4 insert first to make sure it spans the gap lining up with your side panels. Then using your Kreg Jig, create but joints to attach the desk top. Then attach to frame.
-
Storage Cart Assembly
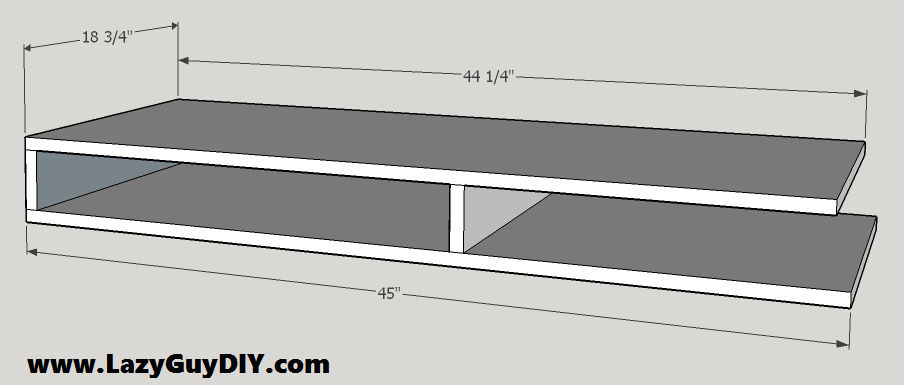
Cut 2 sheets of 3/4 plywood
18.75" x 44.25"
18.75" x 45.00"*Note, you might want to shorten both of these by an 1/8 to allow room for the cart to easily slide in and out of the desk.
1x4 x 18.75"
Using your Kreg Jig, attach the 1x4's between the 45 and 44.25 sheets of plywood. 45.00" to be on the bottom (soon to be on top, you'll flip it over eventually.
-
Storage Cart Middle Assembly
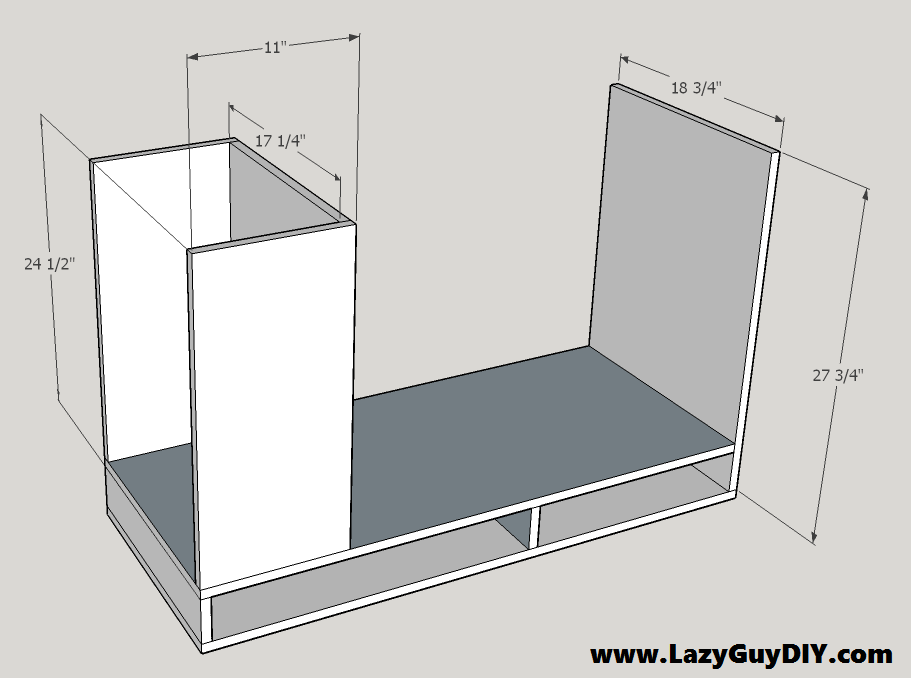
Cut 4 pieces of plywood:
- 18.75" x 27.75"
- 24.50" x 11.00" (2x)
- 24.50" x 17.25"Assemble as shown with pocket holes. Be Sure to also leave room to attach to the top built in the previous step.
-
Storage Cart Bottom
Cut sheet of 3/4" plywood 18.75" x 45.00". Or cut to fit flush on all edges.
Attach to cart.
With the bottom securely attached, also add the 2" swivel casters. Be sure to measure that the actual caster is 2" from wheel to frame. A caster listed as 2.00" is generally the wheel length, not the total height.
-
Attaching Back Panel
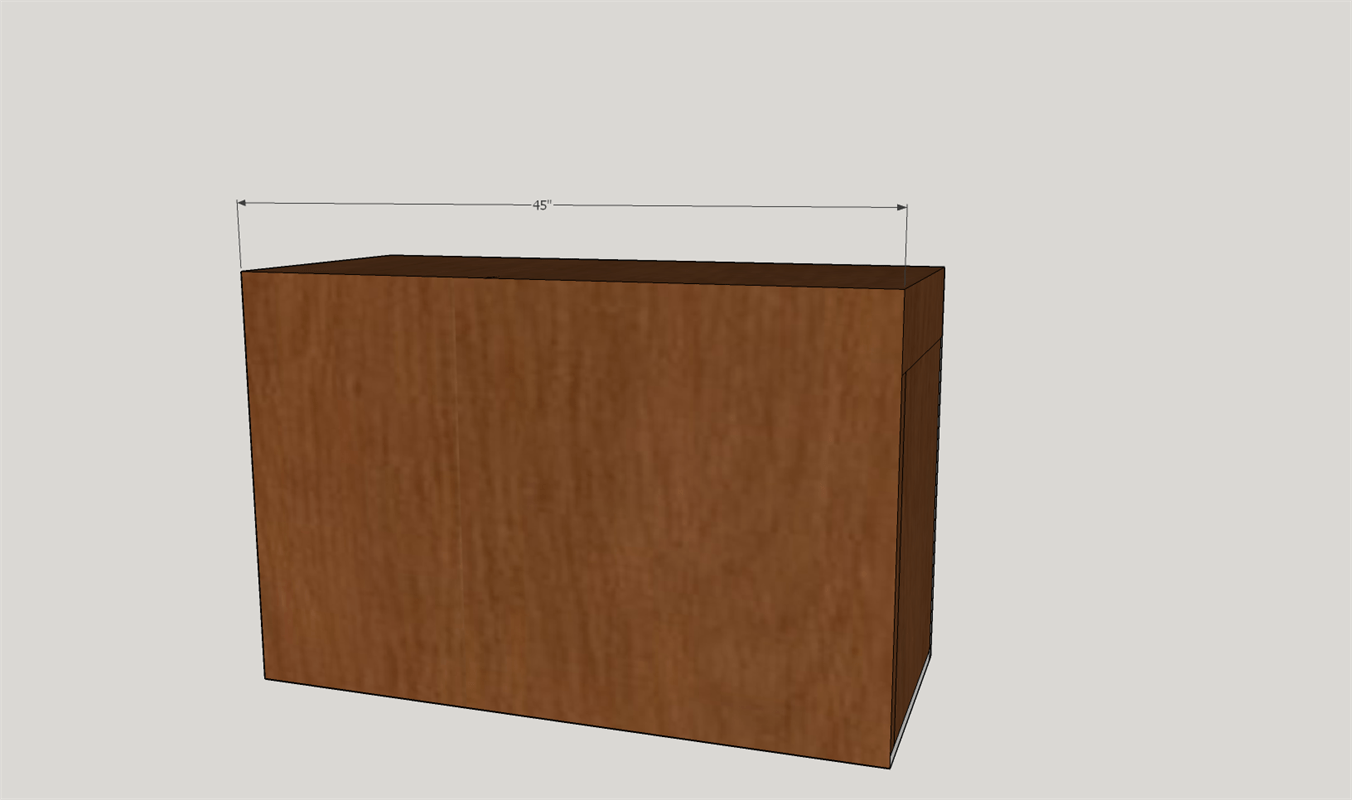
Measure from corner to corner on the back of the cart for the .50" plywood board. I cut mine at 45.00" x 30.75".
Attach to back making sure edges are flush.
-
False Drawer Fronts
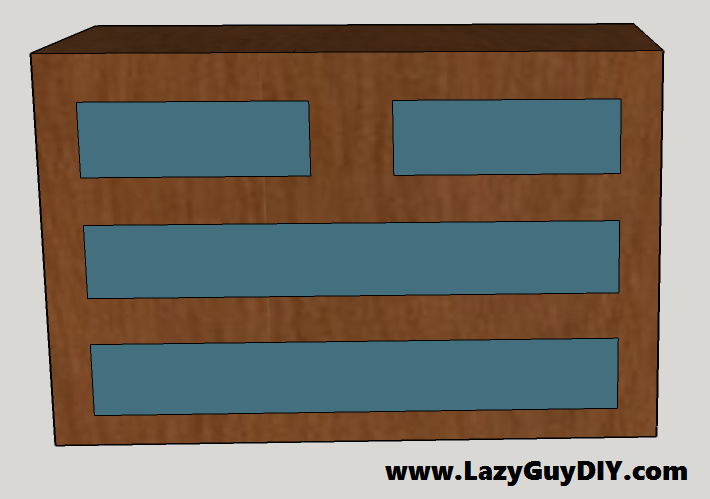
The false drawer fronts are personal preference.
We used 1x6's with 2 small drawers on the top and 2 larger on the bottom. We left a 3.00" gap on all sides and then a 3.5" gap between each drawer.


