

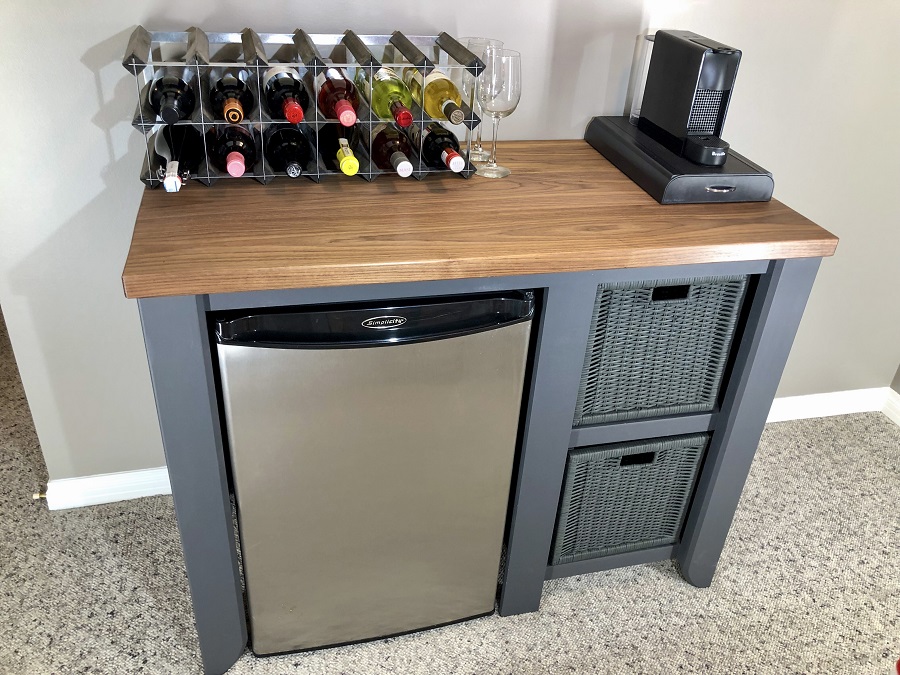
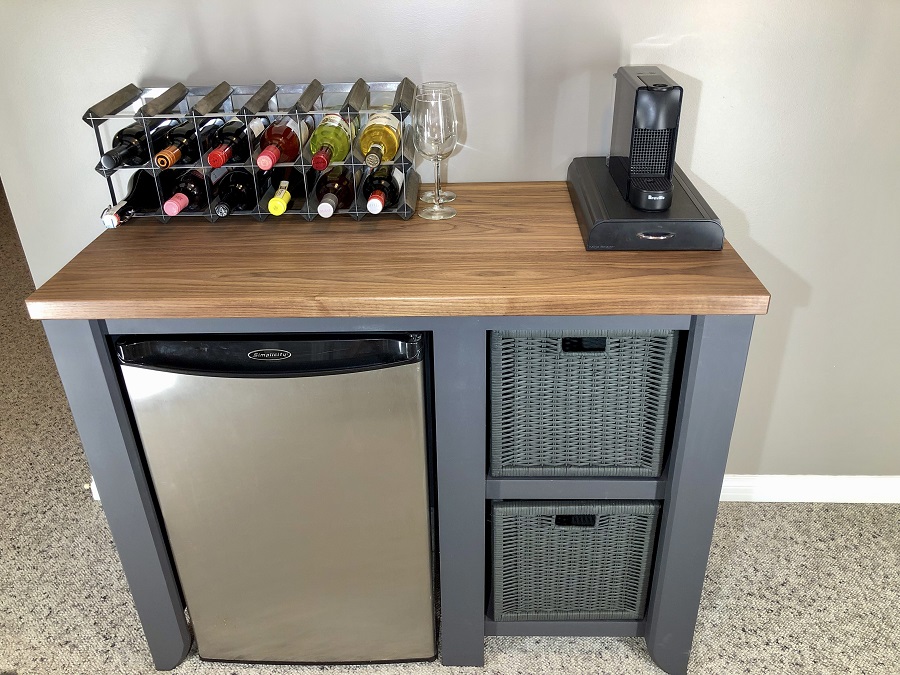
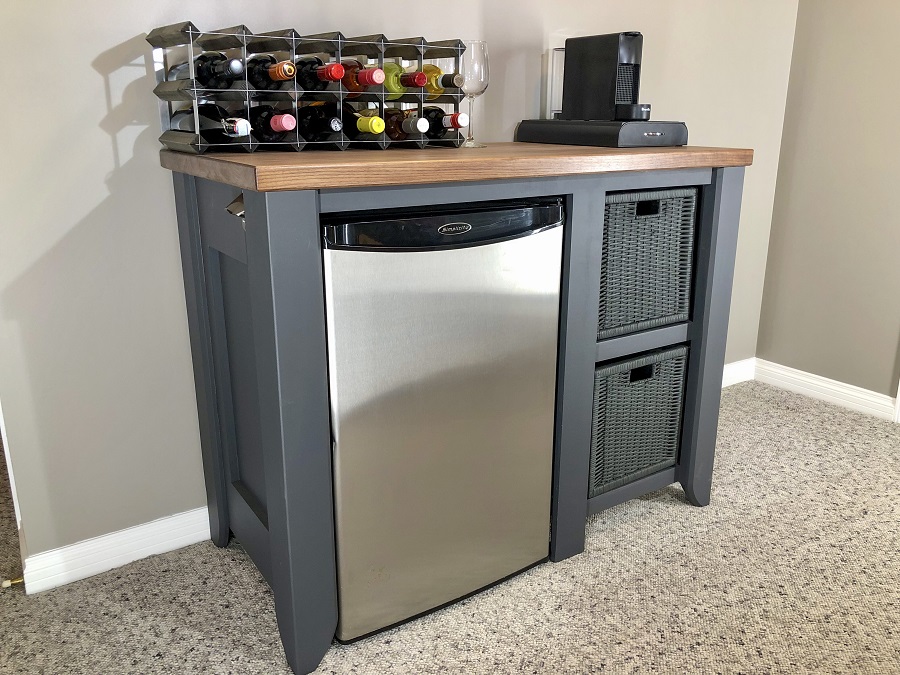

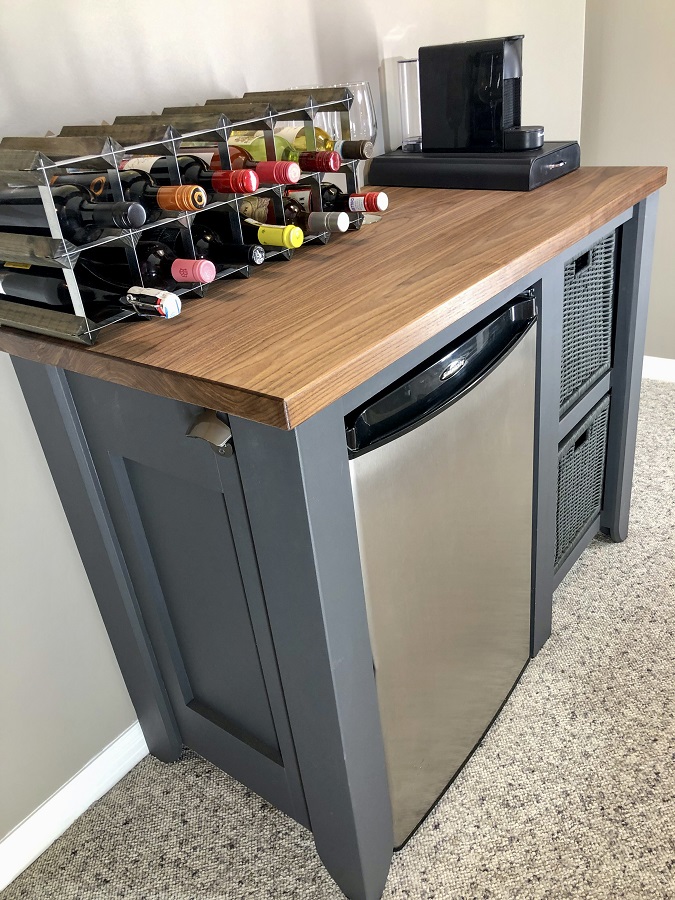


The perfect way to dress up that ugly minifridge and have everything you need on hand and cold. Coffee and Wine have never looked so good!
Tools
Kreg Tools


Other Tools
-
Miter saw

-
Tape Measure
-
Clamps
Materials
Wood Products
- 1 1/2 sheet plywood , 1/4"
- 1 Walnut board , 2x6x16'
- 1 Aspen board , 1x4x29'
- 1 Aspen board , 1x6x14'
- 1 Aspen board , 1x2x24'
Hardware & Supplies
- 1 Paint
- 1 Paint brush
- 1 Wood glue
Directions
-
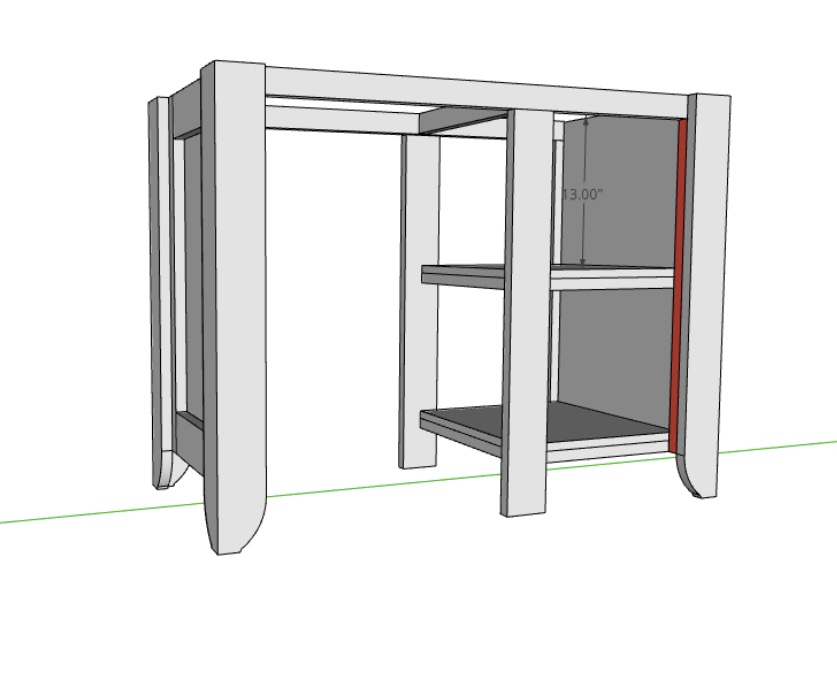
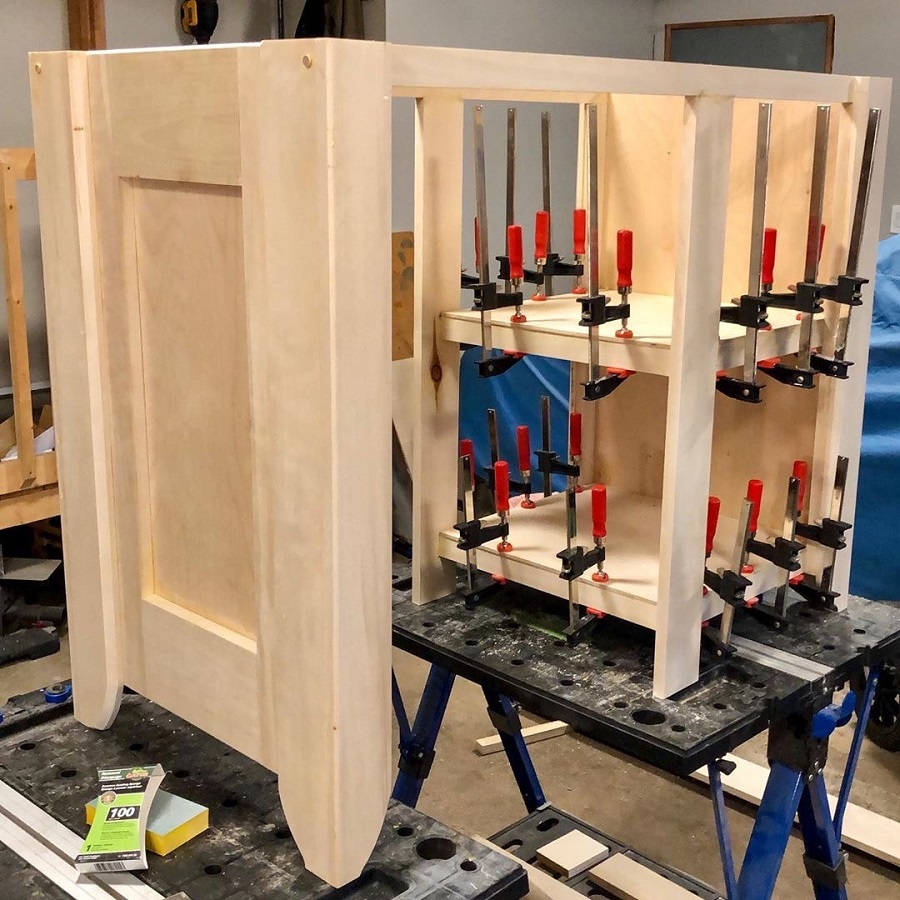
Legs
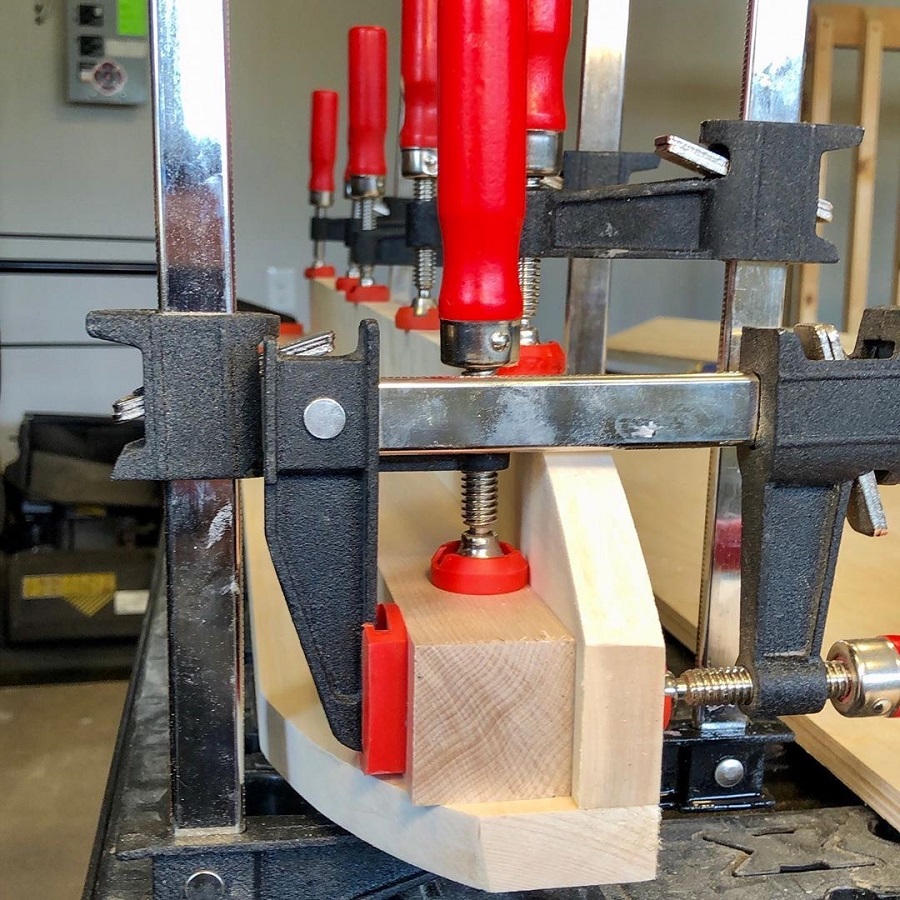
Create the outside part of the legs by cutting four 1x4 pieces to 34.5". You can use normal cuts or add a curve and a routered edge as I did. Glue two of the 1x4 pieces edge to edge. You can use pocket holes or just glue for this part. (tip Use a scrap 2x2 block to glue them together straight like in the photo)
-
Side Panels
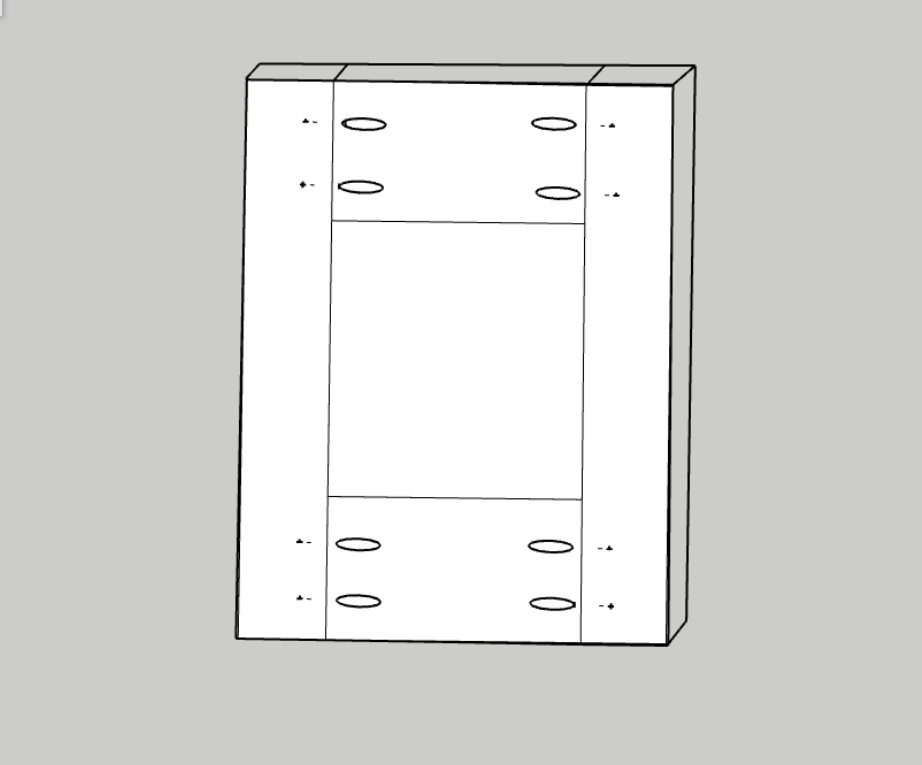
While the legs dry, build the side Panels. Attach the 9" 1x6 pieces to the 31.5" 1x6's using a pocket hole jig to form a frame. I highly recommend the 720Pro to speed up the process. Once you have a square made from 1x6's. Cut two pieces of plywood to 20 x 31.5" and cover the back of the entire panel in 1/4" plywood. (The plywood will cover the pocket holes).
-
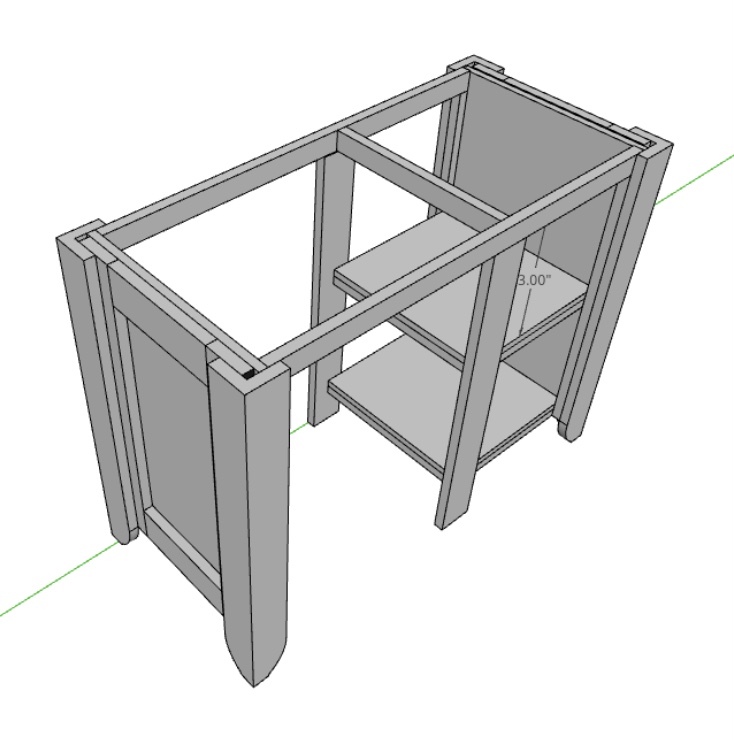
Attach Legs
Attach the legs to the side panels. Glue the inside of the 1x4 legs to the outside of the panels keeping the tops flush with one another. The legs will cover some of the vertical 1x6 face and stick out over the sides. Clamp the wood tight and let it dry.
-
Cross Braces
Cut two pieces of 1x2 to 41 3/4". Once again using pocket holes attach either end of the 2x1 to the inside corners of the panels standing them up.The 2x1 braces will sit flush with the top inside the legs against the back of the panels. At this point you should have a frame standing up.
-
Center Brace
At this point double check the dimensions of your fridge. My fridge needed a space of 21.5" but different fridges have different widths. Using two pieces of 1x4 and some pocket holes attach the center brace legs to the underside of the 1x2 top cross braces. These braces should leave a 13.5" space for the baskets on one side and a 21.5" space on the other side for the fridge. These will act as the center legs.
-
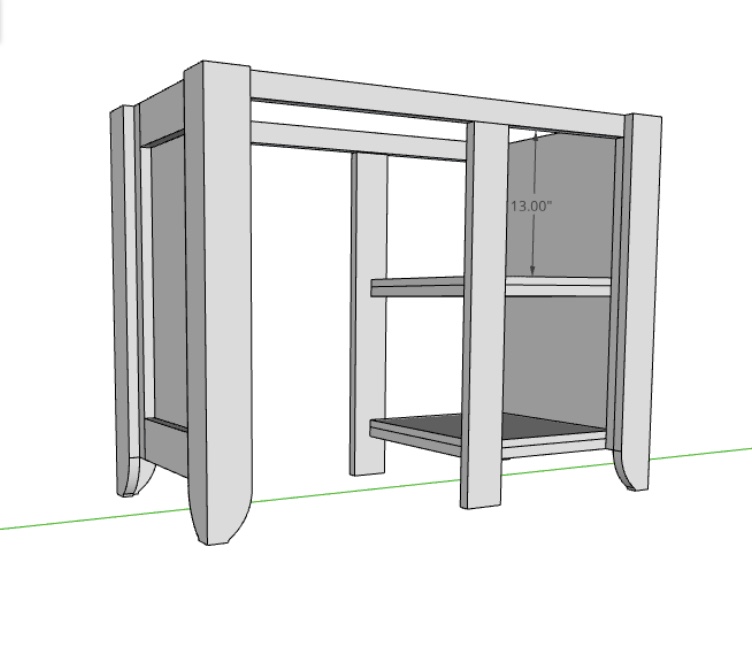
Shelf Filler
In the space where the shelves go to the right of the center brace you will need to add a piece of 1x2 to keep the shelves even with the legs. Cut two 30" pieces of 1x2 and glue them inside the legs on the right side of the cabinet. Keep them flush with the outside edges of the legs.
-
Shelves
Build the basket shelves. My measurements are made for IKEA baskets to fit snug, but you can change the size based on your desired baskets. Cut four 18 3/4" 1x2's and four 17" 1x2's. These pieces will be used to build the bases of the shelves. Attach them to the inside of the panels and back side of the center braces to form a square. Cover the squares by gluing down a piece of 18 3/4 x 17" 1/4" plywood on top of the square. Clamp and allow to dry.
-
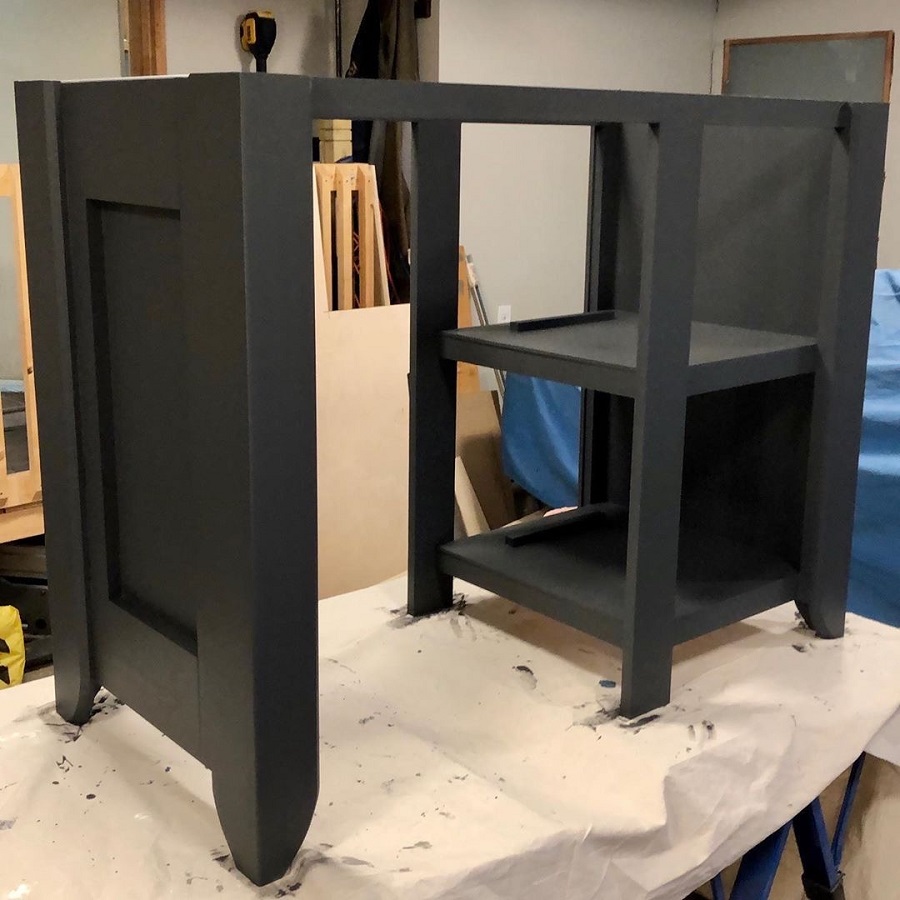
Paint
Sand down any rough spots and paint or stain the base your desired color and finish.
-
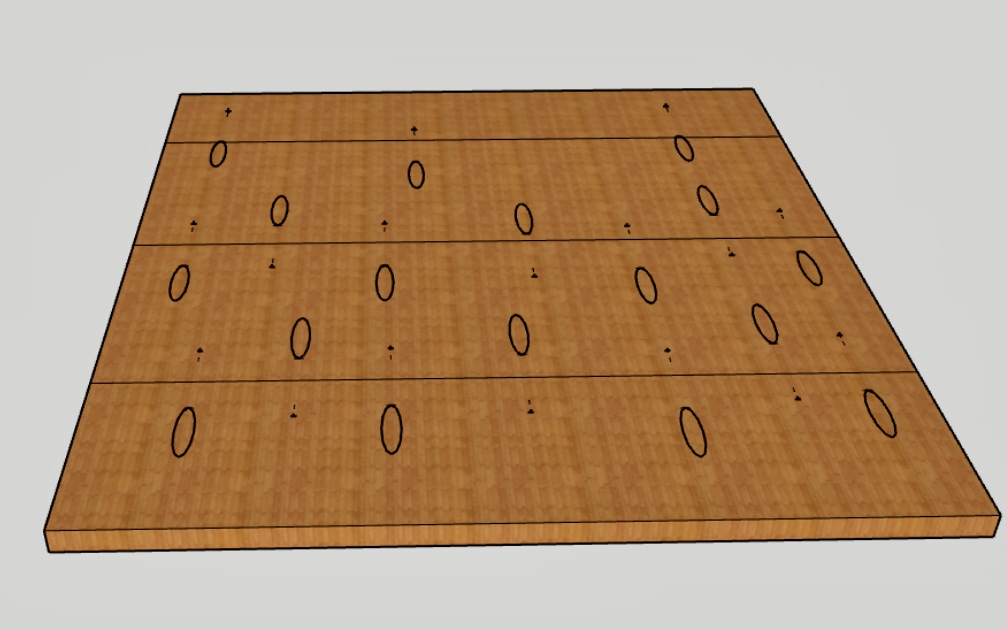
Build the Top
Assemble the top. I used 2" walnut but any type of wood can be used. Cut 4 pieces of 2 x 8 at 46 1/2" in length and drill pocket holes on the bottom of all of them. attach the pieces together using glue and pull them together with the pocket screws. Once dry, trim the entire top using a table or circular saw to 22 1/2" deep. This will give the top roughly a half inch overhang in the front.
-
Finish
Attach the top by drilling more pocket holes on the inside top of the side panels. Place the top over the base, ensure its square and attach it to the base with pocket screws.
-
Enjoy
Add the fridge, baskets, coffee and some wine and enjoy.