Farmhouse Storage Bench
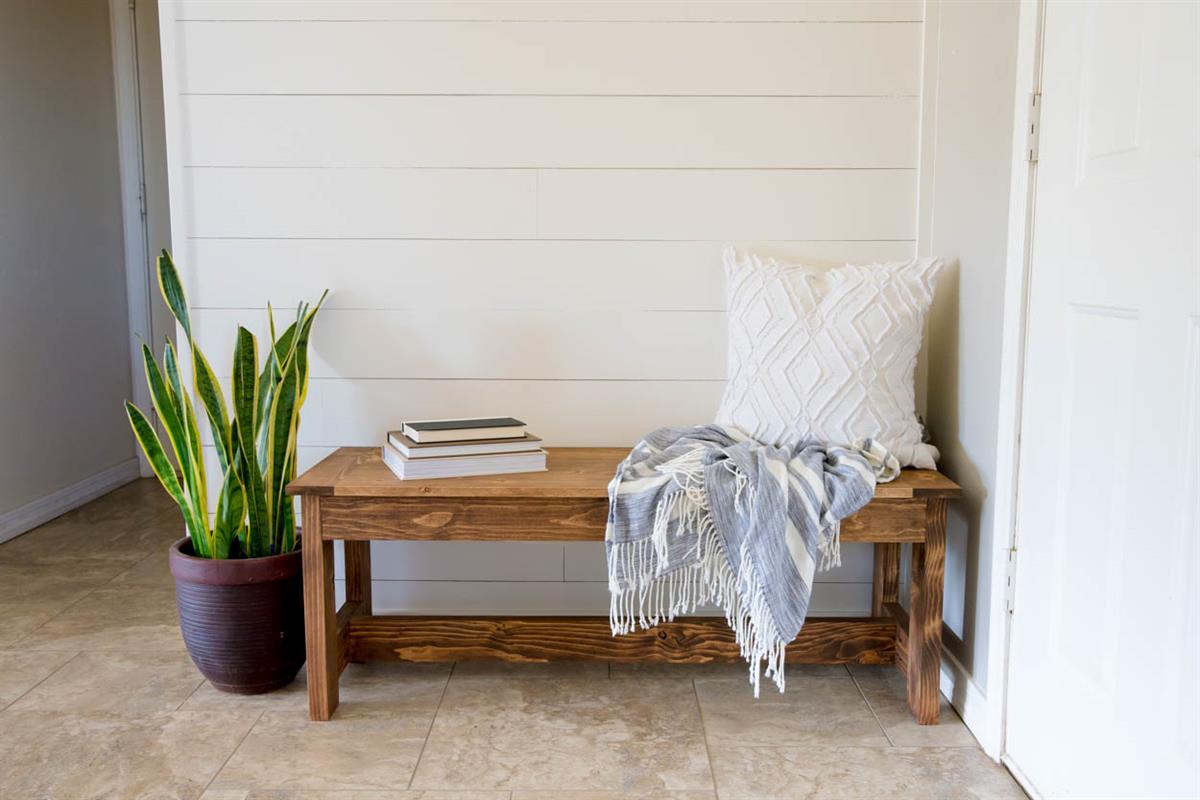
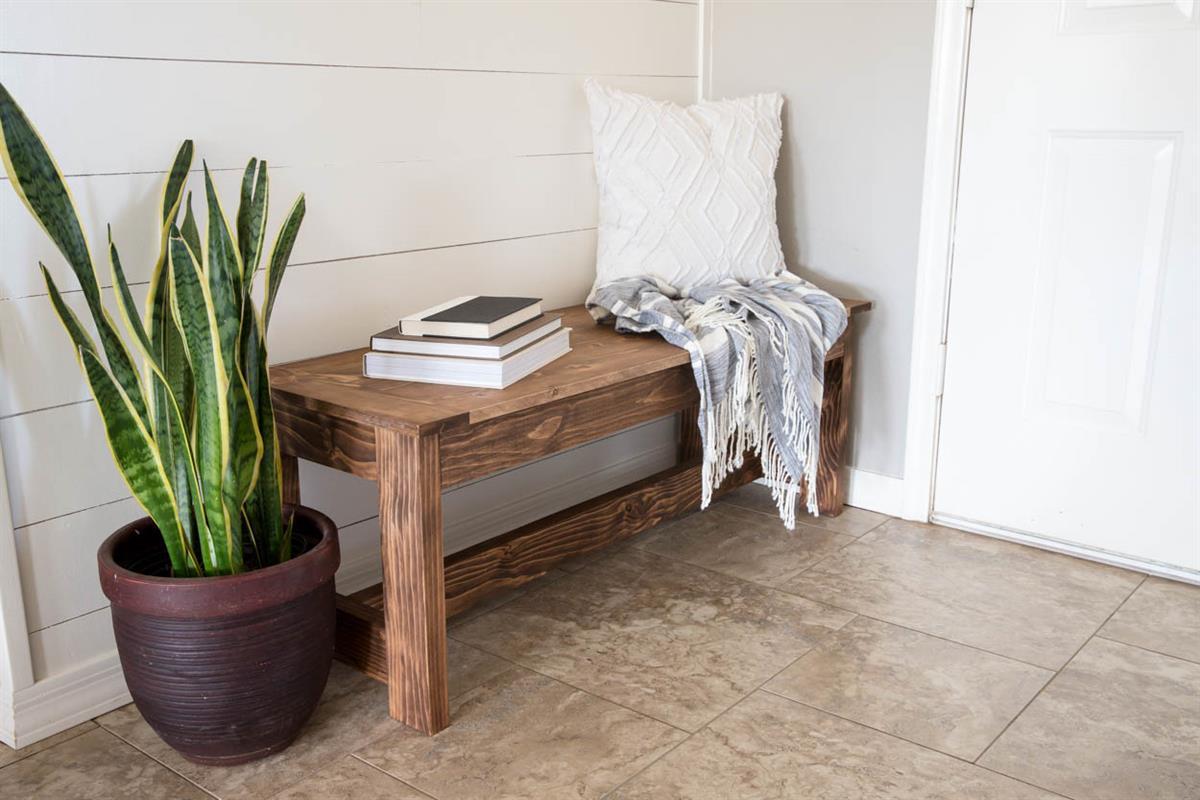
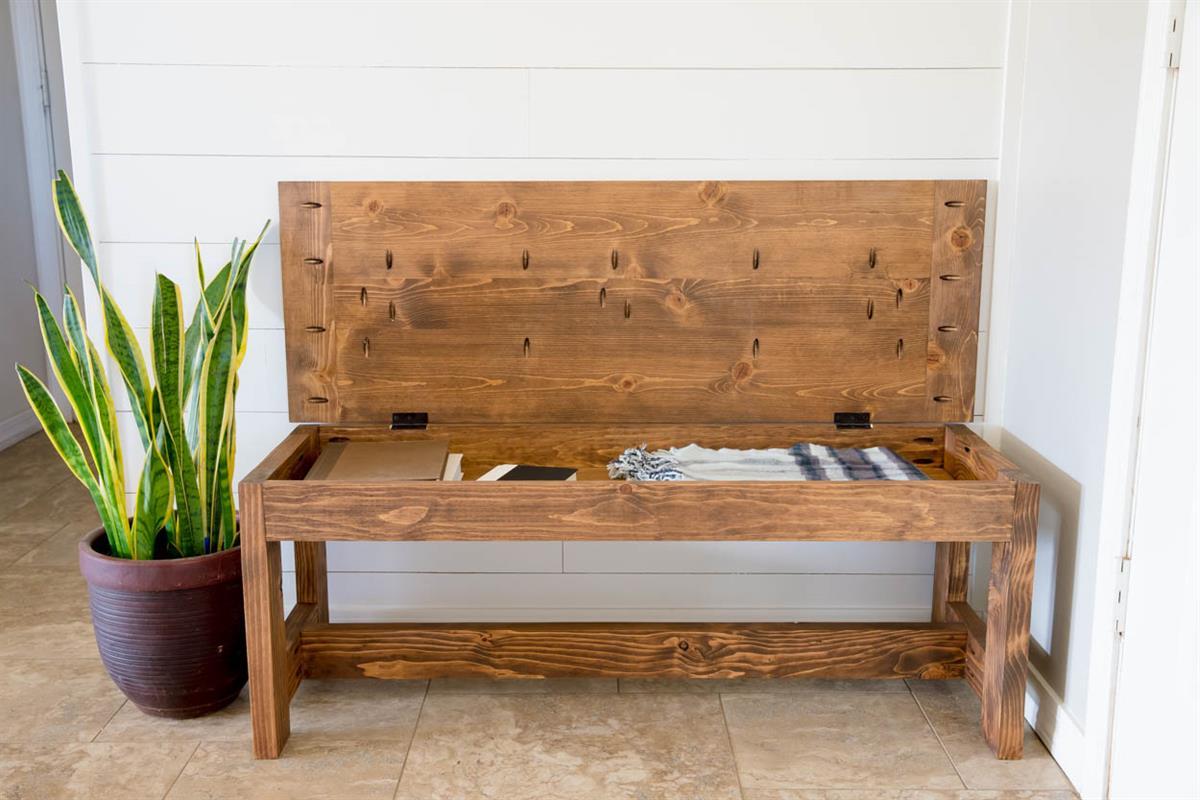
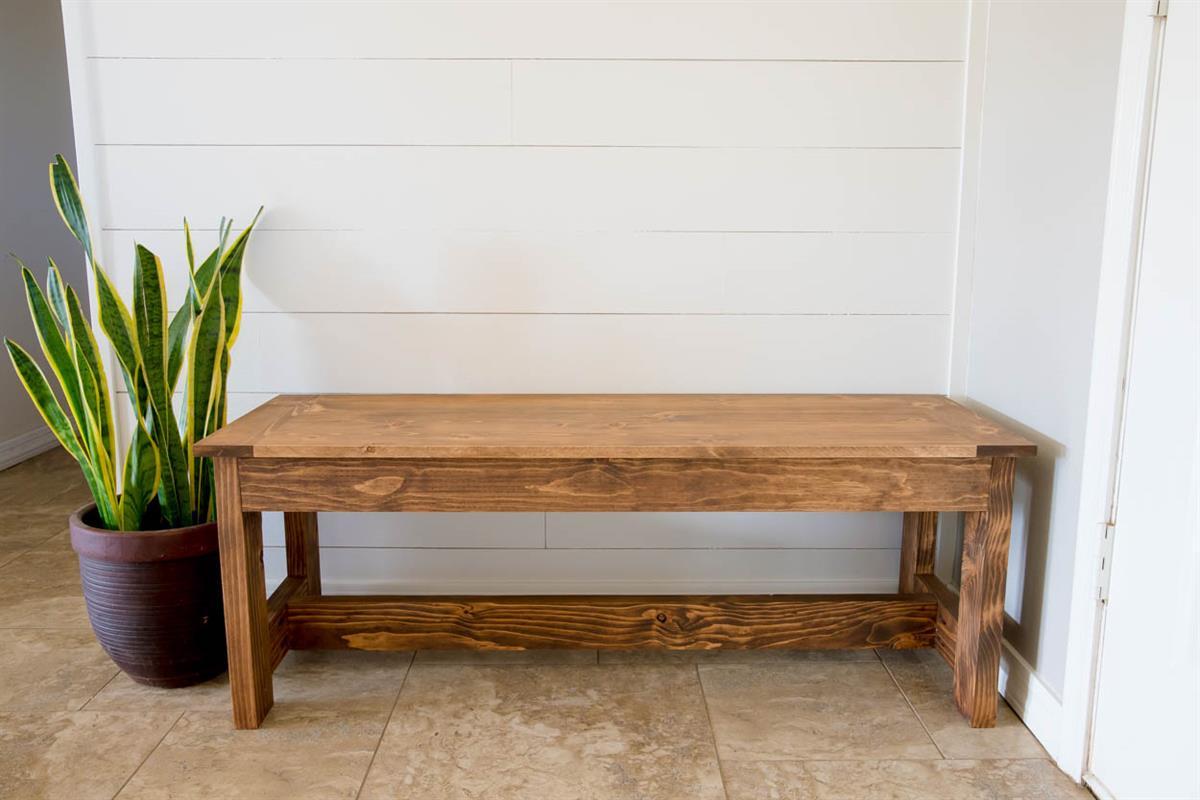
By Addicted 2 DIYThis farmhouse storage bench is a great addition under a window or in your entryway. It can also be lengthened and used as a dining table bench! This project is built from a 2×4 base, which can be done with standard 2×4 lumber, or use the Adaptive Cutting System to make your own 2×4 boards.
Directions
-
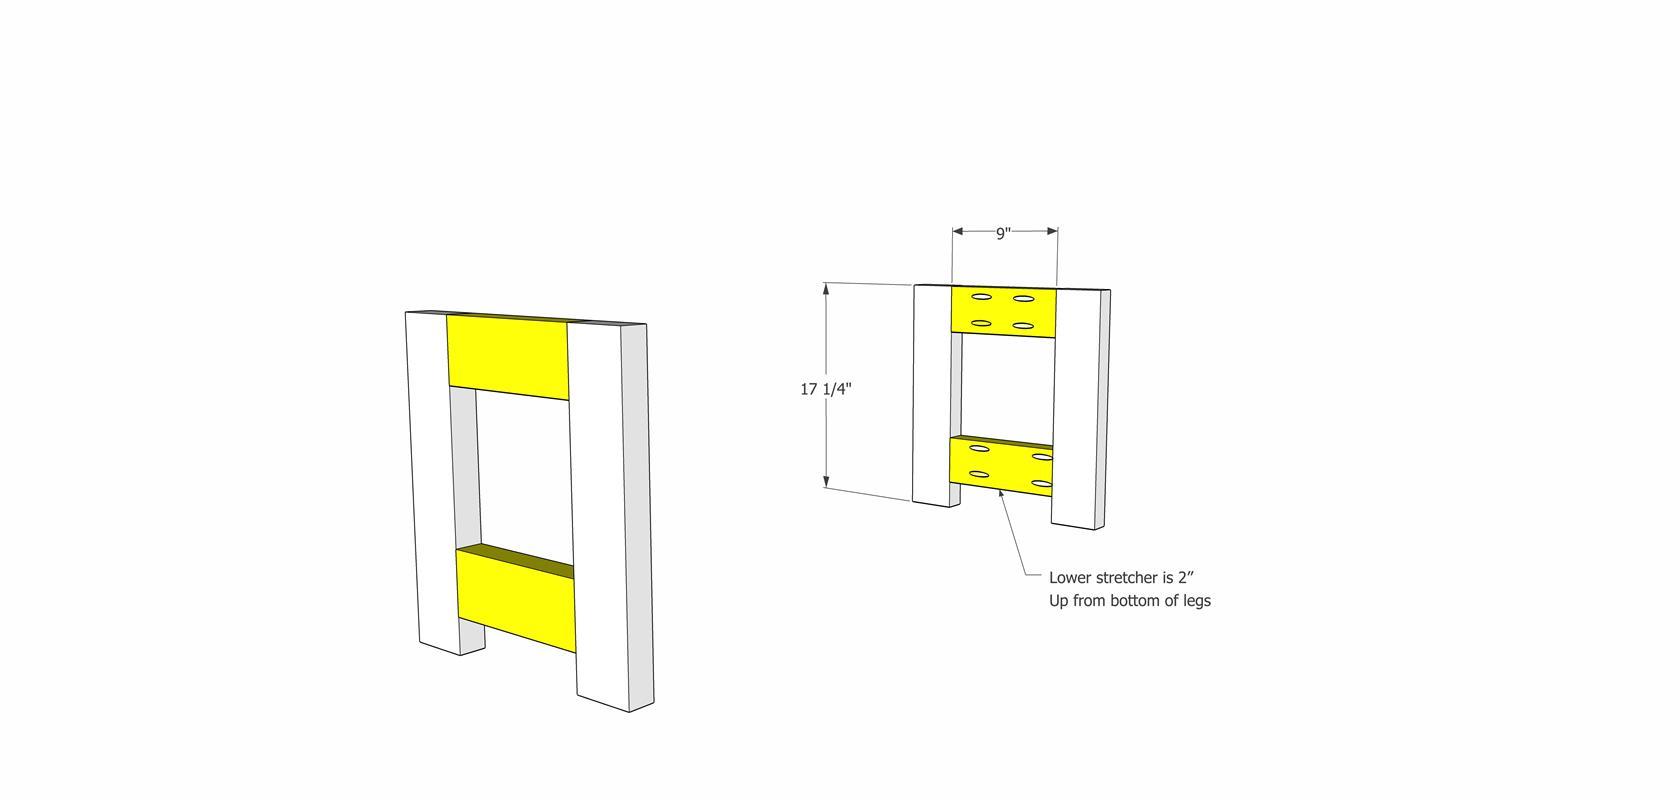
Assemble the legs
Drill 1 1/2" pocket holes into the four stretchers for each side of the bench. Attach with wood glue and 2 1/2" pocket screws.
-
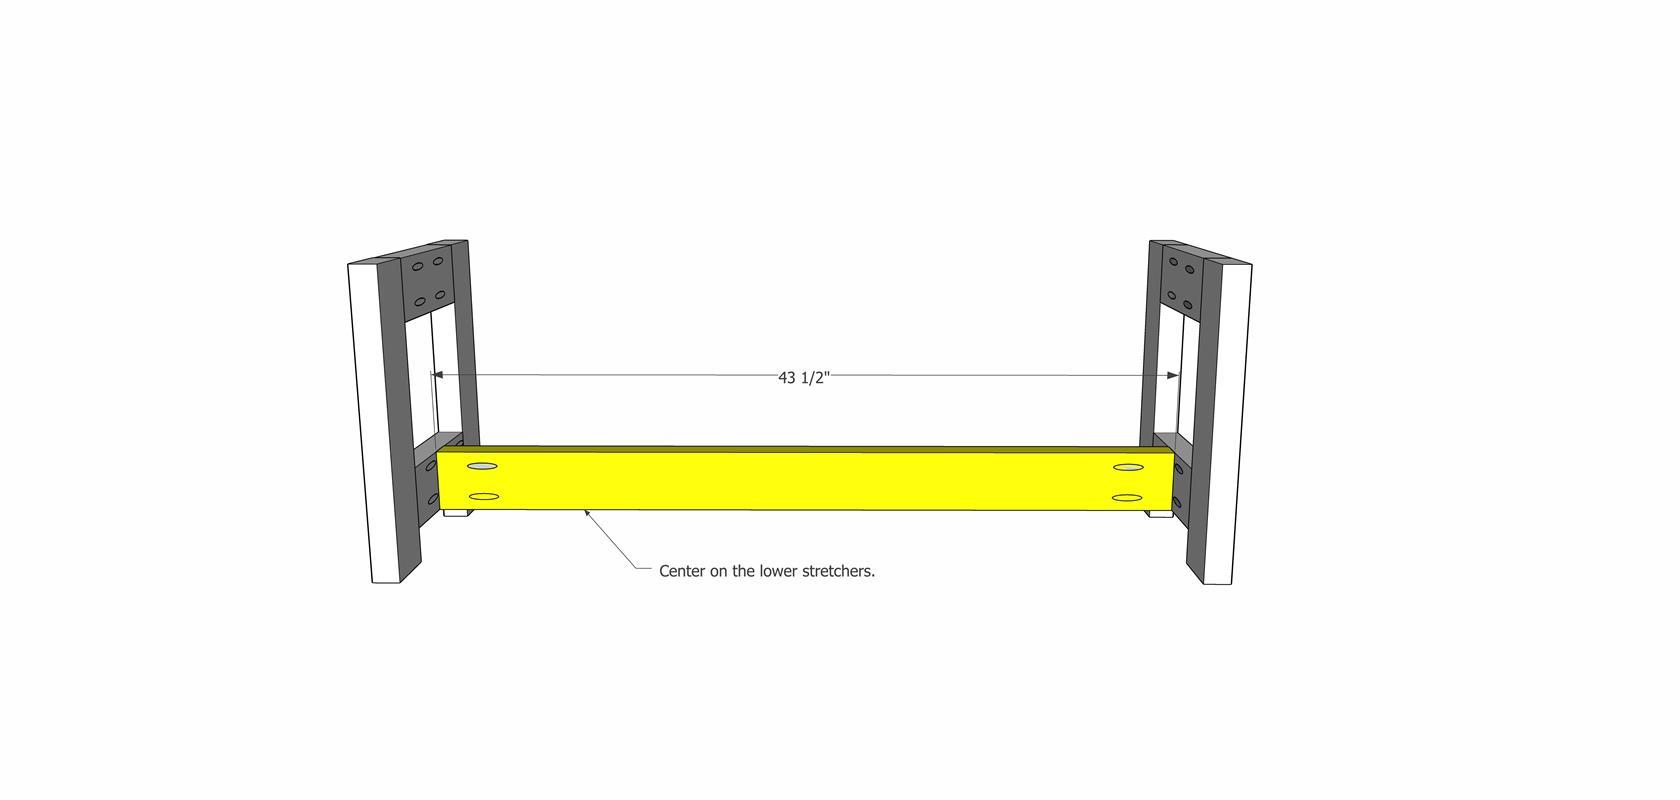
Attach the lower stretcher
Drill 1 1/2" pocket holes into the lower 2x4 stretcher. Center it between the legs and attach with wood glue and 2 1/2" pocket screws.
-
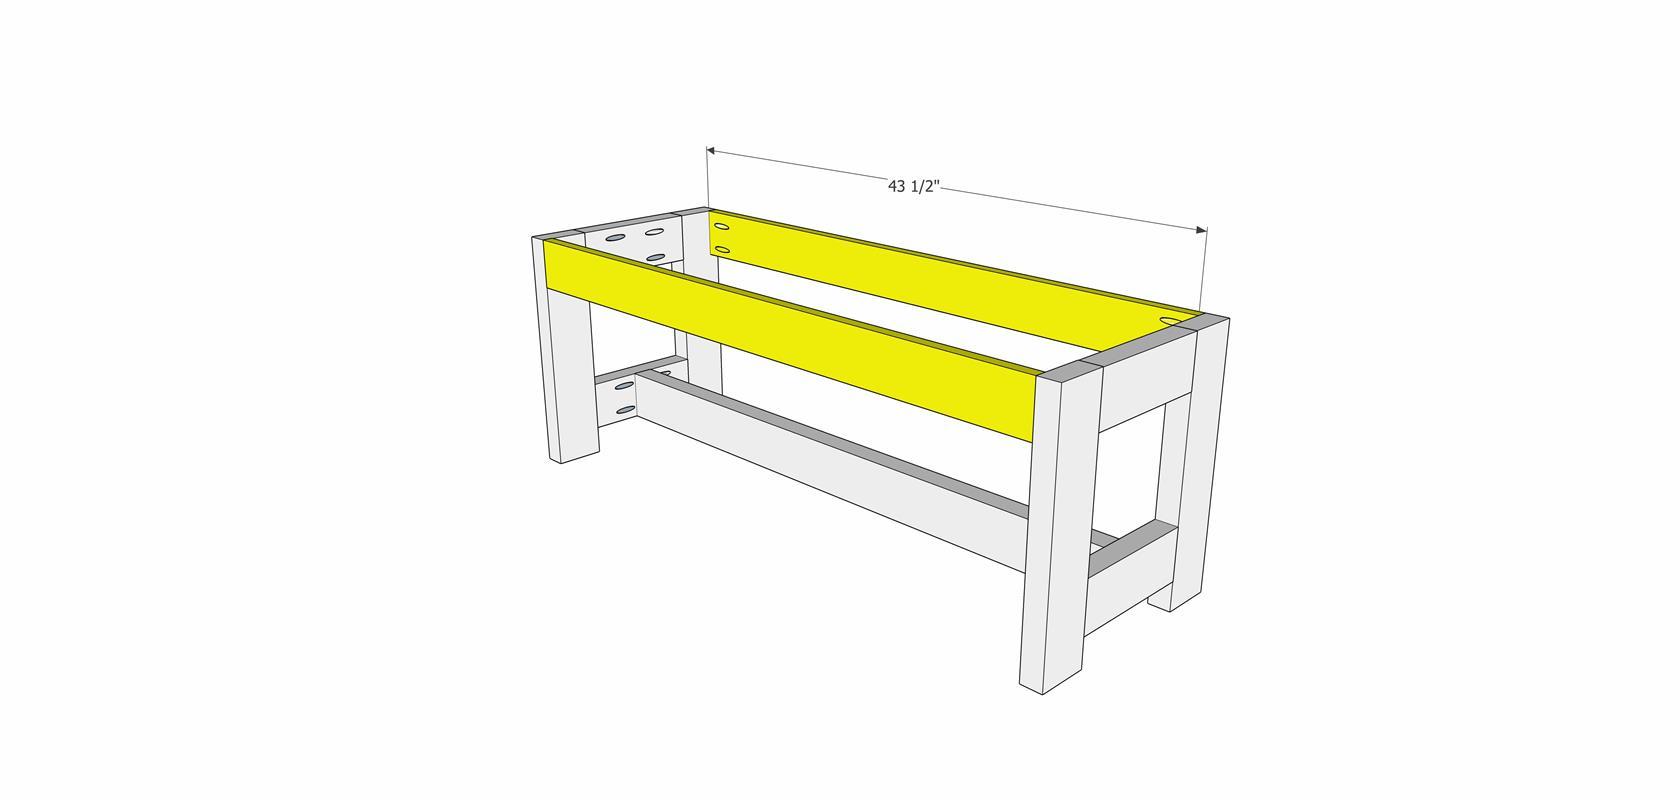
Add the aprons
Attach the 1x4 aprons to the front and back edges of the legs, flush with the top. Drill 3/4" pocket holes into each end and attach with wood glue and 1 1/4" pocket screws.
-
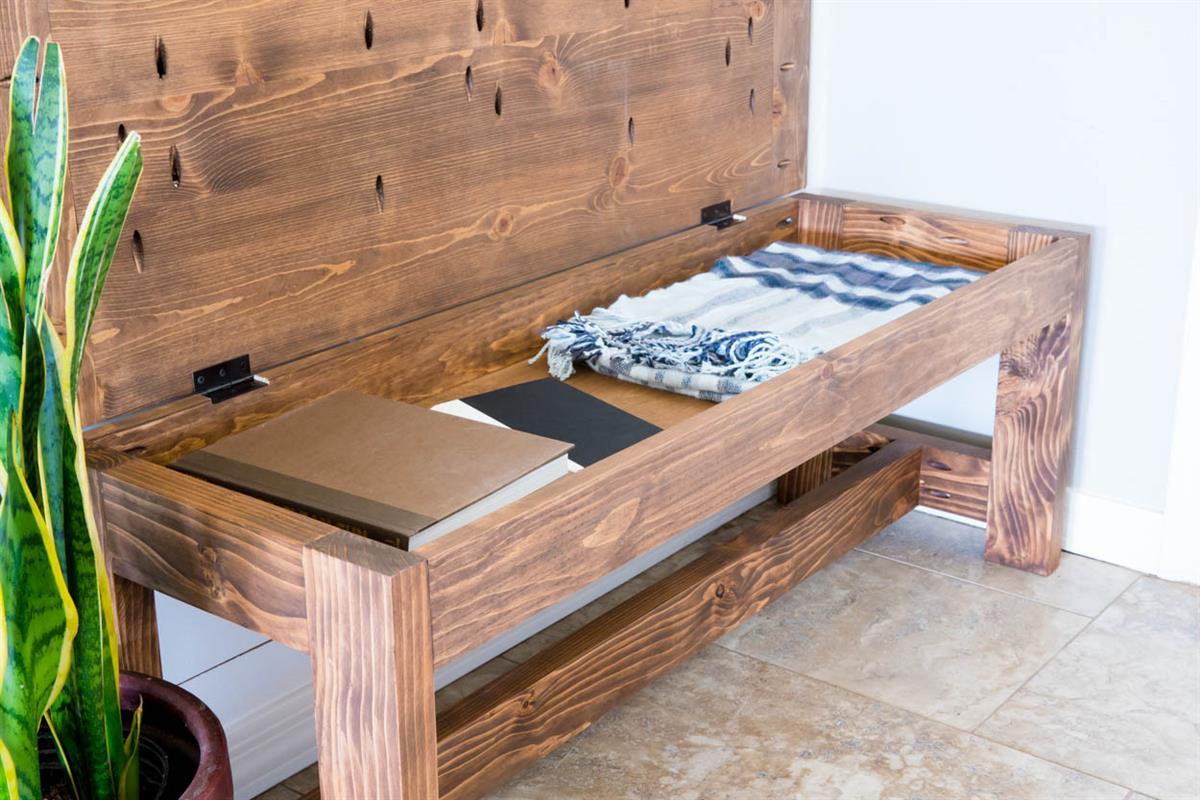
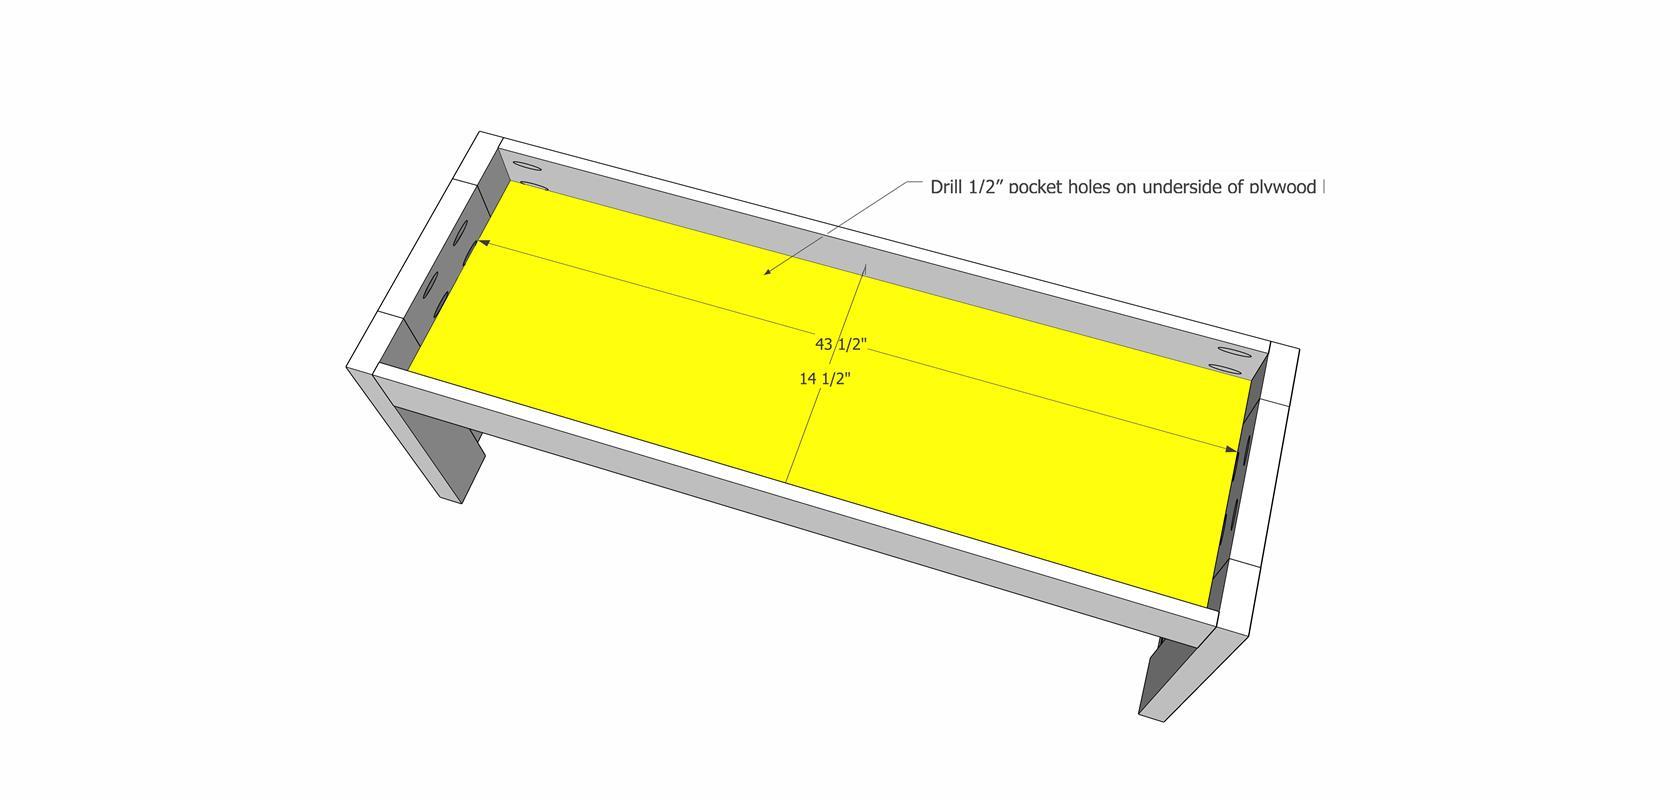
Attach the plywood bottom
Drill 1/2" pocket holes into the 1/2 plywood that will make up the storage compartment bottom. Attach flush with the bottom edge of the 1x4 and 2x4 frame pieces with 1" pocket screws.
-
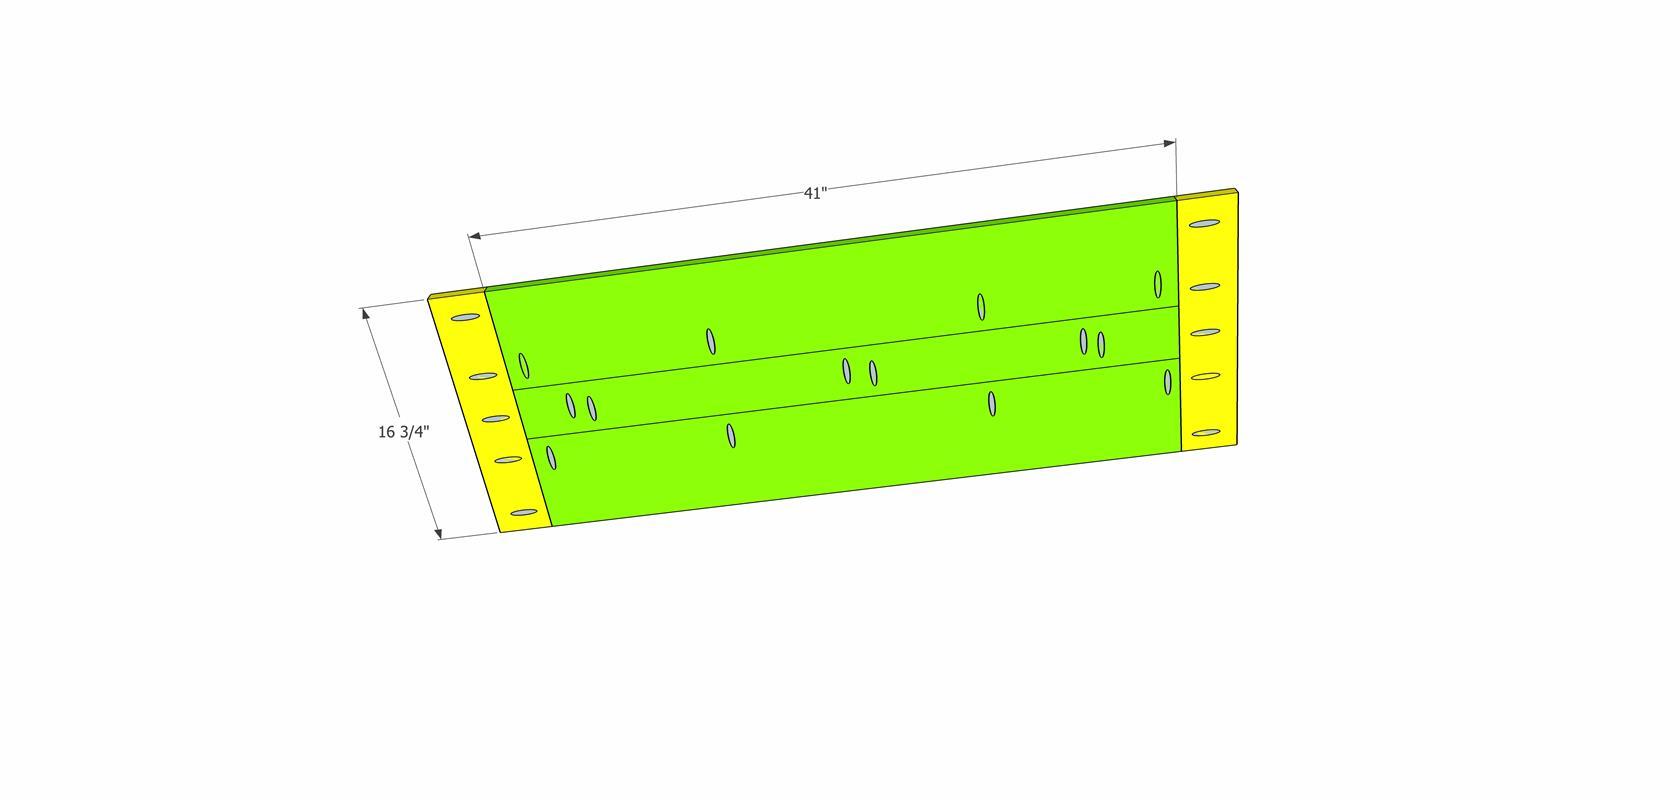
Build the bench seat
Use a table saw or the adaptive cutting system to rip two 1x8 boards down to 6 5/8" widths. Cut to size and drill 3/4" pocket holes into the three long boards as well as the breadboard ends. Attach together with wood glue and 1 1/4" pocket screws.
-
Sand and finish
Sand the entire project down to 220 grit with an orbital sander or by hand. Finish as desired with paint or stain.
-
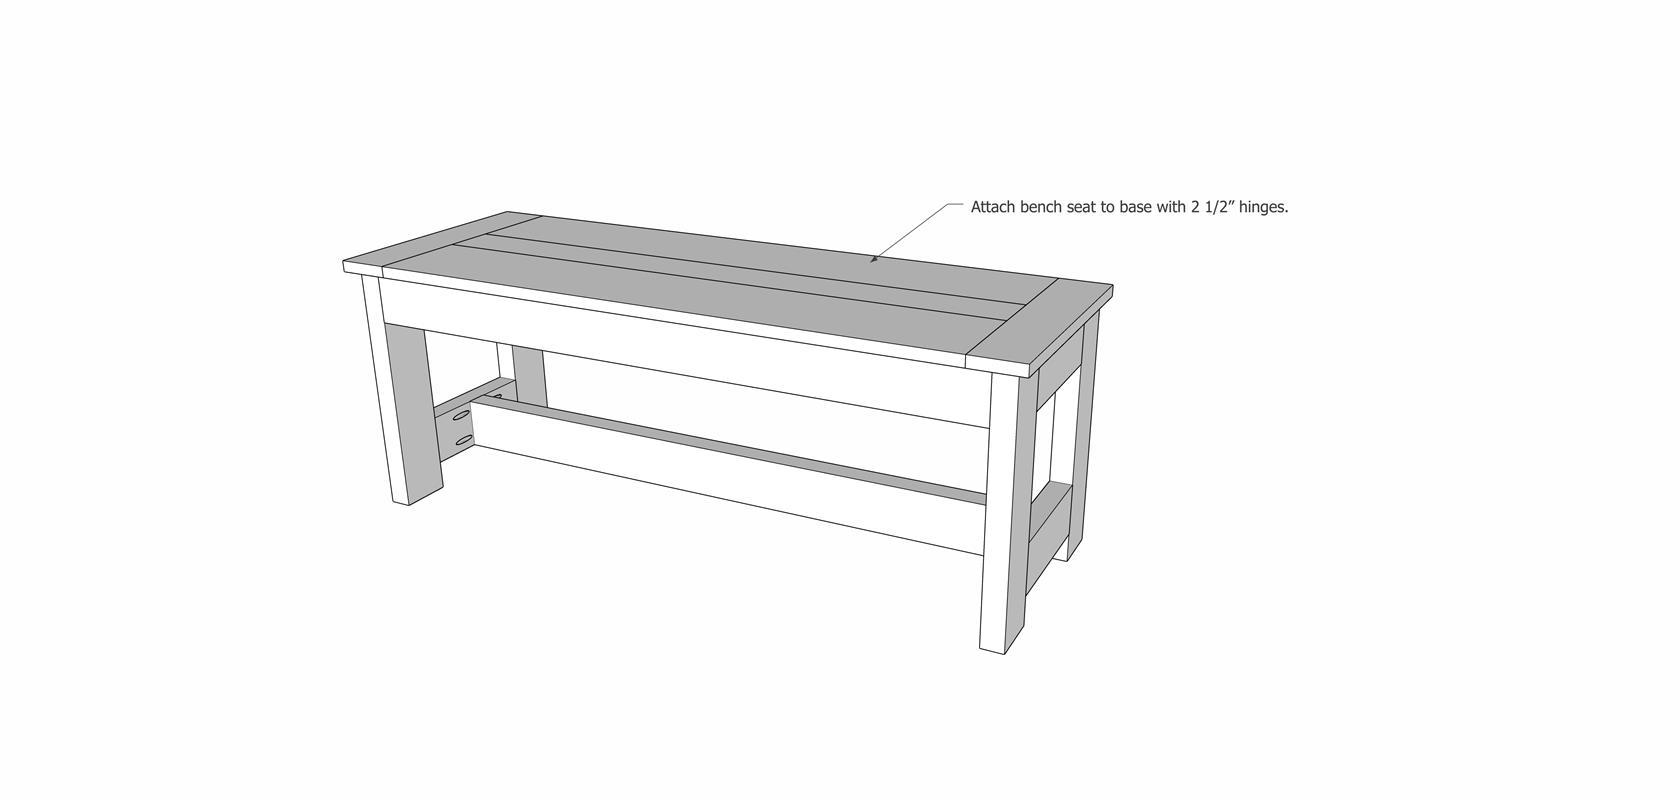
Attach the bench seat
Using 2 1/2" middle hinges, attach the bench seat to the base. Mark the location of the hinges and trace the outside edges with a pencil into the top of the base. Using a chisel and mallet, make a mortise into the wood deep enough for the hinges to fit into and the bench seat to sit flush with the top of the base (approx 1/8").


