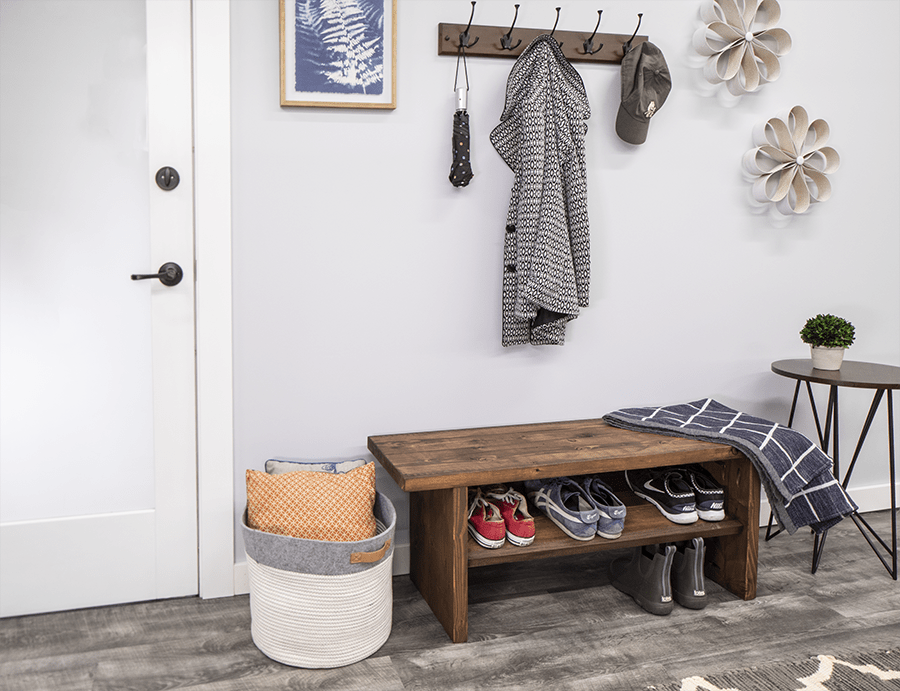
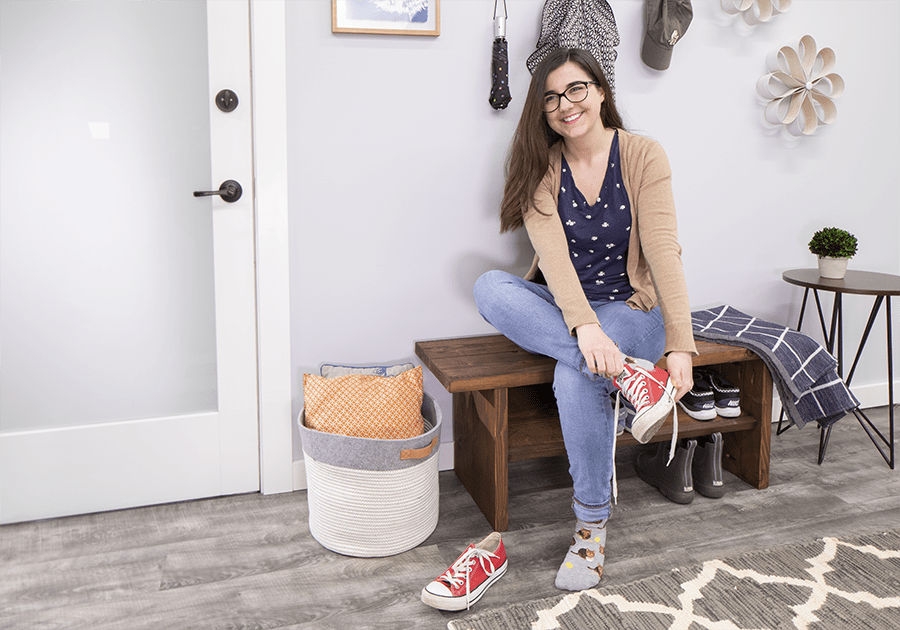
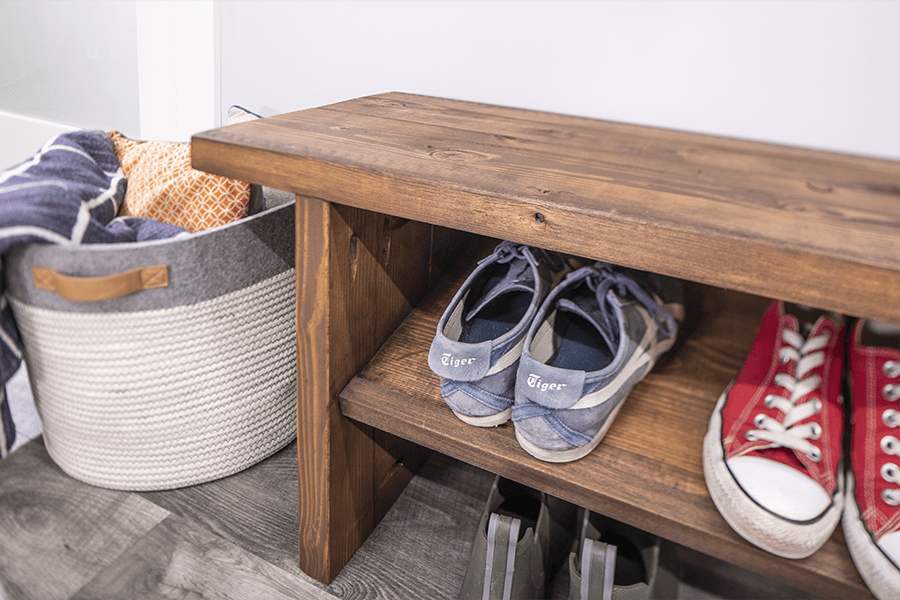

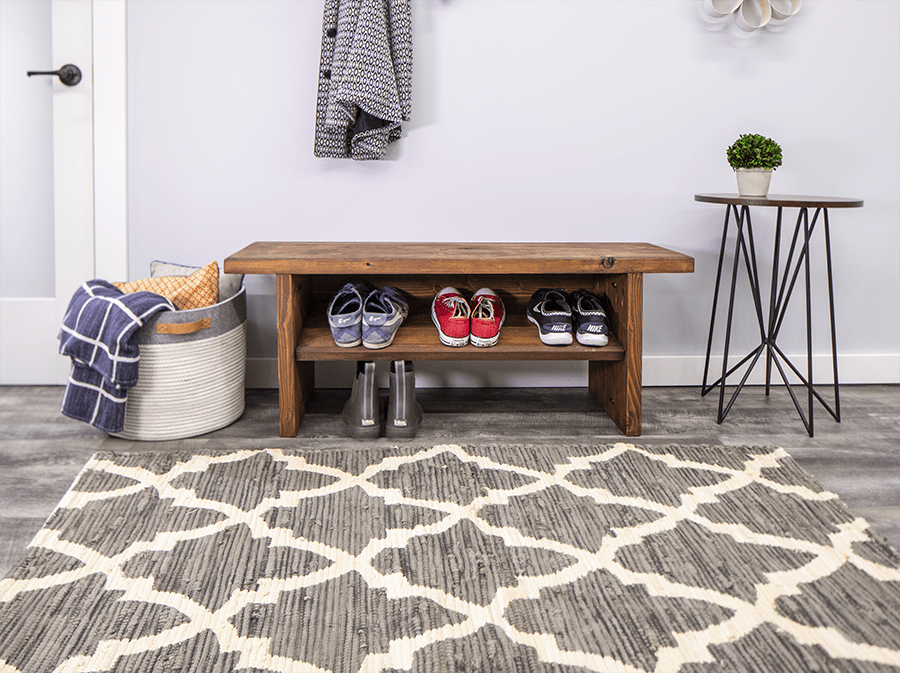


Upgrade your entryway with style and storage with this great-looking bench that you can build for less than $30 in lumber. The bench is made from two 2x8s, a 1x12, and a square dowel. Pocket-hole construction makes it simple to put together, and the design is perfect for a rustic, farmhouse look.
Tools
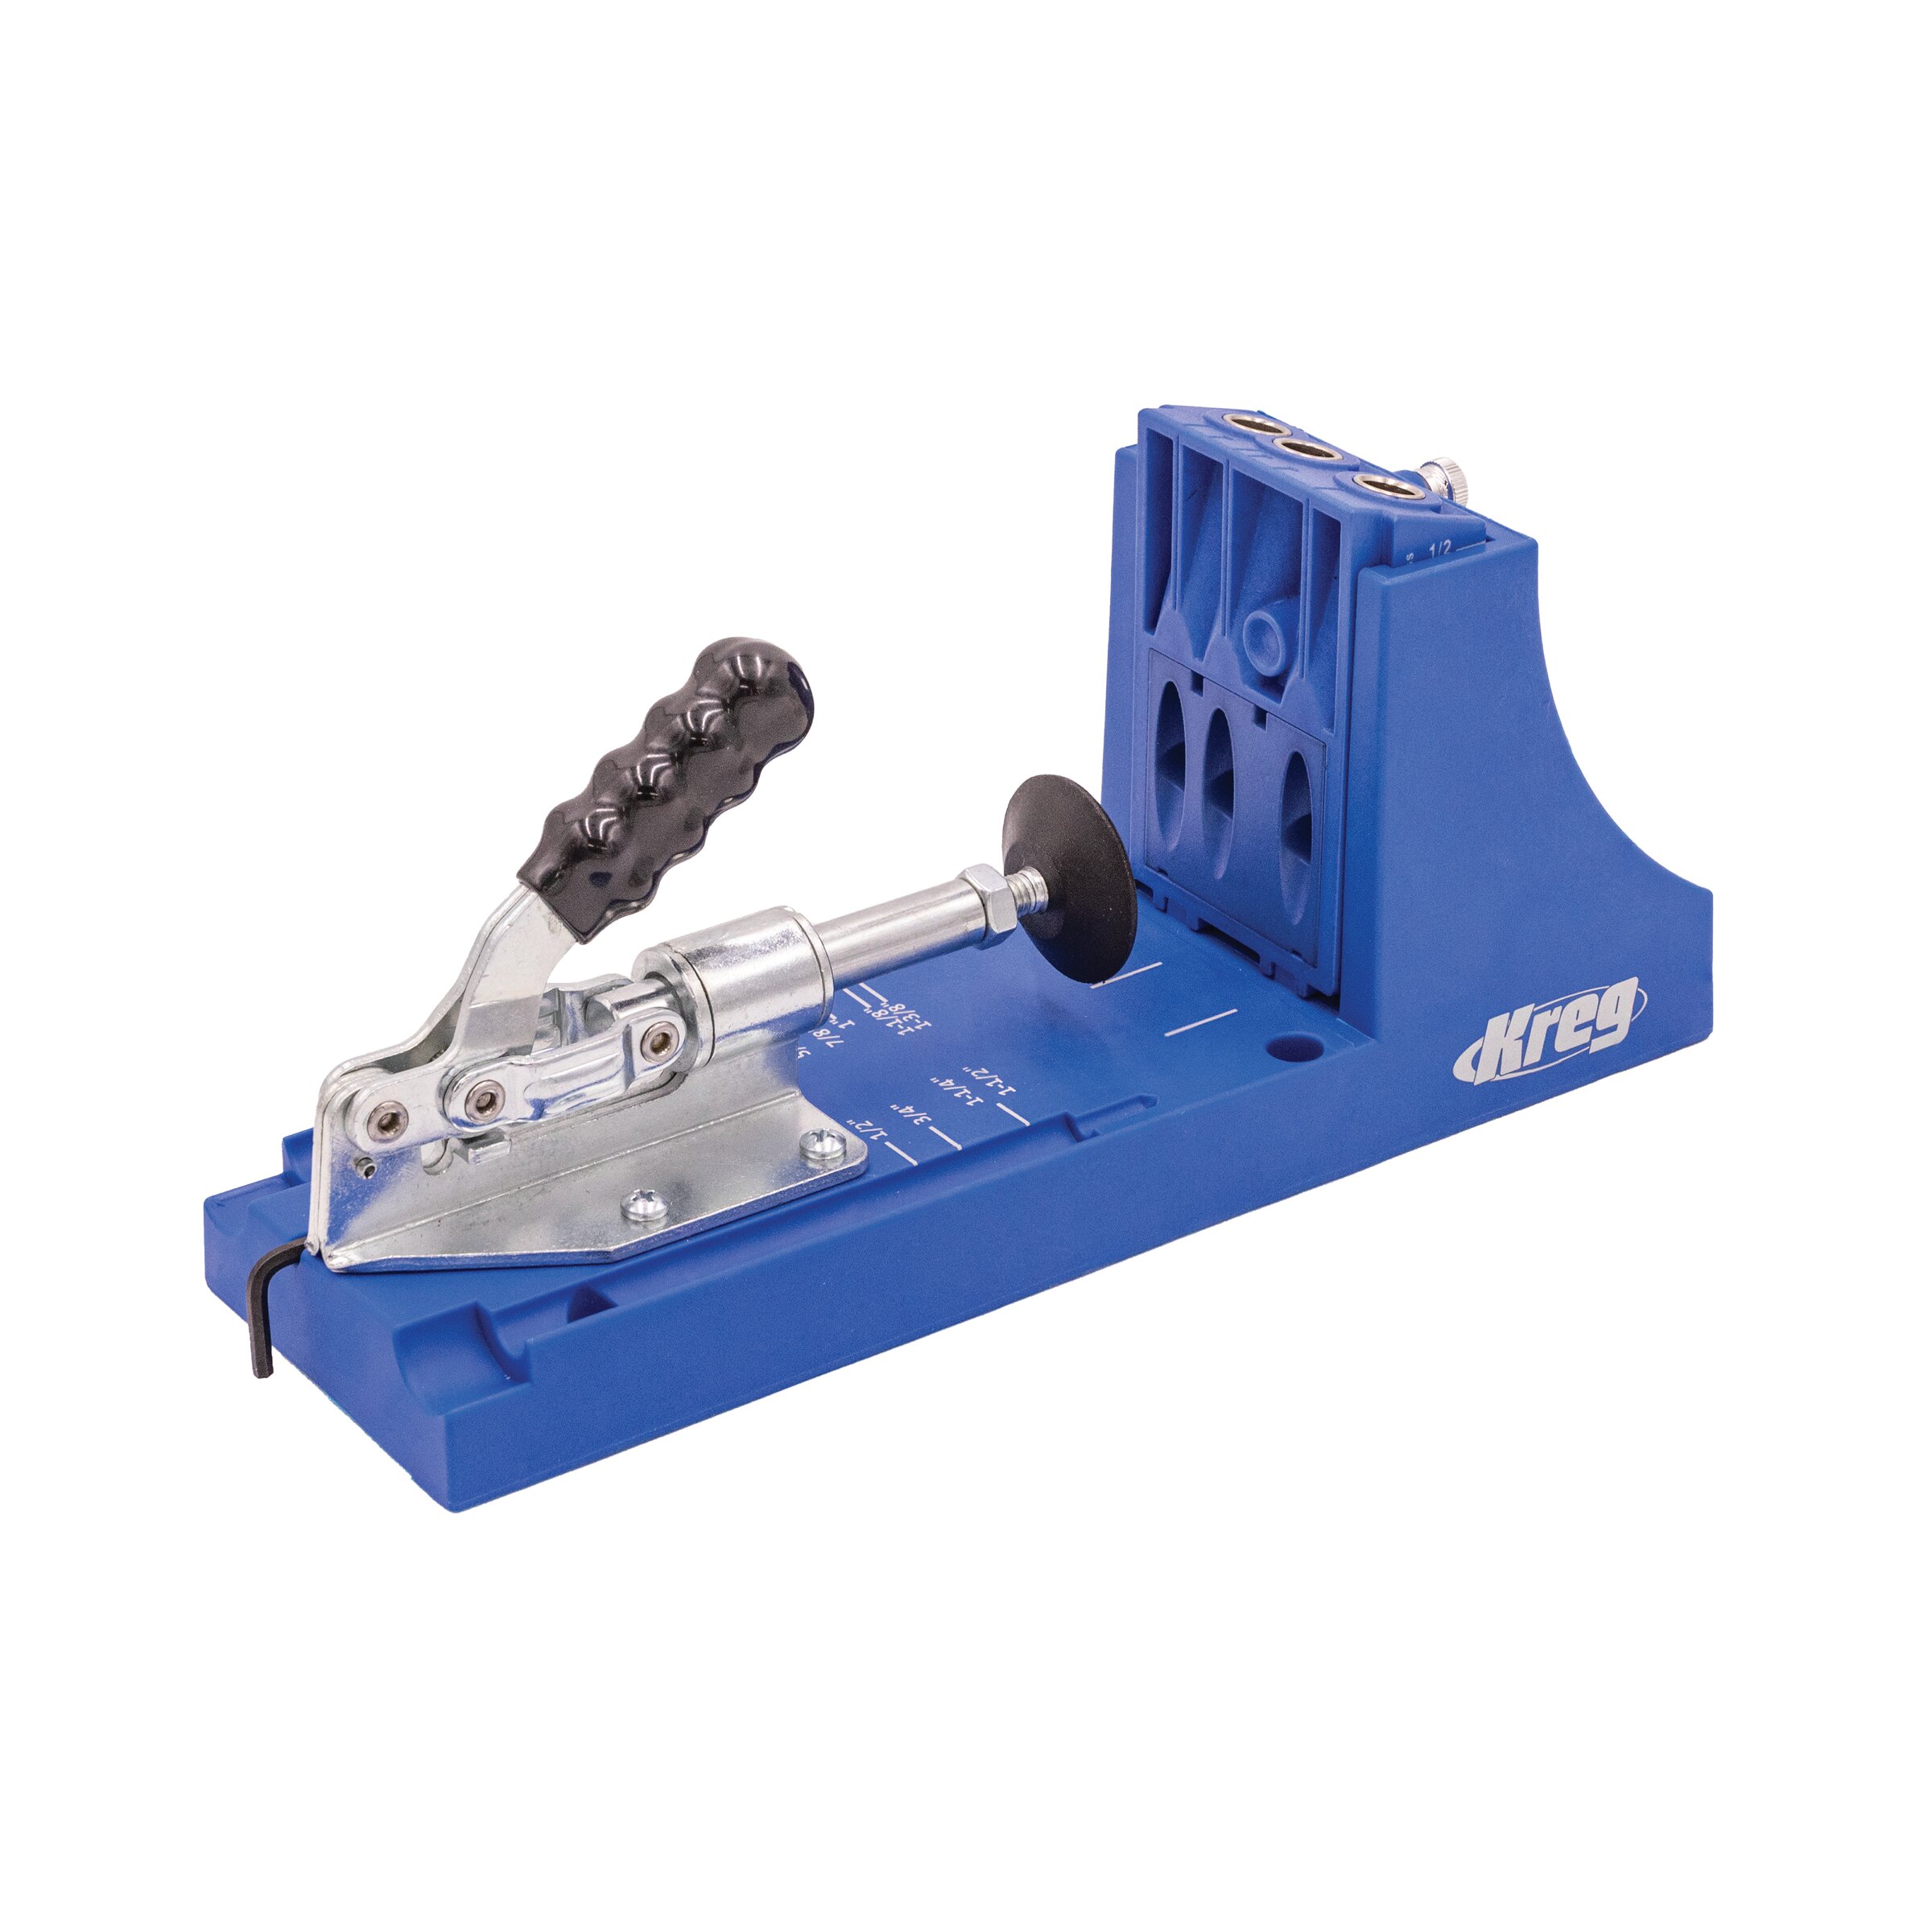
Kreg Tools


Other Tools
-
Tape Measure

Materials
Wood Products
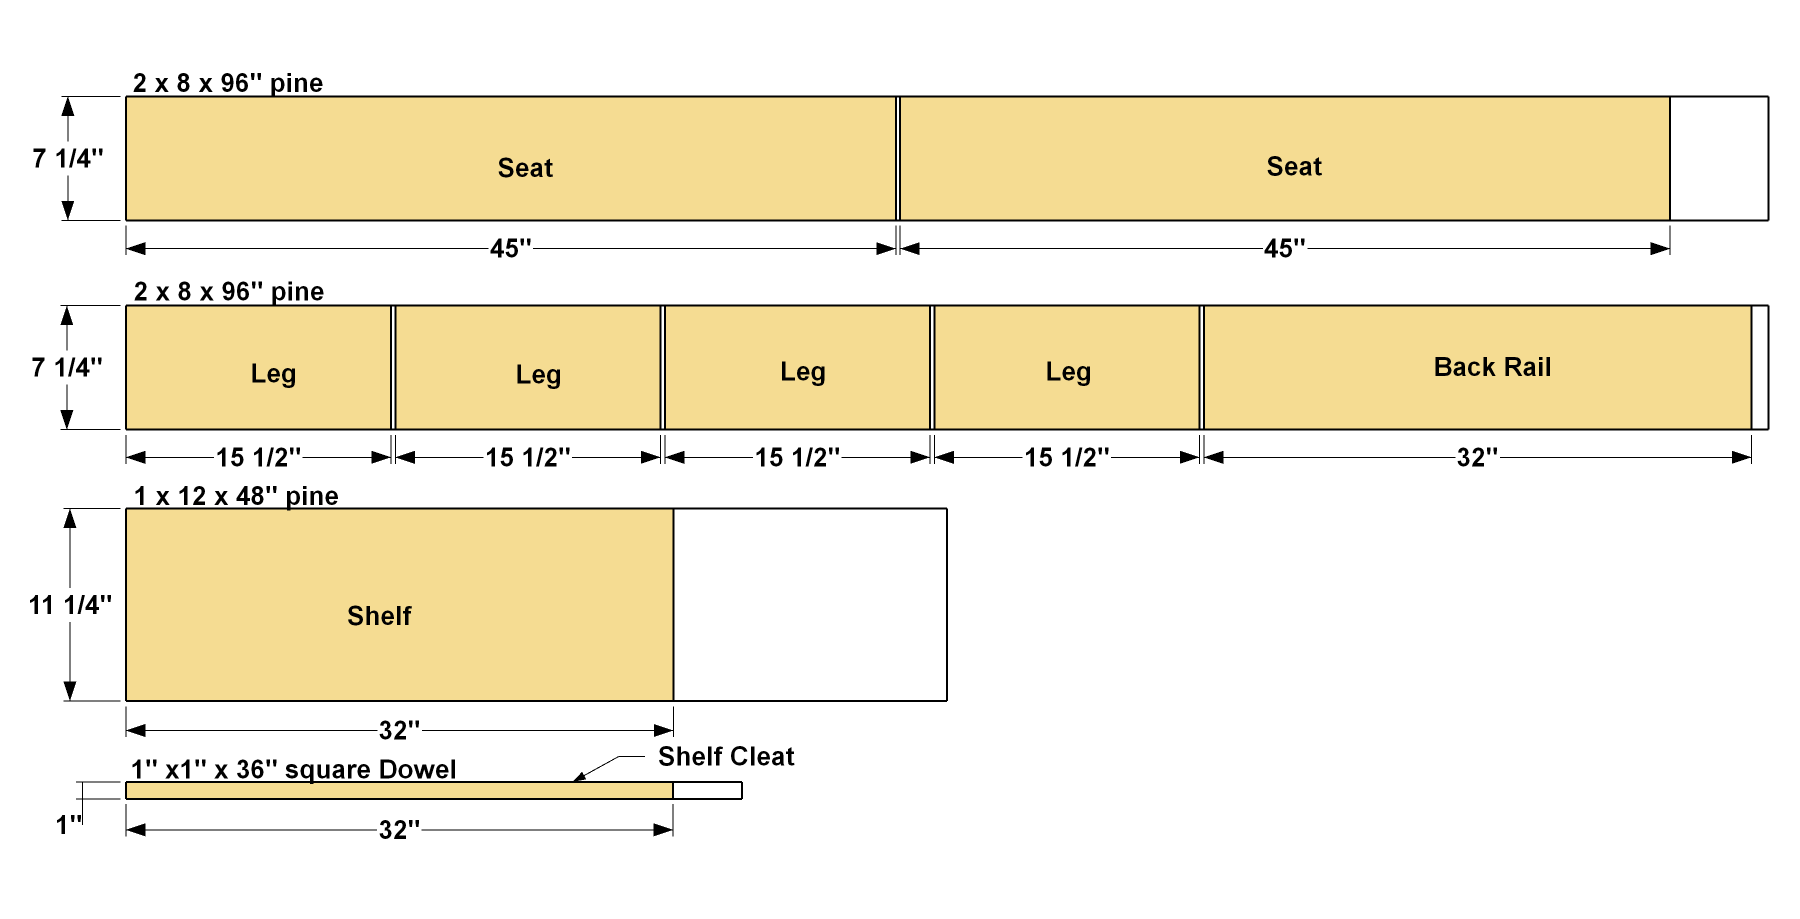
- 2 Board , 2x8 x 96"
- 1 Board , 1x12 x 48"
- 1 Square dowel , 1" x 1" x 36"
Hardware & Supplies
- 28 2 1/2" coarse-thread Kreg Pocket-Hole Screws
- 11 1 1/4" coarse-thread Kreg Pocket-Hole Screws
- 1 Wood glue
Cut List & Parts
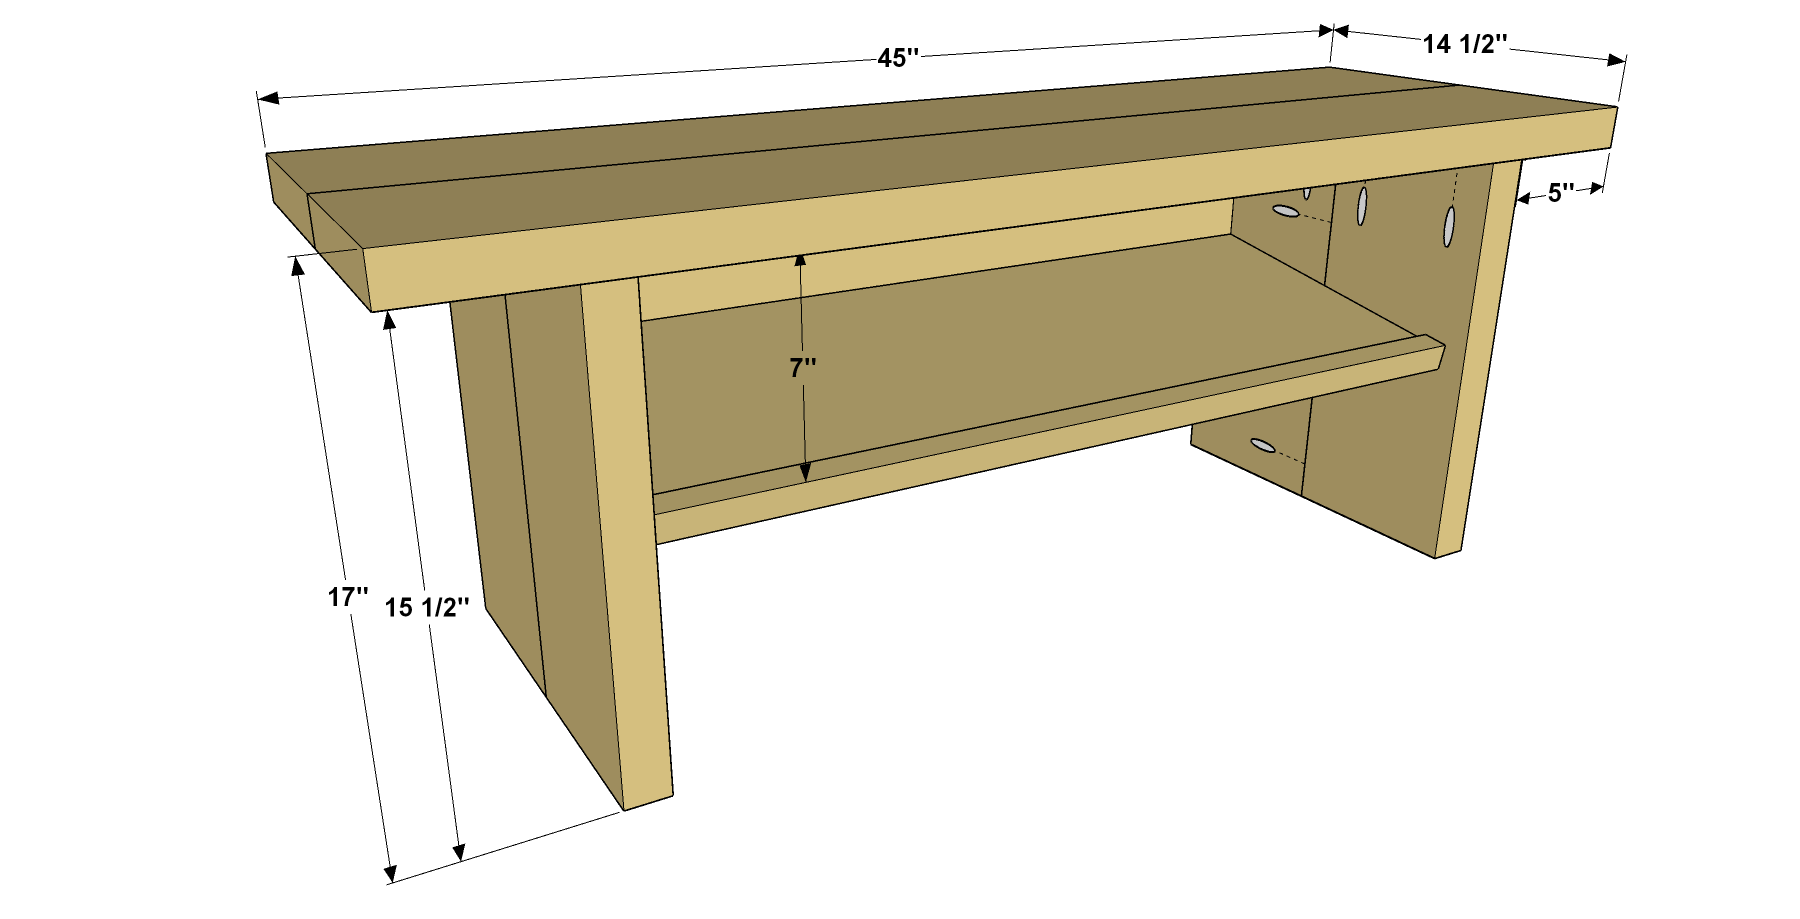
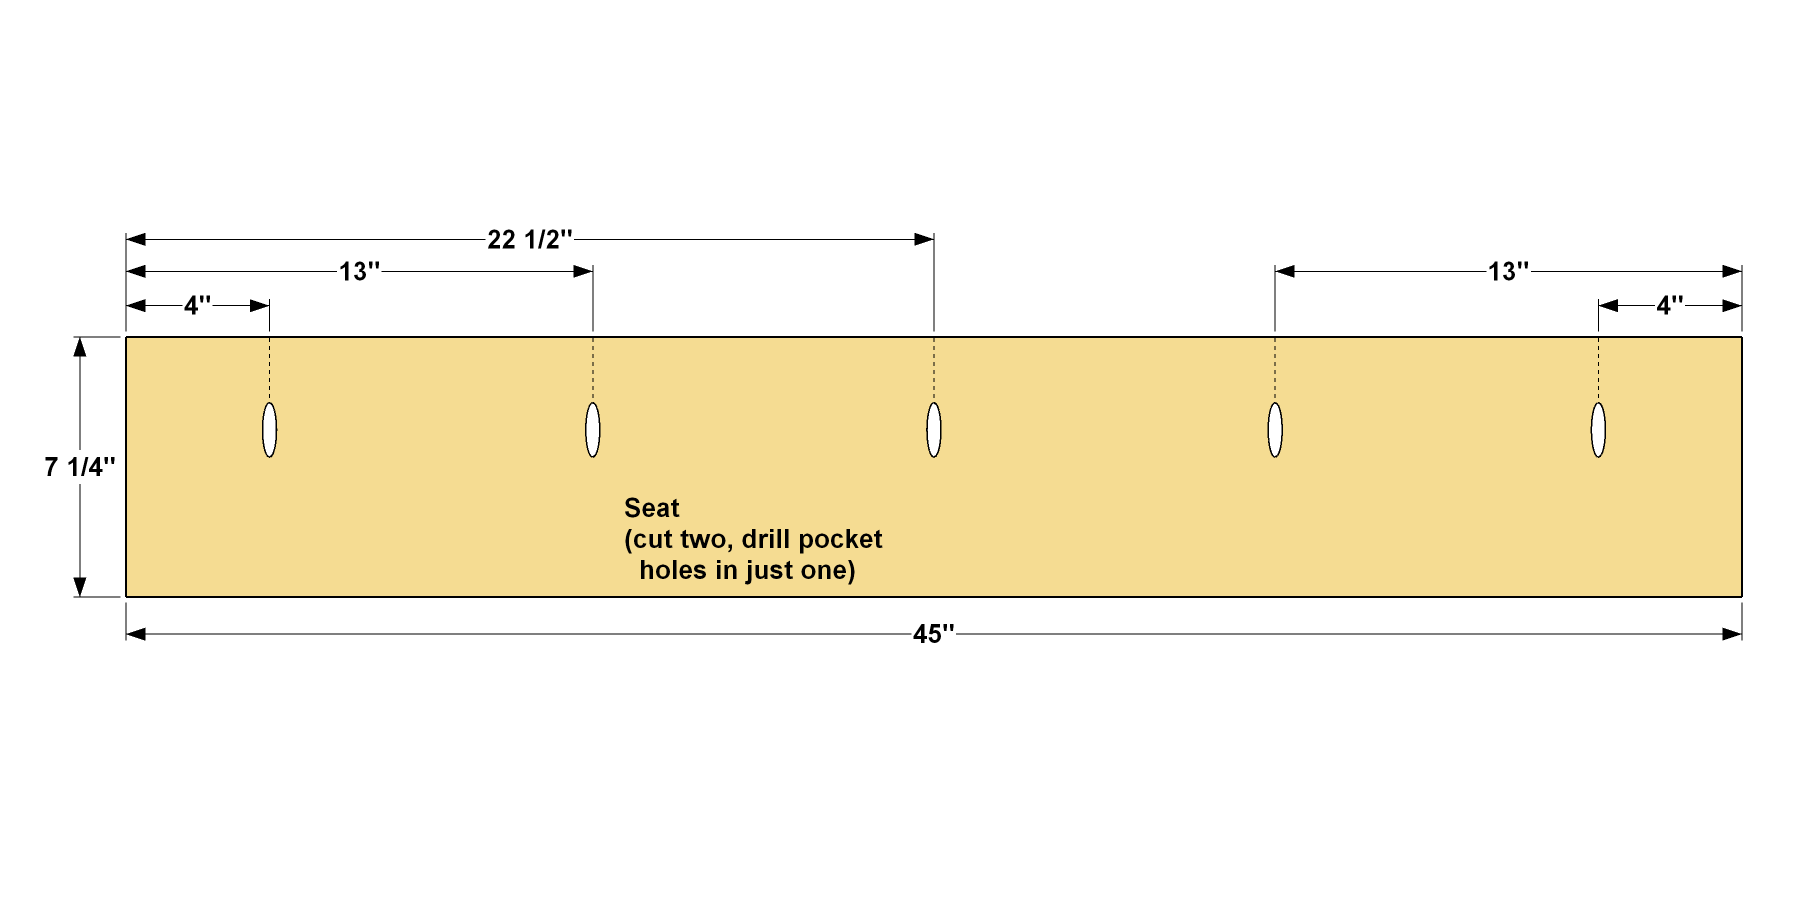
- 2 Seat , 1 1/2" x 7 1/4" x 45"
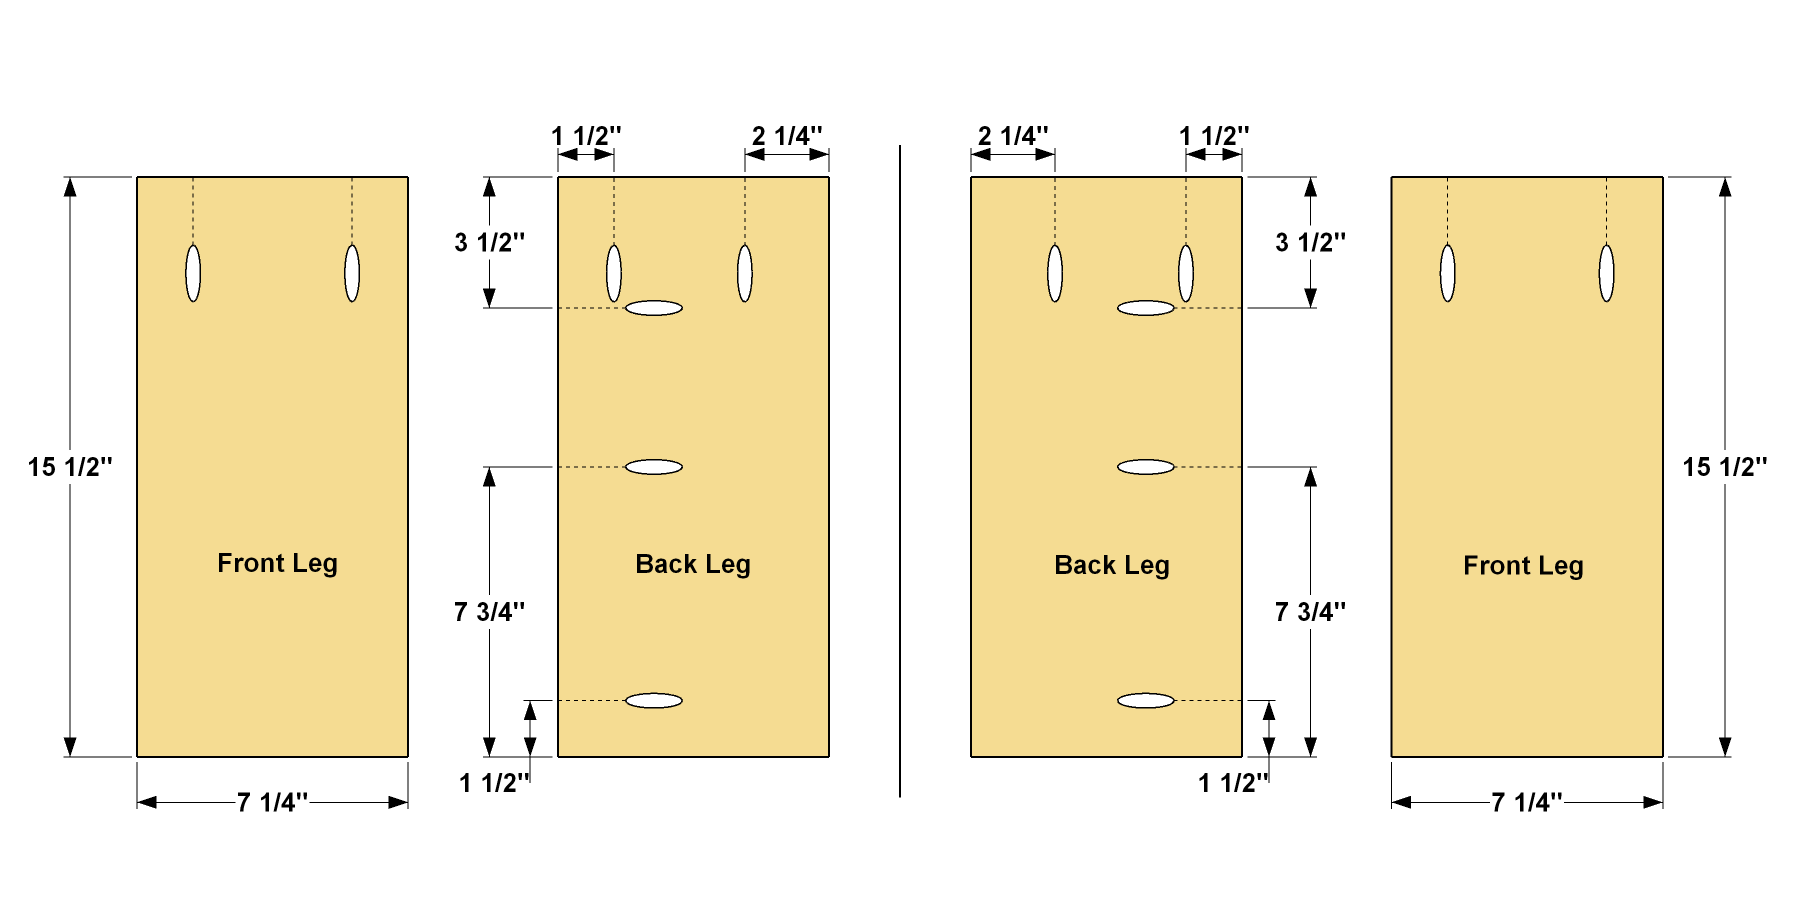
- 4 Leg , 1 1/2" x 7 1/4" 15 1/2"
- 1 Back Rail , 1 1/2" x 7 1/4" 32"
- 1 Shelf , 3/4" x 11 1/4" x 32"
- 1 Shelf Cleat , 1" x 1" x 32"
Directions
-
Make the Seat Boards
Cut two Seat boards to length from 2x8 lumber, as shown in the cutting diagram. If you have a miter saw, you can use it to cut all the pieces. If you don’t have one, you can make straight, square cuts using a circular saw and a saw guide. After you cut the pieces, set your Kreg Pocket-Hole Jig for 1 1/2"-thick material, and then drill pocket holes along the edge of just one of the Seat boards, as shown.
-
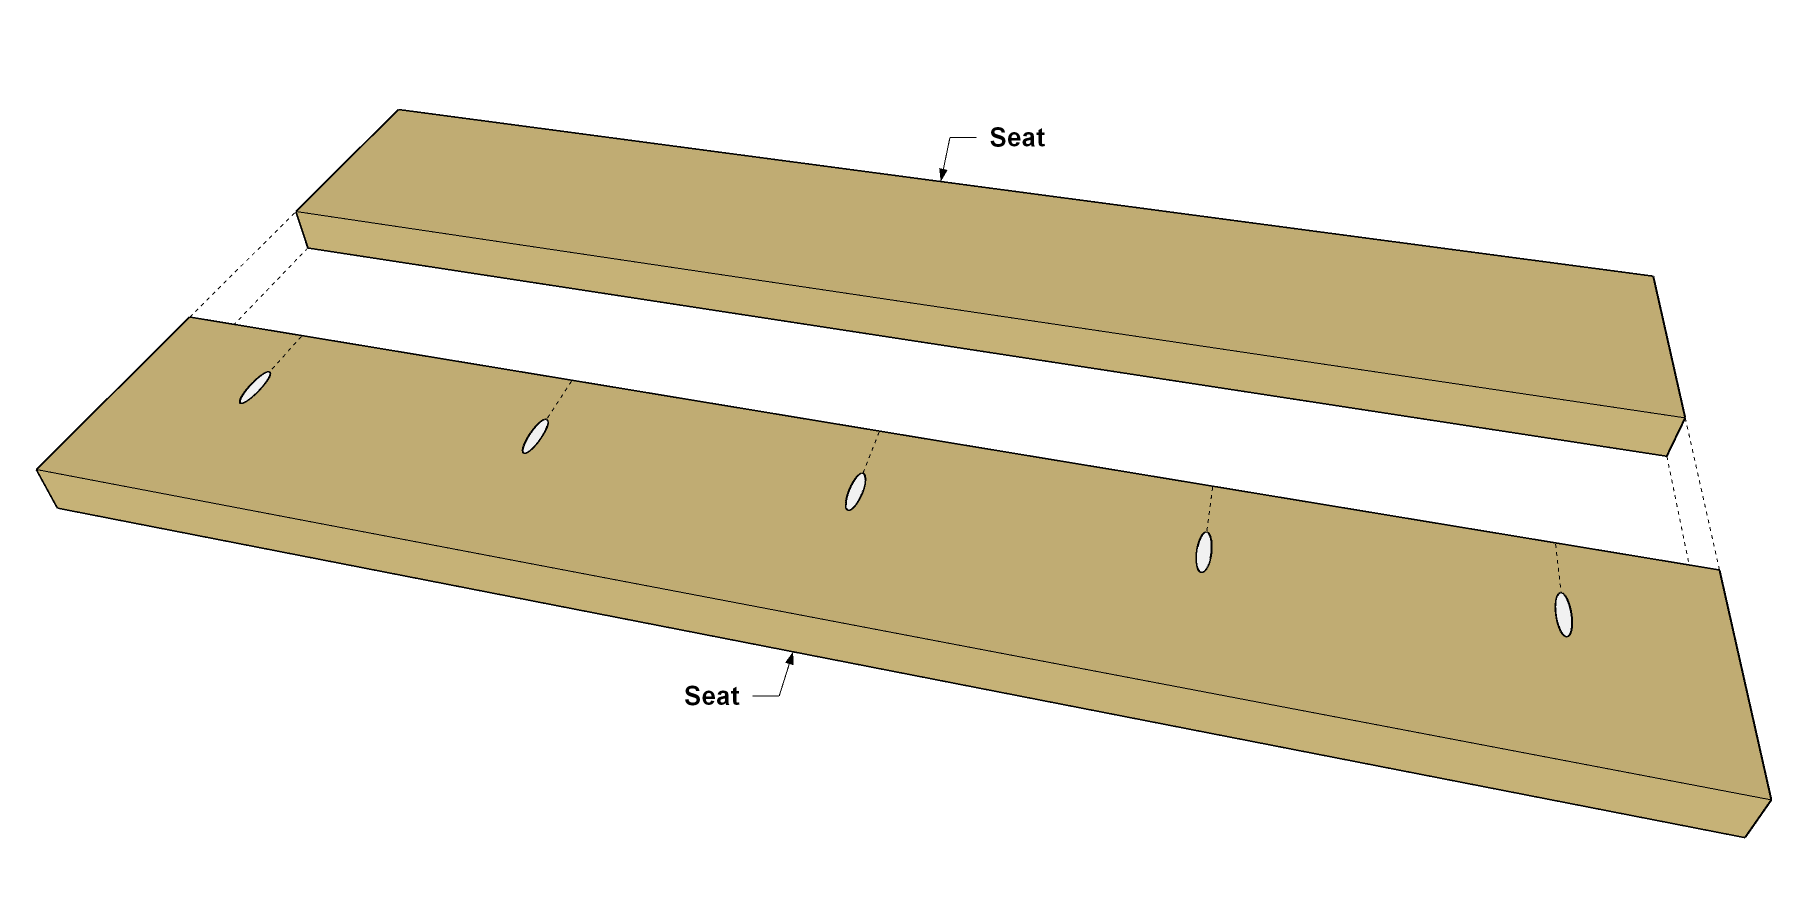
Assemble the Seat
Assemble the two Seat boards by applying glue along the edge of the one with pocket holes, and then clamping the boards together so the ends are flush. Drive in 2 1/2" coarse-thread Kreg Pocket-Hole Screws to draw the boards together.
-
Make the Leg Boards
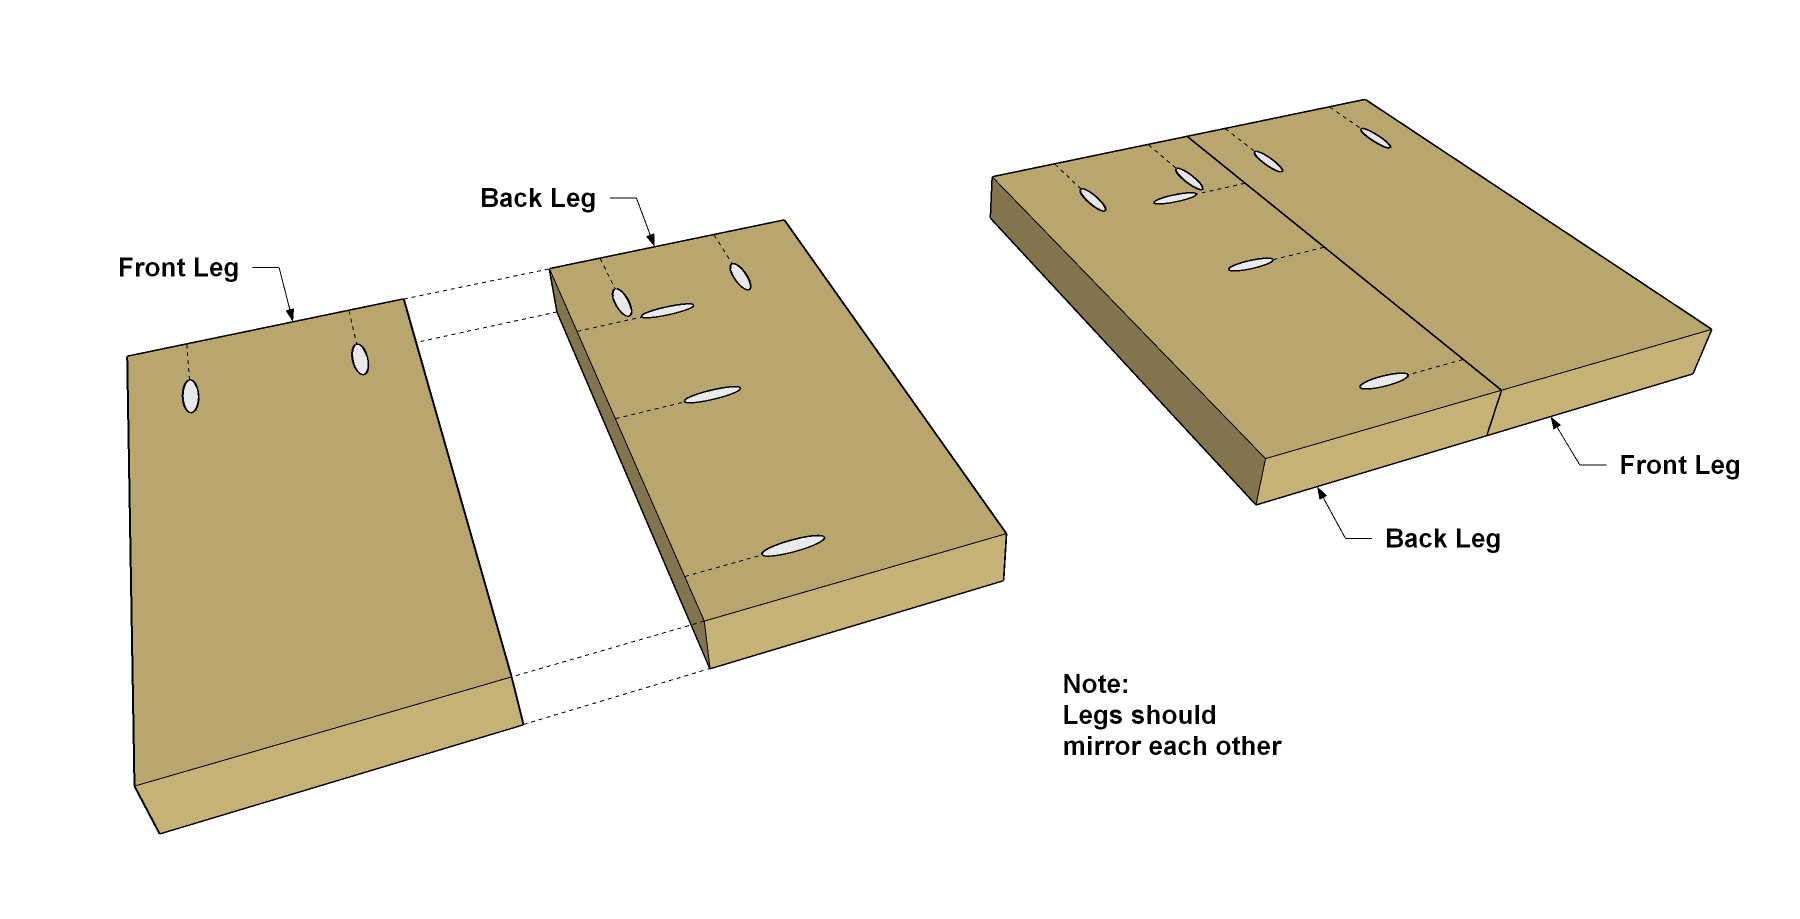
Cut four Legs from a 2x8 board, as shown in the cutting diagram. Drill pocket holes in each of the Leg boards as shown. Note that the boards with the pocket holes along the edge as well as the end should mirror each other. This is so the holes face inward and are oriented in the same direction when you assemble the base.
-
Assemble the Legs
Glue and clamp two Leg Boards together as shown, making sure that the pocket holes are all oriented correctly, as shown. Secure the Leg boards using 2 1/2" coarse-thread Kreg Pocket-Hole Screws. Repeat this process for the other Leg. Note the other Leg assembly should mirror the first.
-
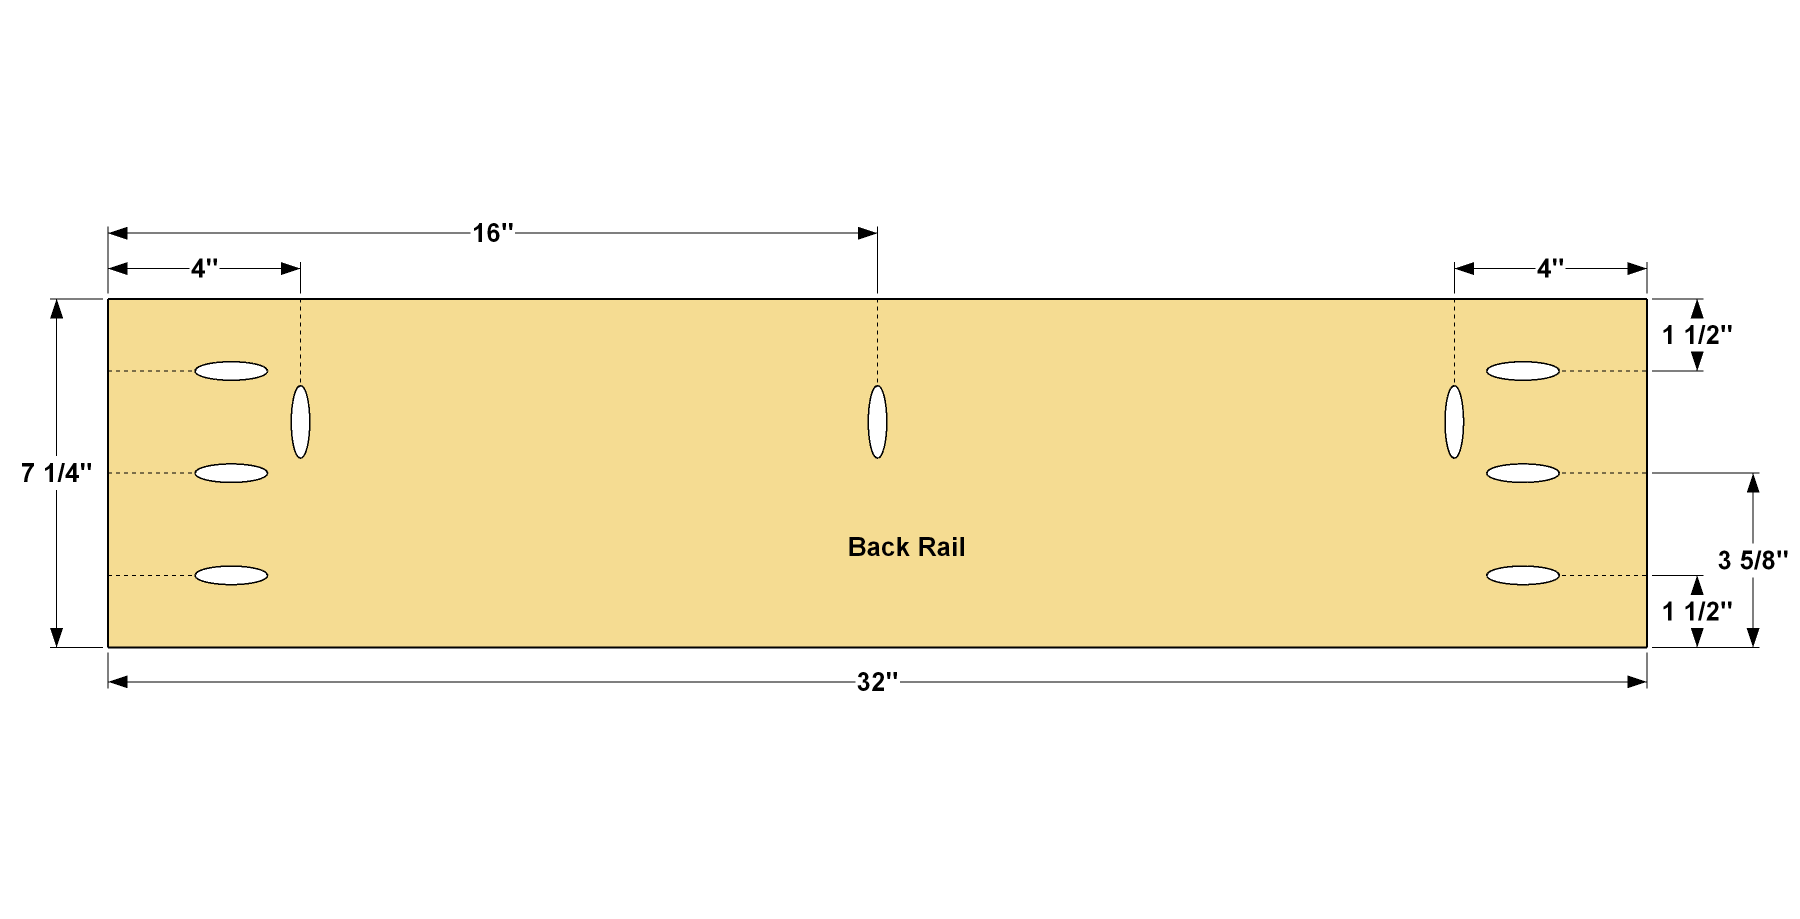
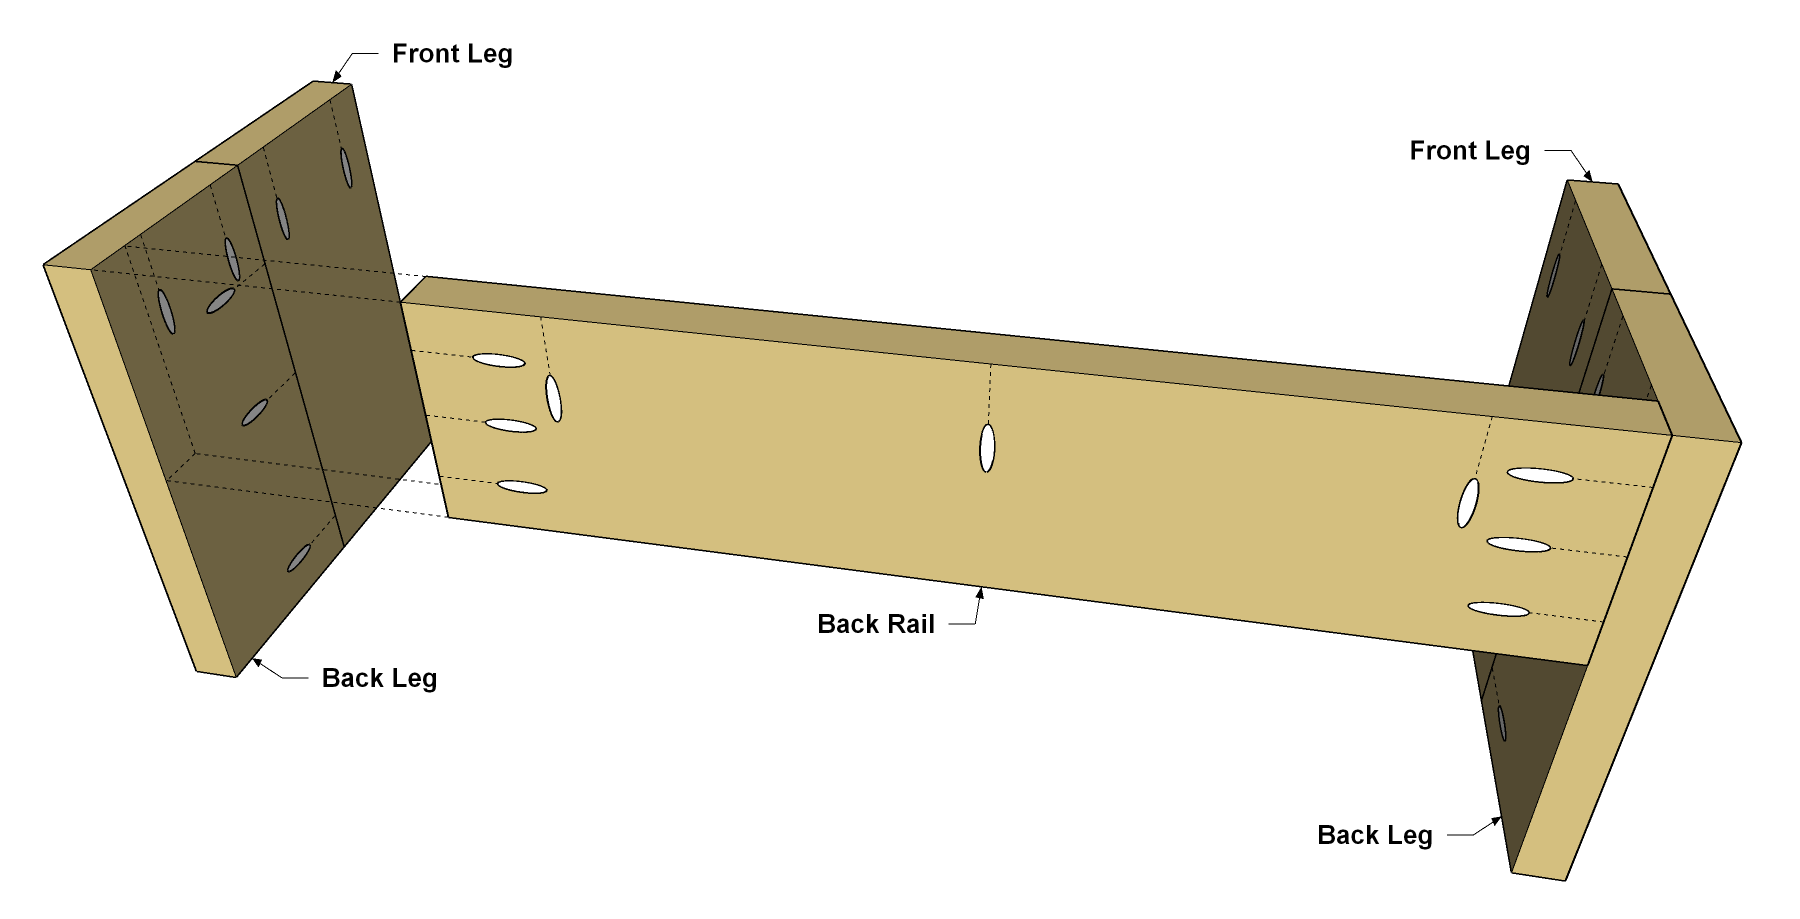
Make the Back Rail
With the leftover section of 2x8 board, cut the Back Rail to final length. Drill pocket holes on each end and along one edge as shown.
-
Assemble the Base
Spread glue on the ends of the Back Rail. Then position the Back Rail between the Legs, as shown, so it is flush at the rear edge and along the upper end, and with the pocket holes facing toward the back of the bench. Make sur ethe pocket holes along the edge of the Back Rail face upward for attaching the Seat later. Clamp the Back Rail and Legs, and then secure them using 2 1/2" coarse-thread Kreg Pocket-Hole Screws.
-
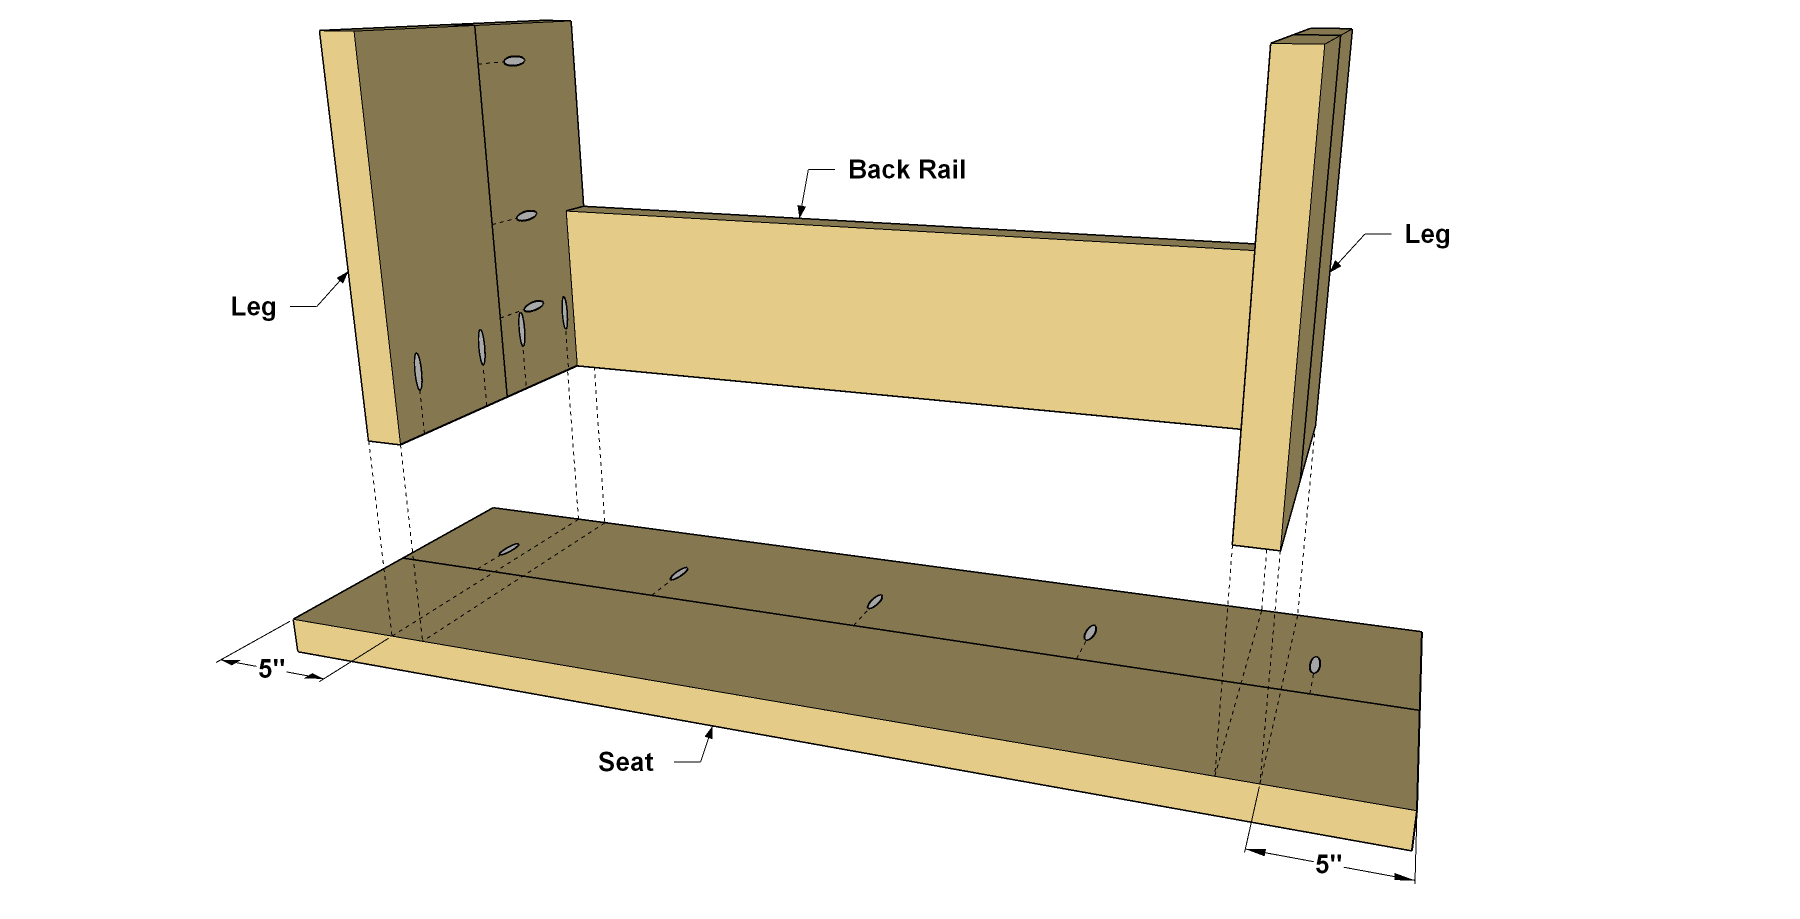
Attach the Seat
Set the Seat flat on a work surface with the pocket holes facing up. Place the base and center it on the Seat. The Base should be flush with the Seat at the front and back. Secure the two assemblies using glue and 2 1/2" coarse-thread Kreg Pocket-Hole Screws.
-
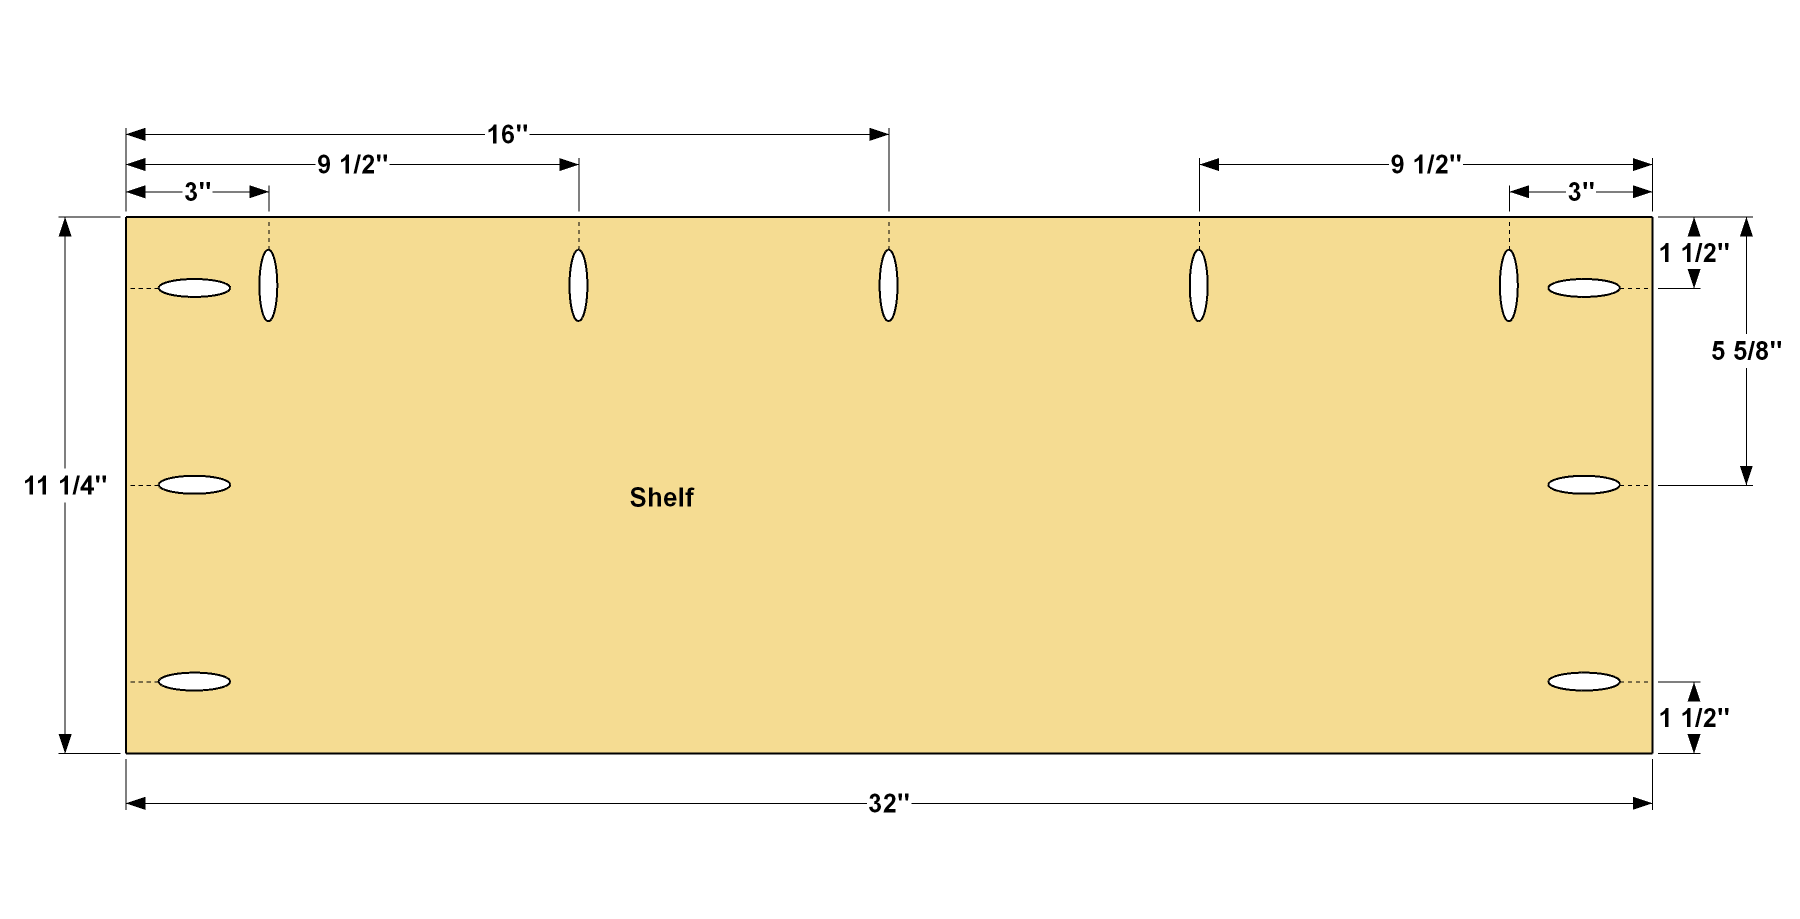
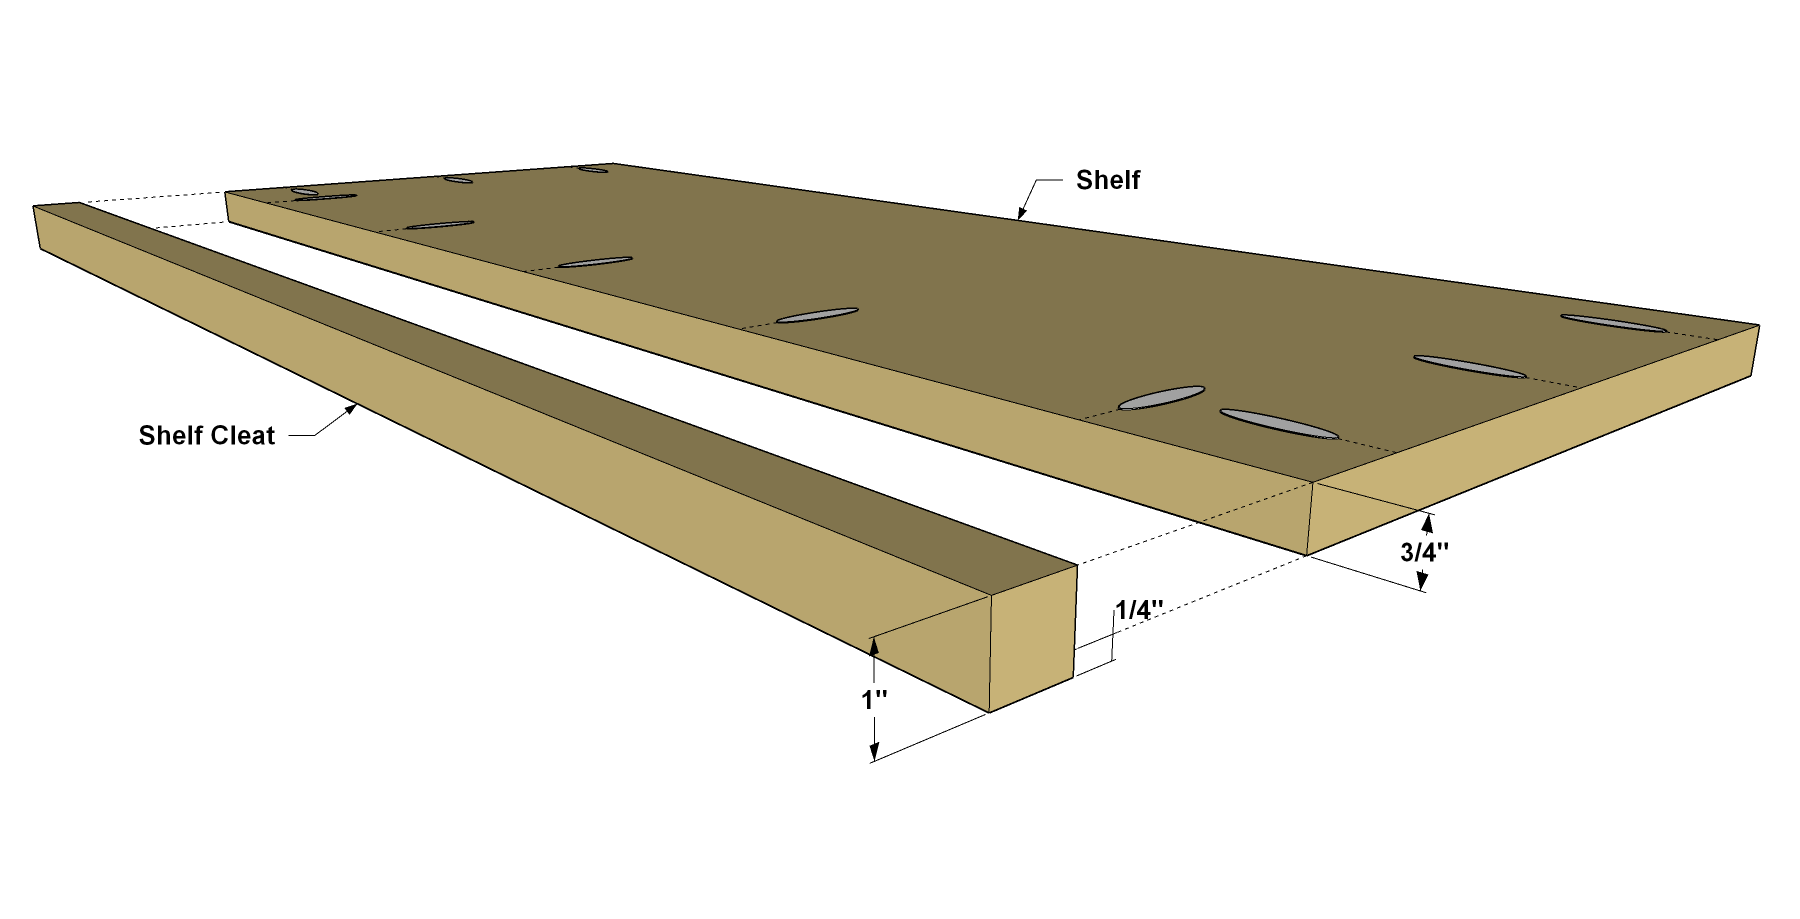
Make the Shelf
Cut the Shelf to length from a 1x12 board, as shown in the cutting diagram. Change the settings on your Kreg Pocket-Hole Jig and drill bit for 3/4"-thick material. Then drill pocket holes in each end of the Shelf, and along one edge, as shown.
-
Add the Cleat
Cut the Shoe Cleat to length from a 1"x1" square dowel, as shown in the cutting diagram. Spread glue along the pocket-hole edge of the shelf, and then clamp the Cleat to it. The Cleat should be flush at the bottom of the Shelf. Now attach the Cleat to the Shelf with 1 1/4" coarse-thread Kreg Pocket-Hole Screws.
-
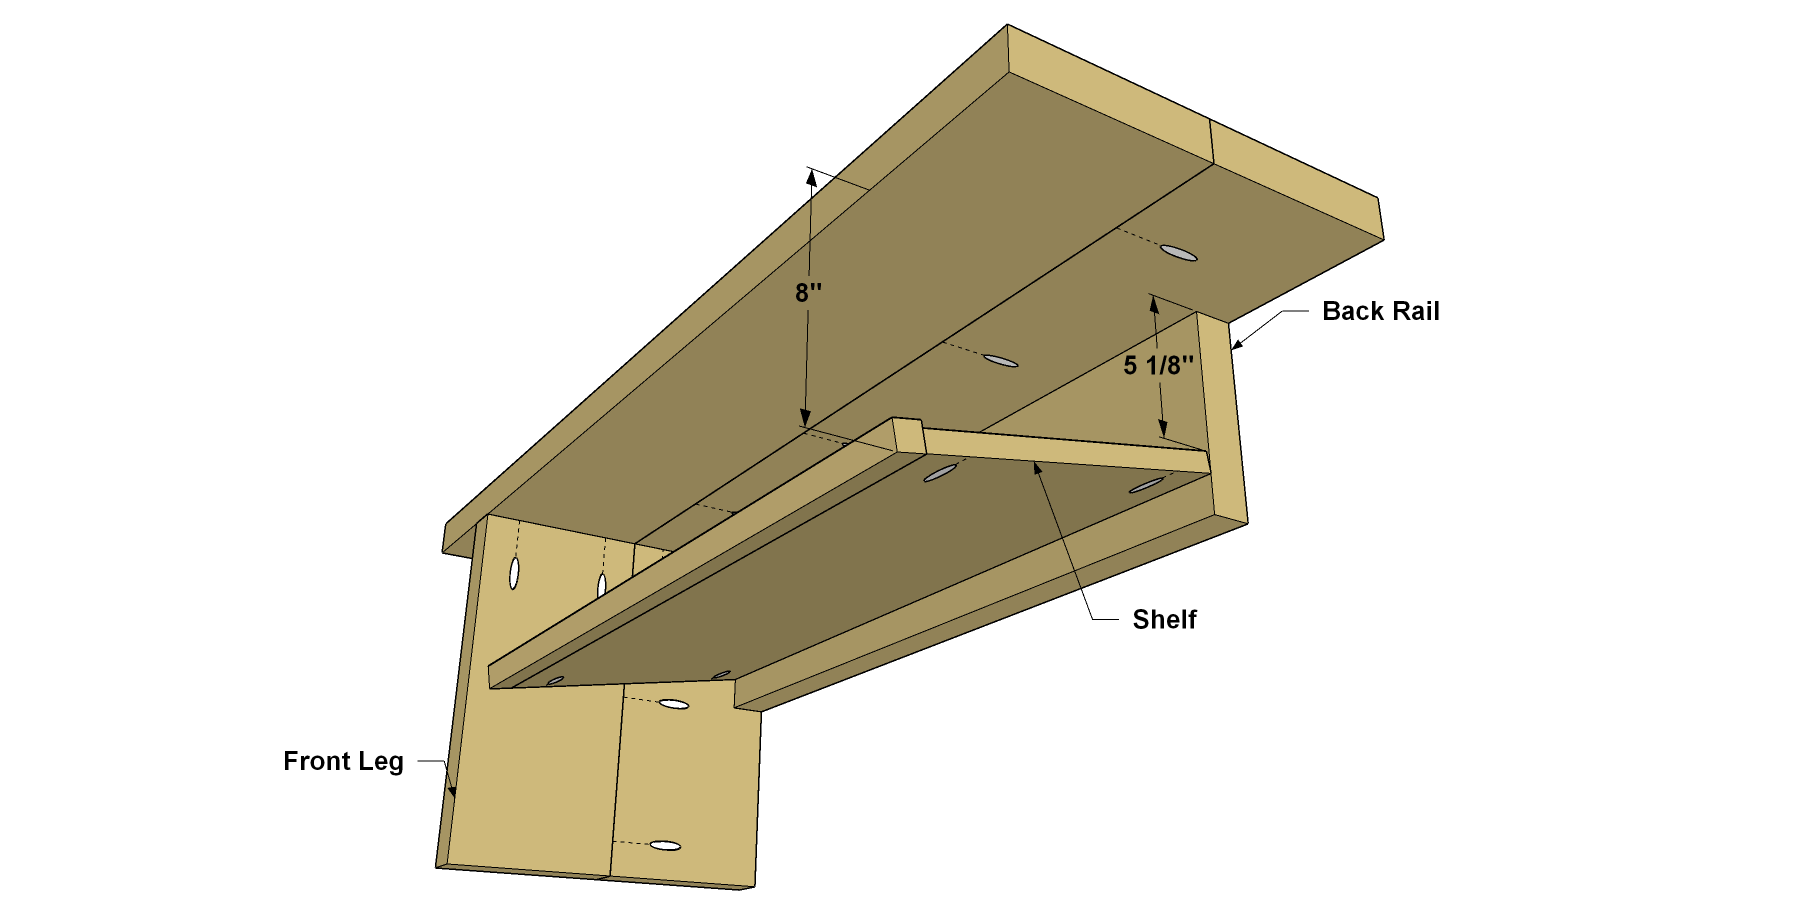
Install the Shelf
Position the shelf in the general location shown. You can adjust the angle and position here to suit your own needs. Secure the Shelf to the Legs using 1 1/4" coarse-thread Kreg Pocket-Hole Screws. You can assemble without glue here. That way, if you decide later that you need to reposition the Shelf, it will be easy
-
Apply a Finish
Now you can sand and finish the bench. Because we were going for a rustic look, we only sanded lightly to ease any sharp edges, and to get rid of major scratches. Then wipe away sanding dust and apply the finish of your choice. We used a Java gel stain. After the stain dries, apply a durable top-coat, like a wipe on polyurethane.
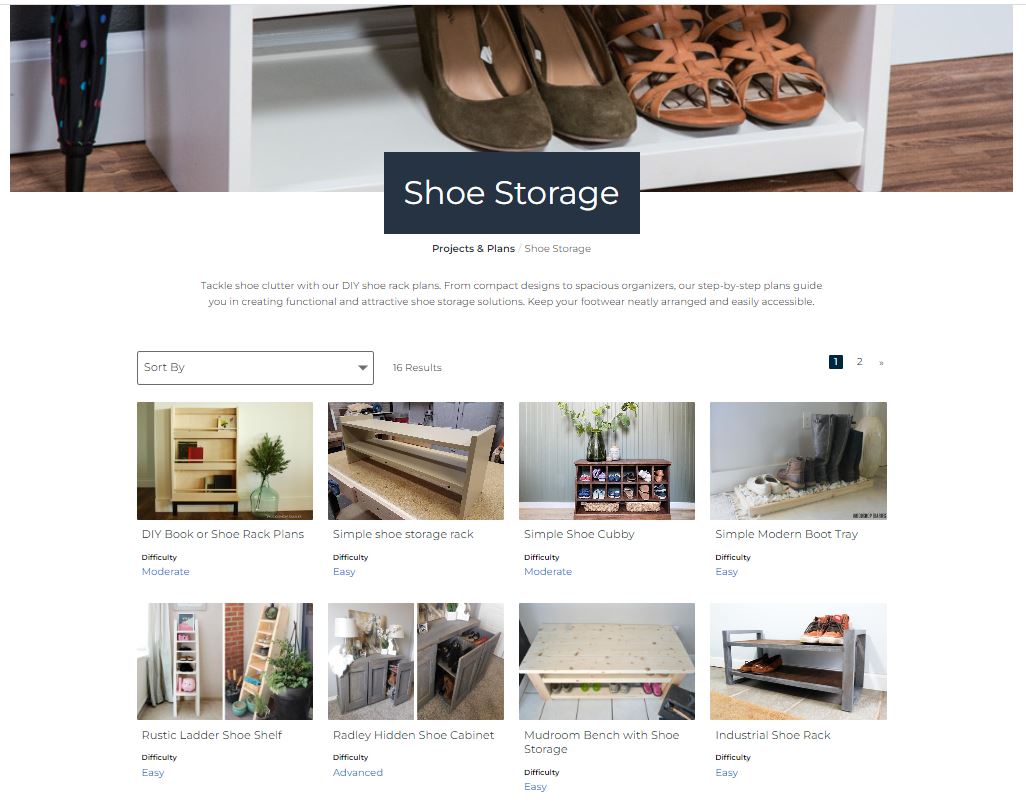
Check out our top project plans for DIY shoe racks: