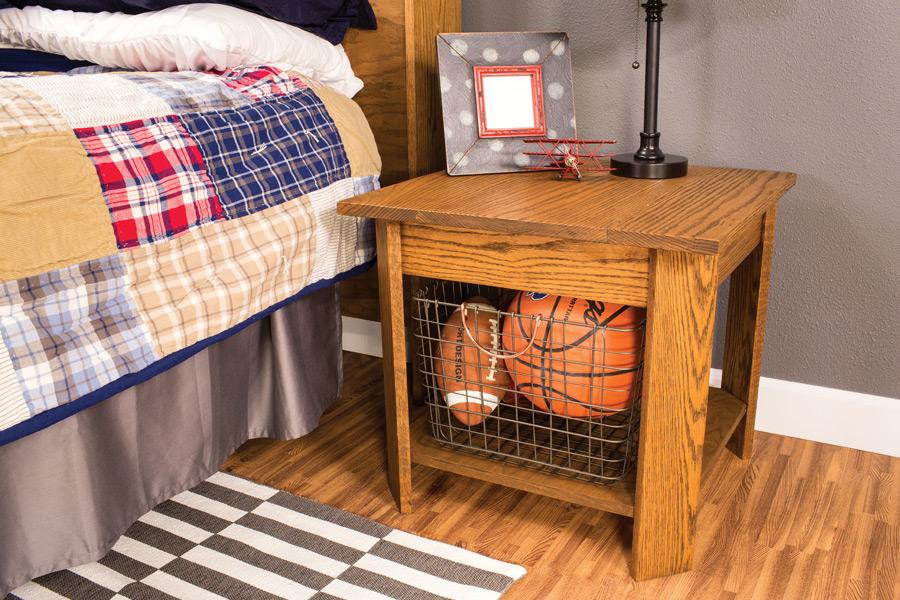
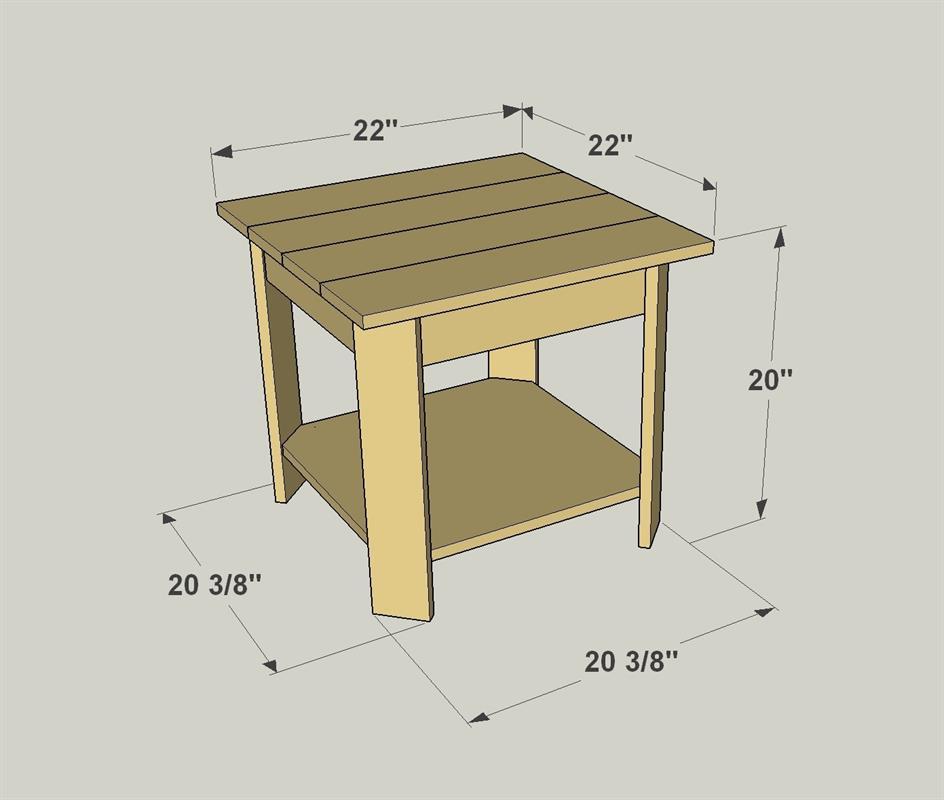
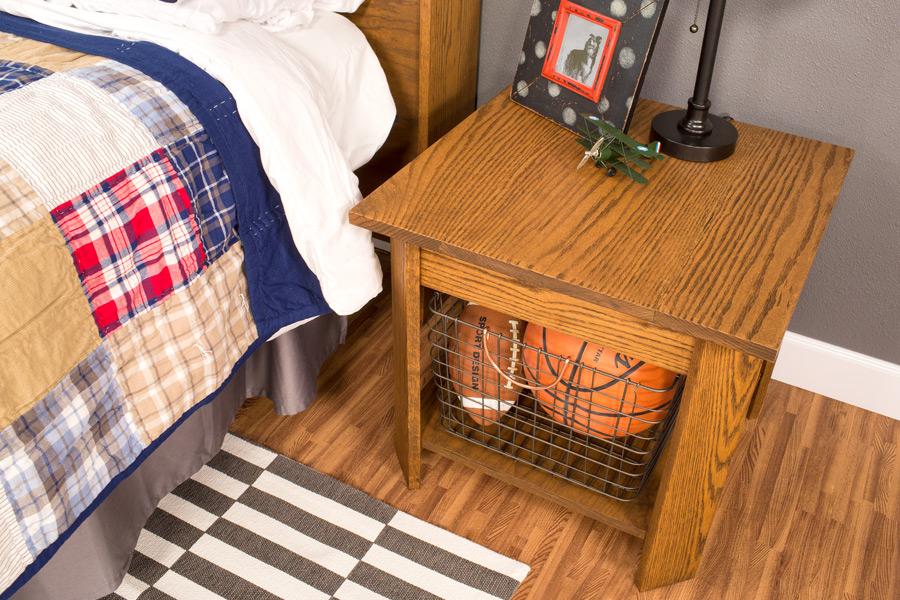
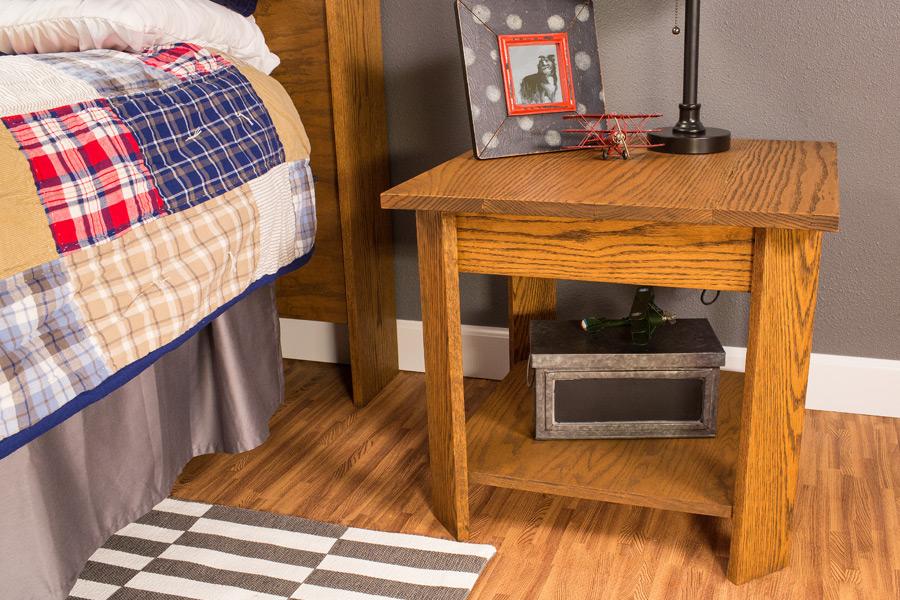
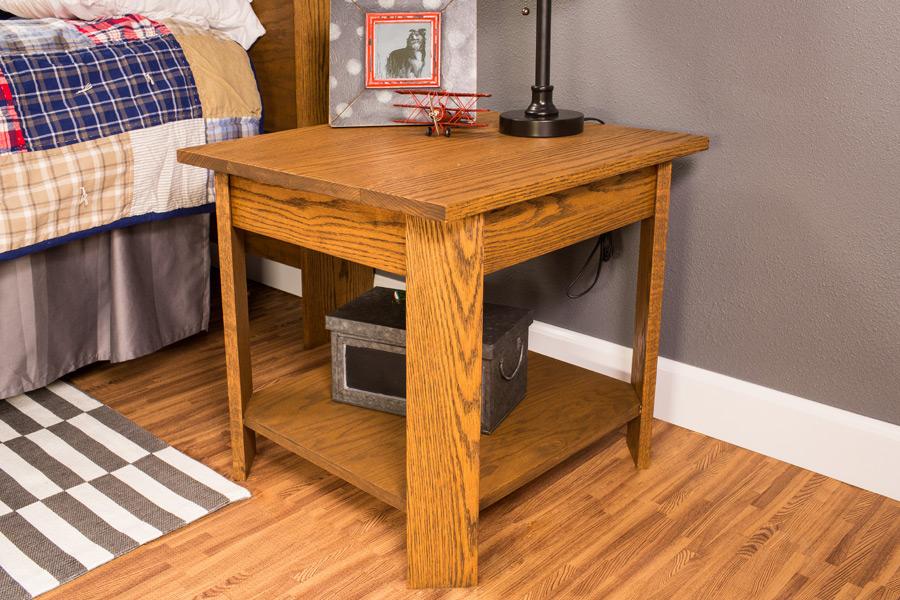


Create storage space next to your bed and add style to your bedroom with this nightstand. It’s easy to build, even with the distinctive legs that sit at 45° angles. You can go for a traditional look like this using oak, choose maple for a modern style, or build one from pine and paint it.
Tools
Kreg Tools


Other Tools
-
Miter Saw

-
Tape Measure
-
Iron
Materials
Wood Products
- 1 Board , 1x4 , 96"
- 1 Board , 1x4 , 72"
- 1 Board , 1x6 , 96"
- 1 Plywood , 3/4" Thick , Quarter Sheet
Hardware & Supplies
- 47 1 1/4" fine-thread pocket-hole screws
- 1 Iron-on edge banding
Cut List & Parts
- 4 Legs , 3/4" x 3 1/2" x 19 1/4"
- 4 Rails , 3/4" x 3 1/2" x 16 1/4"
- 4 Top Slats , 3/4" x 5 1/2" x 22"
- 1 Shelf , 3/4" plywood x 19" x 19"
Directions
-
Create the Legs
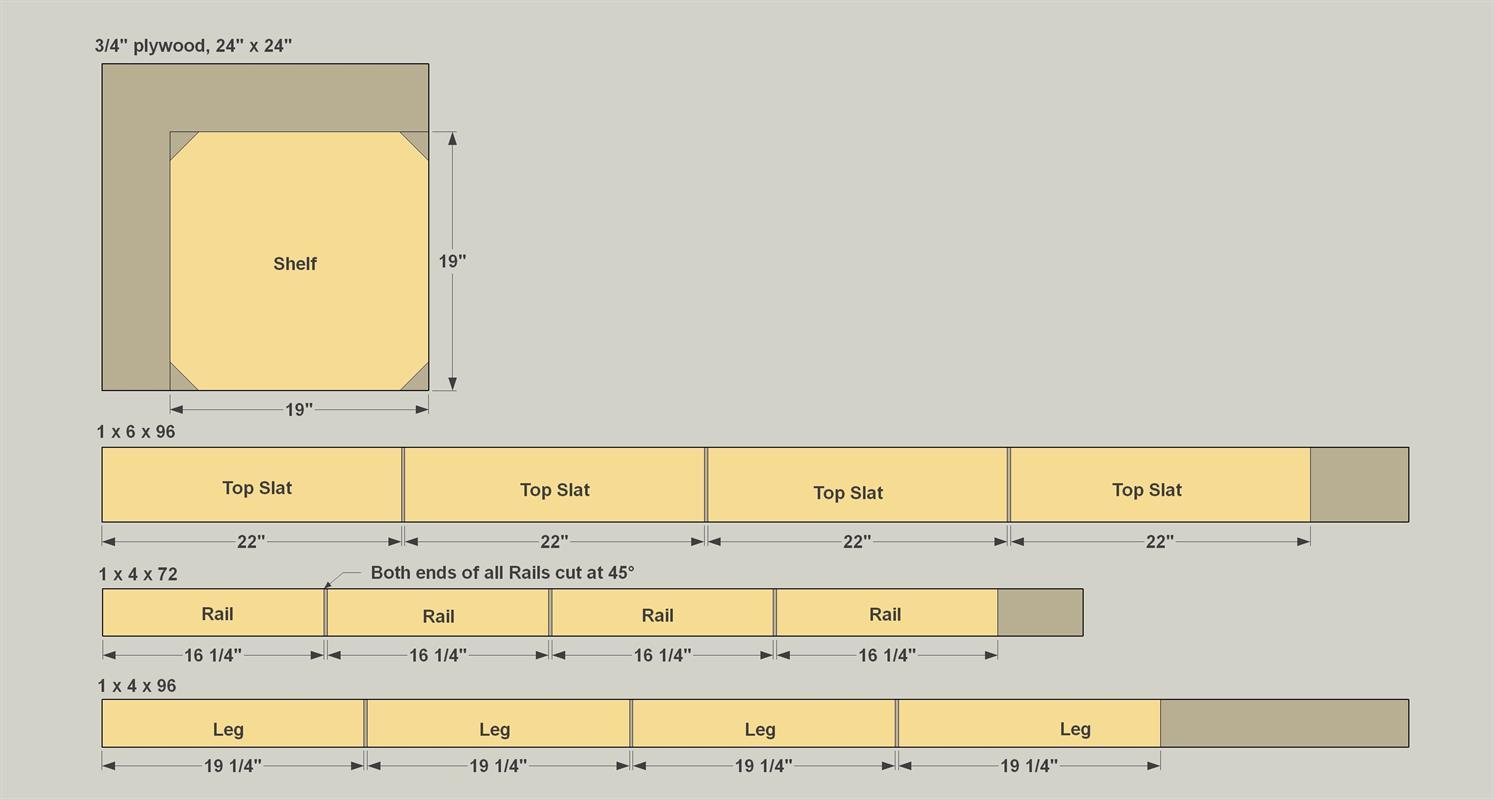
Cut four Legs to length from a 1x4 board, as shown in the cutting diagram.
-
Cut the Rails
Now you can cut four Rails from a 1x4 board, as shown in the cutting diagram. To do that, you’ll need to set your miter saw to a 45° bevel angle. If your saw doesn’t have bevel-cutting capability, you can instead stand the board on ages and rotate the blade for 45° miter cuts instead. Then, with your pocket-hole jig set up for 3/4" material, drill pocket holes in the back face of the Top Rail, as shown.

-
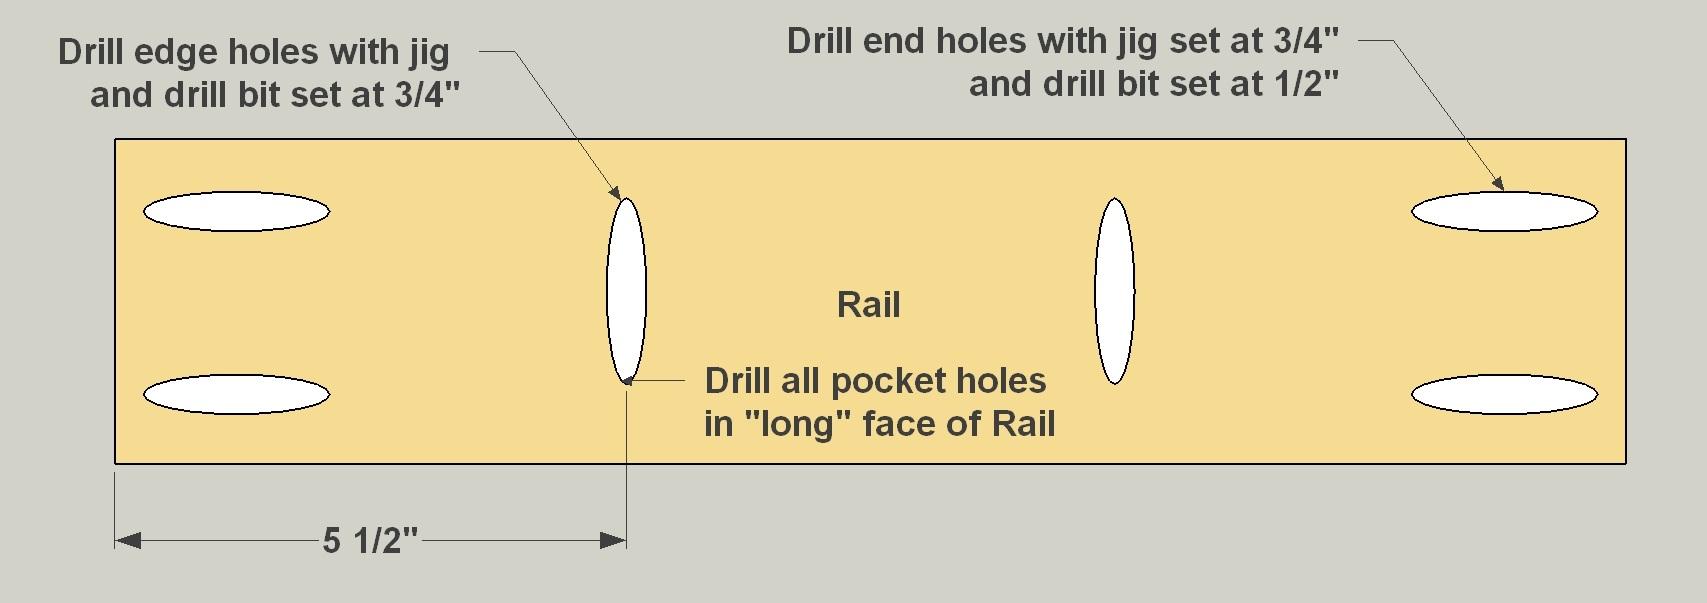
Drill Pocket Holes in the Rails
With the Rails cut, it’s time to drill pocket holes. Because of the mitered ends, this takes a couple of setups. Start with your pocket-hole jig and the drill bit set up for 3/4" material, and drill the pocket holes along the edge of each rail, as shown. For the ends, keep your jig at the 3/4" setting, but change the drill bit to the 1/2" setting. Then drill pocket holes as shown.
-
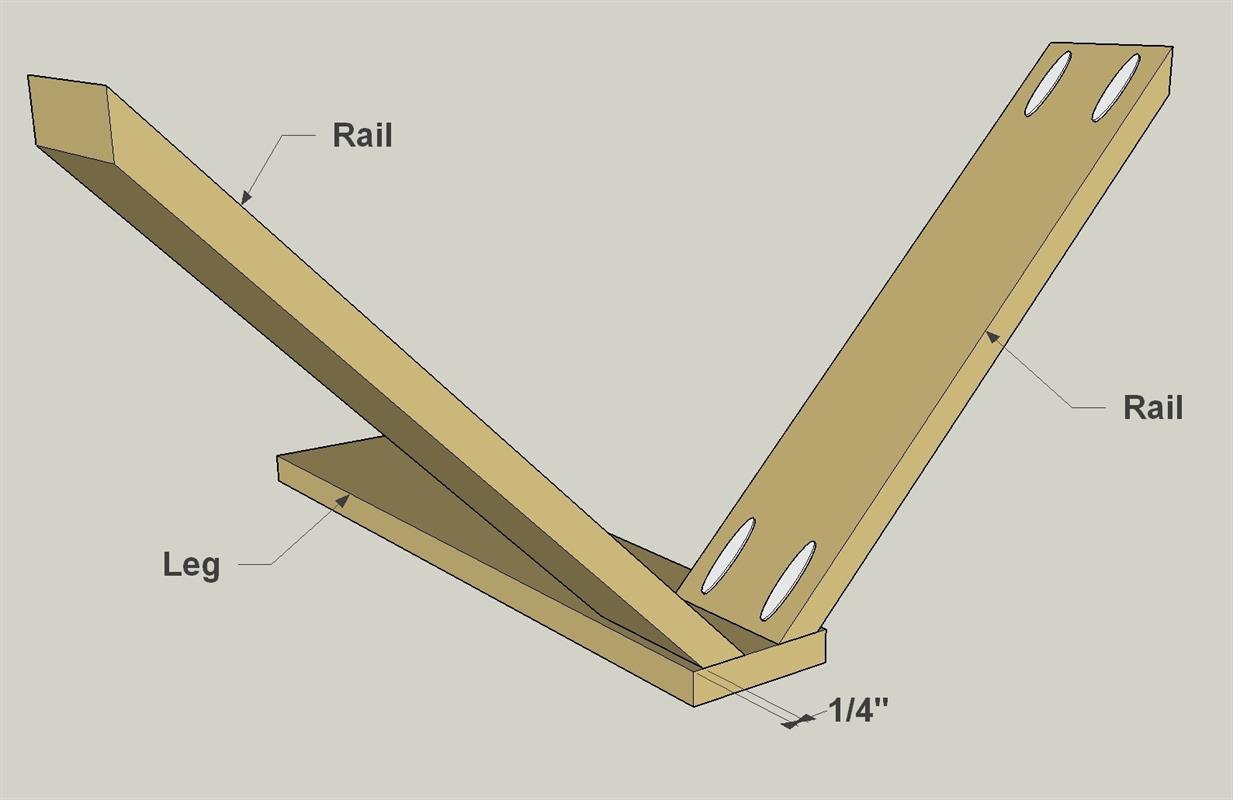
Attach the Rails to the Legs
After sanding the Rails and Legs, you can connect them. To do that, join two Rails to one Leg, as shown, using 1 1/4" fine-thread pocket-hole screws. Then make another assembly just like it.
-
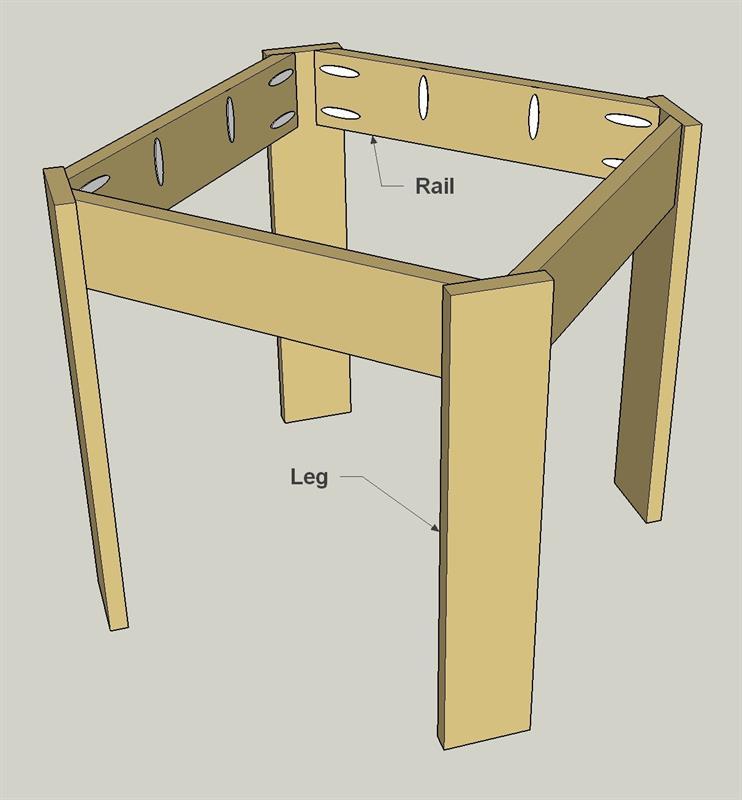
Add the Other Legs
Now you can connect the other two Legs using 1 1/4" fine-thread pocket-hole screws.
-
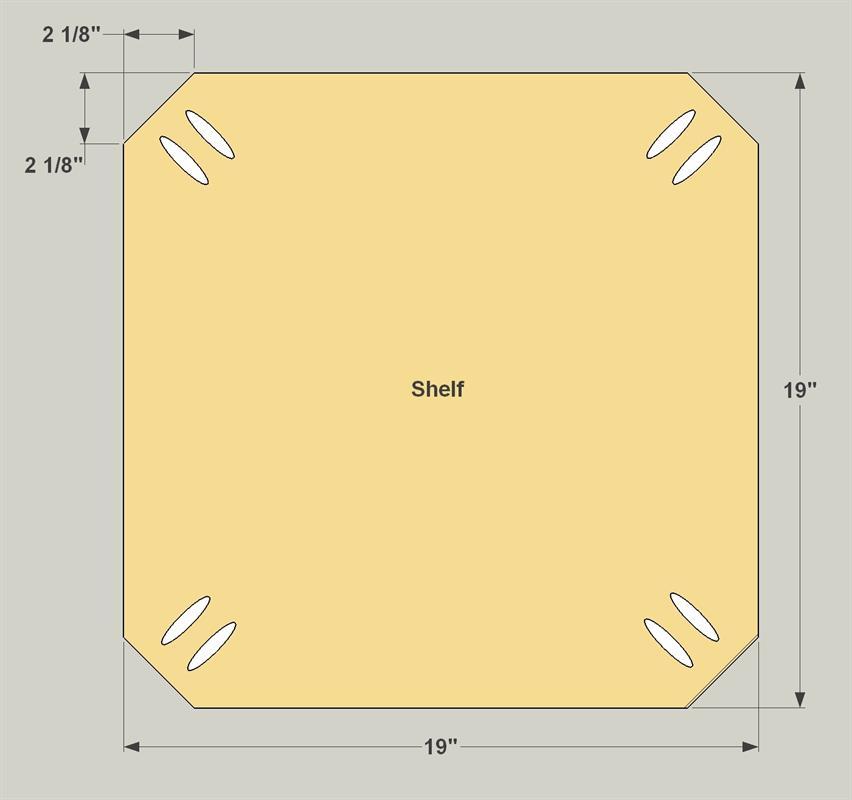
Create a Shelf
Cut a Shelf to size from 3/4" plywood, as shown in the cutting diagram. Then clip off the corners, as shown. Once you’ve done that, drill a pair of pocket holes at each corner with your pocket-hole jig set up for 3/4" material. Cover edges of the plywood that will be exposed with iron-on edge banding. (Or, if you intend to paint, fill the edges with spackling compound, and then sand it smooth.)
-
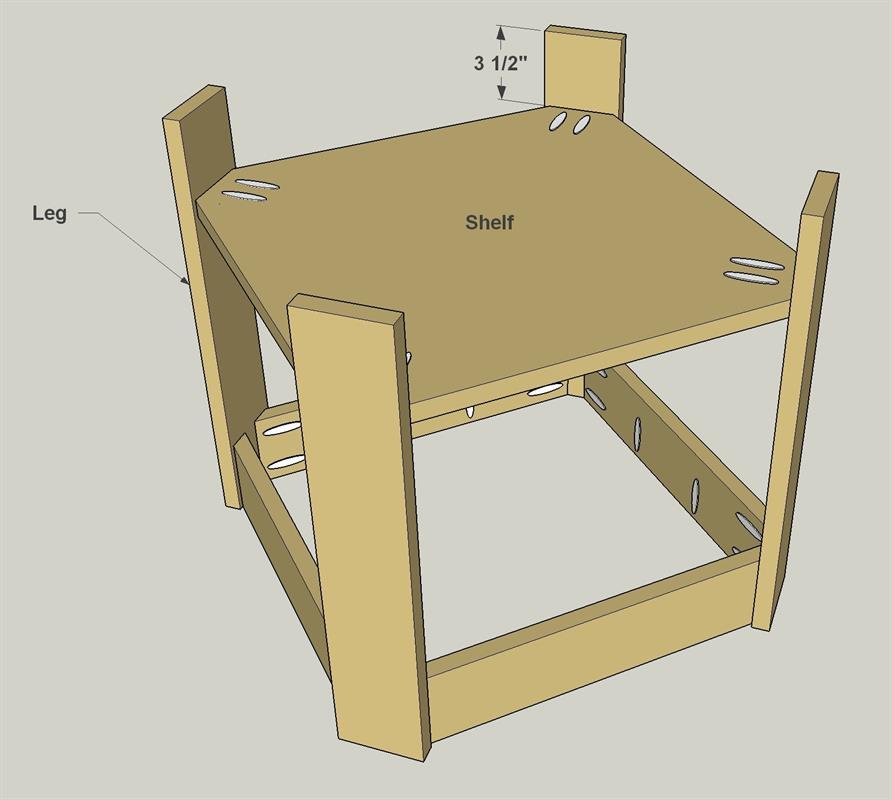
Install the Shelf
With the Shelf done, you can attach it to the Legs using 1 1/4" fine-thread pocket-hole screws.
-
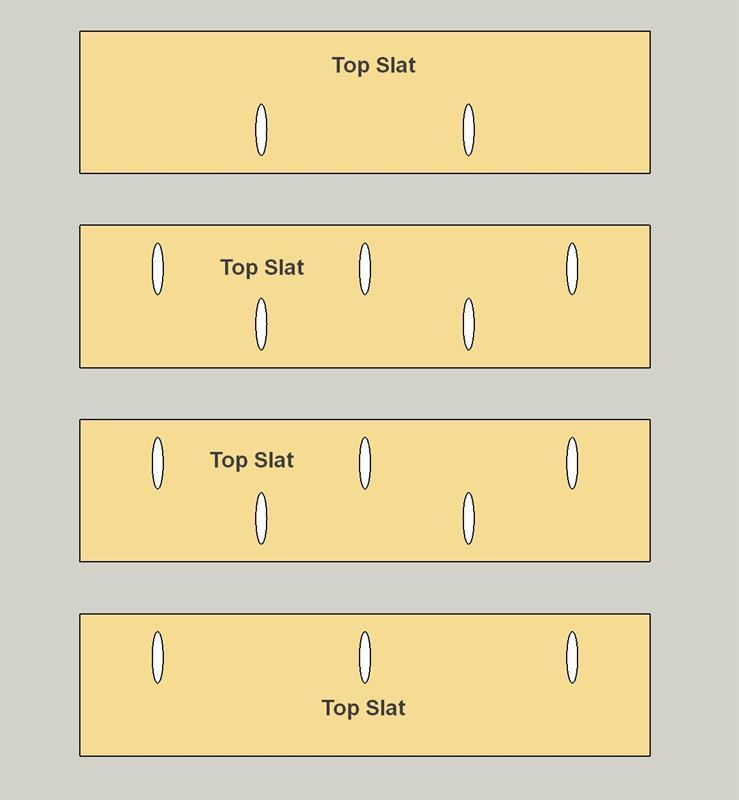
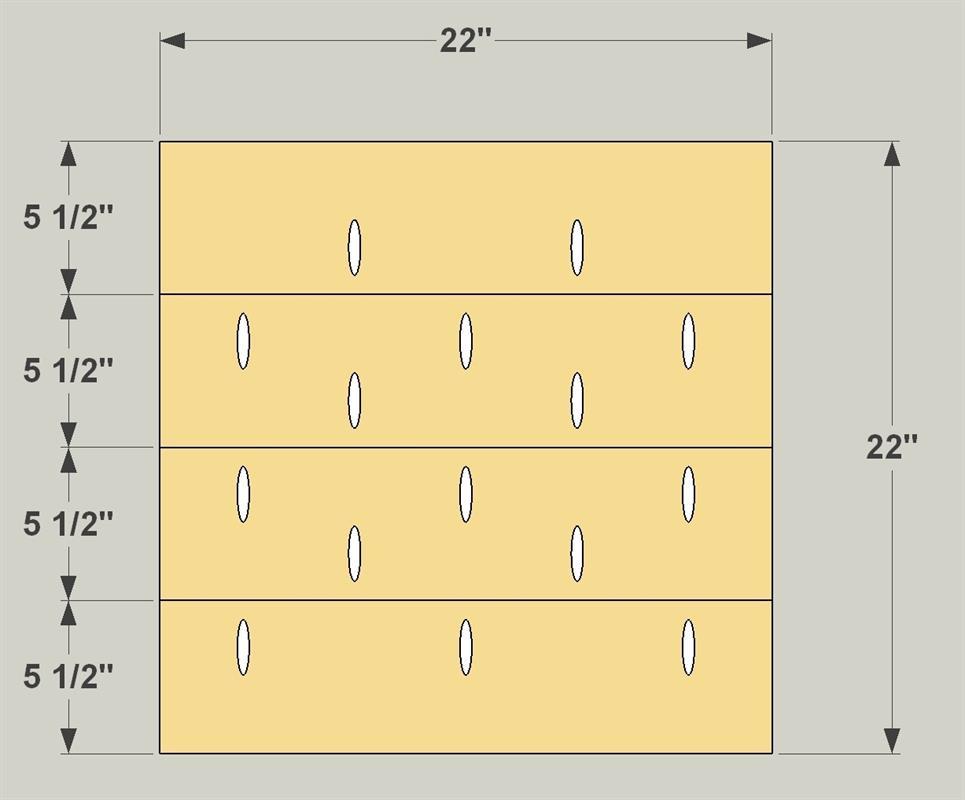
Make the Top Slats
Cut four Top Slats to length from a 1x6 board, as shown in the cutting diagram. Then, with your pocket-hole jig set up for 3/4" material, drill pocket holes in the Top Slats as shown.
-
Assemble the Top
After sanding the top slats, connect them using 1 1/4" fine-thread pocket-hole screws.
-
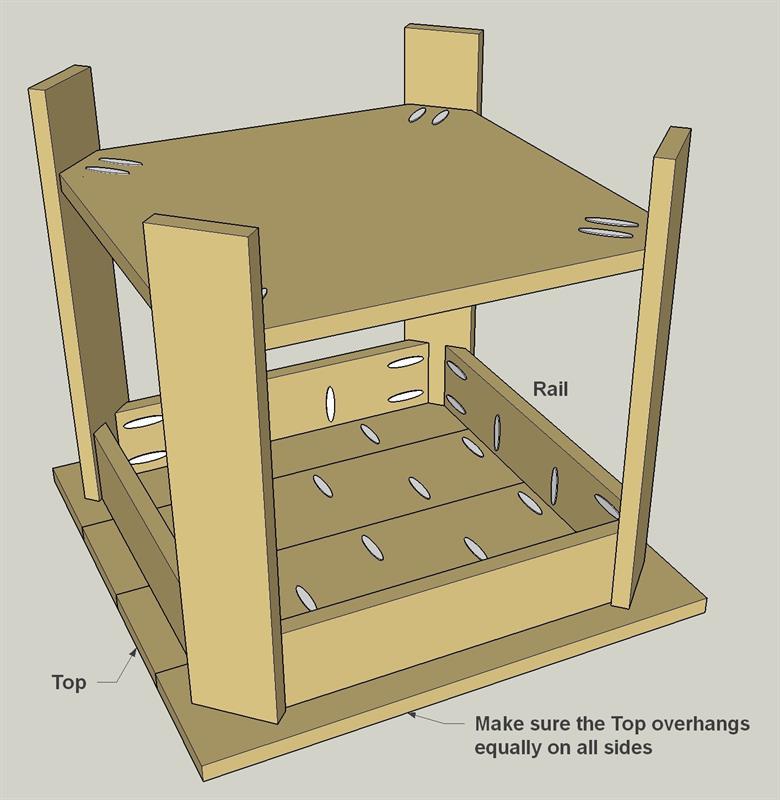
Mount the Top and Finish
To complete your nightstand, mount the Top to the base. Lay the Top face down and position the base on the Slats so that there are equal overhangs on all sides. Then attach the Top to the Rails using 1 1/4" fine-thread pocket-hole screws. Then coat the nightstand with the finish, stain, or paint of your choice.