

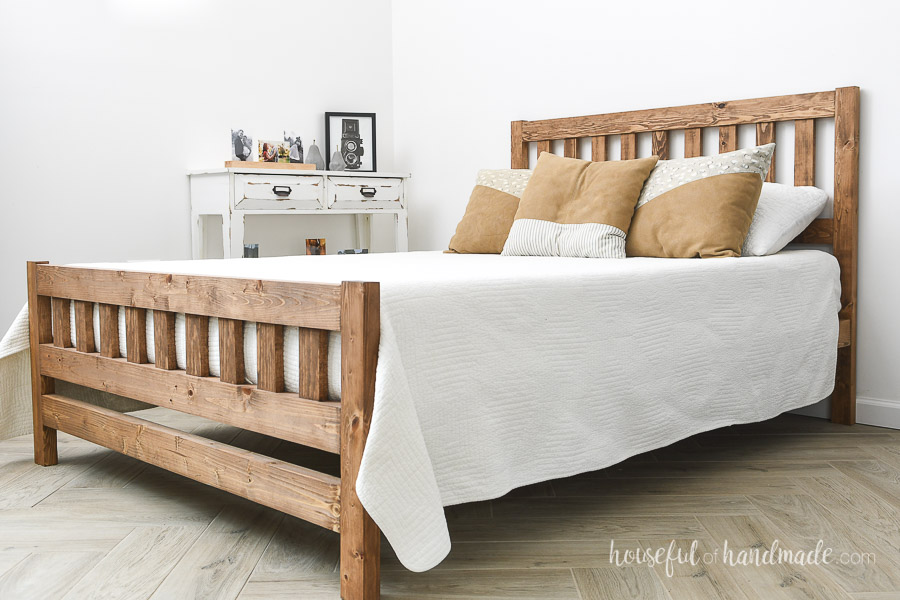
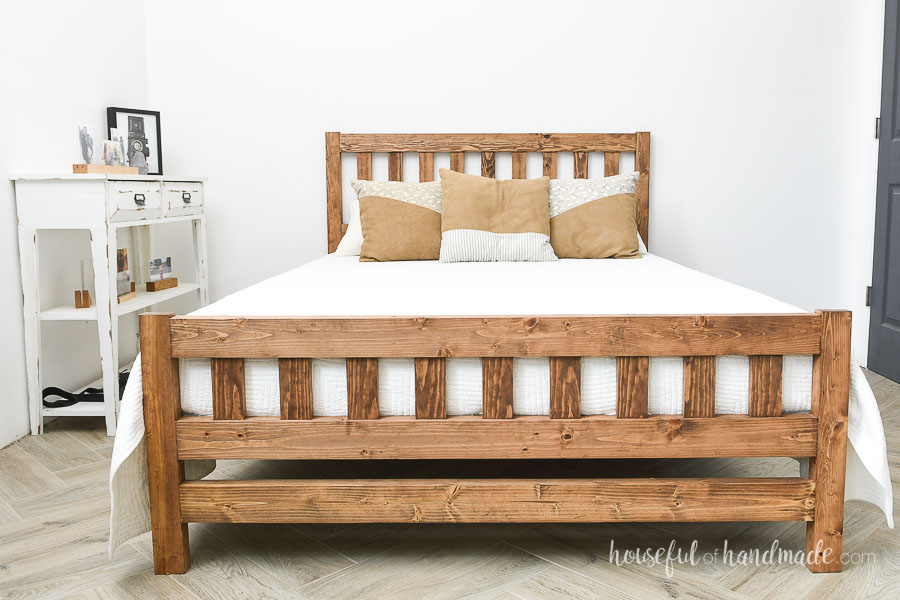
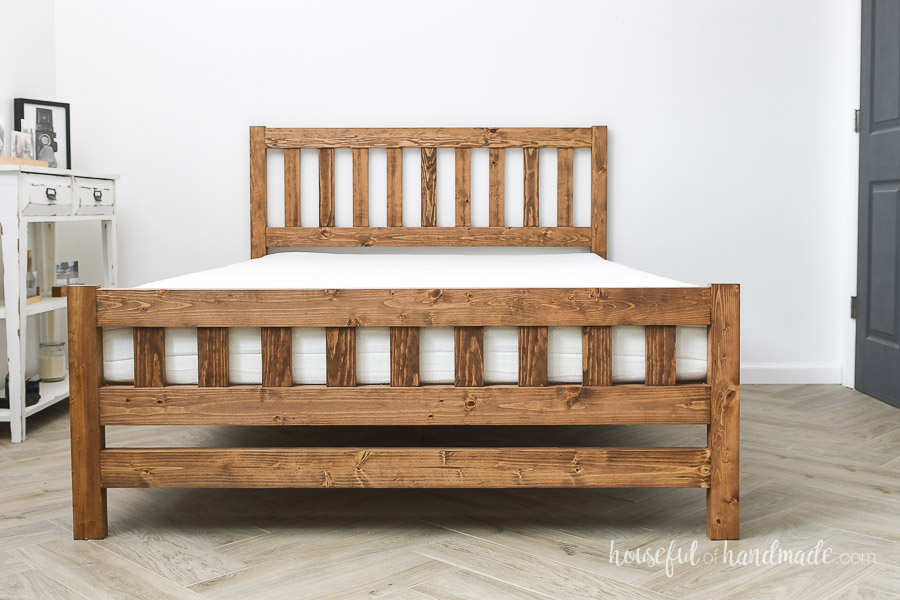
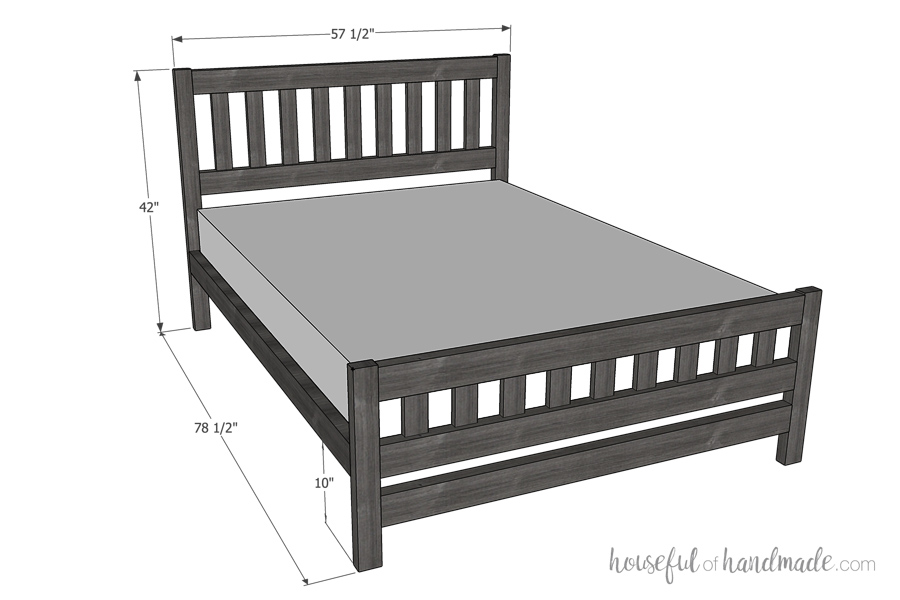


This easy to build bed will make a statement in any room. The simple design creates a stunning headboard and footboard for your full bed from simple 2x4s, 2x3s and 1x3s.
Tools
Kreg Tools


Other Tools
-
Miter saw

Materials
Wood Products
- 3 Board , 2x4x10'
- 2 Board , 2x4x8'
- 3 Board , 2x3x8'
- 2 Board , 2x2x8'
- 2 Board , 1x3x8'
Hardware & Supplies
- 52 2 ½” pocket hole screws
- 72 1 ¼” pocket hole screws
- 1 Wood glue
- 3 Pairs bed rail brackets
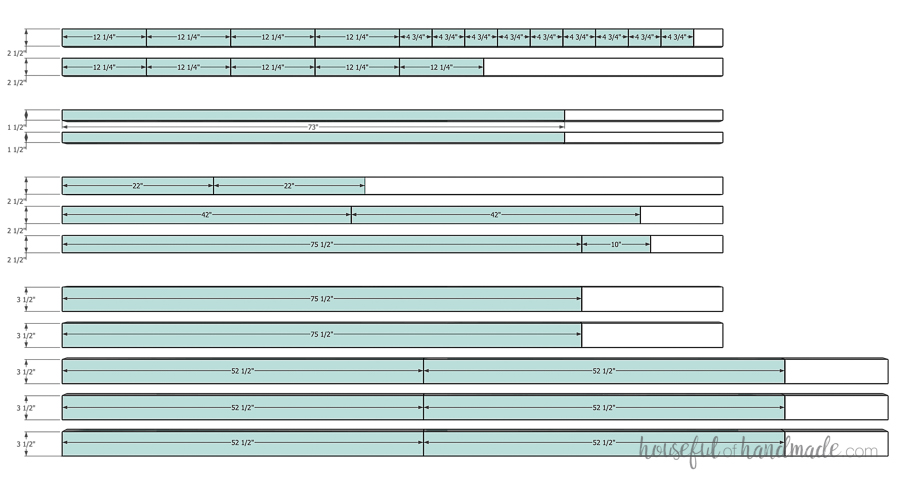
Cut List & Parts
- 2 Side rails , 1 ½” x 3 ½” x 75½”
- 6 Headboard/footboard rails , 1 ½” x 3 ½” x 52 ½”
- 1 Center rail , 1 ½” x 2 ½” x 75 ½”
- 2 Headboard legs , 1 ½” x 2 ½” x 42"
- 2 Footboard legs , 1 ½” x 2 ½” x 22"
- 1 Center leg , 1 ½” x 2 ½” x 10"
- 2 Side rail supports , 1 ½” x 1 ½” x 72"
- 9 Headboard slats , ¾” x 2 ½” x 12 ¼”
- 9 Footboard slats , ¾” x 2 ½” x 4 ¾”
Directions
-
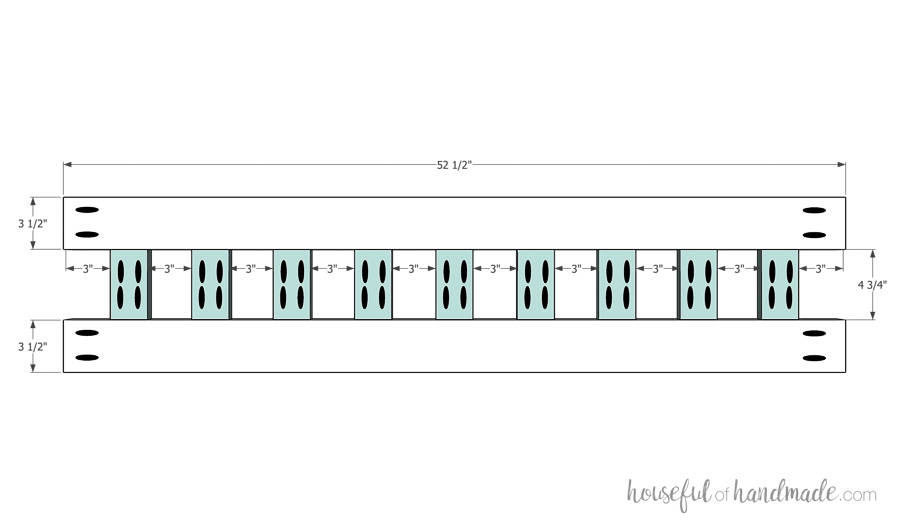
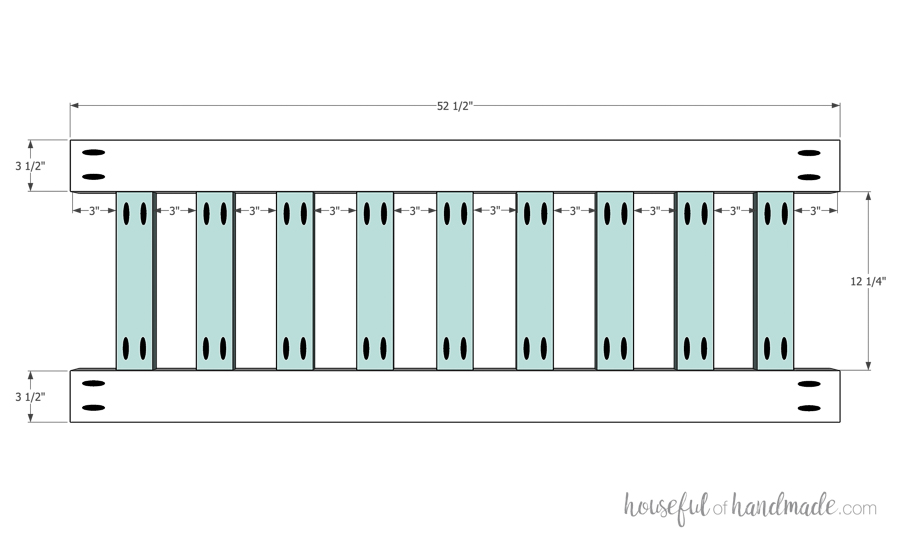
Assemble footboard slats
Set your Kreg pocket hole jig to drill holes in 3/4" thick material. Drill 2 pockets holes in each end of the (9) footboard slat boards. Then set your jig for 1 1/2" thick material and drill 2 pocket holes in each end of 3 footboard rail boards.
Attach the slats between two rail boards so they are spaced 3" from the edge and 3" apart. Set the slats back 3/8" from the front and back of the rails (so they are centered). Secure with wood glue and 1 1/4" pocket hole screws.
To make attaching the slats easier, attach all the slats to one rail first. Then attach them to the second rail. If you attach one slat to both rails, it will be way harder to get the other slats into place.
Square 2x4s
I ripped down the 2x4 boards on my table saw to remove the curved edge. This made my boards slightly smaller than the typical 3 1/2" wide 2x4. All measurements in the plans are for a standard 3 1/2" width. If you trim down your boards, you will need to adjust the measurements (see my blog post for more details).
-
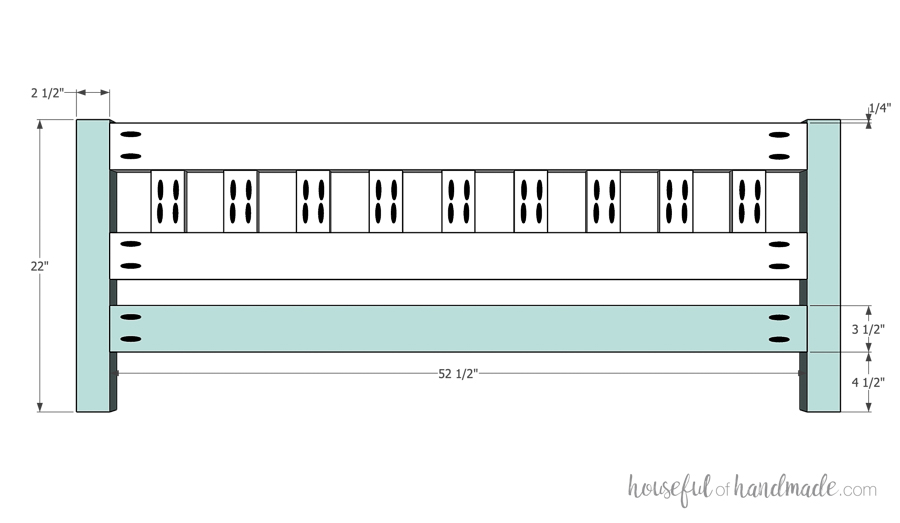
Finish footboard assembly
Attach the three rails to the footboard legs as shown in the diagram. The top of the assembled rail/slats should be set down 1/4" from the top of the legs and the bottom should be 10" up from the bottom.
Attach all three pieces to one leg first, then the other. Secure with 2 1/2" pocket hole screws and wood glue. Use face clamps to keep the boards flush as your secure them.
-
Assemble headboard slats
The headboard is assembled the same way as the footboard. Start by drilling 2 pockets holes in each end of the (9) headboard slat boards and the 3 headboard rail boards. Make sure your jig is set for the correct wood thicknesses.
Attach the slats between two rail boards so they are spaced 3" from the edge and 3" apart and centered on the rails. Secure with wood glue and 1 1/4" pocket hole screws.
-
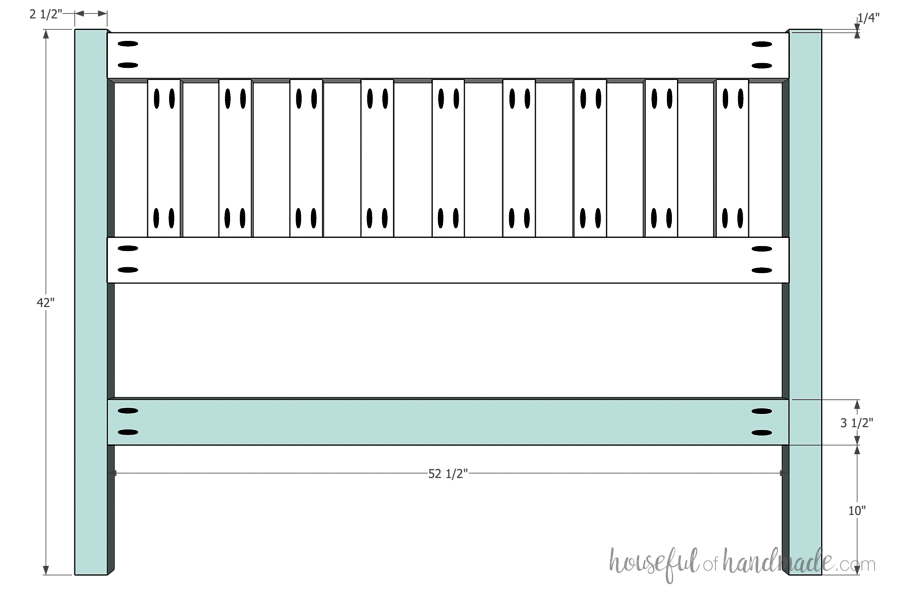
Finish headboard assembly
Then attach the three rails between the two headboard leg boards according to the diagram. The top of the assembled rail/slats should be 1/4" down from the top of the legs. The third, unattached rail, should be attached so it is 10" up from the bottom of the legs.
Secure with wood glue and 2 1/2" pocket hole screws.
Adjusting the Bed Height
The bottom rail on the headboard and the middle rail on the footboard are where the rails will attach to hold the two pieces together and support your mattress. If you want to raise or lower the height of your bed or headboard/footboard, make sure these two boards are always at the same height.
-
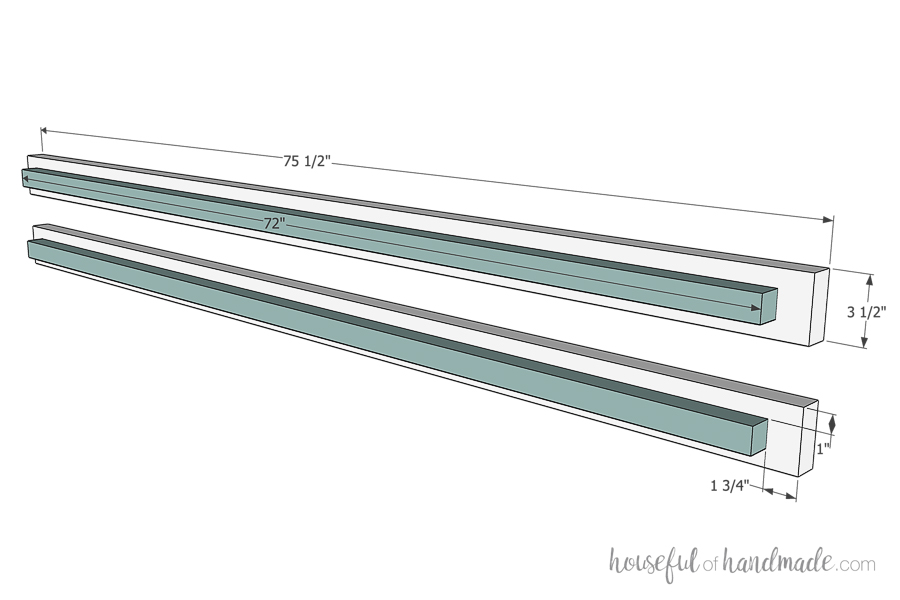
Build side rails
Lay the 2x2 rail support on the side rail pieces so it is centered side to side and set down from the top 1". Attach the 2x2 to the 2x4 with 2 1/2" pocket hole screws spaced every 6" along the board. Countersink the screws with the Kreg quick-flip tool. Repeat for the other side rail.
-
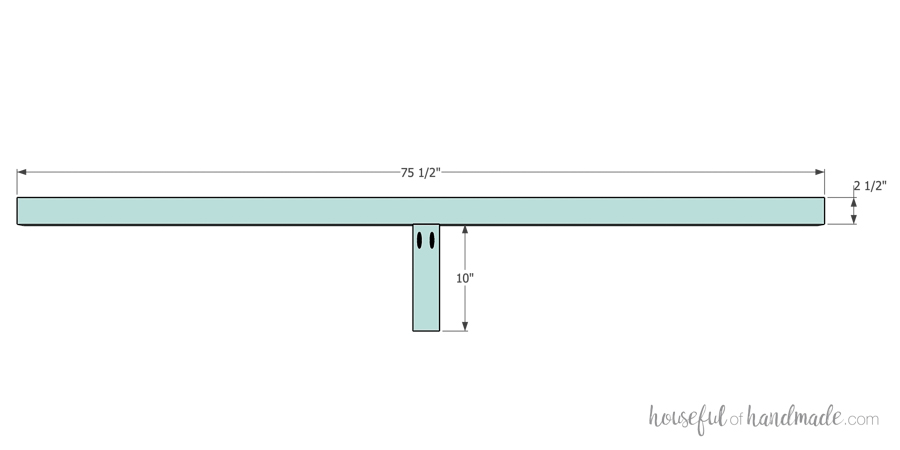
Build center rail
The center rail will support your mattress in the center and prevent sagging. Drill pocket holes set for 1 1/2" thick material in one end of the center leg board. Attach it to the center edge of the center rail board with wood glue and 2 1/2" pocket hole screws.
-
Sand and finish
Sand and finish all your pieces before adding the bed rail brackets to the bed. I used Early American stain by Minwax and sealed it with a furniture wax for a matte finish.
-
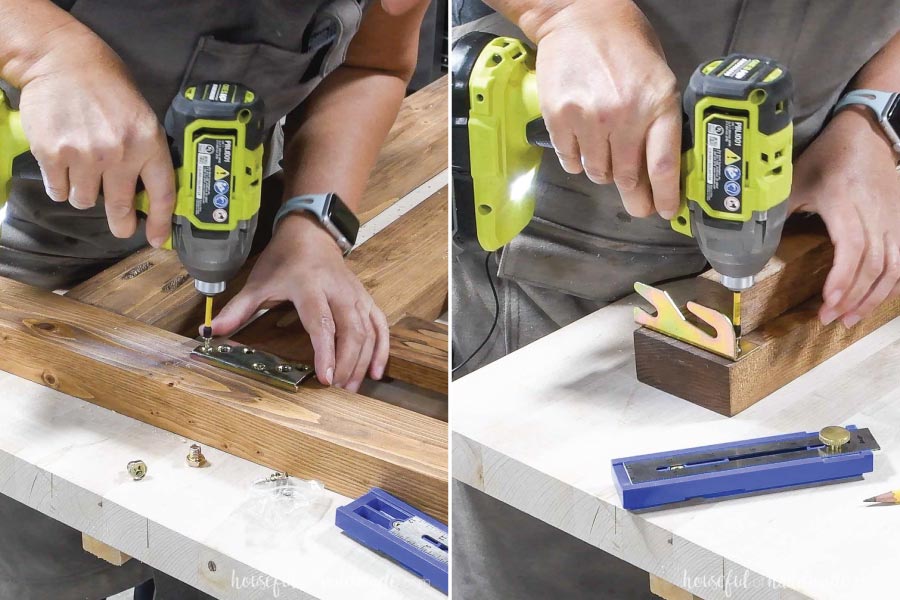
Add bed rail brackets
Attach your bed rail bracket to the ends of the side rail boards according to their specific directions. Then attach the second piece to the back of the footboard and front of the headboard so the rails will be 10" up from the bottom of the legs.
I include detailed install instructions and a link for the specific brackets I used in my linked blog post.
-
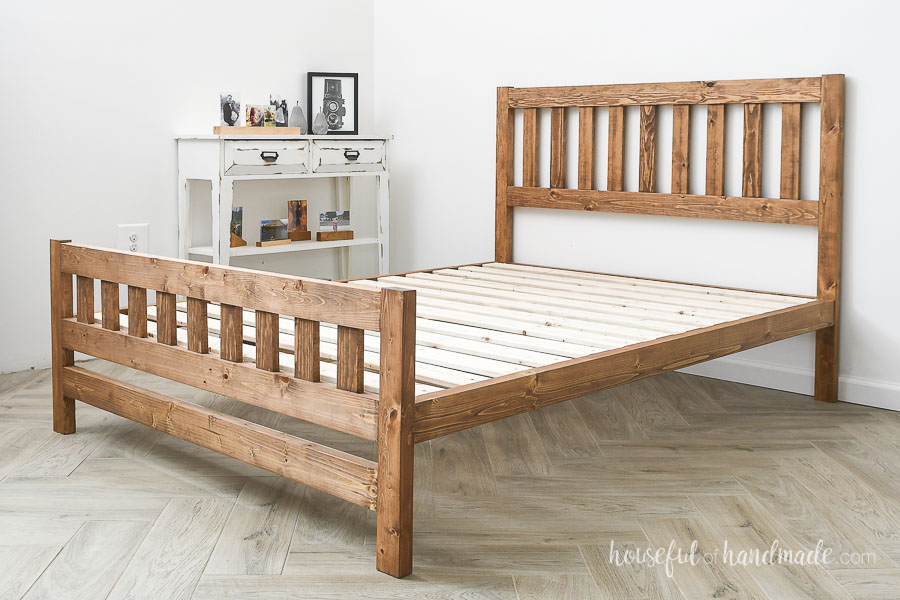
Assemble bed
To assemble the bed, attach the side rails and center rail to the headboard and footboard using the bed rail brackets. Tighten bolts to secure if available.
Add bed slats or plywood to rest on the 2x2 side rail support and center rail. If you want to make your own bed slats, cut 1x4 boards to 54 1/4" long and secure with a screw. Check your specific mattress's requirements to see how close your slats need to be.

-
Enjoy!
You did it! Now all that is left is to add your mattress to your new bed and enjoy.
For plan for different sizes of this bed and more things to build for your home, visit me at Housefulofhandmade.com. I love helping you to learn to DIY.