Easy, Elegant Bench
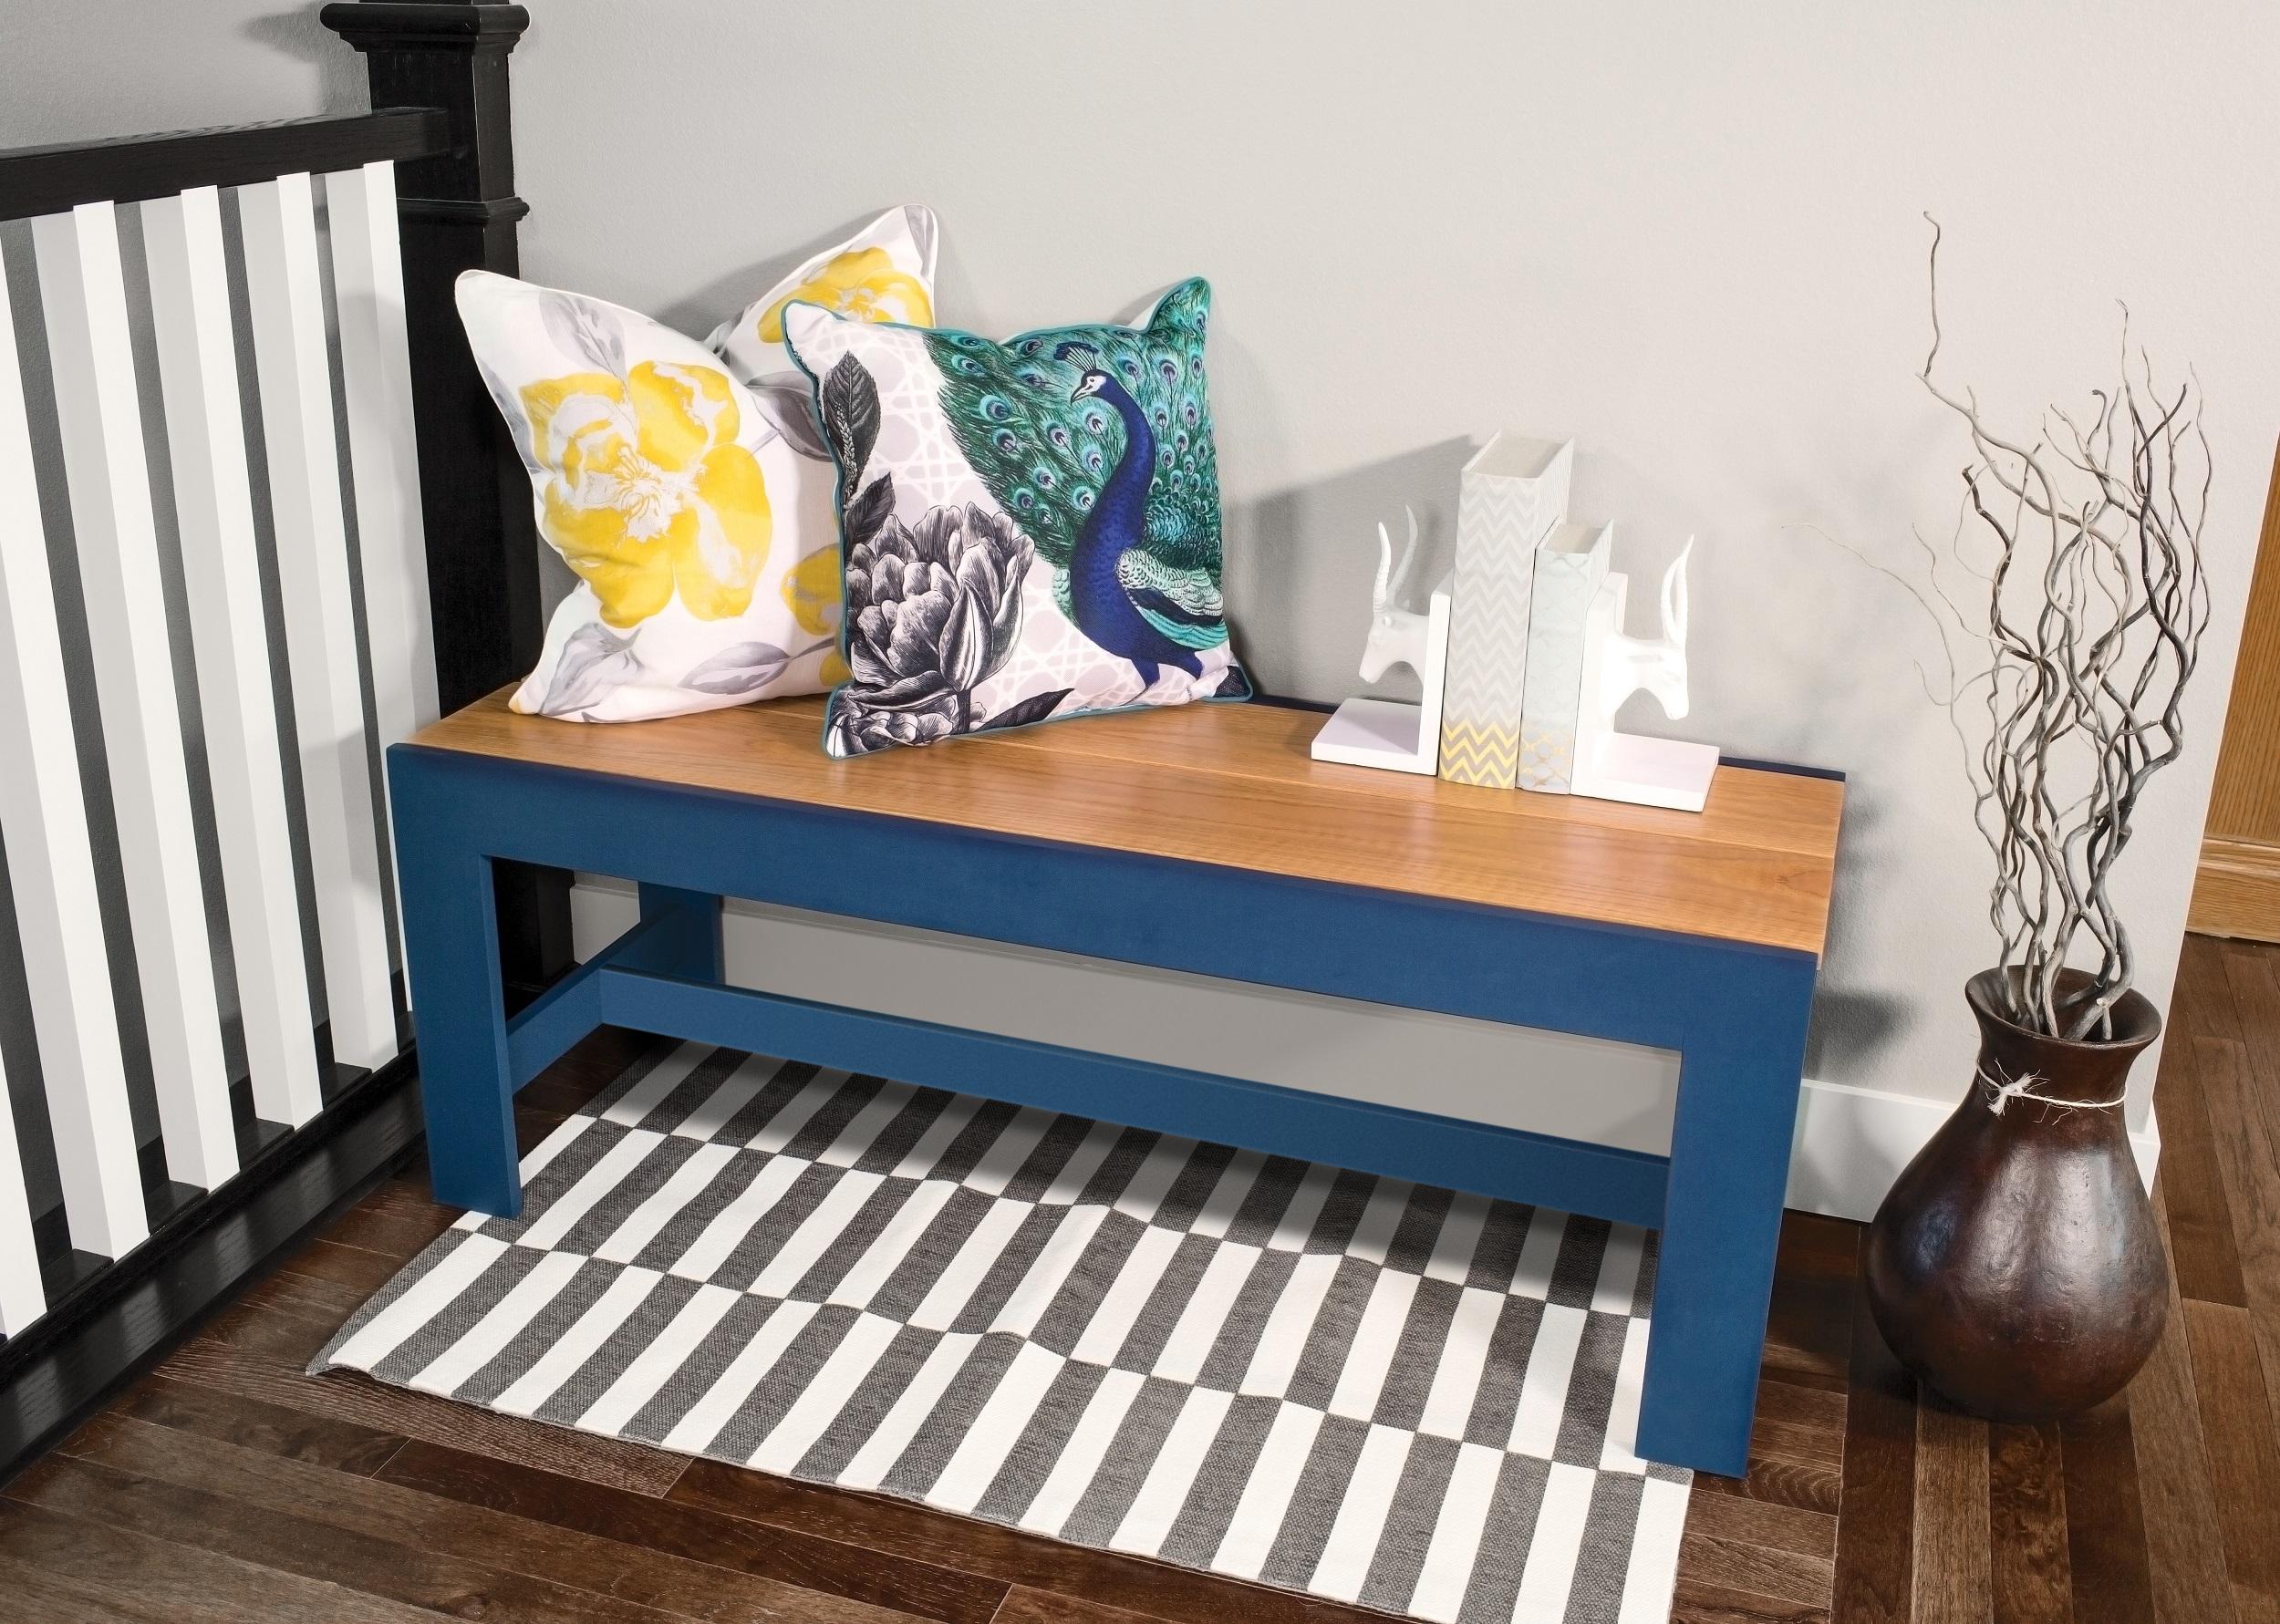
By Kreg ToolSimple lines, bold colors, and easy construction make this bench a perfect project. Whether you use it in an entryway, in a hallway, or even put it to work for another purpose, it will add style and function that you’ll enjoy for years. It’s made from just a few boards, and requires only straight, square cuts, and it’s a project that you can easily customize by choosing a different combination of paint and finish, or by using different woods.
Directions
-
Create the Legs and Side Rails
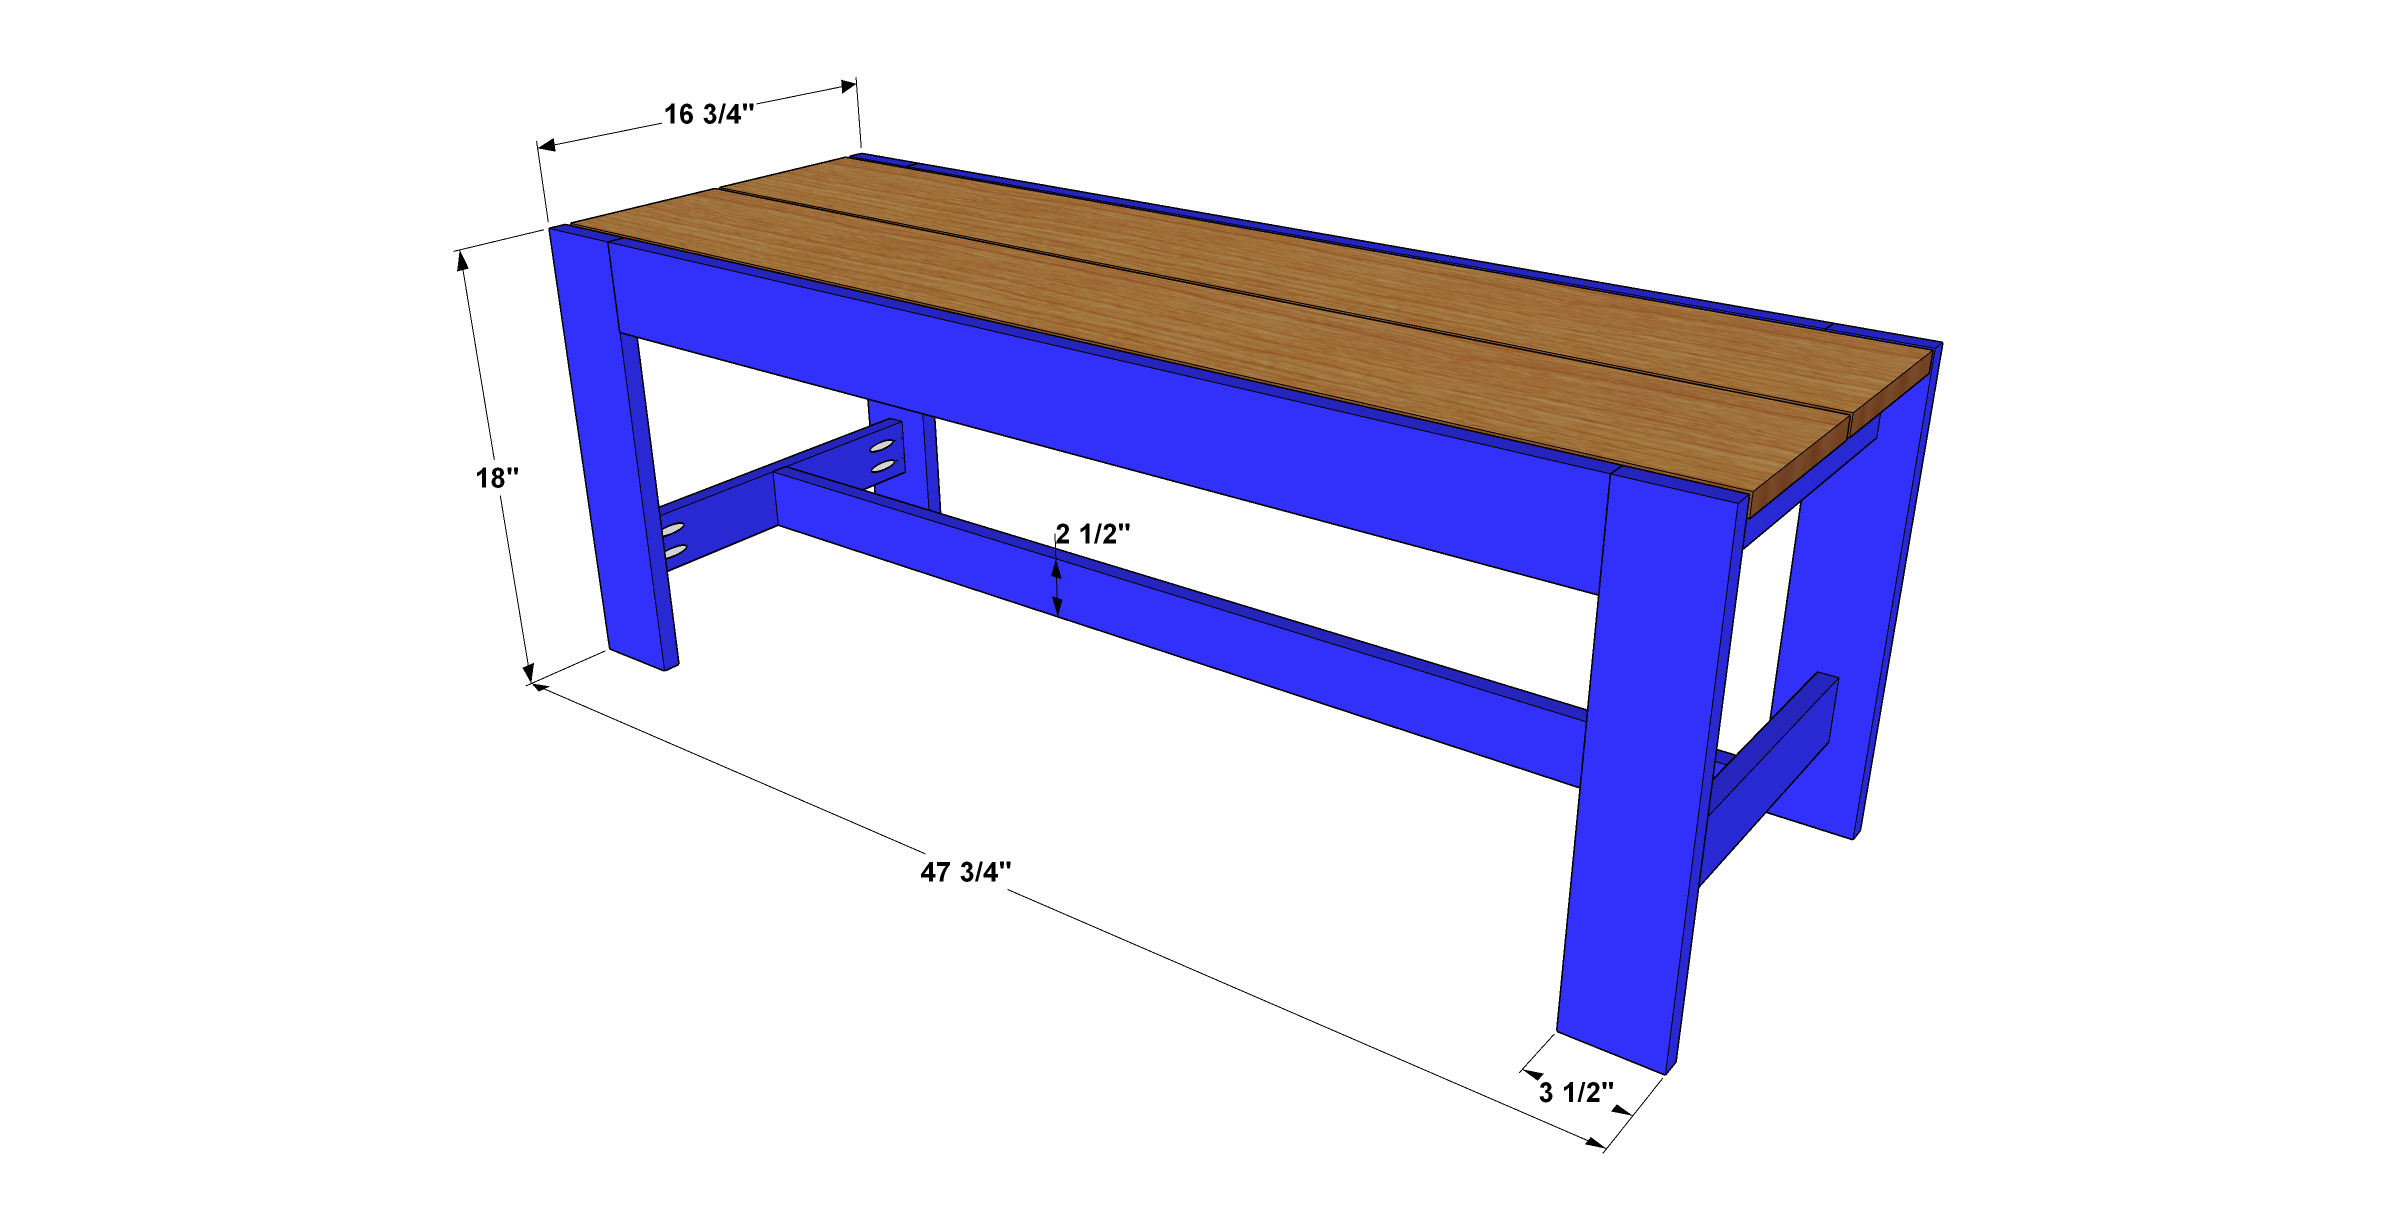
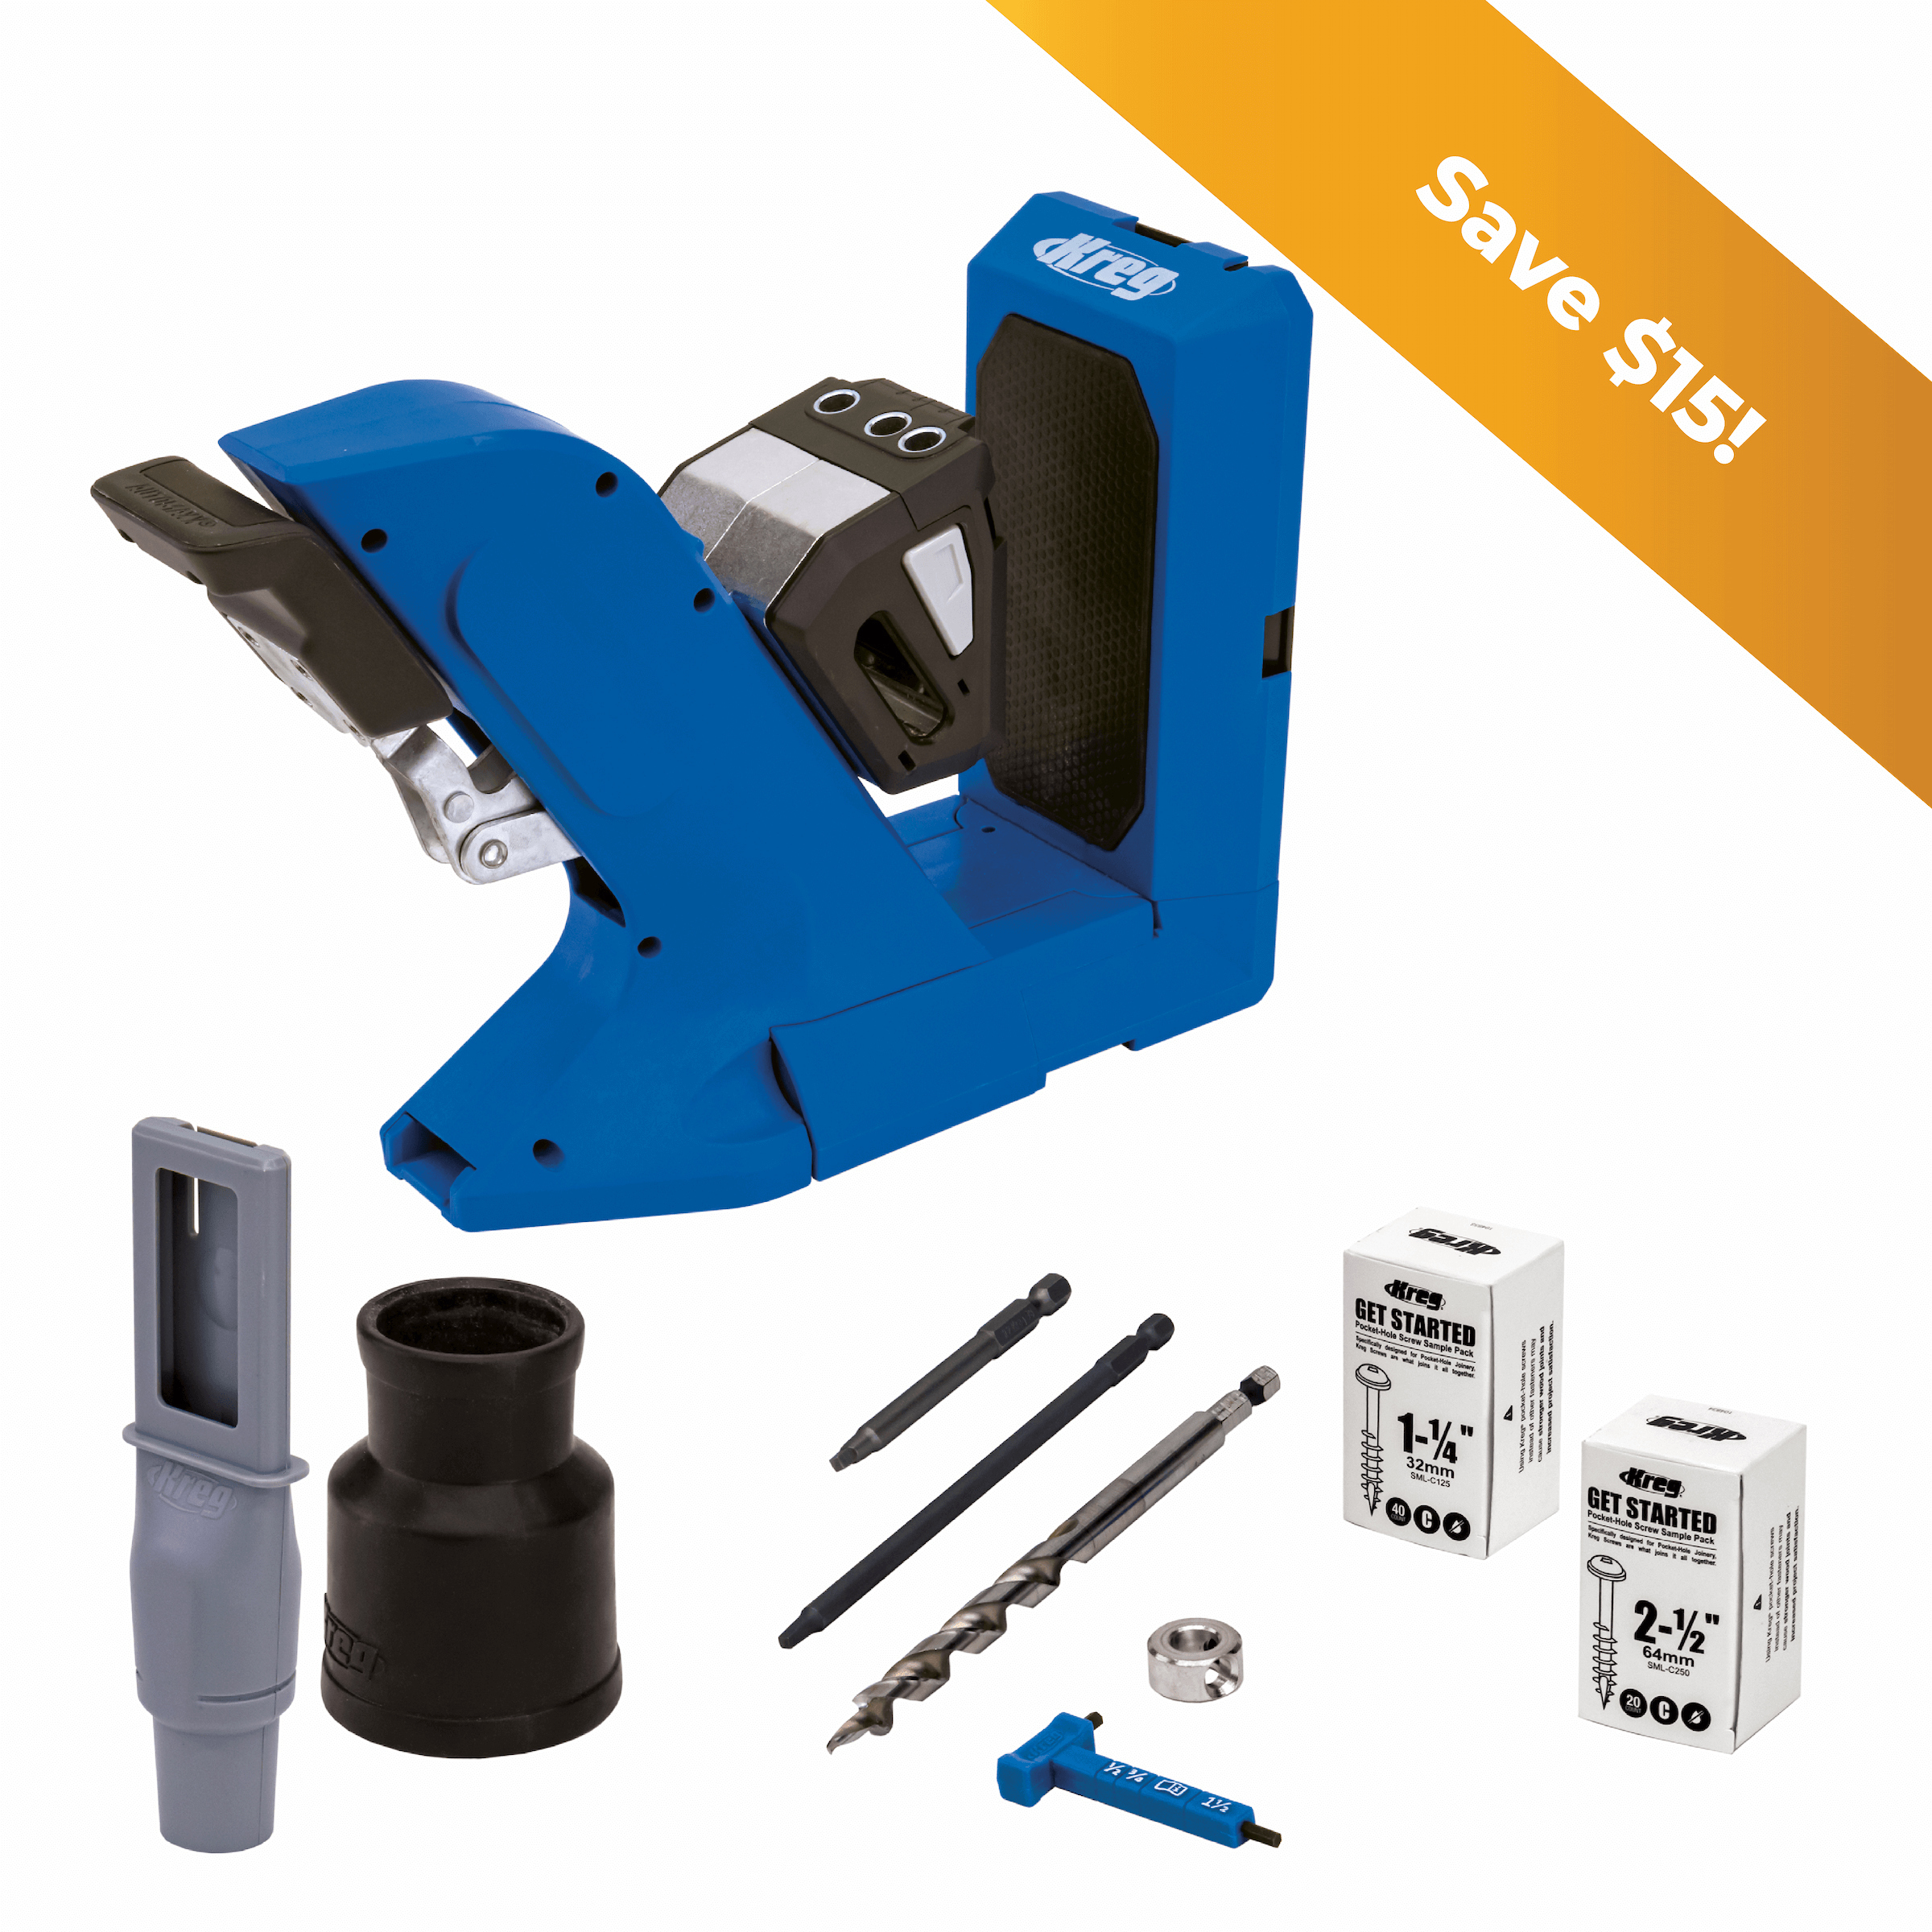
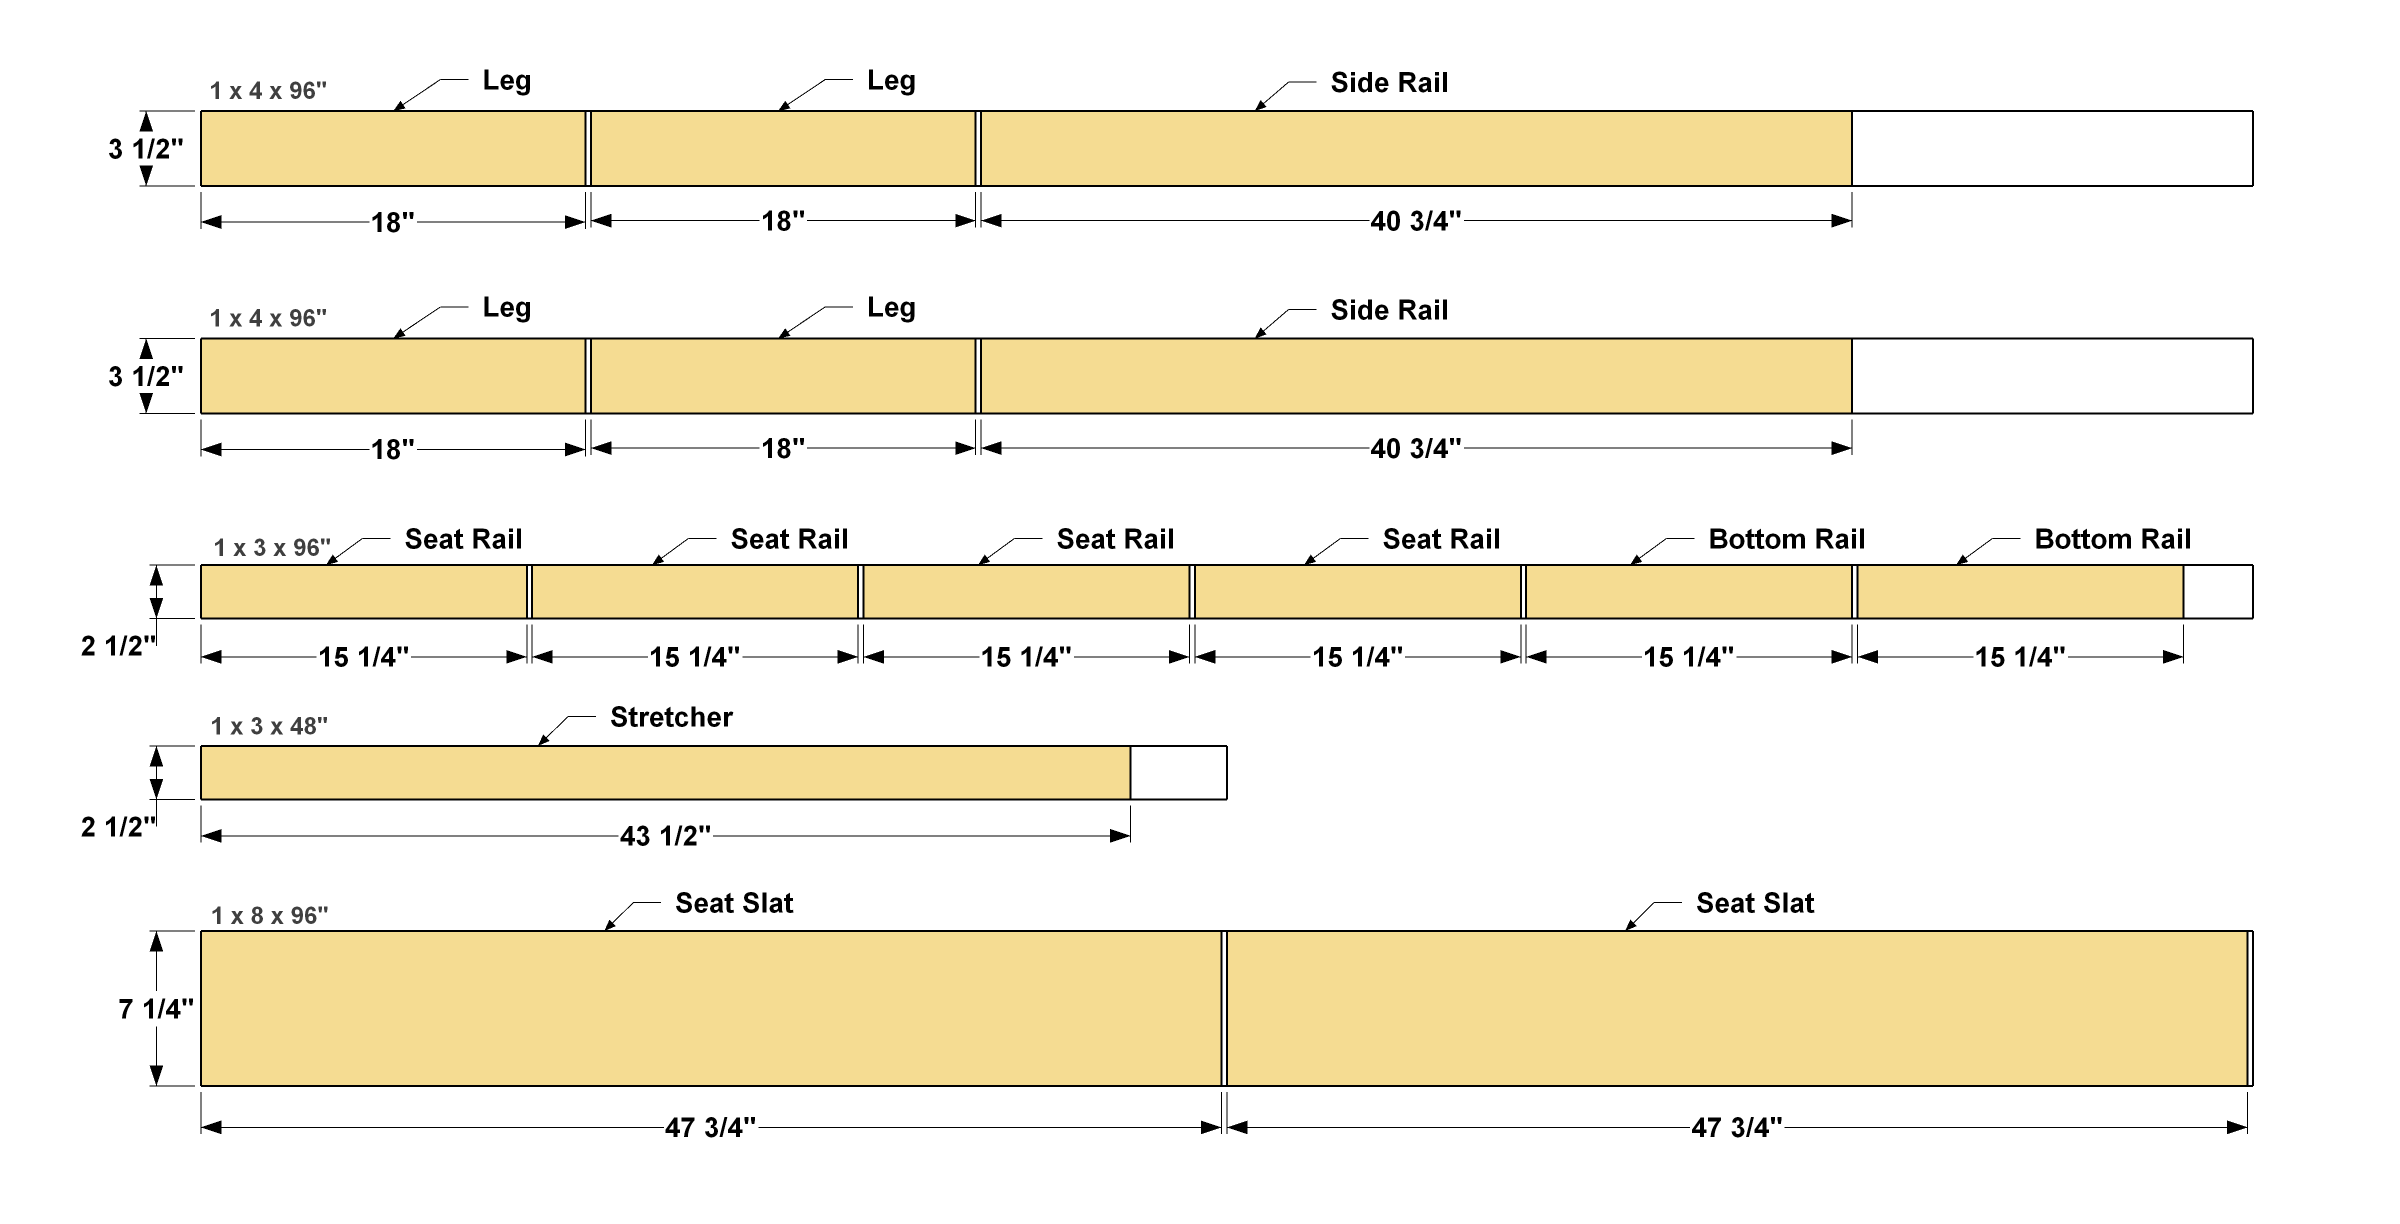
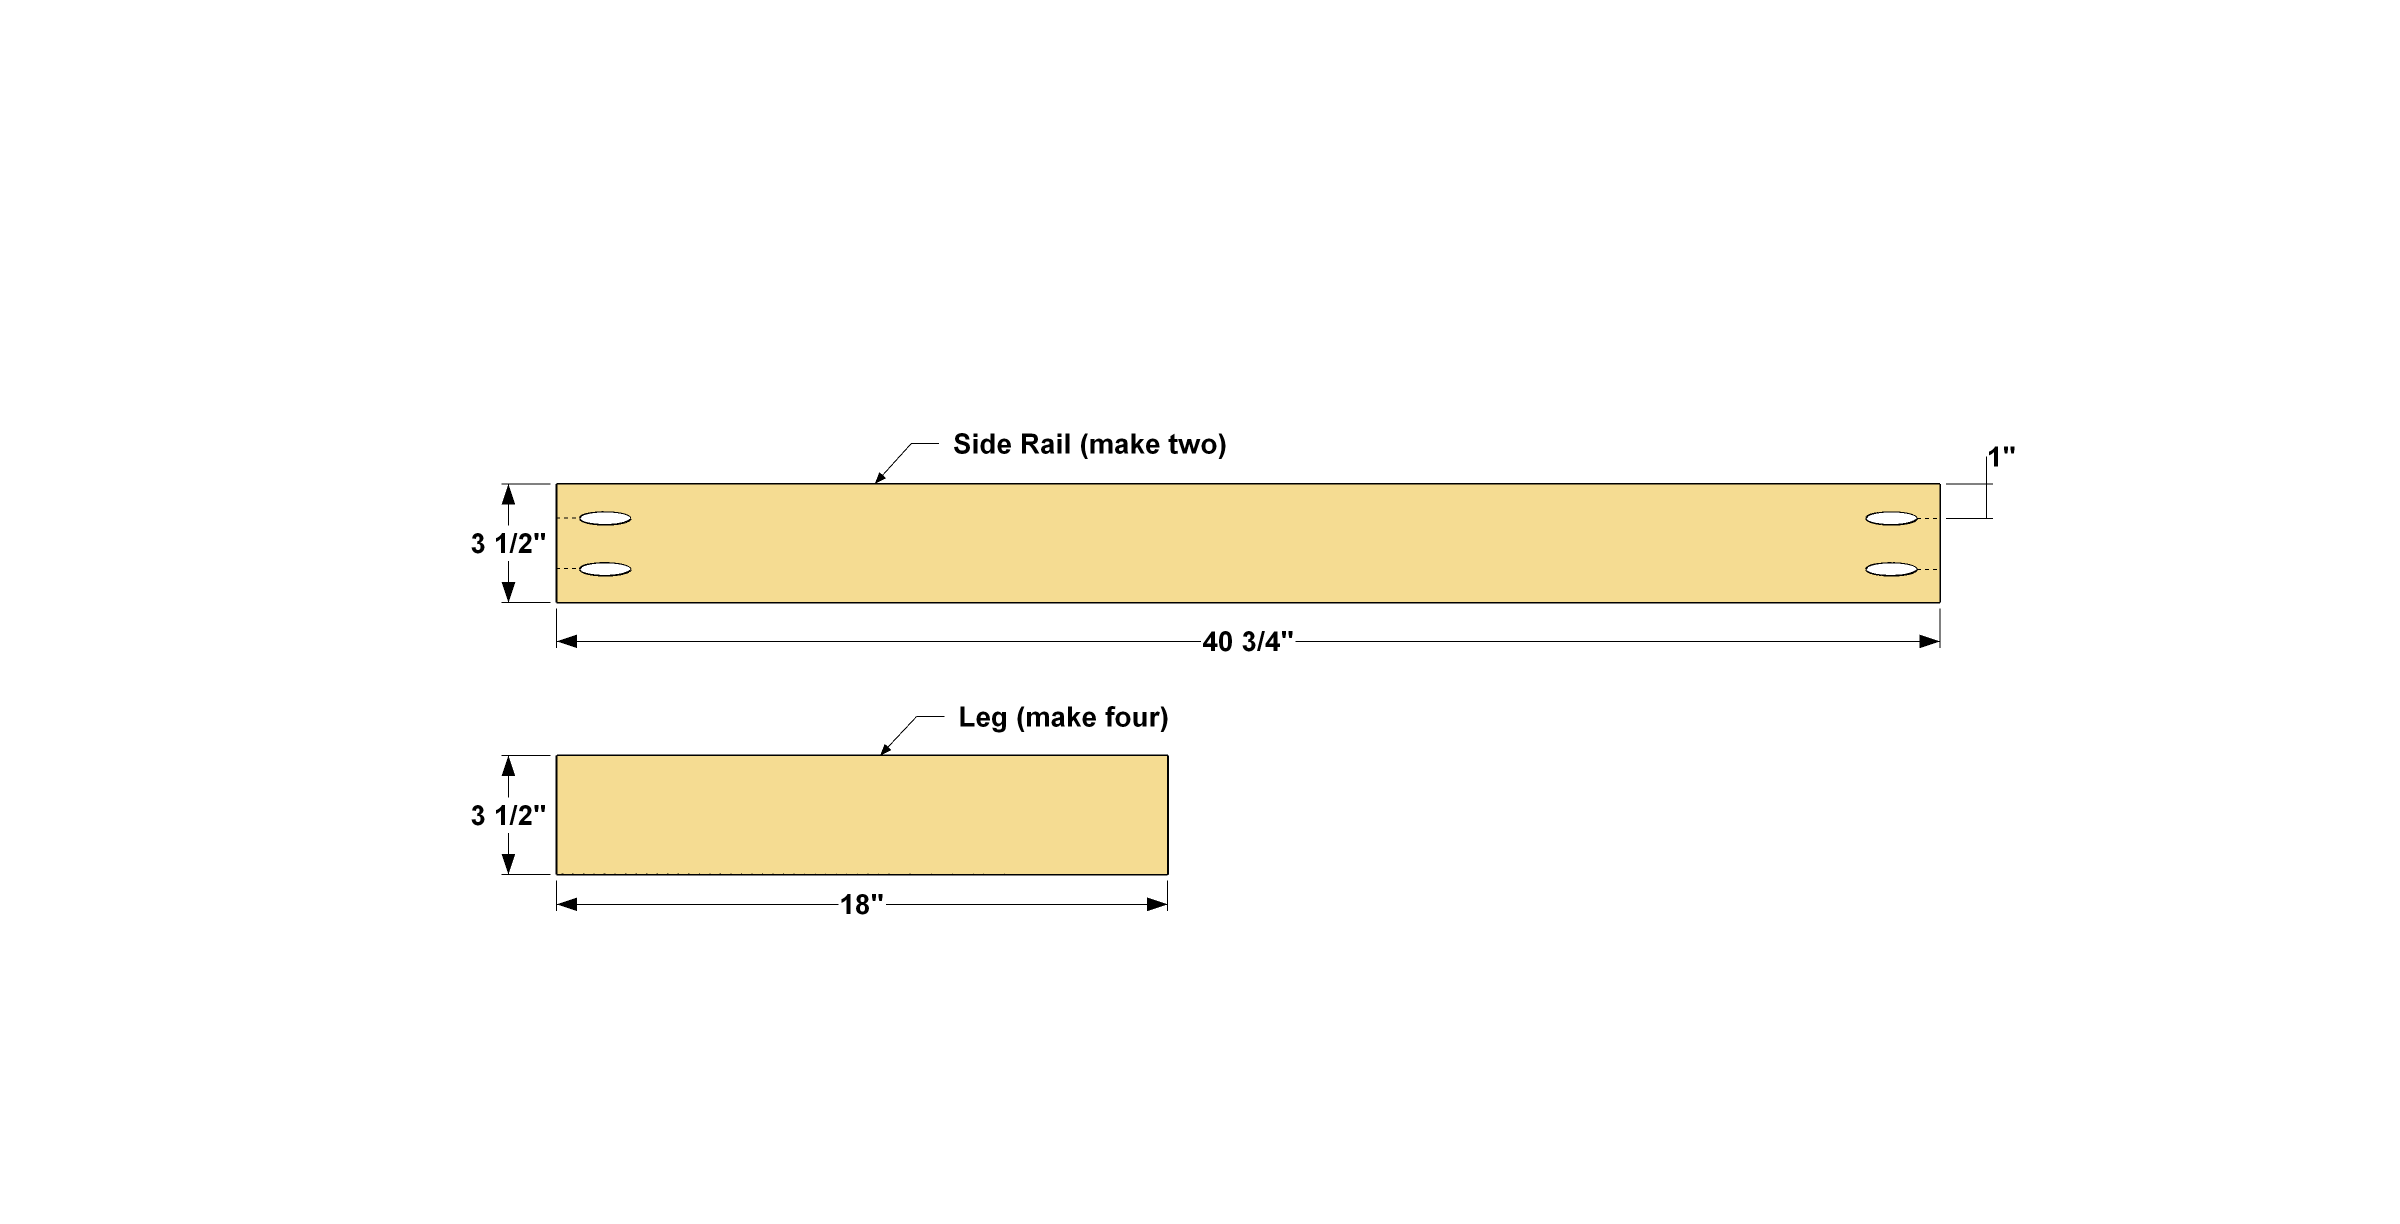
Cut four Legs and two Side Rails to length from 1x4 boards, as shown in the cutting diagram. Set your Kreg®
Pocket-Hole Jig for 3⁄4"-thick stock, and then drill pocket holes in the ends of each of the two Rails as shown. After you drill the pocket holes, sand the faces and edges of the parts smooth. Also sand the ends of the Legs. -
Join the Legs and Rails
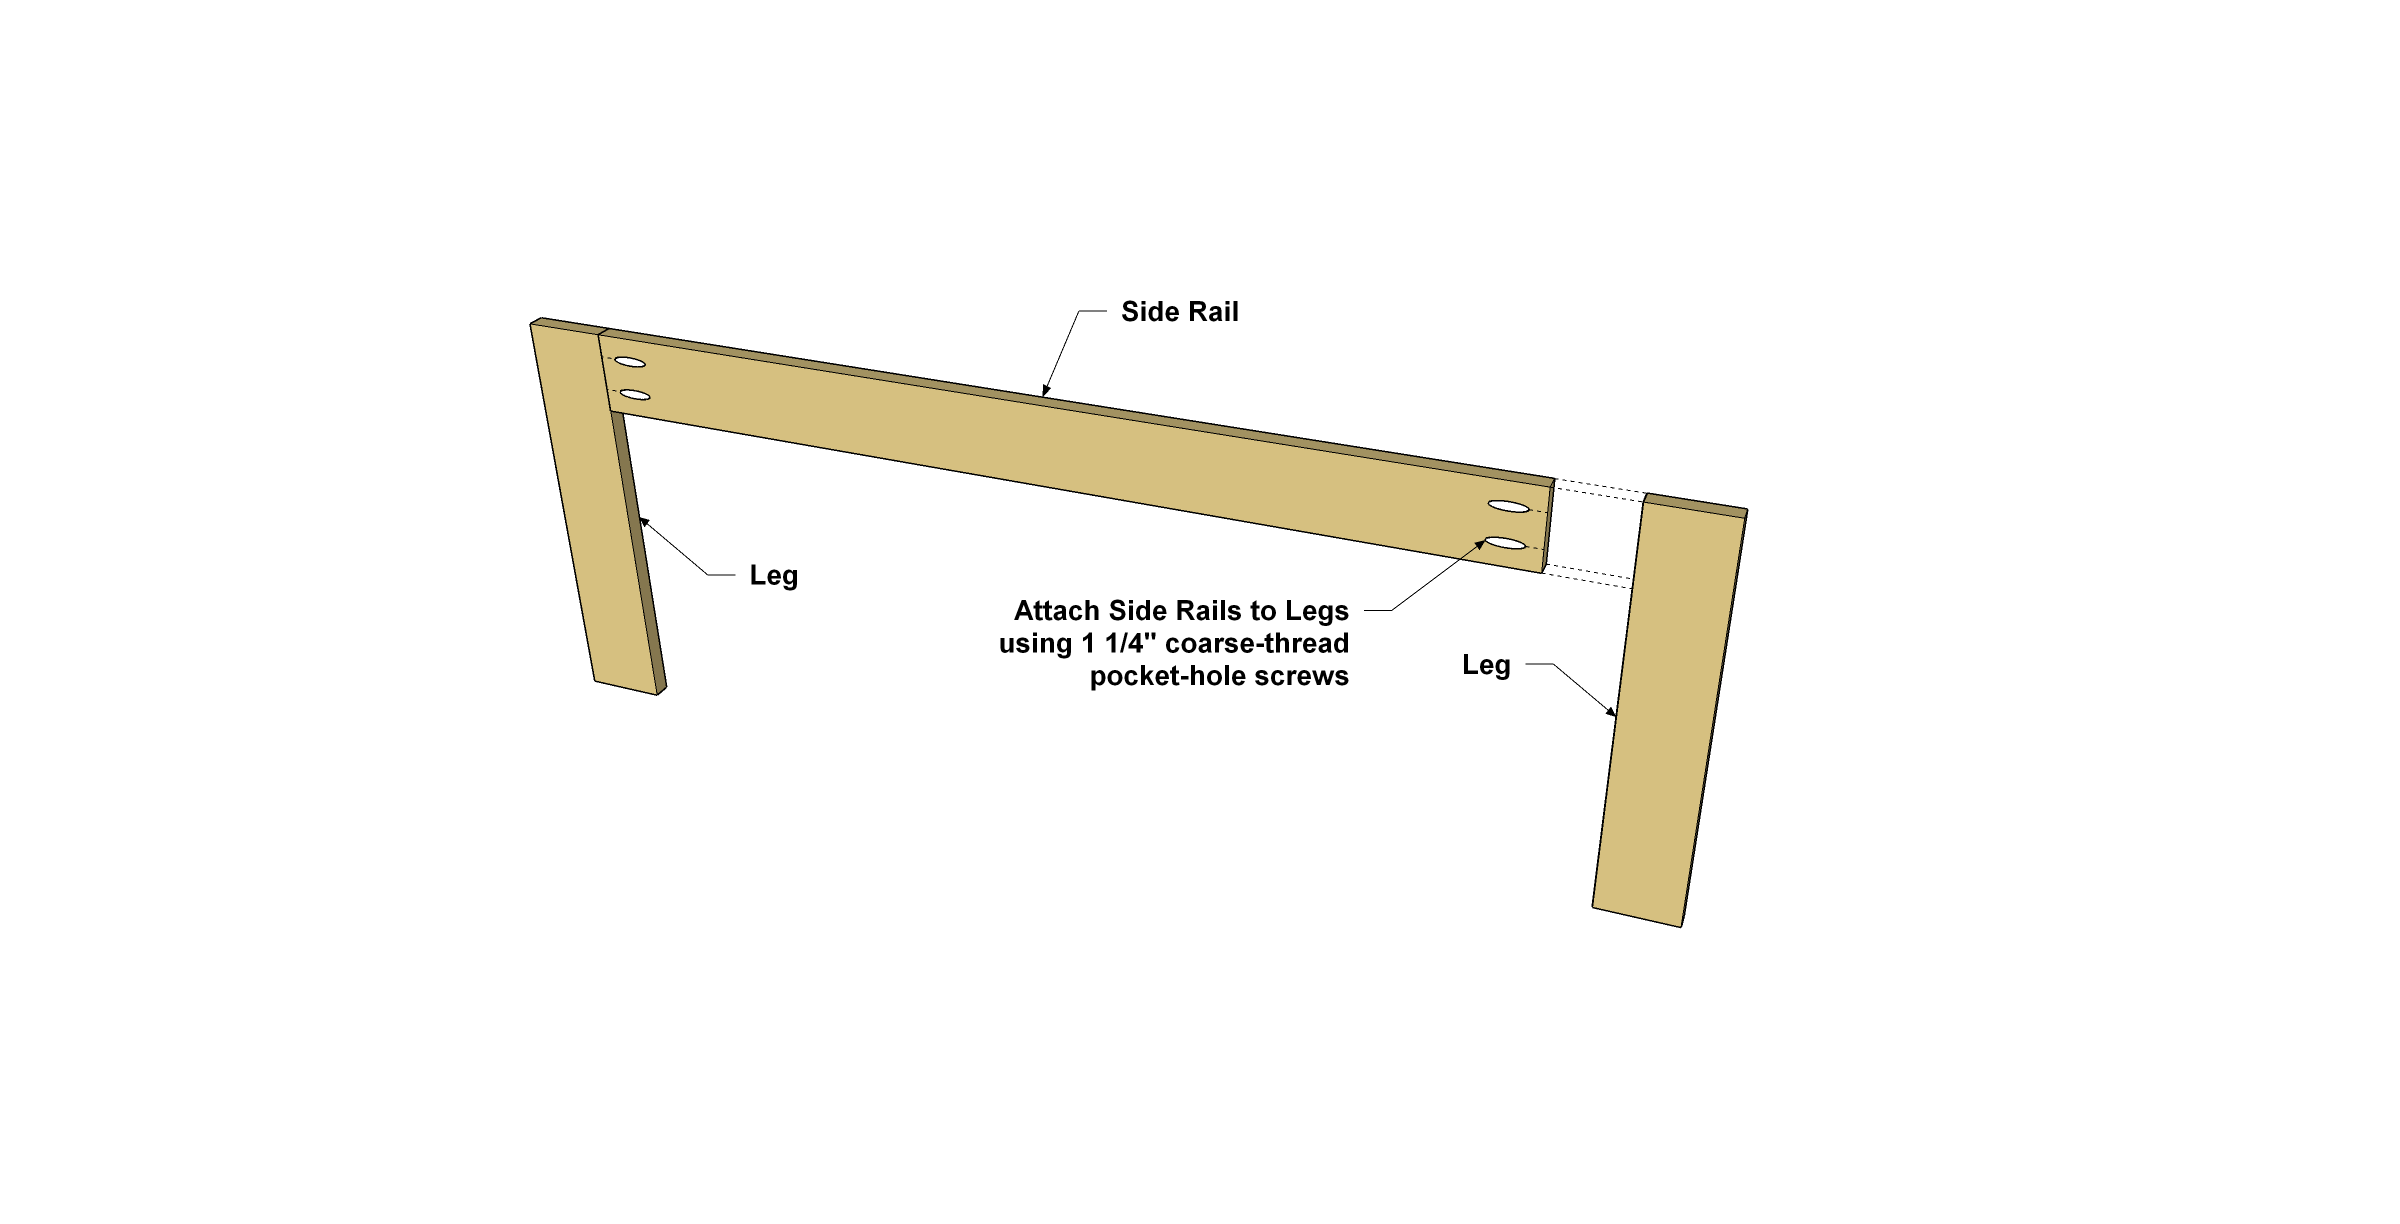
Assemble two Legs to one Side Rail using 1 1⁄4" Kreg Pocket-Hole Screws to create a leg frame. We sued coarse-thread screws, which offer great holding power in the poplar we used for the base. Do the same for the other side.
-
Create Connecting Rails
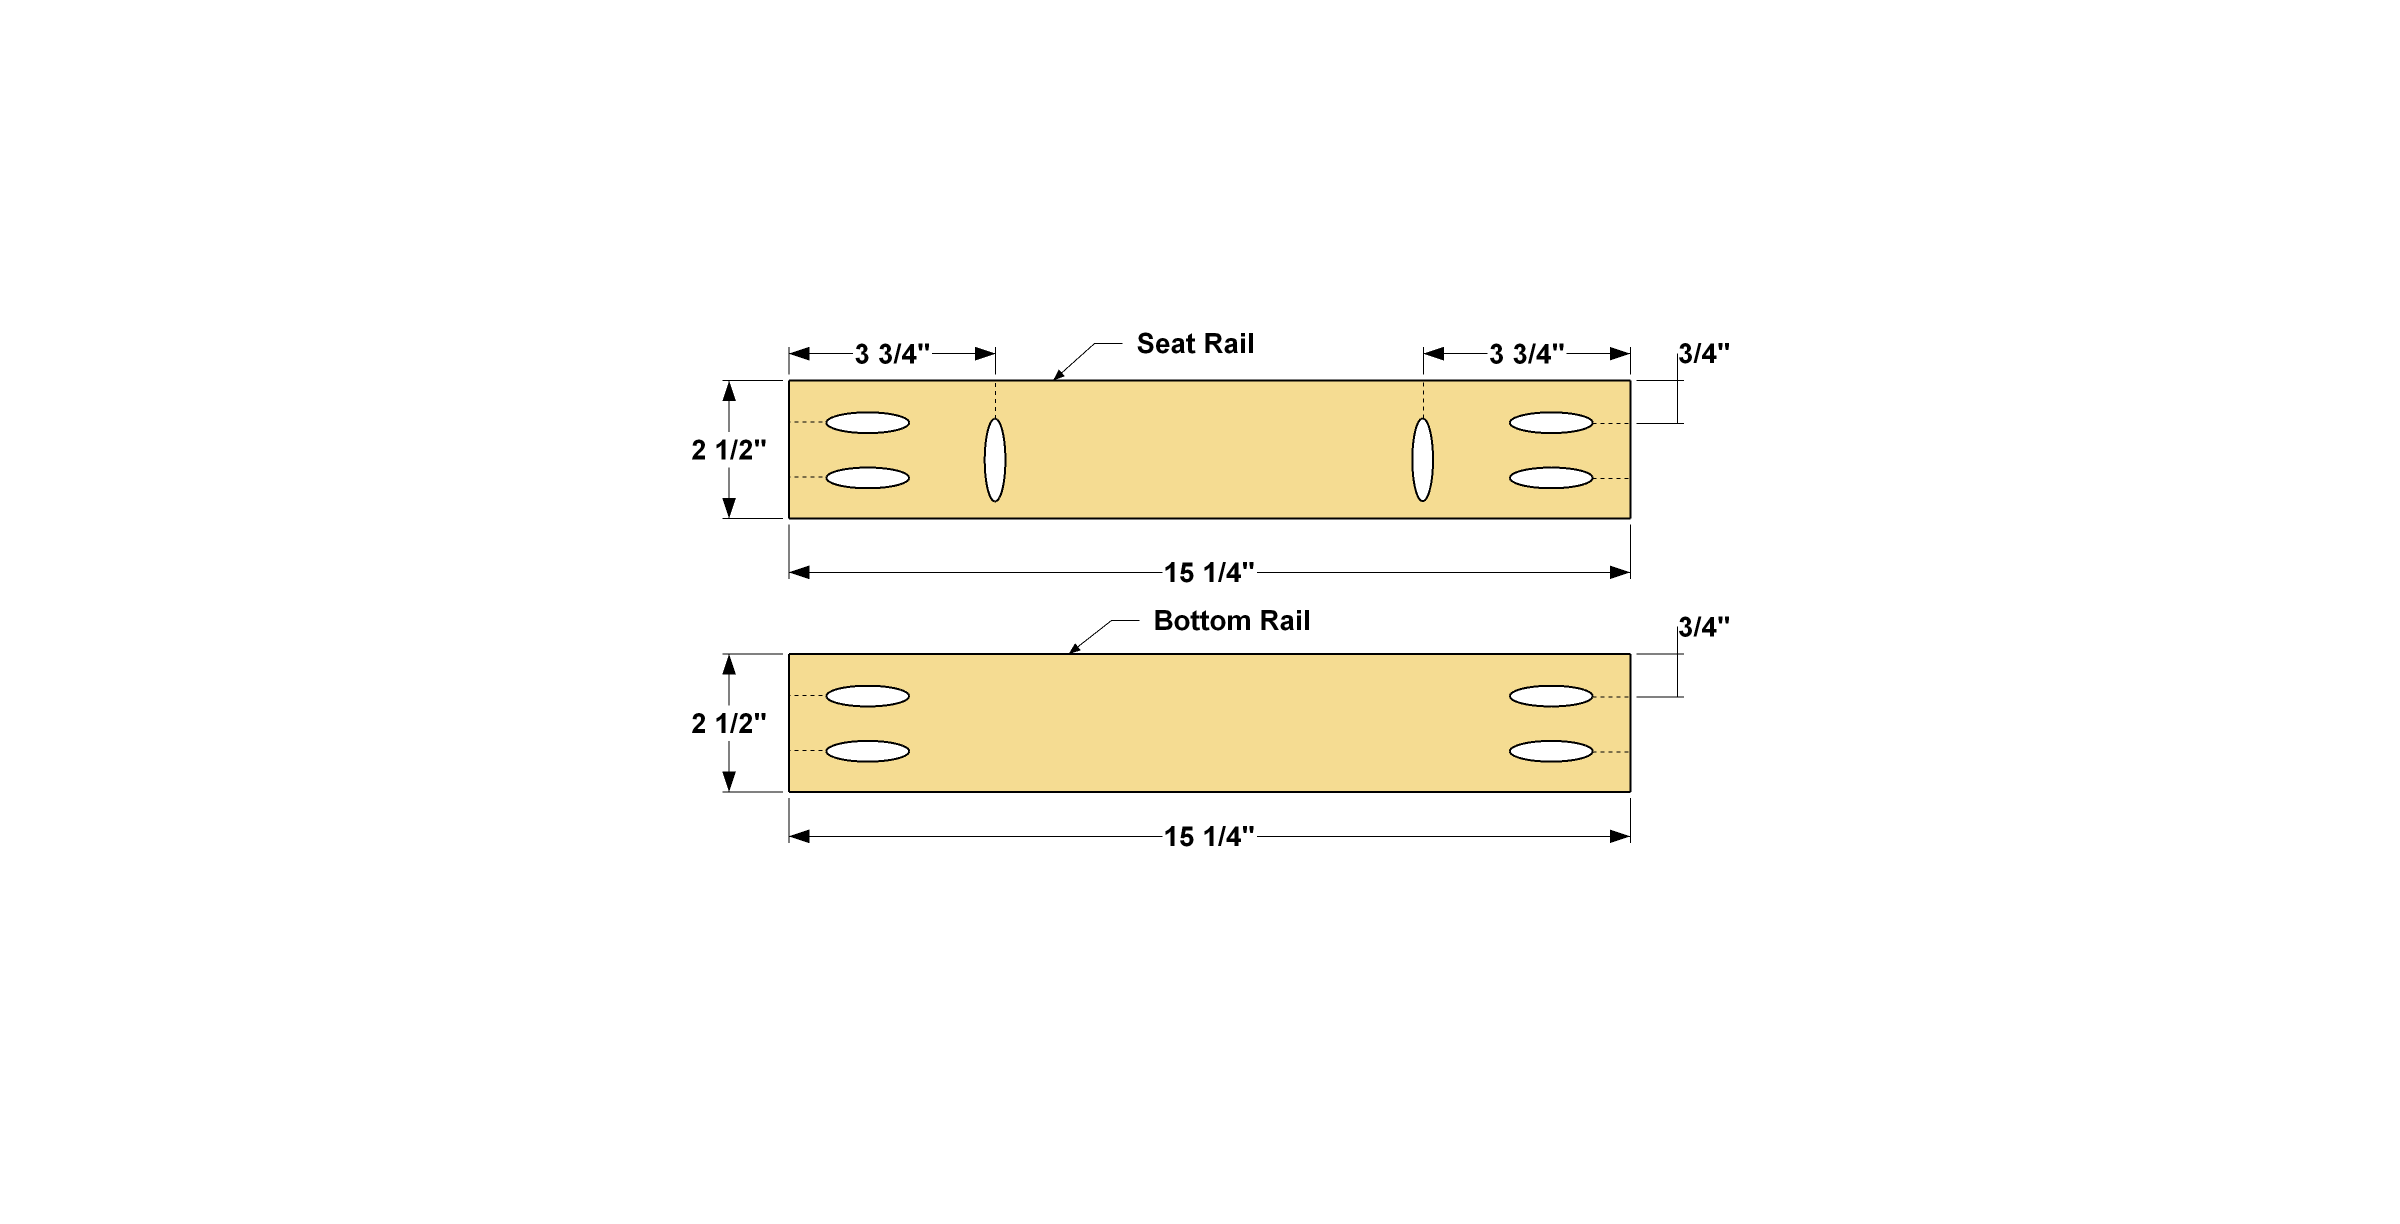
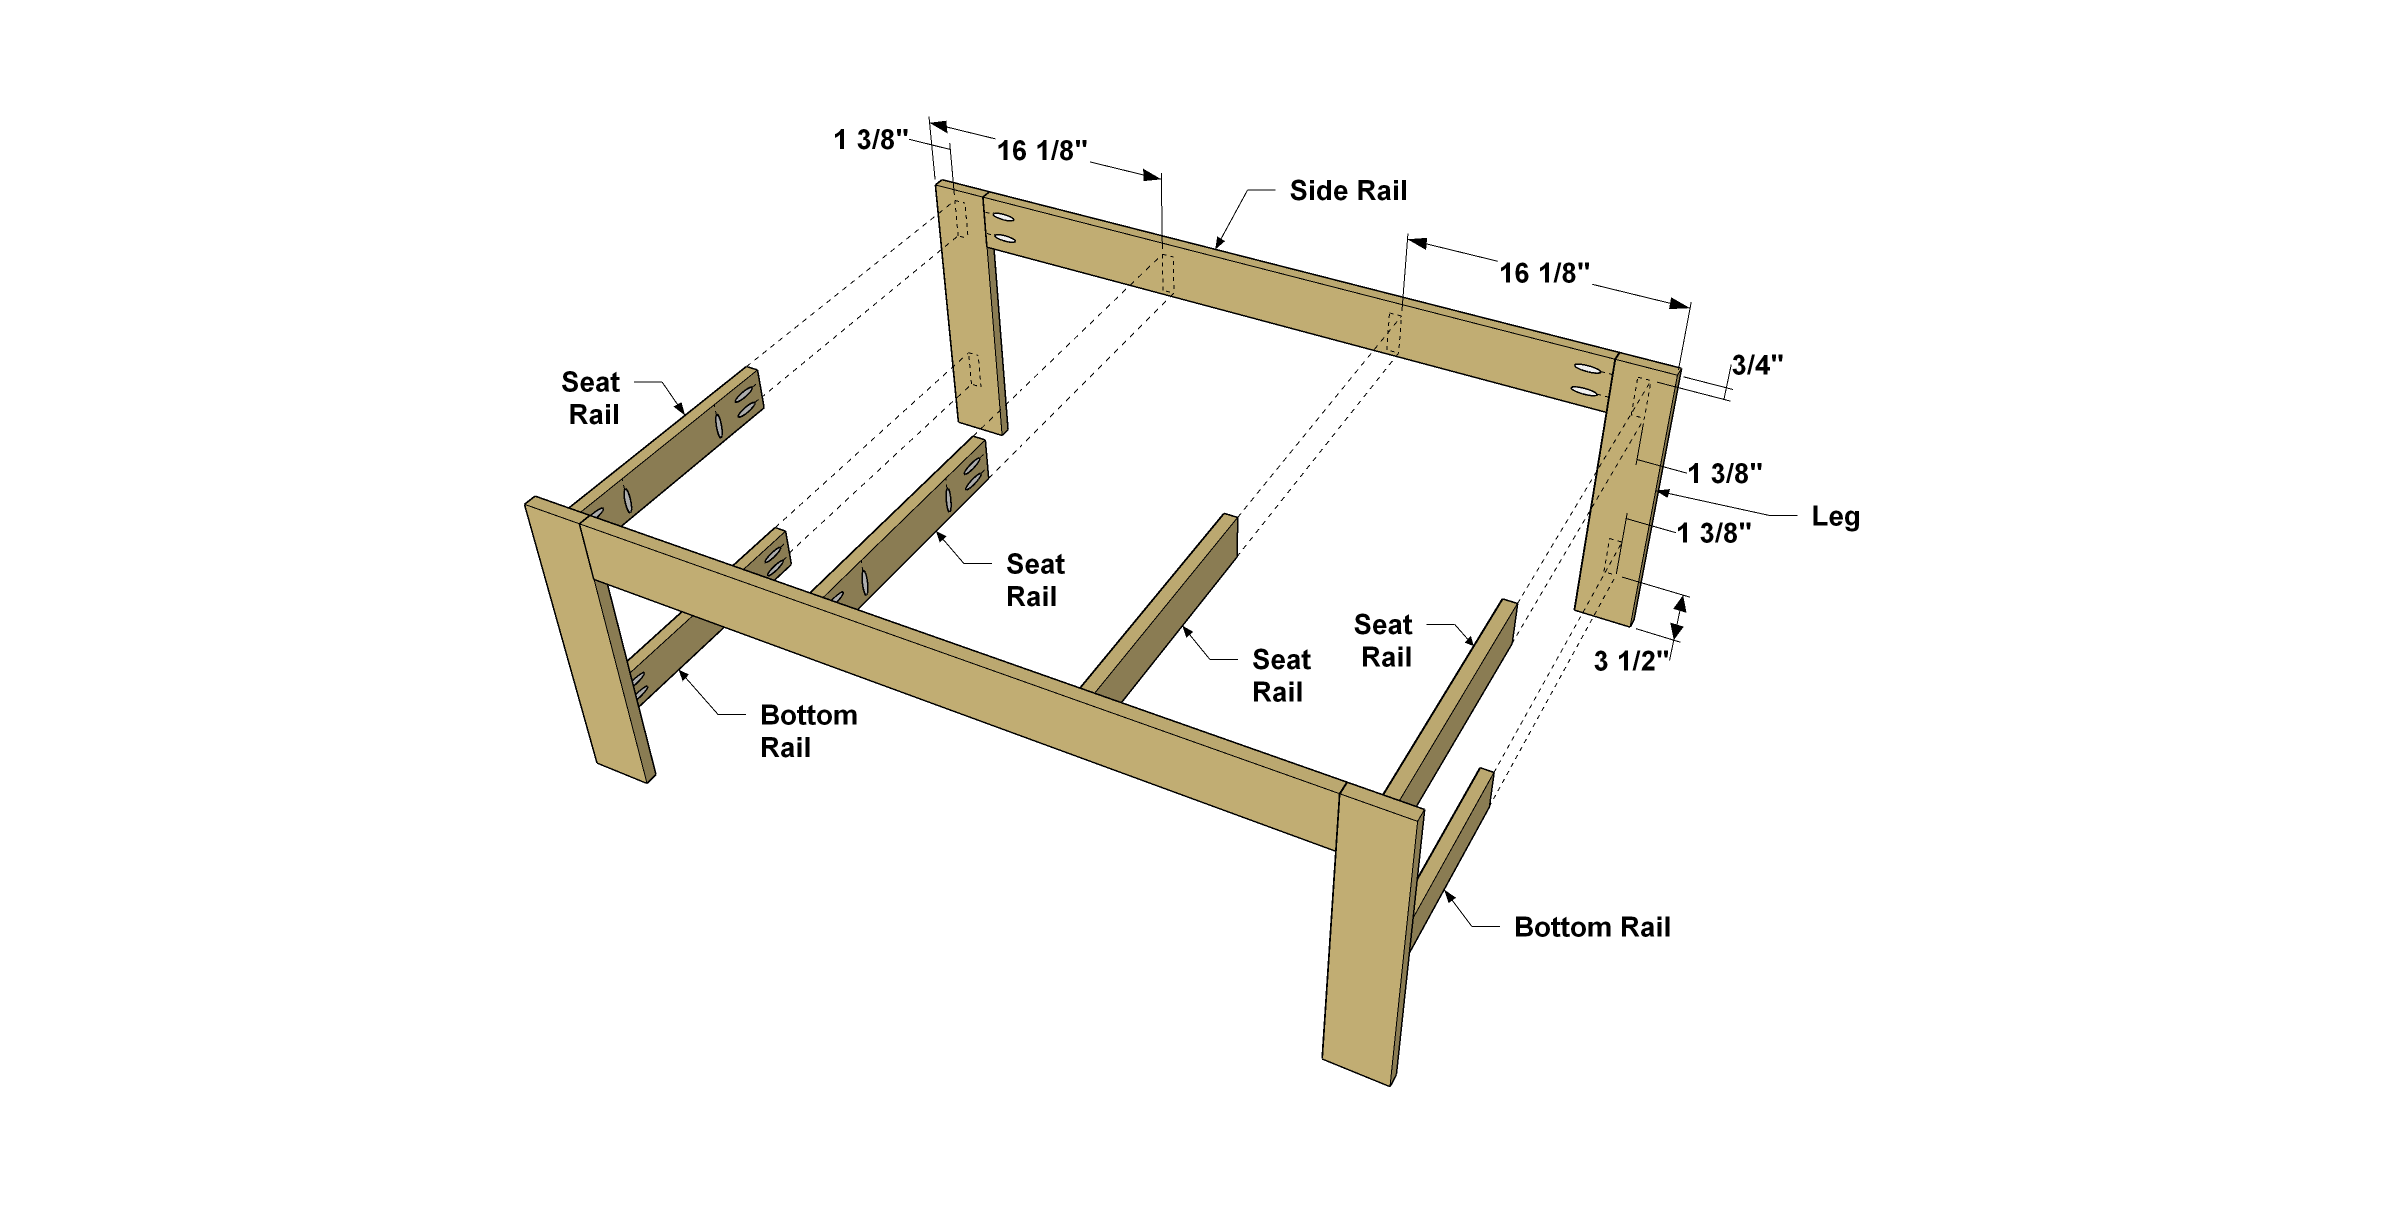
Cut four Seat Rails, as well as two Bottom Rails to length from a 1x3 board, as shown in the cutting diagram. Drill pocket holes into both ends of each Rail, and then set two Rails aside. These will be Bottom Rails. With the remaining four rails, drill additional pocket holes in the edges, as shown. These will be Seat Rails. After you drill the pocket holes, sand the faces and edges of the parts smooth.
-
Start the Bench Assembly
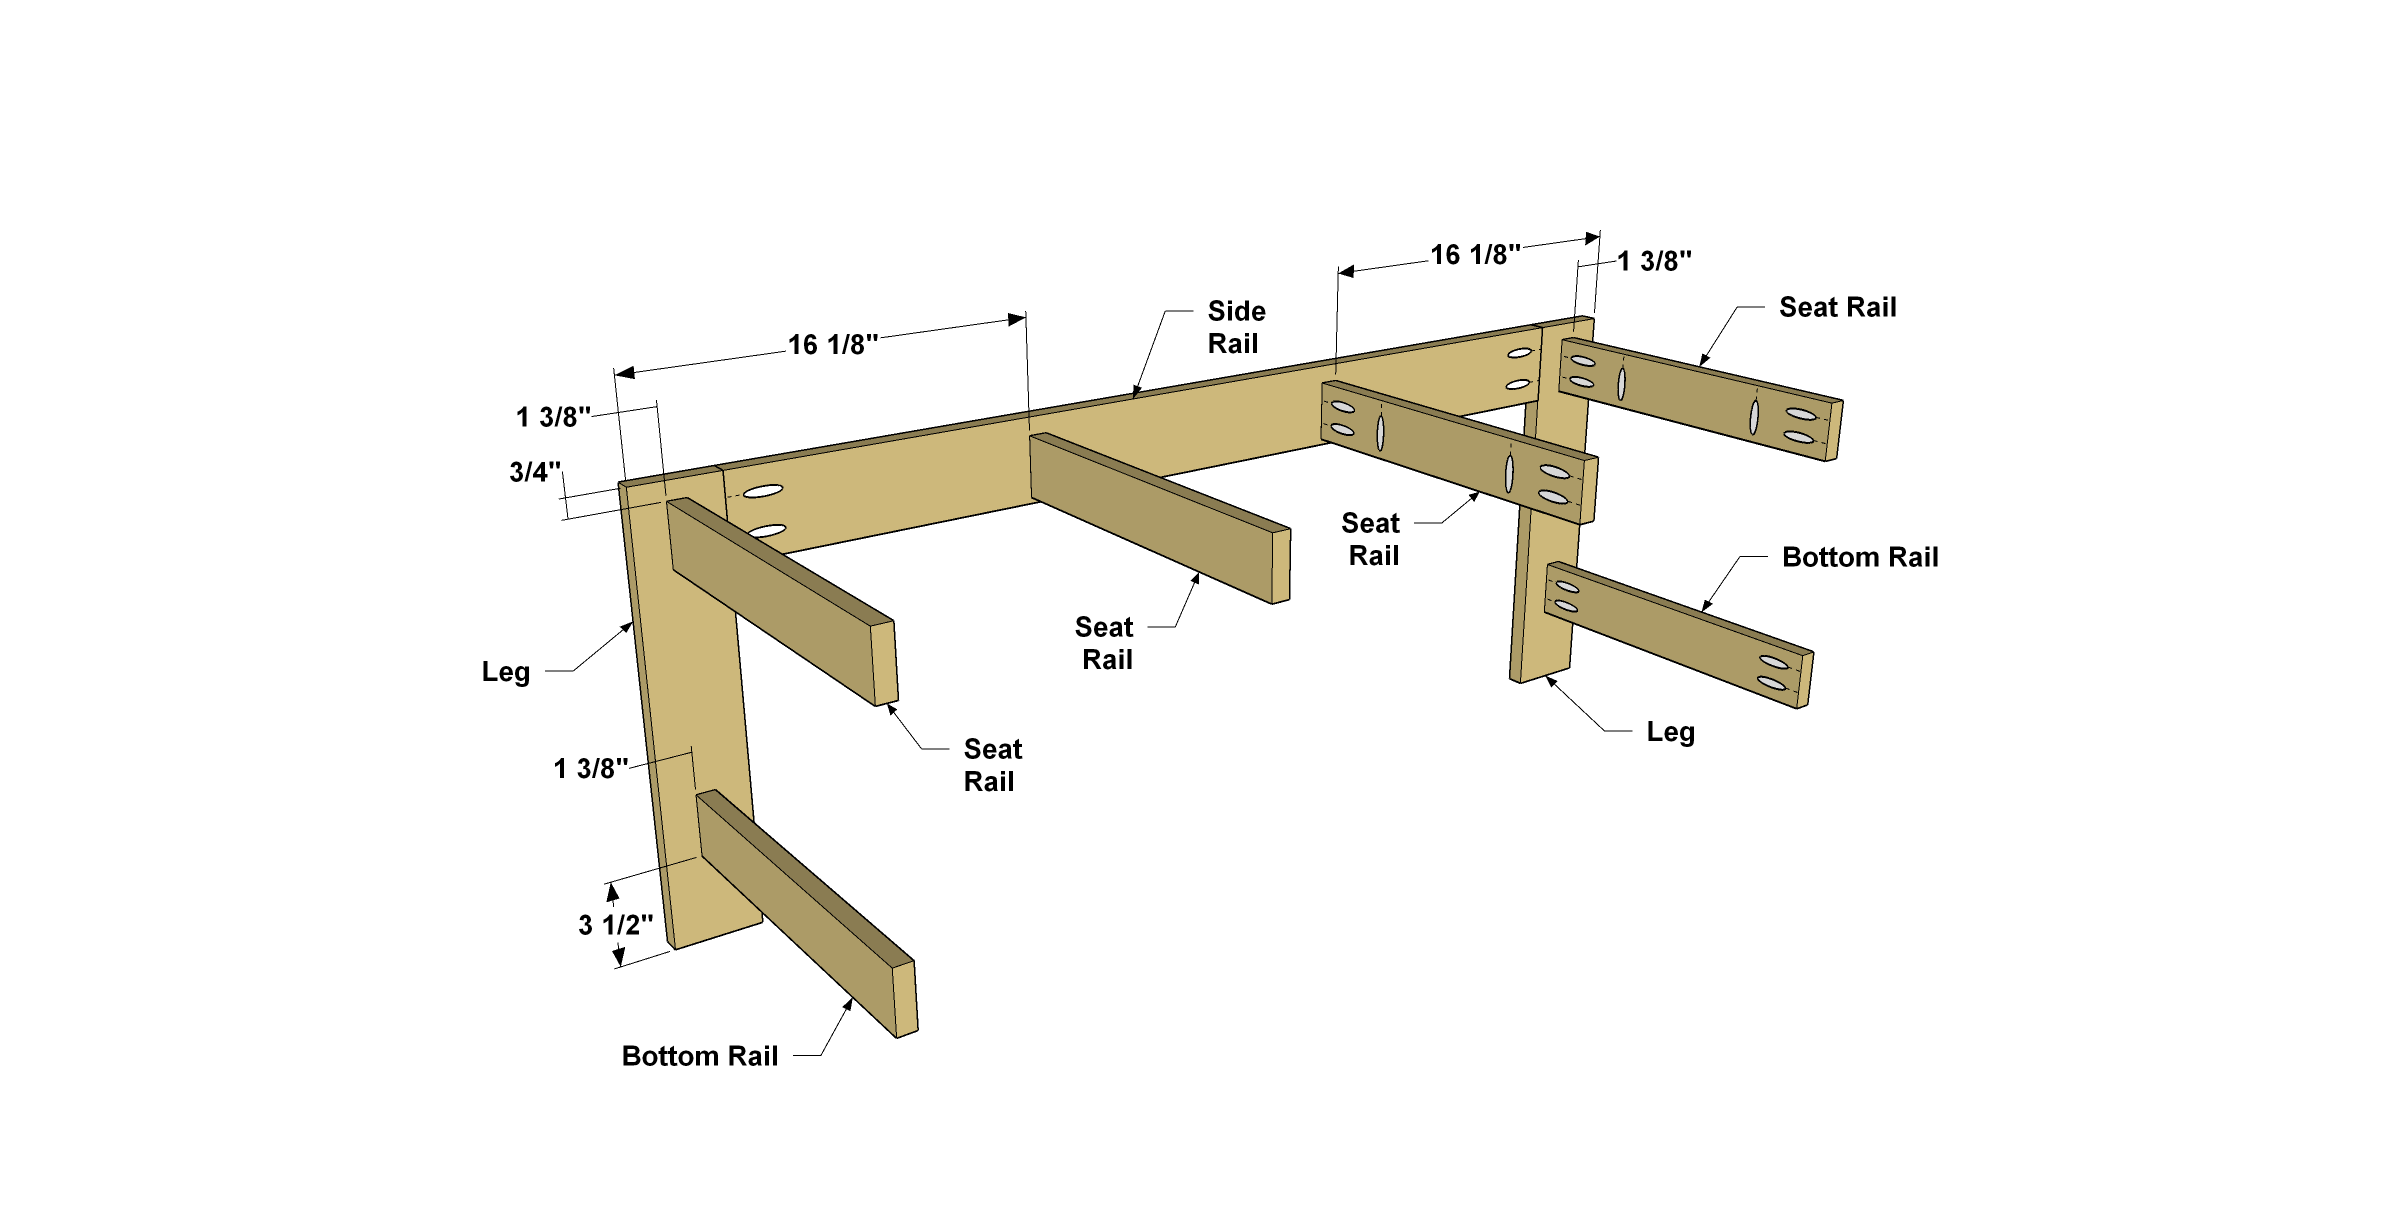
With a leg frame lying flat on a work surface, lay out and install the two bottom rails with 1 1⁄4" Kreg Pocket-Hole Screws. Then lay out the location of the seat rails and install them onto one leg frame.
-
Add the Second Leg Frame
Move the assembly that you just created out of the way and set the other leg frame in its place. Then position the first assembly. Verify the location of the Rails on the leg frame, and secure them with 1 1⁄4" Kreg Pocket-Hole Screws.
-
Add Support with a Stretcher
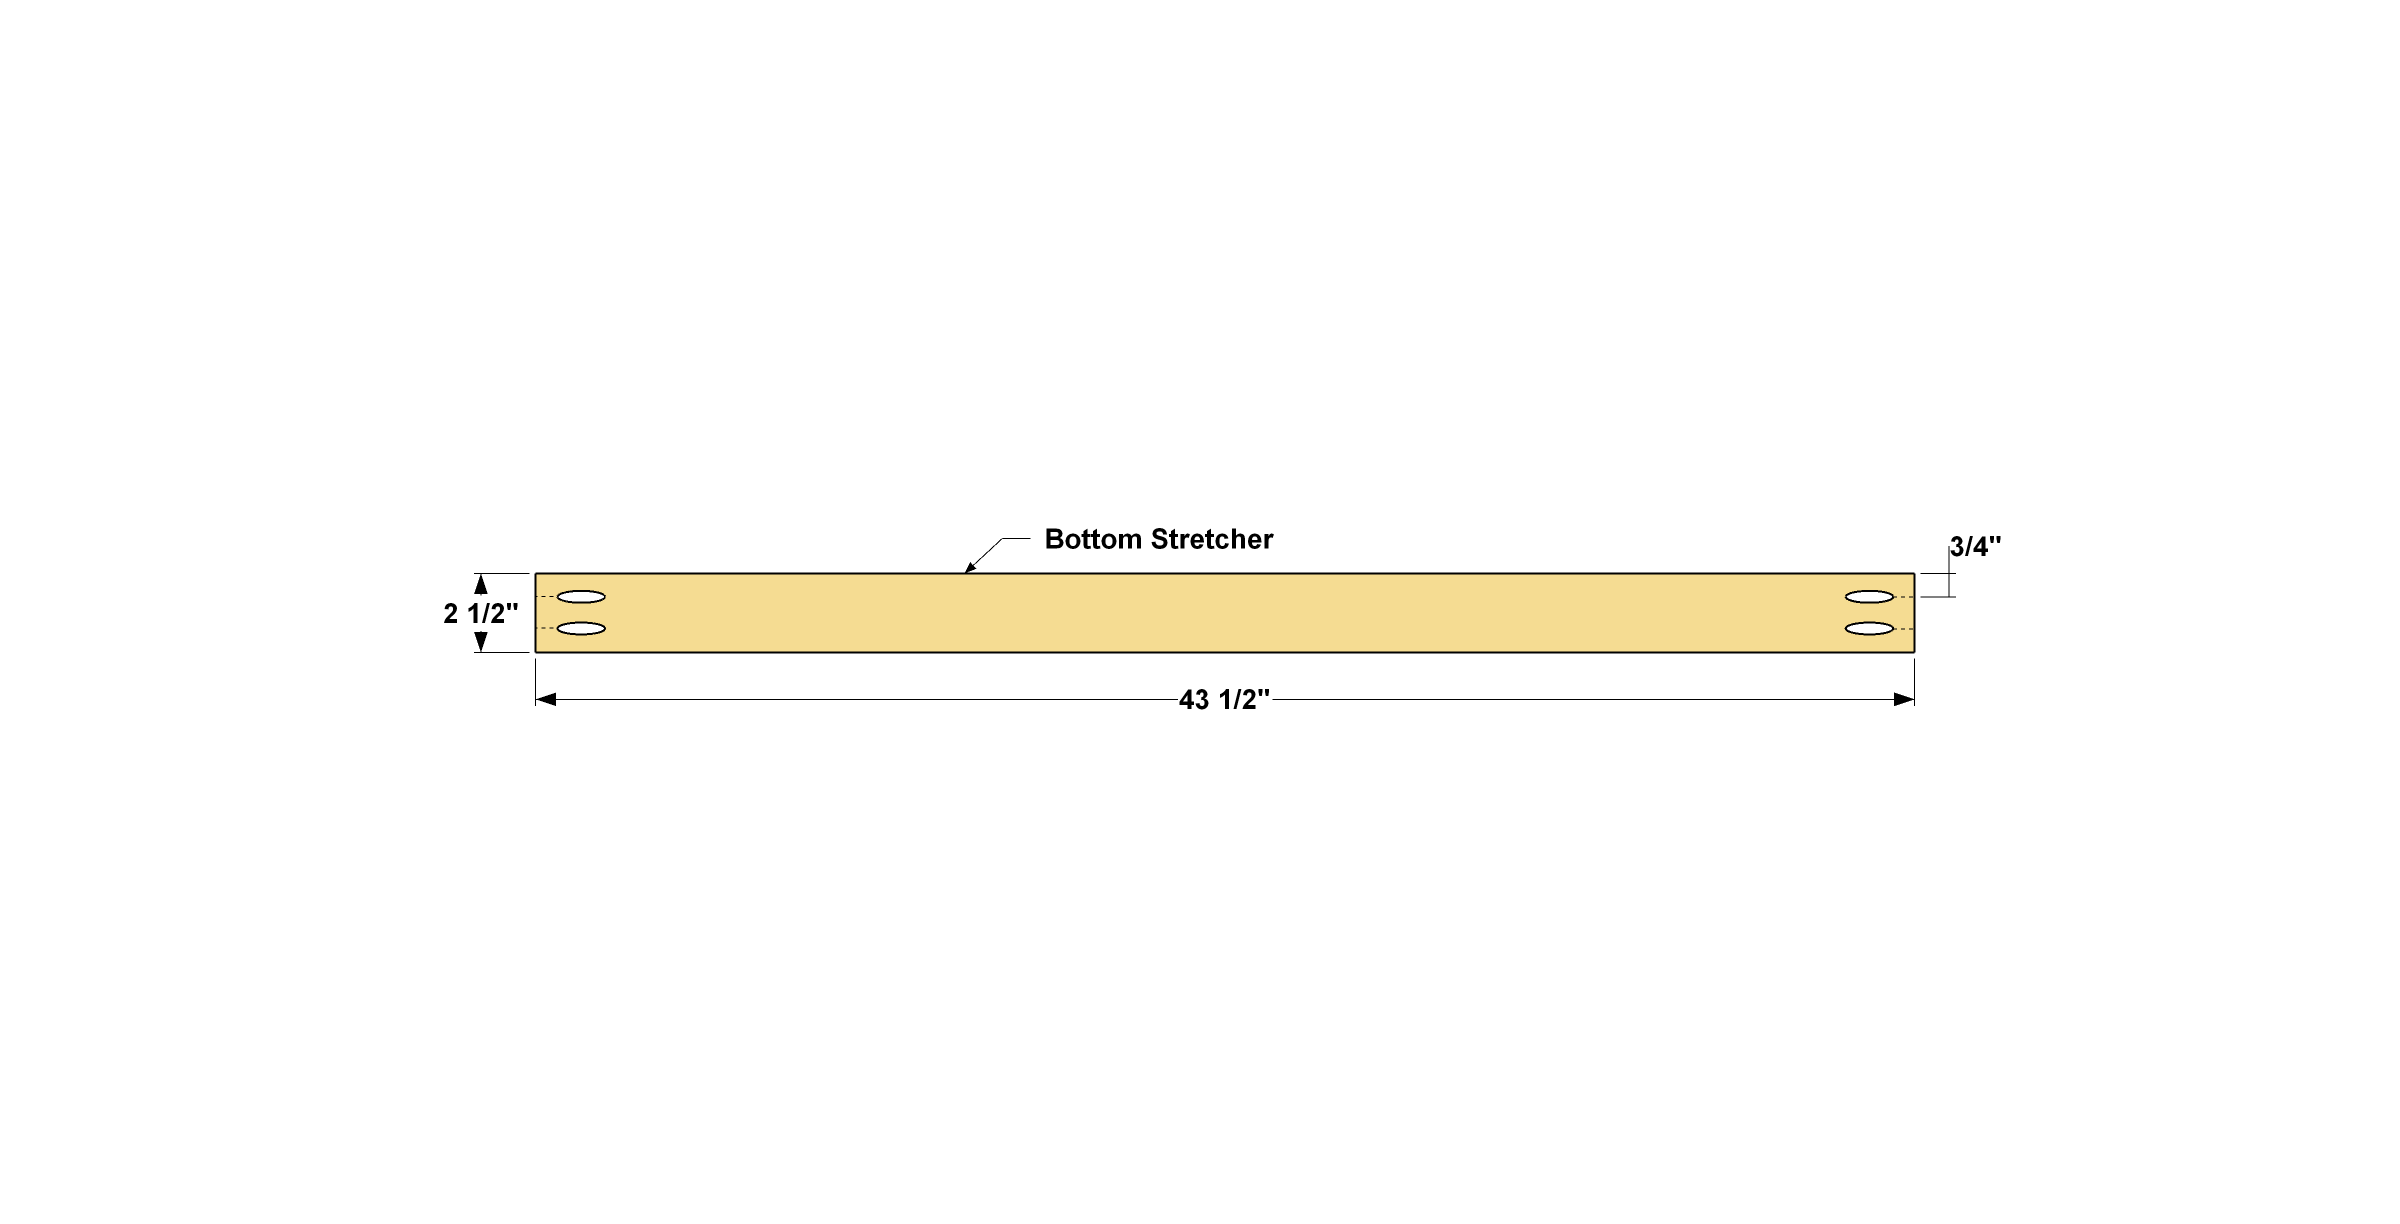
Cut one bottom stretcher to length from a 1x3, as shown in the cutting diagram. Then drill pocket holes in both ends of the stretcher. Sand the faces and edges smooth.
-
Install the Stretcher
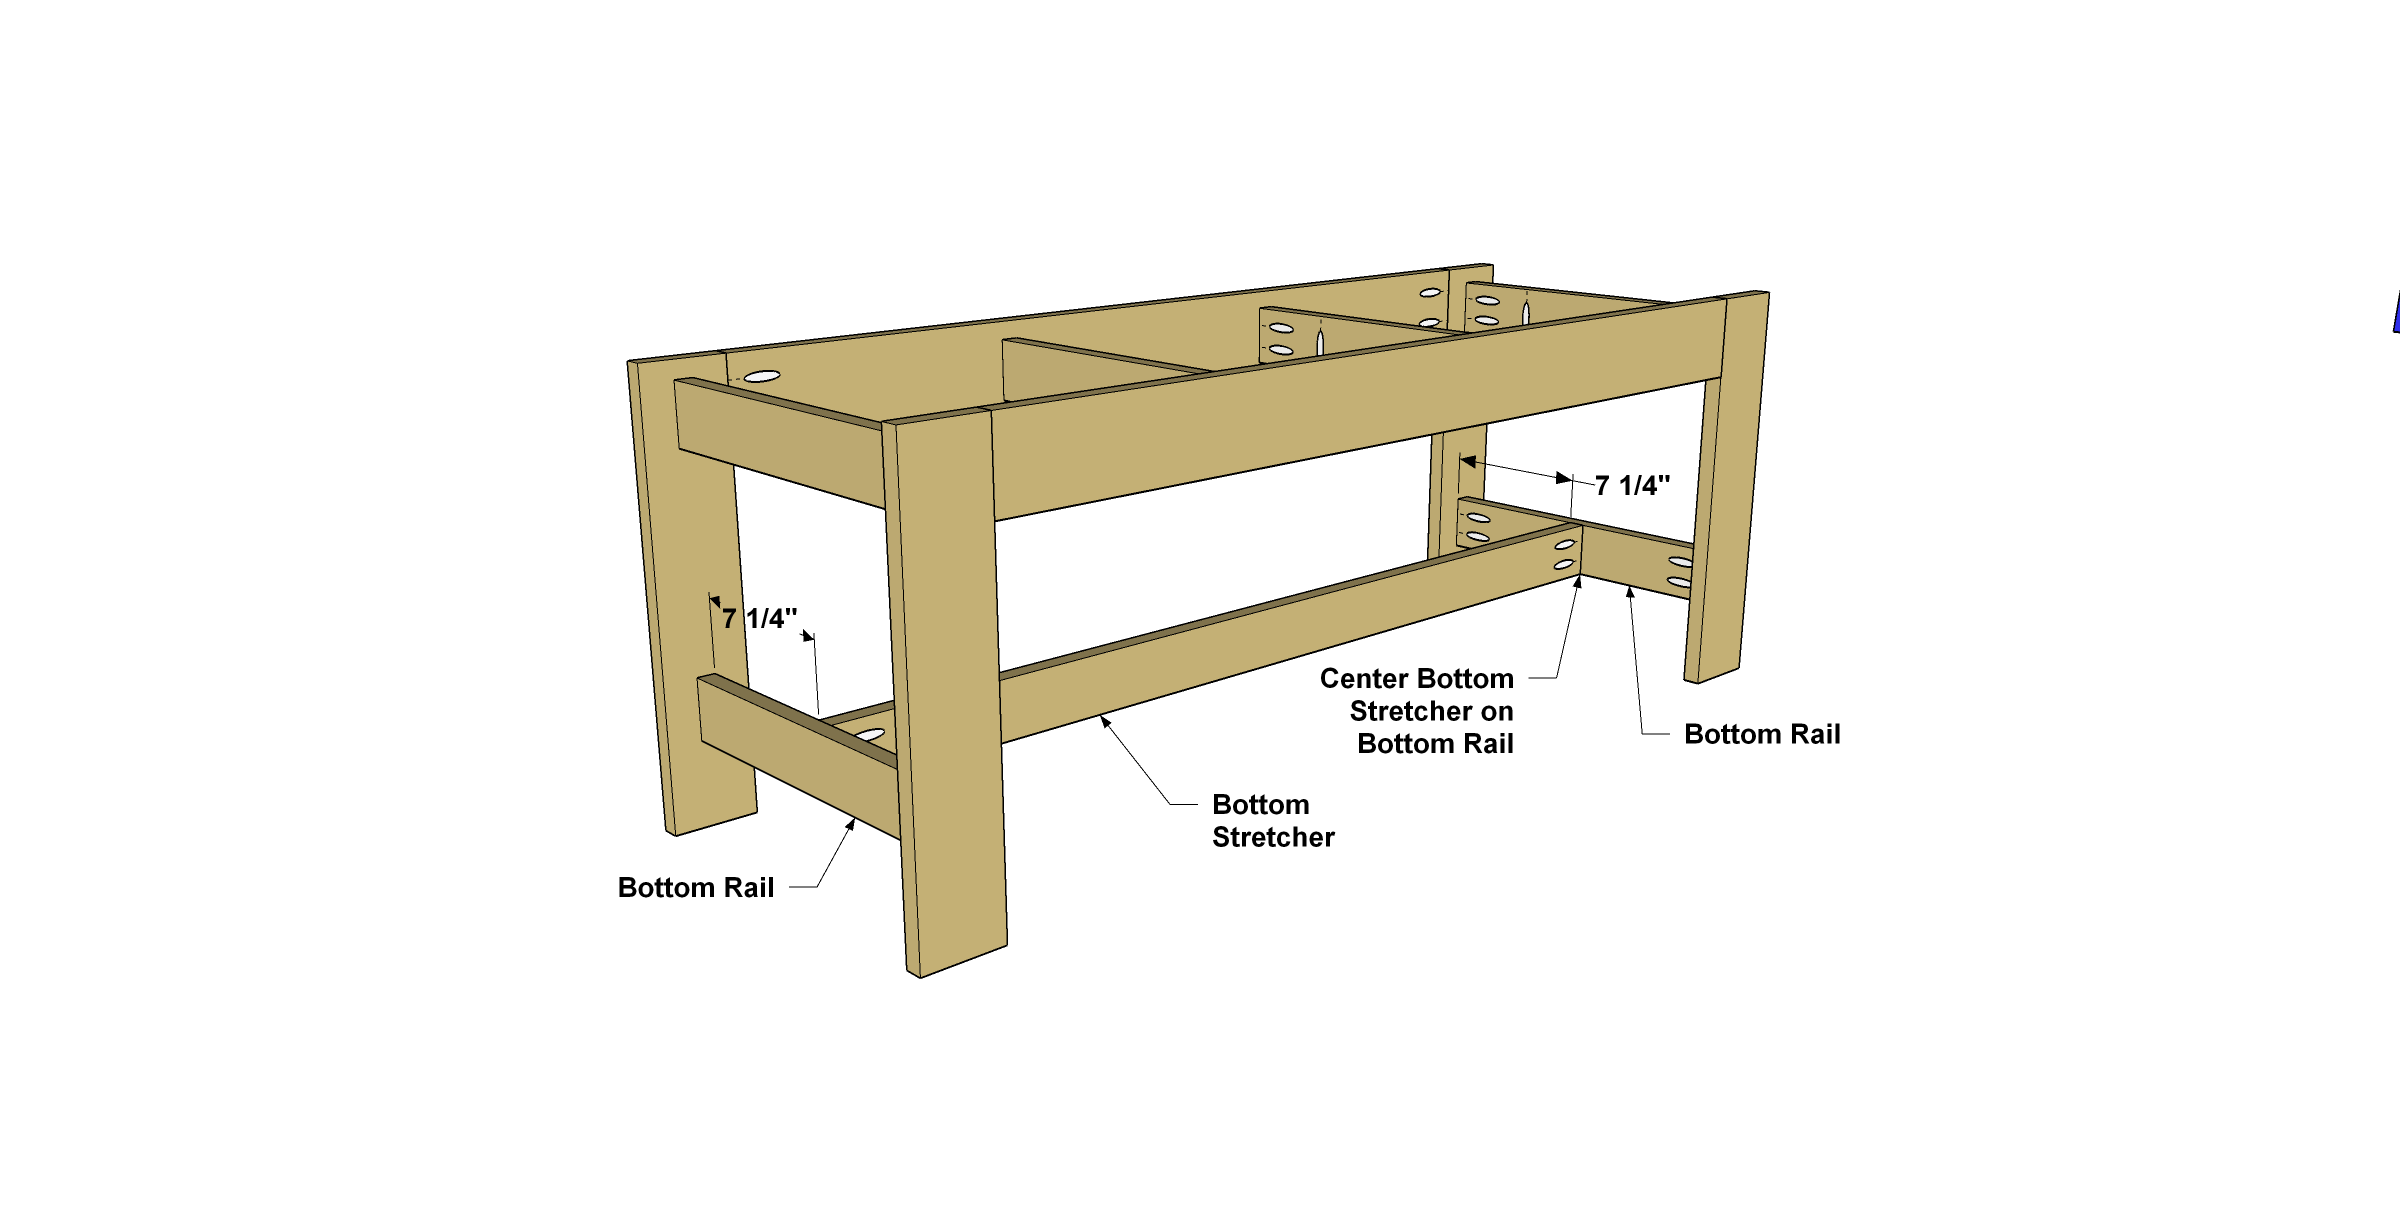
Set the bench base assembly upright on your work surface. Now center the stretcher on the Bottom Rails. Secure it with 1 1⁄4" Kreg Pocket-Hole Screws.
-
Make the Seat Slats
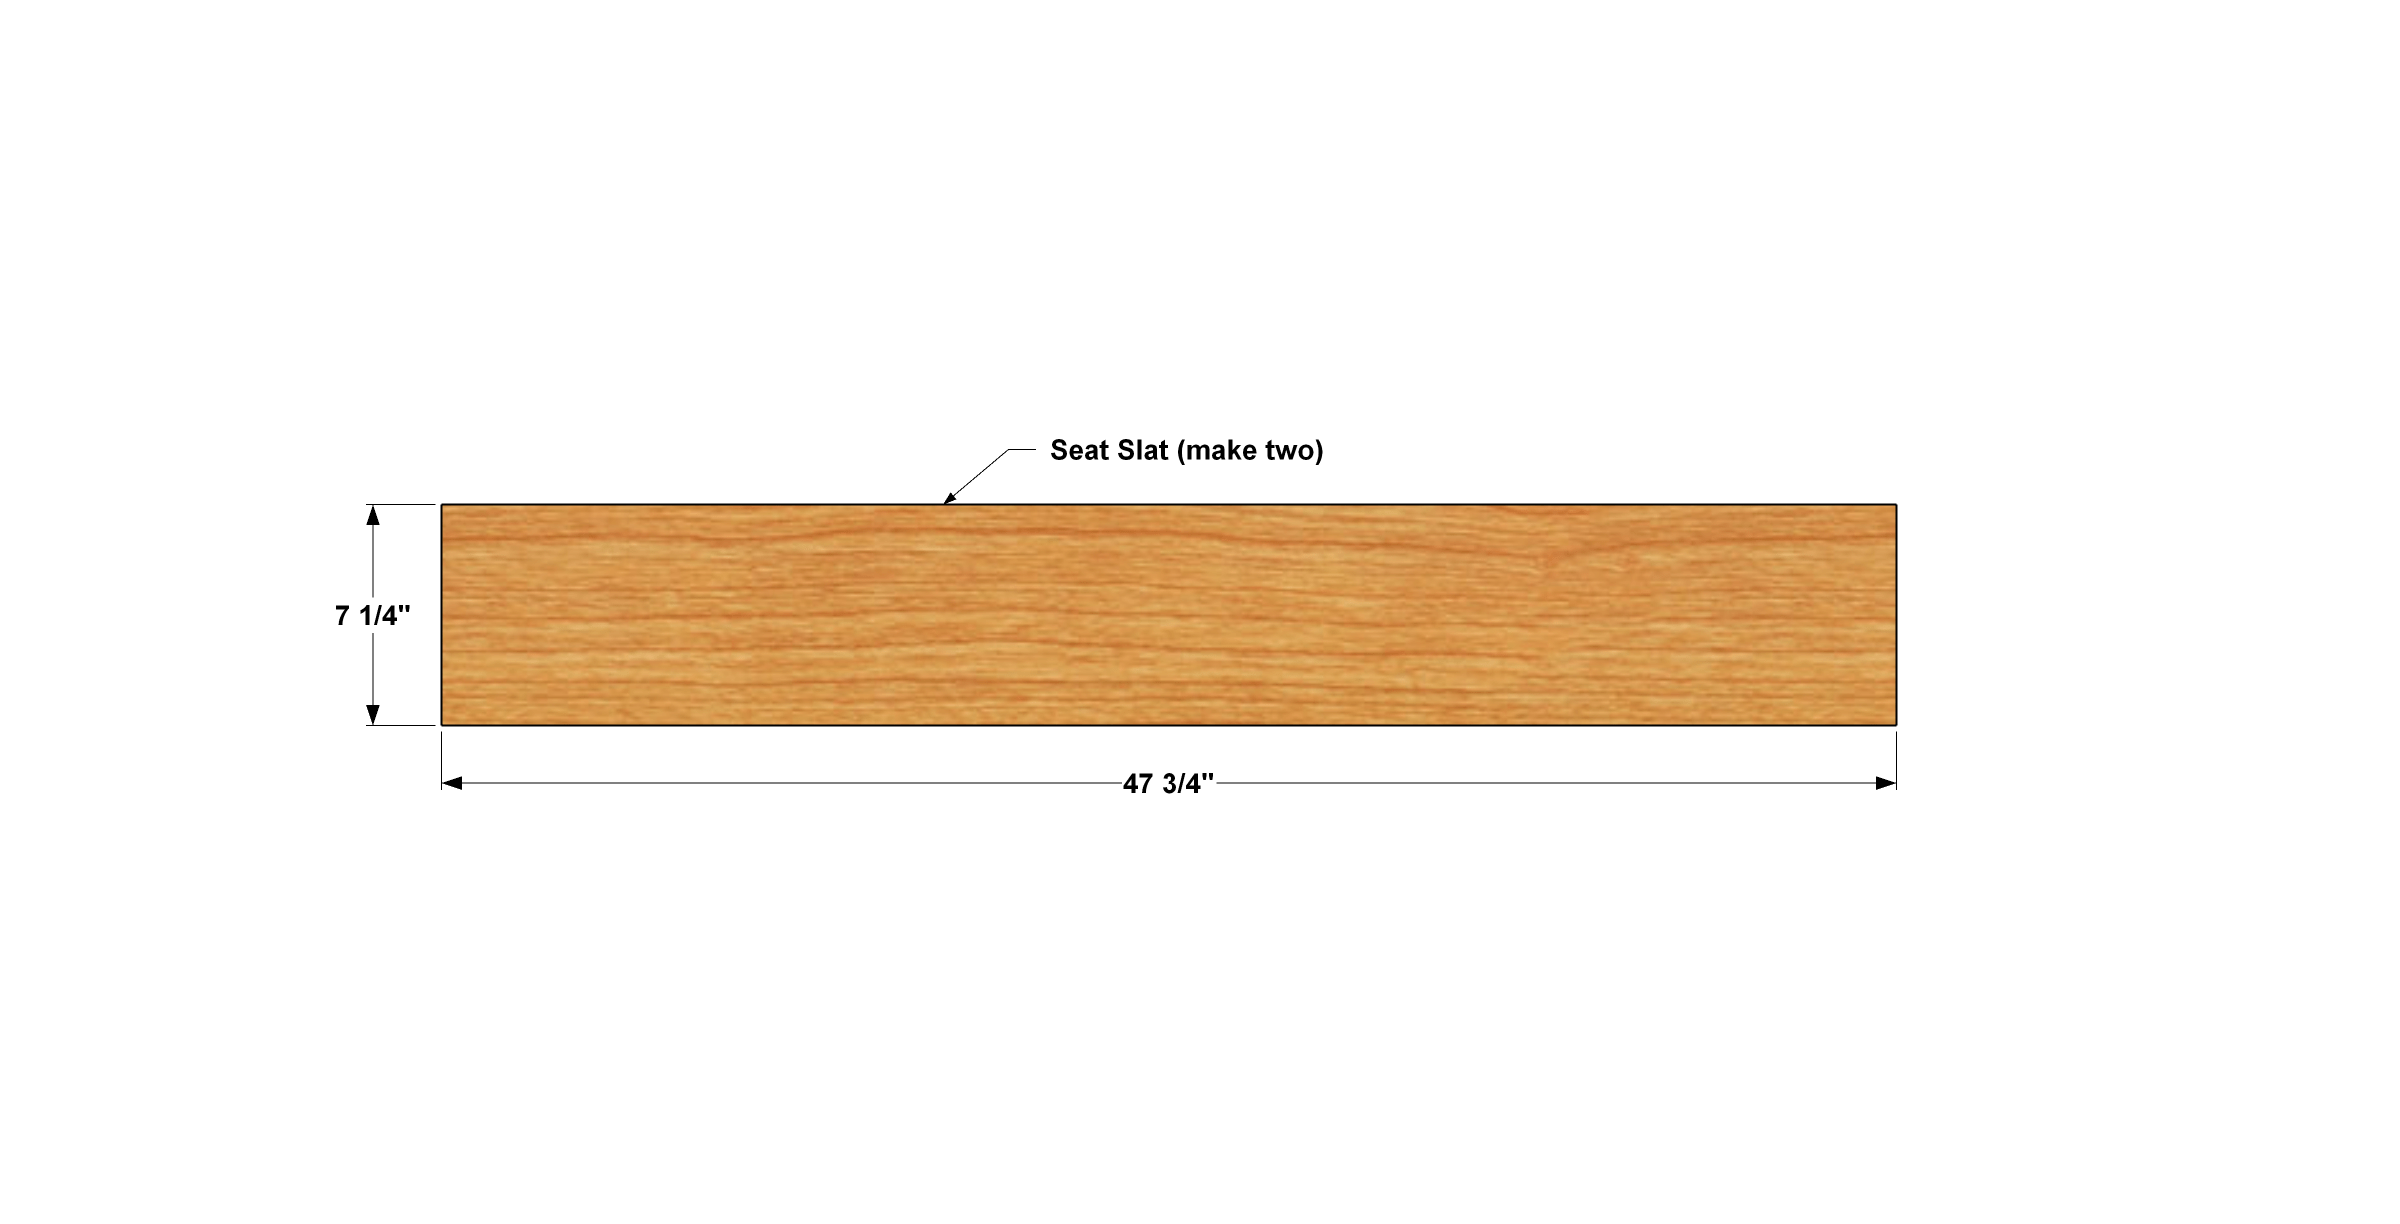
Cut two seat slats to length from a 1x8 board, as shown in the cutting diagram. Sand the faces, edges, and ends of the Slats smooth.
-
Apply the Paint and Finish
Before you attach the Slats to the bench base, it's a good idea to apply the paint and finish--especially if you plan to use a combination of paint on the base and clear finish (or stain) on the Slats, as we did. You'll be able to get to all the surfaces more easily, so you'll get a better-quality result. We used latex paint on the base. On the Slats, we applied two coats of wipe-on polyurethane.
-
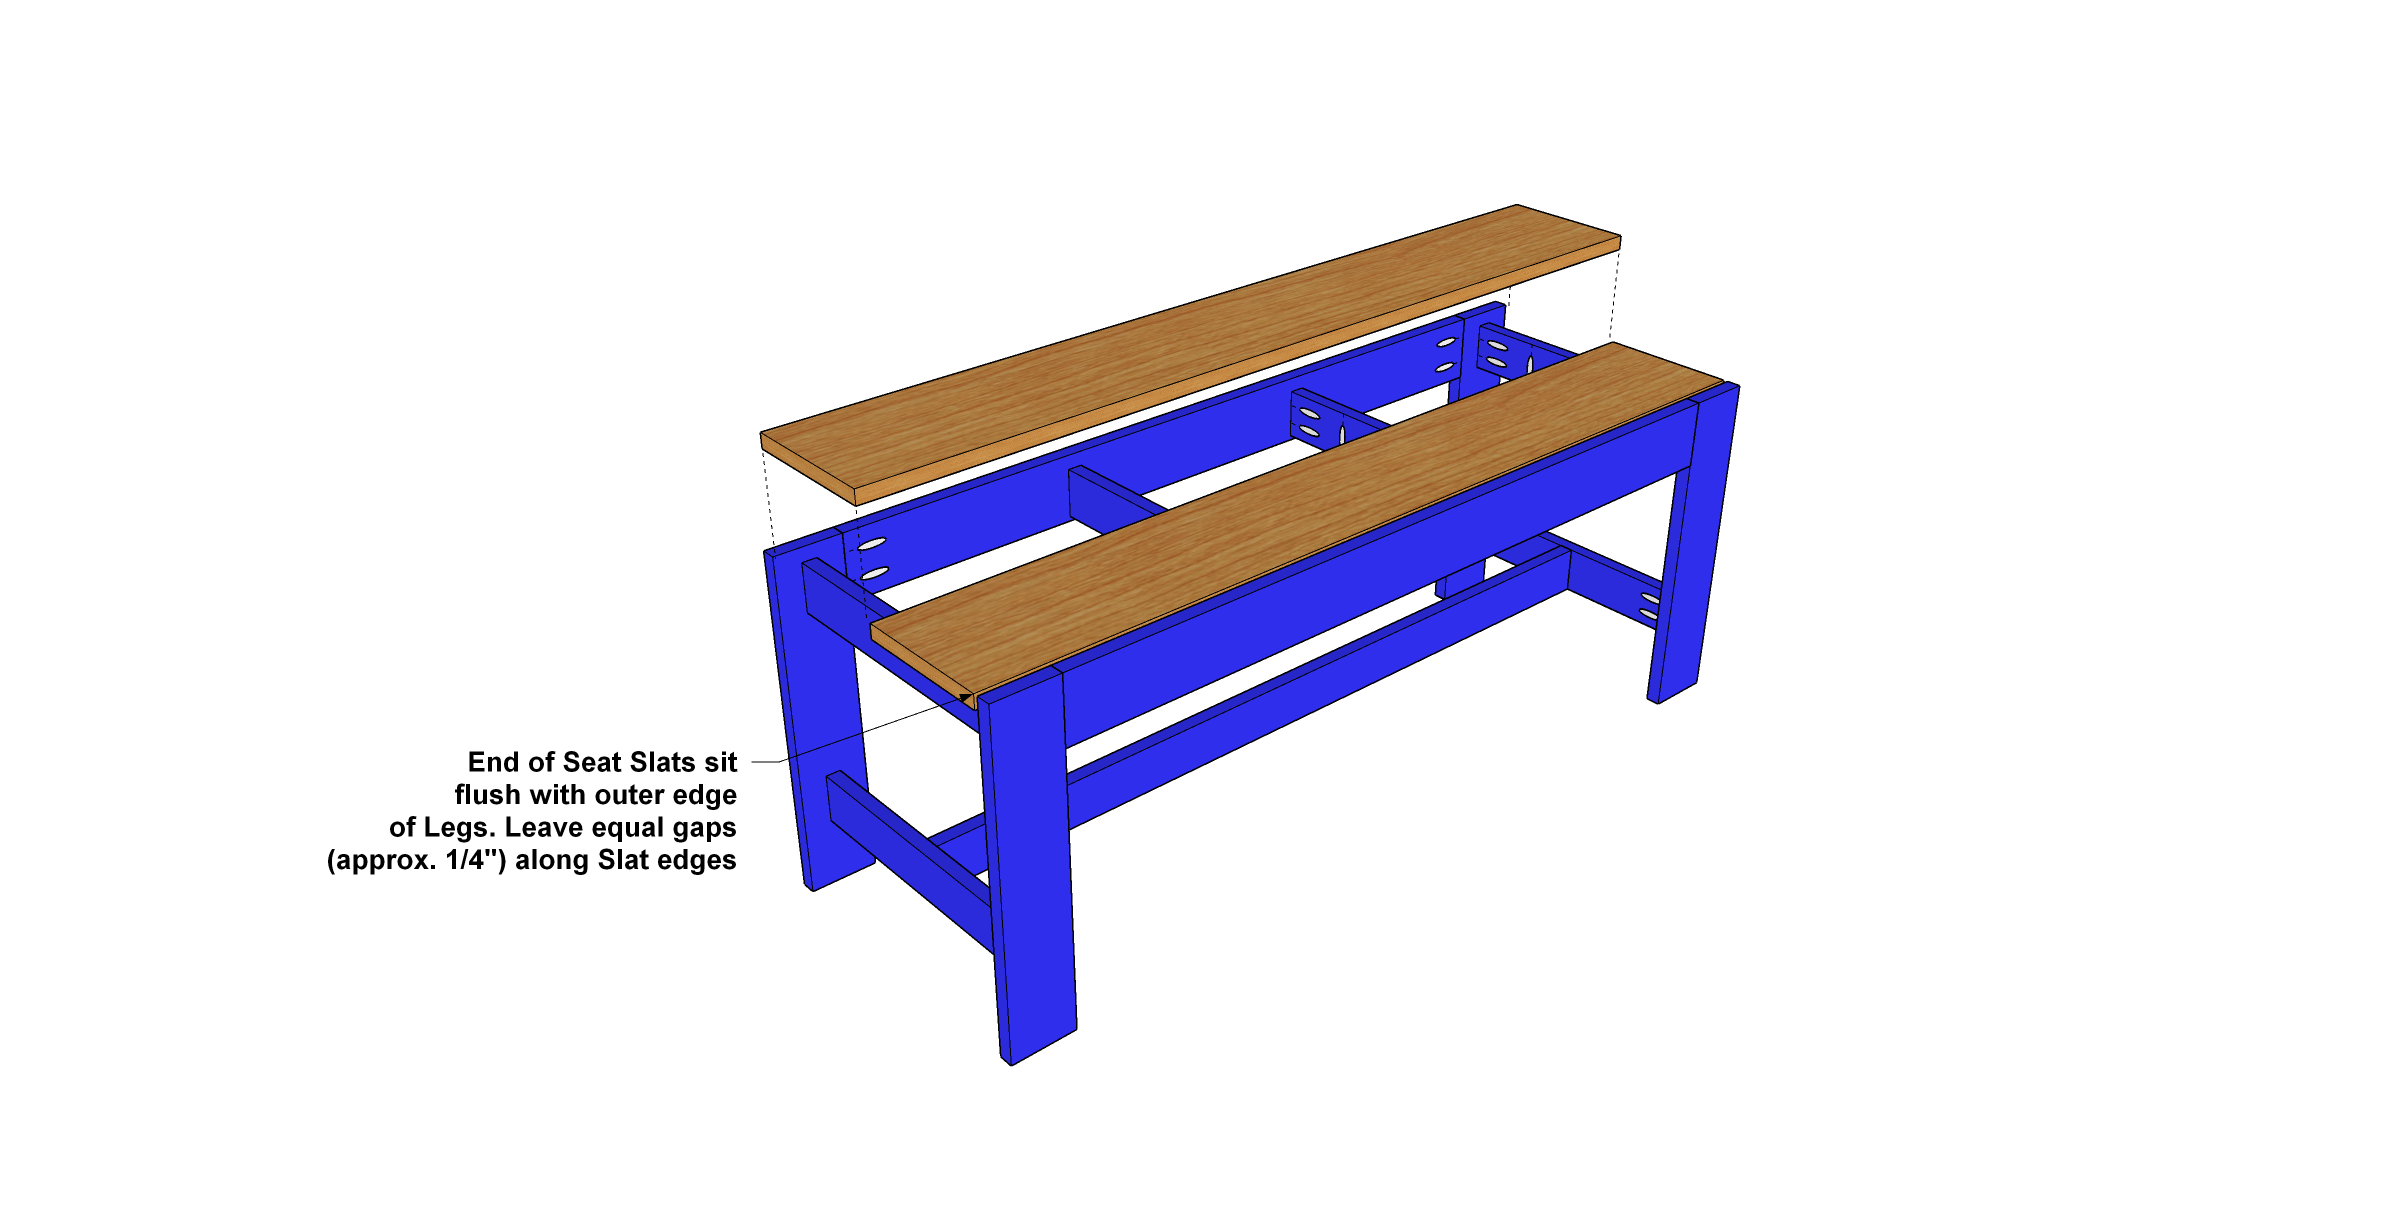
Install the Slats
Mount the two Seat Slats to the finished frame with 1 1⁄4" Kreg Pocket-Hole Screws. We used fine-thread screws here to hold better in the hardwood oak Slats. Be sure to position the Slats so that all of the gaps are consistent (approximately 1⁄4" wide).


