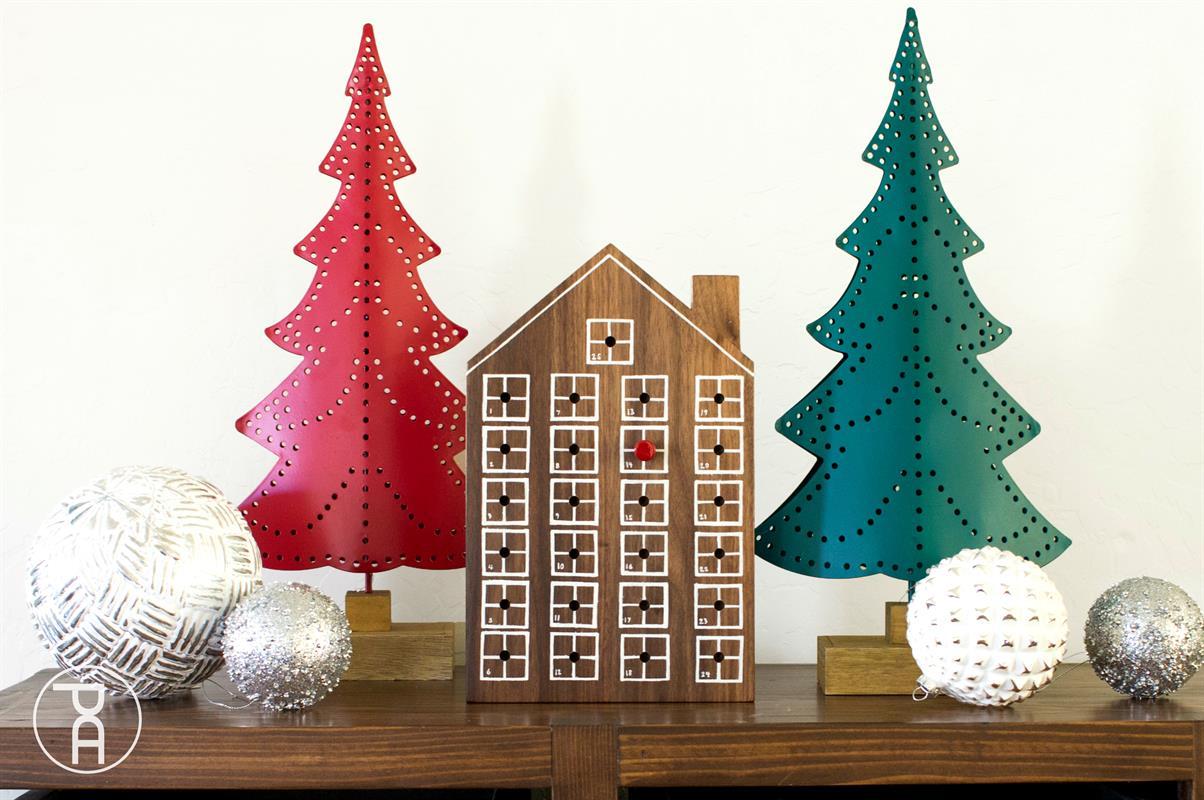
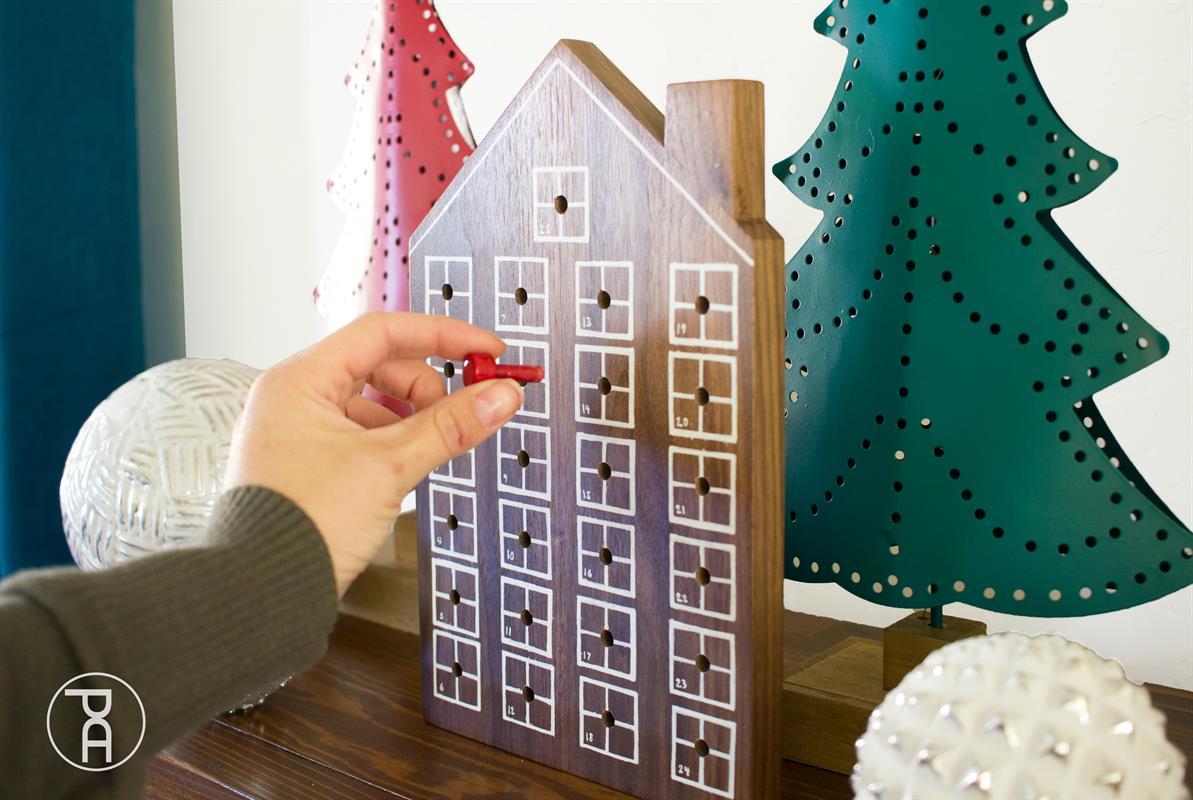


Create fun holiday memories with a simple Christmas countdown, advent calendar. Everyday in December leading up to the 25th, you get to move the colorful pin to the next dated window. This is a simple project that can be made in just a few hours. Great for beginners!
Tools
Kreg Tools

Other Tools
-
Miter Saw

-
Square
-
Tape Measure
Materials
Wood Products
- 1 Board , 1x8 , 12"
- 1 Round dowel , 1/4" Thick , 12"
- 1 Round dowel (optional) , 1/2" Thick , 12"
Hardware & Supplies
- 1 Sawtooth hanger
- 1 Narrow tip paint pen
- 1 Ruler
- 1 1/4" drill bit
Directions
-
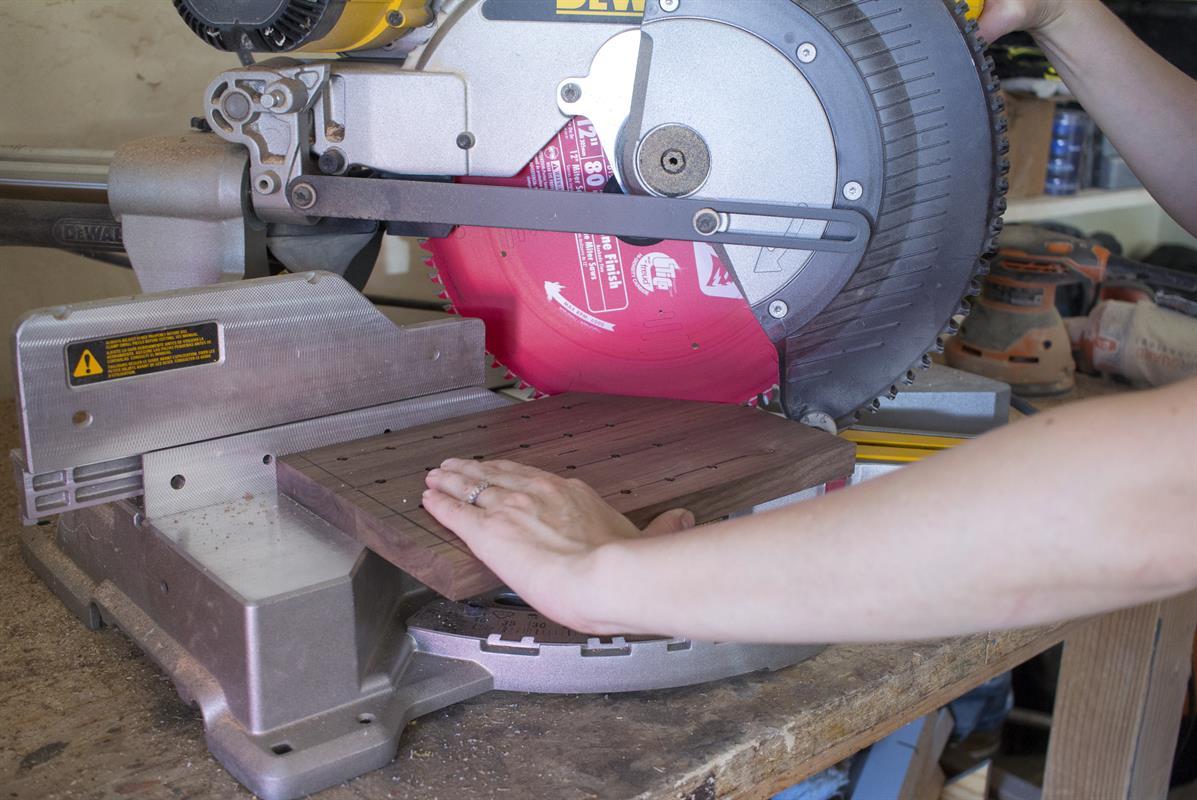
Cut Board
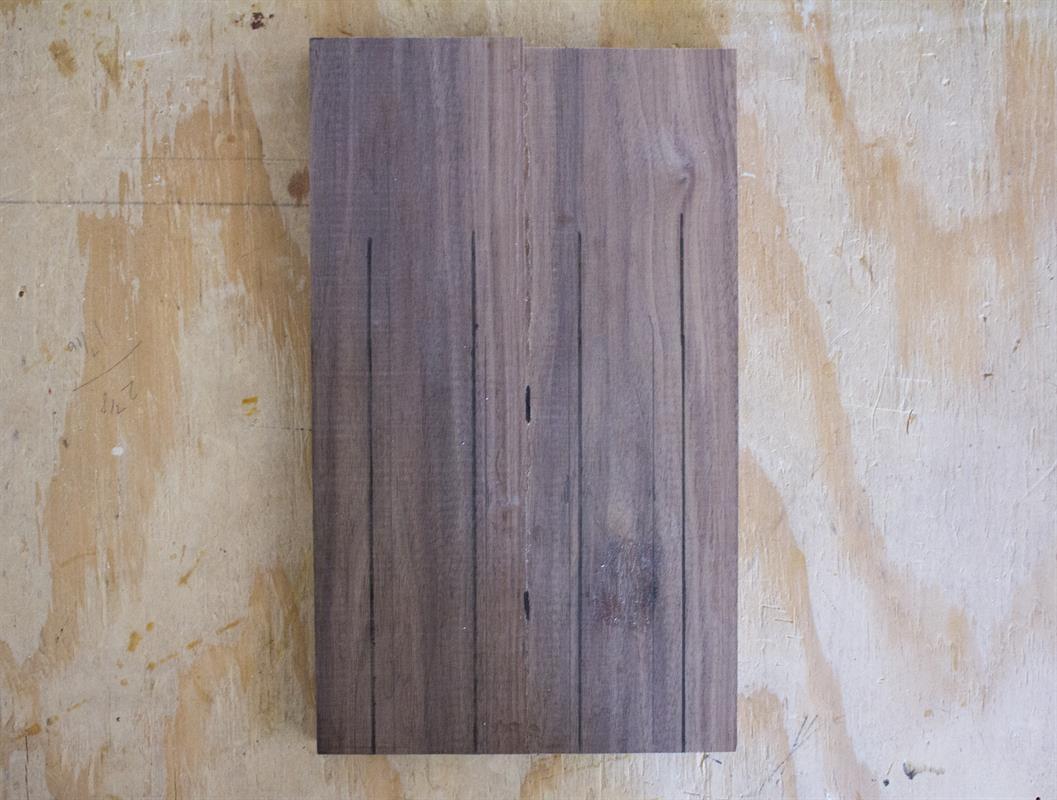
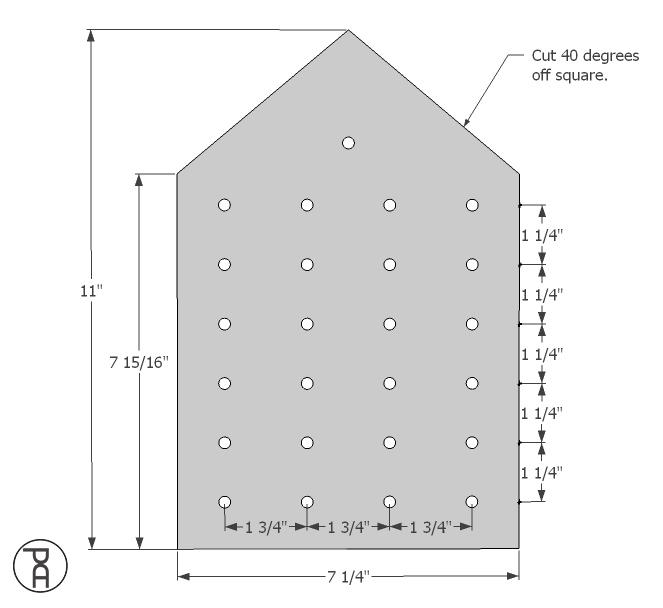
Cut a 1 x 8 board to 11" in length.
-
Layout Grid
Divide the width of the board, creating 4 evenly spaced, vertical lines.
-
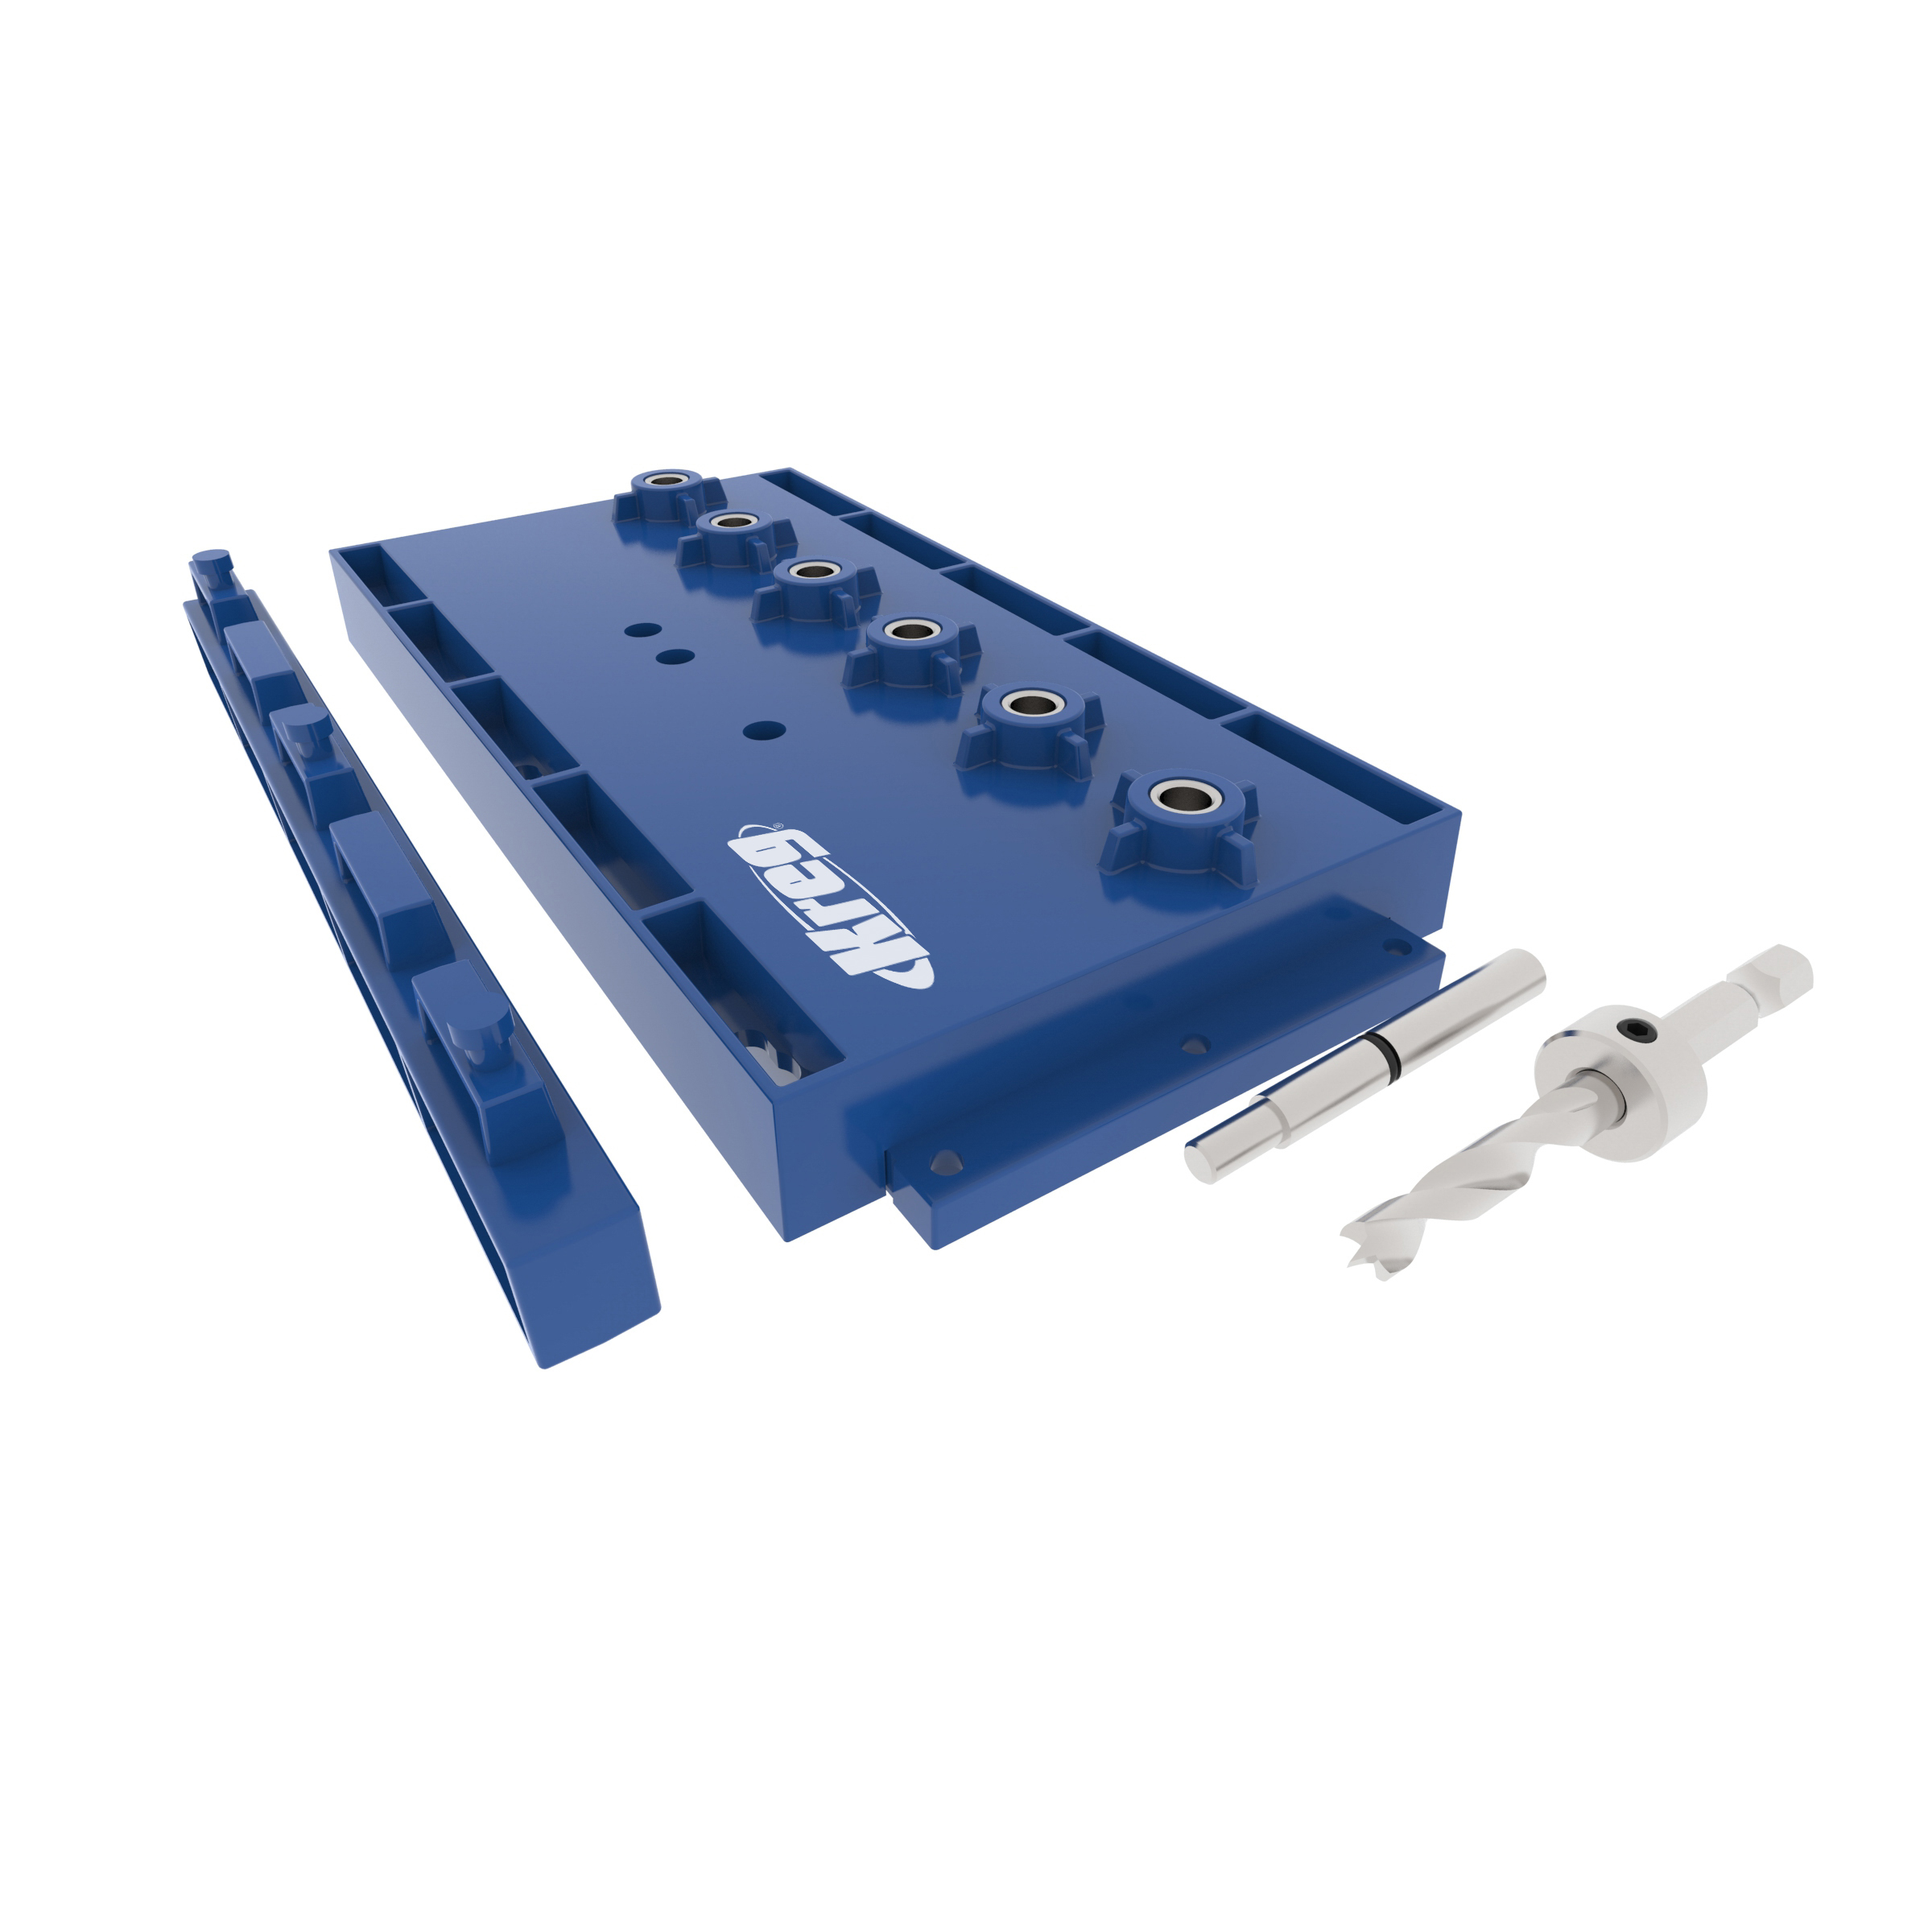
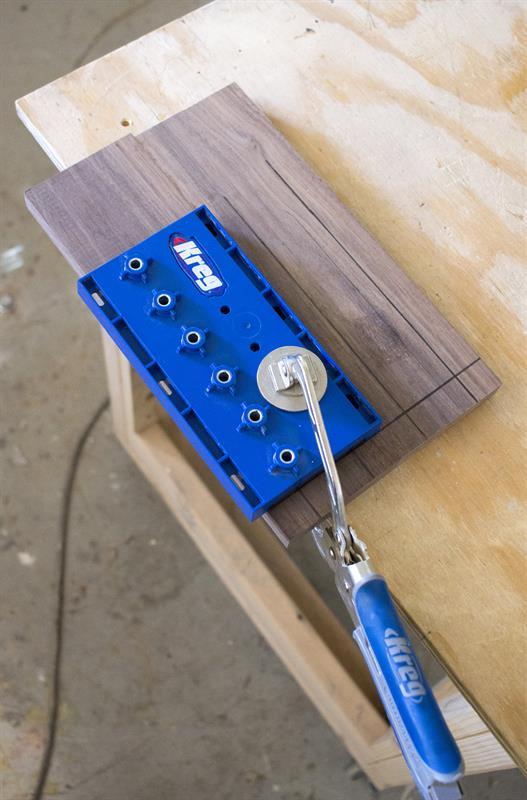
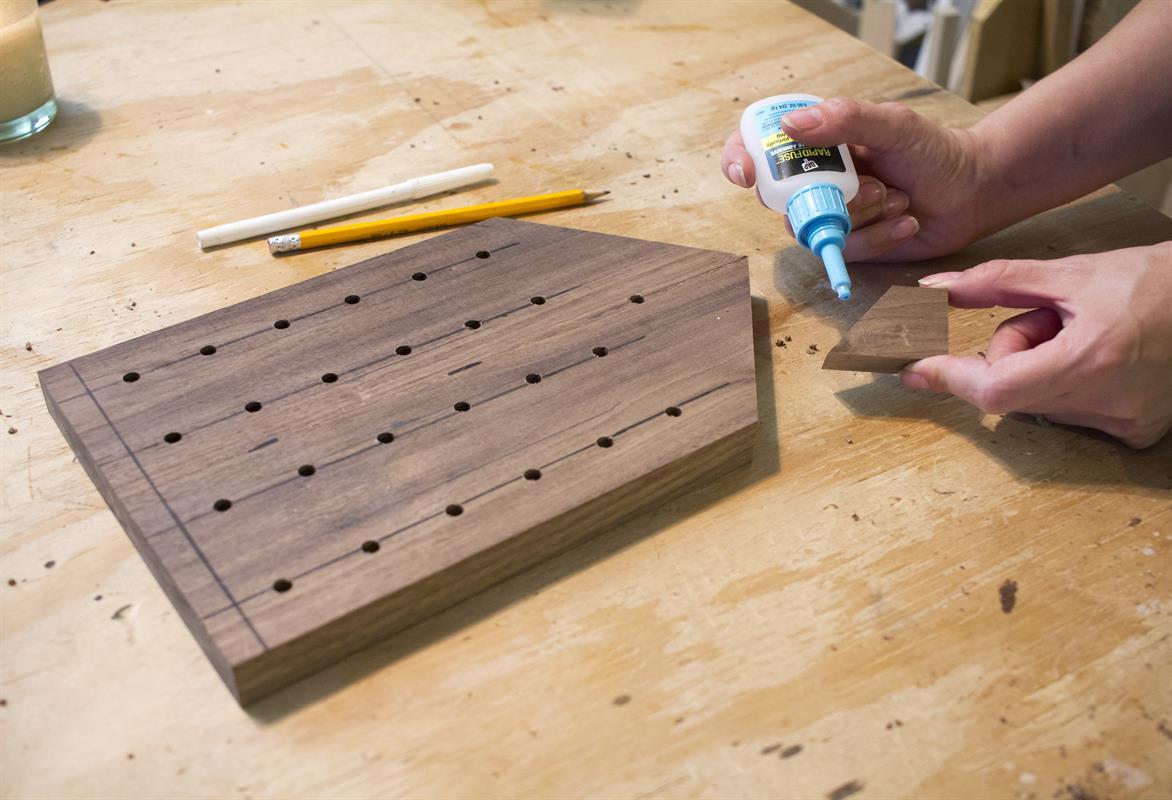
Align Jig
Align a Kreg Shelf Pin Jig so the holes are centered on each vertical line. Use a 3" Wood Project clamp to hold the board and jig securely to your work surface.
-
Drill Holes
Set a depth-stop collar on a 1/4" drill bit. Using the Kreg Shelf Pin Jig, drill six, 1/2" deep holes, vertically along each of the lines drawn. Create a total of 24 holes.

-
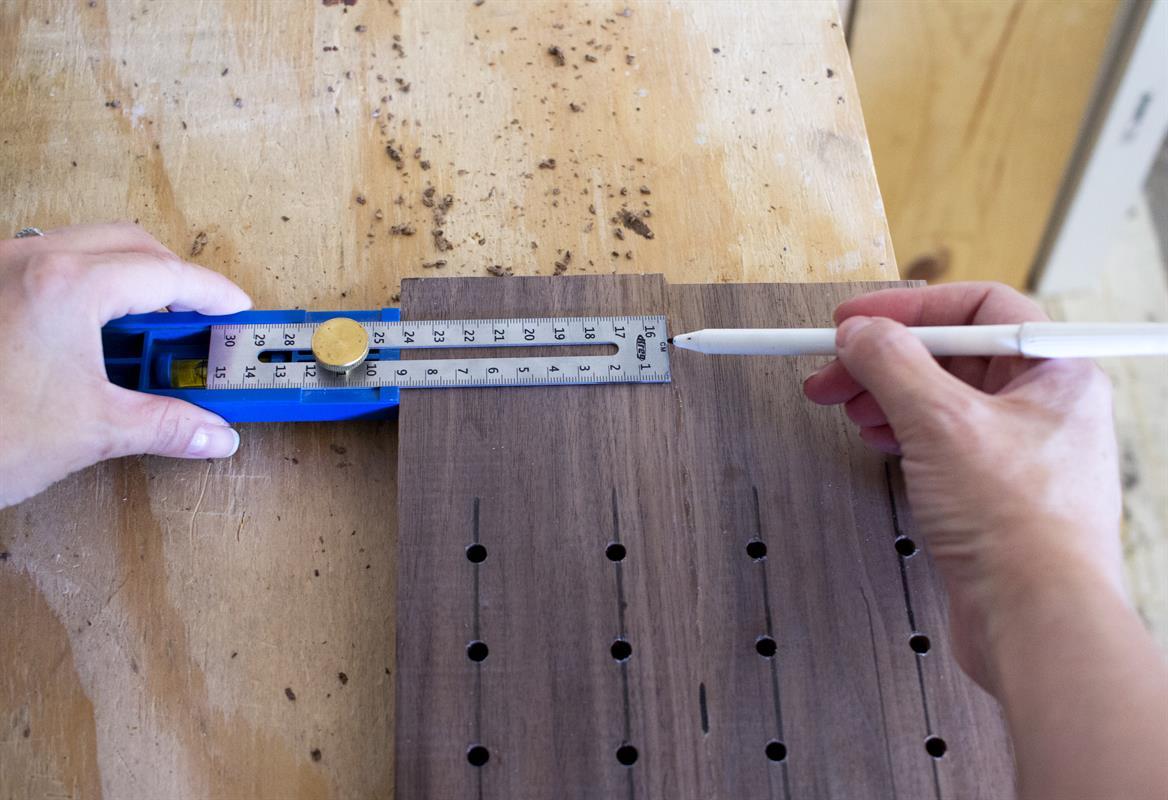
Add Top Hole
Use a Multi-Mark™ multi-purpose measuring tool to find the vertical center, of the board. Measure 1-5/16" from the top row of holes. Drill a 1/4" x 12" hole (creating 25 holes in total).
-
Cut Angled Roof
Use a miter saw to cut an angled roof line. Cut each side of the angle, 40 degrees off of square.
-
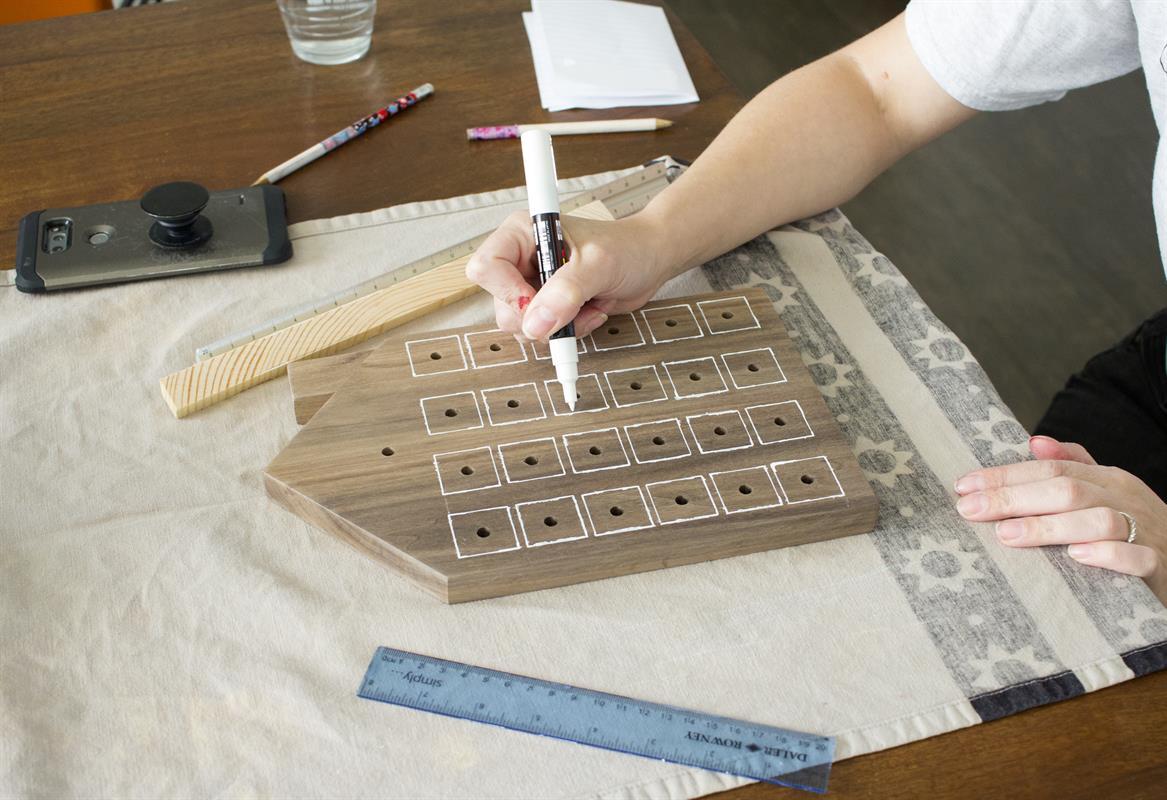
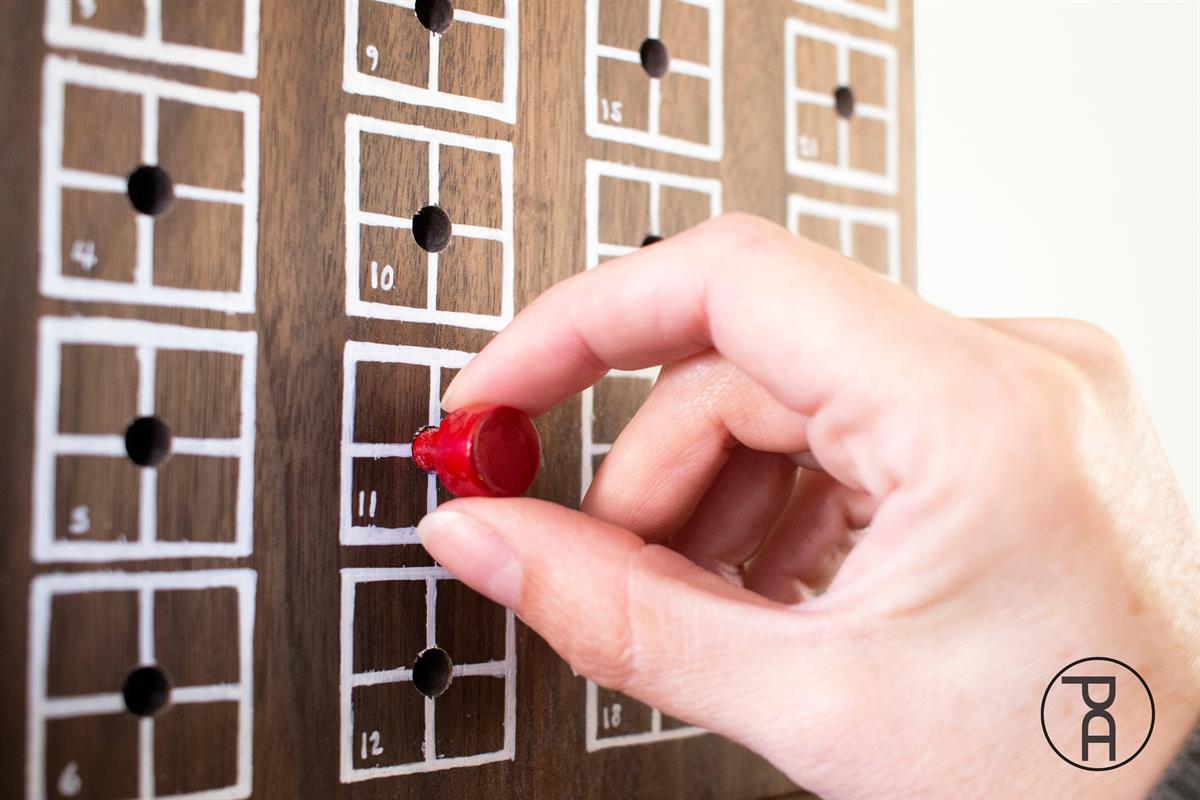
Draw Windows
Use a ruler and narrow paint pen to draw windows around each hole and create a straight roof line.
-
Add Numbers
Write a small number (1-25) in the lower corner of each window.

-
Clear Coat
Apply 2-3 coats of a clear finish to protect your design.
-
Sawtooth Hanger
Once dry, flip the board over, face-down onto your work surface. Carefully attach a sawtooth hanger to give yourself the option to hang the calendar on the wall.
-
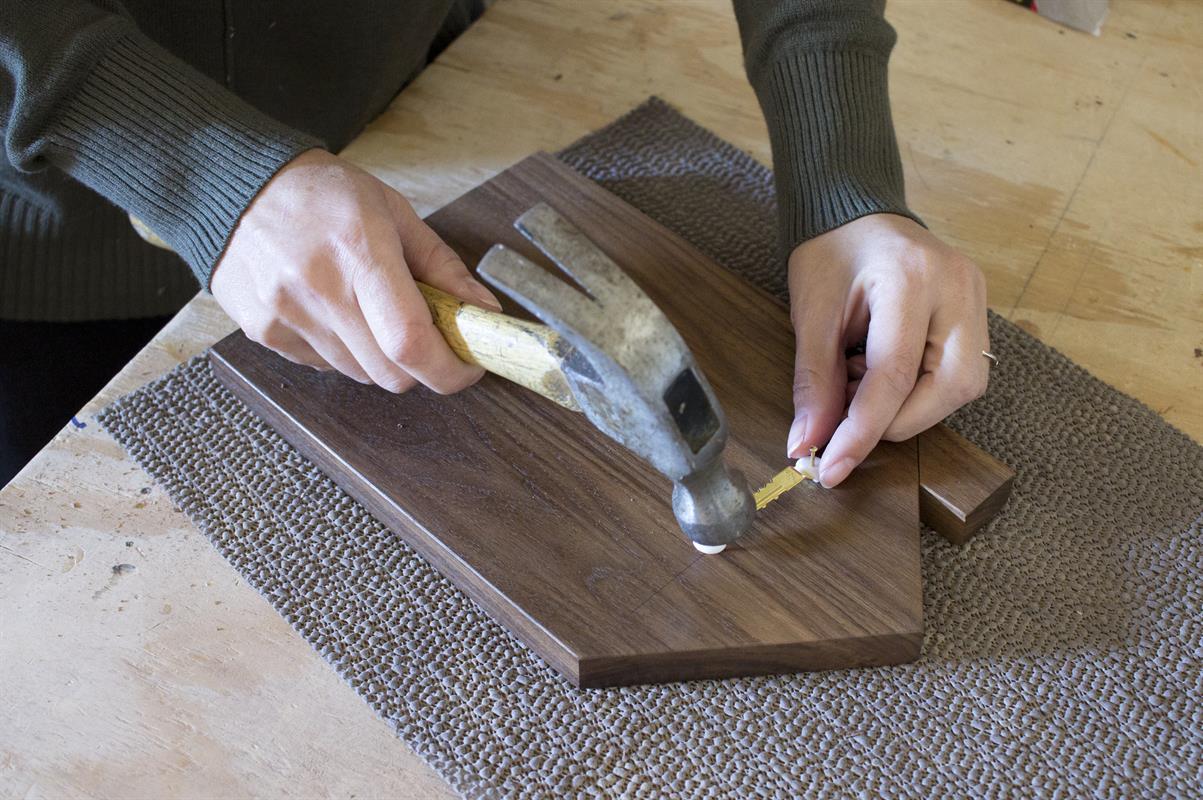
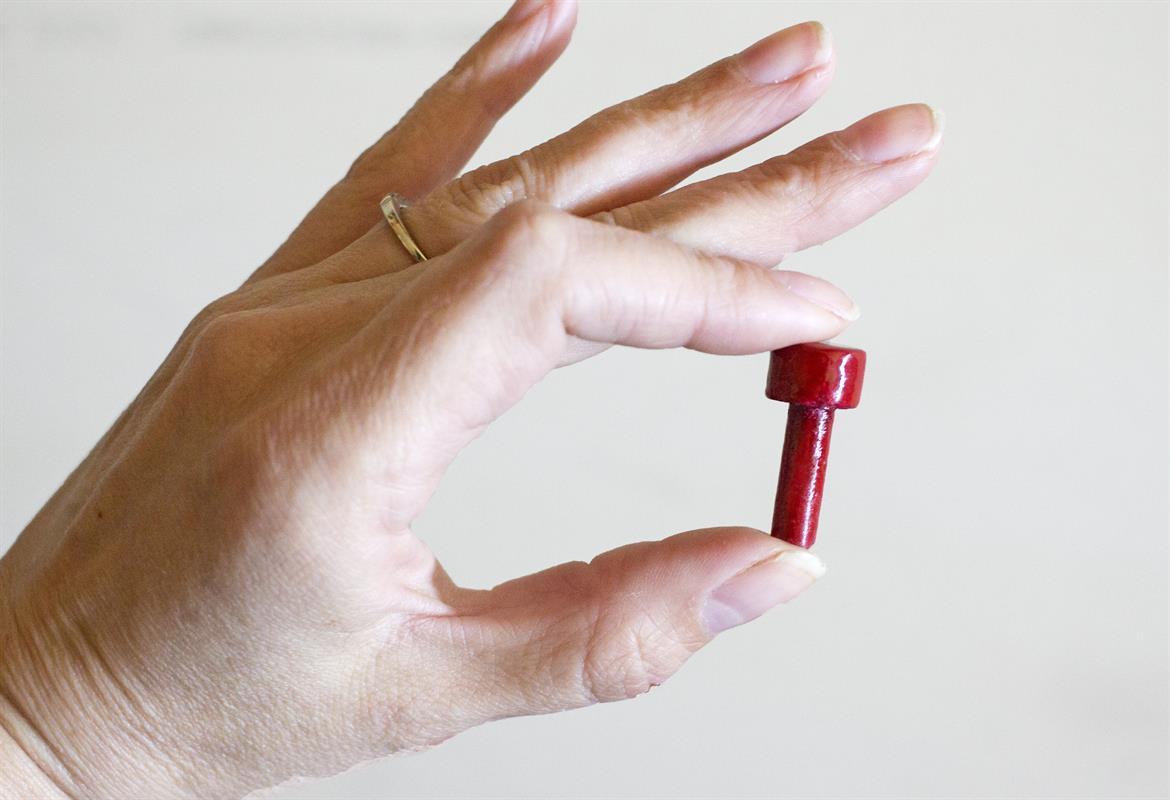
Create Pin
Cut a 1" length of 1/4" round wood dowel. To make the pin easier to pull, glue a 1/2" length of 1/2" round wood dowel (or whatever shape you prefer) to the end of the 1/4" dowel. Paint or finish however you'd like.
-
Add Chimney
Carefully, cut a 1" x 1-1/2" x 3/4" chimney from the scraps created when the roof was angled. (When cutting such a small piece of material, make sure to secure the material to a sacrificial board and keep your fingers a safe distance from the saw blade).
Attach the chimney to the roof of the board, using a fast setting glue.
-
Start the Countdown
Starting on the 1st of December, place the pin in the corresponding date on the calendar.
-
More Tips and Ideas
Head to www.PneumaticAddict.com for more DIY tips and ideas.