

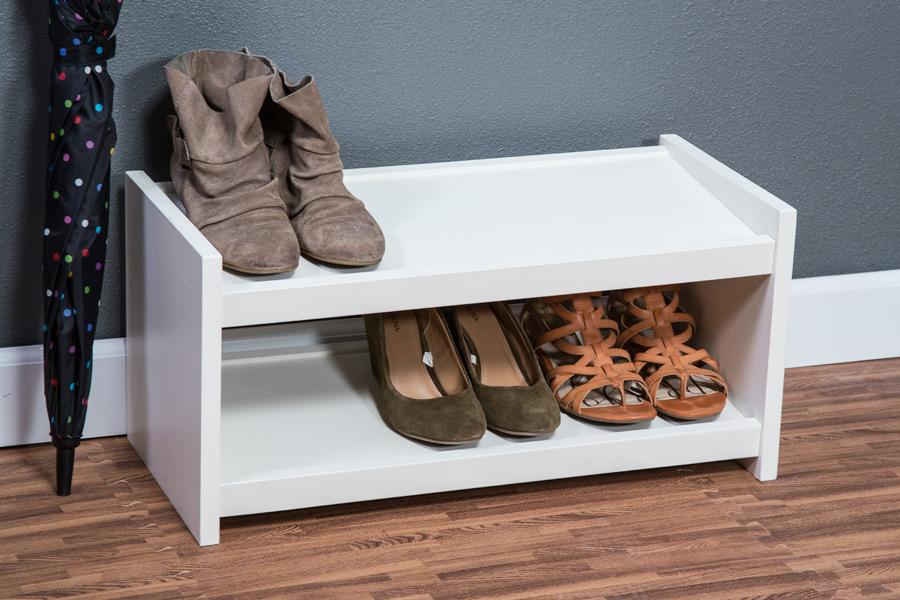
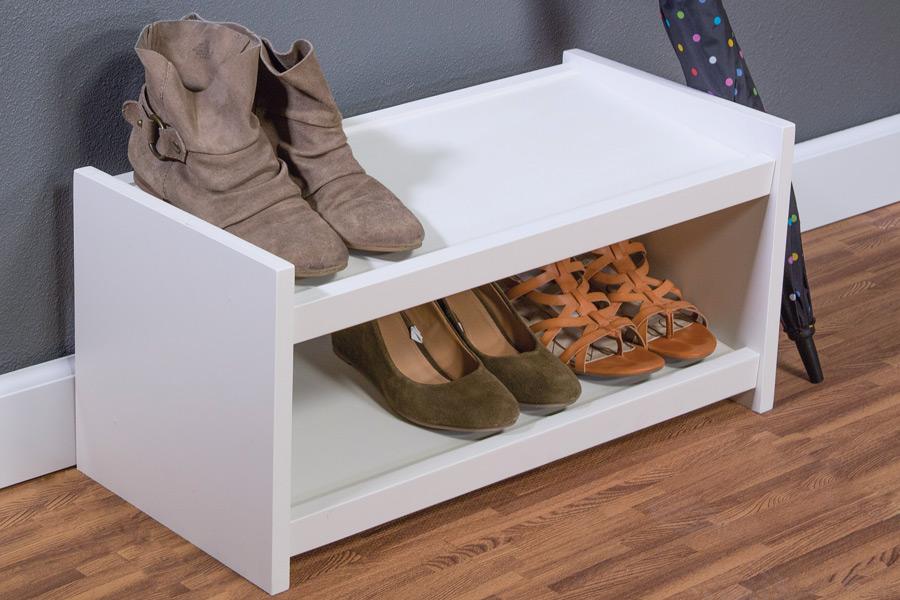
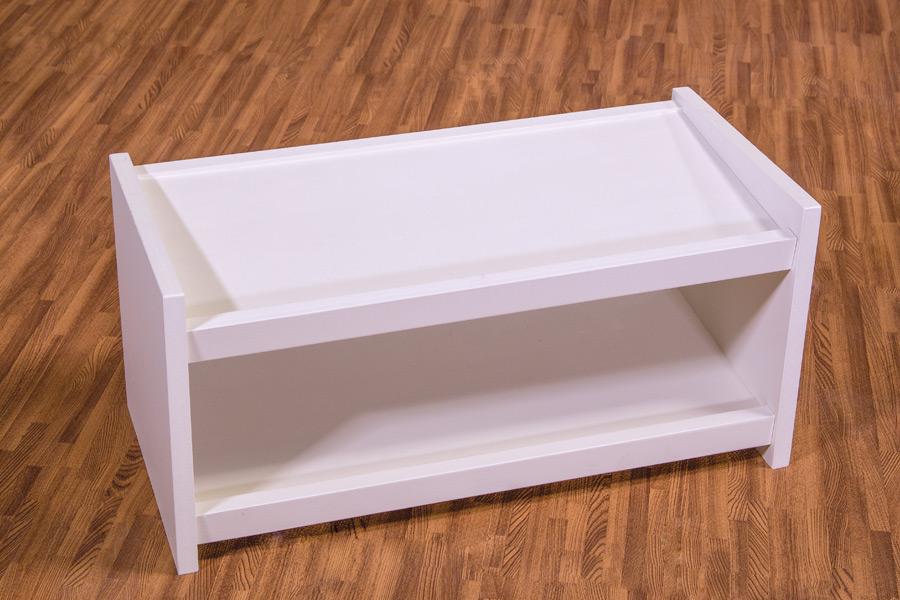


Shoes can quickly pile up, causing unnecessary clutter in the closet. Here’s a simple two-tier shoe organizer that keeps several pairs of shoes tidy and visible. It’s a quick and easy project that you’ll use every day.
Tools
Kreg Tools


Other Tools
-
Miter Saw

Materials
Wood Products
- 1 Plywood , 3/4" Thick , Quarter Sheet
- 1 Board , 1x2 , 96"
Hardware & Supplies
- 24 1 1/4" coarse-thread pocket-hole screws
Cut List & Parts
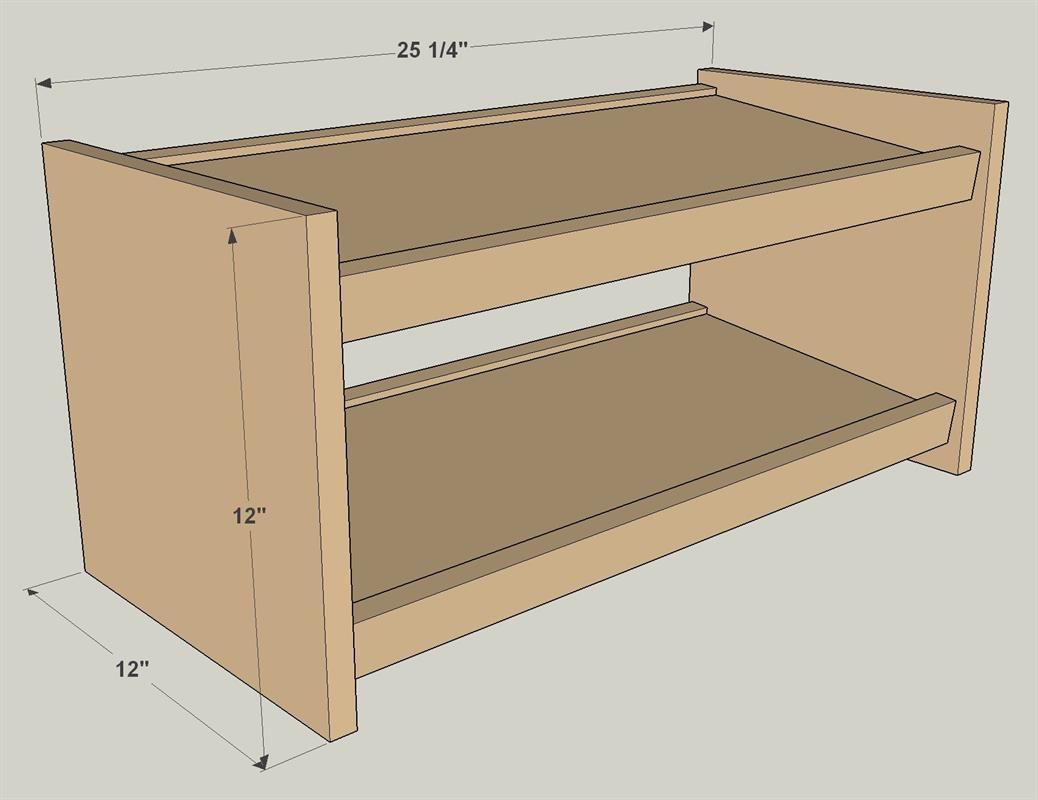
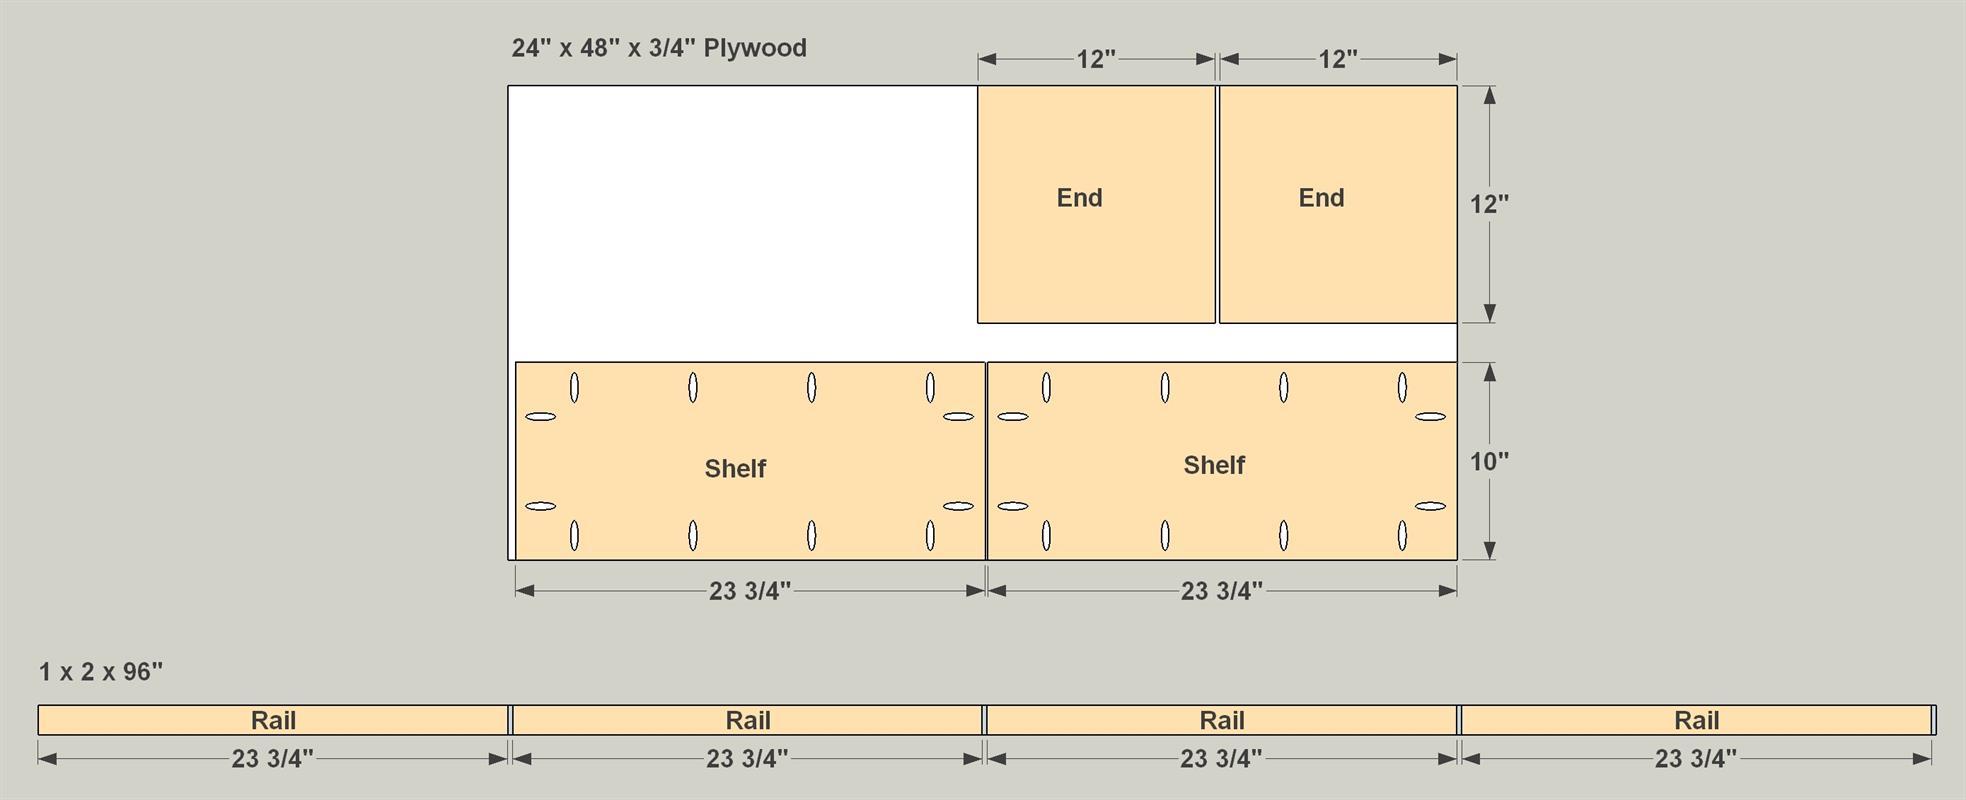
- 2 Ends , 3/4" x 12" x 12"
- 2 Shelves , 3/4" x 10" x 23 3/4"
- 4 Rails , 3/4" x 1 1/2" x 23 3/4"
Directions
-
Cut the Parts to Size
Cut two Ends and two Shelves to size from a quarter sheet of 3/4" plywood, as shown in the cutting diagram. Also cut four Rails to length from a 1x2 board.
-
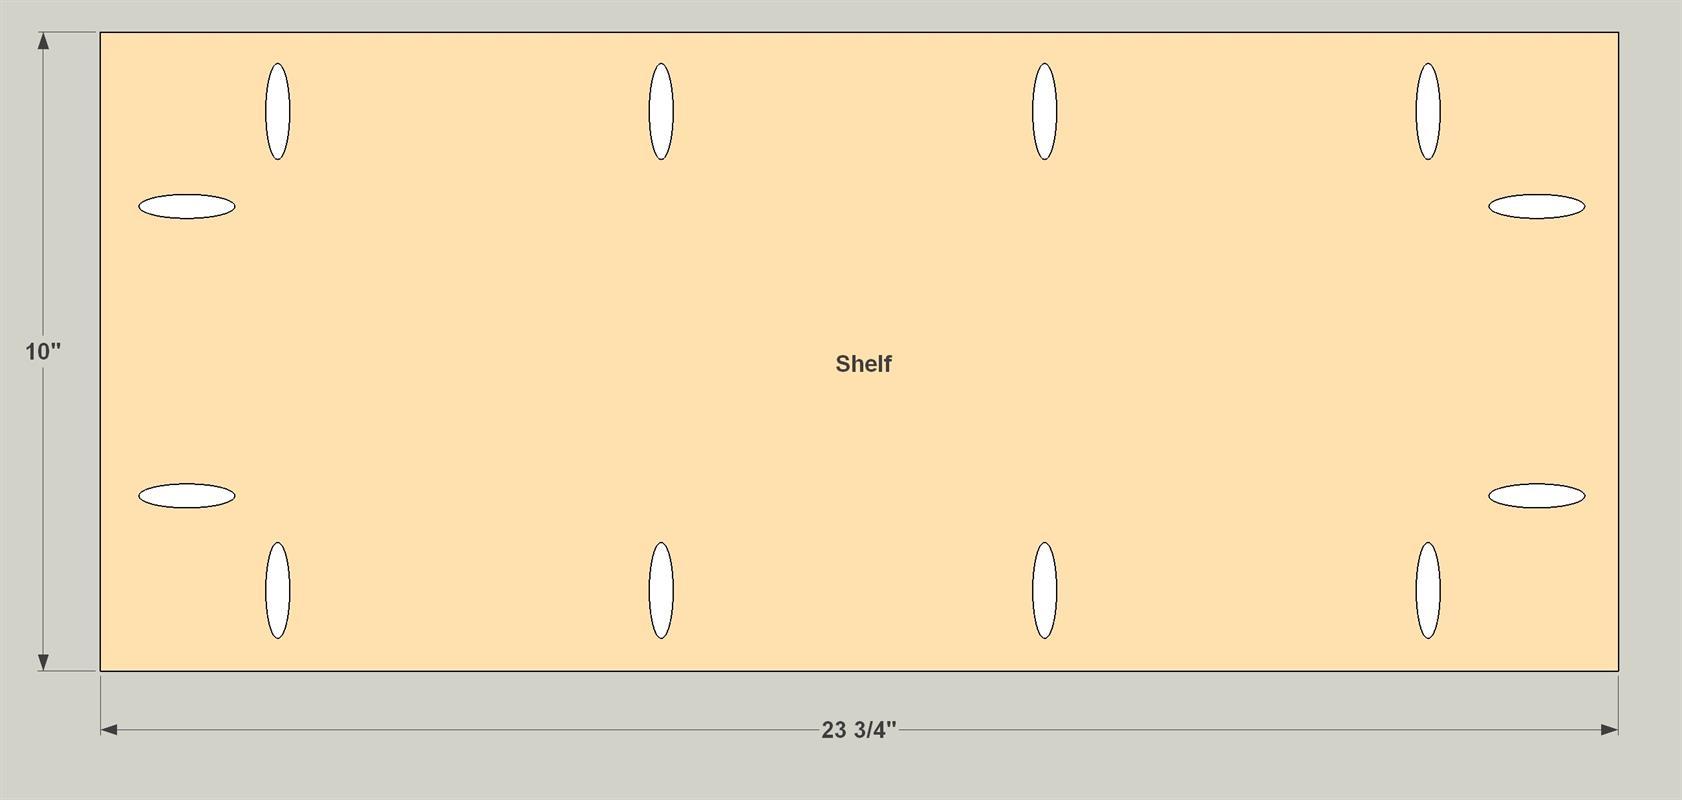
Drill Pocket Holes
With your jig set up for 3/4" stock, drill pocket holes in the underside of the Shelves, as shown.
-
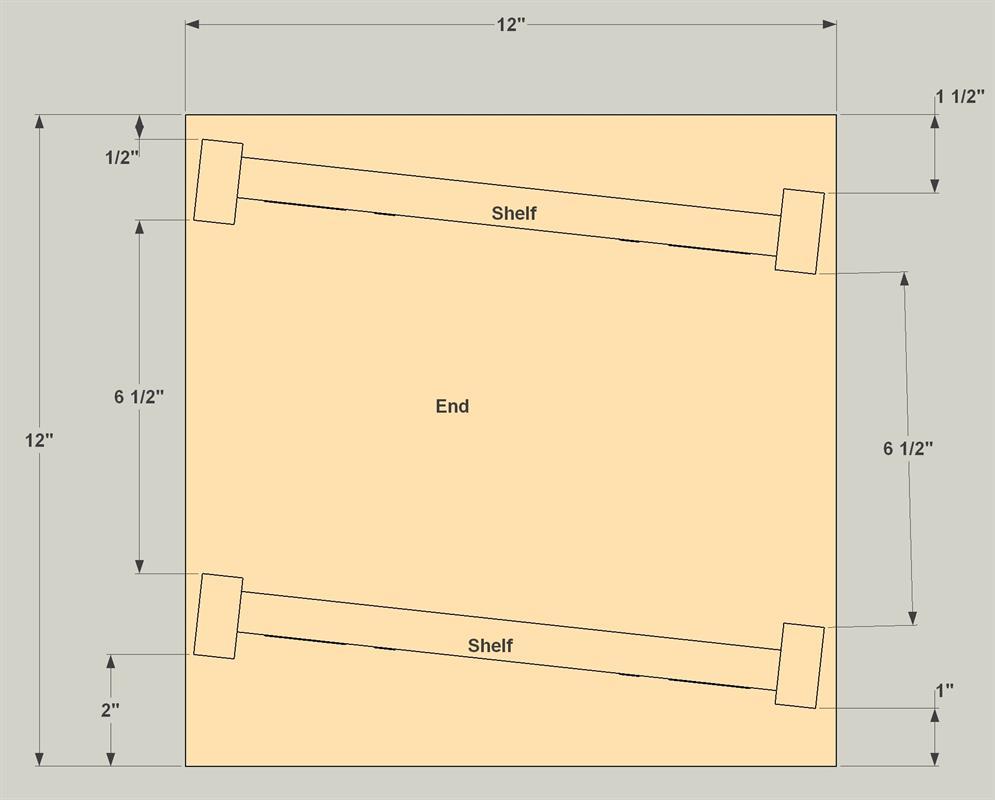
Assemble the Shelves
After sanding the Shelves and Rails, attach two Rails to each Shelf using 1 1/4" coarse-thread pocket-hole screws. Note that the rails are offset: One Rail sits 1/4" below the Shelf, the other sits 1/4" above.

-
Join the Shelves and Ends
After sanding the Ends, position the shelf/rail assemblies as shown. Make sure that the Rail protruding above each shelf is positioned at the front—on the downward sloping side. Then attach the assemblies to the Ends using 1 1/4" coarse-thread pocket-hole screws.
-
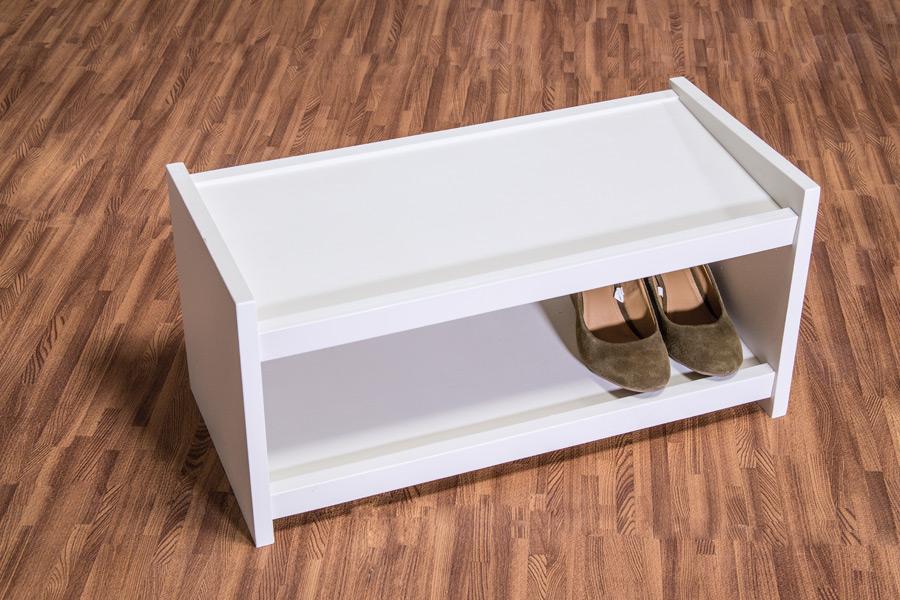
Paint and Put It to Use
After assembly, do any touch up sanding needed, and then paint the Shoe Organizer. Latex makes a great choice, because it’s easy to scrub should your shoes leave any dirt behind.
An Easy Route to Smooth Edges
The exposed edges of plywood are tough to get smooth, no matter how much you sand, and can have voids that will show. A quick, easy way to smooth these edges is to smear on ordinary spackling compound. Let it dry, sand lightly, and you’re ready to paint.