Organize your DIY work space with this beginner-friendly workshop utility cart that makes storing your tools that much easier. Caster wheels are the perfect addition to make this cart as mobile as you are during your projects.
Tools
Kreg Tools


Other Tools
-
Saw

Materials
Wood Products
- 4 Boards , 1x4
- 1 Project Panel , 16” W x 4’ L
- 3 Boards , 2x2
Hardware & Supplies
- 4 Casters
- 1 Box of ½” Screws
- 1 Box of 1 ¼” Pocket Hole Screws (See tools list)
- 1 Box of 2 ½” Pocket Hole Screws (See tools list)
- 1 Box of 2" Wood Screws
- 1 Paint or Stain
Directions
-
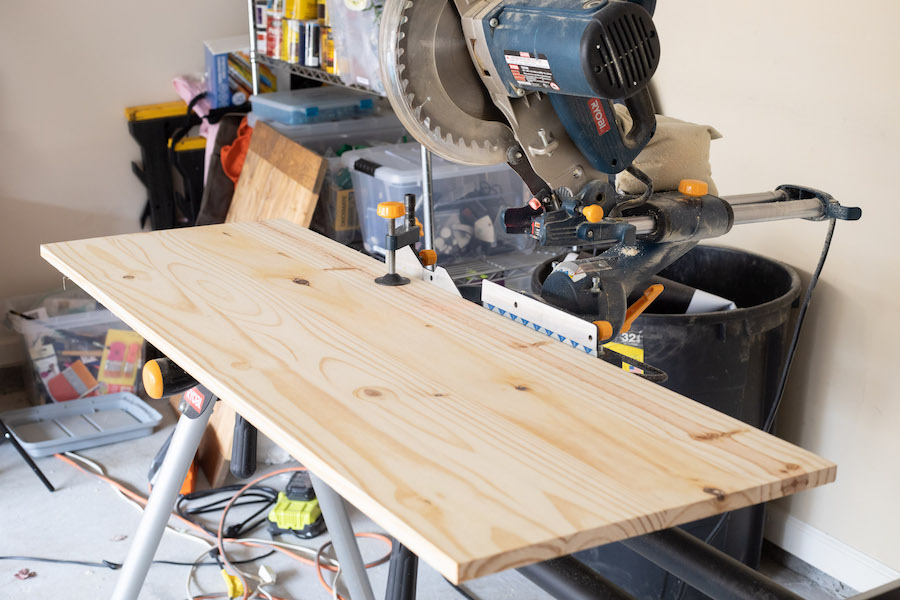
Cut Wood
Cut your wood to the cut list dimensions.
-
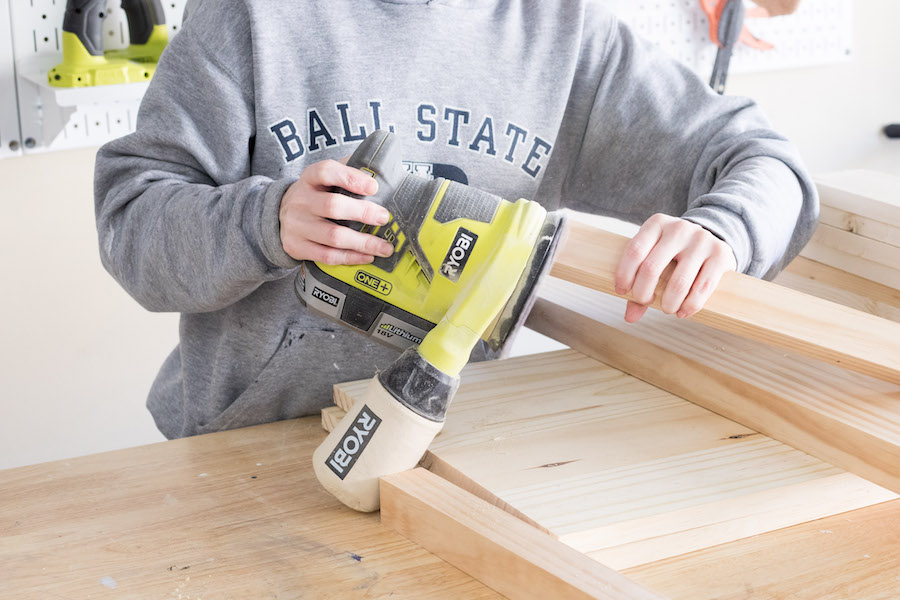
Sand
Use a random orbit sander to sand everything smooth.
-
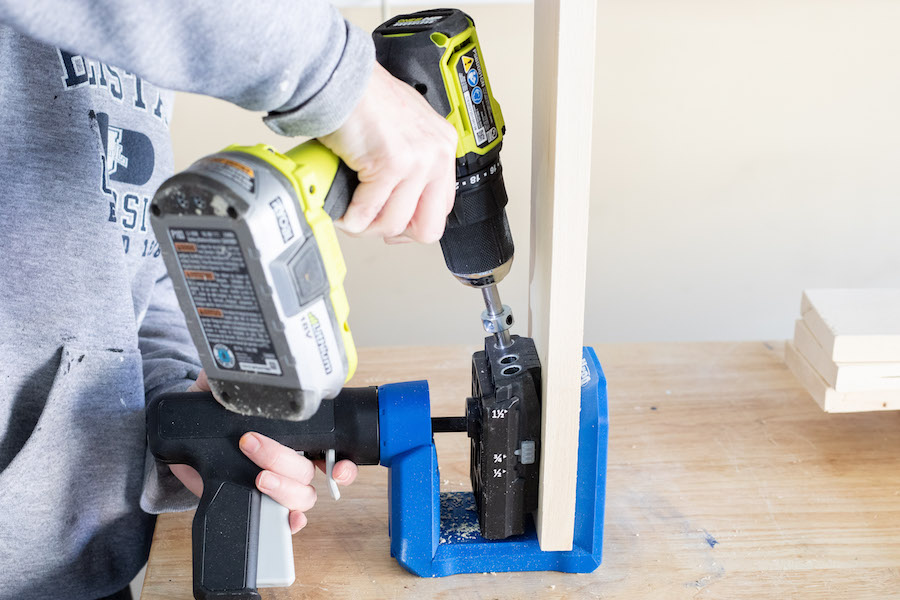
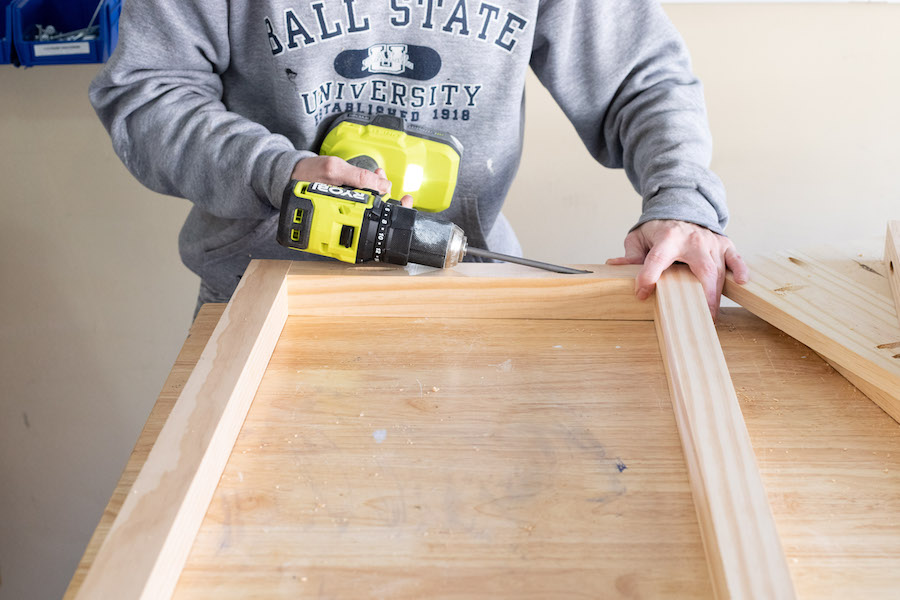
Drill Pocket Holes
I used the Kreg Jig 520PRO to drill pocket holes as follows:
-1 pocket hole at each end of both 12 ½” long 2x2 pieces
-2 pocket holes at each end of (4) 15” long 1x4 pieces
-Pocket holes around the perimeter of each project panel (I drilled 4 on each side and 3 on each end)
-
Build Shelves
This utility cart has two shelves, so in order to build those I attached the shorter 1x4 pieces to the longer 1x4 pieces, forming two separate frames using 1 ¼” pocket hole screws.
Next, I attached each frame to a project panel (this forms the bottom of the box/shelf) using 1 ¼” pocket hole screws.

-
Build Legs
For the legs, I attached each of the short 2x2 pieces to two of the longer 2x2 pieces (perpendicular), forming a “U” shape. I repeated this process so I had two “U” shaped pairs of legs.
-
Attach the Legs
Now it’s time to assemble! I measured 5” down from the handle (the “U” shape part of the 2x2 pieces we assembled is the handle), and working with the cart on its side I placed my first shelf there. I attached it by drilling (2) 2” wood screws from the inside of the shelf into each of the 2x2 legs.
For the second shelf, I used a ruler as a spacer and placed the shelf 12” below the first one, attaching it the same way (2 - 2” wood screws into each leg).

-
Stain or Paint
I finished the cart using a Provincial wood stain. You can use the topcoat of your choice as well.

-
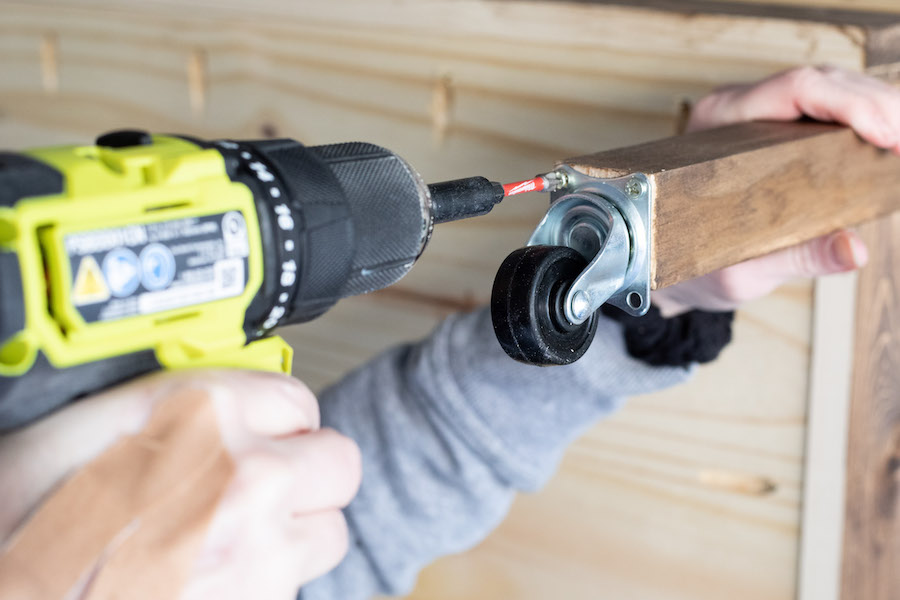
Add Casters
The final step is to add casters after your paint or stain has dried. I flipped the cart on its side and attached small casters. I couldn’t find any small enough so I improvised by just screwing into one side of the bracket since the bracket is a little too large for the 2x2. They still work just fine! I attached them using ½” long screws.