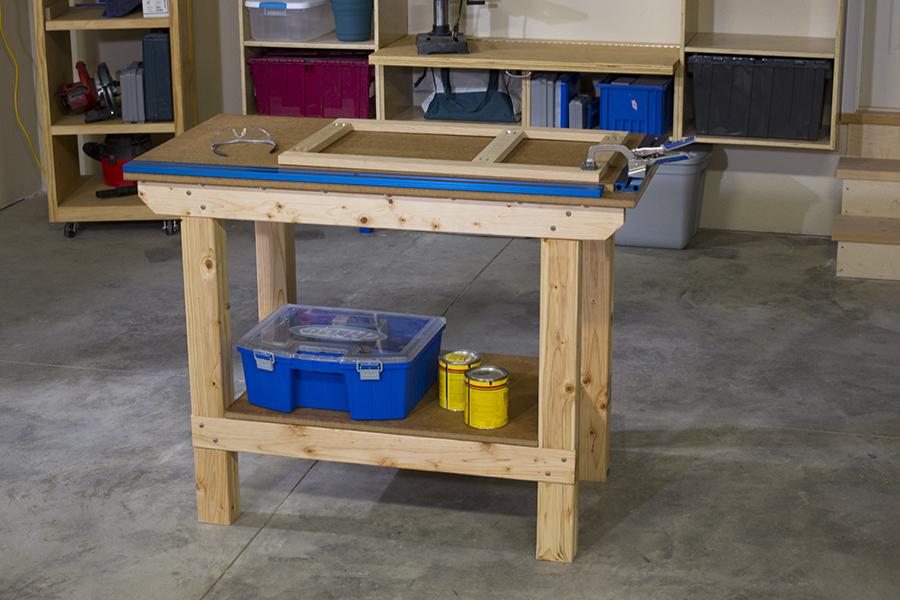
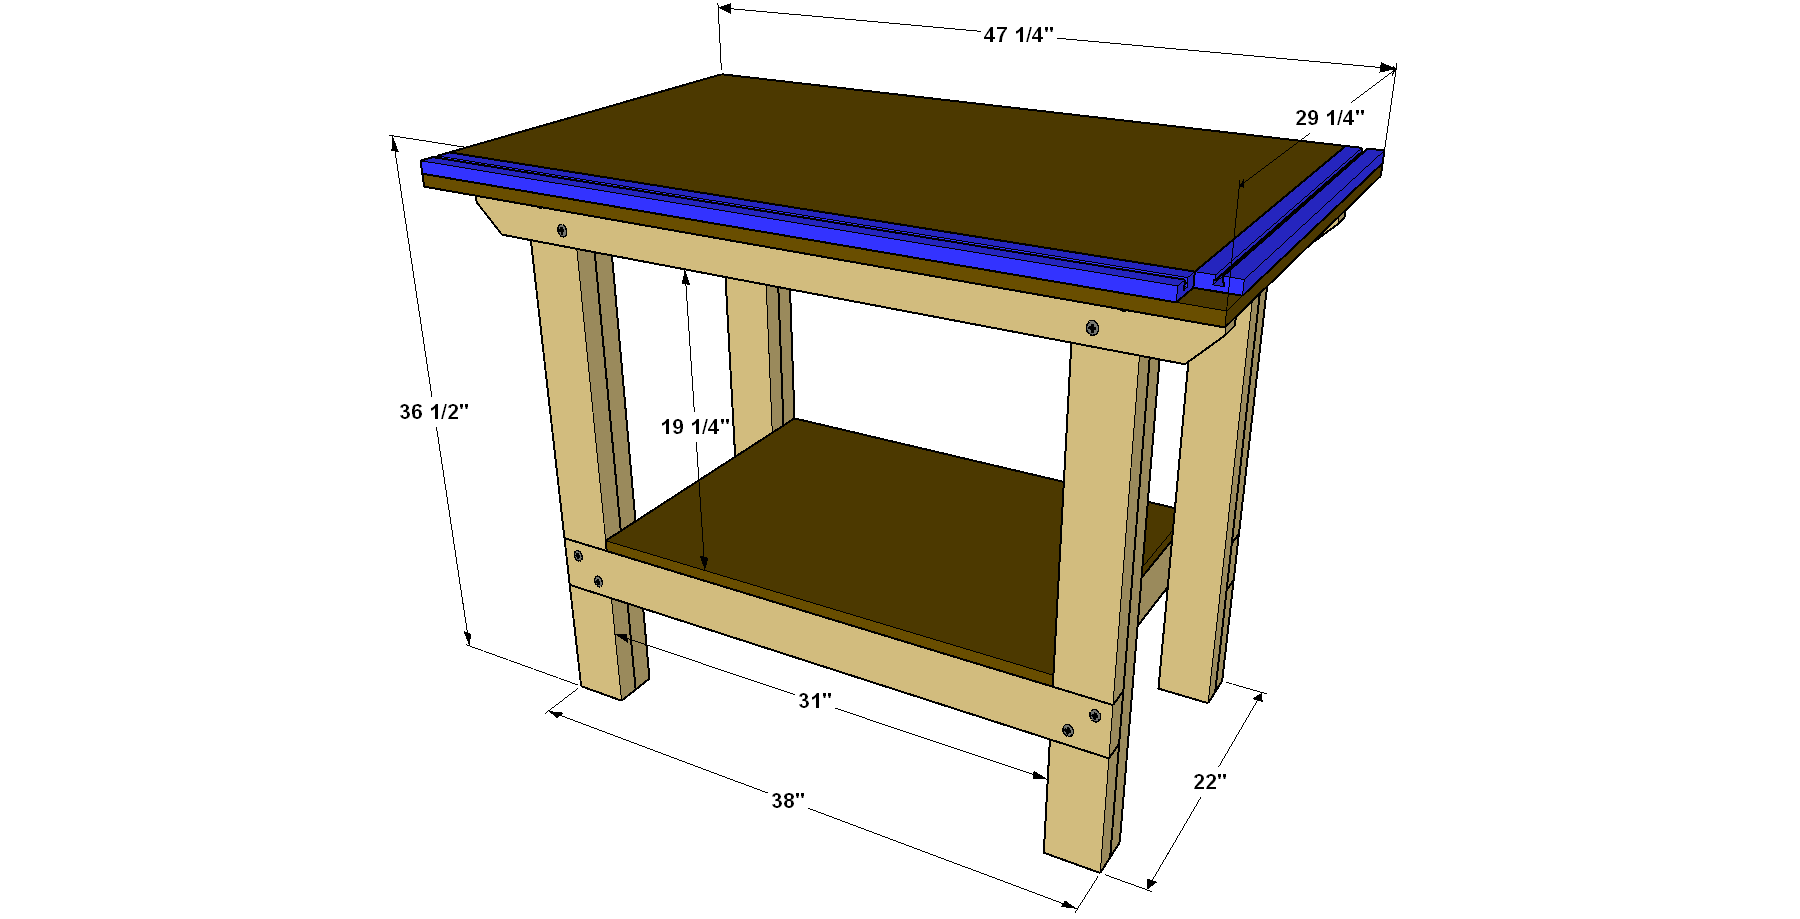


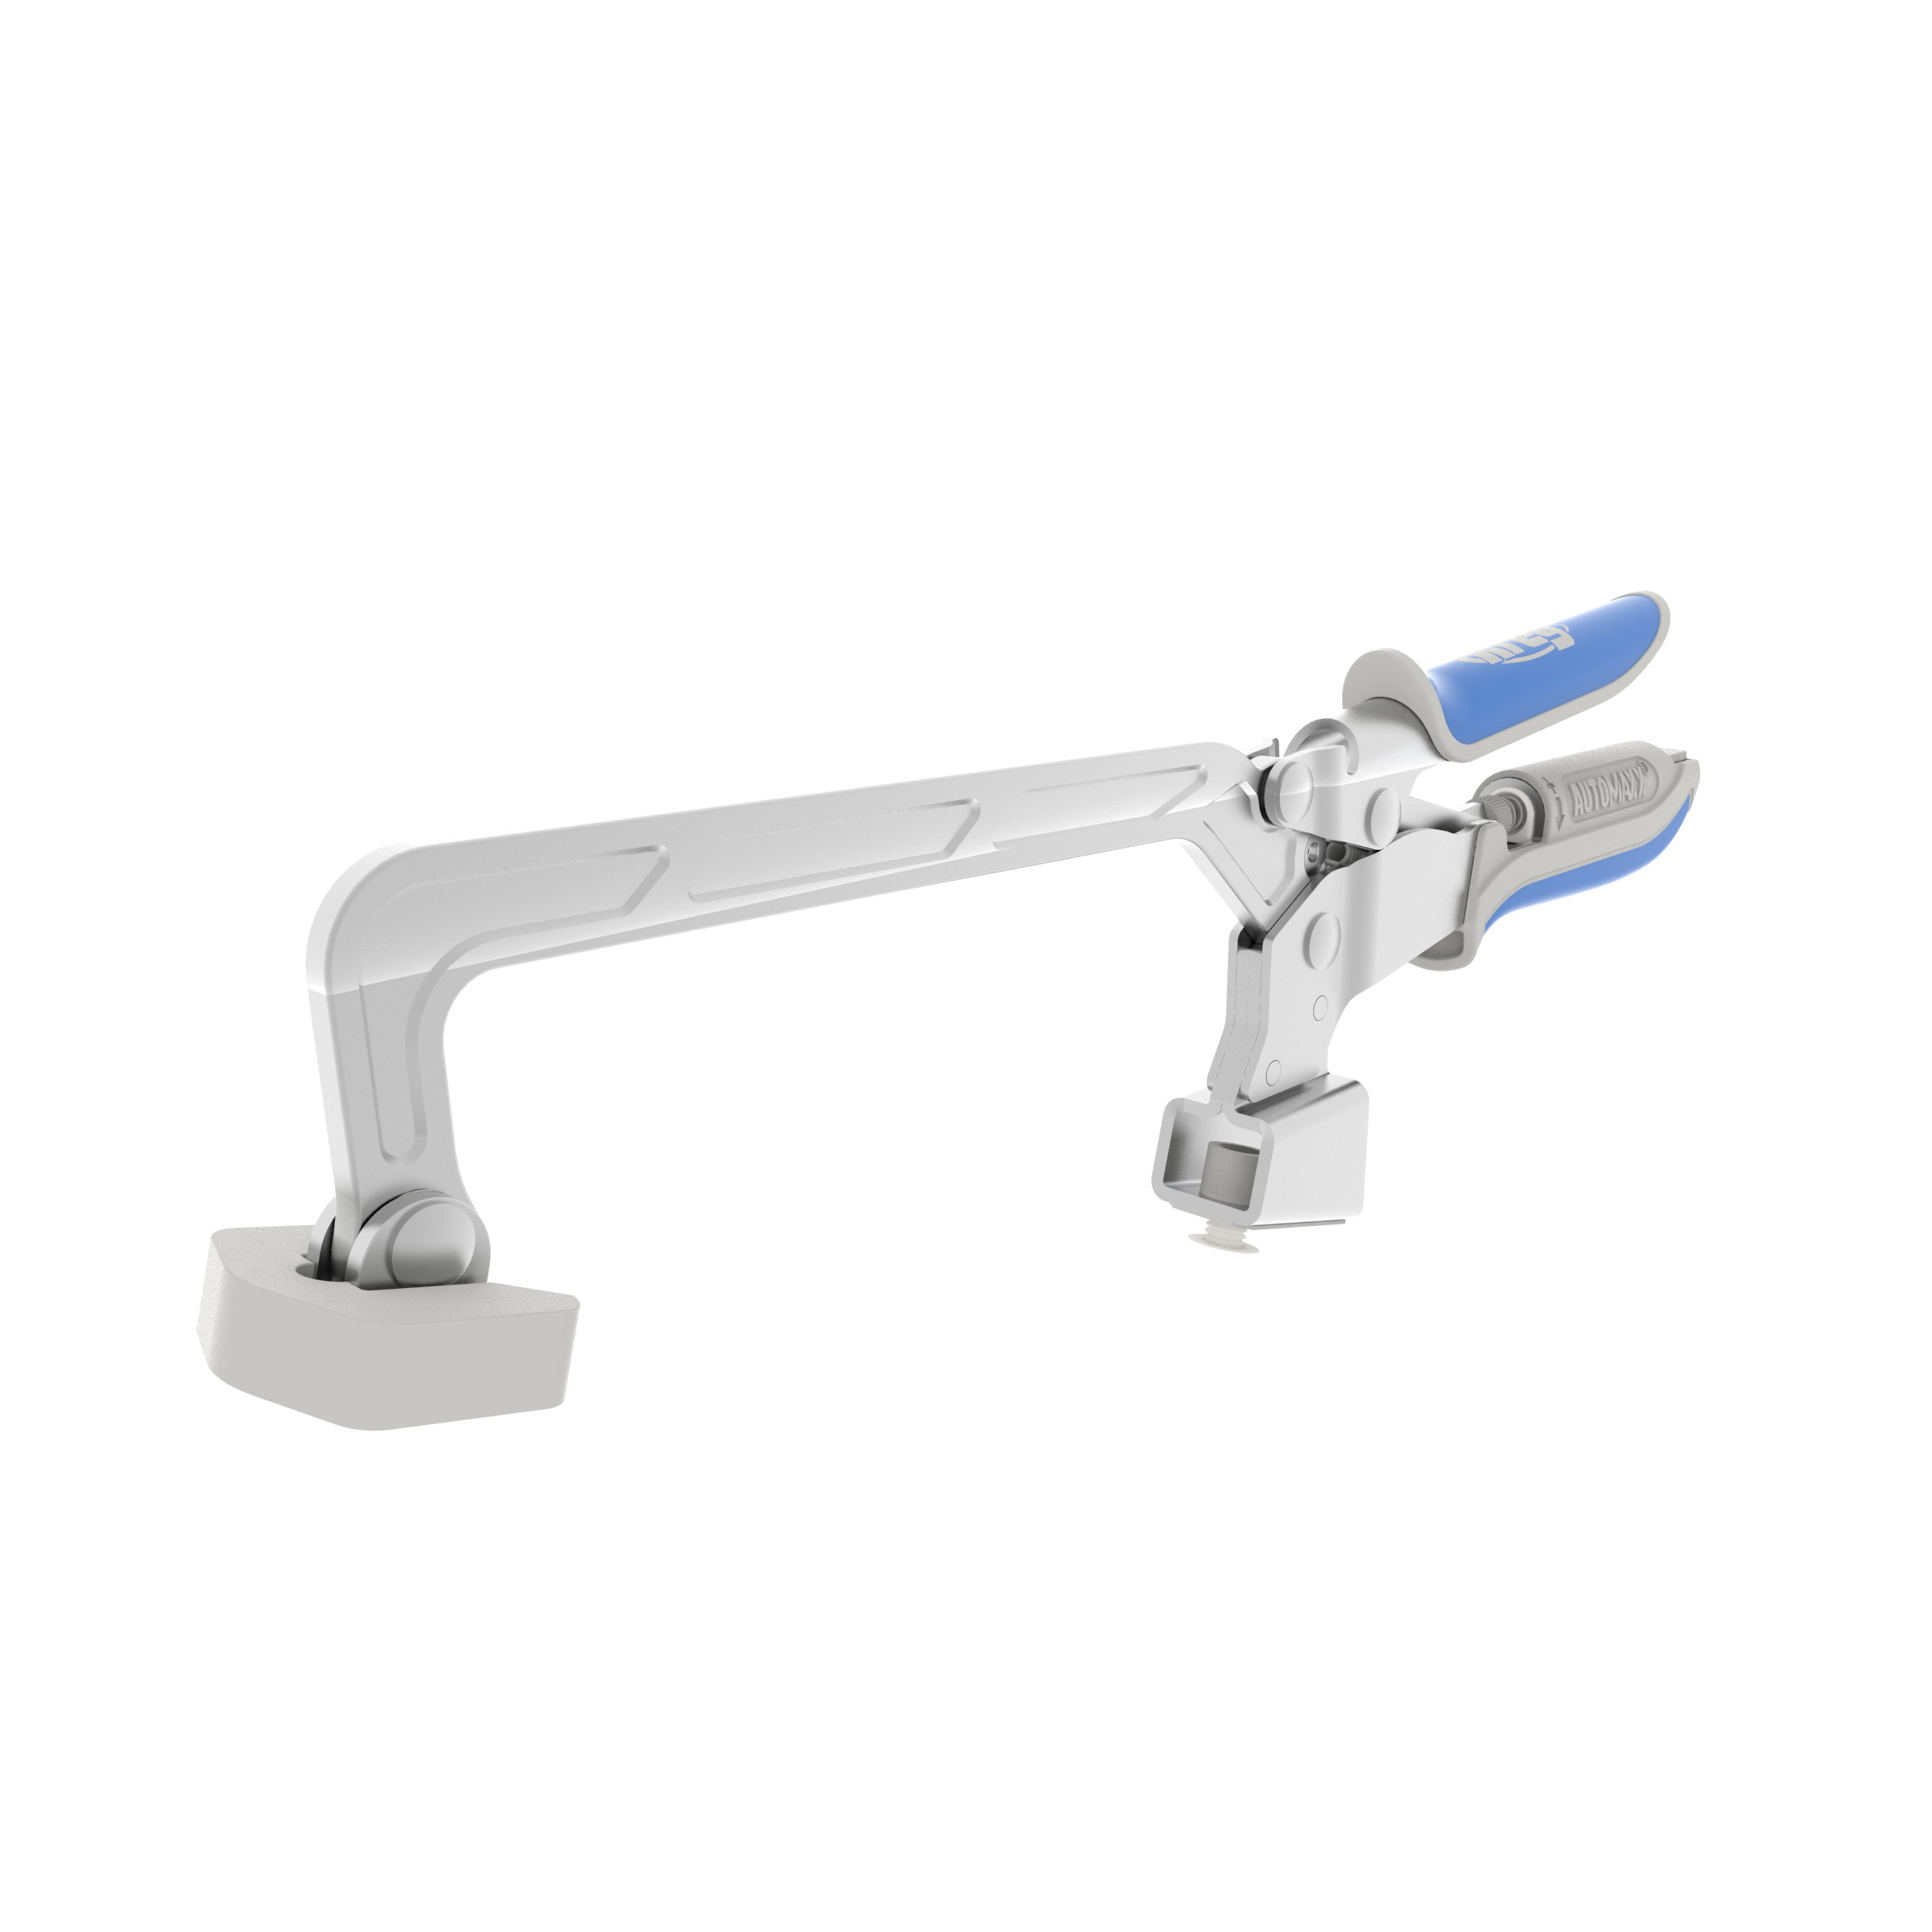
This workbench is easy to build, but built to withstand heavy use. Plus, it offers a versatile benchtop, thanks to a Kreg® Universal Clamp Trak Kit from that’s mounted along the front and one end. Combined with a couple of Kreg Bench Clamps, this makes a slick setup for holding pieces while you work.
Tools
Kreg Tools


Other Tools
-
tape measure

Materials
Wood Products
- 6 Board , 2x4 x 96"
- 1 MDF , 3/4" x 48 x 96"
Hardware & Supplies
- 16 2 1/2" Kreg HD Pocket-Hole Screws
- 16 2 1/2" (standard) Kreg Pocket-Hole Screws
- 24 1 1/4" coarse-thread Kreg Pocket-Hole Screws
- 40 2 1/2" flat-head wood screws
- 1 Kreg 27" x 45" Universal Clamp Trak Kit
Cut List & Parts
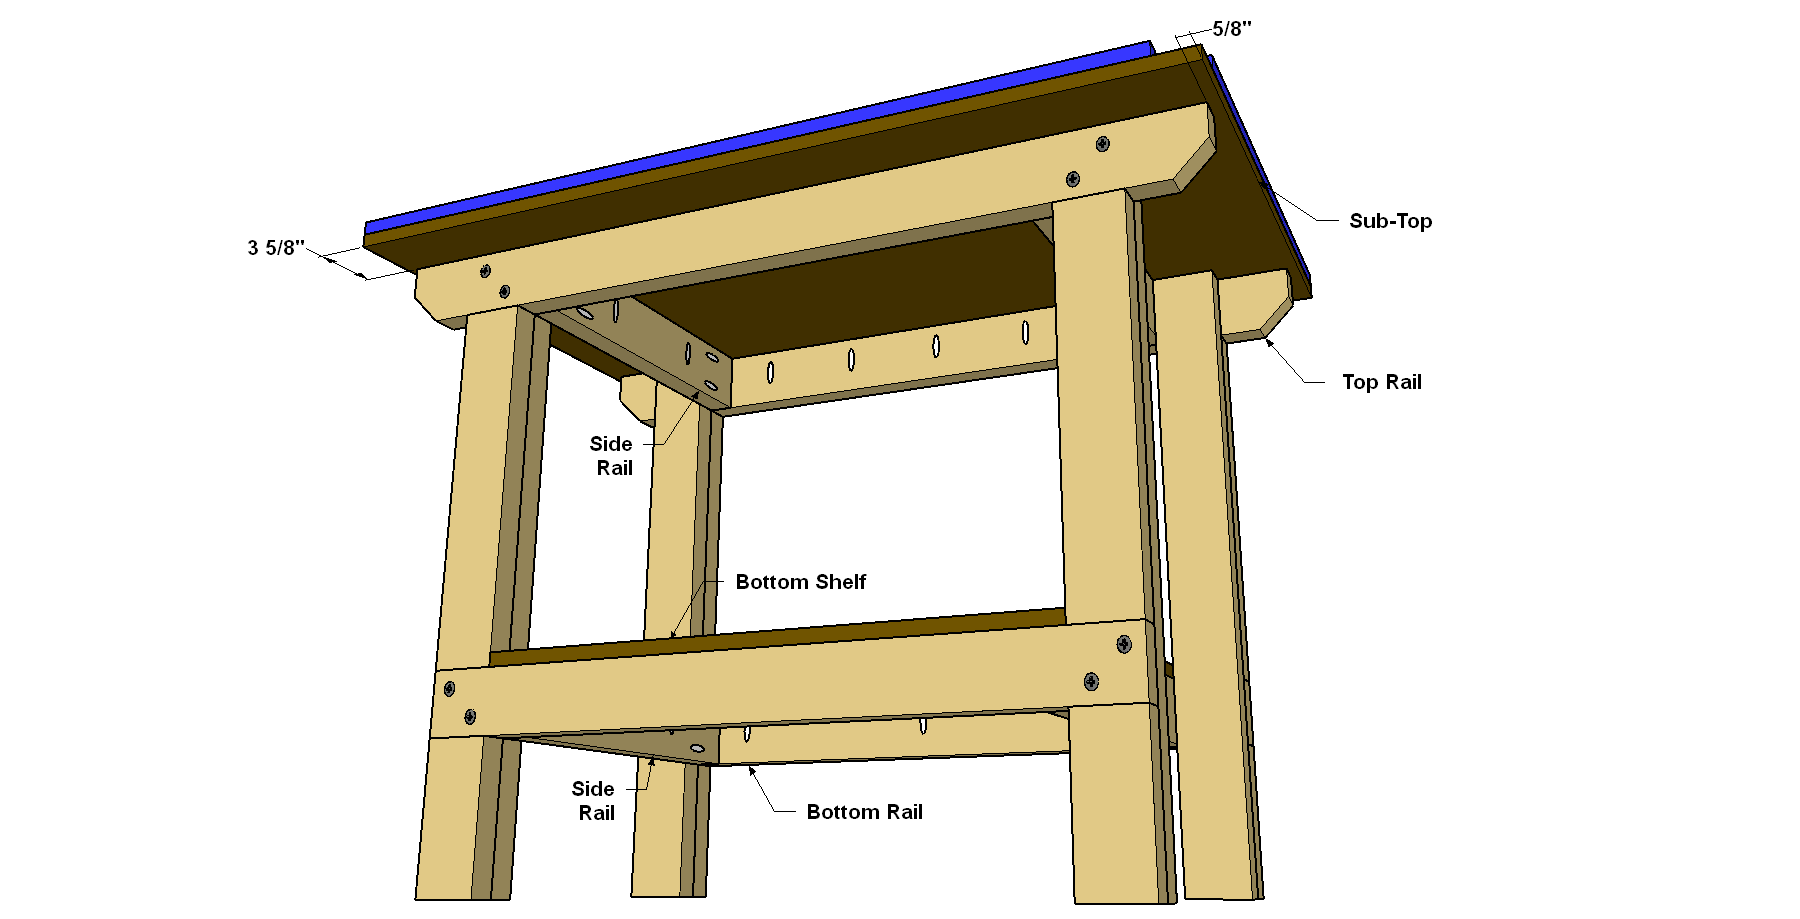
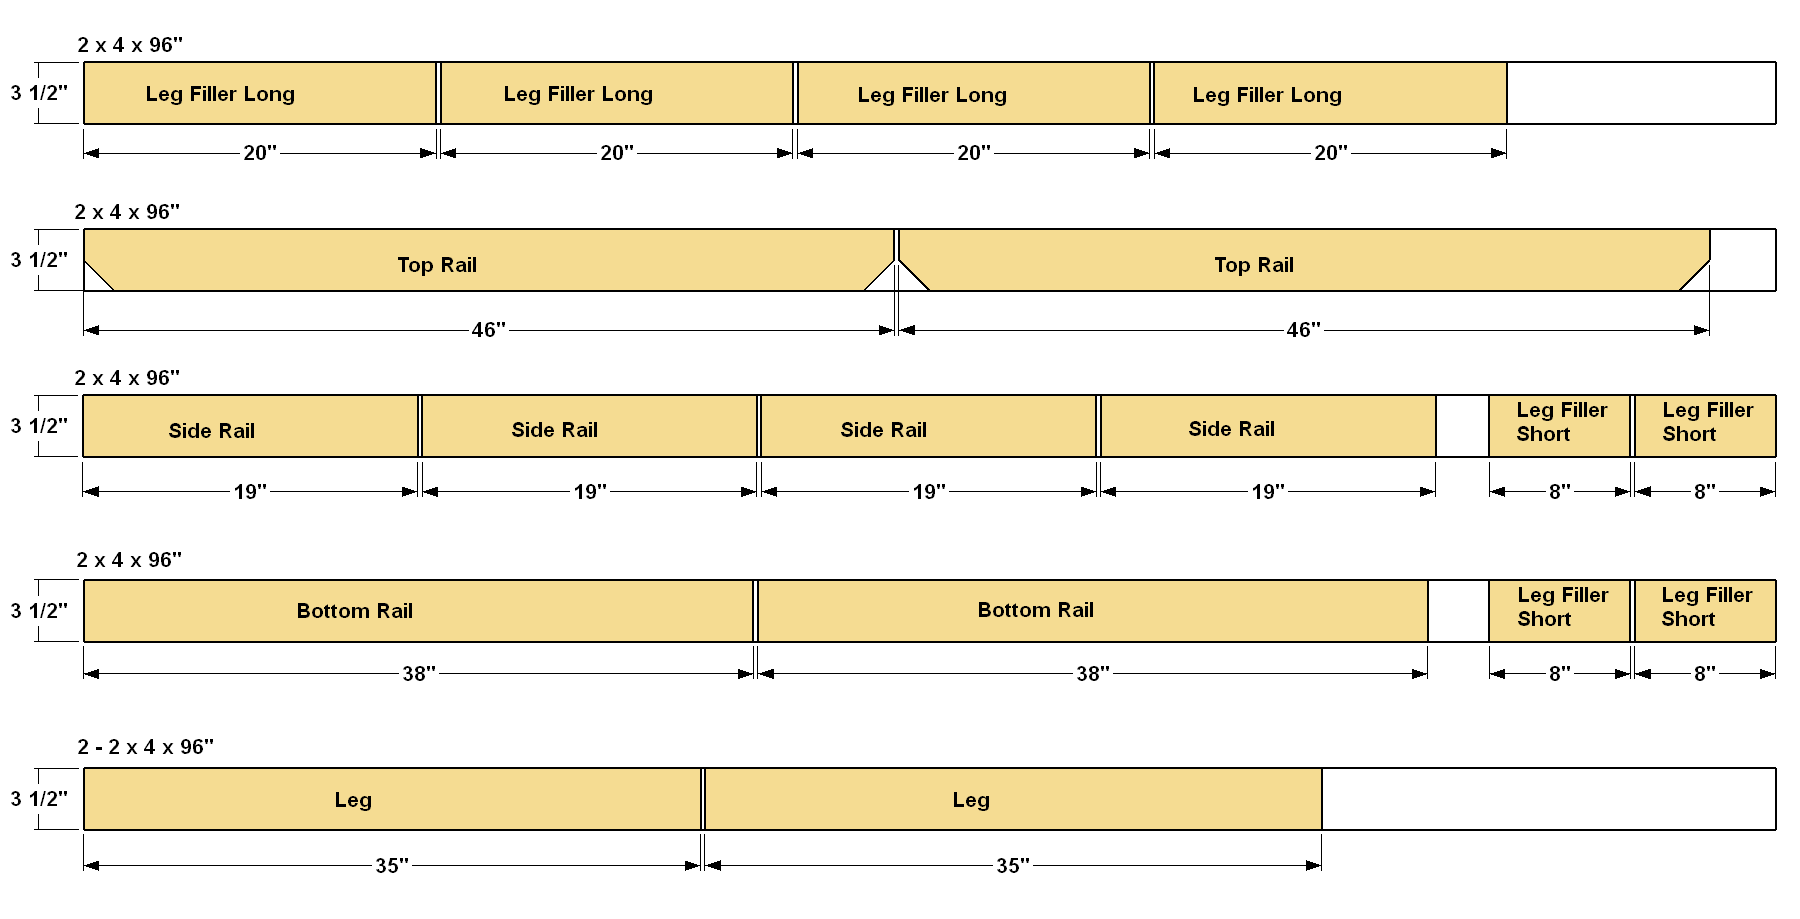
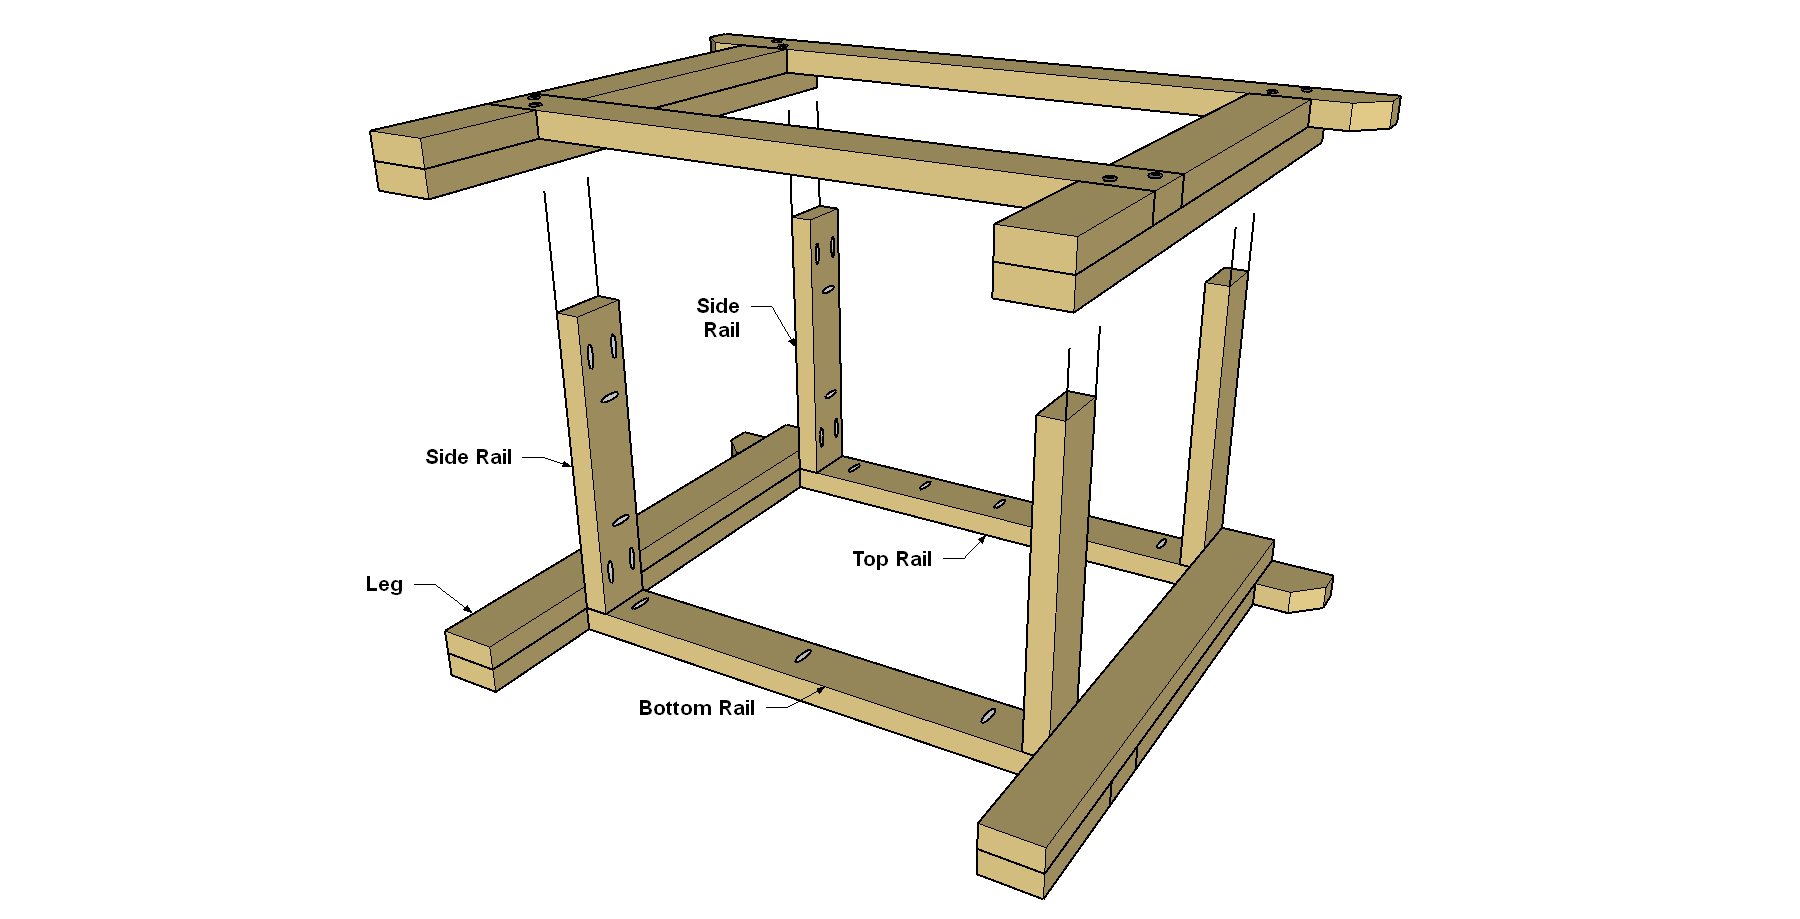
- 4 Leg , 1 1/2" x 3 1/2" x 35"
- 4 Long Leg Filler , 1 1/2" x 3 1/2" x 20"
- 4 Short Leg Filler , 1 1/2" x 3 1/2" x 8"
- 2 Bottom Rail , 1 1/2" x 3 1/2" x 38"
- 2 Top Rail , 1 1/2" x 3 1/2" x 46"
- 4 Side Rail , 1 1/2" x 3 1/2" x 19"
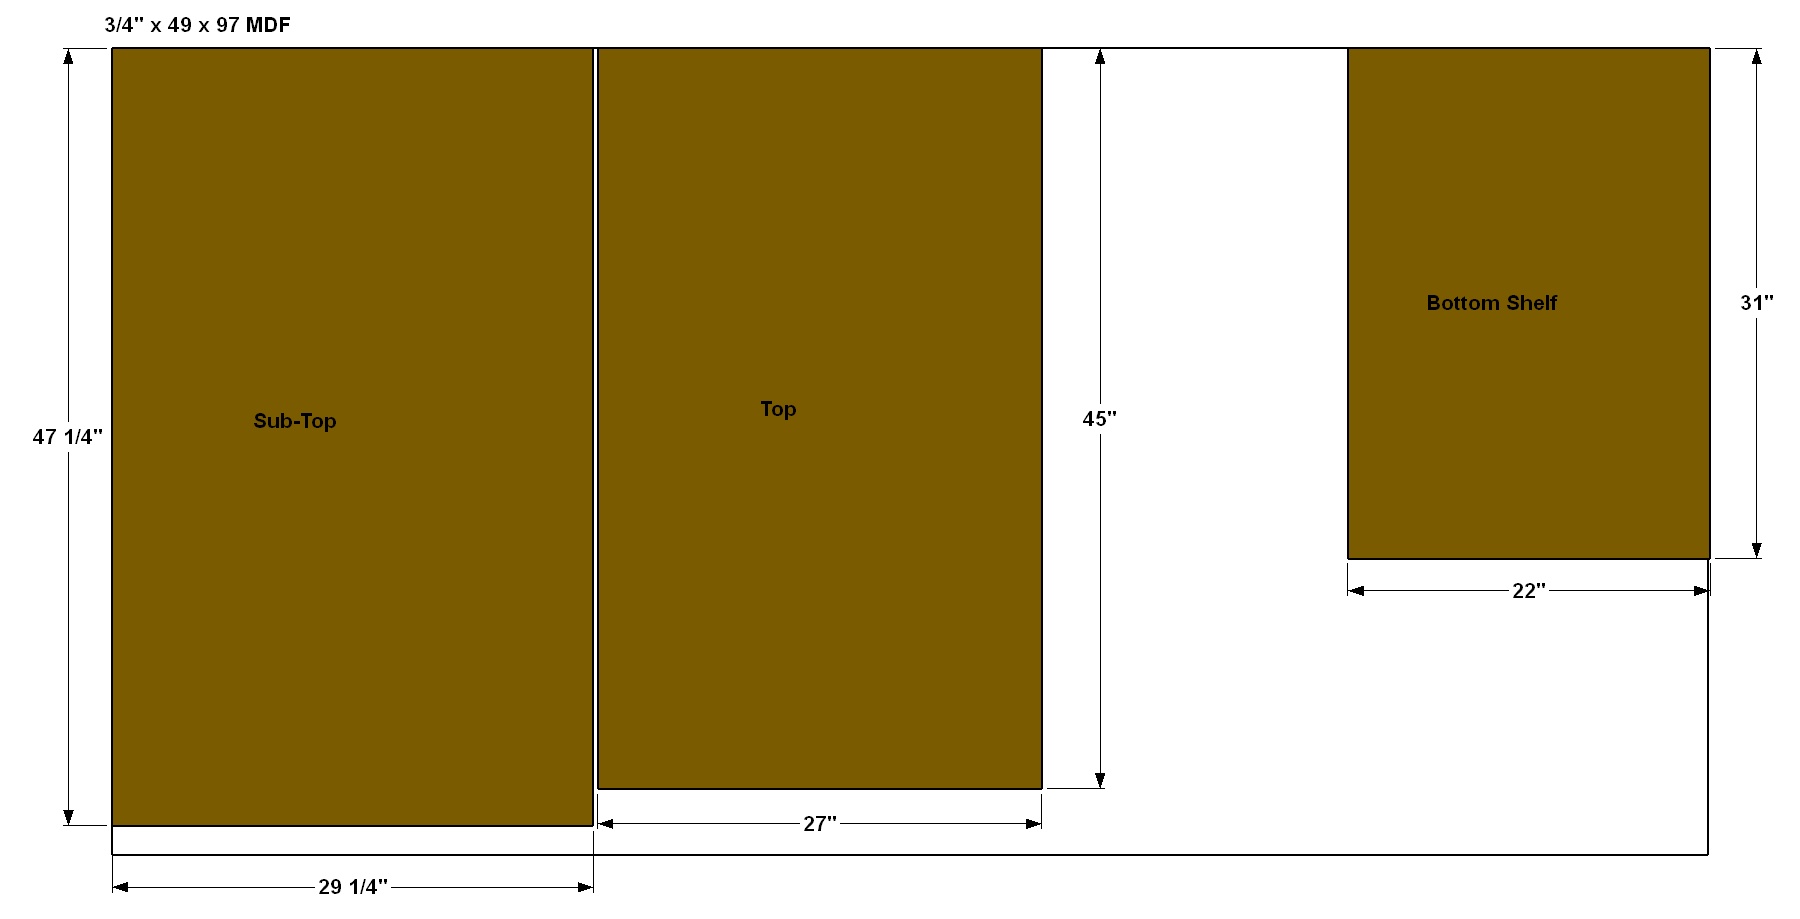
- 1 Shelf , 3/4" x 22" x 31"
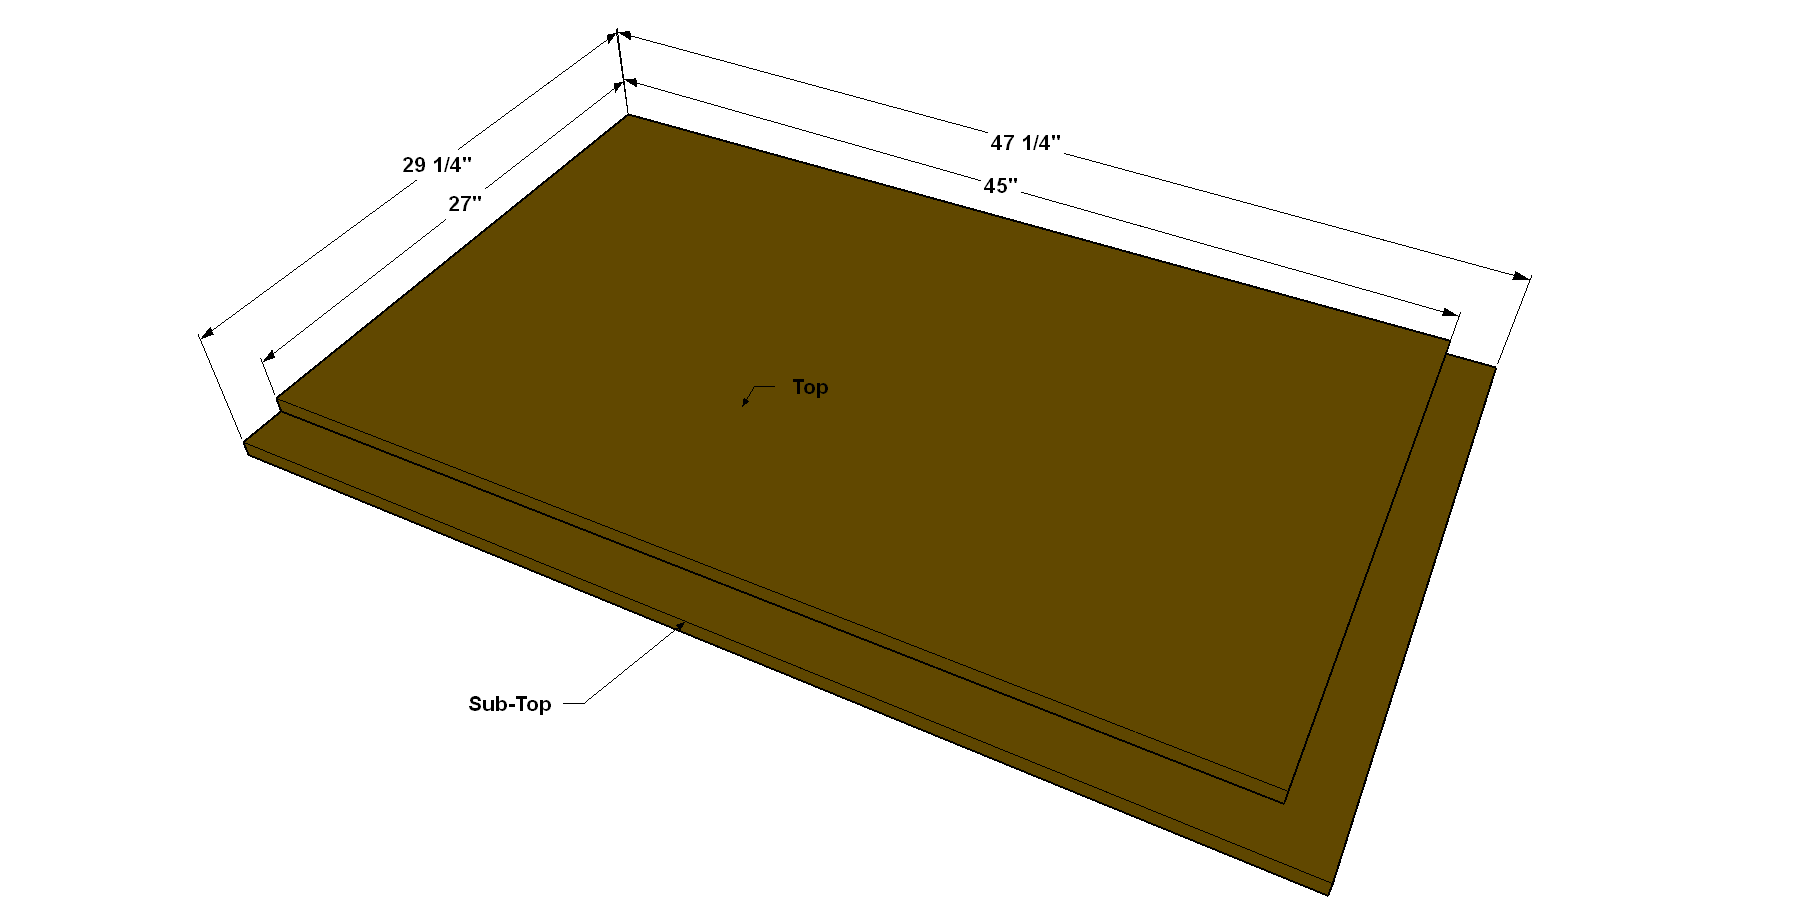
- 1 Sub-Top , 3/4" x 29 1/4" x 47 1/4"
- 1 Top , 3/4" MDF x 27" x 45"
Directions
-
Cut Leg Parts
Cut four Legs, and four Short Leg Fillers, and four Long Leg Fillers to length from 2 x 4 boards, as shown in the cutting diagram. Sand the parts smooth.
Tip: Be Picky when Picking Boards
The base for this bench is made from 2x4 stud lumber. These boards are inexpensive, sturdy, and easy to cut. They’re not always pretty, though. When you’re buying lumber, take your time and find boards that are straight, clean, and that don’t have torn up edges. Even if you have to spend a while digging for boards, it will take a lot less time than you’d spend sanding and trying to make bad boards look good. Plus, you’ll have an easier time building, and you’ll end up with a better-looking bench. -
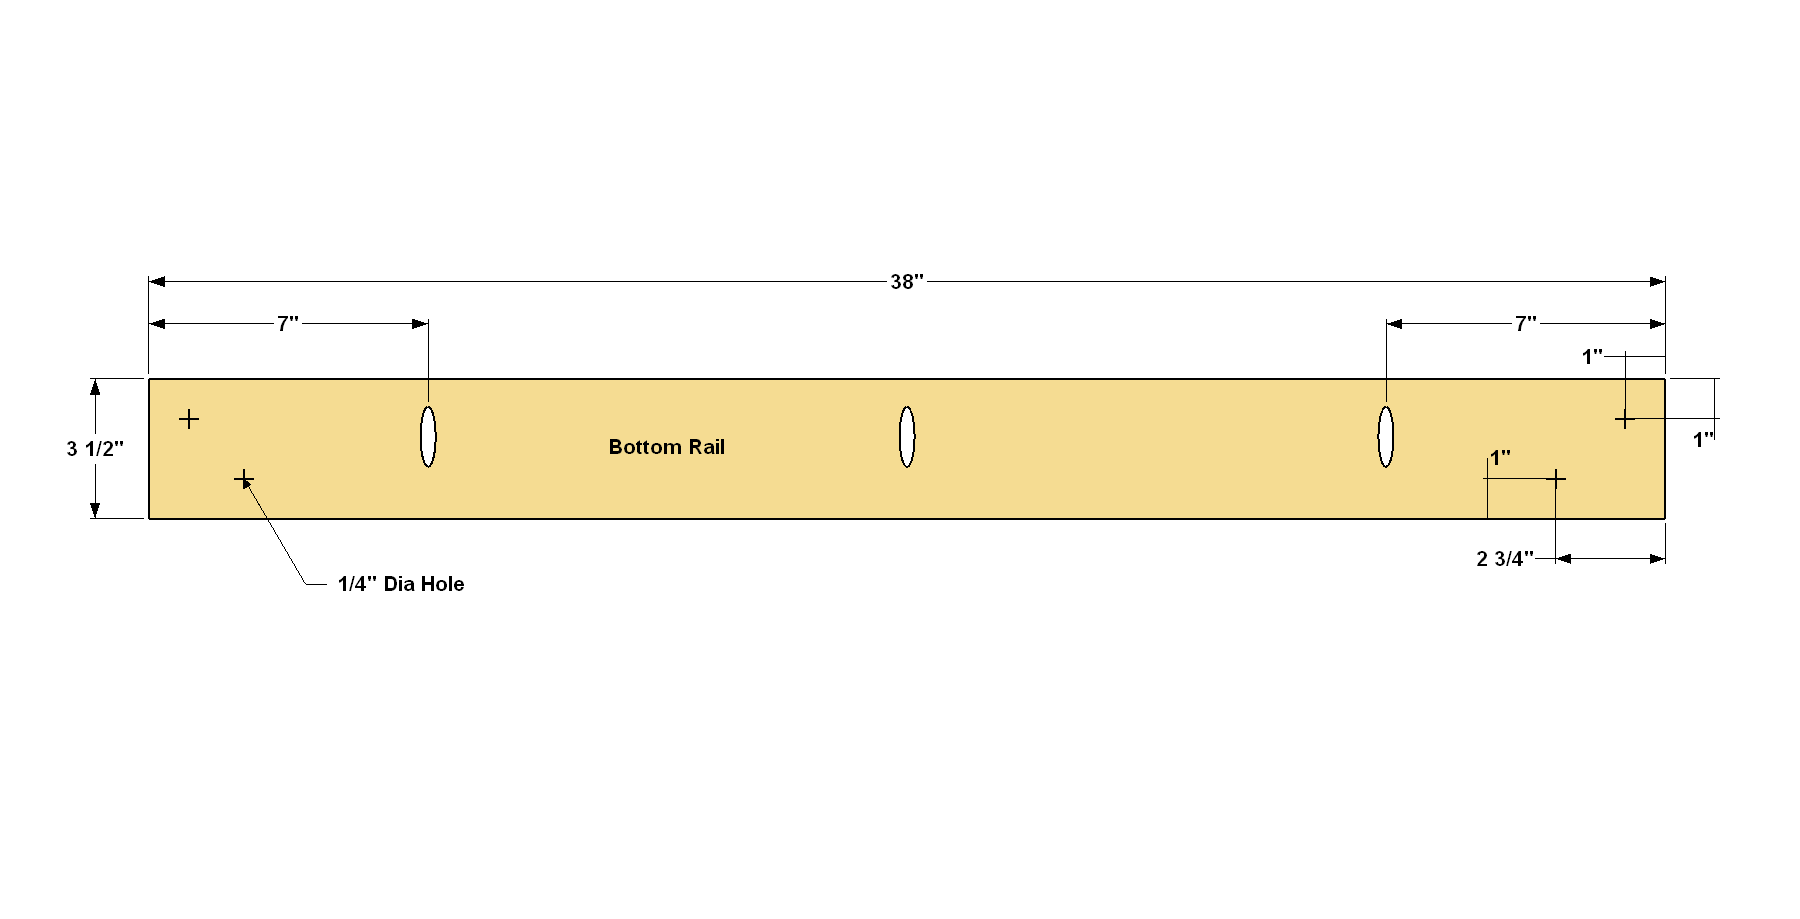
Make the Bottom Rails
Cut two Bottom Rails to length from 2x4 boards, as shown in the cutting diagram. Drill 1/4"-diameter holes where shown. Then, with your Kreg® Pocket-Hole Jig set up for 3/4" material, drill pocket holes along one edge of each Bottom Rail. Sand the Bottom Rails smooth.
-
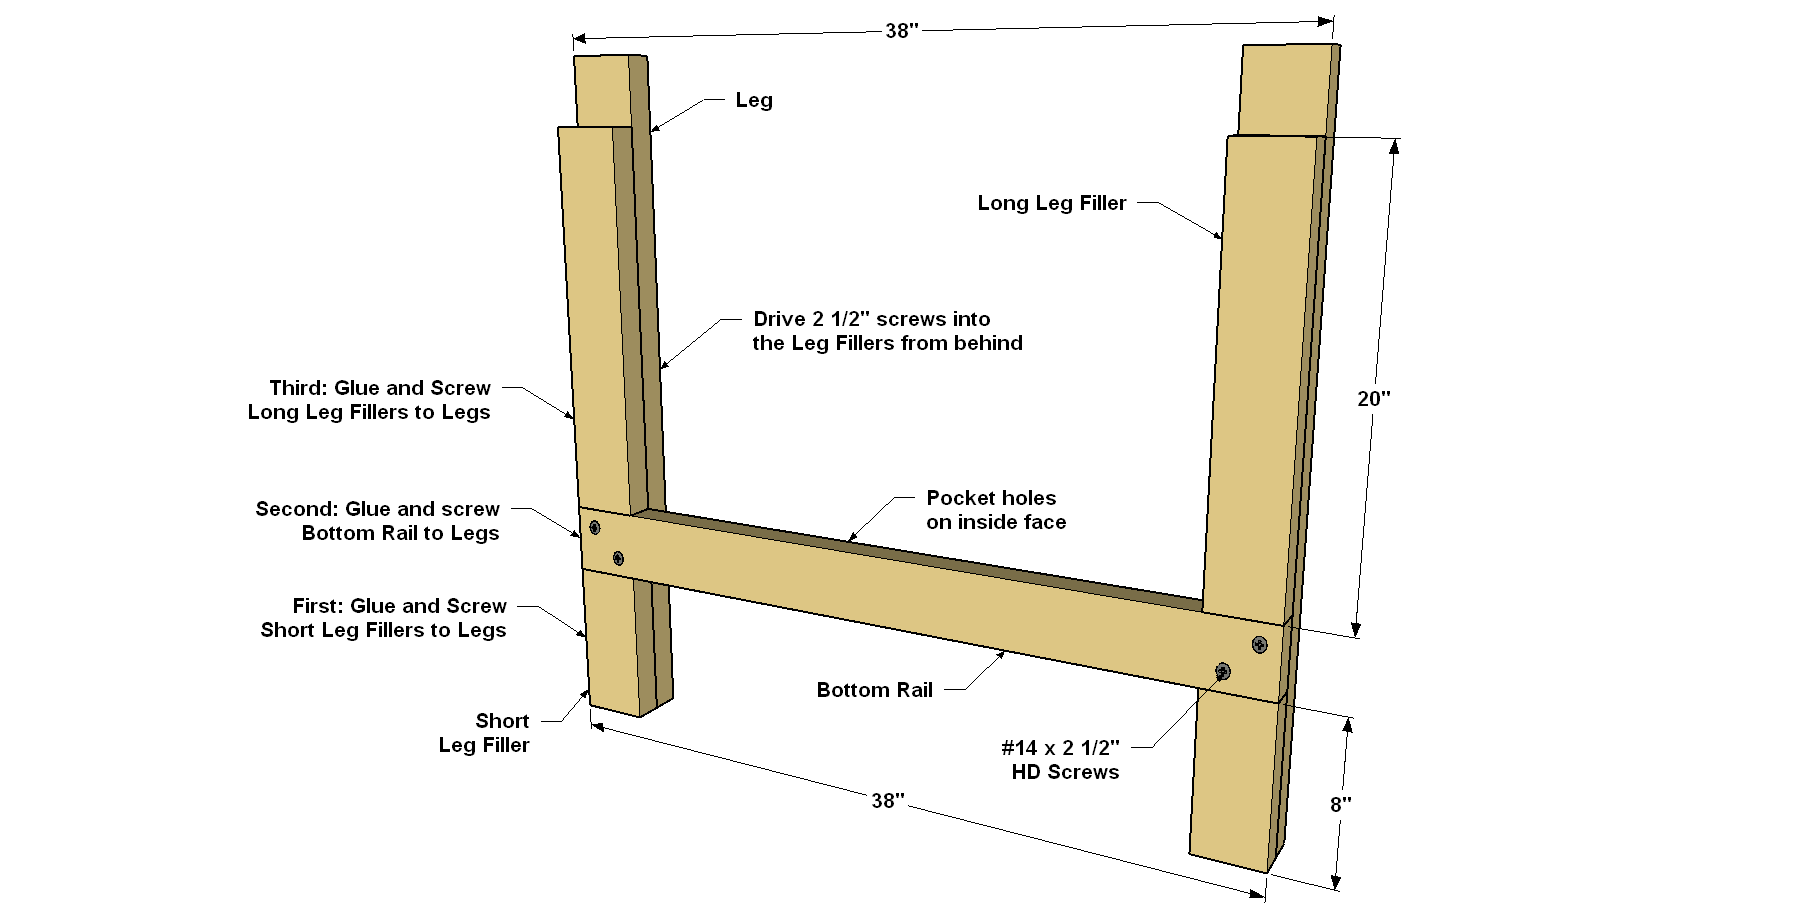
Create Leg Assemblies
Spread glue on the back face of each Short Leg Filler, and then clamp them to the Legs so they are flush on the sides and one end. Secure each Short Leg Filler to the Leg from behind using four 2 1/2" flathead wood screws. You shouldn’t even need to drill pilot holes. Next, position the Bottom Rail so it’s resting on the Short Leg Fillers, and clamp it in place. Make sure the distance between the leg assemblies is correct, and attach the Bottom Rail with large screws. We used Kreg HD (Heavy-Duty) Screws. Now you can add the Long Leg Fillers in the same way as you added the short ones, attaching each one with six 2 1/2" flathead wood screws.
-
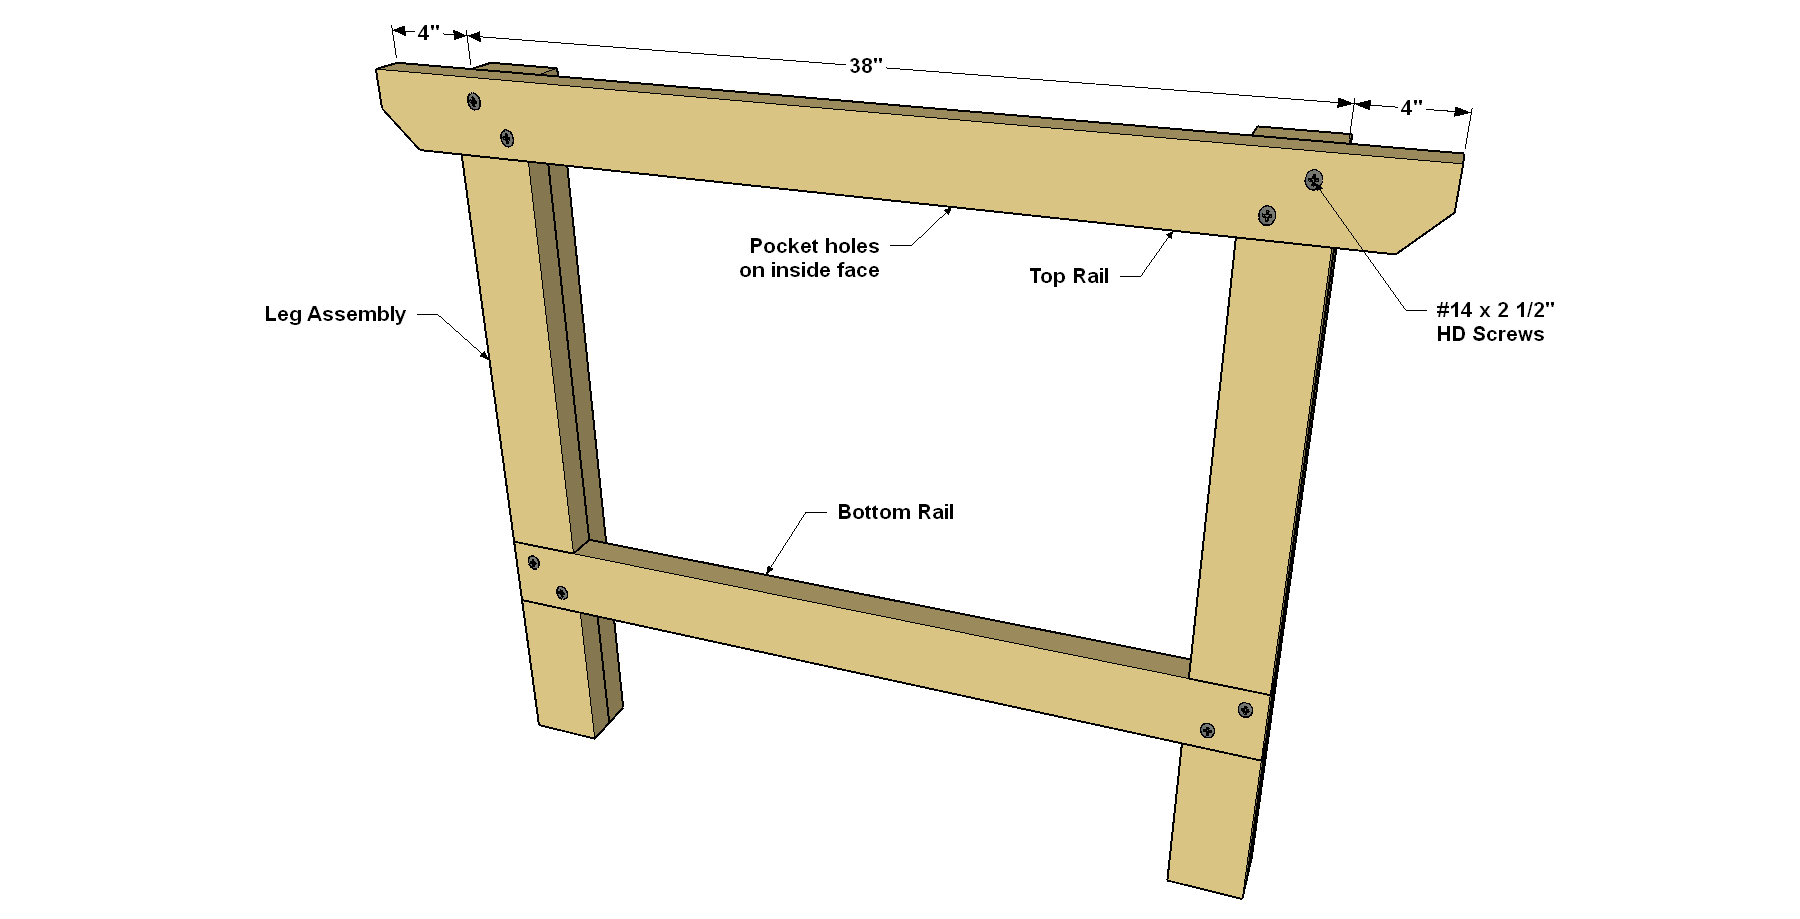
Make the Top Rails
Cut two Top Rails to length, as shown in the cutting Diagram. Trim off the corners, as shown. Next, drill 1/4"-diameter holes at the location shown. Then, with your Pocket-Hole Jig set up for 3/4" material, drill pocket holes along the long edge of each Top Rail. Sand the Top Rails smooth.

-
Attach the Top Rails
Glue and clamp the Top Rail to the leg assemblies as shown. Make sure that the bench legs are parallel and that the distance between them is correct, and then secure each Top Rail to the Legs with four 2 1/2" HD Screws.
-
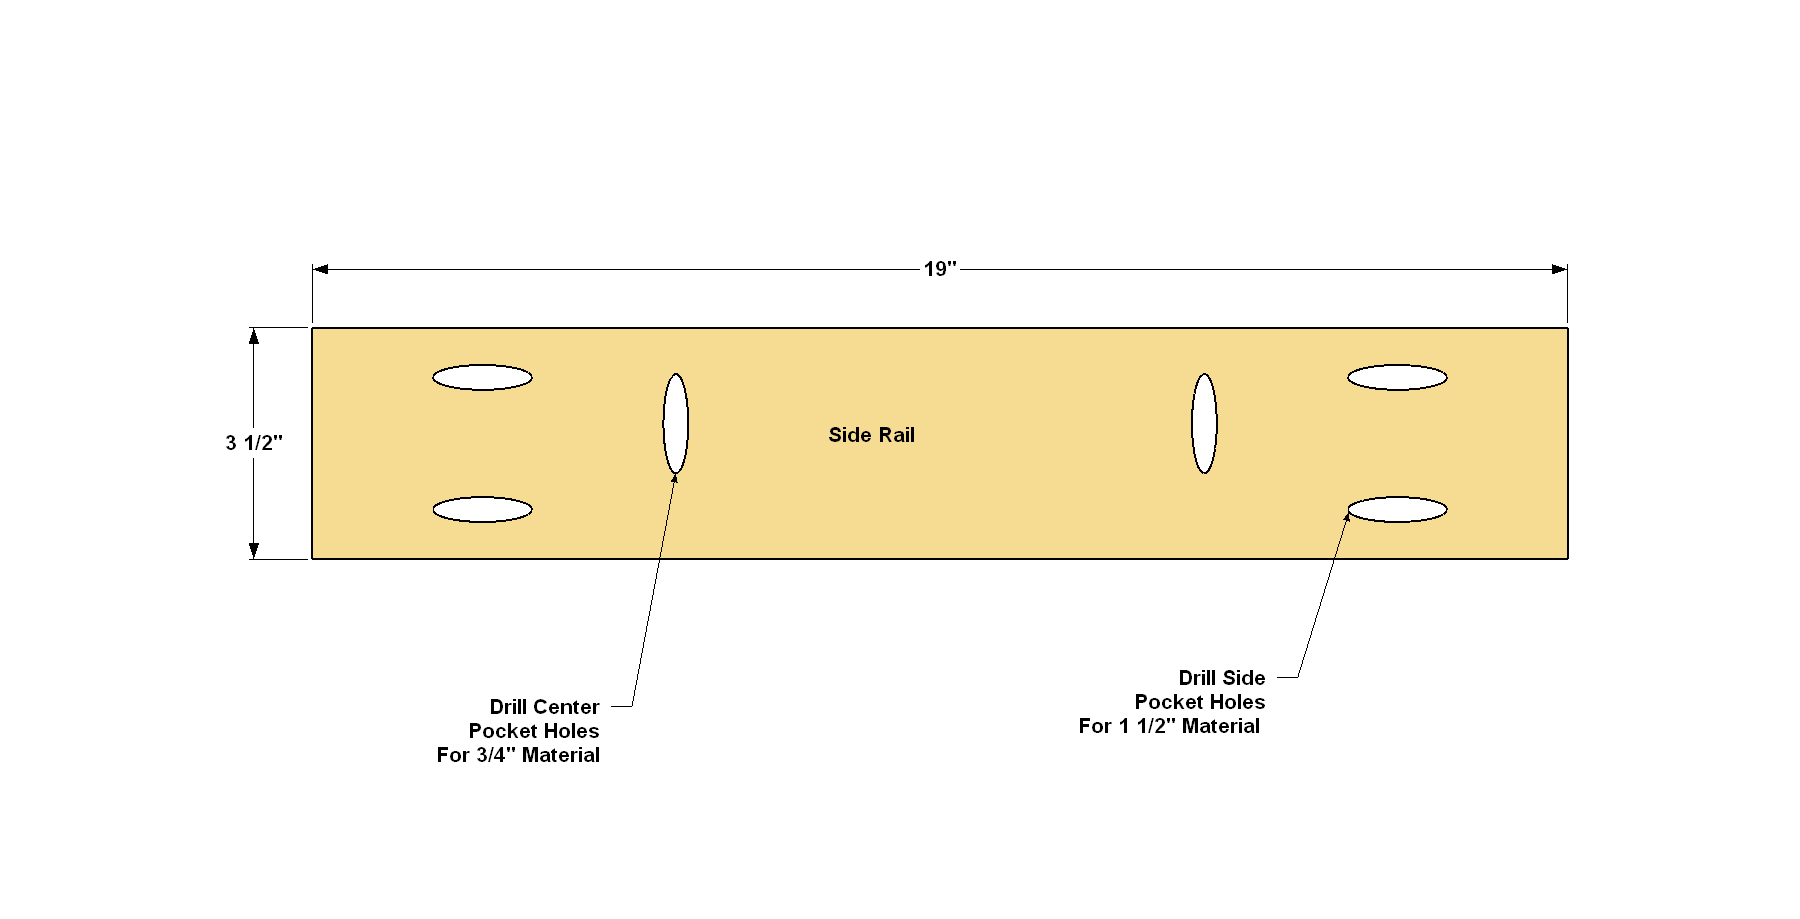
Make the Side Rails
Cut four Side Rails to length, as shown in the cutting diagram. Then you can drill pocket holes in the Side Rails where shown. This requires two pocket hole jig setups. For the pocket holes along the edge (which will be used to attach the shelf later), drill the holes with your jig set up for 3/4" material. Then switch your jig (and bit) setup to 1 1/2" material, and drill pocket holes in the ends of each Side Rail. Sand the parts smooth after you drill the pocket holes
-
Attach the Side Rails
Attach the side rails to one of the leg/rail assemblies by driving 2 1/2" standard pocket hole screws into the Top Rail and Bottom Rail, as shown. Then attach the other leg-rail assembly.
-
Make the Top and Shelf
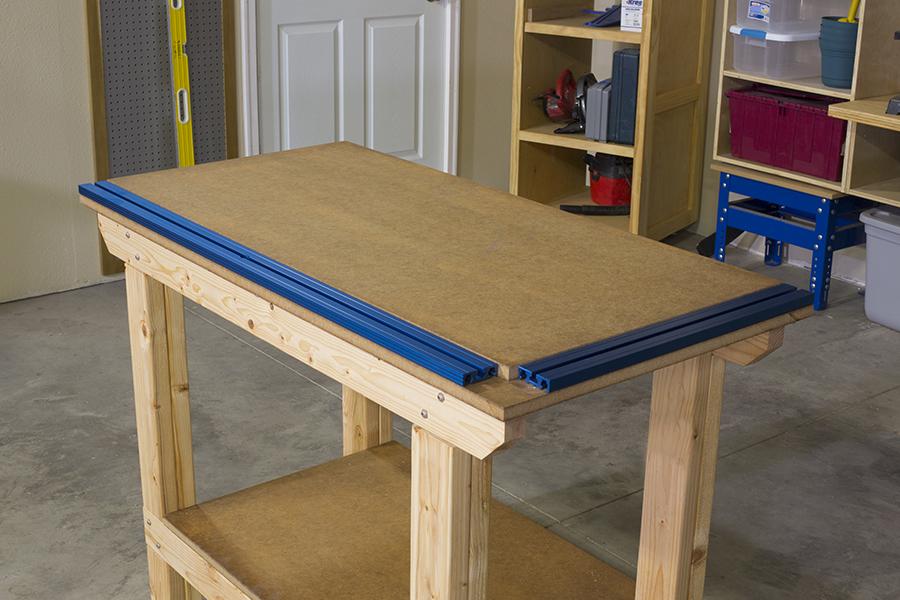
From a sheet of 3/4" MDF, cut out one Top, one Sub-Top, and one Bottom Shelf to size, as shown in the cutting diagram. The dimensions shown accommodate the Kreg Universal Clamp Trak Kit we installed. If you’re not going to add this feature, make both top layers the size shown for the Sub-Top.
-
Assemble the Top
Spread glue on the underside of the Top, and then glue it to the Sub-Top keeping two edges flush, as shown. Clamp the parts together while the glue sets, or drive a few 1 1/4" screws in from the underside in place of using clamps.
-
Add the Track
Once the glue is set on the bench top assembly, install the Kreg Clamp Trak Kit to the Sub-Top following the manufacturer’s instructions.
-
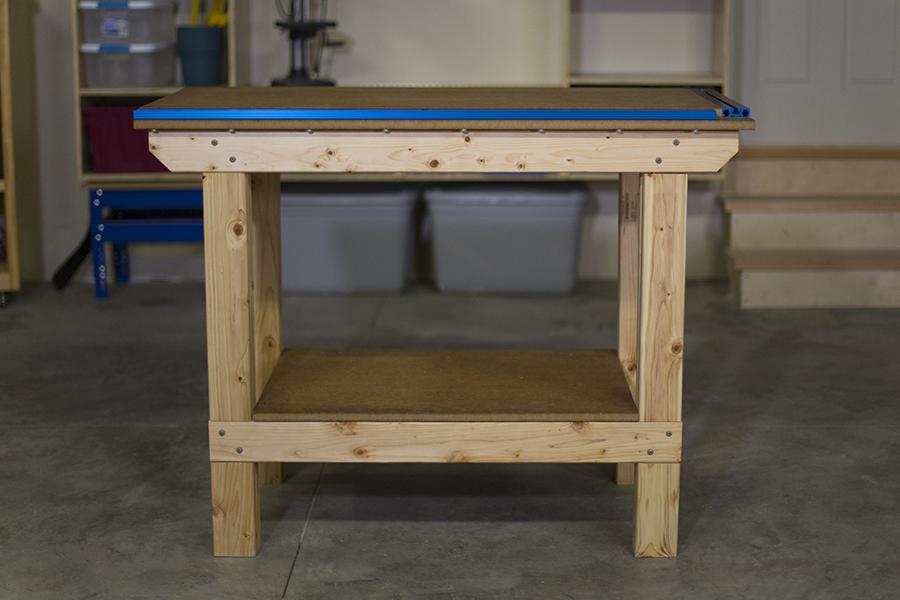
Install the Top and Shelf, then Finish
Install the bench top assembly by first positioning it, and then checking for equal overhangs at the front and back, and on each end, as shown. Then attach the top assembly using 1 1/4" coarse-thread Kreg Pocket-Hole Screws. Install the Bottom Shelf so it fits flush with the outer edges of the Bottom Rails and the Side Rails. Then you can apply a protective finish. We simply wiped on a few coats of natural oil finish. An oil finish is great for a bench because it’s easy to apply, it resists glue, and, best of all, it’s easy to renew. As you bench gets worn and scratched, you can just give it a light sanding, if needed, and then wipe on more oil. The MDF will soak up a lot of oil, so you’ll probably need to apply two or three coats to the bench top and shelf. One or two coats should do it for the bench base.