

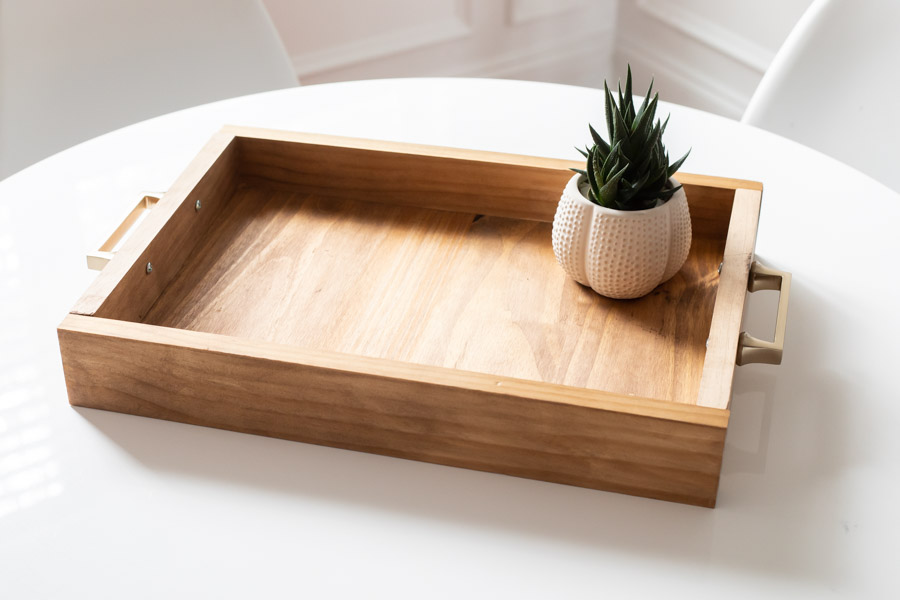
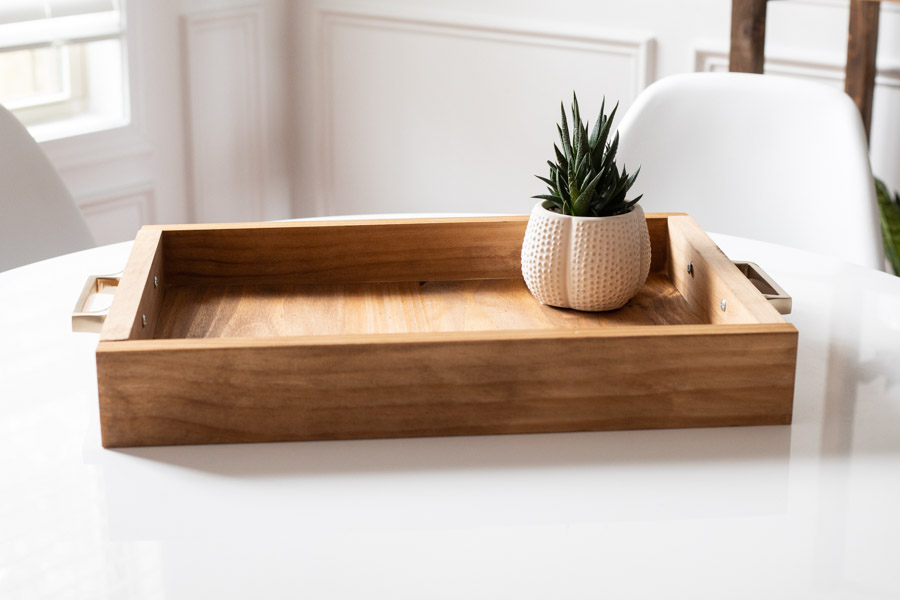


This DIY wooden tray is a simple project, great for beginners! It can be used as a stylish serving tray or just a decorative piece around the house.
Tools
Kreg Tools


Other Tools
-
Saw

Materials
Wood Products
- 1 Project Panel , 15 3/4" x 11" , 3/4" thick
- 1 Pine Board , 1x3x6 , 1x3
Hardware & Supplies
- 12 1 1/4" Pocket Hole Screws
- 1 Sanding Block
- 1 Stain or Paint
- 2 Drawer Pulls/Handles
Directions
-
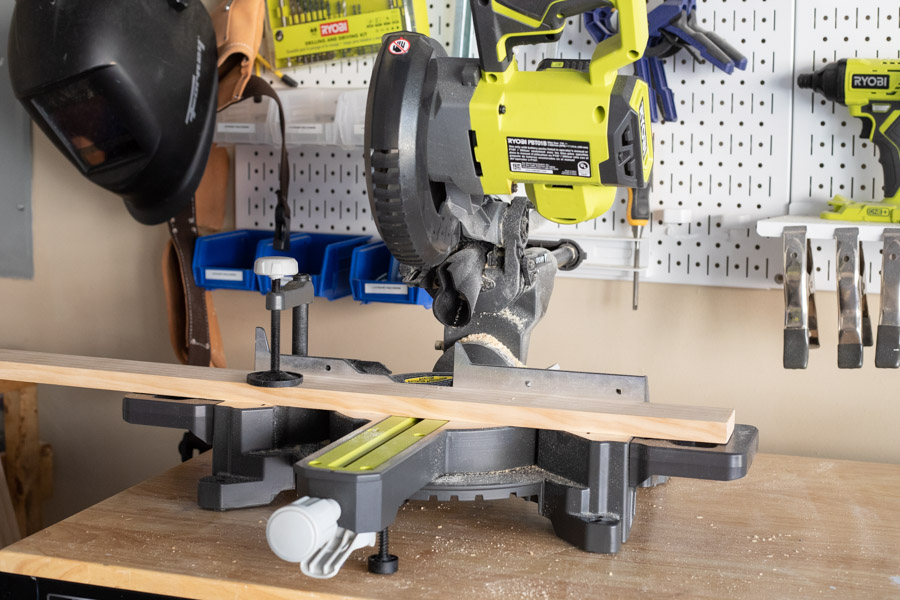
Cut Your Wood
Cut your wood to specified dimensions. (Can be modified to your preferences depending on how large you want your tray to be.)
-
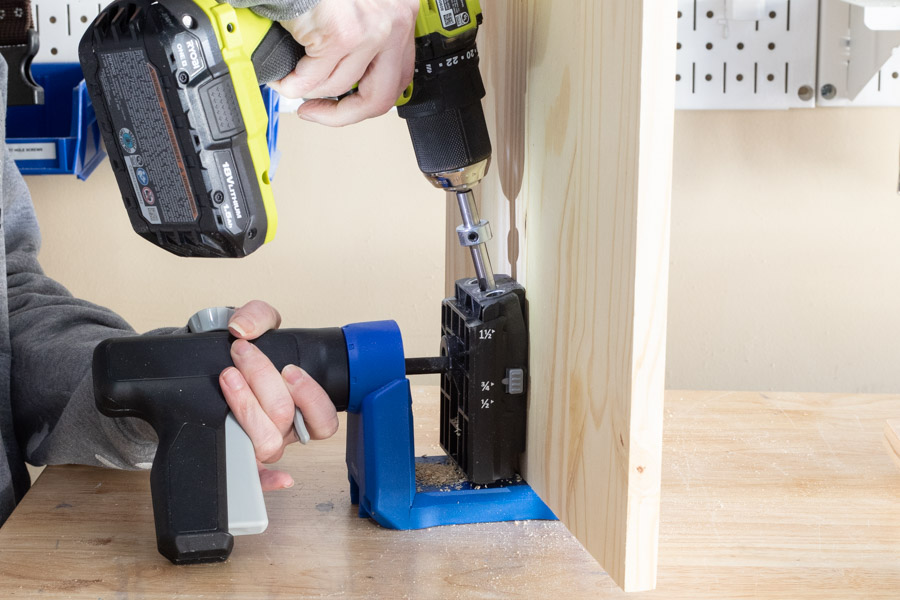
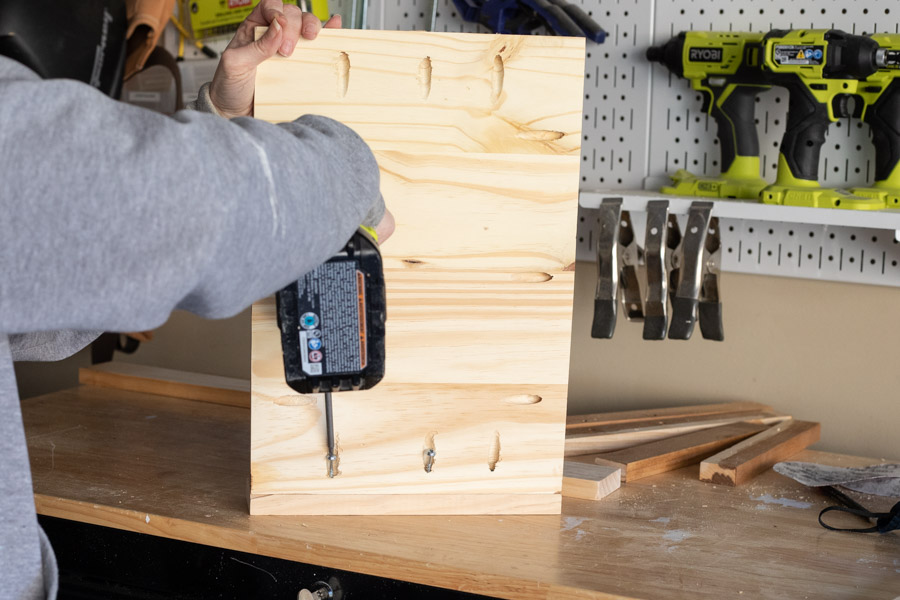
Drill Pocket Holes
Drill 3 pocket holes along each side of your project panel. I used the Kreg Jig 520PRO for this.
-
Sand
Sand edges smooth.
-
Attach Your Wood
Using 1 1/4" pocket hole screws, attach your tray sides to the project panel, ensuring that your pocket hole screws will end up on the bottom of the tray.
-
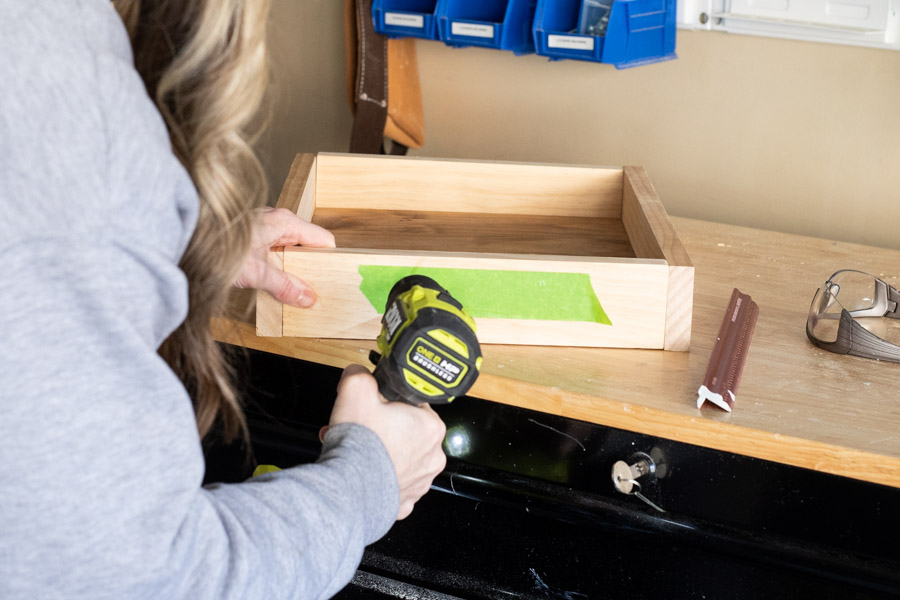
Drill Holes for Handles
Measure your handles to see how far apart the holes need to be. I recommend using a piece of painter's tape as a template and marking where the holes should go, then placing that on the sides of the tray and drilling through it.
-
Paint or Stain
Paint or stain your tray according to your preference. I used a special walnut stain for this one.
-
Add Handles
Add your handles, and enjoy!
